The Really Great Food Company mixes up really great gluten-free Spinach Cheese Biscuits

The Really Great Food Company Gluten-Free Spinach Cheese Biscuit Mix

Product: The Really Great Food Company Gluten-Free Spinach Cheese Biscuit Mix – $6.19+

You know…when a gluten-free company goes all out and calls itself The Really Great Food Company, well, they better be able to back up that claim.  That being said, I had never heard of said company prior to a little visit to Milwaukee and a stop inside the Gluten-Free Trading Company.  If you are ever in Milwaukee, do stop in.  It’s a completely gluten-free grocery store.  And it is awesome!!

Anyway, on my second visit there in two days, I was stocking up on more goodies for the gluten-free pantry at home and came across a few mixes that were produced by The Really Great Food Company.  Huh.  I was actually intrigued because this was something I couldn’t get where I lived.

After toiling over which product to try, my roommate and I finally decided that the Spinach and Cheese Biscuit mix sounded like it could be an epic win (or an epic fail), so we went with that.  Purchase made.  And a lot of products to go through in my pantry prior to this one meant…it sat…and sat…and sat.  Until last night.

You see…our workout schedule runs so that we go to the gym every other day.  Well, this week it just happens to be a Monday, Wednesday, Friday sort of week.  And after hitting up the gym, we head to our office and I nuke something I brought (homemade or otherwise) for us to feast on because by then we are truly starving.  Since this mix was getting close to expiration, this is what I mixed up and baked up for post-workout brekkies this week.

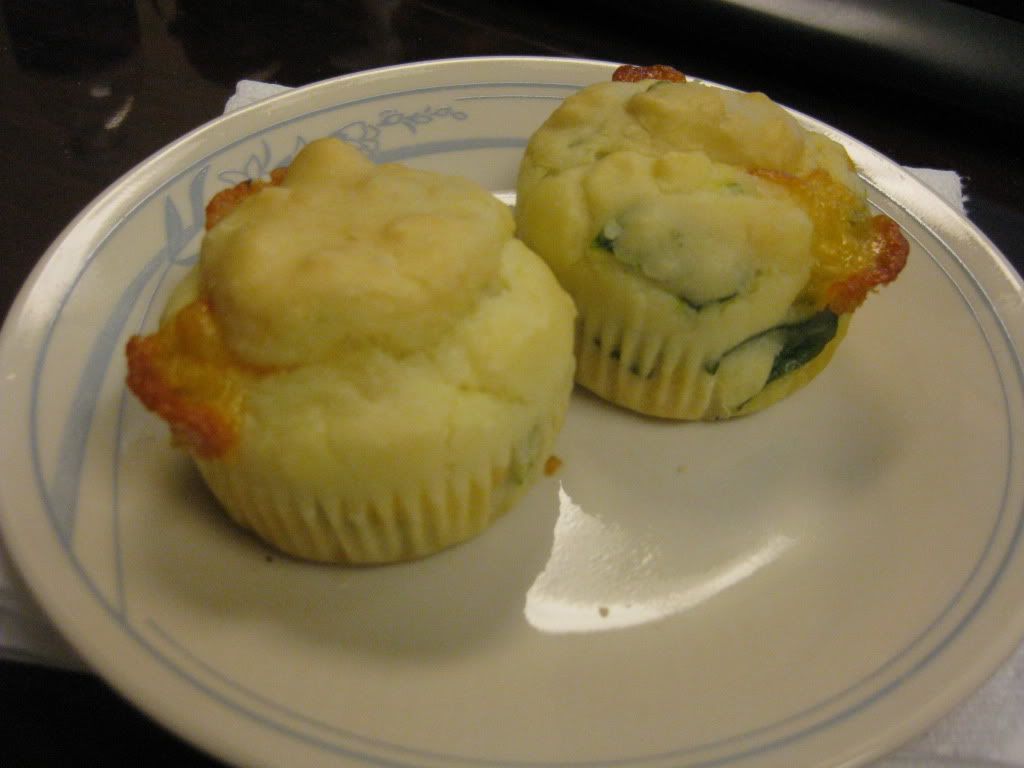
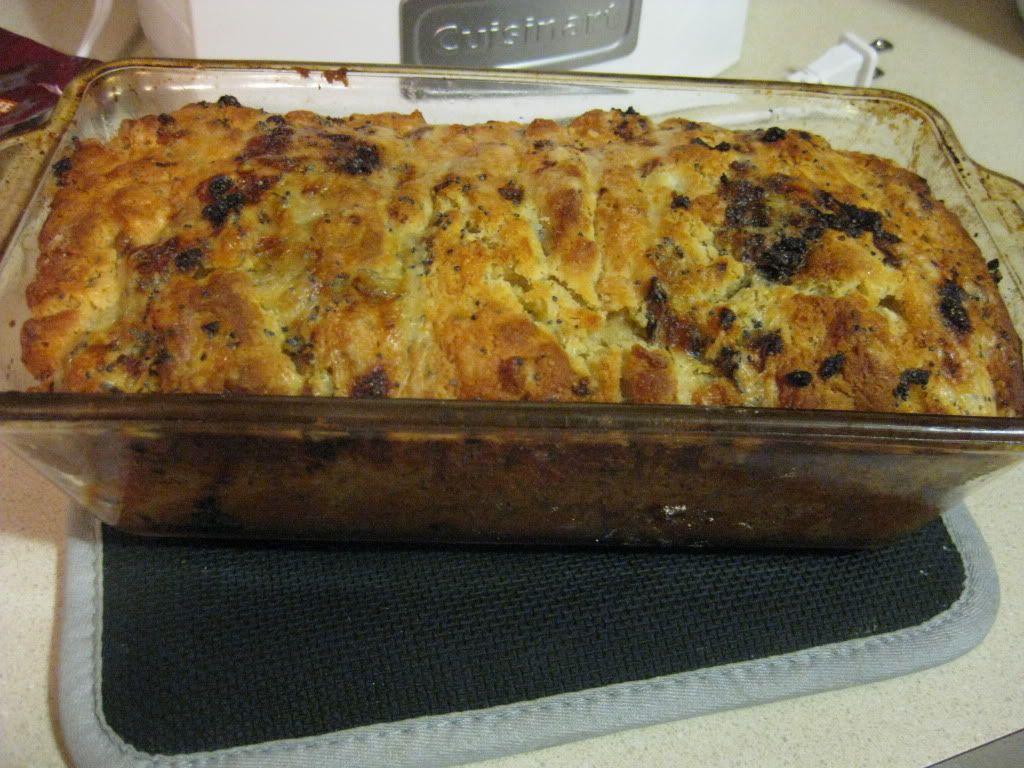
Now, the box itself says that it only makes 9 biscuits.  Heh.  I managed to get 13 out of it.  And as these are not made in traditional biscuit methods (not drop biscuits or cooked up in a pan), but rather made in muffin tins…they seem more like a roll than a biscuit…but this is just me nitpicking every little detail.

The Really Great Food Company Gluten-Free Spinach Cheese Biscuit Mix (mixed and prepped with cheese and spinach)

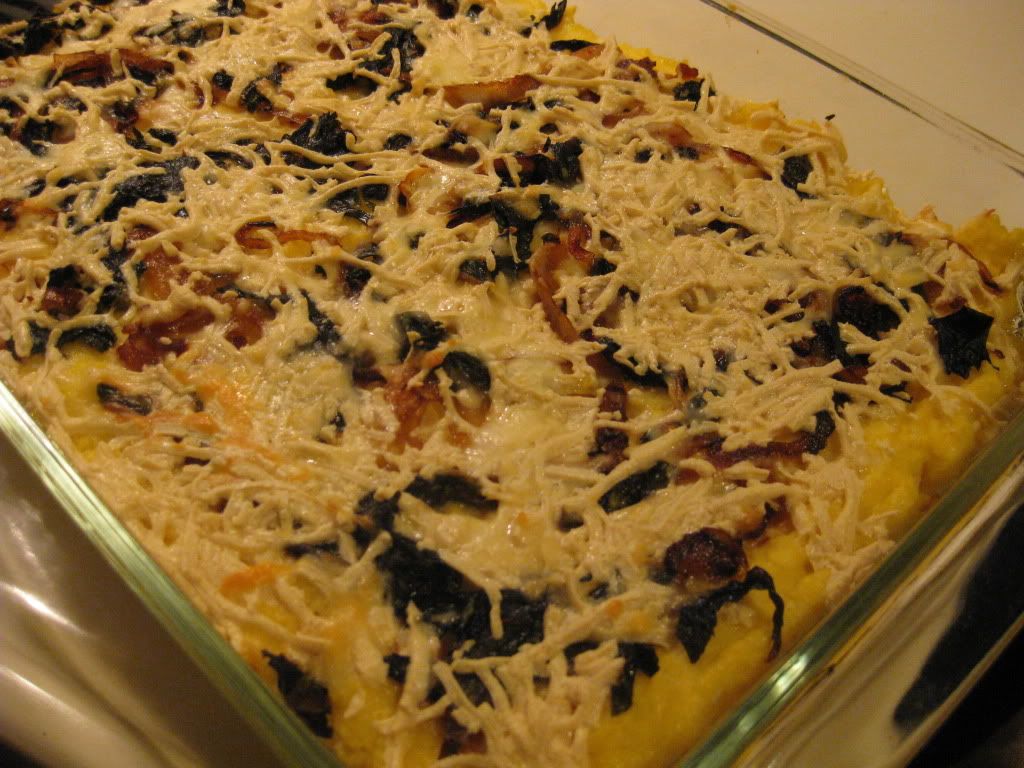
Making these was super easy.  In a bowl, I beat together 2 eggs, some canola oil, and some unsweetened almond milk.  From there, I the mix itself and beat that in as well.  Then, the spinach,  chopped cheddar cheese, and shredded Parmesan cheese all got folded into the mix.  The resulting mixture was then placed into muffin tins and baked in a 375°F oven for about 27 minutes.

Now, if possible, I do try to bake an extra item of the new product I am trying out…just in case it isn’t any good.  Because, after a hard workout, the last thing you want to find out is that your breakfast is nasty.  Not good.  That being said, I put it to the test, as always, with my roommate.  I gave her the 13th biscuit and eagerly awaited her reaction.

“Pretty good.”

Hmmm…pretty good is not what I strive for when I bake something up.  But she wasn’t spitting it out making obscene facial expressions, so…pretty good would have to do.  The rest of the biscuits/rolls were put into containers and prepped for our three gym days this week.

After hitting the gym this morning, we arrived very hungry at the office.  I set to the task of getting our breakfasts ready.  Here was the first snag.  Apparently I needed to spray down the muffin papers I baked them in because I found that the wrappers stuck to the product itself.  Booo.  But, this wouldn’t be the first time I encountered that…so I set to work, carefully peeling and making sure I was getting mostly paper and not mostly biscuit.  Once I accomplished that task, it was a simple reheat in the microwave for about 30 seconds.  Good to go.

When I asked my roomie her thoughts on the biscuits, she said, “I like the cheese.”

Again…not very helpful or useful for my blog…so…here’s my rundown…

The Really Great Food Company knows how to make biscuits!  Honestly.  What shocked me most was that, despite being filled with chunks of cheddar cheese and slices of spinach, these biscuits aren’t dense in the slightest.  They are light and airy.  And the Parmesan cheese that was added to the batter melted down into the biscuits as they baked, giving each bite a cheesy flavor.  Get a bite with a chunk of cheddar and it’s like cheese nirvana in your mouth.  Light…fluffy…and delicious.  I couldn’t stop eating mine.  I had two biscuits for breakfast and they were devoured faster than I’ve eaten anything on a gym day.  Every bite just tasted amazing.  From the spinach to the cheese to the light batter itself, this biscuit was gluten-free perfection.

My only regret now is that I can’t find this brand around here.  Thankfully, they do have a Web site and you can order their products online.  And, trust me, I think I may do that…see what else they offer and if it lives up to the standard these biscuits have now set.

Gluten-free doesn’t have to mean heavy, dense breads.  Nope.  The Really Great Food Company proved once and for all that even something as simple as a biscuit/roll can have a light, airy texture and tons of flavor.  I’m really, really hooked.  The hard part now will be saving them specifically for gym days.

It may sound cheesy (heh heh…see what I did there?) but these biscuits truly are a gluten-free culinary work of art.  If you can find the mix…purchase it and bake it.  If you can order it online, I encourage you to do so.  I was beyond impressed.

I was wowed!

The Really Great Food Company Spinach Cheese Biscuits

Lärabar brings a taste of cherry cobler to Über line

Lärabar Über Cherry Cobbler

Product: Lärabar Über Cherry Cobbler – $1.99

Who can argue with a snack that tastes like a classic summer dessert?  You won’t find a lot of people complaining about that.  Least of all me.  As we all know…I love dessert.  Love it.  I could skip a meal if it mean a bigger dessert (that would be the trade-off).  Of course, getting dessert isn’t easy for the gluten-free vegetarian…so I take what I can get.

With that in mind…I found myself awake on a race morning, having just eaten my cereal and knowing that I was going to need a little more closer to race time to see me through the race.  If I don’t fuel about 30-40 minutes before a 5K, I normally find my stomach growling at the start of the race or halfway through.  Nothing can throw you off your running mojo like hunger in the middle of a run.  And with a 5K race, GU and Sports Beans are a bit excessive.  It’s 3.1 miles…it’s not a half marathon.

That being said, I tend to come prepared for such things with my snack bars and protein bars.  This particular morning, I found myself busting open a box of Lärabar Über that I picked up at the grocery store on Manager’s Special.  I mean…the Über line is completely all natural, gluten-free, kosher, non-GMO, have no added preservatives, fillers, colorings, and no added sulfites.

LOVE that.

So, about 40 minutes before I was to start off on this 5K jaunt Saturday morning, I broke out my fuel, being my Lärabar Cherry Cobbler Über.  My roomie (who was up and there to cheer me on) decided we would split it.  So, I broke it in half and she took a bite.  Being that she’s not big on cherry anything, the fact that she kept eating it was a good sign.

Lärabar Über Cherry Cobbler
Lärabar Über Cherry Cobble

My turn.

Oh.  Yeah.

This fruit and nut bar is hearty, made with chunks of fruit and nuts, rather than having it all ground together like the standard Lärabars.  I love being able to see the full bits of dried cherries, raisins, and dates mixed with the almonds, cashews, and pecans.  I love the rich flavor that the brown rice syrup, the salt, and the honey bring to the bar itself.  When you take a bite of this bar, you actually get the illusion that you are eating an actual cherry cobbler.  That’s exactly what it tasted like.  And with the blend of fruit and nuts, nothing is too overpowering.  Nothing at all.  It is a nice balance of sweet and salty and one that settled perfectly into my stomach before a hard run on hilly roads.

I love how nutritious these bars are as well.  Despite tasting like a dessert, the Lärabar Cherry Cobbler Über bar will only set you back 190 calories and 12 grams of fat, most of which is provided in the healthy form from the nuts.  This particular variety offers of 14 grams of protein and no cholesterol.  Yeah!  Despite the addition of salt, the brown rice syrup, the dried fruits and the nuts, there is only 135 mg of sodium in each bar.  That’s amazing.  And while this does have 12 grams of sugar, I’m relatively certain that mostly comes from the dried fruits that are used and the brown rice syrup and honey that help bind the bar together.

In the end, what you have is a tasty bar that actually satisfies your hunger, keeps you going, and is nutritionally sound.  And…it tastes like dessert.  What could be better?

Lärabar Über Cherry Cobbler (unwrapped)

Recipe: Baked Polenta with Rainbow Chard and Cheese

It’s the night before a race…so you know what that means, right?

Pizza!

Except…not today.  I didn’t have anything in my apartment to work pizza into the equation…so I had to break with my pizza before a race tradition and come up with something I could make with items I did have on hand.  Well, today is the day my CSA bin was delivered and one of the items nestled inside was beautiful rainbow chard.

It was from there…and the fact that I keep polenta on hand in my pantry…that I threw together this recipe for a later than usual dinner.  It was delicious and relatively easy to make.  As I am lactose intolerant, I substituted the ricotta cheese for silken tofu and used Daiya vegan mozzarella cheese.

The rest of the recipe is from Epicurious…but I really enjoyed it with my substitutions.  So delicious.

Recipe: Baked Polenta with Rainbow Chard and Cheese

Baked Polenta with Rainbow Chard and Cheese


Servings: 8
Time: Prep 20 minutes; Cook 1 hour 10 minutes; Cool 30 minutes

Ingredients:

  • 2 tablespoons extra-virgin olive oil
  • 1 large white onion, thinly sliced
  • 2 garlic cloves, minced
  • 1/4 teaspoon dried crushed red pepper
  • 1 pound rainbow chard, thick stems and ribs removed, leaves cut crosswise into 1/2-inch-wide strips
  • 3 1/2 cups water
  • 1 teaspoon salt
  • 1 cup polenta (coarse cornmeal) or yellow cornmeal
  • 1 cup part-skim ricotta cheese (I used Nosoya Silken Tofu)
  • 2 large eggs
  • 2 cups coarsely grated low-fat mozzarella cheese (about 8 ounces) (I used Daiya mozzarella shreds)

Directions:

Preheat oven to 350°F.

Lightly oil 2-quart glass baking dish.  Heat oil in heavy large deep skillet over medium heat.  Add onion; sauté until tender, about 15 minutes.  Stir in garlic and crushed red pepper, then chard; cover and cook until chard is tender, stirring occasionally, about 8 minutes.  Uncover; stir until any excess liquid in skillet evaporates.  Season with salt and pepper.

Meanwhile, bring 3 1/2 cups water and salt to boil in heavy large saucepan.  Gradually stir polenta into boiling water.  Reduce heat to medium-low; simmer until polenta is very thick, stirring frequently, about 10 minutes.  Remove from heat.

Whisk ricotta and eggs in bowl; whisk in 1 cup hot polenta.  Stir ricotta mixture into polenta in saucepan.

Spread half of polenta mixture in baking dish.  Spread half of chard mixture over.  Sprinkle with half of mozzarella.  Repeat layering with remaining polenta, chard, and cheese.

Bake until puffed and brown on top, about 45 minutes.

Cool 30 minutes.

~*~*~

You would never be able to tell that this recipe was made with tofu instead of ricotta cheese, and with vegan cheese over regular.  The onions, chard, and garlic mixture is delicious.  And the polenta made a delicious, creamy addition once it was cooked up.  I loved this and am so happy that I have another 3 days worth of it.  YUMMY!

Best part…each serving has 259 calories.  That’s it!  Amazing.  Delicious.  And quite satisfying.  I served this with a salad made up from fresh produce, also from my CSA bin.  This recipe does take some time to cook…but the end result is worth it.  I would make this again in a heartbeat.

Now…we’ll see how this does when it comes to my race day performance.

I might be sorry I skipped out on pizza…but this was definitely a huge, tasty, epic dinner win!

479° Popcorn perfects caramel corn with elegant and fanciful Fleur de Sel Caramel Organic Popcorn

479° Popcorn Fleur de Sel Caramel

Product: 479° Popcorn Fleur de Sel Caramel – $3.99+

Okay…I copped out on a review prior to this one…mostly out of sheer terror of the product and the fact that I threw it away immediately after tasting it.  And yes…it was the 479° Popcorn brand.  That flavor was Black Truffle & White Cheddar.  While the white cheddar was delicious the truffle was overpowering.  Perhaps my taste buds aren’t “posh and sophisticated” enough for that flavor combination.  But it didn’t taste good at all.

So, the next snack up for the afternoon munchies at work was the other 479° Popcorn I purchased while out grocery shopping one day.  This one – Fleur de Sel Caramel.

Salted Caramel.  How can it go wrong?

It can’t.  That’s the best part.

According to 479° Popcorn, Fleur de Sel is harvested by hand from salt evaporation ponds on the coast of Brittany, France.  These natural salt crystals are delicate and flaky, with a subtle hint of oceanic flavor.  That being said, 479° Popcorn takes organic popcorn, coats it in a buttery caramel and then tops it off with a sprinkle of Fleur de Sel.

What comes of this combination?  The classic sweet and salty combination that salted caramel brings to anything it is added to.  And on popcorn, it’s like a sophisticated caramel corn.  Honestly.  The organic popcorn is light and airy.  The buttery caramel that drenches each kernel isn’t too heavy or overpowering.  In fact, it’s the right amount.  And there at the end…the finishing touch…is the Fleur de Sel.

Magic in every bite.  And trust me…you’ll want to keep eating these.  One is never enough.

Thankfully, a serving size is 1 cup.  And as far as nutrition facts go…this is actually a surprisingly healthy choice.

479° Popcorn’s Fleur de Sel Caramel flavor contains 100 calories per 1 cup serving.  Each serving has 4 grams of fat (not bad for caramel corn!), 160 mg sodium, and 13 grams of sugar.  That is definitely a bit higher on the sugar content than I would like for an afternoon snack…but it’s caramel corn.  It’s going to have more sugar in it than regular corn.  Call it a treat, savor each bite, and don’t worry about sugar for a few moments.

I am a huge fan of salted caramel goodies as it is…but this is just an amazing snack.  Far better than the Black Truffle and White Cheddar flavor I tried just moments before this.  And, wow…am I ever glad I did that.  I couldn’t imagine being at work, biting into that popcorn and immediately having to spit it out in my garbage can.  Thankfully, my roomie and I tried a piece beforehand…and moved on to the epic deliciousness of the Fleur de Sel variety.

With the elegant and fanciful flavor of the Fleur de Sel Caramel popcorn, you’re treating your taste buds to something special.  Trust me…they will thank you for it.

I’m already craving more!

If you love caramel corn or are a huge fan of salted caramel goodies…this Fleur de Sel Caramel popcorn from 479° Popcorn is well worth snacking on.  SO GOOD!

Eco-Planet dishes up a mighty fine Gluten-Free Apples and Cinnamon Instant Oatmeal

Eco-Planet Gluten-Free Apples and Cinnamon Instant Oatmeal

Product: Eco-Planet Gluten-Free Apples and Cinnamon Instant Oatmeal – $5.19+

Oatmeal.

It has been my go-to, inexpensive, gluten-free lunch of choice since I was told by my doctor to go gluten-free.  Sure, not all brands are inexpensive, but when compared to the price of gluten-free bread…gluten-free condiments…oh…and those pesky rising costs of fresh fruits and vegetables…oatmeal is the way to go.

Besides…it’s hearty.  And, more often than not, delicious.

Well, awhile back a local grocery store I frequent suddenly had a massive closeout on items in their gluten-free section.  Fearing that I was about to lose my gluten-free shelves of goodness, I stocked up on items that I loved and a couple items I had been meaning to try, and just hadn’t talked myself into it.

One of the items in the latter category was the Gluten-Free Apples & Cinnamon Instant Oatmeal from Eco-Planet.

Today was the day that I busted this out of the pantry to take to work and enjoy at lunch.  At least…I hoped I was going to enjoy it.  I had high hopes because Eco-Planet is the very same company that is putting out Gluten-Free Toaster Pastries (yes…gluten-free Pop Tarts!).  I wanted it to be good.  I hoped it would be good.

Individual packet of Eco-Planet Gluten-Free Apples and Cinnamon Instant Oatmeal

Before we get to that, however, how about a little information on the product itself?  The gluten-free instant oatmeal from Eco-Planet is definitely one of the more nutritious finds out there.  It is composed of seven whole grains, including whole oats, buckwheat, sorghum, brown rice, puffed amaranth, quinoa and millet.  Each packet of oatmeal contains 500 mg of Omega 3.

Not only that, one serving (which is one pouch) is only 150 calories!  That’s awesome.  Each serving contains only 3 grams of fat and 10 grams of sugar.  Not bad for a hot cereal, yes?  And for me, as a gluten-free, vegetarian…who is also an athlete…the 4 grams of protein is a sweet addition to every spoonful.

So…now to the nitty-gritty of this review…the actual review.

Making the cereal up at work is super easy.  Empty the pouch into a bowl and add 1/2 cup of water (or milk…but I use water).  Stir and then microwave for 1-1/2 minutes to 2 minutes.  Remove from microwave…and enjoy!

I tend to forget that the microwave at the office is much stronger than the one I have at home…so when I put this in for 2 minutes, it turned out a bit thicker than I normally enjoy my hot cereal…but it wasn’t bad.  The taste…well…surprisingly good.  I mean, like most oatmeal, it isn’t much to look at…but one bite…and I knew that this was a good thing.  I didn’t need to break out the back-up lunch plan today.  Nope.  The oatmeal was thick, hearty, and seasoned well with dried apples and that spicy hint of cinnamon.  Yummy!

I was pleasantly surprised with the texture, flavor, and quality of Eco-Planet’s Gluten-Free Apples and Cinnamon Instant Oatmeal.  I would love to try the Maple and Brown Sugar one next if I can find it somewhere.  I am very impressed with the way the company chooses ingredients, makes sure they maintain the integrity of the gluten-free product, and in the end, put out a product that is amazing and delicious.

I’m hooked and ready for more!

Eco-Planet Gluten-Free Apples and Cinnamon Instant Oatmeal (prepared)

Schär’s Chocolate Hazelnut Bars a grown-up, gluten-free KitKat of awesome!

Schär Chocolate Hazelnut Bars

Product: Schär Chocolate Hazelnut Bars – $4.99+

The first time I ever had one of Schär’s amazing products, I was in Los Angeles, California.  One of my besties, Tawn, came down from Fresno and when I walked in the house, we hugged, we hugged more…and she looked at me and said, “I have gifts for you!”  What she brought out of her luggage was a thinkThin bar and one of Schär’s Chocolate Hazelnut Bars.

I, naturally, ate them when I needed a snack or was at a restaurant where there were no real options for me.  That being said…I didn’t blog about the gift snacks…because I devoured them before I took pictures of them.

Well, I remedied that already with the thinkThin bar…but the Schär wafer treat had yet to see it’s day in the blog spotlight.

Tonight…that changes.

During a major gluten-free closeout at my local grocery store, the entire section it seemed was on sale.  So, while out grocery shopping that night, we piled our cart full of everything that was marked down and on closeout, fearing that the gluten-free section was being taken away from us…or shrinking.  That wasn’t the case.  I think they were moving out old stock to make room for a lot of new stock and new items.  We didn’t know that at the time though.

One of the items that were tossed into the cart of gluten-free madness was a package of the Schär Chocolate Hazelnut Bars.

Memories of my time in Los Angeles crept back to me immediately.  Happy, happy memories.  But, other products had to be used up before I got to these…and so…they sat…and waited.

But today was the big unveiling of the Schär Chocolate Hazelnut Bars.  I couldn’t really recall what they tasted like anymore.  That trip to California happened over two years ago.  I remembered finding them delicious though, so I wasn’t too concerned about taking this item to work for my afternoon snack without a backup plan.

Schär Chocolate Hazelnut Bar (individual)

I had been anticipating my 3 p.m. snack most of the day.  Every time I opened my desk drawer, the Schär Chocolate Hazelnut Bar was sitting there…tempting me.  But…I behaved and waited until the appropriate time.  But once the clock struck 3 p.m., all bets were off!

First of all, I love how this is the actual size of a candy bar.  The picture on the cover shows a treat that resembles those little wafer cookies (the ones that come in chocolate, vanilla and strawberry that you devour as a child).  So, already this bar is like that…but on steroids.  After splitting it in half, and taking the required picture for the blog, I took my first bite.

Oh. My. Gluten. Free. God.

Rich.  Decadent.  Light.  Fantastic.  Heaven in chocolate-covered wafer form.  One bite and I knew this was a treat to be savored.

It tasted like the awesomeness that would emerge should a KitKat Bar mate with a Ferrero Rocher.  Honestly.  It was more of a dessert than a snack when it came down to it.  That’s not knocking the bar in the slightest.  It was melt-in-your-mouth awesome from the first bite to the last.  I let my teammate, Andrea, try some and she also loved it.  She’s very picky…especially with gluten-free foods…but this one only garnered compliments.  My roomie also tried a little portion of it…and she too enjoyed it.

Really…it’s a decadent mid-day pick-me-up…or a sweet treat when you are craving something rich, smooth, and chocolatey.  The wafer crackers are thin and lend a slight crunch.  The hazelnut cream is the perfect amount to lend its flavor without overpowering the rest of the bar.  And the milk chocolate that surrounds this treat…exceptional.  Schär managed to find the perfect balance between snack and dessert.  This was definitely a decadent mid-afternoon snack.

It’s also not the healthiest option I’ve ever brought with me for that 3:00 p.m. munchie attack.  One Schär Chocolate Hazelnut Bar packs 200 calories and 12 grams of fat.  Like I said…It’s much more like a dessert than a snack.  And perhaps that’s how these should be treated.  But, at least these are made with recognizable ingredients, have no preservatives, no gluten, no wheat, and no eggs.

Super smooth.  Super rich.  Super delicious!

Super Schär does it again…wrapping up hazelnut goodness in a simple chocolate coating.  The results…sweet chocolate-coated wafer nirvana.

Mmmmm…it tastes as good as it sounds!

Schär Chocolate Hazelnut Bar (unwrapped and split open)

Cooking up and toasting up tasty Gluten-Free Cheese Ravioli from Conte’s Pasta

Conte's Pasta Gluten-Free and Wheat Free Cheese Ravioli
Conte’s Pasta Gluten-Free and Wheat Free Cheese Ravioli

Product: Conte’s Pasta Gluten-Free Cheese Ravioli – $5.99+

I have been leery of the frozen gluten-free pastas that I can find in the freezer section at the grocery store ever since the epic fail of Caesar’s Gluten-Free Gnocchi.  Yeah…it was enough to really just turn me off from the whole frozen gluten-free pasta thing.

But…with New Year’s Eve on the horizon and a trip to visit one of my best friends, Jenn, for the occasion, she and I started getting on Pinterest and plotting a menu.  And the entree that caught our attention was a Oven Toasted Ravioli dish.  It looked absolutely fantastic.  Jenn said she had some of Conte’s Gluten-Free and Wheat Free Cheese Ravioli in her freezer (the sign of a good friend is one who stocks up on gluten-free foods even when you aren’t in town…just for those occasions that you are!).  She suffered through the Caesar’s Gluten-Free Gnocchi fiasco…so I was willing to go along with her on this one.  My job…providing the gluten-free breadcrumbs to be dusted over the ravioli before they were toasted.

New Year’s Eve arrived with a vengeance.  After a busy day of seeing The Hobbit, she and I settled in later than expected (it snowed while we were in the movie and the roads were bad) to start up our gluten-free bread for the evening and then make up the gluten-free ravioli dish while it cooled.  With the bread out of the oven, we set some water on the stove to boil and pulled the Conte’s Gluten-Free and Wheat Free Cheese Ravioli out of the freezer.  Opening the bags…we weren’t impressed immediately.

They looked like pale discs of pasta with a bulging center that would contain the cheese filling.  We said our prayers to the gluten-free pasta gods and poured them into the boiling water.  Unlike Caesar’s frozen pasta, these actually did sink to the bottom of the pan, making it much easier for us to tell when these were truly done cooking.  Once they started floating, Jenn would scoop out a bunch of them into the strainer, shake them carefully over the pan, and bring them to me to put in the egg wash and then coat with the gluten-free bread crumbs.

Looks can be deceiving.  These raviolis really held up to the boiling process.  They didn’t split or fall apart.  Even when I would drop them into the egg on accident, they maintained their form and didn’t ooze filling out.  They survived a dunking in breadcrumbs and everything.  I was already much more impressed with these than the last gluten-free frozen pasta experience.  Conte’s Pasta did a great job making gluten-free ravoili that didn’t fall apart in the pot…or through the breading stages I put the pasta through.

So, with the breadcrumbs on and sticking quite well to the pasta, we gave the ravioli a spray of cooking spray and put them into the oven to toast up.  It took 12 – 15 minutes according to the recipe…and when they emerged, they were golden, and still holding their shape.  We carefully scooped them off the pans and into a serving bowl so we could all help ourselves to as many as we would want.  They held up.  And when we settled in to eat…the three of us (my roomie Cathy was there too!) dug in.

The biggest thing about these ravioli is that they do need a sauce.  Jenn had originally set out to eat the meal without the sauce, but ended up with some on her plate in the end.  That being said, the texture was great.  They held up fantastically to boiling and toasting in the oven.  And the taste of the filling was super good.  I wasn’t disappointed at all with these ravioli.  Conte’s Pasta has definitely restored my faith in the gluten-free frozen pasta.  In fact, when it comes to choosing a brand now, I think I’ll stick with Conte’s.  They definitely won me back over to the frozen side when something like a gluten-free ravioli is needed.

Use a proper sauce when you eat these.  Whether you bread them or eat them straight from the pan…you’ll love the texture and taste.  And the cheese is ooey, gooey, and good as well.  They have quite a few variations of gluten-free pastas to choose from.  But these ravioli’s did the trick for me.

Find them in your grocery store freezer section and give them a try.  And if you are looking for an easy and tasty recipe, check out my blog on the Gluten-Free Oven Toasted Ravioli that Jenn and I prepared on New Year’s Eve.  It’s a fun, different, and delicious way to enjoy gluten-free pasta.

Conte's Pasta Gluten-Free and Wheat Free Cheese Ravioli (cooked and coated with Katz Gluten-Free Bread Crumbs and toasted in the oven)
Conte’s Pasta Gluten-Free and Wheat Free Cheese Ravioli (cooked and coated with Katz Gluten-Free Bread Crumbs and toasted in the oven)

Katz Gluten Free gives gluten-free community bread crumbs that taste and look like bread crumbs

Katz Gluten Free Bread Crumbs

Product: Katz Gluten Free Bread Crumbs – $4.09

Gluten-free bread crumbs suck.

Seriously.

Have you ever purchased a bag of them?  They’ll do in a pinch, but normally they don’t even resemble actual bread crumbs.  No joke.  The first time I ever purchased gluten-free bread crumbs, my heart sank when I opened the pouch.  Normally, gluten-free bread crumbs are these little yellow pellets of milled corn.  They work on certain dishes, but as a vegetarian…most of the time they just don’t work right on what I need them for.  They are usually thick and gritty and don’t stick very well to the food.

So, one day while surfing around one of my favorite gluten-free company Web sites, I discovered Katz Gluten Free Bread Crumbs.  I was skeptical at first…but from the picture on the site, it looked like these were actually super-fine breadcrumbs.  Like the kind people who aren’t gluten-free get.  I figured I could take a chance and put them on my next order.

I couldn’t have been happier when they arrived.  You know that Italian blend of bread crumbs you see at the grocery store…that is exactly what these looked like.  I was thrilled.  I couldn’t wait to try them out!

But, wait I did.  I think I might have been anticipating the perfect dish in which to use them on…but I stuck them in my pantry and they sat there for awhile.

And then the holidays rolled around.  My friend, Jenn, was hosting my roomie and I for New Years once more.  We have such a blast together on New Years and part of the fun is that Jenn and I create a menu and cook it up for a wonderful evening feast to welcome the new year.  This year…we decided on oven toasted gluten-free ravioli (Jenn is awesome in that she does gluten-free for me when I come into town).  They looked fantastic on Pinterest…so we pinned it to her New Year’s Menu board and got to planning.  I told her I actually had some gluten-free bread crumbs we could use for the recipe and that I would bring them with me for the occasion.

Finally…the moment I had been waiting for.  To see how Katz Gluten Free Bread Crumbs would fair against the gluten-free bread crumbs that had come before it.

New Year’s Eve arrived and, hungry after an afternoon at the movies (we saw The Hobbit), Jenn and I returned home and settled into baking mode (while Cathy sat at the table, read, and commented on how good it all smelled).  We got our gluten-free bread cooking first.  And while it was cooling, we settled into working on the Oven Toasted Ravioli.

She got out the gluten-free ravioli and I set into mixing up the breadcrumbs with a bit of cheese, per the recipe. What I loved at first site with these bread crumbs was how superfine they were.  They were the proper texture and looked like REAL bread crumbs.  I was already feeling good about this recipe.  I even tasted a pinch of them from the bag…and that won me over there.  This had to work…because these were the best gluten free bread crumbs out there.  I got them prepped.  Then…the rest was simple.  Cook ravioli, dip into egg/milk mixture.  Then…into the bread crumbs they went.

Miracle upon miracles…the breadcrumbs stuck to the ravioli.  They stuck SO sell.  I was so incredibly pleased with it.  I was seriously looking forward to this meal…and a lot of it was thanks to these gluten-free bread crumbs.  We gave each ravioli a spritz of cooking spray and into the oven they went to bake for about 12-15 minutes.

They came out of the oven looking just as good as they did when they went into it.  Seriously.  I was so highly impressed.  And ready to eat.  Jenn and I removed them from the pan and placed them in a bowl.  The bread crumbs remained in place and didn’t fall off the food as gluten-free bread crumbs from my past had been known to do.  Inset a happy squee and a little dance of joy here.  I placed the bowl of toasted gluten-free ravioli on the table…and soon we were sitting down to our New Year’s feast.

So…did they live up to the standard I built up in my head?

OH…YES!

The bread crumbs toasted up to a beautiful golden color when in the oven.  They didn’t fall off the ravioli as they baked or when we lifted them from the pan.  Nor did they fall off when we all began digging into the bowl for some of the ravioli to dine on.  They remained where they should be…stuck to the gluten-free ravioli.

One bite…and I knew no other bread crumb will ever come close to this when it comes to the gluten-free varieties out there.  These were amazing.  Honestly.  If you put these down in front of someone who didn’t know they were gluten-free…they wouldn’t be able to tell.  I guarantee that much.  The superfine quality really makes all the difference.

Katz Gluten Free Bread Crumbs are made from a gluten-free flour that contains corn and potato.  From there, the ingredients include eggs, water, canola oil, sugar, baking powder, xanthan gum, yeast, and salt.  These are probably all remnants of the amazing gluten-free breads that Katz Gluten Free offers.  I’m okay with that…because if that means we get bread crumbs like this…I’m forever sold.

A serving of Katz Gluten Free Bread Crumbs is 2 ounces, which sets you back 140 calories and 6 grams of fat.  Each serving is low in sodium as well, which is important as my roomie’s family tends to have high blood pressure so we focus a lot on low sodium foods.

So…this gluten-free foodie gives Katz Gluten Free Bread Crumbs a stamp of approval.  They are the most amazing gluten free bread crumbs that have hit the gluten-free market.  I can promise you that.  I am so highly impressed with these.  I am already anticipating my next Katz Gluten Free order because these are definitely going on it.  I have a bunch of other recipes to try now that I found gluten-free bread crumbs that work, taste, and feel like real bread crumbs.

I once again sing only high praises for Katz Gluten Free.  They deserve it though…for putting out quality products that live up to the high standards that they set.

If you have been leaving bread crumbs out of your recipes (this was what I did prior to finding these after having no luck with the other gluten-free bread crumbs on the market), you no longer have to.  All thanks to Katz Gluten Free.

Katz Gluten-Free Bread Crumbs on Conte's Gluten-Free Cheese Ravioli (toasted in the oven)
Katz Gluten-Free Bread Crumbs on Conte’s Gluten-Free Cheese Ravioli (toasted in the oven)

Recipe: Gluten-Free Oven Toasted Ravioli

New Year’s Eve was all planned out between my friend Jenn and I.  We were ready to whip up a feast that night…complete with an entree that she spotted on Pinterest.  And between the two of us and our love of trying Pinterest recipes…we set out to make these.  I just happened to have some Gluten-Free Breadcrumbs from Katz Gluten Free at my apartment and they would be perfect for this recipe.  So…I saved them for this exact reason and they didn’t let us down.

The best part about this recipe is how simple it was to make.  Totally going to do this again.  Nothing fancy…it just looks like it.

The best part…once again we simply modified the ingredients to fit my dietary needs…so while this recipe is gluten-free…it doesn’t have to be made that way.  I am just thankful to have friends who eat foods that I can eat when I’m around.  Some people aren’t willing to give gluten-free a chance…but my friends Cathy and Jenn have always given it a fair shake.  And for that…I am thankful.

Oh…and this recipe was AWESOME!

Recipe: Gluten-Free Oven Toasted Ravioli

Gluten-Free Oven Toasted Ravioli

Servings: 3-4
Time: Prep 10 minutes; Cook 15 minutes

Ingredients:

  • 12 round frozen ravioli, thawed (I used Conte’s Gluten-Free Cheese Ravioli)
  • 1 egg
  • 1 tablespoon milk
  • 6 tablespoons Italian bread crumbs (I used Katz Gluten-Free Breadcrumbs)
  • 2 tablespoons grated Parmesan cheese
  • cooking spray

Directions:

Preheat oven to 375 degrees.

Whisk together egg and milk in shallow bowl.  In another bowl or pie plate, combine bread crumbs and Parmesan cheese.  Dip ravioli in egg and then in bread crumbs.  Place on baking sheet.  Repeat until all ravioli are coated.  Spray ravioli with cooking spray.

Bake for 12-15 minutes or until golden brown.  Serve with warm marinara or pesto.

~*~*~

See…it’s one of the simplest recipes out there…but the end results are a delicious ravioli with a crisp outer layer and soft, warm, gooey inner layer.  Use whatever ravoili you like.  This was the first time I used Conte’s Gluten-Free Cheese Ravioli…and they were awesome.  They held up to cooking and baking and…damn…were they ever delicious.

Impressed!!  Very impressed.

So…if you want a simple meal that is easy to make and big of flavor…give this one a go!  You’ll love it.  I guarantee.

Recipe: Gluten-Free Pull-Apart Cheesy Onion Bread

Oh…Pinterest!

What did I do without you in my life?  Ever since I started getting the hang of searching and pinning and all that goodness…I can’t tear myself away from you.  And, my dearest Pinterest, it is because of you that my dearest friend, Jenn, and I were able to whip up some fantastic food this New Year’s Eve.

Even better?  All of it was gluten-free…because Jenn rocks and working with my food allergies.  She honestly does.

So, when New Year’s Eve hit…we had just come from seeing The Hobbit and we were HUNGRY!  The thing was…we had some cooking to do before the sitting down and eating was possible.  Good thing we did a wee bit of prep work ahead of leaving for the day.

And so…the first thing we cooked up to enjoy with our New Year’s Eve feast was this fantastic Cheesy Onion Pull-Apart Bread.  We had our doubts as to how it would turn out (if it even did) and questions on how exactly to make it…but we managed.  The original recipe was one I found from Food & Wine Magazine and we modified it by changing the cheese used, the amount of onion, and making it gluten-free.  We’re chefs…we tinker.

And yeah…it really is as good as it sounds.

Recipe: Gluten-Free Pull-Apart Cheesy Onion Bread

Gluten-Free Pull-Apart Cheesy Onion Bread


Servings: 10
Time: Prep 25 minutes; Bake 30 minutes

Ingredients:

  • 1-1/2 sticks cold unsalted butter, 1 stick cubed
  • 1/2 large onion, finely chopped
  • 1 tablespoon poppy seeds
  • Kosher salt and freshly ground pepper
  • 1 cup coarsely shredded Dill Havarti cheese (3 ounces)
  • 2 cups all-purpose flour, plus more for dusting (I used Bob’s Red Mill Gluten-Free All-Purpose Flour)
  • 2 teaspoons baking powder
  • 1/2 teaspoon baking soda
  • 1 teaspoon salt
  • 1 cup buttermilk

Directions:

Preheat the oven to 425° F.

Butter a 9-by-4-1/2-inch metal loaf pan.

In a large skillet, melt the 1/2 stick of uncubed butter; pour 2 tablespoons of the melted butter into a small bowl and reserve.

Add the chopped onion to the skillet and cook over moderate heat, stirring occasionally, until it is softened, about 8 minutes.  Stir in the poppy seeds and season with salt and pepper.  Scrape the onion mixture onto a plate and refrigerate for 5 minutes, until cooled slightly.  Stir in the Dill Havarti cheese.

Meanwhile, in a food processor, pulse the flour with the baking powder, baking soda and salt.  Add the cubed butter and pulse until it is the size of small peas.  Add the buttermilk and pulse 5 or 6 times, just until a soft dough forms.

Turn the dough out onto a well-floured work surface and knead 2 or 3 times.  Pat or roll the dough into a 2-by-24-inch rectangle.  Spread the onion mixture on top.  Cut the dough crosswise into 10 pieces.  Stack 9 pieces onion side up, then top with the final piece, onion-side down.  Carefully lay the stack in the prepared loaf pan and brush with the reserved butter.

Bake the loaf in the center of the oven for about 30 minutes, until it is golden and risen.  Let the bread cool for at least 15 minutes before unmolding and serving.

The unmolded loaf can be stored at room temperature for up to 2 days.  Rewarm before serving.

~*~*~

This was probably the most nerve-wracking item we made on New Year’s Eve.  The directions were a little confusing upon reading and we weren’t exactly sure how well the gluten-free flour would do with the recipe.  The result though…was epic.  This bread was SO amazing and delicious.  The modifications we made (the original called for Gruyère cheese and an entire onion) really worked in our favor.  The loaf was packed with flavor, delicious cheese, and lots of yum factor!

The only thing we noted was that it really wasn’t pull-apart.  But, slicing it with the knife worked just as well and definitely didn’t take away from the recipe in the slightest.

Making this again…for sure!