Fact: I take after my mom in the fact that I love, love, love Brussels sprouts. I mean…LOVE them. I didn’t know this, of course, until they turned up in my CSA bin one week. Instead of freaking out…I decided I would coax some flavor out of them. Try them a couple of ways. See if they were really as bad as those family shows growing made them out to be.
Turns out…they are awesome. And my favorite way to make them…is roasting them in the oven.
Simple, delicious, healthy, clean eating. Sign me up!
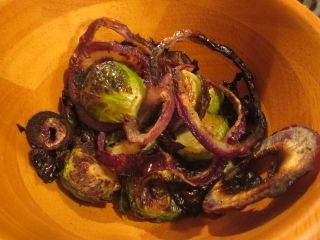
Well, this week when I received my CSA bin…I was ecstatic to find Brussels sprouts inside. I sensed some roasting coming up in my near future. So…I figured what better thing to have on a gray Saturday night. They make a fantastic dinner. Except this time, I roasted them up a little differently. I still seasoned them as I always did and tossed them with a light drizzle of extra virgin olive oil…but this time I sliced up some red onion and chopped up some fresh garlic cloves to roast with the Brussels sprouts as well.
Delicious!! The idea cropped up on a page I followed on Facebook. All I needed was a red onion, and I just happened to be heading to my grocery store. So, a huge thank you to The Slow Roasted Italian for the inspiration and a way to turn up the volume on one of my favorite ways to enjoy one of my favorite vegetables.
12 ounces fresh Brussels sprouts, cut in half (or quarters if sprouts are large)
3 garlic cloves, rough chopped
1/2 medium red onion, sliced
1 tablespoon extra virgin olive oil
salt and pepper to taste
Directions:
Preheat oven to 450°F. Line a baking sheet with aluminum foil.
Add Brussels sprouts, onions and garlic to pan. Drizzle with olive oil. Sprinkle with salt and pepper. Toss with clean hands, until coated. Wiggle the pan until Brussels spouts are in a single layer. Bake 20-25 minutes until fork tender.
Serve and devour…er…enjoy!
~*~*~
I know too many people who have yet to give Brussels sprouts a try. If cooked properly…they can be one of the most fantastic things in this world. I fell in love with them at first bite. My mom loves them. My dad won’t touch them.
But, you won’t know how you feel about them until you give them a shot. Don’t discount these hearty little vegetables. They are amazing. Go ahead…roast them up and see what you think!!
Yep. Friday. Which many of you know means…BIN DAY!! I love my CSA bin. The problem was…I had a lot to use up still from the previous week. Like…potatoes. Both red potatoes and fingerling potatoes. The fingerling potatoes were actually from two bins ago…so I knew I needed to do that first.
Thankfully, I have a board for that on Pinterest…so I hit that up and found a recipe that sounded absolutely delicious. My version is a slight variance on a recipe from Bon Appétit. Really…it was delicious.
Better yet…it was easy to make.
Even better…healthy…and delicious!!
Recipe: Garlic and Herb Roasted Fingerling Potatoes
6 sprigs of fresh herbs, chopped (I used rosemary and thyme)
4 garlic cloves, peeled, grated
1 pound fingerling potatoes, unpeeled
2 tablespoons extra virgin olive oil
Kosher salt
Freshly ground pepper
Directions:
Preheat oven to 375°F.
Place herbs, garlic, potatoes, and oil in a large bowl. Season with salt and pepper and toss to coat.
Place in a large baking dish or rimmed cookie sheet and toss.
Bake for 45-55 minutes.
Serve hot.
~*~*~
See how easy that is. The difficult part is smelling the potatoes as they cook because it really smelled amazing and delicious. I was ready to dive in when I pulled them out of the oven. Total win with the potatoes. It was nice to cook them up differently this time around. I am going to search for more fun and different potato recipes for the very near future.
Until then…give this one a try. I promise…you’ll fall in love with it. Especially if you like potatoes.
It seems to be a seasonal favorite of my CSA bin as of late. For two weeks in a row, it has been one of the components of my bin. Now, normally I would simply make a stir-fry out of it…but I’ve been attempting to expand on my culinary skills a little. Step a little outside the comfort zone. Do something…different.
I think I accomplished that last night when I cooked up a meal inspired by the blog Big Girls Small Kitchen. I had all the components on hand in my pantry and fridge…including the bok choy and tofu.
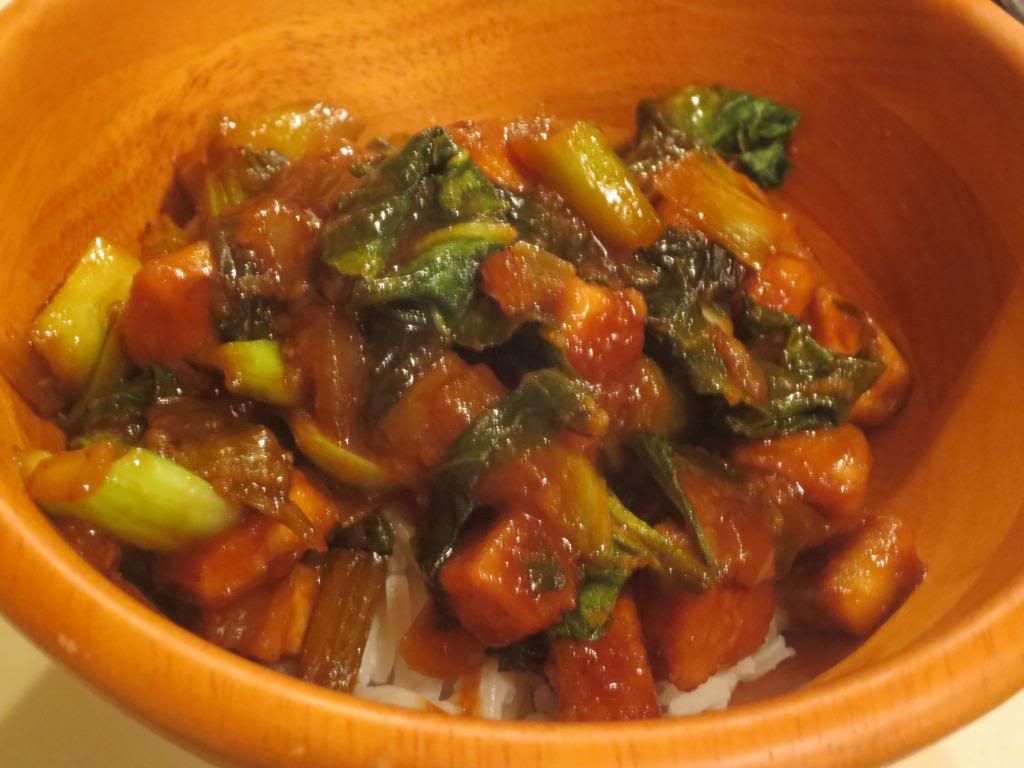
What emerged was a fantastic meal that really worked together. I served mine over basmati rice…which I cooked up while I was working on the rest of the dish as well. It was a fantastic meal and not too difficult to create either.
Recipe: Gluten-Free Sweet-and-Sour Tofu with Bok Choy
2 tablespoons flour (I used Better Batter Gluten-Free All Purpose Flour)
Pinch salt
2 tablespoons safflower, grapeseed, or other neutral oil
1/4 cup lemon juice
1/4 cup honey
1/4 cup soy sauce
1 tablespoon grated ginger (I used 1 teaspoon ground ginger)
1 tablespoon grated garlic (3 cloves)
Sriracha
2 bunches baby bok choy, rinsed, trimmed and cut into bite-sized pieces
3 scallions, white and green parts chopped and separated (I substituted 1/2 a white onion)
Directions:
Cut the tofu into slices about 1 inch thick. Press the water out of the slices, then cut them into 1-inch square cubes. In a baggie or on a wide plate, toss the tofu with the flour and salt until all the pieces have a thin coating.
Mix the lemon juice, honey, soy sauce, sriracha, garlic and ginger in a small bowl. Add 1 tablespoon water.
In a frying pan, warm the oil. In one layer, brown the tofu (in two batches if your pan is small), about 4 minutes per side.
Return all the tofu to the pan if you browned it in two batches.
Put in the onions and the crunchy part of the bok choy and cook for 2-3 minutes, stirring constantly. Add the green leaves and cook 1 more minute.
Add the sauce.
Bring the tofu to a boil, then lower the heat and let is simmer until the sauce has reduced and coats the tofu thickly, about 10 minutes.
~*~*~
I was so happy with the way this meal turned out. The tofu was perfectly cooked, the flour giving it this slight texture to it, even after cooking in the sauce. The bok choy and onion, along with the sauce brought this amazing flavor to every component. I loved this sauce. It smelled amazing and it had the perfect balance of sweet and sour…nothing overpowering the other.
This meal is a great source of protein. As I said, I served mine over a serving of basmati rice…and it was delicious. This meal was so easy to put together and cook…perfect for those nights where you don’t want to spend all night in the kitchen cooking up dinner.
So…I know I have the ability to change out the items I receive in my CSA bin. The truth is…sometimes I don’t want to. Sometimes I like to be challenged by an ingredient…sit there for a couple days and ponder exactly how to best use this piece of produce that I don’t commonly have on hand, nor would I normally buy. Why do I do this? To keep my culinary skills up, of course.
Well, this week’s big challenge was this gorgeous head of cabbage. While I could easily make a coleslaw with it…my roomie despises coleslaw and I’m not a big fan of it myself. So…I was hoping to figure out a unique way to utilize it in a breakfast. With a little guidance form a blog called Ditch The Wheat, I got inspired to make my own little cabbage breakfast, adding a bit of texture with some homemade potato chips. That would give them some crunch. I also added a hint of flavor by adding some sliced shallots and some minced garlic to my sautéed cabbage.
And…to make it all breakfast-like…I topped each bowl off with a fried, over-easy egg. Surprisingly…very delicious and really packed with flavor.
Slice the fingerling potatoes thin like a chip. I recommend using a mandolin.
Pour enough olive oil into the pan to lightly fry the potato slices. Turn the pan to medium. Place the potato slices into the pan, sprinkle salt on them and flip when one side is crispy and sprinkle salt on them again. These are done when both sides are crispy. (NOTE: I used the Mastrad Topchips Chip Maker instead of pan frying them…or you could even bake them in the oven. I’m not big on frying…but not everyone has a chip maker like I do).
Take out all of the sweet potato chips and place on paper towel.
Place the shallot in the oil and stir, allowing to soften slightly. Add the cabbage and saute until desired crispiness. I prefer it to be well done. When you have about a minute left, add the garlic and stir.
While the cabbage finishes up, in a small pan, crack an egg and allow to fry on one side. Carefully flip the egg to cook the white through, but keep the center a little runny (unless you hate runny yolks, in which case…cook the hell out of that egg).
When the cabbage is done take out of the pan and mix with the chips. Place in two bowls and add a fried egg on top of each one. Serve immediately.
~*~*~
I admit…I was surprised with how good this recipe turned out to be. I found elevating the flavor with shallot and garlic was a great call. The cabbage cooked perfectly, just slightly browned by the heat of the pan, giving it this nice caramelization. And the egg on top just made all the difference. One very healthy, nutritious, and different breakfast for sure. But one that I would repeat…in a heartbeat!
We all know…I am one big cookie monster. I mean…give me a chance to try a gluten-free cookie and I’m on it like Cookie Monster. OM NOM NOM!! Seriously…cookies are one of my biggest weaknesses when it comes to treats. I love them. I always have. I grew up with my mom constantly baking cookies, from scratch, on snow days, for special occasions, and especially during the holidays.
While my favorite will always be her Snickerdoodles (which I intend to attempt to make gluten-free this year…so wish me luck), I also love it when she would make sugar cookies. Not only did we get to help cut them into the fun shapes, but we got to help decorate them too. Sugar cookies are so simple…yet have always been one of my favorite cookies to reach for and devour…er…I mean eat.
Why?
Simple flavors. Simple ingredients. Pure awesomeness.
They are basically sugar, butter, and flour, but damn…they are awesome. I’d be hard-pressed to find someone who didn’t enjoy a sugar cookie. And if they said anything of the sort, I’d deem them a liar…just like everyone I know who says they hate chocolate.
LIES! ALL LIES!!
*cough*
Anyway…here I was…before the release of Pillsbury Gluten-Free Cookie Dough (which is refrigerated)…walking around my local natural foods store during one of their fun gluten-free events…when…the roommate says I can pick out some new products to try. WOOHOO! I love it when she expands my grocery budget as a treat…sometimes for no good reason. She says she benefits from it too…so it’s win/win! I never go overboard…and generally pick a few items that I’ve not seen anywhere else. And one of those items this last time was a gluten-free sugar cookie dough in the refrigerator section. It’s EatPastry Gluten-Free Sugar Momma Cookie Dough.
EatPastry is a line of vegan and some vegan and gluten-free cookie doughs. The company was founded, according to the website, by confusion, curiosity, and dedication. The company experimented until they came up with what they thought to be the best tasting, best “feeling” cookie dough. They use only high quality, all natural ingredients. And it has been a priority from the inception of EatPastry to maintain 100% vegan ingredients, meaning none have come into contact with any animal ingredients. Their cookie dough also uses only organic and fair trade sugar (evaporated cane juice) and select organic ingredients. They even make their own peanut butter for their (not gluten-free) vegan Peanut Butter Chocolate Chip Cookie Dough. EatPastry’s doughs contain no eggs, no dairy, no preservatives, no processing, no fillers, no GMOs and no funny business. None. Good cookie dough is serious business, folks! They even state that all flavors were created with various moods in mind.
Mood food. Love it.
Well…I am just now getting around to using this dough because…well…I ran out of desserts in my freezer and pantry. HA! I wanted to try this before but I was working against a deadline on expiration dates. So…this little container was just hanging out in my fridge…waiting patiently.
It’s time to shine came yesterday! I just polished off a delicious, fresh dinner and knew I needed something sweet. I always have dessert. Always. So…I pulled this out of the fridge, preheated my oven to 350 degrees and laid out a strip of parchment paper across a baking sheet. I scooped up two tablespoons of dough, flattened each spoonful out, and then threw the pan in the oven.
How easy is that? About 12 minutes later…out they came. Delicious, individual cookies that were fresh from the oven. That is a total dessert win.
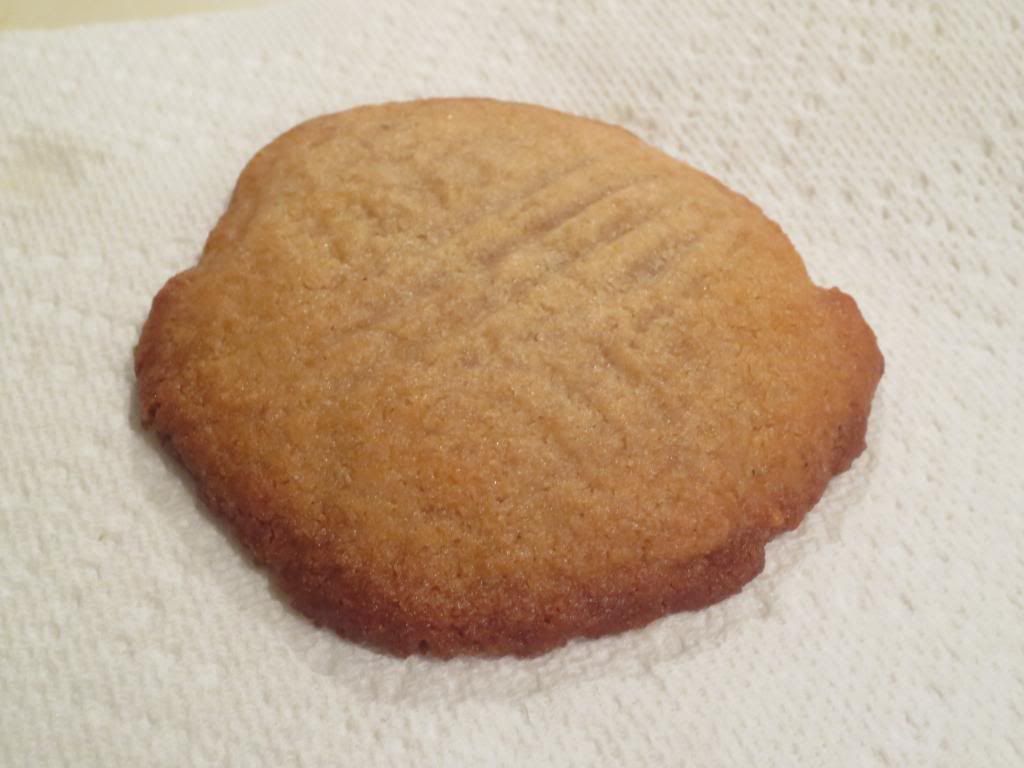
And…oh…my goodness. The EatPastry Gluten-Free Sugar Momma Cookie Dough is sassy, sweet and seductive. No…really…that’s what the Web site says. But I couldn’t agree more. First of all, with the scoopable refrigerator dough, you can make one cookie at a time if that’s what you wanted. You don’t have to make an entire batch right away…which you may or may not polish off before they start to get hard. This is easy and convenient. Seriously. They have this great texture to them. They are soft on the middle, but golden on the edges. And fresh from the oven…that is unbeatable. The flavors are subtle…but fantastic. There is that rich, delicate undertone of vanilla in each bite. And these cookies aren’t gritty with sugar. Not one bit. They are so amazing that it’s probably a good thing I can cook them up personally. Or I might eat the entire container.
Let’s talk ingredients and nutrition now…because I like to know what I’m getting myself into.
The EatPastry Gluten-Free Sugar Momma Cookie Dough is made of from a gluten-free flour blend (garbanzo, brown rice), Earth Balance, filtered water, pure salt, natural flavor (derived from corn with no MSG, no alcohol, no gluten) sunflower lecithin, lactic acid (derived from sugar beets), organic evaporated cane juice, pure apple sauce, pure vanilla extract, nutmeg, baking soda, and sea salt. Not too bad for a cookie right?
You’ll fee the same way about the nutrition. One serving is 1 tablespoon, which spoons you up only 60 calories and 2.5 grams of fat. This serving also has only 25 mg sodium and 5 grams of sugar. Yes…5 grams of sugar in a SUGAR COOKIE!!! You don’t get any fiber of protein from these cookies, but they are free of trans fats as well as cholesterol.
And they are fantastic. Really sexy, smooth, sinful gluten-free cookies of awesomeness. Without the guilt. Because, let’s face it…you don’t find 60 calorie cookies just anywhere, right?
I hope to try the other two vegan and gluten-free varieties offered by EatPastry…the Chocolate Chip and the Snickerdoodle (SQUEE!).
If you can find EatPastry refrigerated vegan and gluten-free cookie dough in your grocery store or natural food store…get it…and try it. You can scoop what you like and keep the rest for later. I’m loving it.
Cookie made from EatPastry’s Gluten-Free Sugar Momma Cookie Dough
To this day…thanks to the good gluten-free bagels out on the market…bagels continue to be one of my favorite, easy, breakfast foods (or snack…or even lunch or dinner) to eat.
That’s right. Just as any proper New Yorker will attest…the bagel is the best invention out there. I love them. I loved them back when I could eat “regular” bagels. And I love them now because I have found two brands that do bagels right. One handles bagel thins…but when it comes to all-out bagels…the crispy on the outside, soft on the inside bready treat…I turn to none other than Udi’s.
Udi’s knows how important taste and texture are to the gluten-free community. They strive to provide the best quality, best tasting gluten-free products out there. The first time I ever had one of their bagels…I might have cried.
Okay…I admit it…there were tears of joy. And I think the roomie had to hug me.
Yes…they really are that good.
And, get this…the roomie was never big on bagels…until she had one of the Udi’s Gluten-Free variety. Now…she loves them as much as I do, and is always interested to see what kind of topping I schmear over one in the morning.
Bagels are back with a gluten-free vengeance.
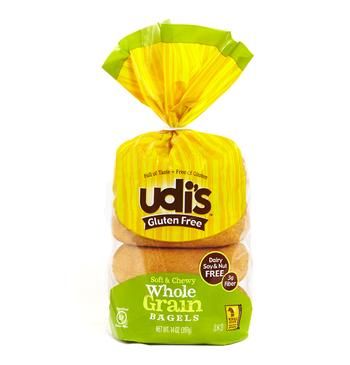
Okay…there is nothing new about Udi’s Gluten-Free Whole Grain Bagels. They’ve been out on the market for as long (if not a wee bit longer) as I’ve been gluten-free. It’s just taken me this long to purchase them and try them. Why? I don’t know. I’m a grocery shopping dork, apparently. But…the other day they were on Manager’s Special at my local grocery store…and I couldn’t pass up a pack of these for $2.49. HELLO! They found their way into my shopping basket faster than you can say gluten-free!
Udi’s Gluten-Free Whole Grain Bagels (untoasted)
Here it was, the Monday after a trip to Huntington, West Virginia, where I ran a full marathon. I was a little sore, very tired, and not wanting to put on my creative thinking cap to actually come up with something to eat for breakfast that day. Thank goodness for splurge purchases on sale items. I reached into my freezer and pulled out two (one for me, one for the roomie) of the Udi’s Gluten-Free Whole Grain Bagels, placed them in a ziplock bag to thaw and became a slug for a good chunk of the morning. Around 20 minutes before the roomie was to get up for work, I turned on my oven to 350 degrees removed the bagels from the ziplock. They were completely thawed and soft (but not mushy…at all!!). I split them in half and set them on a baking sheet. Into the oven they went for about 10 minutes until they were just golden on the top. By then, the roomie was up and ready for some food…same as me.
Why the oven? Because I got rid of my toasted when I was diagnosed with Celiac. The toaster had been used with regular bread and therefore…I couldn’t use it anymore. Toasting bread in the oven is just as easy…it just takes a moment longer to allow it to preheat. I can deal with that. Sure, I miss the ease of a toaster…and yes, I could buy a new one, but my kitchen is the size of a walk-in closet…and I honestly have no room for one.
Anyway…I digress…
Udi’s Gluten-Free Whole Grain Bagels are AMAZING! So tasty. I topped off one half with pumpkin spice cream cheese. The other half got a schmear of PB & Jellies Pumpkin Pie Jam (which I bought in Colorado Springs, CO). Why the different options? Well, I was down to just one serving of the cream cheese, so I split it with the roomie!
So…the verdict from both of us is…SUPER YUM! Like YUMTASTIC kind of YUM! Mmmm…mmmm…fantastic kind of YUM! SO YUM! I loved the texture of these bagels and the fact that they are the size of a real bagel, if not slightly bigger. The crust gets this nice crust on it, but the inside remains soft, but toasted all the way through. Perfect bagel texture…and probably better than any regular bagel I had ever eaten. I am beyond impressed! No surprise there!
So, let’s talk ingredients and nutrition, shall we? I know…I know…but it needs to be done. Udi’s Gluten-Free Whole Grain Bagels are made from water, tapioca starch, brown rice flour, non-GMO canola oil, egg whites, dried cane syrup, teff flour, tapi0ca maltodextrin, tapioca syrup, flax seed, xanthan gum, yeast, salt, cultured corn syrup solids and citric acid, dry molasses, and enzymes. So…it’s not completely clean eating…but it’s not as bad as some things on the market.
Nutrition-wise, one serving is one a bagel. This really large bagel will serve you 320 calories and 11 grams of fat. One bagel also has 570 mg of sodium and 5 grams of sugar. In addition to that, this one bagel will also provide you with 3 grams of fiber and 8 grams of protein. Trust me…you’ll be more than full after eating one of these…and you won’t be hungry for awhile. LOVE THAT!
I also love how delicious these bagels are…for real. Udi’s really does have it figured out and does a brilliant job of maintaining high standards when it comes to their products. This leaves only one type of bagel left for me to try…the Cinnamon Raisin. And I haven’t found that anywhere around here as of yet.
If you love bagels…you’ll totally love these! Trust me.
Toast one up for yourself and see if you agree!
Udi’s Gluten-Free Whole Grain Bagel (toasted and topped with a schmear of pumpkin spice cream cheese and a schmear of PB & Jellies Pumpkin Pie Jam)
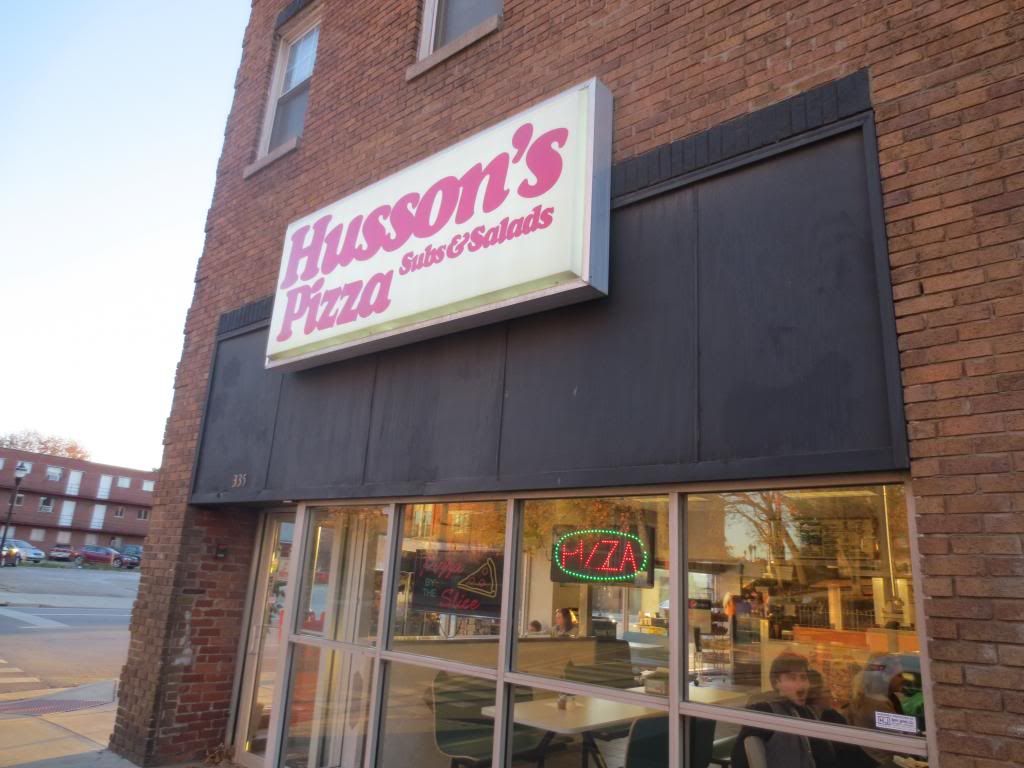
Restaurant: Husson’s Pizza, Huntington, West Virginia
It was the night before a marathon and I was in Huntington, West Virginia. Trust me…when it comes to dining gluten-free, Huntington, West Virginia is not where you’d want to find yourself. Why? There just aren’t a lot of options out there.
But…it’s tradition.
Race = fuel = gluten-free pizza.
Thankfully, before he left the running group and the state to move to Dayton, Ohio, my good friend Keith mentioned this place called Husson’s…not far from Marshall University. As this was the Marshall University Marathon…I was going to be in that area anyway. So Husson’s Pizza was kept in the back of my mind. And I recalled it as the date of the race grew closer and I traveled from Louisville to Huntington.
After a very busy day of traveling and race related stuff…I was ready to tuck into my gluten-free pizza around 5 p.m. My roomie and I had planned on splitting one of the 10 inch gluten-free pizzas. So when we drove down to Husson’s Pizza on Hal Greer Boulevard, we parked the car, and headed toward the establishment. Huntington, West Virginia is a mix of really beautiful buildings and some that are run down. Husson’s was definitely one of the ones that looked down. And if I had been traveling through, without the recommendation from my friend Keith, I probably never would have stopped there to eat. At all.
But, looks can be deceiving.
We stepped inside, and while the place definitely looks dated, you can’t argue with the affordability of their food. We already had an idea of what we wanted to eat…so we stepped up to the counter. We were greeted by a very friendly guy working the register who was ready to take our order. Cathy inquired about the gluten-free crust and they confirmed they did have it. So, as it was the day before a marathon…we kept the flavors simple.
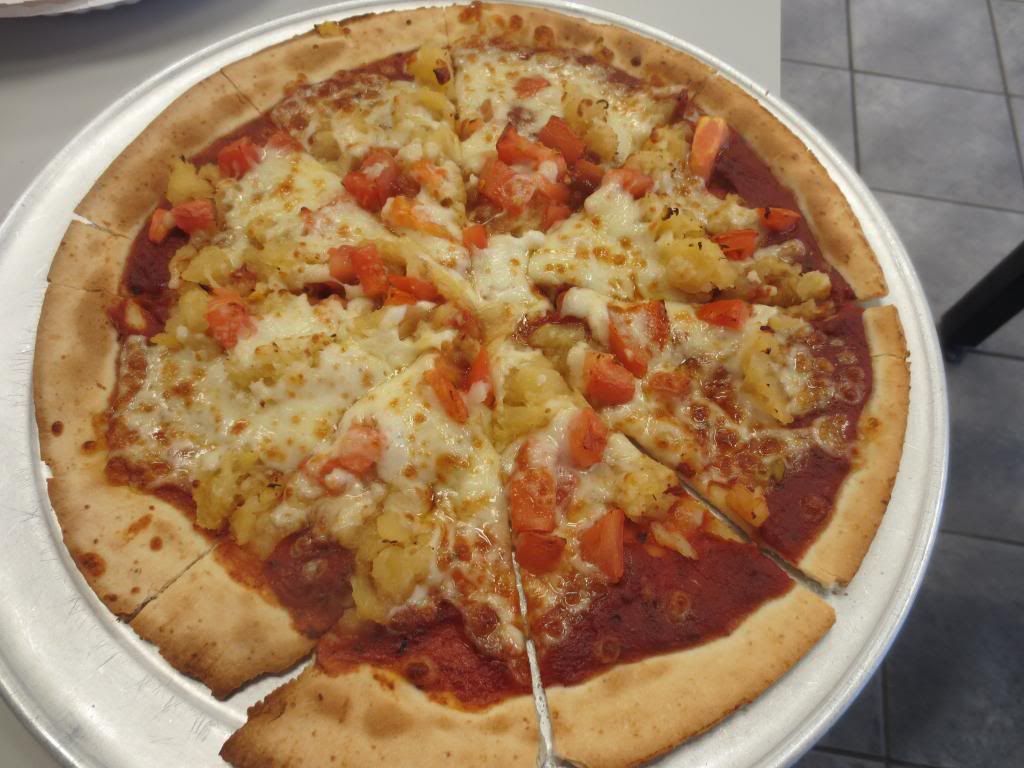
A gluten-free pizza with tomatoes and pineapple ($10.99). YUM! It’s great because you can actually choose up to 5 toppings for the pizza without being charged extra for it. And a $10.99 gluten-free pizza is awesome. What a great price. With our order in, Cathy and I settled in at one of the tables and awaited our food.
A short while later, our pizza arrived.
It smelled absolutely fantastic. It looked a mess…but…if it was as good as it smelled we were certainly in for a treat. I snapped a picture for the blog…and we each took our first slices.
So, the pizza is really nothing to right home about. Which was more than disappointing. The gluten-free crust was a simple cracker crust. Not much flavor. And it crumbled. It crumbled under the sauce, cheese, and our two toppings. I had no silverware to eat my pizza with (and I normally eat pizza with a fork and knife), so as the pizza would fall apart, I would have to scoop it up with my fingers. The sauce, however, was awesome. It was definitely the star of the entire pizza. I loved the smokey, rich flavor that came with this simple red sauce. It was fantastic. I could have eaten an entire jar of the sauce. I loved how the pineapple and tomatoes were chopped up small…but they were just casually thrown onto the top…so it was a bit…uneven with the toppings on the 8 slices. Like I said…decent enough pizza…but nothing that really made me want to go back for more.
While I appreciate a decent, affordable, gluten-free meal as much as the next person, I was truly hoping for an epic pizza experience. As it was, with the exception of the sauce, this was a complete let down. Not bad. And if I were back in town, I would probably head here for food again…because I know they have gluten-free food I can eat. I just…wish it had been more spectacular than it was.
When you eat a lot of gluten-free pizza…and I do…you just need a bit more than a cracker crust and a splash of sauce and a dusting of toppings. I want my taste buds to be wowed and my stomach to be full. This pizza didn’t accomplish that at all. Again, it wasn’t horrible or bad…it just wasn’t what I had anticipated. I’ve been spoiled by too many really damn good gluten-free pizzas that when I get something like this…it’s a complete let-down.
At least tradition remained thanks to Husson’s Pizza.
Husson’s Pizza’s Gluten-Free Pizza with Tomatoes and Pineapple
With Halloween over…the next big holiday coming up is none other than Thanksgiving. And we all have a lot to be thankful for this year.
Do you know what I’m thankful for?
Stuffing.
Yep…you read that right. Stuffing!
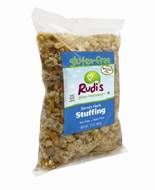
You see, Rudi’s Gluten-Free Bakery just recently launched its first ever Gluten-Free Savory Herb Stuffing. Yep…just in time for the holidays. I mean, if being gluten-free isn’t stressful enough at the holidays, tackling the homemade buffet at the dinner table can be enough to set you on edge. But not anymore. Not this year. Rudi’s wanted to help make the holidays brighter and easier this season, and they have certainly accomplished that with their delicious…yummy…made for everyone (not just the gluten-free) stuffing. The stuffing is a blend of Rudi’s Gluten-Free Multigrain and Original breads with savory spices that will tie in with any holiday dish on the table. Guaranteed. Oh, and it only takes 5 minutes to prepare…and is free of dairy, soy, and (of course) gluten. However, this product will only be available for a limited time…while supplies last through the 2013 holiday season. If you want to see what stores in your area carry Rudi’s Gluten-Free Savory Herb Stuffing, you can check out their Facebook page!
But…that’s not all! To celebrate the launch of their Gluten-Free Savory Herb Stuffing, Rudi’s is also providing a giveaway on their Facebook page, running from November 4-15. Every day, for 10 days straight, Rudi’s Gluten-Free Bakery is giving away daily prizes of fun “stuff” for their fans to use and enjoy over the holidays with their family. In addition, fans can also download a coupon for $1 off any Rudi’s Gluten-Free Savory Herb Stuffing through the More Fun Stuff(ing) Giveaway app.
How do you enter?
Hop over to Rudi’s Gluten-Free More Fun Stuff(ing) Giveaway and enter the information needed…and who knows…you might be chosen to win one of the prizes!
GOOD LUCK!! And stuff your holidays with delicious goodness this season with Rudi’s Gluten-Free Savory Herb Stuffing!
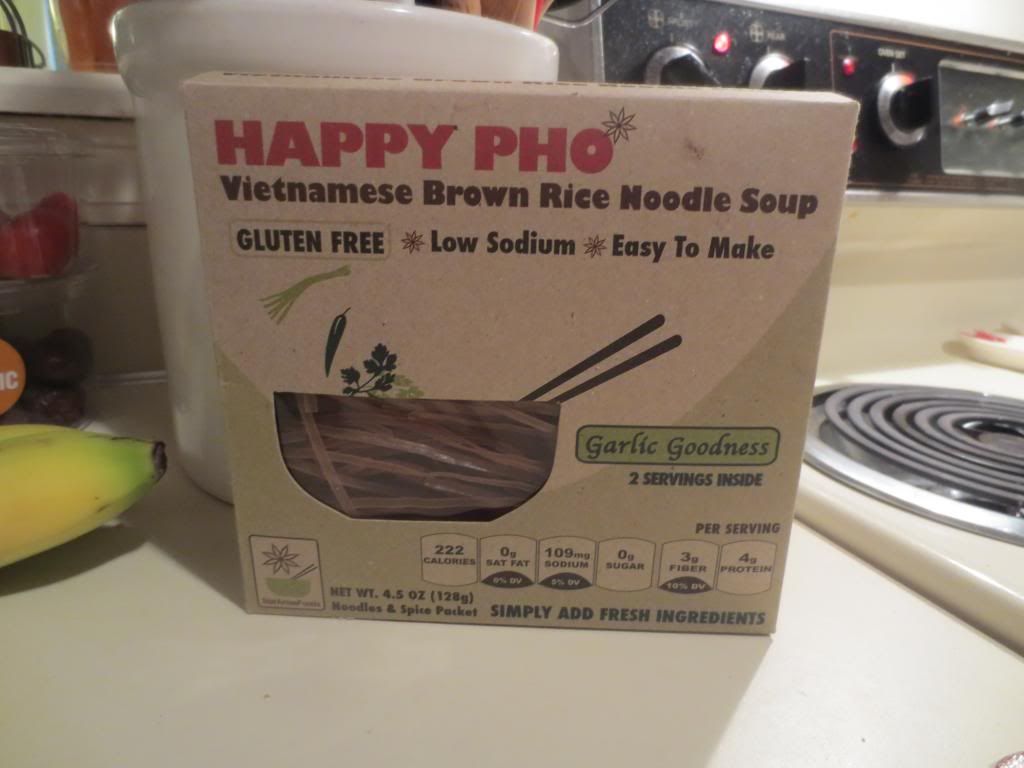
Star Anise Foods Happy Pho Garlic Goodness – Vietnamese Brown Rice Noodle Soup
Product: Star Anise Foods Happy Pho – Garlic Goodness Vietnamese Brown Rice Pho Noodle Soup – $3.49+
Splurges happen.
For real.
And for me…splurges tend to happen when food is involved. Mainly…grocery shopping. Something catches my eye, peeks my interest, and before you know it, the plan to stick to the already tight budget is out the window and I’m scraping by the rest of the week. But it’s okay…because I have food. Right?
Sure.
Well, a splurge happened this past weekend. I was wandering the aisles of Whole Foods, which already is a dangerous thing, when my roomie spotted these little brown boxes. The words “PHO” caught her attention first. Followed by “GLUTEN-FREE.” Now we’re talking. She’s been wanting to have pho for a long, long while…but…I just don’t know of where to go in Louisville to make that happen for her. Instead…we figured this might be a good way to use up some of the produce and make our own version of a pho. And why not? If you can’t get creative in the kitchen…there’s no point to having one.
The product we spotted was by Star Anise Foods. It’s called Happy Pho, and it comes in three different flavors. We chose the Garlic Goodness Vietnamese Brown Rice Pho Noodle Soup. We figured we’d eventually try them all…if the one we tried was any good. Cathy loves garlic…so I had a feeling that would be the one to start us off.
Instead…with a little refrigerator magic…and a Organic Vegetarian Pho Base by Pacific Natural Foods (which was in my pantry, swear to the culinary gods!), this splurge of a purchase became tonight’s dinner. And tomorrows lunch for that matter.
Let’s talk a little bit about this product though. First of all, Star Anise Foods Happy Pho – Garlic Goodness Vietnamese Brown Rice Pho Noodle Soup is not only gluten-free, but also non-GMO, low in sodium, contains no MSG, made from 100% brown rice with organic green tea, vegan, all natural, made with organic ingredients, fat-free, wheat-free, egg-free, dairy-free, free from artificial colors and preservatives. It’s ALL NATURAL, my little pho babies!!
One serving is 1/2 the packet, which my roommate and I stretched out into 4 meals, so we’re only eating 1/4 of the packet each. Regardless, a regular serving will provide you with 222 calories. A serving only has 190 mg of sodium, which is amazing for a shelf-stable, packaged product. The Garlic Goodness variety of Happy Pho also will has 1 gram sugar, 3 grams of fiber, and 4 grams of protein. That’s really good!!
To make my pho…I pan fried up some thinly sliced tofu. While the pho starter came to a boil, I added the packet of seasoning that comes with the noodles and allowed it to blend with the pho starter. I then sliced up some bok choy (compliments of my CSA bin) and put it into the broth. Once the tofu was nearing completion, in went the brown rice noodles to soften up in the hot soup base. As the noodles finished up, I poured the tofu in to warm and…dinner was easily served.
And…OMG…was it ever good!! I mean super good. As in I make a mean vegetarian pho thanks to Star Anise Foods and their Happy Pho starter kits. Honestly. I was so happy with the flavor of this noodle soup. The brown rice noodles were a bit gummy, but that tends to be the trend with brown rice noodles. Sadly enough. But…the flavor was there, and the noodles, broth, tofu, and bok choy all married together to make this incredible, flavor-filled meal. The seasoning packet combined with the pho soup base made a perfect base for the vegetables, tofu, and…the noodles. My roommate and I devoured this with chopsticks. Happy girls, we were! Food Yoda, I speak like.
Go to your local Whole Foods…check out their aisle with the Asian foods. If you spot Star Anise Foods Happy Pho kits…buy one. Buy them all. Trust me, they are totally amazing and I intend to pick up more of them, other flavors, and give them a taste as well. This made for a quick, easy, and very delicious (and nutritious) dinner tonight. I was beyond impressed.
Star Anise Foods Happy Pho – Garlic Goodness Vietnamese Brown Rice Noodle Soup
Twas the night of my Monday fun run…and instead of doing my usual go-to meals…a Tasty Bite Indian meal or a grilled cheese sandwich…I went off the beaten path. I decided…pasta would be good. Mmmm…pasta.
I love pasta, and being gluten-free sometimes means I don’t get as good pasta as I used to be able to eat. Rice pasta gets mushy and gummy. Corn pasta is fine…but doesn’t always go with what I’m making.
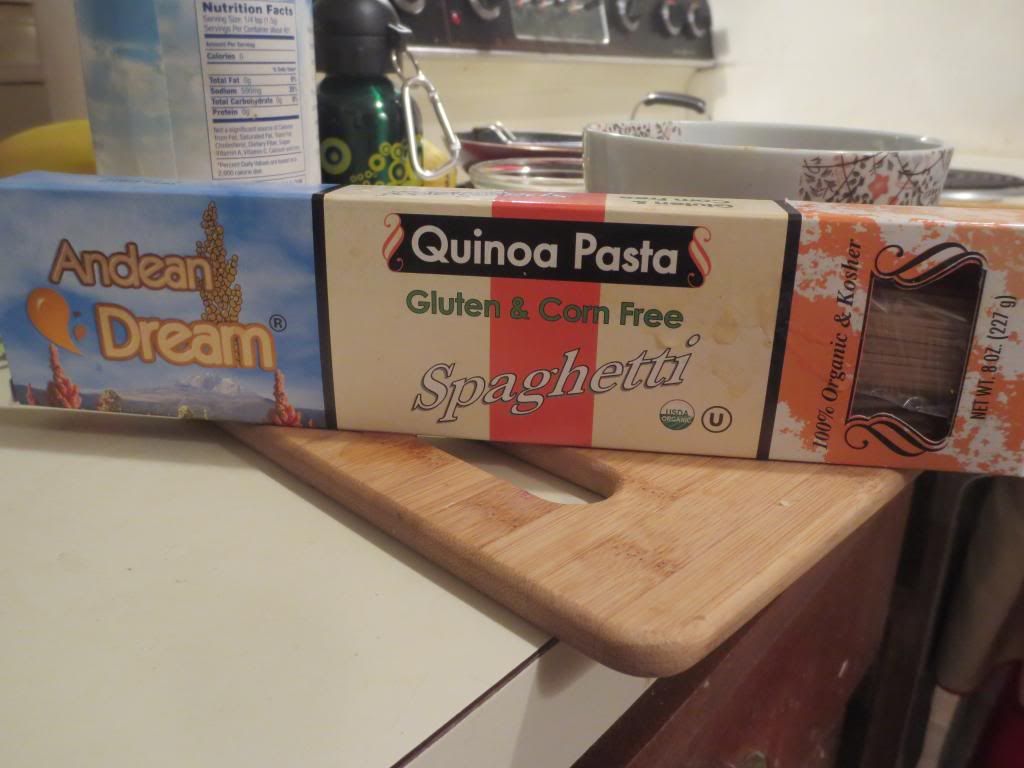
And then…Andean Dream created the solution to my problem. Quinoa pasta. Yes…pasta made from quinoa. I figured…why not give it a try? So, I purchased a box of the spaghetti and took it home with me. I have an overabundance of gluten-free pasta…because I love pasta…like…love, love, love…devour…mmmmm…good…carbs…pasta…kind of love…so this one sat in my pantry until it was it’s turn.
Well, on Monday…for some reason…I decided it would be pasta night. Even though it was a hectic, busy, rushed night. Traffic going to Louisville is bad. I mean…BAD…every Monday and it’s only gotten worse with some of the construction going on…lane closures on the bridge…etc. Why I thought pasta might be a good idea, who knows? Things work out better in my head. Timing works out better in my head. But…that’s how life goes.
Live. Learn. Eat pasta anyway.
I made it home from work and immediately turned on the pot of water I left on the stove all day. It was covered, so I hoped that would bring the water up to a boil faster. I opened up the Andean Dream Quinoa Spaghetti and pulled out 4 ounces…or two servings. The box says that it serves 4, so this was half of the box. But you know me…I weighed it out.
The color and texture of the dried noodles remind me a lot of when I ate spelt pasta. That was a good sign. I loved my spelt pasta…until I could no longer eat it. While waiting on the water to boil, I did busy work…like get changed, put together lunch and snack for the following day, and chop up some grape tomatoes and get them sauteing in a pan with some olive oil. The water did boil and in went the Quinoa Spaghetti. The box said it would take about 13-15 minutes to cook, so I let it go…stirring occasionally…and hoped that it wasn’t one of those pastas that really took about 20-25 to reach that perfect al dente. It wasn’t. It took all but 13 minutes. I swear to the quinoa gods (which must exist for this to be a reality!).
Time to plate up. I had my tomatoes in a pan, so I drained the pasta, threw it in the pan with the tomatoes, added my chopped fresh basil, and just gave it a toss, warming it all up all the way through, coating everything in the remnants of the olive oil and red wine vinegar. Viola. Dinner was served. And…appropriately devoured…with a little slice of the gluten-free pull-apart bread I made and baked up over the weekend when my sister was in town.
So…how did the pasta stack up in flavor?
I only want to buy quinoa pasta from now on. It is fantastic. It didn’t get gummy or mushy. It held up through the additional cooking with the tomatoes and basil…in the sauce. It didn’t crumble or fall apart. It was so good. The texture reminded me not just of spelt pasta, but when I could eat whole wheat pasta. It just…was wow. Wonderful. Not chewy, not mushy, not disappointing at all. I was thrilled to cook it up again and have it perform equally as well on the second go-round.
Yes…Andean Dream has converted me. Quinoa pasta…FOREVER!
A serving size of Andean Dream Quinoa Spaghetti is 2 ounces, which dishes up a delightfully tasty 207 calories. Which is about right for a pasta. Just slightly under most other pastas out there. The Quinoa spaghetti has only 1 gram of fat. In addition to all that, not only is this pasta wheat-free and corn-free, but it is also sodium-free. That’s right!! A serving also provides you with a meager 3 grams of sugar and fiber. But, due to this pasta being made from quinoa and rice flour…a serving contains 6 grams of protein. Love that quinoa!!
Looking for a change or just want to step away from the strictly rice and corn based gluten-free pasta out on the market? I highly recommend Andean Dream pasta noodles. The spaghetti worked perfectly with my dinner and I can’t wait to try the other pastas that Andean Dream makes. So happy with this…and wish I had dug it out sooner!!
Gluten-Free Caprese Pasta made with Andean Dream Quinoa Spaghetti