Recipe: Gluten-Free BBQ Mushroom Sliders

I don’t know what I did before Pinterest.  Honestly.

Last week, I was surfing around on my favorite time-suck and came across a delightful recipe for sliders…but instead of meat, these were portobello mushroom sliders.  Oooooh.  They looked absolutely fantastic too.  Seasoned, covered in melted cheese, caramelized onion, avocado…and dripping with barbeque sauce.

*mouth waters*

So, when the crimini mushrooms I received in my CSA bin turned out to be freakishly large…I thought to myself, “Hey…I bet I can make those sliders out of these.”

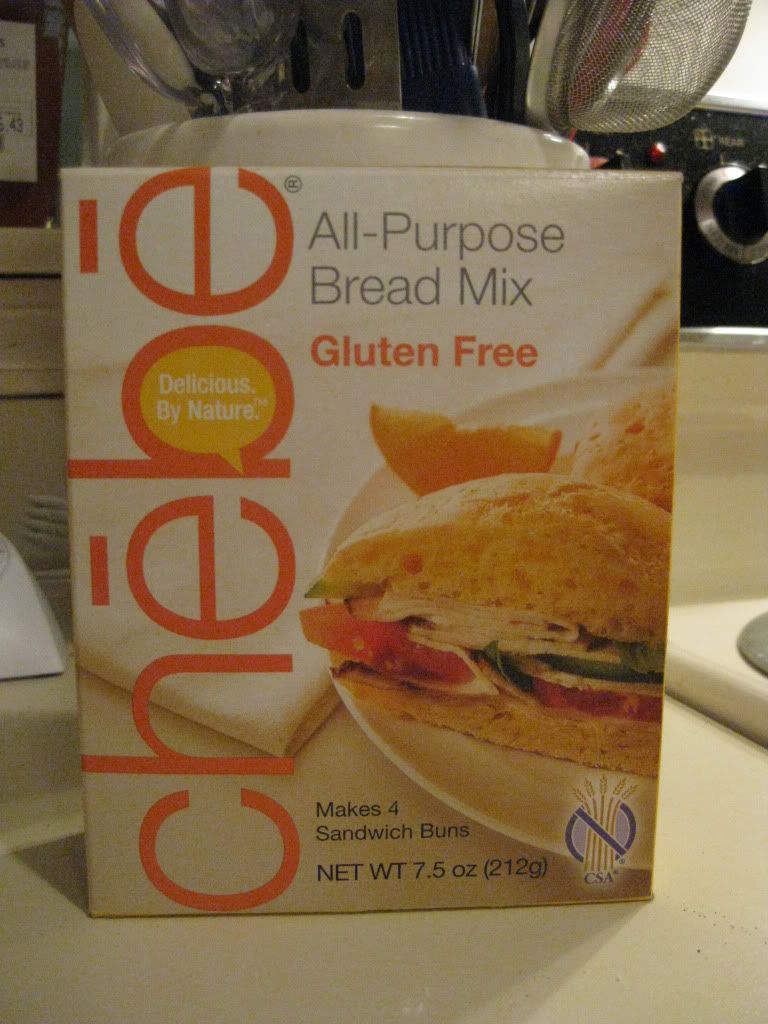
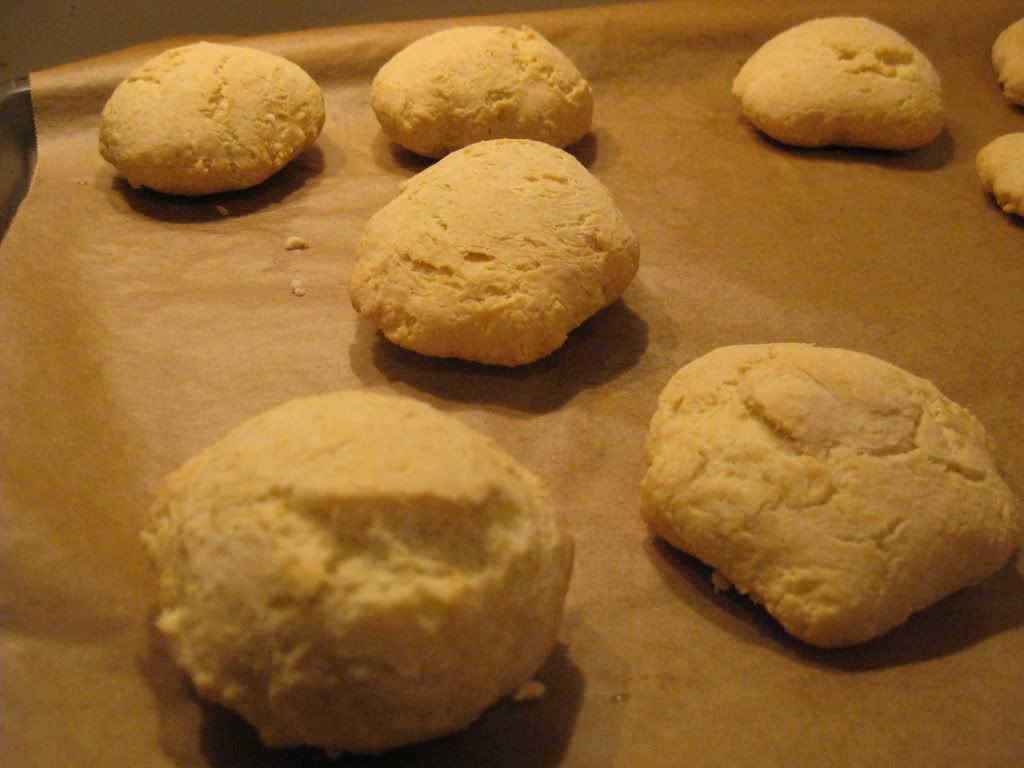
The only thing I lacked would be gluten-free slider-sized buns, which I solved by baking up my own from a bread mix I had in my pantry.  WINNING!

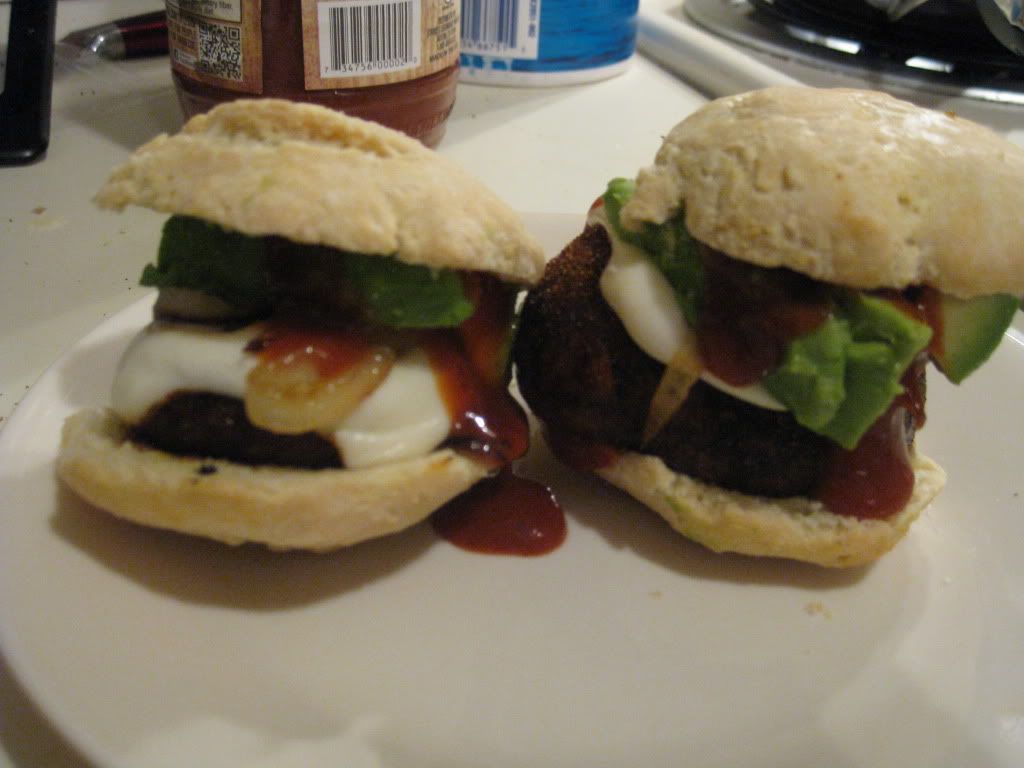
With that taken care of…I set out to make this recipe up for a light dinner after a very busy day out and about.  And the results…were epic.  Delicious.  And I wish I had made more than just two sliders each for myself and my roommate because these were beyond super yummy.  They were mushroom slider epic wonders of culinary proportions.

The original recipe came from the blog How Sweet It Is.  I just adapted it to fit my dietary needs and the ingredients I had on hand.

Recipe: Gluten-Free BBQ Mushroom Sliders

Gluten-Free BBQ Mushroom Sliders


Servings: 6
Time: Prep 10 minutes; Cook 20 minutes

Ingredients:

  • 6 baby portobello stuffing mushrooms (I used really large crimini mushrooms)
  • 6 slider buns (I made my own, gluten-free, using Chebe Gluten-Free All Purpose Bread Mix)
  • 1 teaspoon smoked paprika
  • 1 teaspoon onion powder
  • 1/2 teaspoon chili powder
  • 1/2 teaspoon black pepper
  • 1 tablespoon olive oil
  • 1 red onion, sliced
  • 2-3 ounces Gouda, sliced into squares (I used Veggie Slices Pepper Jack Flavored)
  • 1 avocado, sliced
  • 1/2 cup BBQ sauce, for drizzling and dipping (I used Stubbs Original BBQ Sauce)

Directions:

Heat a skillet on medium-low heat and add 1/2 tablespoon olive oil.

Add sliced onions with a pinch of salt and let caramelize, stirring occasionally.  Cook for about 8-10 minutes, then turn off heat and set aside.

While onions are caramelizing, brush mushrooms with remaining olive oil and sprinkle both sides with pepper, paprika, onion and chili powder.  Heat a skillet ( or a grill) on medium heat and cook until mushrooms are juicy and tender – about 5 minutes on each side.  With 1-2 minutes remaining, add a slice of cheese on top to melt.

Assemble sliders by placing the mushroom on the bun, then top with onions, avocado, and a hefty drizzle of bbq sauce.

~*~*~

Yeah…it doesn’t get much easier than that.  And the fact of the matter is…these are super-delicious.  Honestly.  I was blown away by how amazing these were.  They were that perfect level of balance in flavor and the mushroom was definitely the star of the dish.  The avocado was a nice addition and when mixed with the caramelized onions, the cheese, and the sauce…it made for one of the best vegetarian sandwiches I have had to date.  And…this was definitely my first vegetarian and gluten-free slider dish.

I’d make this again in a heartbeat.  No questions asked.  Packed with flavor and not heavy like regular sliders can be.  That’s the joy of using mushrooms.  Delicious, light, and just filling enough.

Dinner perfection.

Chebe Gluten-Free All Purpose Bread Mix slides in just short of really good gluten-free bread

Chebe Gluten-Free All Purpose Bread Mix

Product: Chebe Gluten-Free All Purpose Bread Mix – $3.29+

You know…I raved once, almost two years ago, I believe, about Chebe Cheese Bread Mix.  I had made up the little breaded balls of goodness to accompany a pasta dinner I was preparing for a friend who was coming for the weekend.  Much to my delight…Greg (the guest), my roommate, and I all loved the taste, texture, and fluffiness these had.

So, Chebe rose to the top of my gluten-free go-to’s.  Even though I didn’t really purchase anything further of the brand until my local grocery store put their entire gluten-free section on closeout.  Picture me in panic mode as I grabbed a huge shopping cart and began tossing items I had wanted to try, but never got the chance to, into my cart for the reduced price.

One such product was Chebe Gluten-Free All Purpose Bread Mix.

The great thing about Chebe Gluten-Free All Purpose Bread Mix is how allergen friendly it is.  Not only is it gluten-free, but it is also soy free, corn free, rice free, potato free, yeast free, peanut free, tree nut free, egg free (unless you use it in the mix instead of egg substitute), lactose/casein free, iodine free, and sugar free.  This mix is also non-GMO and certified kosher!

Well, my pantry is quite full of numerous mixes and delicious things to try.  So, this just sort of sat.  But with the expiration date fast approaching…it was time to give them a shot.  And, I was thinking something light and savory for dinner.  So, I hit up Pinterest and found a recipe for BBQ Portobello Sliders.  Now, I didn’t have portobello mushrooms, but had rather large crimini ones in my fridge from my CSA bin.  I had the rest of the ingredients too.  What I lacked was the most obvious part of the slider…the slider buns.

Then…it dawned on me that I had this mix in my pantry…and it was getting close to the time it needed to be used up.  So, out it came and I got to work on making up my own little gluten-free slider buns.

Slider buns made from Chebe Gluten-Free All Purpose Bread Mix

This was a simple process.  Following the instructions on the box, I simply poured the bread mix into a bowl, added two eggs and 2 tablespoons of olive oil…mixed that together…then slowly added exactly 1/4 cup of water.  Once that was all incorporated and blended, I kneaded the dough with my hands until it was smooth and all one large lump of bread dough.

And here is where I went off script.  The rest of the recipe created 4 sandwich buns…but I wanted slider buns.  So I made 10 little rolls out of the lump of bread, flattened them down into little round disks like the recipe said, and brushed each one with olive oil.  I then put it in my oven at 375° F for about 25 minutes and allowed them to bake.

When time was up, I removed them from the oven and allowed them to cool on the baking sheet while I prepared the mushrooms, caramelized the onions, and sliced an avocado.

First of all, I was hoping these would crisp into a beautiful golden-brown…but they never quite did.  They looked anemically pale.  It was a bit off-putting, but…that was the last of my problems.  The mix, prior to putting everything together was a very white, very thin powder.  That being said, this Chebe mix is made up simply of tapioca powder, modified tapioca starch, cream of tartar, sea salt, and sodium bicarbonate.  You can add cheese to the mix, but I didn’t…as the sliders were going to have cheese on them.  Still, with the brushing of olive oil…one would think there would still be some golden crust forming.

That was the first disappointment.  The second disappointment was that they really didn’t puff up much.  The flat little disks of dough rose only slightly in the heat of the oven.  So…these made for very flat slider buns.

Finally…the third disappointment was…the taste.  Not that these tasted bad…they just weren’t light and soft like the Cheese Bread that I made from Chebe.  This dough wasn’t too dense, but it was definitely not soft and squishy like a slider bun should be.  It just felt…wrong.  The flavor was fine…but it was the texture that was just all wrong for me this time.  It just didn’t work.

But…I went ahead and sliced the flat rolls in half (as best I could) and filled them up with my mushroom caps, vegan cheese slices, caramelized onions, avocados and a drizzle of barbeque sauce and used them for the purpose I baked them up for.  It wasn’t bad.  I just wish they had been softer and a bit fluffier.

That being said, I have six more rolls in my fridge that I’ll use up tomorrow by making breakfast slider sandwiches.  I am kind of sad about the way this mix turned out, because I have raved about Chebe in the past and was really hoping for that trend to continue.  Sadly…this one failed to win me over.

Maybe, with some convincing, I’ll give another mix a try.  But this one…won’t find it’s way into my pantry again any time soon.

BBQ Mushroom Sliders sandwiched between buns made from Chebe Gluten-Free All Purpose Bread Mix

Recipe: Crispy Baked Parmesan Green Bean Fries

As a vegetarian, I am always looking for new and different ways to eat vegetables.  That’s more than true these days since I began receiving a CSA bin of fresh, organic, local produce from my area.  Finding a new way to prepare a favorite vegetable is always fun and I’ve been enjoying playing with new techniques and recipes.

And…thanks to the magic and wonder of Pinterest…I stumbled across this recipe.  It was originally posted by Dashing Dish…and it truly caught my eye.  Well, I made it tonight and couldn’t have been happier with it.  A little crispy, a little savory, a little salty…and lots of yummy.

Recipe: Crispy Baked Parmesan Green Bean Fries

Crispy Baked Parmesan Green Bean Fries


Servings: 4
Time: Prep 10 minutes; Bake 20 minutes

Ingredients:

  • 4 cups fresh whole green beans (or 1 14 ounce bag of frozen whole green beans)
  • 1/4 cup Parmesan cheese, grated
  • 1/2 teaspoon garlic powder
  • 1/4 teaspoon salt (or to taste)
  • 1/8 teaspoon pepper (or to taste)

Directions:

Preheat oven to 425 degrees.

Line a baking sheet with foil, and spray with non-stick cooking spray.

If using frozen green beans, pop the bag of green beans in the microwave for 3-4 minutes, or until just de-thawed (or you could leave them out at room temperature for a few hours).  If using fresh green beans, wash and snip off the ends.

Place green beans on prepared baking pan, making sure they are evenly spread out, and none are laying on top of each other, (this will ensure even crispiness!)  Sprinkle seasonings and Parmesan cheese evenly over green beans.

Place green beans in the pre-heated oven and bake for 10-15 minutes, or until golden brown and crispy!  (To make them extra crispy, broil them for an extra 1-2 minutes before pulling them out of the oven).

Enjoy immediately with low sugar ketchup or dipping sauce of choice.

~*~*~

Taking that whole enjoy with a dipping sauce of choice, I whipped up a simple vegan Sriracha aoili…and it went with these fries perfectly.  Mine didn’t crisp up as much as I hoped, but I was also baking gluten-free/vegan no chicken nuggets in the oven as well, which took some of the heat source away from the green beans.  Regardless…these were amazing and fantastic…and I intend to make them again tomorrow with the other half of the green beans from my CSA bin.  Yeah…they were that good.

Perfect healthy side dish for any meal, honestly.  What better way to serve your veggies?

Überly Nuts over Lärabar Über Roasted Nut Bar

Lärabar Über Roasted Nut Roll

Product: Lärabar Über Roasted Nut Roll – $1.99+

You know…I’m a  nutty person.  No…for real.

So, it should come as no surprise whatsoever that I fell completely head over feet in love with the Lärabar Über Roasted Nut Roll fruit and nut bar.  I mean…honestly…what’s not to love?

Confession time – today was not the first time I ever ate one of these.  Honestly, I was in the middle of nowhere Pennsylvania at a convenience store/gas station…and in desperate need of a snack.  Aside from a fruit cup, I was finding very little that this gluten-free girl could eat.  And then…I spotted a stash of the Roasted Nut Roll Lärabar Über’s…and I grabbed it.

Like I said…I was a hungry girl in the middle of nowhere, so no pictures were taken.  But…this bar ROCKS!!  I loved it then…and I loved it even more today as I settled in for my 3 p.m. snack time.

Lärabar Über Roasted Nut Roll

It’s sort of nice to come into snack time on a new snack and know, for sure, that it will be delicious.  I have been burned a few times by sub-par gluten-free products.  But Lärabar is a name I trust.  Every flavor I have ever had has been good…some great…quite a few more delicious…but this one…this one is pure awesomeness.

What I think makes this bar so amazing is that perfect balance of sweet and salty.

Even more…I think it’s the fantastic inclusion of so many varieties of nuts that gives it that super nutty flavor.  The Lärabar Über Roasted Nut Roll contains a fantastic mix of roasted almonds, cashews, roasted peanuts, pecans and macadamia nuts.  YUM!!  It’s like a Planters Mixed Nut blend…but healthier…and sweeter.  Why sweeter?  Because in addition to the nuts, the bars also contain brown rice syrup, dates and honey.  Add a dash of sea salt…and what you get is über perfection.  The perfect blend of sweet and salty.  Honestly…it was hard not to just shove the entire bar in my mouth and chew it until it was gone.

I think you can pretty much guess how I feel about these.  And as far as nutrition facts go…these bars contain 220 calories per bar and 16 grams of fat.  So…definitely not the healthiest of options…but still amazing and good.  They have 5 grams of sugar and only 7 grams of sugar, which is awesome.  At least the fat in this bar comes from the nuts…which means it is at least they are healthy fats.

Oh yeah…these are just yumminess personified.  Trust me…buy these.  Buy these now.

Lärabar Über Roasted Nut Roll (unwrapped)

Forget Krispy Kreme – Katz Gluten Free brings glazed donuts to the gluten free masses

Katz Gluten Free Glazed Donuts

Product: Katz Gluten Free Glazed Donuts – $6.99

Were you like me and once upon a time used to be able to eat what everyone else does?

If so, you might recall one of life’s simplest, sweetest, most divine treats – a simple glazed Krispy Kreme donut.

Sure…a donut is a donut, right?  Or…you might think that until you have to give them up.  Trust me…no matter how healthy you are or how good you are trying to be…everyone appreciates a good donut every now and again.

Problem: when you are gluten-free…a good donut isn’t always easy to come by.  Even more difficult…finding one that is reminiscent of the ones you used to be able to savor.

Now…I absolutely love donuts.  And I’ve tried out quite a few different gluten-free ones.  While the ones in stores are all fine and good…the only brand that has really made me sit up and remember what eating at Dunkin’ Donuts after swim class was really like…has been Katz Gluten Free.  Yes, once again I am lifting upon high the fantastic products that Katz Gluten Free puts out on the market.  Why?  Because they truly are worthy of such high praise.  I have yet to find something I have tried that I haven’t liked.

A couple weeks ago, I received an e-mail regarding new products from Katz Gluten Free.  One of the items listed was…glazed donuts.  So, upon returning to my desk at the office, I went ahead and ordered some…because they looked absolutely scrumptious in the announcement.  They arrived two days later and I skipped to the freezer at the office to store them, brought them home and put them in my freezer, then…could hardly wait a week before I was pulling them out to use as breakfast after hitting up the gym.

Yes…hard workout at the gym = gluten-free donut (with some fruit…give me some credit!) for breakfast at the office.

Anyway…I got to the office and went into the kitchen with the donuts.  I pulled out a plate and set one in the microwave, giving it a very quick nuke for 10 seconds.  With it and some freshly chopped pear from my CSA bin, I took the first one to my roommate at her desk.  Then, I returned to the kitchen to repeat the process for me.

As I settled in at my desk, I started on the pear.  My roommate came over to show me something and I asked her how the donut was.  She lifted her eyebrows, looked at my untouched one, and simply said…”Take a bite.”  Who am I to argue when a gluten-free glazed donut is sitting right there waiting for me to devour it.

I lifted it up, drawing in that amazing scent of sugar from the glaze.  It smelled like all those donut shops and bakeries that seem to torture me now.  I savored that aroma for one moment more…then took my first bite.

WOW!  No…honestly…WOW!!  While these are definitely not as light and fluffy as the famous Krispy Kreme donuts…these are just as delicious.  And I don’t mind the extra definition to the donut.  I like that it has a little heft to it.  Honestly…these were melt-in-your-mouth-Krispy-Kremeish-fantasticness.  Yes…that really is an adjective.  Trust me.

I couldn’t believe how much I fell in love with this donut.  It was like, the moment I had a bite…I had to have another one.  Every donut I ever ate before my diagnosis seemed to pale in comparison.  This…was one fantastic glazed donut.  And for the first time ever, I lost myself in the taste and texture of this little treat.  I don’t even care that the office has Krispy Kreme’s and other donuts on occasion now…because I have Katz Gluten-Free Glazed Donuts.  They…are even better, in my opinion.

Dear Katz…if you keep expanding your donut line…I might just love you even more.  Especially if they keep getting better and better…like these.

I love you.

No really.  I do.

Looks like it’s time to order more donuts…

Katz Gluten Free Glazed Donut

Waldon Farms dresses up salads right with Thousand Island dressing

Walden Farms Calorie Free Thousand Island Dressing

Product: Walden Farms Calorie Free Thousand Island Dressing – $4.99+

How good can a product be when it has the bold claim that it has no calories, fat, carbs, gluten, or sugars of any kind?  Well…if it’s a product made by Walden Farms…then, as far as I am concerned…it’s going to be good.

Of course, nothing ever compares to the real thing, but as far as these things go, Walden Farms has hit the flavor right on the head.  A while back, I gave their Honey Dijon salad dressing a try…and absolutely loved it.  It was not as creamy as regular dressing, but the flavor is totally there.

And that was how it was with Walden Farms Calorie Free Thousand Island Dressing.  Honestly.  While it doesn’t contain all the bits that you usually see in Thousand Island dressing, it tastes just like the dressing I used to pour all over my salads.  I found that while it wasn’t as thick as regular salad dressing, it didn’t need to be.  What it lacks in body it makes up for in its simple, rich flavor of regular Thousand Island dressing.  It was very impressive.

And the best part is…you don’t need to drown your salad in it.  The two tablespoon serving size is perfect for the salad.  Give it a toss and every bit will get covered with a bit of the dressing.  And that is only a good thing.  I even let my roomie, who is a Thousand Island dressing freak try it out…and she said it was awesome…and that she missed Thousand Island dressing (the brand she used to get had high fructose corn syrup in it…so we had to move her to something else).

Salads can be healthy again…and you can still have an awesome creamy dressing…that is so allergen friendly and quite delicious too.  If you can find Walden Farms products, I encourage you to give it a try.  Honestly…the two dressings I have tried have been super delicious and very good.  And…guilt free.

Better yet, the dressing is made with natural ingredients, flavors and spices.

What’s not to love about that?

Recipe: Spicy Quinoa Stuffed Avocados (with a Vegan Sriracha Sour Cream)

I know…this sounds bizarre, even for someone like me…but the fact of the matter was…I had produce that needed to be used up before Friday…and two of the items still staring at me were amazing organic avocados.  Now, I could have done my usual standbys with these…guacamole…or put it into a breakfast scramble of sorts.

But why?  Why when I run across such interesting and different recipes such as this one, which I pilfered from the blogg Bullfrogs & Bulldogs, and adjusted to make it easier and more time efficient for me…the non-stop busy-body!  It’s very nutritious, packing a high protein punch with the quinoa, and the healthy fat of the avocado.  Awesome.

So…if you love avocado, love quinoa, and just plain love delicious things…here is a great recipe for you…done up the way I do it.  And I’ll even include my recipe for Vegan Sriracha Sour Cream.

Yes…I love you guys that much…

Recipe: Spicy Quinoa Stuffed Avocados

Spicy Quinoa Stuffed Avocado with a Vegan Sriracha Sour Cream

Servings: 2
Time: Prep 10 minutes; Cook 15 minutes

Ingredients:

Spiced Quinoa:

  • Avocados (1 small avocado per person)
  • 1/2 cup quinoa
  • 1 can Green Giant Southwest Style Corn
  • 1/4 yellow onion, chopped
  • 2 tablespoons chopped cilantro + some for garnish
  • 1 tbsp taco seasoning (I crated my own using chili powder, red pepper flakes, cumin, and garlic powder)

Vegan Sriracha Sour Cream

  • 1/4 cup Tofutti Better Than Sour Cream
  • 2 teaspoons Sriracha

Directions:

Rinse the quinoa well and place it in a sauce pan and toast for about two minutes until the quinoa starts to smell ‘toasty.’ Add one cup of water or vegetable broth and bring to boil.  Once boiling, reduce heat to simmer and cover.  (To get fluffy quinoa, it’s really important to not stir it, just let it be, keeping a close eye on it).

Chop the onion drain the can of Southwest Style Corn.  Combine both ingredients in a bowl and mix well with the taco seasoning.  Cover and heat in the microwave for 3 minutes.  Remove from microwave, uncover, and allow to cool slightly.

Once the quinoa is finished, fluff with a fork and allow it to sit for 15 minutes, until it has cooled slightly.  Add  it to the vegetable mixture.

Make the sour cream by measuring out 1/4 cup of vegan sour cream and adding the Sriracha to it.  Stir it together until well blended.

To assemble the avocados, begin by cutting them in half, removing the skin and the pit.

Scoop about ½ a cup of the quinoa mixture into each avocado, more if you can fit it.

Top it with a little Sriracha Sour Cream and some chopped cilantro and serve.

Enjoy!

~*~*~

Creamy, rich, smooth, amazing, delicious, totally yummy and just plain good!  The blend of cool avocado with the slight spice from the quinoa/vegetable mixture as well as the vegan Sriracha sour cream on top is just…perfection.  With a healthy does of belly-flattening fats from the avocado and the blast of protein from the quinoa, this makes for one very healthy dish to have for lunch or dinner…or whenever your little heart desires.

I had more than half of the quinoa/veggie mixture left so I sense a run to the grocery store for more avocados in my very near future.

A great meal…guilt free.  Awesome.

Recipe: Spicy Buffalo Cauliflower

I love spicy food.  Love it.  I love that little bit of heat that accompanies each bite…and when done right…doesn’t mask the flavor of the food.  Yum!

Well, this past weekend, my friend Robert shared a recipe on my Facebook wall that he thought I might enjoy.  It was for Spicy Buffalo Cauliflower.  And let me tell you…it looked awesome.  Seriously!  It just so happened that my CSA bin that week had an amazing head of cauliflower in it…and everything else on the list I had in my pantry.  Perfect!

And after the winter weather that came through last night, something warm, spicy, and different just sounded appetizing tonight for dinner.  So, upon returning home from work…I went to work on my head of cauliflower and preparing this simple, yet really delicious dish.  You just need about 25 minutes and dinner is served.

Recipe: Spicy Buffalo Cauliflower

Spicy Buffalo Cauliflower (with a Vegan Ranch Dip)

Servings: 2-4
Time: Prep 5 minutes; Cook 20 minutes

Ingredients:

  • 1 head cauliflower

For the batter:

  • Dash of hot sauce (I used Sriracha)
  • 1/2 cup white rice flour
  • 1/2 cup water
  • Pinch salt

For the buffalo sauce:

  • 1/4 cup hot sauce (I used Sriracha)
  • 1/4 cup oil, canola oil works best
  • Pinch salt

Directions:

Preheat oven to 450 degrees.

Mix together the batter ingredients in a small bowl.

Dip the cauliflower in the batter until coated evenly then place on greased baking sheet.  Bake for about 15 minutes or until the batter hardens.

Mix together sauce ingredients in a small bowl.

Once the cauliflower are done baking, brush them with the hot sauce mixture and bake again for a few more minutes, until cauliflower is crispy.

Remove from oven. You may want to add a bit more buffalo sauce to taste.

Enjoy!

~*~*~

Oh…this was crazy, stupid good.  I mean…so delicious.  I was highly impressed.  Honestly.  I love cauliflower regardless, but this just took it to the next level.  This is the second cauliflower recipe that Robert has shared with me, and both times I have been super impressed.  I can’t wait to make this again.

Oh, and it’s a super easy recipe too, so that is a bonus.  I whipped up a Vegan Ranch Dip to serve with mine, which consisted of:

  • a few spoonfuls of Trader Joe’s vegan mayonnaise
  • 1 teaspoon garlic powder
  • pinch of salt
  • pinch of pepper
  • 1 tablespoon of dried parsley flakes
  • 3 tablespoons of almond milk to thin it out

I just mixed it all together in a bowl and viola…instant buffalo cauliflower dip!

Honestly…if you are looking for a fun and exciting way to serve up veggies…this is the recipe to try!

Sea Veggies…taste like the ocean…and not in a good way

YangBan Sea Salt Sea Veggies

Product: YangBan Sea Salt Sea Veggies – $1.39+

BLECH!  YUCK!  GROSS!  EWWWW!

Does that sum it up enough?  I was actually pretty stoked about these great little seaweed chips that I found on Manager’s Special at my local grocery store.  I think, now that I’ve had them, that I now know why they were there…

Now, don’t get me wrong…I am a vegetarian sushi loving girl…and as such, I am accustomed to the inclusion of seaweed (nori) in my rolls.  I love it when paired with the vegetables and the sushi rice.  But on its own…well…

…it tastes like…the ocean floor.  Or like orca.  I can’t decide which.

This afternoon, I was starving after a quick run on my lunch break at the gym.  So, when my 3:00 p.m. snack time hit, I reached into my desk and emerged with the little package of YangBan Sea Veggies.  I had actually thought to, perhaps, bring a backup plan in case these didn’t hit the mark on flavor, but I decided against it.  It was a healthy little snack…made from seaweed.

And…that’s exactly what it is.  In fact, each little chip is just a section of nori, this one dusted with a light coating of sea salt.  It looked harmless enough.  In fact…I thought…it might even be tasty.

I was wrong.  Not a fan.  At all.  It took a handful of Reeses Pieces and lots of water to get rid of the taste of algae, but…eventually it got there.  My palate cleansed, I went and threw away the rest of the bag and vowed to go home and get rid of the hot chili flavor as well.  In sushi…I love nori.  In snack form…on its own…not so much.

So, if seaweed is your thing…then this might be the snack for you.  It’s super healthy…only 35 calories for the little bag.  But…I didn’t even take in one since I just couldn’t get past one bite.

BLECH!

That being said…never again.

Bob’s Red Mill Gluten-Free Brownie Mix makes moistest, softest gluten-free brownies

Bob's Red Mill Gluten-Free Brownie Mix
Bob’s Red Mill Gluten-Free Brownie Mix

Product: Bob’s Red Mill Gluten-Free Brownie Mix – $5.99+

Moist.  Soft.  Delicious.

These aren’t words that normally people would think of when someone says the “dreaded” words gluten-free.  And trust me…people can be that finicky when it comes to whether or not they try a dish or not.  Believe me…I see it happen every time I bring in food to my office.  There are very few people willing to give something a try.  It’s sad…because one always hopes that people will at least try something you bring in.

That being said, I have a lot of baking mixes in my pantry and I finally used up the last of my Swiss Colony Chocolano cookies that I ordered before Christmas.  (For the record, those are amazing and you totally get more than the 16 cookies they list on the container.  Would order those again in a heartbeat!).  So…a new dessert was needed for this week.

After a quick consult of my gluten-free pantry list, I noticed that Bob’s Red Mill Gluten-Free Brownie Mix was the next sweet treat up for baking.  Now, I’ve had so much luck with Bob’s Red Mill Gluten-Free items that I didn’t even hesitate when it came to making these up.  Honestly.  Nothing I’ve cooked up from a gluten-free mix from Bob’s Red Mill has done me wrong.  Nothing.

And mixing this up was super easy.  With my new Kitchenaid handheld mixer, I blended together the mix, warm water, melted margarine, and an egg.  It was that simple.  And what emerged was a creamy, thick batter just begging to be poured and spread over a greased 9×13 pan.  But…there’s more.  I could have stopped there, but I have a pantry of goodies as well and I figured why not add some dark and mint morsels to the mix?  Minty brownies?!  Yes, please!  So, I folded in about 1/4 cup of the morsels and then poured the brownies into the pan.

Into my oven these went for about 23 minutes.  And when the timer went off, I was fully prepared (as usual) to test it with a toothpick and have to put it back into the oven for another few minutes, check again, and repeat until the toothpick was clean.  Except, Bob’s Red Mill’s Gluten-Free Brownies were actually done…right on time.  My toothpick I inserted right into the center came out clean on the first try.

When I pulled these from the oven, I found that the surface was shiny and they smelled awesome.  I let them cool for about 45 minutes and then just had to try one.  So, my roomie and I decided to cut a piece and split it.

Verdict:  We both stood there with this super-moist, light, soft brownie, chewing slowly, savoring…

This is the best brownie mix I’ve used so far since going gluten-free.  Sure, I’ve liked the Hodgson Mill and even the Betty Crocker…but they weren’t as moist and soft and light as how Bob’s Red Mill’s Gluten-Free mix baked up.  Honestly.  I took a bite, feeling the moist crumbs tumble across my tongue and went, “Oh. My. God.”  Then…devour mode was switched on.  And that was a bite that didn’t even have the added dark and mint morsels!!

My roomie, who can eat any brownie she wants, also declared these as amazing.  She loved the taste and texture as much as I did.  And that rich, creamy, chocolate flavor was so amazing.  It’s rich, without being too much.  And the softness of each brownie just makes you crave more.  As much as I raved about the previous brownies I made up with gluten-free mixes…they don’t even begin to compare to the way these turned out.

And, for the ultimate test, I took one of these brownies into my teammate at work.  She has a very discerning palate, and she took one bite and said that the consistency was perfect.  The flavor was awesome.  And she enjoyed it as much as the roomie and I did.  That, my dear friends, is a huge SCORE!!

Bob’s Red Mill once again for the win.

So what makes these brownies so spectacular, rich, deep and intense?  Well, they have a moist, cake-like texture…which I love.  I prefer cake brownies to fudge brownies any day.  And Bob’s Red Mill uses Ghirardelli cocoa to coax out that rich flavor.  Delicious.  No wonder they are a decadent treat!

As for nutrition facts…these make 16 brownies…but I found those would be rather large for my liking.  I love dessert, but small bites are usually enough.  So I managed 24 brownies from my pan.  This, naturally, changes the nutrition facts.  If you make 24 brownies out of the mix though, your fudgey, moist brownie treat will only set you back 145 calories and 7 grams of fat.  Less than that if you don’t add the baking chips to the mix.  That’s about perfect for a dessert and you still get a really decent sized square of brownie without it being too much.  Let’s face it…dessert comes after a meal…you really just need a couple of bites.

I’m already looking forward to sinking my teeth into another brownie tonight after dinner.  These are the gluten-free brownies that dreams are made of.  Even if you aren’t gluten-free…you’ll love these.  You’d never know the difference.  Trust me.

Gluten-Free Brownies with Dark & Mint Chocolate Morsels made with Bob's Red Mill Gluten-Free Brownie Mix
Gluten-Free Brownies with Dark & Mint Chocolate Morsels made with Bob’s Red Mill Gluten-Free Brownie Mix