Recipe: Gluten-Free Mac & Cheese Broccoli Bake

My friend Julie Sullivan is a saint.  A saint, I tell you.

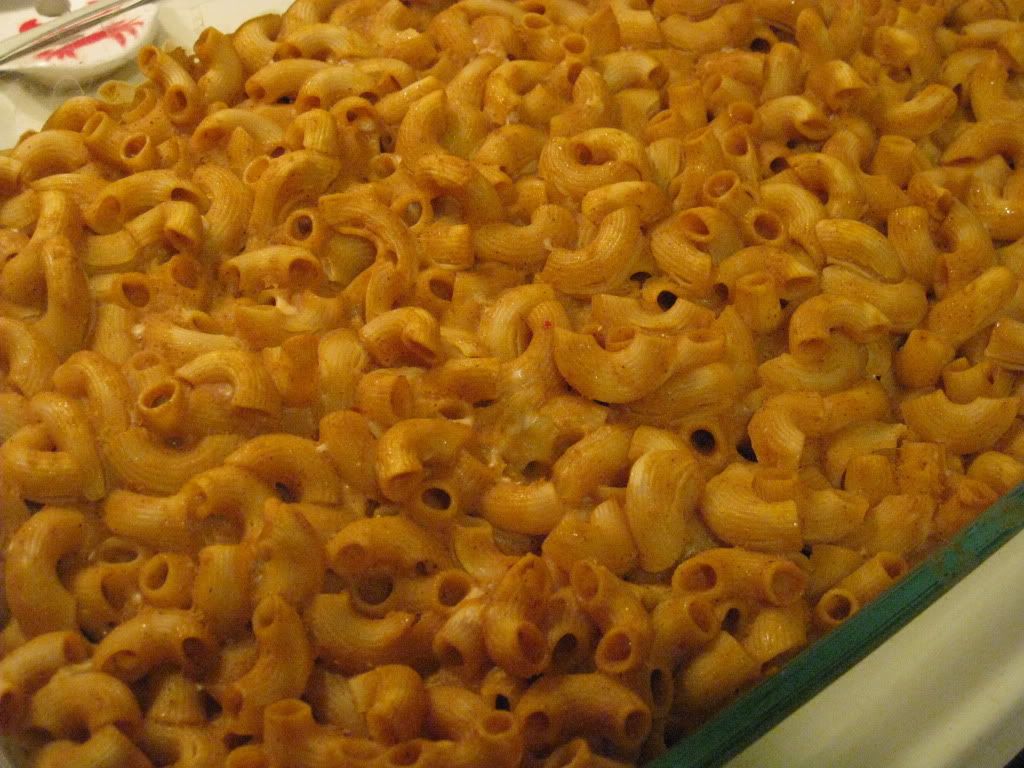
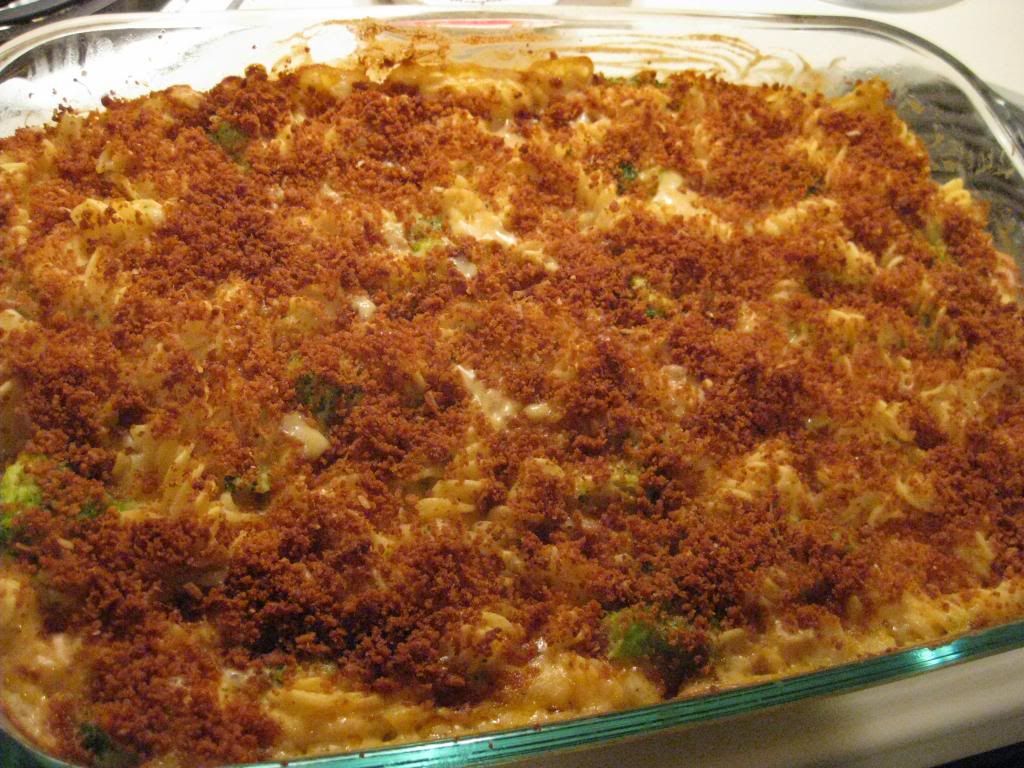
The other day, she posted this picture of her dinner…this amazing pasta-ish casserole, with the caption “Mac & Cheese Broccoli Bake.”  Well, I was intrigued.  I was drooling.  Why?  Because it looked absolutely fantastic, that’s why.

And…I did what any good hungry girl would do.  I asked for the recipe.

She was kind enough to pass it on…as I wasn’t the only one begging for it.  And she even mentioned how I could make it gluten-free.  And, amazingly enough, I had everything I needed in my pantry and fridge.  Gotta love that.  So…after polishing off my Vegan Gumbo last night, I was set to cook up another fantastic meal to get me and my roommate through another couple of days.

Thanks to Julie…I did just that.

Recipe: Gluten-Free Mac & Cheese Broccoli Bake


Gluten-Free Mac & Cheese Broccoli Bake


Servings: 6
Time: Prep 30 minutes; Bake 20 minutes

Ingredients:


  • 12oz uncooked twisted pasta (I used Bi-Aglut Fusilli)
  • 2 1/2 c. uncooked broccoli
  • 1 tsp salted butter (I used Smart Balance)
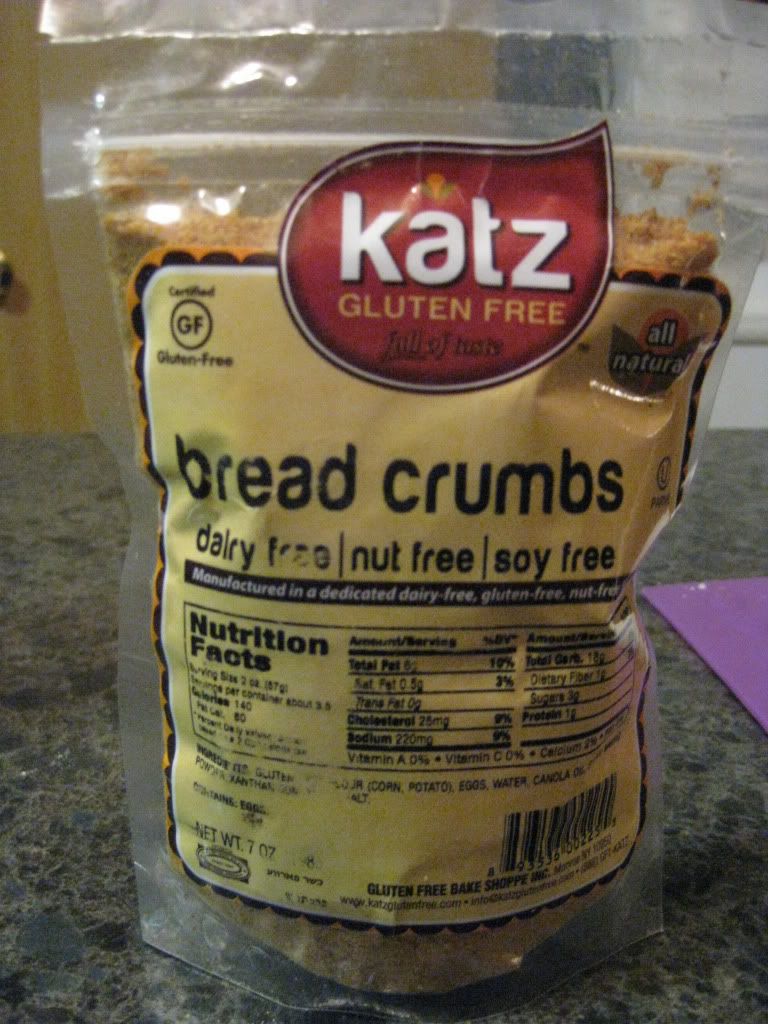
  • 1/3 c. fresh bread crumbs (I used Katz Gluten-Free Bread Crumbs…because they ROCK!)
  • 3 Tbsp. plus 1/2 c. grated Parmesan cheese, divided
  • 2 1/2 c. skim milk (I substituted unsweetened almond milk)
  • 1/3 c. all purpose flour (I used Hodgson Mills Gluten-Free Multi Purpose Flour)
  • 1/2 c. onion, diced
  • 1 c. shredded cheddar cheese
  • 1 tsp. Dijon Mustard
  • 1 1/2 tsp salt
  • 1/2 tsp black pepper

Directions:

Preheat oven to 375 degrees.  Coat a shallow 2 quart baking dish with cooking spray (I used butter to grease it).

Cook pasta, adding broccoli to water for the last 3 minutes of cooking time.  Drain and return to pot.

In a large saucepan, melt butter over medium heat, add bread crumbs and cook until light golden brown.  Remove from heat and transfer to a small bowl, stir in 3 Tbsp of Parmesan cheese and set aside.

In same saucepan (can wipe clean easily) whisk together milk and flour, add onion.  Bring to a boil over med-high heat, whisking often.  Reduce heat to low and simmer until thickened, about 2 minutes.

Remove from heat and stir in cheese, mustard, salt and pepper.

Pour pasta and broccoli into baking dish, cover with cheese mixture, stirring to coat evenly.  Top with breadcrumbs.

Bake until edges are bubbly, about 20-25 minutes.

~*~*~

Yes…it really is that easy.  And even more…it really is that tasty.  I was in love with the flavor and taste of this.  Those breadcrumbs add an amazing texture and flavor to the entire dish.  And while I didn’t get to use the cheese I had wanted and intended to use on this, the back-up plan worked out better than imagined (I like bold flavors and I had no extra sharp cheese to supplement when I found my original cheese plan had…gone bad).  This was easy to throw together and allow to bake.  The apartment smelled awesome.

And when my roomie and I sat down to taste…we devoured it.  Honestly.  It’s a good thing I pre-portion these meals out because I think we could have eaten the entire pan on our own…in one sitting.  That is how much we raved about it.

So…again…thank you, Julie!

And now…to the rest of you…I encourage you to get cooking.  This one is totally worth it.

Recipe: Gluten-Free Hearty Rice and Bean Vegan Nachos

Twas the day of the Super Bowl and I made my roomie one simple promise.

Nachos.

No…really.  She had been craving nachos and I decided, despite us not watching the big game (instead we watched cooking shows…for real!), I told her Super Bowl Sunday would be the perfect day to break out some nachos for dinner.  Of course, the one catch to me being the chef of the apartment is…I make them my way.

Thankfully…she’s quite okay with that…and words like gluten-free and vegan don’t phase her one bit.

I know…awesome!

So…after a major cleaning spree that day, I started to piece together our not-too-bad for you version of Super Bowl Snack Awesomeness.  And we dug in while watching an Emeril Lagasse show on Vegetarian Main Dishes.  I can’t make this up, friends!!  This is a true story.  But the best part of this story is…how awesome and filling these nachos turned out to be!

Recipe: Gluten-Free Hearty Rice and Bean Vegan Nachos

Gluten-Free Hearty Rice and Bean Vegan Nachos

Servings: 2
Time: Prep 60 minutes; Cook 10 minutes

Ingredients:

  • 1 cup brown rice (I used Lundberg Family Farms)
  • 5 ounces (about 6 1/2 cups) Tortilla Chips (I used Garden of Eatin’ Blue Corn Chips)
  • 3/4 cup cooked no-salt-added black beans, rinsed and drained if canned
  • 4 ounces Teese Nacho Vegan Cheese Sauce
  • 1/4 cup milk (I used unsweetened almond milk)
  • 1 avocado, sliced
  • 1 fresh Serrano pepper, seeded and finely chopped (optional) (I roasted mine with my red pepper)
  • 1 red pepper, roasted and chopped
  • 1/2 sweet onion, chopped
  • 1/2 cup prepared salsa
  • 1/2 cup chopped fresh cilantro
  • 1/2 lime

Directions:

Preheat the oven to 450°F.

Cook the brown rice according to package directions.  While rice cooks, saute the onion in a small skillet and set aside.

In a small saucepan over medium heat, add Teese Nacho Vegan Cheese Sauce and 1/4 cup milk.  Stir together until creamy and sauce thickens.  Add half of the roasted peppers.

Spread chips in a 9×13-inch baking dish and spoon rice over top.  Sprinkle with black beans beans, onions, and the rest of the roasted peppers (red and Serrano).  Bake until the nachos are very hot, 8 to 10 minutes.  Remove from oven and add the avocado slices.  Spoon the vegan nacho cheese over the nachos, add salsa, sprinkle with cilantro.  Squeeze lime over the top.

Serve.

~*~*~

These were so amazing and delicious.  I was so happy with the way this turned out.  It was definitely the perfect food for Super Bowl Sunday.  Nothing better than some junk food on a big game night, even if you are not watching the game.  And as far as recipes go…this isn’t too bad for you.  Packed with protein (thanks to the beans…and quinoa could be substituted for the rice), vegetables, and vegan cheese…it was guilt-free snack food for dinner.

And my roommate has already requested I make them again sometime.

I only take that as a good thing.

Recipe: Crispy Baked Parmesan Green Bean Fries

As a vegetarian, I am always looking for new and different ways to eat vegetables.  That’s more than true these days since I began receiving a CSA bin of fresh, organic, local produce from my area.  Finding a new way to prepare a favorite vegetable is always fun and I’ve been enjoying playing with new techniques and recipes.

And…thanks to the magic and wonder of Pinterest…I stumbled across this recipe.  It was originally posted by Dashing Dish…and it truly caught my eye.  Well, I made it tonight and couldn’t have been happier with it.  A little crispy, a little savory, a little salty…and lots of yummy.

Recipe: Crispy Baked Parmesan Green Bean Fries

Crispy Baked Parmesan Green Bean Fries


Servings: 4
Time: Prep 10 minutes; Bake 20 minutes

Ingredients:

  • 4 cups fresh whole green beans (or 1 14 ounce bag of frozen whole green beans)
  • 1/4 cup Parmesan cheese, grated
  • 1/2 teaspoon garlic powder
  • 1/4 teaspoon salt (or to taste)
  • 1/8 teaspoon pepper (or to taste)

Directions:

Preheat oven to 425 degrees.

Line a baking sheet with foil, and spray with non-stick cooking spray.

If using frozen green beans, pop the bag of green beans in the microwave for 3-4 minutes, or until just de-thawed (or you could leave them out at room temperature for a few hours).  If using fresh green beans, wash and snip off the ends.

Place green beans on prepared baking pan, making sure they are evenly spread out, and none are laying on top of each other, (this will ensure even crispiness!)  Sprinkle seasonings and Parmesan cheese evenly over green beans.

Place green beans in the pre-heated oven and bake for 10-15 minutes, or until golden brown and crispy!  (To make them extra crispy, broil them for an extra 1-2 minutes before pulling them out of the oven).

Enjoy immediately with low sugar ketchup or dipping sauce of choice.

~*~*~

Taking that whole enjoy with a dipping sauce of choice, I whipped up a simple vegan Sriracha aoili…and it went with these fries perfectly.  Mine didn’t crisp up as much as I hoped, but I was also baking gluten-free/vegan no chicken nuggets in the oven as well, which took some of the heat source away from the green beans.  Regardless…these were amazing and fantastic…and I intend to make them again tomorrow with the other half of the green beans from my CSA bin.  Yeah…they were that good.

Perfect healthy side dish for any meal, honestly.  What better way to serve your veggies?

The Really Great Food Company mixes up really great gluten-free Spinach Cheese Biscuits

The Really Great Food Company Gluten-Free Spinach Cheese Biscuit Mix

Product: The Really Great Food Company Gluten-Free Spinach Cheese Biscuit Mix – $6.19+

You know…when a gluten-free company goes all out and calls itself The Really Great Food Company, well, they better be able to back up that claim.  That being said, I had never heard of said company prior to a little visit to Milwaukee and a stop inside the Gluten-Free Trading Company.  If you are ever in Milwaukee, do stop in.  It’s a completely gluten-free grocery store.  And it is awesome!!

Anyway, on my second visit there in two days, I was stocking up on more goodies for the gluten-free pantry at home and came across a few mixes that were produced by The Really Great Food Company.  Huh.  I was actually intrigued because this was something I couldn’t get where I lived.

After toiling over which product to try, my roommate and I finally decided that the Spinach and Cheese Biscuit mix sounded like it could be an epic win (or an epic fail), so we went with that.  Purchase made.  And a lot of products to go through in my pantry prior to this one meant…it sat…and sat…and sat.  Until last night.

You see…our workout schedule runs so that we go to the gym every other day.  Well, this week it just happens to be a Monday, Wednesday, Friday sort of week.  And after hitting up the gym, we head to our office and I nuke something I brought (homemade or otherwise) for us to feast on because by then we are truly starving.  Since this mix was getting close to expiration, this is what I mixed up and baked up for post-workout brekkies this week.

Now, the box itself says that it only makes 9 biscuits.  Heh.  I managed to get 13 out of it.  And as these are not made in traditional biscuit methods (not drop biscuits or cooked up in a pan), but rather made in muffin tins…they seem more like a roll than a biscuit…but this is just me nitpicking every little detail.

The Really Great Food Company Gluten-Free Spinach Cheese Biscuit Mix (mixed and prepped with cheese and spinach)

Making these was super easy.  In a bowl, I beat together 2 eggs, some canola oil, and some unsweetened almond milk.  From there, I the mix itself and beat that in as well.  Then, the spinach,  chopped cheddar cheese, and shredded Parmesan cheese all got folded into the mix.  The resulting mixture was then placed into muffin tins and baked in a 375°F oven for about 27 minutes.

Now, if possible, I do try to bake an extra item of the new product I am trying out…just in case it isn’t any good.  Because, after a hard workout, the last thing you want to find out is that your breakfast is nasty.  Not good.  That being said, I put it to the test, as always, with my roommate.  I gave her the 13th biscuit and eagerly awaited her reaction.

“Pretty good.”

Hmmm…pretty good is not what I strive for when I bake something up.  But she wasn’t spitting it out making obscene facial expressions, so…pretty good would have to do.  The rest of the biscuits/rolls were put into containers and prepped for our three gym days this week.

After hitting the gym this morning, we arrived very hungry at the office.  I set to the task of getting our breakfasts ready.  Here was the first snag.  Apparently I needed to spray down the muffin papers I baked them in because I found that the wrappers stuck to the product itself.  Booo.  But, this wouldn’t be the first time I encountered that…so I set to work, carefully peeling and making sure I was getting mostly paper and not mostly biscuit.  Once I accomplished that task, it was a simple reheat in the microwave for about 30 seconds.  Good to go.

When I asked my roomie her thoughts on the biscuits, she said, “I like the cheese.”

Again…not very helpful or useful for my blog…so…here’s my rundown…

The Really Great Food Company knows how to make biscuits!  Honestly.  What shocked me most was that, despite being filled with chunks of cheddar cheese and slices of spinach, these biscuits aren’t dense in the slightest.  They are light and airy.  And the Parmesan cheese that was added to the batter melted down into the biscuits as they baked, giving each bite a cheesy flavor.  Get a bite with a chunk of cheddar and it’s like cheese nirvana in your mouth.  Light…fluffy…and delicious.  I couldn’t stop eating mine.  I had two biscuits for breakfast and they were devoured faster than I’ve eaten anything on a gym day.  Every bite just tasted amazing.  From the spinach to the cheese to the light batter itself, this biscuit was gluten-free perfection.

My only regret now is that I can’t find this brand around here.  Thankfully, they do have a Web site and you can order their products online.  And, trust me, I think I may do that…see what else they offer and if it lives up to the standard these biscuits have now set.

Gluten-free doesn’t have to mean heavy, dense breads.  Nope.  The Really Great Food Company proved once and for all that even something as simple as a biscuit/roll can have a light, airy texture and tons of flavor.  I’m really, really hooked.  The hard part now will be saving them specifically for gym days.

It may sound cheesy (heh heh…see what I did there?) but these biscuits truly are a gluten-free culinary work of art.  If you can find the mix…purchase it and bake it.  If you can order it online, I encourage you to do so.  I was beyond impressed.

I was wowed!

The Really Great Food Company Spinach Cheese Biscuits

Katz Gluten Free gives gluten-free community bread crumbs that taste and look like bread crumbs

Katz Gluten Free Bread Crumbs

Product: Katz Gluten Free Bread Crumbs – $4.09

Gluten-free bread crumbs suck.

Seriously.

Have you ever purchased a bag of them?  They’ll do in a pinch, but normally they don’t even resemble actual bread crumbs.  No joke.  The first time I ever purchased gluten-free bread crumbs, my heart sank when I opened the pouch.  Normally, gluten-free bread crumbs are these little yellow pellets of milled corn.  They work on certain dishes, but as a vegetarian…most of the time they just don’t work right on what I need them for.  They are usually thick and gritty and don’t stick very well to the food.

So, one day while surfing around one of my favorite gluten-free company Web sites, I discovered Katz Gluten Free Bread Crumbs.  I was skeptical at first…but from the picture on the site, it looked like these were actually super-fine breadcrumbs.  Like the kind people who aren’t gluten-free get.  I figured I could take a chance and put them on my next order.

I couldn’t have been happier when they arrived.  You know that Italian blend of bread crumbs you see at the grocery store…that is exactly what these looked like.  I was thrilled.  I couldn’t wait to try them out!

But, wait I did.  I think I might have been anticipating the perfect dish in which to use them on…but I stuck them in my pantry and they sat there for awhile.

And then the holidays rolled around.  My friend, Jenn, was hosting my roomie and I for New Years once more.  We have such a blast together on New Years and part of the fun is that Jenn and I create a menu and cook it up for a wonderful evening feast to welcome the new year.  This year…we decided on oven toasted gluten-free ravioli (Jenn is awesome in that she does gluten-free for me when I come into town).  They looked fantastic on Pinterest…so we pinned it to her New Year’s Menu board and got to planning.  I told her I actually had some gluten-free bread crumbs we could use for the recipe and that I would bring them with me for the occasion.

Finally…the moment I had been waiting for.  To see how Katz Gluten Free Bread Crumbs would fair against the gluten-free bread crumbs that had come before it.

New Year’s Eve arrived and, hungry after an afternoon at the movies (we saw The Hobbit), Jenn and I returned home and settled into baking mode (while Cathy sat at the table, read, and commented on how good it all smelled).  We got our gluten-free bread cooking first.  And while it was cooling, we settled into working on the Oven Toasted Ravioli.

She got out the gluten-free ravioli and I set into mixing up the breadcrumbs with a bit of cheese, per the recipe. What I loved at first site with these bread crumbs was how superfine they were.  They were the proper texture and looked like REAL bread crumbs.  I was already feeling good about this recipe.  I even tasted a pinch of them from the bag…and that won me over there.  This had to work…because these were the best gluten free bread crumbs out there.  I got them prepped.  Then…the rest was simple.  Cook ravioli, dip into egg/milk mixture.  Then…into the bread crumbs they went.

Miracle upon miracles…the breadcrumbs stuck to the ravioli.  They stuck SO sell.  I was so incredibly pleased with it.  I was seriously looking forward to this meal…and a lot of it was thanks to these gluten-free bread crumbs.  We gave each ravioli a spritz of cooking spray and into the oven they went to bake for about 12-15 minutes.

They came out of the oven looking just as good as they did when they went into it.  Seriously.  I was so highly impressed.  And ready to eat.  Jenn and I removed them from the pan and placed them in a bowl.  The bread crumbs remained in place and didn’t fall off the food as gluten-free bread crumbs from my past had been known to do.  Inset a happy squee and a little dance of joy here.  I placed the bowl of toasted gluten-free ravioli on the table…and soon we were sitting down to our New Year’s feast.

So…did they live up to the standard I built up in my head?

OH…YES!

The bread crumbs toasted up to a beautiful golden color when in the oven.  They didn’t fall off the ravioli as they baked or when we lifted them from the pan.  Nor did they fall off when we all began digging into the bowl for some of the ravioli to dine on.  They remained where they should be…stuck to the gluten-free ravioli.

One bite…and I knew no other bread crumb will ever come close to this when it comes to the gluten-free varieties out there.  These were amazing.  Honestly.  If you put these down in front of someone who didn’t know they were gluten-free…they wouldn’t be able to tell.  I guarantee that much.  The superfine quality really makes all the difference.

Katz Gluten Free Bread Crumbs are made from a gluten-free flour that contains corn and potato.  From there, the ingredients include eggs, water, canola oil, sugar, baking powder, xanthan gum, yeast, and salt.  These are probably all remnants of the amazing gluten-free breads that Katz Gluten Free offers.  I’m okay with that…because if that means we get bread crumbs like this…I’m forever sold.

A serving of Katz Gluten Free Bread Crumbs is 2 ounces, which sets you back 140 calories and 6 grams of fat.  Each serving is low in sodium as well, which is important as my roomie’s family tends to have high blood pressure so we focus a lot on low sodium foods.

So…this gluten-free foodie gives Katz Gluten Free Bread Crumbs a stamp of approval.  They are the most amazing gluten free bread crumbs that have hit the gluten-free market.  I can promise you that.  I am so highly impressed with these.  I am already anticipating my next Katz Gluten Free order because these are definitely going on it.  I have a bunch of other recipes to try now that I found gluten-free bread crumbs that work, taste, and feel like real bread crumbs.

I once again sing only high praises for Katz Gluten Free.  They deserve it though…for putting out quality products that live up to the high standards that they set.

If you have been leaving bread crumbs out of your recipes (this was what I did prior to finding these after having no luck with the other gluten-free bread crumbs on the market), you no longer have to.  All thanks to Katz Gluten Free.

Katz Gluten-Free Bread Crumbs on Conte's Gluten-Free Cheese Ravioli (toasted in the oven)
Katz Gluten-Free Bread Crumbs on Conte’s Gluten-Free Cheese Ravioli (toasted in the oven)

Recipe: Gluten-Free Pull-Apart Cheesy Onion Bread

Oh…Pinterest!

What did I do without you in my life?  Ever since I started getting the hang of searching and pinning and all that goodness…I can’t tear myself away from you.  And, my dearest Pinterest, it is because of you that my dearest friend, Jenn, and I were able to whip up some fantastic food this New Year’s Eve.

Even better?  All of it was gluten-free…because Jenn rocks and working with my food allergies.  She honestly does.

So, when New Year’s Eve hit…we had just come from seeing The Hobbit and we were HUNGRY!  The thing was…we had some cooking to do before the sitting down and eating was possible.  Good thing we did a wee bit of prep work ahead of leaving for the day.

And so…the first thing we cooked up to enjoy with our New Year’s Eve feast was this fantastic Cheesy Onion Pull-Apart Bread.  We had our doubts as to how it would turn out (if it even did) and questions on how exactly to make it…but we managed.  The original recipe was one I found from Food & Wine Magazine and we modified it by changing the cheese used, the amount of onion, and making it gluten-free.  We’re chefs…we tinker.

And yeah…it really is as good as it sounds.

Recipe: Gluten-Free Pull-Apart Cheesy Onion Bread

Gluten-Free Pull-Apart Cheesy Onion Bread


Servings: 10
Time: Prep 25 minutes; Bake 30 minutes

Ingredients:

  • 1-1/2 sticks cold unsalted butter, 1 stick cubed
  • 1/2 large onion, finely chopped
  • 1 tablespoon poppy seeds
  • Kosher salt and freshly ground pepper
  • 1 cup coarsely shredded Dill Havarti cheese (3 ounces)
  • 2 cups all-purpose flour, plus more for dusting (I used Bob’s Red Mill Gluten-Free All-Purpose Flour)
  • 2 teaspoons baking powder
  • 1/2 teaspoon baking soda
  • 1 teaspoon salt
  • 1 cup buttermilk

Directions:

Preheat the oven to 425° F.

Butter a 9-by-4-1/2-inch metal loaf pan.

In a large skillet, melt the 1/2 stick of uncubed butter; pour 2 tablespoons of the melted butter into a small bowl and reserve.

Add the chopped onion to the skillet and cook over moderate heat, stirring occasionally, until it is softened, about 8 minutes.  Stir in the poppy seeds and season with salt and pepper.  Scrape the onion mixture onto a plate and refrigerate for 5 minutes, until cooled slightly.  Stir in the Dill Havarti cheese.

Meanwhile, in a food processor, pulse the flour with the baking powder, baking soda and salt.  Add the cubed butter and pulse until it is the size of small peas.  Add the buttermilk and pulse 5 or 6 times, just until a soft dough forms.

Turn the dough out onto a well-floured work surface and knead 2 or 3 times.  Pat or roll the dough into a 2-by-24-inch rectangle.  Spread the onion mixture on top.  Cut the dough crosswise into 10 pieces.  Stack 9 pieces onion side up, then top with the final piece, onion-side down.  Carefully lay the stack in the prepared loaf pan and brush with the reserved butter.

Bake the loaf in the center of the oven for about 30 minutes, until it is golden and risen.  Let the bread cool for at least 15 minutes before unmolding and serving.

The unmolded loaf can be stored at room temperature for up to 2 days.  Rewarm before serving.

~*~*~

This was probably the most nerve-wracking item we made on New Year’s Eve.  The directions were a little confusing upon reading and we weren’t exactly sure how well the gluten-free flour would do with the recipe.  The result though…was epic.  This bread was SO amazing and delicious.  The modifications we made (the original called for Gruyère cheese and an entire onion) really worked in our favor.  The loaf was packed with flavor, delicious cheese, and lots of yum factor!

The only thing we noted was that it really wasn’t pull-apart.  But, slicing it with the knife worked just as well and definitely didn’t take away from the recipe in the slightest.

Making this again…for sure!

Nothing sinful about Sinfully Gluten Free’s light and fluffy table rolls

Sinfully Gluten Free Table Rolls

Product: Sinfully Gluten Free Table Rolls – $3.25

I attempted to make dinner rolls back when I first went gluten-free.  The problem?  They just came out way too dense.  Super, duper heavy.  I wasn’t a fan…but my roommate and I ate them with our breakfast (usually making egg sandwiches out of them) or with our dinner…doing what we could to make them lighter.  Or at least…not feel so dense.

And I attempted cheddar biscuits using Gluten-Free Bisquick once with a non-gluten-free friend of mine…and they were dense.  My mom attempted to do it for Christmas Eve so I could enjoy bread with everyone.  My dad was the guinea pig…and he said they were too chewy.  They were definitely dense and heavy…and not up to par.  My mom ended up making a regular batch for everyone else and I consumed two of the ones that she attempted gluten-free.

Dinner rolls were turning out to be an epic gluten-free fail.

But…over the New Year, I was heading to Ohio to hang with my friend Jenn.  And one of the trips we planned was to head to Dayton, Ohio…for the sole purpose of hitting up Sinfully Gluten Free.  You see…I love their Cinnamon Rolls (which they only have on Saturdays) and Jenn is a huge fan of their Lemon Bars (yes…and Jenn doesn’t even have to eat gluten-free!)…so I called ahead to make sure they had 4 trays of them on hand for me.  I didn’t want to make the trip and be disappointed by ending up walking away without any cinnamon rolls.  Well, the snow started the night before and continued through much of the next morning…delaying the journey to Dayton.  But…we eventually dug out the car and made our way onto the slick roads for our road trip to Dayton.

By the time we got there…it was lunch time.  Lunch was now going to be part of the fun at Sinfully Gluten Free.  I had mentioned that I put in an order for Cinnamon Rolls, but that I would get it after I ate lunch.  So, we all ordered lunch, settled in to eat, then made our purchases afterwards.

However…it just so happened that there were these table rolls in the pastry case.  And now I was intrigued.  The original plan for that evening was gluten-free stuffed shells…and I thought some dinner rolls might go well with it.  So, I also picked up a bag of those along with the 4 trays of cinnamon rolls I had ordered the night before.  Jenn…well…she bought them out of every lemon bar they had in the place.  We are gluten-free rockstars, friends!

Sinfully Gluten Free Table Rolls

With the later lunch, however, we weren’t hungry enough for the gluten-free stuffed shells.  I didn’t want to freeze the table rolls, because when I pulled them out of the bag at home, I realized how soft and light they were.  I hadn’t held a gluten-free dinner roll that was light yet.  I wanted to definitely eat these before they had to see a refrigerator or freezer.  So, after a little thinking of something light to do for dinner…we settled on table rolls with scrambled eggs.

Once the eggs were in the pan, I gave the table rolls a little warm-up in the microwave.  This took their soft and light texture to a warm version of it.  With a schmear of butter…it would be the perfect compliment to…any meal, really…but that night…it was scrambled eggs.

I wanted to eat part of the roll without the butter to start with.  Just to see what it tasted like.  First of all, these heated up so well.  I think they would have also done well with a slight toasting in the oven…but the microwave warmed them through and gave them that fresh out of the oven feel.  I loved that.  They were still very light and steam rolled back as I tore into mine and took a bite.

Light.  Fluffy.  Soft.  Chewy.  They were dinner roll perfection.  Put one of these down in front of someone who wasn’t aware that they were gluten-free and I guarantee that you wouldn’t be able to tell the difference.  Honestly.  These were not dense at all.  I wish I knew the secret to making gluten-free dinner rolls that didn’t feel and taste so heavy.  These were light as a feather and delicious.  And they complimented the eggs perfectly.  I gave part of mine a small pad of butter and topped it with a bit of the scrambled egg…and it was a match made in heaven.

These rolls would compliment any dinner to be sure.  They are the perfect bite of gluten-free bread.  No feeling like you’re eating an entire loaf.  These were light to the touch and just plain light in texture.  And the taste…phenomenal.

Sinfully Gluten Free is sinful in the respect that everything they put out is a delicious bite…and just sheer gluten-free magic.  I hope to purchase more dinner rolls from them next time I’m in town because I was highly impressed.

How do they make them so light and fluffy?  I may never find out…but thankfully Sinfully Gluten Free bakes them up that way…so that even the gluten-free community can enjoy a good dinner roll every now and again!

YUM!

Sinfully Gluten Free Table Rolls with Scrambled Eggs

Recipe: Gluten-Free Zucchini Fettuccine in a Vegan Cream Sauce

It was the night before Christmas and my mom and I were settling in to plan a vegetarian and gluten-free entreé option for me (the only vegetarian in the family) and a possible side for everyone else at Christmas dinner.  We had meant to do planning long before then…but we both lead very busy lives and we had a lot of other stuff to do when I flew into town for the holidays.

So, the night before the big day, we found ourselves at Earth Fare in Birmingham, Alabama…picking up the necessities for the recipe we finally decided on.  The original  recipe was from Manifest Vegan, and it involved the use of maitake mushrooms.  But…only my mom and I like mushrooms in the family, so we put our heads together to come up with a replacement.  Our solution: zucchini.

That settled, we hit up the grocery store and purchased all the necessary items, including RP’s Fresh Gluten-Free Fettuccine noodles.  I fell in love with RP’s fresh gluten-free pasta very recently and no other pasta would do for Christmas.  With the ingredients purchased…we were ready to start cooking up a variation of this vegan pasta dish for Christmas.  And we did just that on Christmas morning…and finished up in enough time to pack up everything and head to my sister’s house.

Recipe: Gluten-Free Zucchini Fettuccine in a Vegan Cream Sauce

Gluten-Free Zucchini Fettuccine in a Vegan Cream Sauce

Servings: 8
Time: Prep 20 minutes; Cook 30 minutes

Ingredients:

  • 16 ounces, brown rice fettuccine style pasta (I used RP’s Gluten Free Fettuccine)
  • 3-1/2 tablespoons olive oil, divided
  • 1 teaspoon sea salt
  • 2 leeks, cleaned and sliced
  • 1 tablespoon fresh thyme
  • 3 cloves garlic, minced
  • 1 stick cinnamon or 1 teaspoon cinnamon powder
  • 10 ounces zucchini, chopped
  • 3 finely diced carrots
  • 3/4 cup white wine
  • 1-1/2 cups full fat coconut milk
  • 1 cup (salted) vegetable broth
  • 2 tablespoons superfine brown rice flour
  • Chopped chives for garnish
  • Salt to taste

Directions:

Cook the pasta according to package directions.  Douse pasta with 3 tablespoons olive oil and then add sea salt.

In large pan, combine leeks, thyme, garlic, cinnamon, zucchini, and carrots with 1/2 teaspoon olive oil and sauté until golden on edges.  Add the white wine and cook over medium low heat until much of the liquid has dissolved.  Stir in coconut milk and vegetable broth and let cook over medium heat until slightly reduced, about 10 minutes.  Stir often to prevent scorching.

Whisk in 2 tablespoons superfine brown rice flour and let cook until thickened, stirring often with a spoon, about 7 minutes.  Combine with pasta and salt to taste, if needed.  Top with fresh chives before serving.

~*~*~

The pasta was quite a popular dish at Christmas dinner.  No one even knew it was vegan and gluten-free…except for the fact that I could eat it.  LOVE that.  And everyone tried it…and loved it.  Let me tell you…the item that really makes this dish pop is that addition of cinnamon.  It was amazing.  I can’t wait to make this again.

Go ahead and try it.  And if you love mushrooms like me…go ahead and keep the maitake mushrooms.  When I make this at home for myself and my roommate…I’ll do it with the mushrooms.  Mmmm…I kind of want this for dinner this week now…


Recipe: Roasted Brussels Sprouts

It’s winter time…and you know what that means?  It means my CSA bin is throwing Brussels sprouts at me again.  As you will recall, the first time Brussels sprouts turned up in my bin…I was at a loss.  Not only had I never eaten them…but I had no idea how to cook them.  I finally cooked them up in a Creamy Brussels Sprouts Bake which my roommate and I did enjoy.

But we weren’t blown away by it.

This time, when I pulled out the Brussels sprouts, I was determined to find a different way to cook them.  So, in the end I went with the most basic, rustic, perfect way…simply roasting them in the oven.  And it only takes 4 ingredients to make this happen.

Recipe: Roasted Brussels Sprouts

Roasted Brussels Sprouts

Servings: 6
Time: Prep 20 minutes; Cook 40 minutes

Ingredients:

  • 1 1/2 pounds Brussels sprouts
  • 3 tablespoons good olive oil
  • 3/4 teaspoon kosher salt
  • 1/2 teaspoon freshly ground black pepper


Directions:

Preheat oven to 400 degrees F.

Cut off the brown ends of the Brussels sprouts and pull off any yellow outer leaves.

Mix them in a bowl with the olive oil, salt and pepper.

Pour them on a sheet pan and roast for 35 to 40 minutes, until crisp on the outside and tender on the inside.  Shake the pan from time to time to brown the sprouts evenly.  Serve immediately.

~*~*~

It doesn’t get much easier than that.  Honestly.  And they smelled so good while they were cooking.  When I dished them up to eat with dinner, my roommate took the first bite and said that they reminded her of when I made kale chips.

NICE!

You know what?  She was right.  This is definitely my favorite way to eat Brussels sprouts.  Nothing fancy.  Just letting the vegetable shine.  Who would have thought something this basic, this simplistic could win my taste buds over.

Now I know exactly what to do next time Brussels sprouts turn up in my bin.

Recipe: Gluten-Free and Vegan Pumpkin Mac and “Cheese”

Awhile back, I did a gluten-free version of a recipe that came from The Brokeass Gourmet that intrigued me.  It was a Brown Butter Pumpkin Mac and Cheese.  And it was delicious.

It is definitely the time of year for pumpkin flavored things, so when the office potluck luncheon rolled around this week, I decided I would make the Brown Butter Pumpkin Mac & Cheese.  And then, after pondering for a bit, I decided to do things a little differently.  For one thing, it was going to be vegan, as we do have a vegan in the office and I wanted him to be able to eat it too.  Secondly…I was going to do a different recipe that put a little more emphasis on the pumpkin portion of the entree.

So, after some searching I found a recipe that originally came from The Inventive Vegetarian and modified it to fit the ingredients I have (vegan & gluten-free).  The end result…was better than I dreamed.

Recipe: Gluten-Free and Vegan Pumpkin Mac and “Cheese”

Gluten-Free and Vegan Pumpkin Mac &
Gluten-Free and Vegan Pumpkin Mac & “Cheese”

Servings: 6-8
Time: Prep 15 minutes; Cook 45 minutes

Ingredients:


  • 1 box elbow macaroni (I used BiAglut Gluten-Free Maccheroncini)
  • 2 cups almond milk (I used unsweetened)
  • 2 tablespoons olive oil
  • 2 tablespoons all-purpose flour (I used Arrowhead Mills Gluten-Free All-Purpose Flour)
  • 2 cups Daiya Cheddar Style Shreds (I prefer the Daiya wedges, so I just shredded an entire Daiya Cheddar Wedge)
  • 1 can pumpkin puree
  • 1 teaspoon soy sauce*
  • 1/2 teaspoon cinnamon
  • 1/4 teaspoon cloves
  • 1/4 teaspoon allspice
  • 1/8 – 1/4 teaspoon cayenne pepper (or more if you like heat)
  • Salt and pepper to taste

Directions:

Preheat oven to 375 degrees F.

Heat the almond milk in a small saucepan, but don’t boil it.

In a medium pot, heat the oil over medium heat and sprinkle in the flour.  Whisk for about 2 minutes to create a smooth roux.  The mixture should darken slightly during this time.

Still whisking, add the hot almond milk slowly and cook for a minute or two more, until the mixture has thickened.   A good way to check is to dip a spoon into the mixture, then run your finger over the back of the spoon.  If the mixture does not run into the streak made by your finger, it’s thick and good to go.

Add in the pumpkin puree and stir until smooth.  Keep it on the heat for just a minute or two, until the puree is warmed through.

Take the almond milk mixture off the heat and stir in the vegan cheese, soy sauce, and spices.  Partially cover and let the mixture sit as the cheese melts.

While waiting for the cheese to melt, bring a pot of water to a boil and cook your macaroni.  Cook it just shy of al dente (subtract a minute or two from the al dente cooking time on the box).  Drain the noodles when they’re done.

Once the cheese has fully melted (it will take a little longer with this stuff than with real cheese), taste and adjust any of the spices, as well as salt and pepper, to your liking.  The whole mixture should now have a nice, velvety texture to it.  Add the cooked macaroni (and the onions if you’re adding them) and stir well. Pour the whole mixture into a 9×13 baking dish, or a deeper casserole dish.

Bake for 40 to 50 minutes, or until the sauce is bubbly.

Enjoy!

~*~*~

The difference between this pumpkin mac and cheese and the previous one is the pumpkin flavor is definitely more pronounced in this one.  I think that has to do with the seasonings used more than anything.  It was creamy and delicious and those who ventured to try it at the office luncheon all said it was really good.

*Now, I do want to note that if you are using real cheese and not making this a vegan recipe…do not add the soy sauce.  The soy sauce is basically used as a seasoning for the extra umami that soy cheese needs.  Real cheese…you’re good to go without it.

Very impressed with this recipe.  If you love pumpkin and mac & cheese…give this one a try.