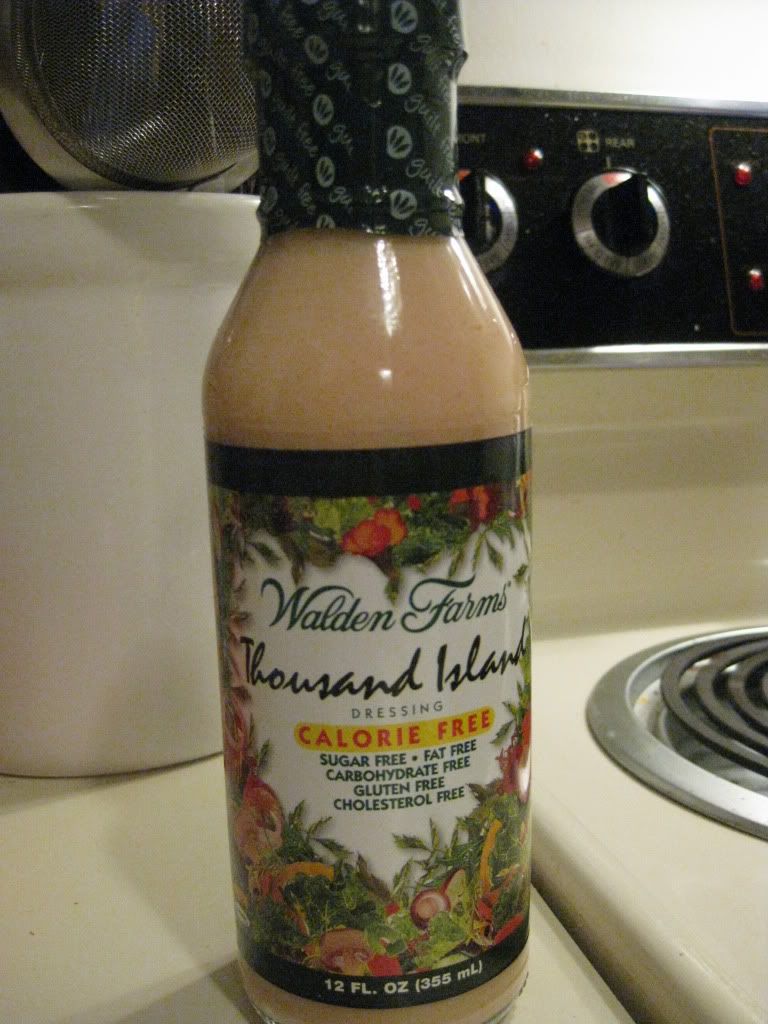
Walden Farms Calorie Free Thousand Island Dressing
Product: Walden Farms Calorie Free Thousand Island Dressing – $4.99+
How good can a product be when it has the bold claim that it has no calories, fat, carbs, gluten, or sugars of any kind? Well…if it’s a product made by Walden Farms…then, as far as I am concerned…it’s going to be good.
Of course, nothing ever compares to the real thing, but as far as these things go, Walden Farms has hit the flavor right on the head. A while back, I gave their Honey Dijon salad dressing a try…and absolutely loved it. It was not as creamy as regular dressing, but the flavor is totally there.
And that was how it was with Walden Farms Calorie Free Thousand Island Dressing. Honestly. While it doesn’t contain all the bits that you usually see in Thousand Island dressing, it tastes just like the dressing I used to pour all over my salads. I found that while it wasn’t as thick as regular salad dressing, it didn’t need to be. What it lacks in body it makes up for in its simple, rich flavor of regular Thousand Island dressing. It was very impressive.
And the best part is…you don’t need to drown your salad in it. The two tablespoon serving size is perfect for the salad. Give it a toss and every bit will get covered with a bit of the dressing. And that is only a good thing. I even let my roomie, who is a Thousand Island dressing freak try it out…and she said it was awesome…and that she missed Thousand Island dressing (the brand she used to get had high fructose corn syrup in it…so we had to move her to something else).
Salads can be healthy again…and you can still have an awesome creamy dressing…that is so allergen friendly and quite delicious too. If you can find Walden Farms products, I encourage you to give it a try. Honestly…the two dressings I have tried have been super delicious and very good. And…guilt free.
Better yet, the dressing is made with natural ingredients, flavors and spices.
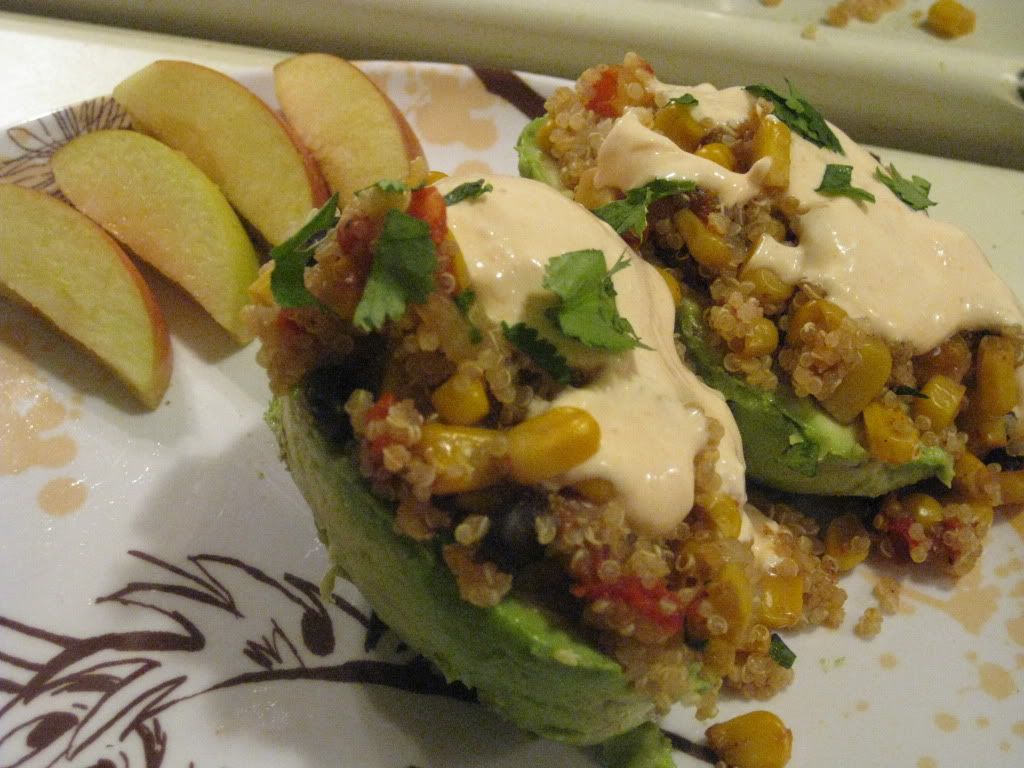
I know…this sounds bizarre, even for someone like me…but the fact of the matter was…I had produce that needed to be used up before Friday…and two of the items still staring at me were amazing organic avocados. Now, I could have done my usual standbys with these…guacamole…or put it into a breakfast scramble of sorts.
But why? Why when I run across such interesting and different recipes such as this one, which I pilfered from the blogg Bullfrogs & Bulldogs, and adjusted to make it easier and more time efficient for me…the non-stop busy-body! It’s very nutritious, packing a high protein punch with the quinoa, and the healthy fat of the avocado. Awesome.
So…if you love avocado, love quinoa, and just plain love delicious things…here is a great recipe for you…done up the way I do it. And I’ll even include my recipe for Vegan Sriracha Sour Cream.
Yes…I love you guys that much…
Recipe: Spicy Quinoa Stuffed Avocados
Spicy Quinoa Stuffed Avocado with a Vegan Sriracha Sour Cream
1 tbsp taco seasoning (I crated my own using chili powder, red pepper flakes, cumin, and garlic powder)
Vegan Sriracha Sour Cream
1/4 cup Tofutti Better Than Sour Cream
2 teaspoons Sriracha
Directions:
Rinse the quinoa well and place it in a sauce pan and toast for about two minutes until the quinoa starts to smell ‘toasty.’ Add one cup of water or vegetable broth and bring to boil. Once boiling, reduce heat to simmer and cover. (To get fluffy quinoa, it’s really important to not stir it, just let it be, keeping a close eye on it).
Chop the onion drain the can of Southwest Style Corn. Combine both ingredients in a bowl and mix well with the taco seasoning. Cover and heat in the microwave for 3 minutes. Remove from microwave, uncover, and allow to cool slightly.
Once the quinoa is finished, fluff with a fork and allow it to sit for 15 minutes, until it has cooled slightly. Add it to the vegetable mixture.
Make the sour cream by measuring out 1/4 cup of vegan sour cream and adding the Sriracha to it. Stir it together until well blended.
To assemble the avocados, begin by cutting them in half, removing the skin and the pit.
Scoop about ½ a cup of the quinoa mixture into each avocado, more if you can fit it.
Top it with a little Sriracha Sour Cream and some chopped cilantro and serve.
Enjoy!
~*~*~
Creamy, rich, smooth, amazing, delicious, totally yummy and just plain good! The blend of cool avocado with the slight spice from the quinoa/vegetable mixture as well as the vegan Sriracha sour cream on top is just…perfection. With a healthy does of belly-flattening fats from the avocado and the blast of protein from the quinoa, this makes for one very healthy dish to have for lunch or dinner…or whenever your little heart desires.
I had more than half of the quinoa/veggie mixture left so I sense a run to the grocery store for more avocados in my very near future.
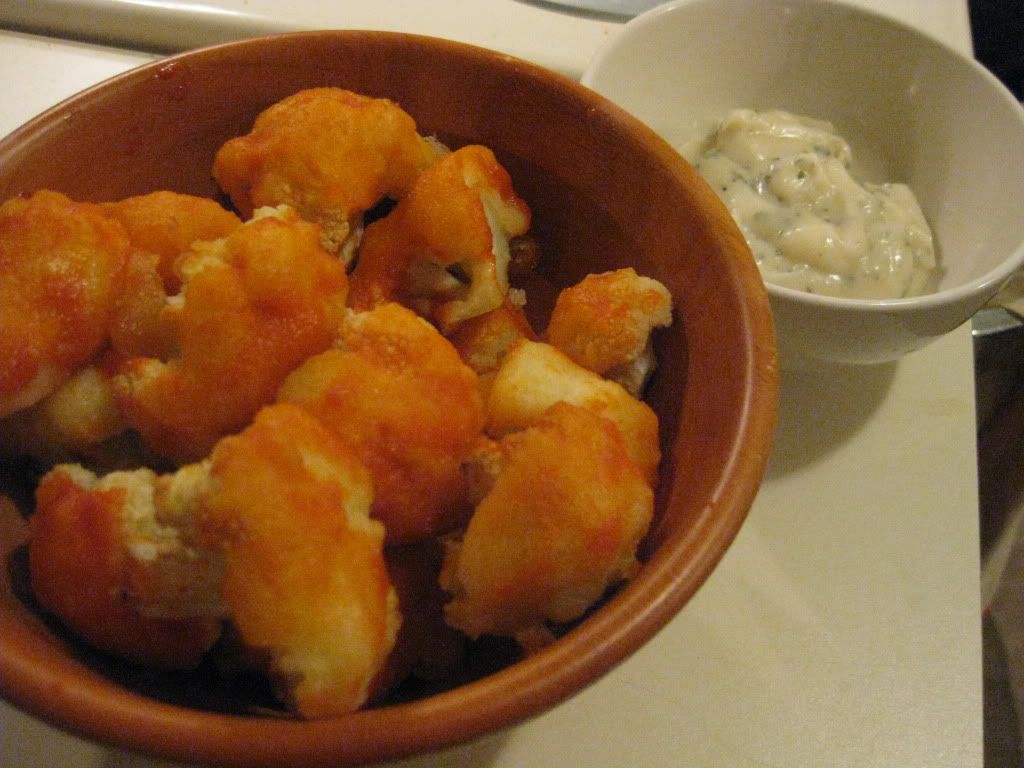
I love spicy food. Love it. I love that little bit of heat that accompanies each bite…and when done right…doesn’t mask the flavor of the food. Yum!
Well, this past weekend, my friend Robert shared a recipe on my Facebook wall that he thought I might enjoy. It was for Spicy Buffalo Cauliflower. And let me tell you…it looked awesome. Seriously! It just so happened that my CSA bin that week had an amazing head of cauliflower in it…and everything else on the list I had in my pantry. Perfect!
And after the winter weather that came through last night, something warm, spicy, and different just sounded appetizing tonight for dinner. So, upon returning home from work…I went to work on my head of cauliflower and preparing this simple, yet really delicious dish. You just need about 25 minutes and dinner is served.
Recipe: Spicy Buffalo Cauliflower
Spicy Buffalo Cauliflower (with a Vegan Ranch Dip)
Mix together the batter ingredients in a small bowl.
Dip the cauliflower in the batter until coated evenly then place on greased baking sheet. Bake for about 15 minutes or until the batter hardens.
Mix together sauce ingredients in a small bowl.
Once the cauliflower are done baking, brush them with the hot sauce mixture and bake again for a few more minutes, until cauliflower is crispy.
Remove from oven. You may want to add a bit more buffalo sauce to taste.
Enjoy!
~*~*~
Oh…this was crazy, stupid good. I mean…so delicious. I was highly impressed. Honestly. I love cauliflower regardless, but this just took it to the next level. This is the second cauliflower recipe that Robert has shared with me, and both times I have been super impressed. I can’t wait to make this again.
Oh, and it’s a super easy recipe too, so that is a bonus. I whipped up a Vegan Ranch Dip to serve with mine, which consisted of:
a few spoonfuls of Trader Joe’s vegan mayonnaise
1 teaspoon garlic powder
pinch of salt
pinch of pepper
1 tablespoon of dried parsley flakes
3 tablespoons of almond milk to thin it out
I just mixed it all together in a bowl and viola…instant buffalo cauliflower dip!
Honestly…if you are looking for a fun and exciting way to serve up veggies…this is the recipe to try!
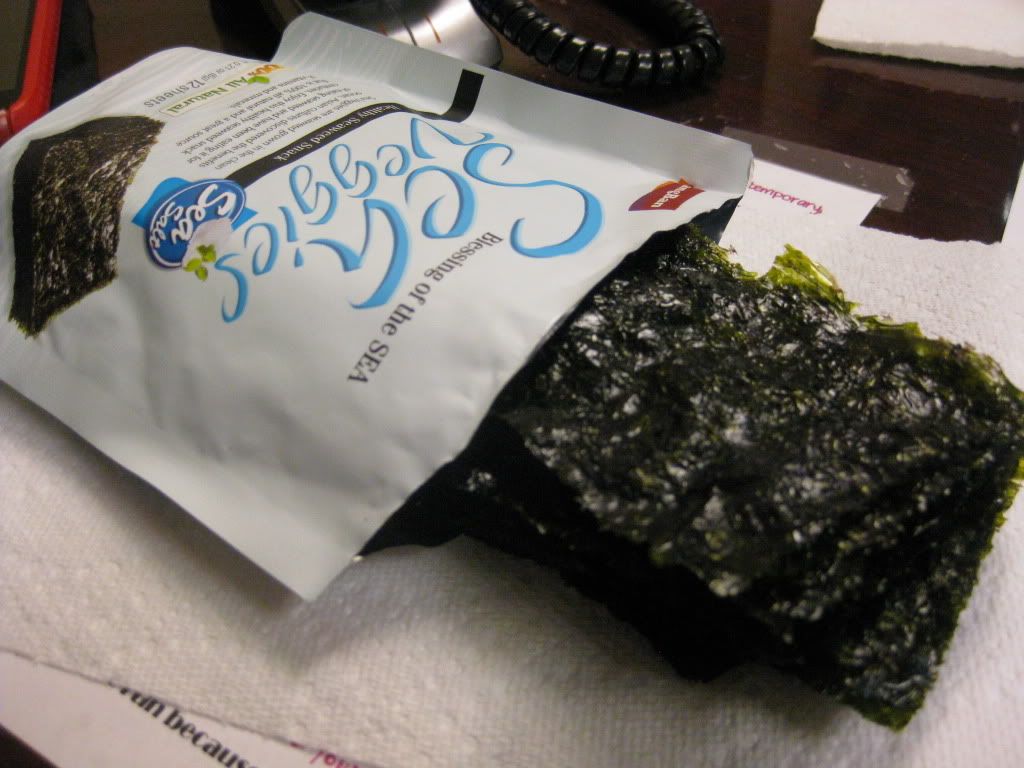
Does that sum it up enough? I was actually pretty stoked about these great little seaweed chips that I found on Manager’s Special at my local grocery store. I think, now that I’ve had them, that I now know why they were there…
Now, don’t get me wrong…I am a vegetarian sushi loving girl…and as such, I am accustomed to the inclusion of seaweed (nori) in my rolls. I love it when paired with the vegetables and the sushi rice. But on its own…well…
…it tastes like…the ocean floor. Or like orca. I can’t decide which.
This afternoon, I was starving after a quick run on my lunch break at the gym. So, when my 3:00 p.m. snack time hit, I reached into my desk and emerged with the little package of YangBan Sea Veggies. I had actually thought to, perhaps, bring a backup plan in case these didn’t hit the mark on flavor, but I decided against it. It was a healthy little snack…made from seaweed.
And…that’s exactly what it is. In fact, each little chip is just a section of nori, this one dusted with a light coating of sea salt. It looked harmless enough. In fact…I thought…it might even be tasty.
I was wrong. Not a fan. At all. It took a handful of Reeses Pieces and lots of water to get rid of the taste of algae, but…eventually it got there. My palate cleansed, I went and threw away the rest of the bag and vowed to go home and get rid of the hot chili flavor as well. In sushi…I love nori. In snack form…on its own…not so much.
So, if seaweed is your thing…then this might be the snack for you. It’s super healthy…only 35 calories for the little bag. But…I didn’t even take in one since I just couldn’t get past one bite.
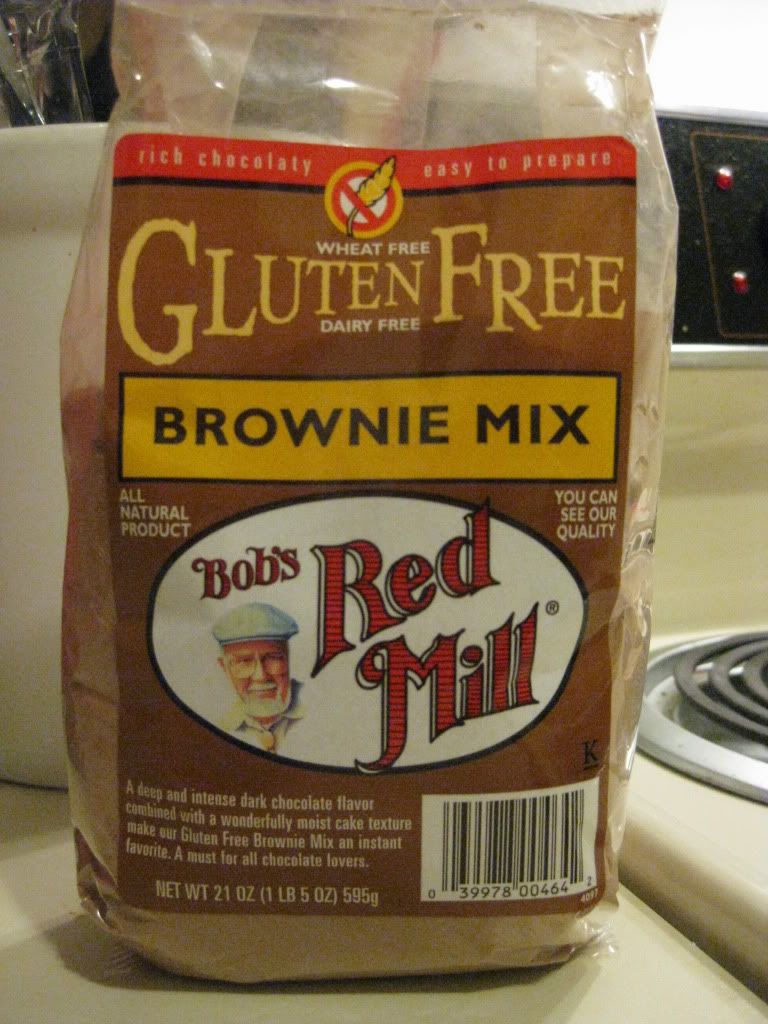
Product: Bob’s Red Mill Gluten-Free Brownie Mix – $5.99+
Moist. Soft. Delicious.
These aren’t words that normally people would think of when someone says the “dreaded” words gluten-free. And trust me…people can be that finicky when it comes to whether or not they try a dish or not. Believe me…I see it happen every time I bring in food to my office. There are very few people willing to give something a try. It’s sad…because one always hopes that people will at least try something you bring in.
That being said, I have a lot of baking mixes in my pantry and I finally used up the last of my Swiss Colony Chocolano cookies that I ordered before Christmas. (For the record, those are amazing and you totally get more than the 16 cookies they list on the container. Would order those again in a heartbeat!). So…a new dessert was needed for this week.
After a quick consult of my gluten-free pantry list, I noticed that Bob’s Red Mill Gluten-Free Brownie Mix was the next sweet treat up for baking. Now, I’ve had so much luck with Bob’s Red Mill Gluten-Free items that I didn’t even hesitate when it came to making these up. Honestly. Nothing I’ve cooked up from a gluten-free mix from Bob’s Red Mill has done me wrong. Nothing.
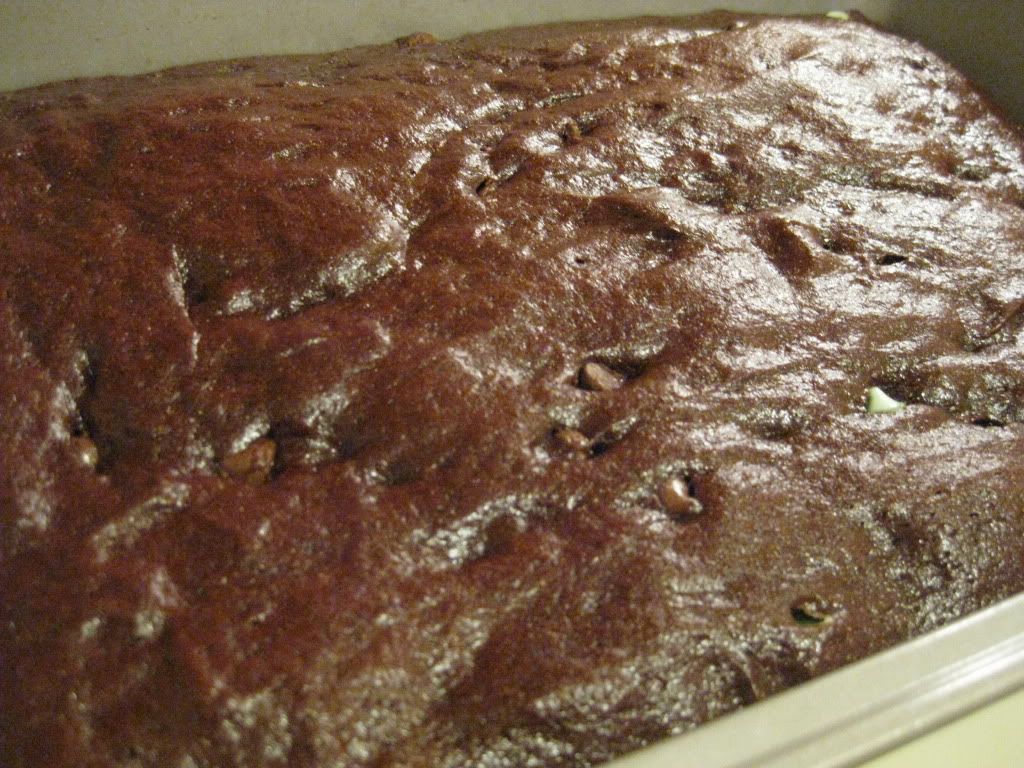
And mixing this up was super easy. With my new Kitchenaid handheld mixer, I blended together the mix, warm water, melted margarine, and an egg. It was that simple. And what emerged was a creamy, thick batter just begging to be poured and spread over a greased 9×13 pan. But…there’s more. I could have stopped there, but I have a pantry of goodies as well and I figured why not add some dark and mint morsels to the mix? Minty brownies?! Yes, please! So, I folded in about 1/4 cup of the morsels and then poured the brownies into the pan.
Into my oven these went for about 23 minutes. And when the timer went off, I was fully prepared (as usual) to test it with a toothpick and have to put it back into the oven for another few minutes, check again, and repeat until the toothpick was clean. Except, Bob’s Red Mill’s Gluten-Free Brownies were actually done…right on time. My toothpick I inserted right into the center came out clean on the first try.
When I pulled these from the oven, I found that the surface was shiny and they smelled awesome. I let them cool for about 45 minutes and then just had to try one. So, my roomie and I decided to cut a piece and split it.
Verdict: We both stood there with this super-moist, light, soft brownie, chewing slowly, savoring…
This is the best brownie mix I’ve used so far since going gluten-free. Sure, I’ve liked the Hodgson Mill and even the Betty Crocker…but they weren’t as moist and soft and light as how Bob’s Red Mill’s Gluten-Free mix baked up. Honestly. I took a bite, feeling the moist crumbs tumble across my tongue and went, “Oh. My. God.” Then…devour mode was switched on. And that was a bite that didn’t even have the added dark and mint morsels!!
My roomie, who can eat any brownie she wants, also declared these as amazing. She loved the taste and texture as much as I did. And that rich, creamy, chocolate flavor was so amazing. It’s rich, without being too much. And the softness of each brownie just makes you crave more. As much as I raved about the previous brownies I made up with gluten-free mixes…they don’t even begin to compare to the way these turned out.
And, for the ultimate test, I took one of these brownies into my teammate at work. She has a very discerning palate, and she took one bite and said that the consistency was perfect. The flavor was awesome. And she enjoyed it as much as the roomie and I did. That, my dear friends, is a huge SCORE!!
Bob’s Red Mill once again for the win.
So what makes these brownies so spectacular, rich, deep and intense? Well, they have a moist, cake-like texture…which I love. I prefer cake brownies to fudge brownies any day. And Bob’s Red Mill uses Ghirardelli cocoa to coax out that rich flavor. Delicious. No wonder they are a decadent treat!
As for nutrition facts…these make 16 brownies…but I found those would be rather large for my liking. I love dessert, but small bites are usually enough. So I managed 24 brownies from my pan. This, naturally, changes the nutrition facts. If you make 24 brownies out of the mix though, your fudgey, moist brownie treat will only set you back 145 calories and 7 grams of fat. Less than that if you don’t add the baking chips to the mix. That’s about perfect for a dessert and you still get a really decent sized square of brownie without it being too much. Let’s face it…dessert comes after a meal…you really just need a couple of bites.
I’m already looking forward to sinking my teeth into another brownie tonight after dinner. These are the gluten-free brownies that dreams are made of. Even if you aren’t gluten-free…you’ll love these. You’d never know the difference. Trust me.
Gluten-Free Brownies with Dark & Mint Chocolate Morsels made with Bob’s Red Mill Gluten-Free Brownie Mix
Rudi’s Gluten-Free is on a mission…a mission that will greatly impact as well as benefit the gluten-free community. Their mission is seeking out what millions of gluten-free sandwiches have been missing since the age of gluten-free products – a soft and fluffy texture reminiscent of regular bread. Trust me…we’ve all missed that sensation, that texture, that taste…
Well, look no further. Rudi’s Gluten-Free has launched a new line of softer and fluffier Gluten-Free Sandwich Breads. Yes…you read that right. SOFT AND FLUFFY!
Your eyes are not deceiving you! However, Rudi’s Gluten-Free needs your help in finding the bread through a Missing Soft & Fluffy $1,000 Reward Sweepstakes and Lost & Found Facebook campaign. It’s only with your help, dearest readers, that Rudi’s can find what has been missing from gluten-free bread – that amazing soft and fluffy texture. Your sandwiches will never be the same…only better.
You detectives and seekers who stumble across Soft & Fluffy can text “FOUND” to 304-52-RUDIS for a chance to claim a $1,000 reward. To help spread the word, fans of Rudi’s Gluten-Free can share Missing Soft & Fluffy notices on their Facebook wall. And to prove they’re assisting in the search, fans can share photos on the whereabouts of Soft & Fluffy (hiding in the toaster, the freezer, etc.) and as a reward will be entered to win weekly prizes, such as a Garmin GPS, Nikon CoolPix camera, soft and fluffy bathrobes, or a Rudi’s Gluten-Free T-shirt. But, remember, fans do have to post their detective photos each week to be eligible for that week’s prize. And everyone who participates will be rewarded with a $2 off coupon for the new “Soft and Fluffy” Gluten-Free bread products from Rudi’s.
But…wait…there is more!
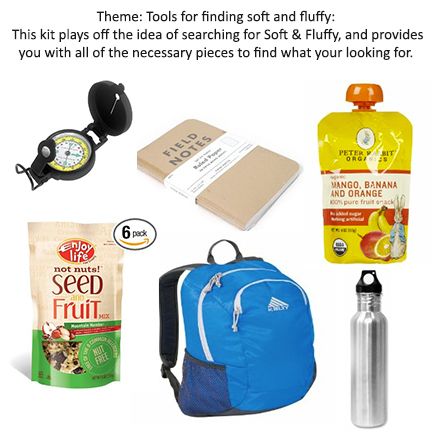
My friends at Rudi’s Gluten-Free have given me the opportunity to provide one of you, dear readers, with a prize package of deliciousness and fun valued at $100 in return for helping spread the word about the new Rudi’s Gluten-Free Soft & Fluffy Sandwich Bread! Yep…a giveaway! This amazing prize package includes:
Tools For Finding Soft and Fluffy Giveaway
That prize package is loaded with goodness:
Compass
Field Notebook
Organic Trail Mix
Peter Rabbit Organic Fruit Snacks
Kelty Backpack
Stainless Steel Water Bottle
How amazing is that prize package? Rudi’s Gluten-Free is going all out and giving you all the tools you will need to seek out and devour their new line of Soft & Fluffy Gluten-Free Sandwich Bread.
To enter for your chance to win, all you have to do is post a comment on my blog, telling me your favorite sandwich or food to make with sandwich bread. That’s all. The winner will be randomly chosen and will receive their prize package by mail.
So, what are you waiting for? This amazing prize package could be yours! Enter today!
The Really Great Food Company Gluten-Free Spinach Cheese Biscuit Mix
Product: The Really Great Food Company Gluten-Free Spinach Cheese Biscuit Mix – $6.19+
You know…when a gluten-free company goes all out and calls itself The Really Great Food Company, well, they better be able to back up that claim. That being said, I had never heard of said company prior to a little visit to Milwaukee and a stop inside the Gluten-Free Trading Company. If you are ever in Milwaukee, do stop in. It’s a completely gluten-free grocery store. And it is awesome!!
Anyway, on my second visit there in two days, I was stocking up on more goodies for the gluten-free pantry at home and came across a few mixes that were produced by The Really Great Food Company. Huh. I was actually intrigued because this was something I couldn’t get where I lived.
After toiling over which product to try, my roommate and I finally decided that the Spinach and Cheese Biscuit mix sounded like it could be an epic win (or an epic fail), so we went with that. Purchase made. And a lot of products to go through in my pantry prior to this one meant…it sat…and sat…and sat. Until last night.
You see…our workout schedule runs so that we go to the gym every other day. Well, this week it just happens to be a Monday, Wednesday, Friday sort of week. And after hitting up the gym, we head to our office and I nuke something I brought (homemade or otherwise) for us to feast on because by then we are truly starving. Since this mix was getting close to expiration, this is what I mixed up and baked up for post-workout brekkies this week.
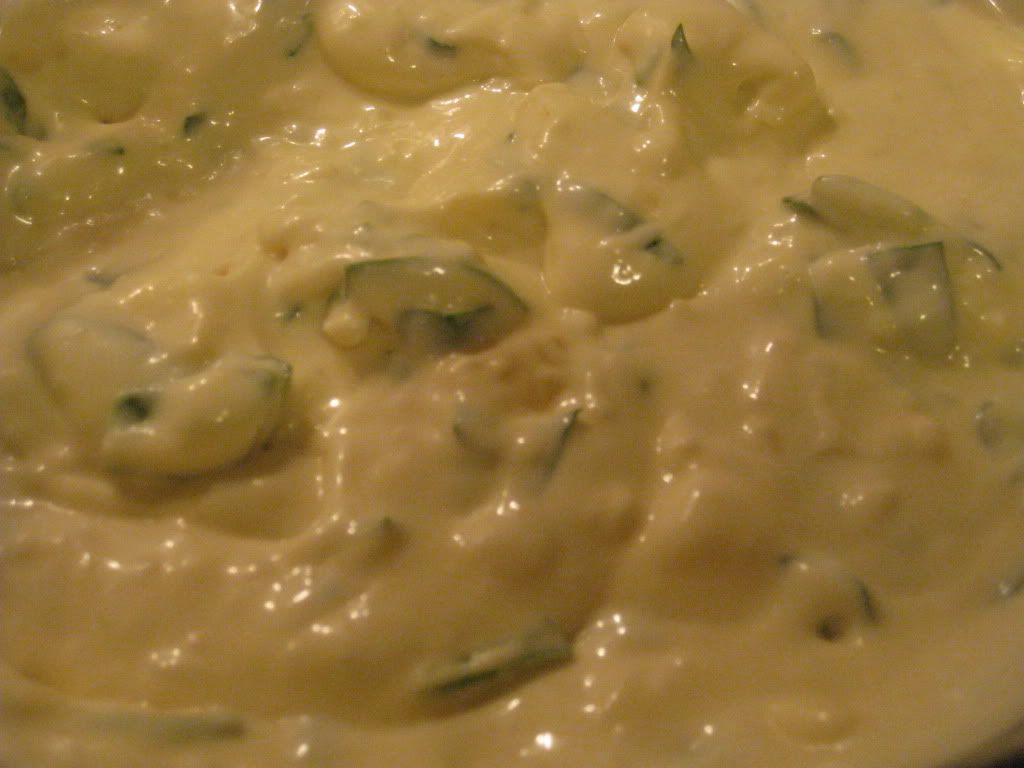
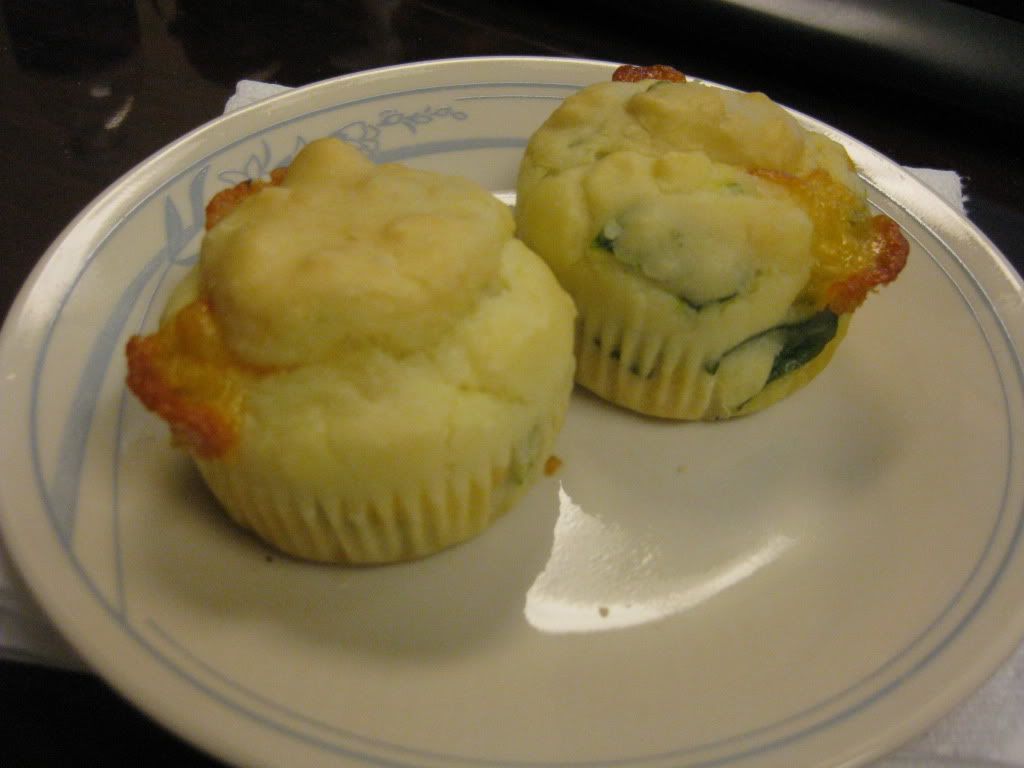
Now, the box itself says that it only makes 9 biscuits. Heh. I managed to get 13 out of it. And as these are not made in traditional biscuit methods (not drop biscuits or cooked up in a pan), but rather made in muffin tins…they seem more like a roll than a biscuit…but this is just me nitpicking every little detail.
The Really Great Food Company Gluten-Free Spinach Cheese Biscuit Mix (mixed and prepped with cheese and spinach)
Making these was super easy. In a bowl, I beat together 2 eggs, some canola oil, and some unsweetened almond milk. From there, I the mix itself and beat that in as well. Then, the spinach, chopped cheddar cheese, and shredded Parmesan cheese all got folded into the mix. The resulting mixture was then placed into muffin tins and baked in a 375°F oven for about 27 minutes.
Now, if possible, I do try to bake an extra item of the new product I am trying out…just in case it isn’t any good. Because, after a hard workout, the last thing you want to find out is that your breakfast is nasty. Not good. That being said, I put it to the test, as always, with my roommate. I gave her the 13th biscuit and eagerly awaited her reaction.
“Pretty good.”
Hmmm…pretty good is not what I strive for when I bake something up. But she wasn’t spitting it out making obscene facial expressions, so…pretty good would have to do. The rest of the biscuits/rolls were put into containers and prepped for our three gym days this week.
After hitting the gym this morning, we arrived very hungry at the office. I set to the task of getting our breakfasts ready. Here was the first snag. Apparently I needed to spray down the muffin papers I baked them in because I found that the wrappers stuck to the product itself. Booo. But, this wouldn’t be the first time I encountered that…so I set to work, carefully peeling and making sure I was getting mostly paper and not mostly biscuit. Once I accomplished that task, it was a simple reheat in the microwave for about 30 seconds. Good to go.
When I asked my roomie her thoughts on the biscuits, she said, “I like the cheese.”
Again…not very helpful or useful for my blog…so…here’s my rundown…
The Really Great Food Company knows how to make biscuits! Honestly. What shocked me most was that, despite being filled with chunks of cheddar cheese and slices of spinach, these biscuits aren’t dense in the slightest. They are light and airy. And the Parmesan cheese that was added to the batter melted down into the biscuits as they baked, giving each bite a cheesy flavor. Get a bite with a chunk of cheddar and it’s like cheese nirvana in your mouth. Light…fluffy…and delicious. I couldn’t stop eating mine. I had two biscuits for breakfast and they were devoured faster than I’ve eaten anything on a gym day. Every bite just tasted amazing. From the spinach to the cheese to the light batter itself, this biscuit was gluten-free perfection.
My only regret now is that I can’t find this brand around here. Thankfully, they do have a Web site and you can order their products online. And, trust me, I think I may do that…see what else they offer and if it lives up to the standard these biscuits have now set.
Gluten-free doesn’t have to mean heavy, dense breads. Nope. The Really Great Food Company proved once and for all that even something as simple as a biscuit/roll can have a light, airy texture and tons of flavor. I’m really, really hooked. The hard part now will be saving them specifically for gym days.
It may sound cheesy (heh heh…see what I did there?) but these biscuits truly are a gluten-free culinary work of art. If you can find the mix…purchase it and bake it. If you can order it online, I encourage you to do so. I was beyond impressed.
I was wowed!
The Really Great Food Company Spinach Cheese Biscuits
Who can argue with a snack that tastes like a classic summer dessert? You won’t find a lot of people complaining about that. Least of all me. As we all know…I love dessert. Love it. I could skip a meal if it mean a bigger dessert (that would be the trade-off). Of course, getting dessert isn’t easy for the gluten-free vegetarian…so I take what I can get.
With that in mind…I found myself awake on a race morning, having just eaten my cereal and knowing that I was going to need a little more closer to race time to see me through the race. If I don’t fuel about 30-40 minutes before a 5K, I normally find my stomach growling at the start of the race or halfway through. Nothing can throw you off your running mojo like hunger in the middle of a run. And with a 5K race, GU and Sports Beans are a bit excessive. It’s 3.1 miles…it’s not a half marathon.
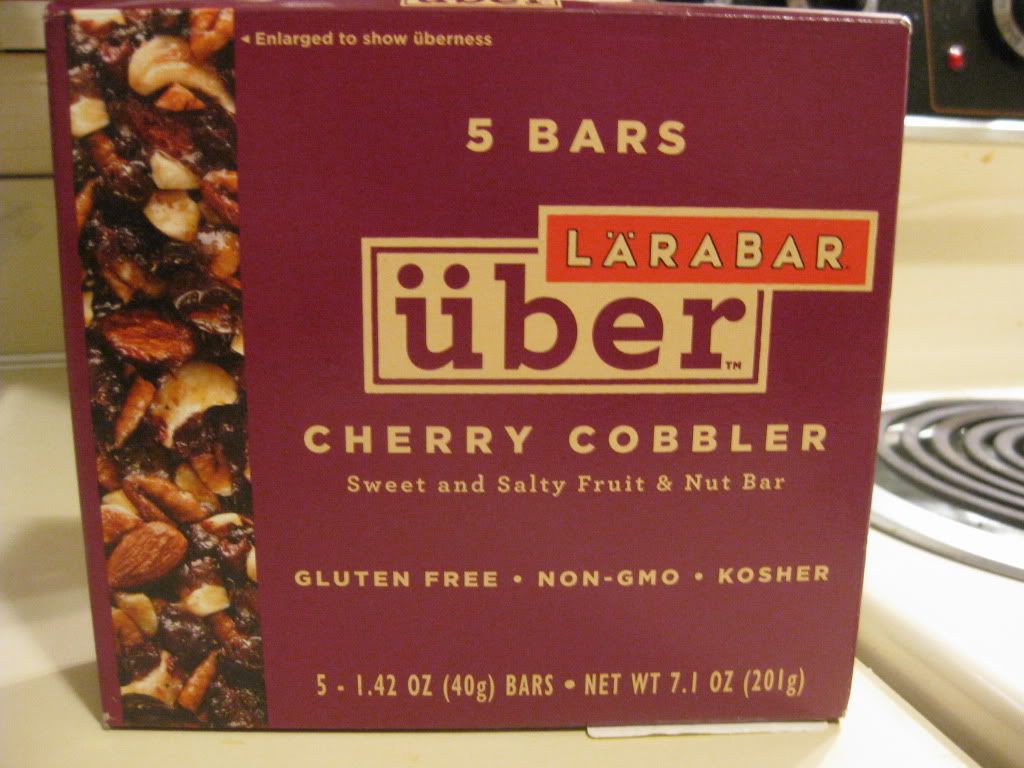
That being said, I tend to come prepared for such things with my snack bars and protein bars. This particular morning, I found myself busting open a box of Lärabar Über that I picked up at the grocery store on Manager’s Special. I mean…the Über line is completely all natural, gluten-free, kosher, non-GMO, have no added preservatives, fillers, colorings, and no added sulfites.
LOVE that.
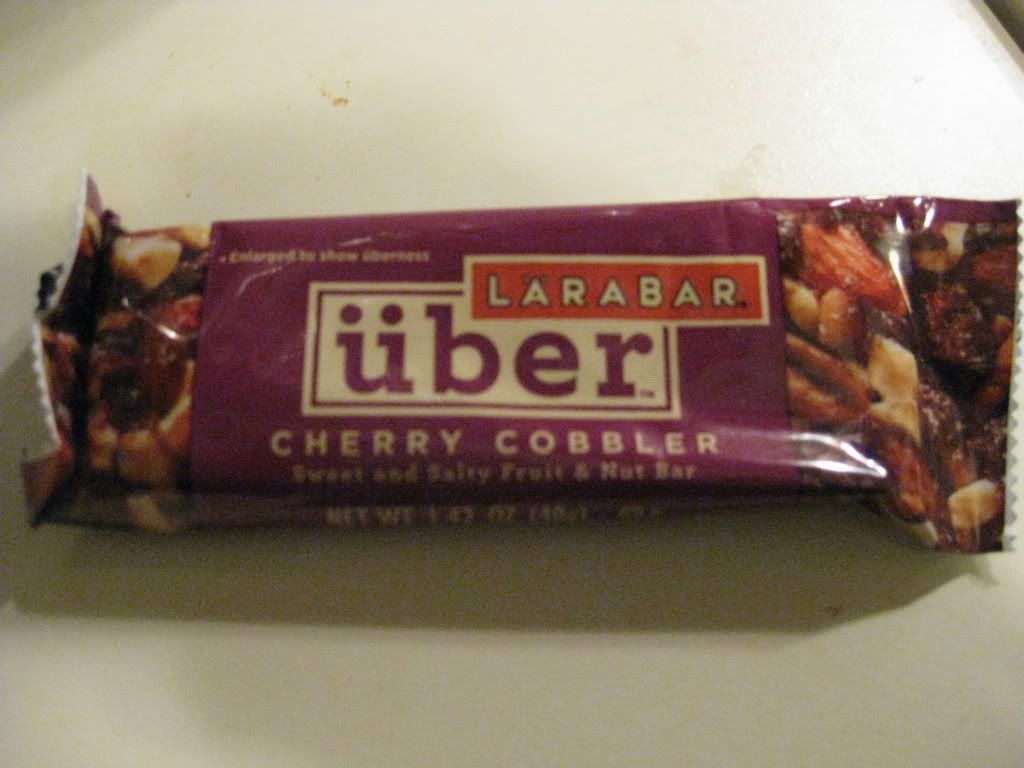
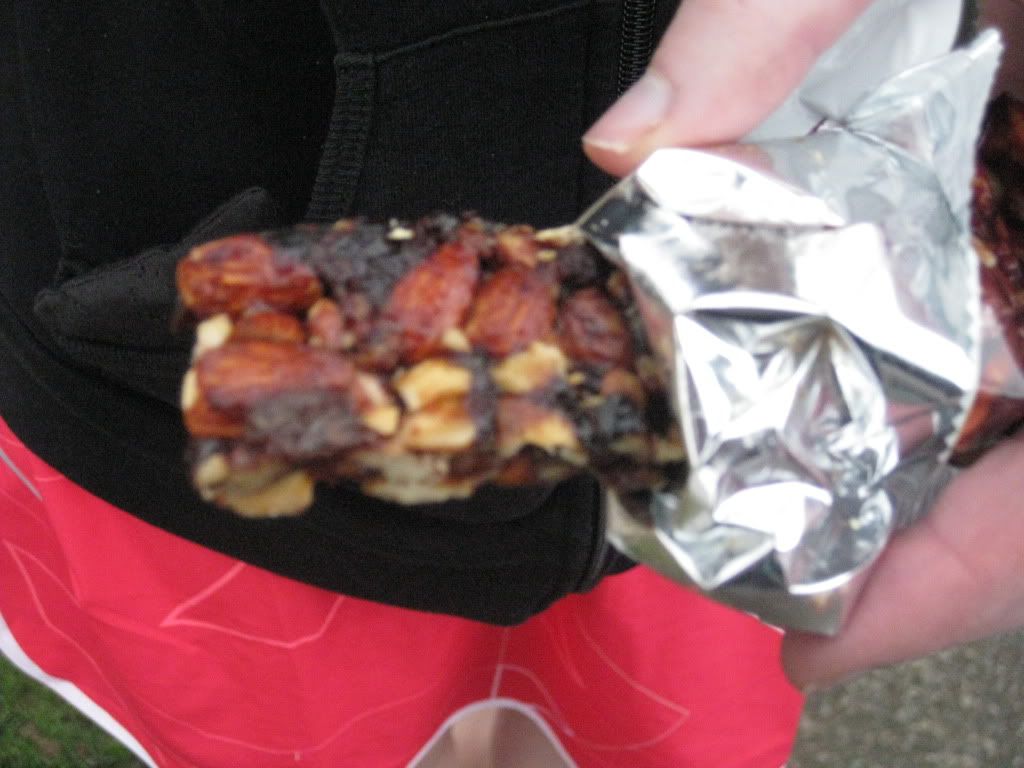
So, about 40 minutes before I was to start off on this 5K jaunt Saturday morning, I broke out my fuel, being my Lärabar Cherry Cobbler Über. My roomie (who was up and there to cheer me on) decided we would split it. So, I broke it in half and she took a bite. Being that she’s not big on cherry anything, the fact that she kept eating it was a good sign.
Lärabar Über Cherry Cobble
My turn.
Oh. Yeah.
This fruit and nut bar is hearty, made with chunks of fruit and nuts, rather than having it all ground together like the standard Lärabars. I love being able to see the full bits of dried cherries, raisins, and dates mixed with the almonds, cashews, and pecans. I love the rich flavor that the brown rice syrup, the salt, and the honey bring to the bar itself. When you take a bite of this bar, you actually get the illusion that you are eating an actual cherry cobbler. That’s exactly what it tasted like. And with the blend of fruit and nuts, nothing is too overpowering. Nothing at all. It is a nice balance of sweet and salty and one that settled perfectly into my stomach before a hard run on hilly roads.
I love how nutritious these bars are as well. Despite tasting like a dessert, the Lärabar Cherry Cobbler Über bar will only set you back 190 calories and 12 grams of fat, most of which is provided in the healthy form from the nuts. This particular variety offers of 14 grams of protein and no cholesterol. Yeah! Despite the addition of salt, the brown rice syrup, the dried fruits and the nuts, there is only 135 mg of sodium in each bar. That’s amazing. And while this does have 12 grams of sugar, I’m relatively certain that mostly comes from the dried fruits that are used and the brown rice syrup and honey that help bind the bar together.
In the end, what you have is a tasty bar that actually satisfies your hunger, keeps you going, and is nutritionally sound. And…it tastes like dessert. What could be better?
It’s the night before a race…so you know what that means, right?
Pizza!
Except…not today. I didn’t have anything in my apartment to work pizza into the equation…so I had to break with my pizza before a race tradition and come up with something I could make with items I did have on hand. Well, today is the day my CSA bin was delivered and one of the items nestled inside was beautiful rainbow chard.
It was from there…and the fact that I keep polenta on hand in my pantry…that I threw together this recipe for a later than usual dinner. It was delicious and relatively easy to make. As I am lactose intolerant, I substituted the ricotta cheese for silken tofu and used Daiya vegan mozzarella cheese.
The rest of the recipe is from Epicurious…but I really enjoyed it with my substitutions. So delicious.
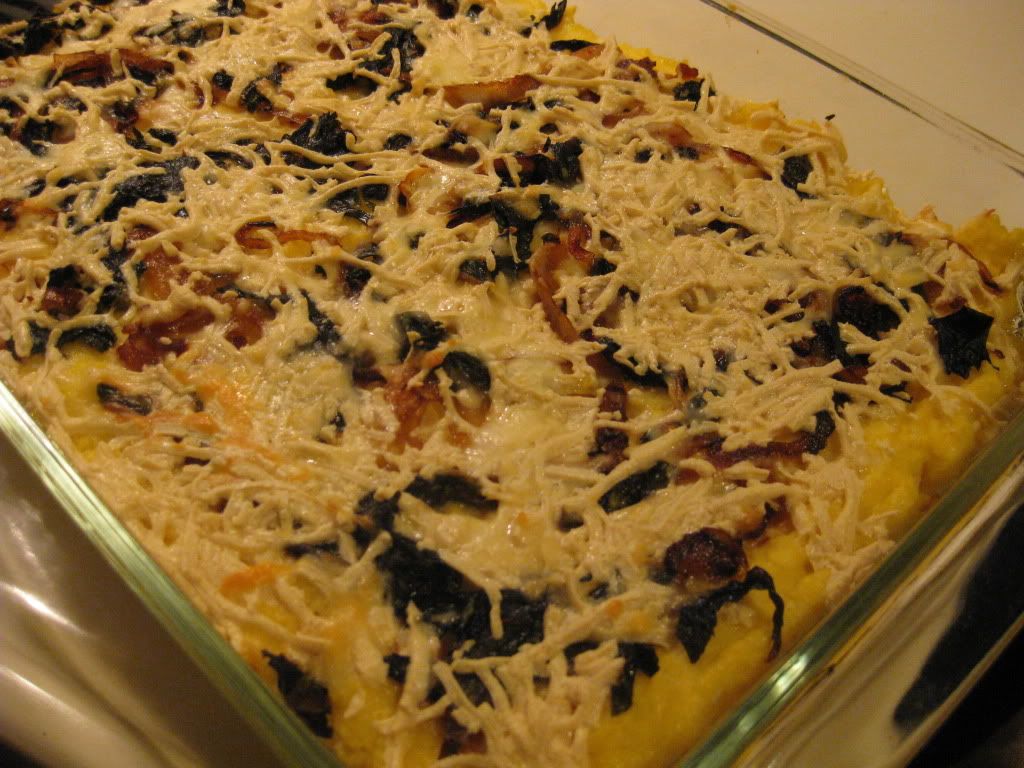
Recipe: Baked Polenta with Rainbow Chard and Cheese
1 pound rainbow chard, thick stems and ribs removed, leaves cut crosswise into 1/2-inch-wide strips
3 1/2 cups water
1 teaspoon salt
1 cup polenta (coarse cornmeal) or yellow cornmeal
1 cup part-skim ricotta cheese (I used Nosoya Silken Tofu)
2 large eggs
2 cups coarsely grated low-fat mozzarella cheese (about 8 ounces) (I used Daiya mozzarella shreds)
Directions:
Preheat oven to 350°F.
Lightly oil 2-quart glass baking dish. Heat oil in heavy large deep skillet over medium heat. Add onion; sauté until tender, about 15 minutes. Stir in garlic and crushed red pepper, then chard; cover and cook until chard is tender, stirring occasionally, about 8 minutes. Uncover; stir until any excess liquid in skillet evaporates. Season with salt and pepper.
Meanwhile, bring 3 1/2 cups water and salt to boil in heavy large saucepan. Gradually stir polenta into boiling water. Reduce heat to medium-low; simmer until polenta is very thick, stirring frequently, about 10 minutes. Remove from heat.
Whisk ricotta and eggs in bowl; whisk in 1 cup hot polenta. Stir ricotta mixture into polenta in saucepan.
Spread half of polenta mixture in baking dish. Spread half of chard mixture over. Sprinkle with half of mozzarella. Repeat layering with remaining polenta, chard, and cheese.
Bake until puffed and brown on top, about 45 minutes.
Cool 30 minutes.
~*~*~
You would never be able to tell that this recipe was made with tofu instead of ricotta cheese, and with vegan cheese over regular. The onions, chard, and garlic mixture is delicious. And the polenta made a delicious, creamy addition once it was cooked up. I loved this and am so happy that I have another 3 days worth of it. YUMMY!
Best part…each serving has 259 calories. That’s it! Amazing. Delicious. And quite satisfying. I served this with a salad made up from fresh produce, also from my CSA bin. This recipe does take some time to cook…but the end result is worth it. I would make this again in a heartbeat.
Now…we’ll see how this does when it comes to my race day performance.
I might be sorry I skipped out on pizza…but this was definitely a huge, tasty, epic dinner win!
Product: 479° Popcorn Fleur de Sel Caramel – $3.99+
Okay…I copped out on a review prior to this one…mostly out of sheer terror of the product and the fact that I threw it away immediately after tasting it. And yes…it was the 479° Popcorn brand. That flavor was Black Truffle & White Cheddar. While the white cheddar was delicious the truffle was overpowering. Perhaps my taste buds aren’t “posh and sophisticated” enough for that flavor combination. But it didn’t taste good at all.
So, the next snack up for the afternoon munchies at work was the other 479° Popcorn I purchased while out grocery shopping one day. This one – Fleur de Sel Caramel.
Salted Caramel. How can it go wrong?
It can’t. That’s the best part.
According to 479° Popcorn, Fleur de Sel is harvested by hand from salt evaporation ponds on the coast of Brittany, France. These natural salt crystals are delicate and flaky, with a subtle hint of oceanic flavor. That being said, 479° Popcorn takes organic popcorn, coats it in a buttery caramel and then tops it off with a sprinkle of Fleur de Sel.
What comes of this combination? The classic sweet and salty combination that salted caramel brings to anything it is added to. And on popcorn, it’s like a sophisticated caramel corn. Honestly. The organic popcorn is light and airy. The buttery caramel that drenches each kernel isn’t too heavy or overpowering. In fact, it’s the right amount. And there at the end…the finishing touch…is the Fleur de Sel.
Magic in every bite. And trust me…you’ll want to keep eating these. One is never enough.
Thankfully, a serving size is 1 cup. And as far as nutrition facts go…this is actually a surprisingly healthy choice.
479° Popcorn’s Fleur de Sel Caramel flavor contains 100 calories per 1 cup serving. Each serving has 4 grams of fat (not bad for caramel corn!), 160 mg sodium, and 13 grams of sugar. That is definitely a bit higher on the sugar content than I would like for an afternoon snack…but it’s caramel corn. It’s going to have more sugar in it than regular corn. Call it a treat, savor each bite, and don’t worry about sugar for a few moments.
I am a huge fan of salted caramel goodies as it is…but this is just an amazing snack. Far better than the Black Truffle and White Cheddar flavor I tried just moments before this. And, wow…am I ever glad I did that. I couldn’t imagine being at work, biting into that popcorn and immediately having to spit it out in my garbage can. Thankfully, my roomie and I tried a piece beforehand…and moved on to the epic deliciousness of the Fleur de Sel variety.
With the elegant and fanciful flavor of the Fleur de Sel Caramel popcorn, you’re treating your taste buds to something special. Trust me…they will thank you for it.
I’m already craving more!
If you love caramel corn or are a huge fan of salted caramel goodies…this Fleur de Sel Caramel popcorn from 479° Popcorn is well worth snacking on. SO GOOD!