It’s the night before a race…so you know what that means, right?
Pizza!
Except…not today. I didn’t have anything in my apartment to work pizza into the equation…so I had to break with my pizza before a race tradition and come up with something I could make with items I did have on hand. Well, today is the day my CSA bin was delivered and one of the items nestled inside was beautiful rainbow chard.
It was from there…and the fact that I keep polenta on hand in my pantry…that I threw together this recipe for a later than usual dinner. It was delicious and relatively easy to make. As I am lactose intolerant, I substituted the ricotta cheese for silken tofu and used Daiya vegan mozzarella cheese.
The rest of the recipe is from Epicurious…but I really enjoyed it with my substitutions. So delicious.
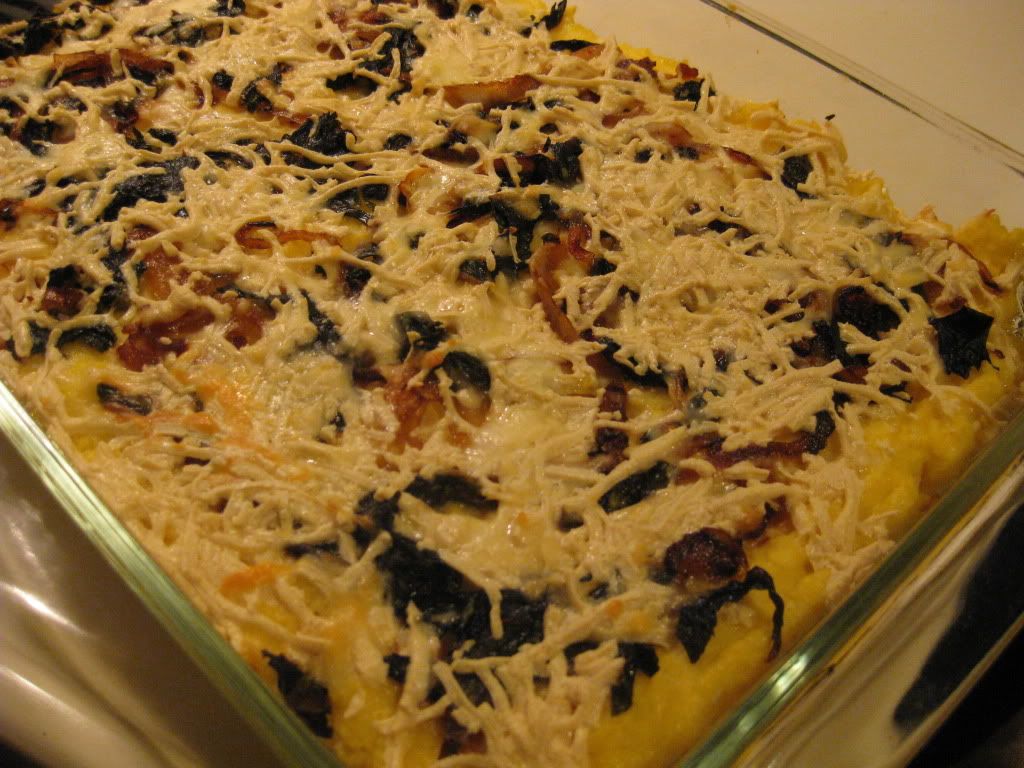
Recipe: Baked Polenta with Rainbow Chard and Cheese
1 pound rainbow chard, thick stems and ribs removed, leaves cut crosswise into 1/2-inch-wide strips
3 1/2 cups water
1 teaspoon salt
1 cup polenta (coarse cornmeal) or yellow cornmeal
1 cup part-skim ricotta cheese (I used Nosoya Silken Tofu)
2 large eggs
2 cups coarsely grated low-fat mozzarella cheese (about 8 ounces) (I used Daiya mozzarella shreds)
Directions:
Preheat oven to 350°F.
Lightly oil 2-quart glass baking dish. Heat oil in heavy large deep skillet over medium heat. Add onion; sauté until tender, about 15 minutes. Stir in garlic and crushed red pepper, then chard; cover and cook until chard is tender, stirring occasionally, about 8 minutes. Uncover; stir until any excess liquid in skillet evaporates. Season with salt and pepper.
Meanwhile, bring 3 1/2 cups water and salt to boil in heavy large saucepan. Gradually stir polenta into boiling water. Reduce heat to medium-low; simmer until polenta is very thick, stirring frequently, about 10 minutes. Remove from heat.
Whisk ricotta and eggs in bowl; whisk in 1 cup hot polenta. Stir ricotta mixture into polenta in saucepan.
Spread half of polenta mixture in baking dish. Spread half of chard mixture over. Sprinkle with half of mozzarella. Repeat layering with remaining polenta, chard, and cheese.
Bake until puffed and brown on top, about 45 minutes.
Cool 30 minutes.
~*~*~
You would never be able to tell that this recipe was made with tofu instead of ricotta cheese, and with vegan cheese over regular. The onions, chard, and garlic mixture is delicious. And the polenta made a delicious, creamy addition once it was cooked up. I loved this and am so happy that I have another 3 days worth of it. YUMMY!
Best part…each serving has 259 calories. That’s it! Amazing. Delicious. And quite satisfying. I served this with a salad made up from fresh produce, also from my CSA bin. This recipe does take some time to cook…but the end result is worth it. I would make this again in a heartbeat.
Now…we’ll see how this does when it comes to my race day performance.
I might be sorry I skipped out on pizza…but this was definitely a huge, tasty, epic dinner win!
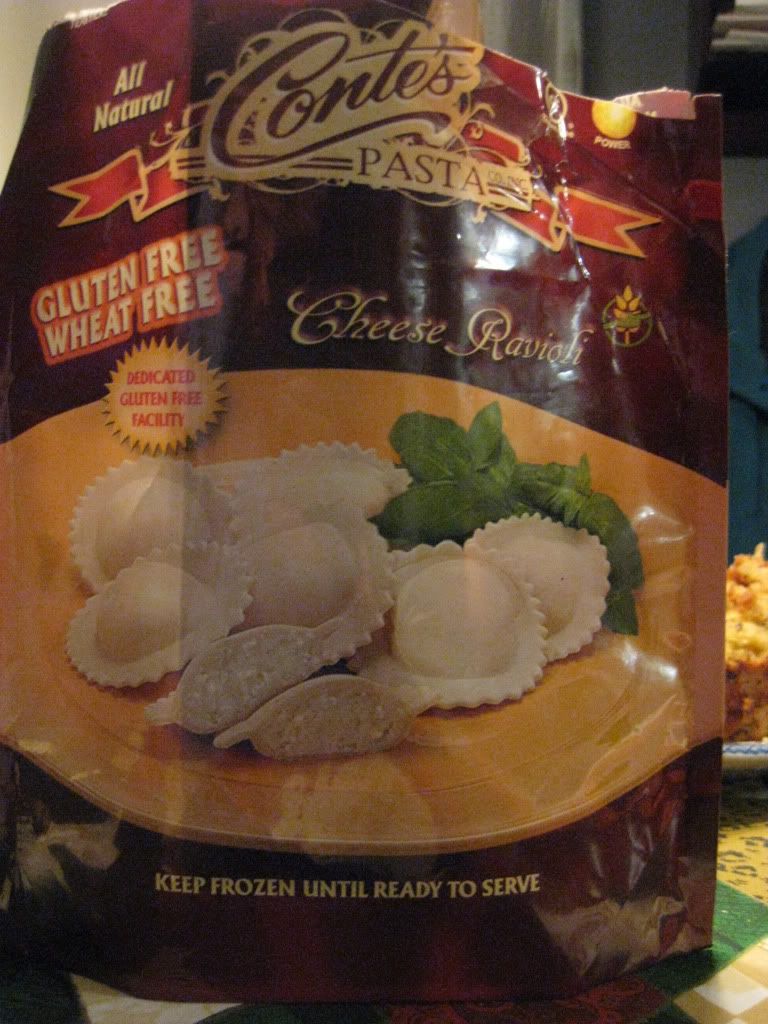
Conte’s Pasta Gluten-Free and Wheat Free Cheese Ravioli
Product: Conte’s Pasta Gluten-Free Cheese Ravioli – $5.99+
I have been leery of the frozen gluten-free pastas that I can find in the freezer section at the grocery store ever since the epic fail of Caesar’s Gluten-Free Gnocchi. Yeah…it was enough to really just turn me off from the whole frozen gluten-free pasta thing.
But…with New Year’s Eve on the horizon and a trip to visit one of my best friends, Jenn, for the occasion, she and I started getting on Pinterest and plotting a menu. And the entree that caught our attention was a Oven Toasted Ravioli dish. It looked absolutely fantastic. Jenn said she had some of Conte’s Gluten-Free and Wheat Free Cheese Ravioli in her freezer (the sign of a good friend is one who stocks up on gluten-free foods even when you aren’t in town…just for those occasions that you are!). She suffered through the Caesar’s Gluten-Free Gnocchi fiasco…so I was willing to go along with her on this one. My job…providing the gluten-free breadcrumbs to be dusted over the ravioli before they were toasted.
New Year’s Eve arrived with a vengeance. After a busy day of seeing The Hobbit, she and I settled in later than expected (it snowed while we were in the movie and the roads were bad) to start up our gluten-free bread for the evening and then make up the gluten-free ravioli dish while it cooled. With the bread out of the oven, we set some water on the stove to boil and pulled the Conte’s Gluten-Free and Wheat Free Cheese Ravioli out of the freezer. Opening the bags…we weren’t impressed immediately.
They looked like pale discs of pasta with a bulging center that would contain the cheese filling. We said our prayers to the gluten-free pasta gods and poured them into the boiling water. Unlike Caesar’s frozen pasta, these actually did sink to the bottom of the pan, making it much easier for us to tell when these were truly done cooking. Once they started floating, Jenn would scoop out a bunch of them into the strainer, shake them carefully over the pan, and bring them to me to put in the egg wash and then coat with the gluten-free bread crumbs.
Looks can be deceiving. These raviolis really held up to the boiling process. They didn’t split or fall apart. Even when I would drop them into the egg on accident, they maintained their form and didn’t ooze filling out. They survived a dunking in breadcrumbs and everything. I was already much more impressed with these than the last gluten-free frozen pasta experience. Conte’s Pasta did a great job making gluten-free ravoili that didn’t fall apart in the pot…or through the breading stages I put the pasta through.
So, with the breadcrumbs on and sticking quite well to the pasta, we gave the ravioli a spray of cooking spray and put them into the oven to toast up. It took 12 – 15 minutes according to the recipe…and when they emerged, they were golden, and still holding their shape. We carefully scooped them off the pans and into a serving bowl so we could all help ourselves to as many as we would want. They held up. And when we settled in to eat…the three of us (my roomie Cathy was there too!) dug in.
The biggest thing about these ravioli is that they do need a sauce. Jenn had originally set out to eat the meal without the sauce, but ended up with some on her plate in the end. That being said, the texture was great. They held up fantastically to boiling and toasting in the oven. And the taste of the filling was super good. I wasn’t disappointed at all with these ravioli. Conte’s Pasta has definitely restored my faith in the gluten-free frozen pasta. In fact, when it comes to choosing a brand now, I think I’ll stick with Conte’s. They definitely won me back over to the frozen side when something like a gluten-free ravioli is needed.
Use a proper sauce when you eat these. Whether you bread them or eat them straight from the pan…you’ll love the texture and taste. And the cheese is ooey, gooey, and good as well. They have quite a few variations of gluten-free pastas to choose from. But these ravioli’s did the trick for me.
Find them in your grocery store freezer section and give them a try. And if you are looking for an easy and tasty recipe, check out my blog on the Gluten-Free Oven Toasted Ravioli that Jenn and I prepared on New Year’s Eve. It’s a fun, different, and delicious way to enjoy gluten-free pasta.
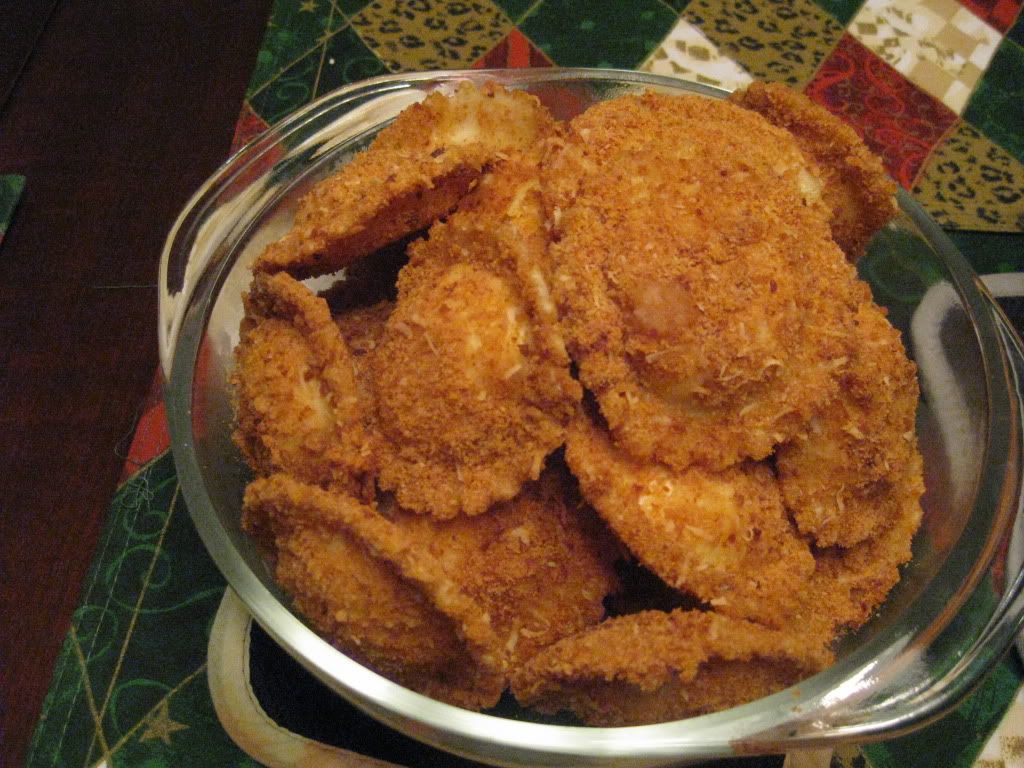
Conte’s Pasta Gluten-Free and Wheat Free Cheese Ravioli (cooked and coated with Katz Gluten-Free Bread Crumbs and toasted in the oven)
New Year’s Eve was all planned out between my friend Jenn and I. We were ready to whip up a feast that night…complete with an entree that she spotted on Pinterest. And between the two of us and our love of trying Pinterest recipes…we set out to make these. I just happened to have some Gluten-Free Breadcrumbs from Katz Gluten Free at my apartment and they would be perfect for this recipe. So…I saved them for this exact reason and they didn’t let us down.
The best part about this recipe is how simple it was to make. Totally going to do this again. Nothing fancy…it just looks like it.
The best part…once again we simply modified the ingredients to fit my dietary needs…so while this recipe is gluten-free…it doesn’t have to be made that way. I am just thankful to have friends who eat foods that I can eat when I’m around. Some people aren’t willing to give gluten-free a chance…but my friends Cathy and Jenn have always given it a fair shake. And for that…I am thankful.
12 round frozen ravioli, thawed (I used Conte’s Gluten-Free Cheese Ravioli)
1 egg
1 tablespoon milk
6 tablespoons Italian bread crumbs (I used Katz Gluten-Free Breadcrumbs)
2 tablespoons grated Parmesan cheese
cooking spray
Directions:
Preheat oven to 375 degrees.
Whisk together egg and milk in shallow bowl. In another bowl or pie plate, combine bread crumbs and Parmesan cheese. Dip ravioli in egg and then in bread crumbs. Place on baking sheet. Repeat until all ravioli are coated. Spray ravioli with cooking spray.
Bake for 12-15 minutes or until golden brown. Serve with warm marinara or pesto.
~*~*~
See…it’s one of the simplest recipes out there…but the end results are a delicious ravioli with a crisp outer layer and soft, warm, gooey inner layer. Use whatever ravoili you like. This was the first time I used Conte’s Gluten-Free Cheese Ravioli…and they were awesome. They held up to cooking and baking and…damn…were they ever delicious.
Impressed!! Very impressed.
So…if you want a simple meal that is easy to make and big of flavor…give this one a go! You’ll love it. I guarantee.
What did I do without you in my life? Ever since I started getting the hang of searching and pinning and all that goodness…I can’t tear myself away from you. And, my dearest Pinterest, it is because of you that my dearest friend, Jenn, and I were able to whip up some fantastic food this New Year’s Eve.
Even better? All of it was gluten-free…because Jenn rocks and working with my food allergies. She honestly does.
So, when New Year’s Eve hit…we had just come from seeing The Hobbit and we were HUNGRY! The thing was…we had some cooking to do before the sitting down and eating was possible. Good thing we did a wee bit of prep work ahead of leaving for the day.
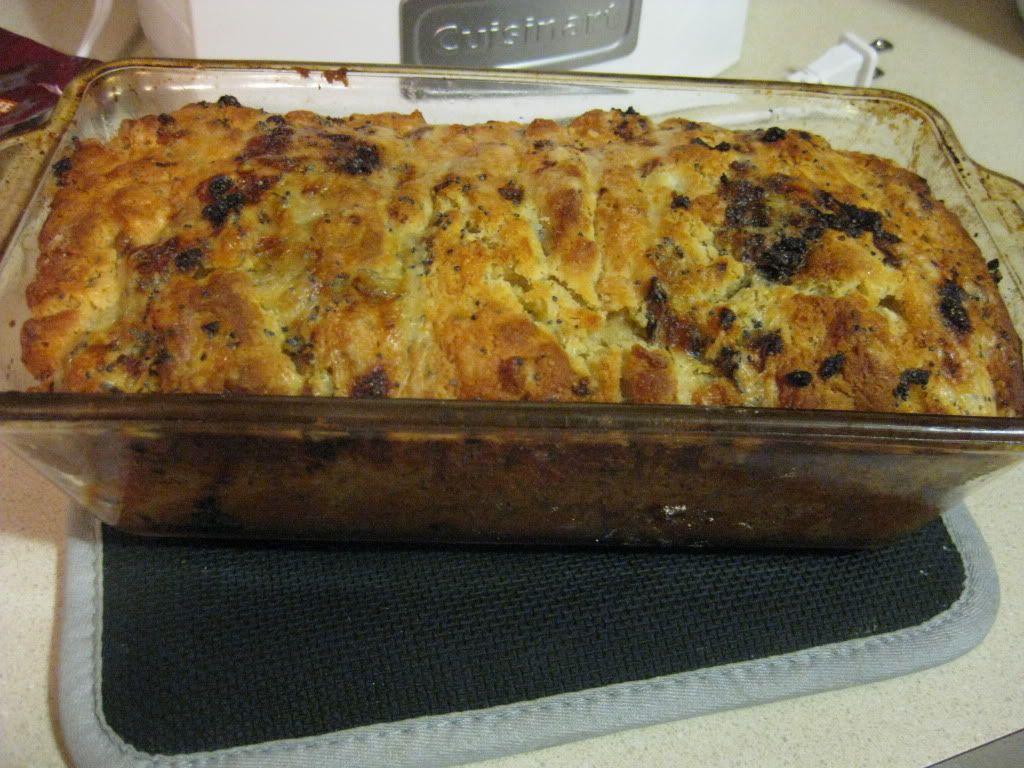
And so…the first thing we cooked up to enjoy with our New Year’s Eve feast was this fantastic Cheesy Onion Pull-Apart Bread. We had our doubts as to how it would turn out (if it even did) and questions on how exactly to make it…but we managed. The original recipe was one I found from Food & Wine Magazine and we modified it by changing the cheese used, the amount of onion, and making it gluten-free. We’re chefs…we tinker.
1 cup coarsely shredded Dill Havarti cheese (3 ounces)
2 cups all-purpose flour, plus more for dusting (I used Bob’s Red Mill Gluten-Free All-Purpose Flour)
2 teaspoons baking powder
1/2 teaspoon baking soda
1 teaspoon salt
1 cup buttermilk
Directions:
Preheat the oven to 425° F.
Butter a 9-by-4-1/2-inch metal loaf pan.
In a large skillet, melt the 1/2 stick of uncubed butter; pour 2 tablespoons of the melted butter into a small bowl and reserve.
Add the chopped onion to the skillet and cook over moderate heat, stirring occasionally, until it is softened, about 8 minutes. Stir in the poppy seeds and season with salt and pepper. Scrape the onion mixture onto a plate and refrigerate for 5 minutes, until cooled slightly. Stir in the Dill Havarti cheese.
Meanwhile, in a food processor, pulse the flour with the baking powder, baking soda and salt. Add the cubed butter and pulse until it is the size of small peas. Add the buttermilk and pulse 5 or 6 times, just until a soft dough forms.
Turn the dough out onto a well-floured work surface and knead 2 or 3 times. Pat or roll the dough into a 2-by-24-inch rectangle. Spread the onion mixture on top. Cut the dough crosswise into 10 pieces. Stack 9 pieces onion side up, then top with the final piece, onion-side down. Carefully lay the stack in the prepared loaf pan and brush with the reserved butter.
Bake the loaf in the center of the oven for about 30 minutes, until it is golden and risen. Let the bread cool for at least 15 minutes before unmolding and serving.
The unmolded loaf can be stored at room temperature for up to 2 days. Rewarm before serving.
~*~*~
This was probably the most nerve-wracking item we made on New Year’s Eve. The directions were a little confusing upon reading and we weren’t exactly sure how well the gluten-free flour would do with the recipe. The result though…was epic. This bread was SO amazing and delicious. The modifications we made (the original called for Gruyère cheese and an entire onion) really worked in our favor. The loaf was packed with flavor, delicious cheese, and lots of yum factor!
The only thing we noted was that it really wasn’t pull-apart. But, slicing it with the knife worked just as well and definitely didn’t take away from the recipe in the slightest.
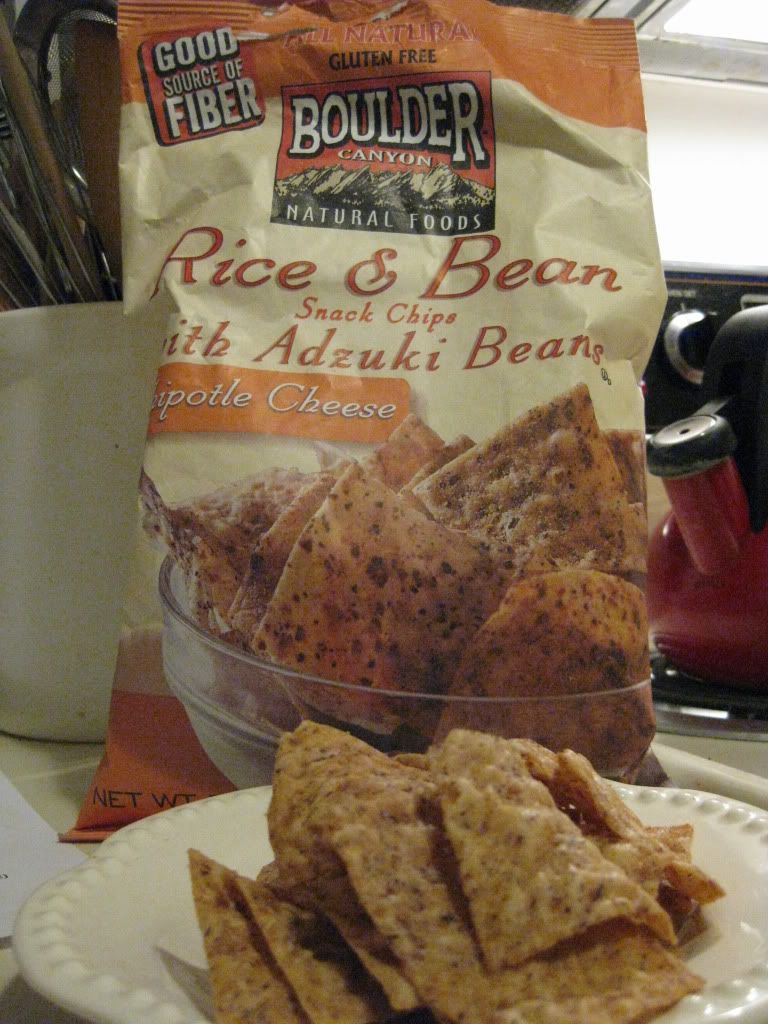
I started off with the original. Just a touch of sea salt and I had in my possession a snack chip made from rice flour and adzuki beans. Yes…you read that right…adzuki beans. And what did I make of these? That they were phenomenal. Like…better tasting Doritos. And much healthier option at that than what preservatives and unnatural ingredients go into Doritos.
So, this time I was quite excited to dive into the bag of Boulder Canyon’s Rice and Adzuki Bean Chipotle Cheese flavored chips. I mean…a little extra spice is always. Combine it with the addition of cheese…and yeah…it’s winning.
That being said, after I scooped up a serving of these chips to haul to the office with me, I couldn’t wait to dive into them and really test them out. I mean, the original flavor had been mind-blowing delicious…so these had to be yummy-amazing right?
ABSOLUTELY!
That afternoon, when my 3:00 snack time rolled around, I pulled out my container which had a 1 ounce serving (or around 20 chips), and took up my first chip. One bite…and I was even happier with these than I was the original. Oddly enough, the fact that these tasted more like Cool Ranch Doritos (despite having cheese in them) was amazing. Cool Ranch was always my favorite. I was hooked. Love at first bite.
The texture and flavor with each of these was fantastic. And one serving only set me back 140 calories and 7 grams of fat. Not too shabby for a snack trip. In addition, with the inclusion of adzuki beans in the ingredients, these chips give 2 grams of protein and 3 grams of fiber. I loved these and was quite sad when I got down to the bottom of my serving and had no more to nosh on.
Would I buy these again? In a heartbeat. Without a moment of hesitation. YUM YUM YUMMY!
Looking for a healthier option for a snack chip, I would definitely direct you to find Boulder Canyon’s Rice and Adzuki Bean Chipotle Cheese snack chips. I promise…these are not just a healthier snack chip option…but delicious too.
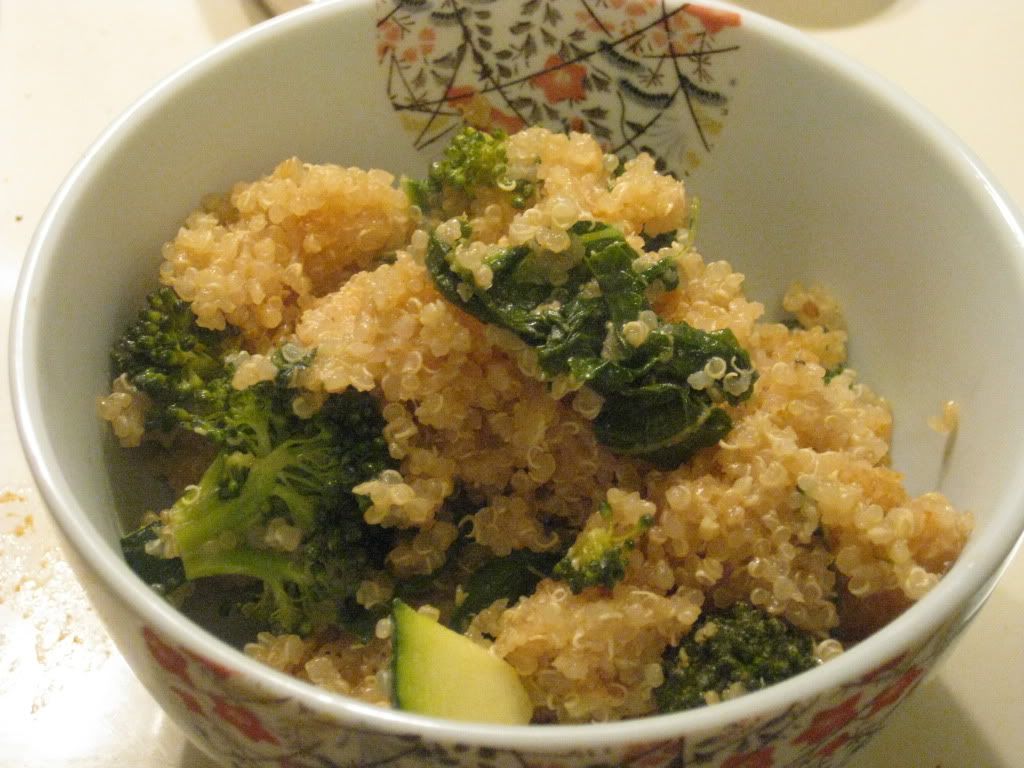
I’m getting ready to leave town for a little while to head home to see my family for the holidays. And I still have a large amount of produce from my CSA bin that is just dying for me to use it. So, I was trying to decide what I could make that would utilize some of the contents in my crisper drawer, which would allow for me to clear out some of the produce and make room for the new stuff I’m getting on Friday…which my roommate will have to take care of as I won’t be in town.
So, after a little bit of searching I ran across a recipe on a blog called Purely Twins, and I sort of based my own recipe off of the basis they laid down for theirs. I did a completely different sauce and chose very different vegetables…but the quinoa…that stayed the same.
I wasn’t too sure how this was going to turn out…but the end result was actually mighty tasty…and extremely healthy.
Recipe: Baked Quinoa Casserole with a Spicy Cheese Sauce
1-1/2 tablespoons butter (I used I Can’t Believe It’s Not Butter)
2 tablespoons flour (I used Hodgson Mill Gluten-Free Multi-Purpose Flour)
1 cup almond milk
1/4 cup freshly shredded Parmesan cheese
1/4 cup freshly shredded Mozzarella cheese
1 teaspoon hot sauce
1/4 teaspoon salt
1/4 teaspoon pepper
pinch paprika
Directions:
Preheat the oven to 350 degrees.
Cook the quinoa by bringing 4 cups of water to a boil. Add in 2 cups of dry quinoa and bring back to a boil. Reduce heat and cover, allowing to simmer for about 15 minutes or until the water is gone.
While the quinoa is cooking, make the sauce.
Melt the butter in a medium skillet over medium-high heat. Sprinkle the flour into melted butter, whisking constantly. Cook, whisking constantly, 30 seconds to 1 minute or until mixture is golden and lumpy.
Gradually whisk in the almond milk and bring to a boil. Cook, whisking constantly, 1 to 2 minutes, or until thickened.
Add the cheese, hot sauce, salt, pepper, and paprika, whisking until smooth. Remove from heat.
Once the quinoa is ready and the sauce is made, grab a large bowl and pour your cooked quinoa into the bowl. Add the cheese sauce. Then put the freshly chopped vegetables into the bowl. Mix well so that the vegetables and quinoa are evenly dispersed.
Pour the mixture into a 9×13 glass pan and place in the oven. Bake for 30 minutes or until the quinoa casserole is golden brown.
Serve and enjoy.
~*~*~
What can I say about this? For being something that I just took a concept from a blog…and then mixed up a sauce and threw it all together…the end result was really delicious and super healthy. Quinoa is packed with protein and combining it with fresh vegetables was a great way to boost the nutrition value of this meal. I was a big fan. And the spicy cheese sauce wasn’t overly spicy. It just gave enough of a little kick that you knew it was there.
Twas the night before the Santa Hustle Half Marathon and all through the city, this runner’s stomach was rumbling…and that meant one thing…gluten-free pizza.
It’s a race tradition for me these days. I tend to run better in races the day after I eat a gluten-free pizza dinner. Hey…I’m an athlete with superstitions now. And for me…the night before races means I have to eat gluten-free pizza (or gluten-free pizza related). The one time I didn’t eat something pizza related, I felt like death at the end of the race (granted, that might have been the 90% humidity that I ran in, but still…)
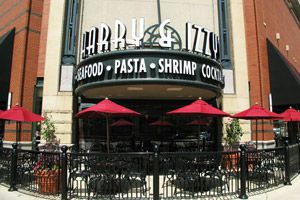
So, with that in mind, my roommate went on the hunt for places in downtown Indianapolis that offered gluten-free pizza that wouldn’t be too difficult to get to from our hotel. Just up the way was Harry & Izzy’s, who actually have a gluten-free menu…with, yes, gluten-free pizza on the menu.
Harry & Izzy’s is an independent, upscale American Grill with two locations: downtown and at the Indianapolis International Airport. It is actually the sister restaurant to the famous St. Elmo Steak House, which means they share a few classic dishes. Some of which are even on the gluten-free menu.
However…the added difficulty with me is that I’m also a vegetarian. So, with the exception of one of the salads, I was pretty much limited to the pizza anyway. But…I’m okay with that. The pizza was the entire reason I was there to begin with.
Dinner tonight was being shared with Cathy (the roomie) and our friend Greg. Once we were finally seated (they were changing over the tables from lunch to dinner, so it took our hostess three tries to get us to a table that was ready for us), we were handed menus and asked if we were going to want something other than ice water to drink. As I am running tomorrow, I stayed with the water. So did Cathy. We also went ahead and gave our waitress the heads up that I am medically gluten-free. She said she would go grab a gluten-free menu for me and that when she takes my order, the manager would come up and talk to me and ask if I had any questions with the menu. I actually loved that.
Greg arrived soon after and we settled into conversation as we had much to catch up on. Our waitress returned with the manager, Amy, who directed her focus right on me to talk to me about their gluten-free options. She asked if I had any specific questions regarding the menu. At that point, I didn’t. So she said our waitress would now take our order and if I had any concerns, to just ask for her. What a great perk. It really put my mind to ease about how the food was prepared on the gluten-free menu when the manager makes a point to come out and talk to me about it. Yeah, I felt confident. I was ready for some pizza.
So…we placed our orders. Greg went with the Steakburger, a burger served with cheese (he had them leave that off), lettuce, tomato, onion, and a spicy mayo ($12.00). He chose the coleslaw as his side item.
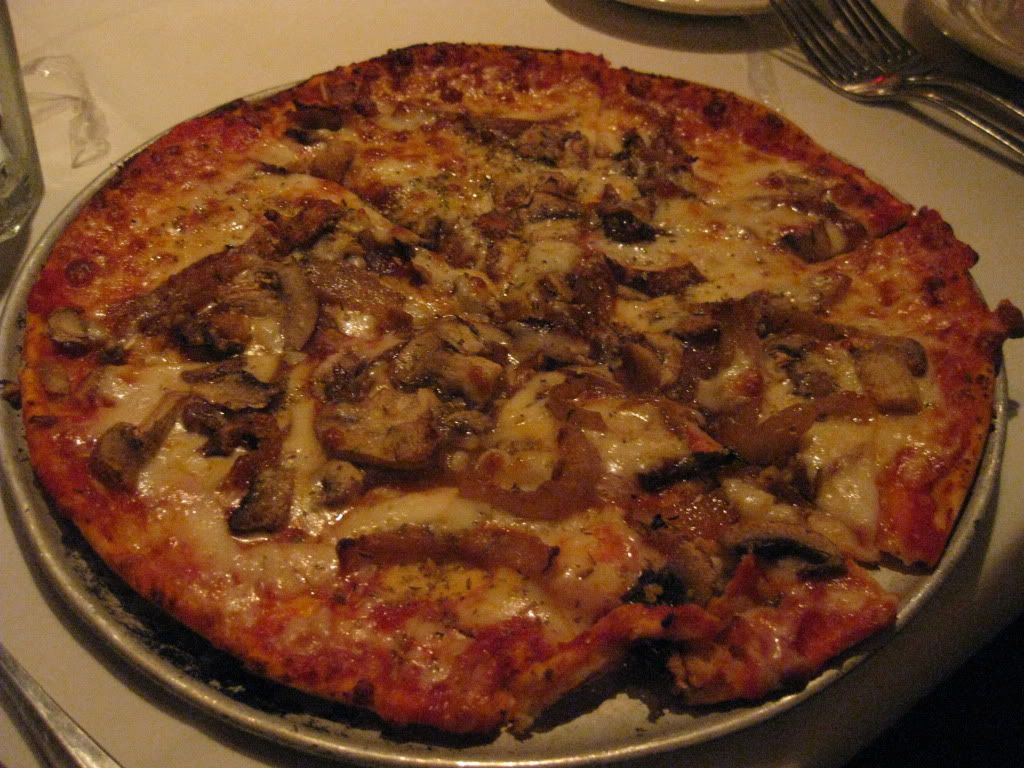
Harry & Izzy’s Gluten-Free Thin Crust Pizza (topped with cheese, caramelized onion, and mushrooms)
Cathy and I decided that we would split the 10-inch gluten-free thin crust pizza on the menu. For our toppings, we chose cheese, mushrooms, and caramelized onions ($12.00). The plain cheese pizza normally runs $10, but each additional topping is $1 each. That is an awesome price for a gluten-free pizza, let me tell you!
Our waitress went to go put in order and for the time being, we got caught up on eveything that has been keeping our lives so busy as of late. It had been awhile since we last got together with Greg and we had much to talk about. As our food was nearing time to come out, I noticed our waitress grab a couple of plates for my roommate and I. She specifically wiped them off and placed them in front of us. I appreciated that too, as it means they are very aware of the dangers of cross-contamination and were taking no chances.
A few minutes later, our waitress was climbing the stairs with a tray laden with our food. The burger was set down in front of Greg and Cathy and I were given the pizza. Our waitress aid that the Parmesan cheese might have something in it to keep it fresher longer that might be gluten-free, but I prefer red pepper flakes on my pizza anyway…so my roommate got the fresh Parmesan and I took the red pepper flakes. I appreciated my waitress mentioning the possibility that the cheese wasn’t safe. That is often the case when it comes to Parmesan at restaurants anyway…so I normally just skip it regardless. I prefer a little added spice to my pizza regardless and always opt for the red pepper in the end.
The pizza was sliced so that Cathy and I would each get three slices. And let me tell you…this pizza was really delicious. It is brick oven baked, and that is evident from the crispness of the outer crust of the pizza. I did find the inner crust to be softer than I would normally like…but when you can’t bake a pizza on a pizza stone, that crispiness is sometimes very hard to achieve. That being said…I was impressed. With the first bite, the complete flavors of the sauce, the cheese, the mushrooms, and the perfectly caramelized onions all came together on my palate and it was just…yummy. Super, duper, delicious yummy! I don’t think the crust is actually made by Harry & Izzy’s…but the fact is they cook it up fantastically. And my roommate and I devoured each bite. Each slice was completely downed and enjoyed thoroughly.
And, yes, even after that…we left a little room for dessert. The waitress asked if I was feeling the Créme Brûlée…but it was the Sorbet that caught my attention. I love ice cream and frozen goodies…so the sorbet sounded like the perfect palate cleanser and way to end the meal. I was given a choice: lemon or raspberry. I decided on the Lemon Sorbet ($3.50). Cathy and Greg decided they would split the Signature Brownie ($8.00) from the homemade dessert menu. I couldn’t enjoy that chocolate goodness due to the brownie, but the dessert consisted of a homemade brownie topped with vanilla ice cream, hot fudge, caramel sauce and candied pecans.
Harry & Izzy’s Signature Brownie (NOT GLUTEN-FREE)
Our desserts arrived. I had two amazing scoops of delightful, light, pleasing lemon sorbet. I loved how it wasn’t too sweet or sour. It was the perfect level of each for lemon sorbet. My problem with sorbets normally is that they can be too sweet. So after a few bites, I’m done and craving something to counterbalance the sweetness. This wasn’t the case with this sorbet. It was balanced and refreshing. And it was just what I needed at the end of my meal.
The Signature Brownie was this tower of dessert awesomeness. It was definitely meant to split. Cathy and Greg managed, between them, to devour it completely. But it was a near thing. Cathy raved about the brownie base, saying that you could tell that it was freshly made. It died a very messy death between the two of them. And it looked so good. Now there is something I totally miss since going gluten-free…the amazing dessert sundaes I used to be able to help eat.
To say that I was impressed with the service and the food at Harry & Izzy’s is an understatement. I felt confident that the food I was receiving was safe to eat. They took very, very good care of me and were very careful with the food that I ordered. I have already said that whenever we are in Indianapolis, this had to be our go-to spot for food. There was plenty on the menu that caught Cathy’s eye…so she seems more than happy to go along with that.
Being a Celiac means that the food has to be safely prepared and served. Not every restaurant knows how to do that properly. But with Harry & Izzy’s…I had no concerns about the food I was served and appreciated all the attention given to me and others who have food allergies. I appreciated that the manager personally came out to talk to me and answer any questions I might have about food preparation and the menu in general.
When I feel that safe at a restaurant, of course I’ll want to go back. I’m looking forward to my return sometime in the near future.
Thank you, Harry & Izzy’s for the delicious, safe meal. I can’t rave about you enough. The precautions you take set my mind at ease and made me feel content in my decision to eat there. It means so much to me that you take that sort of care and consideration for those with food allergies.
Who says being a gluten-free vegetarian is boring? When you can cook up something as amazing as a cheesesteak sandwich, without even touching any meat…now that’s awesome. And it is possible. And thanks to my stock of gluten-free breads in my freezer, I happened to have gluten-free sub buns at my disposal. And, thanks to my CSA bin, I had all the vegetables already in my home.
Thanks to the wonder that is Pinterest, I stumbled across this recipe and knew, immediately, that I had to make it. As previously stated, I had every ingredient necessary to make it happen. But…I had a few days of using things up and a holiday dinner that had to come first. Thus…this recipe didn’t get made until last night. But, wow…was I ever happy I went ahead, trusted Pinterest, and made it.
The recipe comes from a vegetarian food blog called Oh My Veggies. The original recipe is for four sandwiches, but I had only 2 sub buns and it was just my roommate and I eating…so why make the extra? I just cut it in half. But this is the amazing recipe for you to try as well. Trust me, the meaty portabello mushrooms will make you not even miss the lack of meat in this sandwich.
8 slices provolone or mozzarella cheese (I used Veggie Slices Provolone Flavored vegan cheese)
4 sub rolls, sliced lengthwise (don’t completely cut the top from the bottom, though!) (I used Tina’s Sweet Treats Gluten-Free Sub Buns)
Directions:
Heat 1 tablespoon of olive oil in a large skillet over medium-high heat.
Add mushrooms and cook 3-4 minutes, or until softened and browned. Add wine and increase heat to high. Cook until liquid has evaporated, about 2-3 minutes. Transfer to bowl.
Preheat oven to 250 degrees F.
Carefully wipe skillet clean. Heat remaining tablespoon of olive oil over medium-high heat. Add green pepper and onions; cook until softened, about 5-8 minutes.
Reduce heat to low. Return mushrooms to skillet and stir to combine. Top vegetable mixture with cheese slices. Once cheese has melted, remove from heat.
Divide veggie mixture into sub rolls. Wrap each cheesesteak tightly with foil and place on a baking sheet. Bake for 15 minutes. Remove from oven and unwrap carefully.
ENJOY!
~*~*~
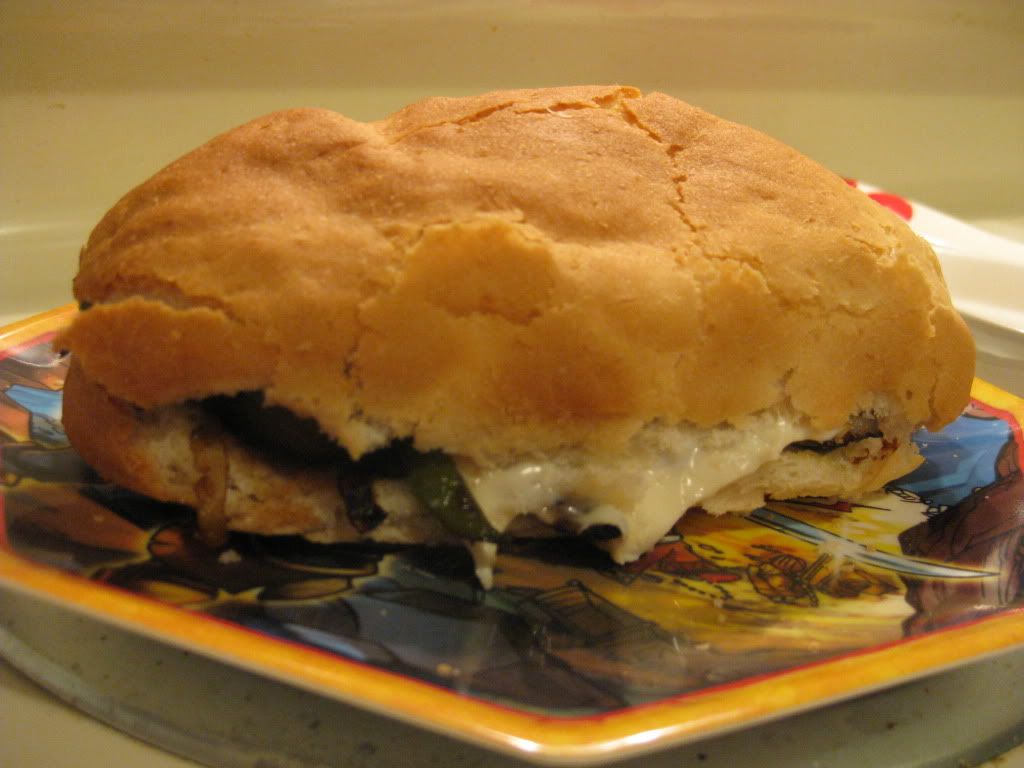
Loved these! Absolutely LOVED these from first bite to last. My roommate thought some sort of sauce on them might be good next time. I could see what I could come up with. I loved the way the portabello mushroom cap perfectly mimicked the meat that would normally go inside this sandwich. It was seasoned perfectly, the vegetables were tender and flavorful, and the cheese just sort of topped it all off. All of it melted to perfection inside the gluten-free bun that I used.
I would totally make this again in a heartbeat. Beyond impressed with how delicious and amazing this meal was. If you love a good, hearty sandwich…I totally recommend making these. Totally delicious.
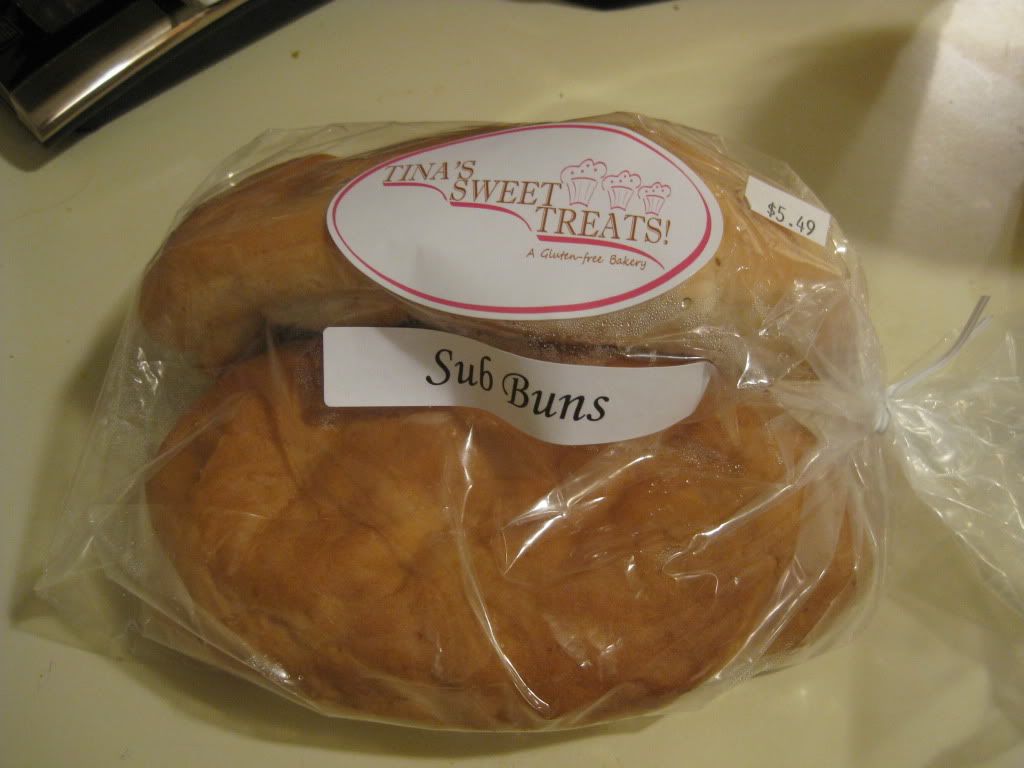
Product: Tina’s Sweet Treats Gluten-Free Sub Buns (2 buns per package) – $5.49
I love Ohio for numerous reasons. One of my best friend’s lives there. Countless other friends live scattered throughout the state. And near the Dayton, Ohio area, I stumbled across a great little grocery store called Dorothy Lane Market. What I found inside made me eager to go back. And though I have yet to do so, the bounty of gluten-free products I purchased the one time I stopped in lives on, thanks to my freezer.
Well, I was surfing Pinterest the other day (shock!) and I ran across a recipe for Portobello Mushroom Cheesesteak Sandwiches. They needed sub sandwich rolls. And…I just happened to have a pair of gluten-free sub sandwich rolls in my freezer thanks to my random stop in at Dorothy Lane Market. If you have never been to Dorothy Lane Market, by the way, and you happen to be going through Ohio…stop. Go. Shop. They have an incredible selection of gluten-free items…including baked goods from local bakeries…and a knowledgeable staff in the gluten-free aisle. I was beyond impressed and ended up stocking up on quite a few things I knew I couldn’t get anywhere else.
And…one such item was Sub Buns from Tina’s Sweet Treats, a gluten-free bakery in Franklin, Ohio. Dorothy Lane Market provides customers with a variety of different items from local businesses that are dedicated gluten-free. I was intrigued. And these really caught my eye. Normally when I make sub sandwiches I use the Schär Sub Sandwich Rolls that are parbaked and just need a toasting in the oven. And I love those. But here was a chance to try something “fresh” and homemade. Not in a facility…but from a bakery. I was truly excited about this.
Well, after the initial purchase, all the fresh baked items found a spot in my freezer. I really had no reason to use them…until a recipe showed up on my Pinterest feed. Knowing that I had every ingredient (including the sub rolls) in my pantry or fridge (thank you CSA bin), I knew these buns were coming out and this recipe was going to get made.
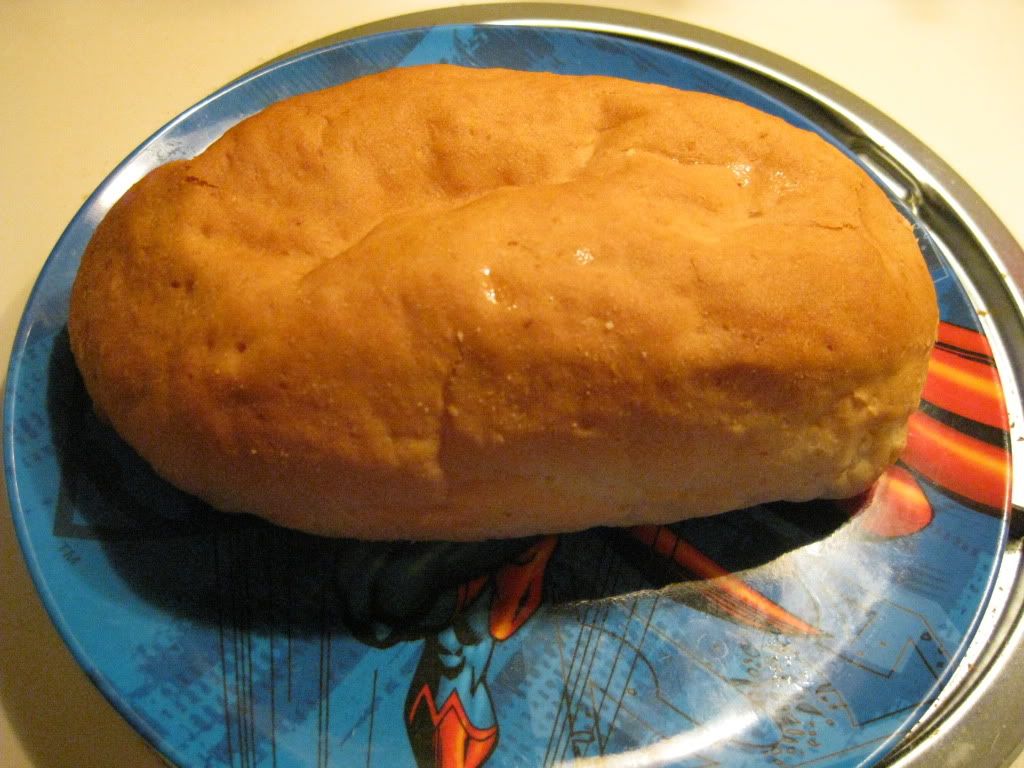
Tina’s Sweet Treats Gluten-Free Sub Bun
When I purchased these rolls, I failed to realize just how massive they were. You are definitely getting your money’s worth, that’s for sure. These rolls are about 2 Schär sub sandwich rolls put together. I sliced each ginormous bun in half, loving how the bread would flake away. Ah, I do love homemade, fresh items. I noticed there was some spring in the texture, which meant it wouldn’t be dry. I approved. So, after cutting both of the dino-sized buns in half, I finished sauteing up my mushrooms, onions, and green peppers, topped them off with vegan provolone cheese, and allowed it to melt. Then, onto the sub sandwich buns the filling went. I wrapped each sandwich in tin foil and placed them on a baking sheet in a warm oven for about 15 minutes.
At the end of the warming period, I removed the sub sandwiches, now toasted all the way through, and unwrapped them. Plating was easy. The bread didn’t fall apart. Nor did it get mushy from any residual juices from the sliced portobello mushroom cap that I sauteed. I was impressed! Really. But the real test was coming up. I needed to find out how these tasted. My roommate was already digging into hers when I settled in, and I asked what she thought. She said they were definitely heavier than the Schär Sub Sandwich Rolls, but that it was good.
So, it was my turn now. One bite. And I was immediately reminded of the sort of flaky gluten-free hamburger bun I get at Cheeseburger in Paradise. That’s exactly what the flavor and texture reminded me of. You could tell it was made in a bakery though. The flavors that each bite imparted was enough to prove that. According to Tina’s Sweet Treats’ Web site, the ingredients that go into these sub buns are rice flour, tapioca flour, egg whites, butter, yeast, xanthan gum, apple cider vinegar, and salt. That’s it. And what emerges, whether toasted in the oven or heated in the microwave is a soft, delicious bun that is flaky and soft and perfect to stuff full of whatever ingredients you crave.
I was very impressed by Tina’s Sweet Treats. My roommate actually prefers the Schär rolls over the bakery’s version of a sub roll. But I could go for either. These buns were very filling, but very good and worked well with the sandwich I created. I would totally try other products from Tina’s Sweet Treats, and hope to next time I stop into a Dorothy Lane Market in Ohio. I was quite happy with the taste, texture, and the way the subs held up to the fillings, and the baking in the oven.
Do your sub sandwiches with something fresh and something tasty. Check out Tina’s Sweet Treats. And if you can’t get to Ohio…they do ship.
Portobello Mushroom Cheesesteak Sandwich made using Tina’s Sweet Treats Gluten-Free Sub Buns
It’s the night before a race. You know what that means?
PIZZA NIGHT!
Granted, this is a very, very, very short race in the morning, but…why mess with tradition, right?
In addition to it being pizza night, I just happened to have some gluten-free pizza crusts in the freezer, compliments of Katz Gluten-Free. I could have made my own dough…I actually do have recipes for that…but I was hungry and really just wanted to eat. So, when I got home, I set my roomie to the task of chopping the rainbow chard that came in my CSA bin this past week, while I worked on getting the pizza stone heated and the rest of the ingredients prepped and ready for some pizza.
I got the idea for this recipe from Cate’s World Kitchen, but altered it to fit my dietary needs as well as what I had on hand.
2 individual size gluten-free pizza crusts (though feel free to make your own and do this in larger scale)
1/4 cup olive oil
1/2 tsp smoked paprika
1/4 tsp chili powder
1 bunch rainbow chard, chopped
zest of half a lemon (I didn’t have lemon on hand, but I had plenty of orange zest…so I used that)
Mozzarella cheese (I used Rice Shreds Mozzarella flavor)
Directions:
Preheat the oven to 500 degrees F with a pizza stone inside (if you have one).
Heat the oil in a small saucepan with the paprika and chili powder. Simmer on low heat for about two minutes, stirring constantly so the spices don’t burn. Remove from heat.
Heat about 1 tbsp of the paprika oil in a wide skillet. Saute the chard until wilted. Stir in a pinch of salt and the lemon zest.
Brush each individual pizza crust with paprika oil. Sprinkle evenly with chard, then top with mozzarella.
Bake the pizzas on the pizza stone for about 10 minutes, or until the crust is golden and the cheese is melted and bubbly.
~*~*~
I am thrilled that we have more rainbow chard left and 2 more pizza shells because this was really good. I loved tasting the earthiness of the chard, mixing with the zing of orange zest and the heat from the oil. It was a fantastic mix. And the cheese just added that little bit of saltiness to round it all out. I really enjoyed every bite of this pizza. And trust me…it was going, going, gone!
Give pizza night a colorful veggie flare. And feel free to add your own spin on things. If you prefer to make your own dough, even better. Simply shape the dough and then brush with the paprika oil. It’s that easy. And it truly is a delicious slice of vegetarian pizza.