The Silver Palate San Marzano Tomato Basil Pasta Sauce
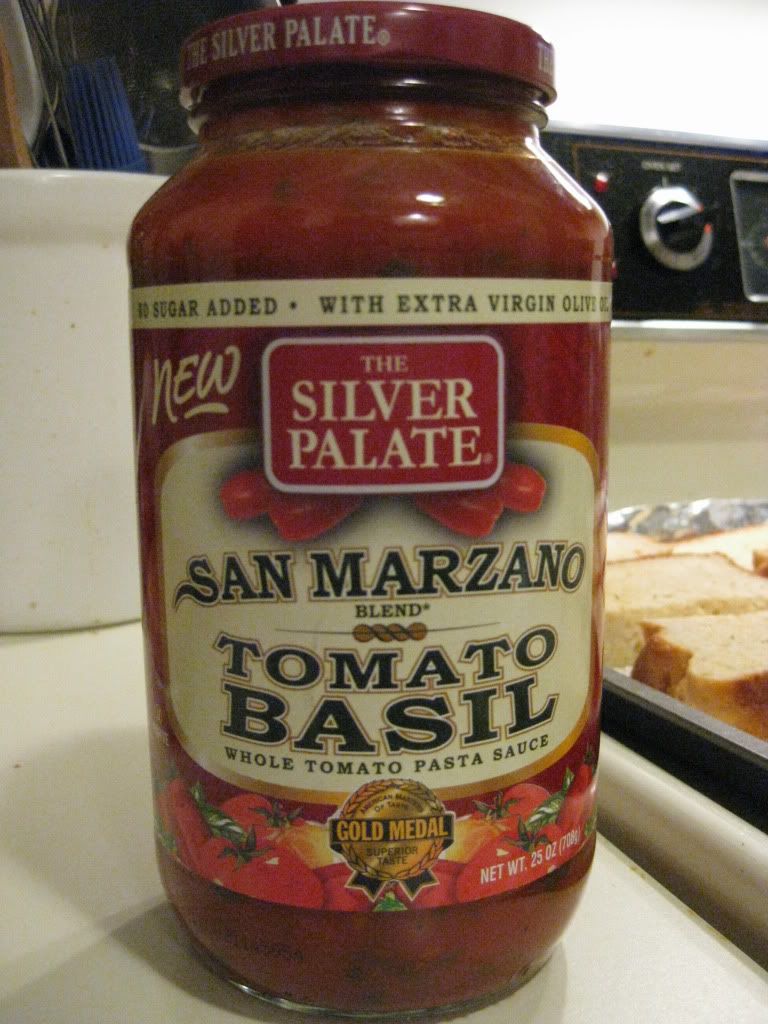
Product: The Silver Palate San Marzano Tomato Basil Pasta Sauce – $5.99+
I blame the Manager’s Specials at the grocery store for impulse purchases of pasta sauce. For one thing, it was $3.00 off the regular price, with the expiration date still a ways off. Secondly, it was clearly marked gluten-free. Key word. And…I have plenty of pasta in my pantry at the moment just begging…begging for me to cook it up.
So, it was with all this in mind that I purchased The Silver Palate’s San Marzano Tomato Basil Pasta Sauce a couple of weeks ago. It looked fantastic, and the nutrition information was right in line with other pasta sauces that I enjoy…if not better. I figured, why not try something new?
Despite the plethora of pastas in my pantry, I didn’t have a single one that would feet up to 6 people. So, when I was hosting my roommate’s family the other night for Christmas dinner, I was at a loss on what pasta to try out this new sauce on. I finally sent my roommate to the grocery store to find something acceptable, and she returned soon after with some corn pasta. It would do. It served 8.
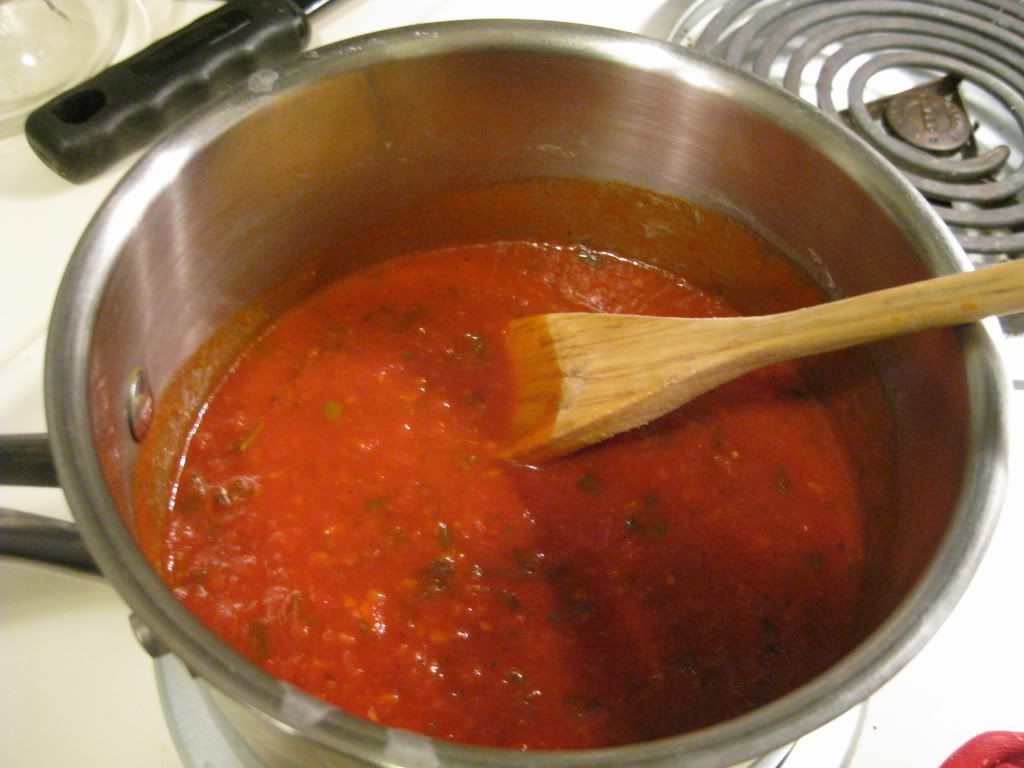
While the pasta was boiling away on the stove, trying to hit that perfect al dente, I prepped some gluten-free homemade bread. Once it was in the oven, into a saucepan went the San Marzano Tomato Basil Pasta Sauce. It smelled absolutely fantastic from the moment I opened up the jar.
The Silver Palate San Marzano Tomato Basil Pasta Sauce (heating on stove top)
Made from tomatoes that are grown in the rich, volcanic soil of the San Marzano region of Italy and the Central Valley of California, this blend of pasta sauce brought about a perfect balance of sweetness and acidity. The olive oil helped smooth it out. You could taste the ripeness of the tomatoes. It was bursting with flavor. And the basil was a nice accent. Not little flecks of it here or there, but julianned pieces were throughout the entire sauce. You couldn’t miss the vibrant green, chopped, fresh basil leaves. It was a tasty addition and it really livened up the sauce presentation-wise as well.
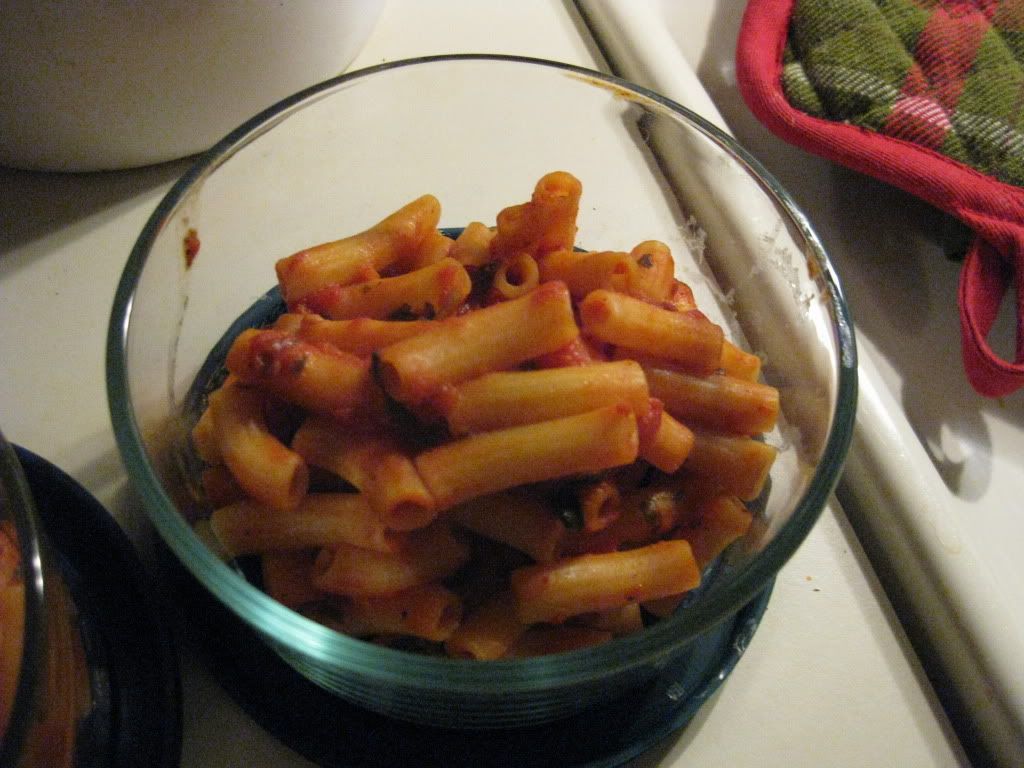
Once it was heated, I drained the pasta, put it back in the pan, and then poured the sauce over it. Giving it a good mix, I dished it up for the dinner guests and myself and tucked in for conversation and food.
The verdict on the sauce: YUMMY!!
Considering the last impulse buy pasta sauce was a disappointment, I loved the consistency of this one. It was packed with tomato flavor, but not watery at all. So many marinara sauces get watery, but not this one. It was refreshing and light and just meshed well with the corn pasta. A gluten-free pasta lover’s dream come true. I was highly impressed with this sauce.
Even more impressive is the nutritional value. A serving size of 1/2 cup serves up 70 calories and 4 grams of fat. For a jarred sauce, it is relatively low in sodium, tapping out at 420 mg. I love that the sugar content is quite low and that it provides 3 grams of protein as well. It’s a simple sauce with a fantastic flavor. I really enjoyed it. And, compared to the usual pasta sauce I purchase, this one is a deal as far as price. Even when it’s not marked down or on sale.
Highly impressed with The Silver Palate’s San Marzano Tomato Basil Pasta Sauce. It definitely has me interested in trying their other varieties and even some other products. Well done!
A serving of gluten-free pasta with The Silver Palate San Marzano Tomato Basil Pasta Sauce
I didn’t know they existed until I was wandering down the frozen food aisle of my local Earth Fare grocery store. I was just glancing in and out of the freezers, looking for something…anything…that might catch my eye. Something that might be gluten-free. Maybe. If I prayed really hard and closed my eyes…maybe it would be so.
Or something to that affect…just less dramatic.
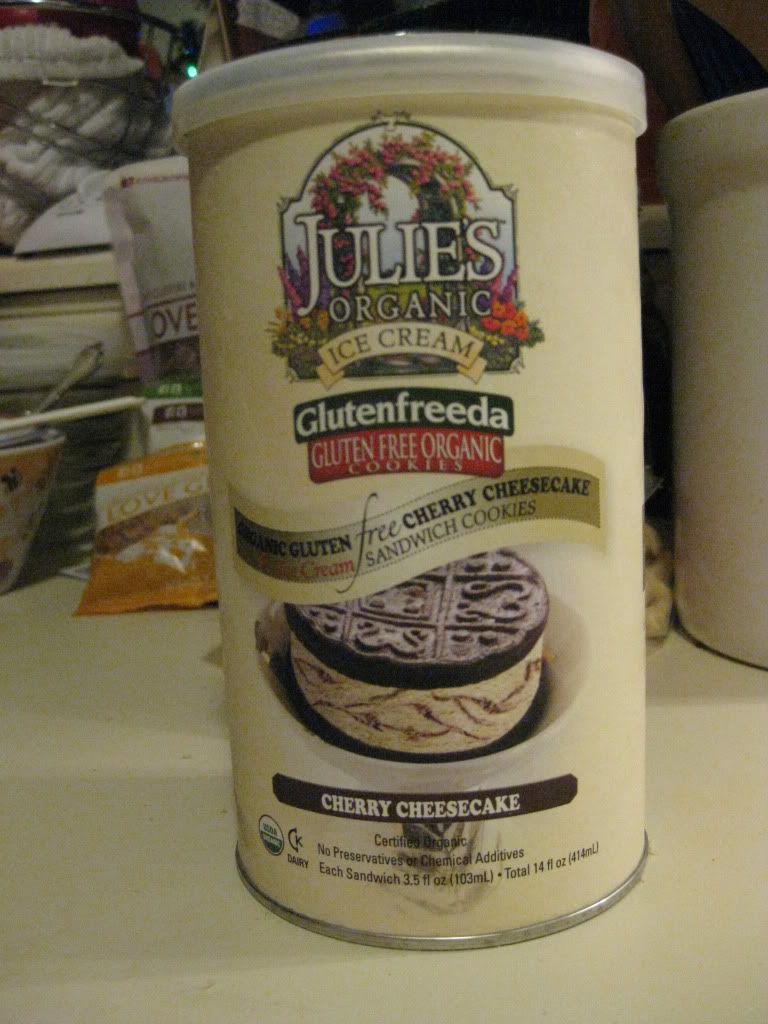
The fact of the matter was, I was at the grocery store and as I was searching the aisles, I stumbled across two new flavors of gluten-free ice cream sandwiches from Julie’s. Thrilled? Yes. Ecstatic? Very much. Did I buy them? OF COURSE!
And then…the reality of my overflowing gluten-free pantry hit…and I didn’t get to eat them. Not right away. Not until two nights ago, in fact. Thank goodness there was no freezer burn on them. I would have cried had it been so.
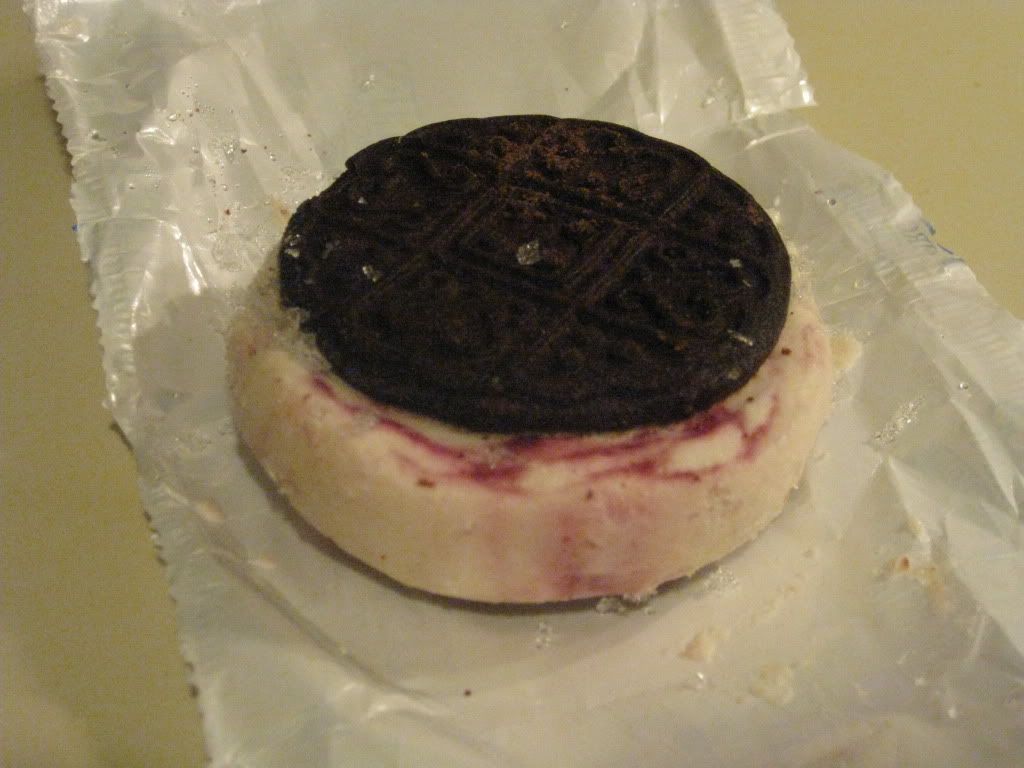
The Cherry Cheesecake Sandwich Cookies are amazing. No…they really are. Picture with me, if you will…two chocolate sandwich cookies (manufactured by Glutenfreeda…so they are gluten-free) that are packed…literally packed full of cherry cheesecake ice cream. If that sounds amazing to you, then let me tell you…this is not a figment of my overactive foodie imagination. No, my friends. This reality was brought to life by Julie’s Organic Ice Cream.
Cherry and chocolate is a fantastic combination as it is, but this ice cream sandwich brings out the best of everything sweet that I love. Cherries…check. Cheesecake…check. Chocolate…check. Ice cream…check. Totally gluten-free too. Which means…I get ice cream sandwiches!!
I had been previously blown away by the taste, texture, and awesomeness of the original (chocolate gluten-free cookies with vanilla ice cream) ice cream sandwiches and the Lemon Yogurt Ice Cream Sandwiches (lemon yogurt between vanilla gluten-free cookies). So, I figured this one had a lot to live up to. But…I have a lot of faith in these products as they have not only impressed me, but impressed my friends who can eat regular ice cream sandwiches. So much that they prefer these instead!
The Cherry Cheesecake Ice Cream Sandwich Cookie is a mouthful to say…but it’s a delight to eat. Honestly. I love the way the soft chocolate cookie melts away with the delicious and smooth cherry cheesecake ice cream. Totally wowed by this flavor. The lemon is still my favorite thus far…but this one is a very close second. It was like biting into a cheesecake with a chocolate crust. It brought back so many delicious and amazing memories. I can’t wait to devour the other one waiting for me in the freezer.
As far as sweet, ice-creamy snacks go, the nutrition information on this one isn’t too bad. One ice cream sandwich will set you back 200 calories and 9 grams of fat. That’s not bad for an ice cream sandwich. And, let me tell you, it is worth every creamy, dreamy calorie. For real.
Search high and low for these at your local grocery store…and if you don’t see them, see if the store can order them in. Trust me…you’ll want to take a bite out of these…and then polish it off. It’s hard to eat just one.
All the taste of an apple turnover without the guilt-laden pastry shell. I kid you not.
Welcome to the wonderful new line from Lärabar. In early 2012, Lärabar launched their new line of protein bars – the Über. In four flavors, this product combined sweet and salty flavors of classic desserts and brought them into bar form. No joke.
And after a 10 mile run the other day, I was hungry and needing something to satisfy my stomach while I went to an eye appointment before getting a late lunch. I happened to pick up one of each flavor of the Lärabar Über bars on Manager’s Special at my local grocery store. Super sale on a product that is gluten-free…yeah, I’ll buy that. And since they had an abundance of each flavor on the market, I grabbed one of each. The Über bars are available in Apple Turnover, Bananas Foster, Cherry Cobbler, and Fruit and Nut Roll.
First up, by the scientific method of grabbing the box in front…was the Lärabar Über Apple Turnover Bar.
Lärabar is known for making their products strictly from fruit, nuts, and spices/seasoning. That holds true with the Über bars. In fact, the Apple Turnover variety has 9 ingredients in them. That’s it. And they are all things you could find in your pantry. It’s true. They are composed of walnuts, dried apples, brown rice syrup, raisins, dates, pecans, honey, sea salt, and cinnamon. That’s it. Nothing unrecognizable. Defintiely not made up of chemicals that you’d have to Google to figure out what they were (if you dared!) or something completely unpronounceable and unknown to anyone but a chemist. I love that about Lärabar. What you see is what you get.
The Lärabar Über Apple Turnover bar contains only 190 calories for the entire bar. It contains 11 grams of fat, but is very low in sodium (125 mg) and serves up 3 grams of protein. Not too bad, overall.
The best part…the Apple Turnover bar tastes just like an apple turnover would. Seriously! It’s fantastic. The combination of dried fruits, nuts, and seasonings really lend that illusion that you are eating a sinful pastry. But you’re doing it at a fraction of the calories and fat. Honestly, you won’t even miss the flaky, fattening pastry crust. I fell in love with it at first bite. And so did my roommate. We both agreed that the apple flavor is there, without dominating. All of the ingredients get their time to shine, and when they are together…you really feel like you’re sitting down to a fantastic pastry. Just…without the guilt. Love that.
These bars are soft, chewy, and provide a hint of sweet/salty flavor to each bite. Not to mention, the Apple Turnover Über bar is gluten-free, dairy free, soy free, made from all-natural ingredients, vegan, kosher, non-GMO, has no added sulfites and no preservatives, fillers or colorings. It’s wholesome and all natural and for that, I feel confident continuing to purchase products from Lärabar. Not only do they fit my dietary needs, but they are delicious as well.
If you love to indulge in a dessert but want to do so without the guilt, I recommend the Lärabar Über Apple Turnover bar. And if you are gluten-free…I also recommend this variety. Honestly, you won’t even miss the pastry crust. Just indulge in the moment and savor every bite.
It seems apple pie is everywhere these days. I guess it just comes with the time of year. Apples are always in season, but so many people associate them with the fall/winter. It is, after all, the height of apple cider time. And I do love apple cider. Heck, I just love apples. One of my favorite desserts is apple crisp, after all.
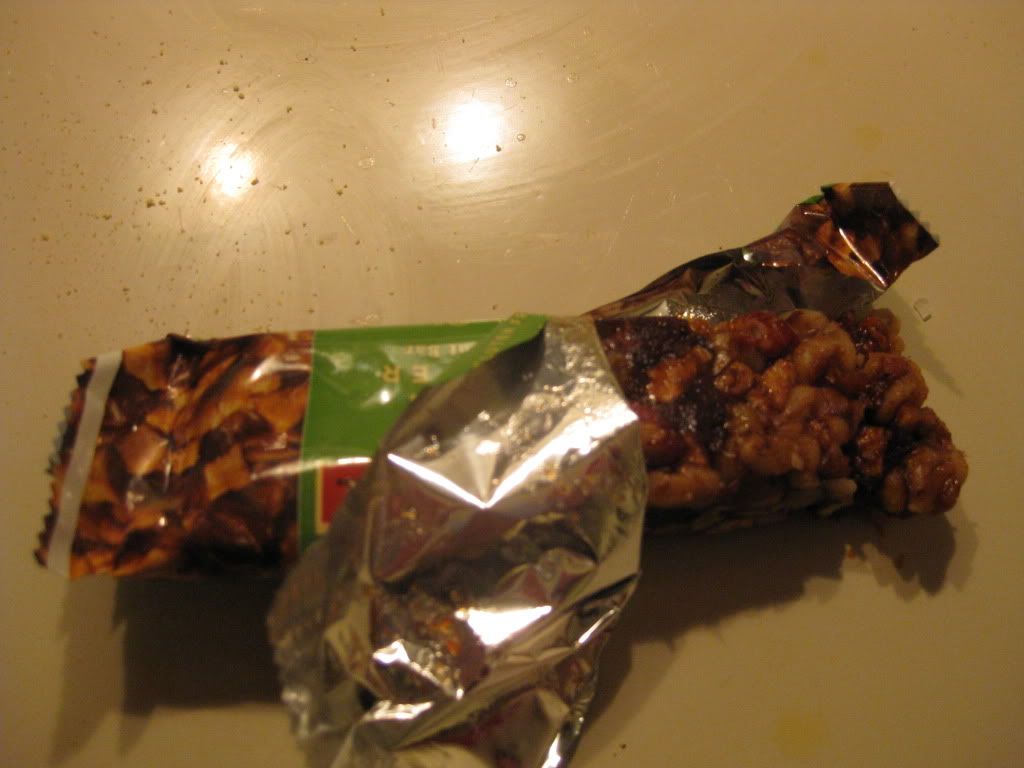
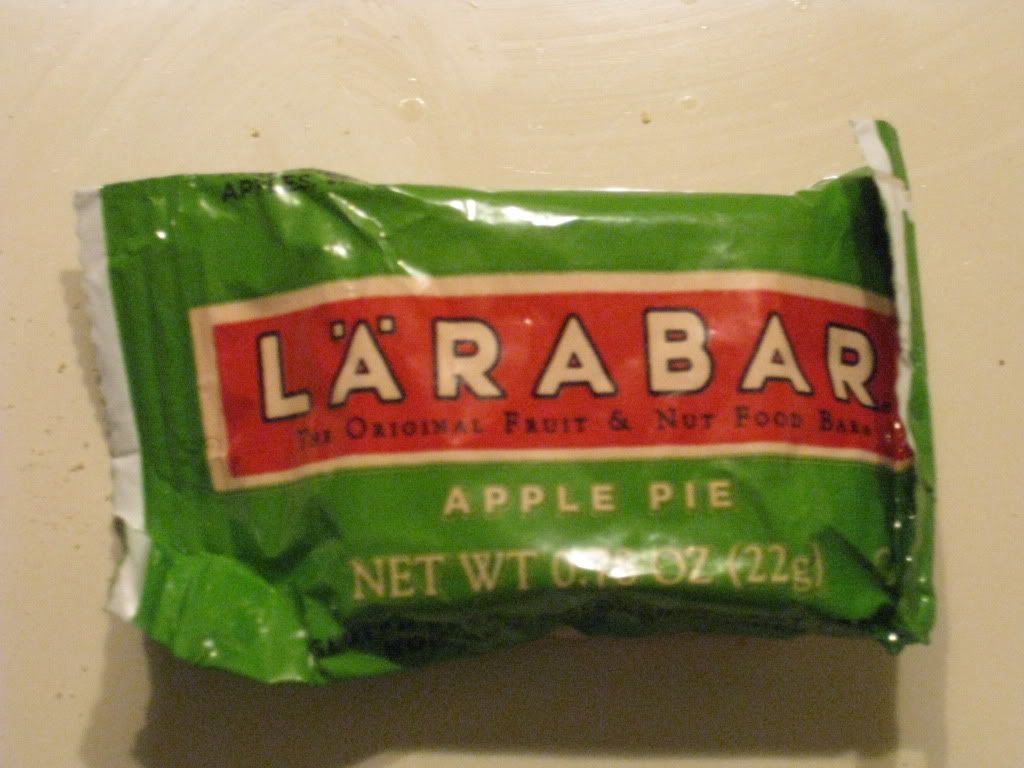
That being said, yesterday was another race morning. Nothing big. No reason to cream an entire protein bar down my throat before the run. Thankfully, I have a bunch of Lärabar mini bars still in my run-snack drawer. And the next one up just happened to be…Apple Pie.
I packed this away in my bag to take with me to eat an hour before the short 4K run. After all, the race wasn’t long…but I knew the cereal I ate when I woke up wouldn’t last through to the 9:00 a.m. start time. I always come prepared with a bar on race days now. There is nothing worse than standing at that starting line and hearing your stomach rumble. Or worse…being halfway through and realizing your cereal has burned off and now…you’re running on fumes. Best to just properly fuel.
So, the Lärabar Apple Pie Mini Bar accompanied on my drive over the river to Louisville, Kentucky and the park that was hosting the run. I actually pulled into the park exactly an hour before the race started. So it was perfect timing. Out came the Lärabar. I unwrapped it and took a small bite.
Okay…it actually does taste like apple pie. I can safely say that because my dessert last week was gluten-free apple pie. Honestly…this was just like having a slice. Really good. Although, even though it tastes like apple pie…it isn’t one of my favorite ones. Maybe it is the underlying hint of cinnamon that just kept creeping into my palate. But, while it was good, some of the others have been far better. But, it can be hit or miss with protein bars. That’s not to say this one wasn’t good. I would eat it again if it were offered to me. I wouldn’t turn my nose up at it. It’s just really not up to par with the other ones that have come before it. (Cashew Cookie is still my absolute favorite!)
So, a little information about this little protein bar. The Lärabar Apple Pie Mini Bar is comprised of of six ingredients. That’s it. These are dates, almonds, unsweetened apples, walnuts, raisins, and cinnamon. I knew there was cinnamon in there. All together, you sort of get this illusion that you are biting into a slice of apple pie…crust and all. The apples really shine. And the cinnamon gives it that warm flavor to it, though I found it a bit overpowering at times. As for the nuts and the raisins and dates…it just lends to that illusion of crust and filling. The texture was soft and yes…this one was delicious, despite not being one of my favorites.
The mini bar offers you 90 calories and 5 grams of fat. It only has 2 grams of protein to it. Not much on that protein, now that I look at it. The full-size bar, however is a bit more. It would set you back 190 calories and 10 grams of fat. With it, you would get 4 grams of protein. But…it is definitely filling and the fiber count (3 grams in the mini; 5 grams in the full-size) is the reason for that.
Again, this was a really good bar, it just wasn’t as amazing as some of the other ones I have eaten. That being said, if you love apple pie…then you will truly love taking a bite into this bar.
It’s the night before a race. You know what that means?
PIZZA NIGHT!
Granted, this is a very, very, very short race in the morning, but…why mess with tradition, right?
In addition to it being pizza night, I just happened to have some gluten-free pizza crusts in the freezer, compliments of Katz Gluten-Free. I could have made my own dough…I actually do have recipes for that…but I was hungry and really just wanted to eat. So, when I got home, I set my roomie to the task of chopping the rainbow chard that came in my CSA bin this past week, while I worked on getting the pizza stone heated and the rest of the ingredients prepped and ready for some pizza.
I got the idea for this recipe from Cate’s World Kitchen, but altered it to fit my dietary needs as well as what I had on hand.
2 individual size gluten-free pizza crusts (though feel free to make your own and do this in larger scale)
1/4 cup olive oil
1/2 tsp smoked paprika
1/4 tsp chili powder
1 bunch rainbow chard, chopped
zest of half a lemon (I didn’t have lemon on hand, but I had plenty of orange zest…so I used that)
Mozzarella cheese (I used Rice Shreds Mozzarella flavor)
Directions:
Preheat the oven to 500 degrees F with a pizza stone inside (if you have one).
Heat the oil in a small saucepan with the paprika and chili powder. Simmer on low heat for about two minutes, stirring constantly so the spices don’t burn. Remove from heat.
Heat about 1 tbsp of the paprika oil in a wide skillet. Saute the chard until wilted. Stir in a pinch of salt and the lemon zest.
Brush each individual pizza crust with paprika oil. Sprinkle evenly with chard, then top with mozzarella.
Bake the pizzas on the pizza stone for about 10 minutes, or until the crust is golden and the cheese is melted and bubbly.
~*~*~
I am thrilled that we have more rainbow chard left and 2 more pizza shells because this was really good. I loved tasting the earthiness of the chard, mixing with the zing of orange zest and the heat from the oil. It was a fantastic mix. And the cheese just added that little bit of saltiness to round it all out. I really enjoyed every bite of this pizza. And trust me…it was going, going, gone!
Give pizza night a colorful veggie flare. And feel free to add your own spin on things. If you prefer to make your own dough, even better. Simply shape the dough and then brush with the paprika oil. It’s that easy. And it truly is a delicious slice of vegetarian pizza.
You know what that means? For me, it means I get to do all my holiday baking. And I absolutely love to bake goodies for the holidays. Even better, I love to surprise people with homemade goodies for the holidays.
You see, the other day while my roomie and I were in the gas station getting our daily dose of caffeine, the cashier behind the counter (who literally sees us every work day) said that she was leaving. On Monday she was starting a new job…in an office. So she would definitely miss us.
And we all know that I love any occasion to bake. I happened to be in the gas station one morning when she was talking to a co-worker about chocolate. She hates chocolate…except for white chocolate. So…I knew her going away gift needed to be something white chocolate. And keeping with the spirit of the holidays…I was guided by the wonder of Pinterest to this recipe, featured on the Crazy For Crust blog. I took it, and gave it a gluten-free spin.
Recipe: Gluten-Free Triple White Chocolate Peppermint Blossoms
1/2 cup butter, softened (I used I Can’t Believe It’s Not Butter All-Purpose Sticks)
3/4 cup sugar
3 ounces white chocolate, melted and cooled slightly (I used Ghirardelli White Chocolate)
1 box white chocolate instant pudding (3.5 ounces)
2 eggs
1 teaspoon vanilla extract
1 teaspoon baking soda
2 1/2 cups flour (I used 2 cups Arrowhead Mills Gluten-Free All-Purpose Flour and ran out, so the last 1/2 cup was Hodgson Mill Gluten-Free Multi-Purpose Flour)
1 package Candy Cane Hershey’s Kisses, unwrapped
Additional sugar for rolling, if desired
Directions:
Cream butter and sugar in the bowl of an electric mixer fitted with the paddle attachment.
Add pudding mix and blend until combined.
Add white chocolate and mix until mixture is smooth.
Add eggs and vanilla and beat until combined.
Mix in baking soda and flour.
Chill dough for at least 30 minutes.
When ready to bake, preheat oven to 350 degrees.
Line cookie sheets with parchment paper. Place about 1/2 cup sugar in a small bowl for rolling, if desired. (Cookies will be a little crunchy on the outside with the sugar, if you use it.)
Scoop one tablespoon balls of dough and roll in sugar, or just place on cookie sheet. Bake 7-9 minutes until bottoms just begin to get golden. Remove from oven and immediately press an unwrapped Peppermint Hershey’s Kiss on top. Do not move pan until Kiss is cooled, or it will collapse.
Cookies can be frozen for later consumption, if desired. Place in a Ziploc bag between layers of paper towel for best results when freezing.
~*~*~
Here’s the best part…they truly are amazing. Honestly. I had my doubts. Me and sugar cookie bases don’t get a long…at all. Seriously…I’ve tried for about 5 years now to make sugar cookies at Christmas time and it just never works. This time…it did. And to think…it was with a blend of flours too.
Of course my roommate and I each had to sample one. I even took one in for my teammate to try. She loves to bake and I love to have her sample things, especially since I’ve had to go gluten-free. She doesn’t hold back. We all loved how the cookies were soft in texture and that after you swallow, the white chocolate really hits. But the magic happens when you take a bite with that Peppermint Hershey’s Kiss in it. Oh…yeah.
I am going to do a few different variations on these cookies now and I’m really looking forward to the end results.
Anyway, I gave the cashier at the gas station her gift and told her that I overheard that she loved white chocolate so I made these for her. She looked so happy and said that she wasn’t going to share. She thanked me and we left. I hope she enjoyed them as much as three three of us who also got to eat one did.
It’s winter time…and you know what that means? It means my CSA bin is throwing Brussels sprouts at me again. As you will recall, the first time Brussels sprouts turned up in my bin…I was at a loss. Not only had I never eaten them…but I had no idea how to cook them. I finally cooked them up in a Creamy Brussels Sprouts Bake which my roommate and I did enjoy.
But we weren’t blown away by it.
This time, when I pulled out the Brussels sprouts, I was determined to find a different way to cook them. So, in the end I went with the most basic, rustic, perfect way…simply roasting them in the oven. And it only takes 4 ingredients to make this happen.
Cut off the brown ends of the Brussels sprouts and pull off any yellow outer leaves.
Mix them in a bowl with the olive oil, salt and pepper.
Pour them on a sheet pan and roast for 35 to 40 minutes, until crisp on the outside and tender on the inside. Shake the pan from time to time to brown the sprouts evenly. Serve immediately.
~*~*~
It doesn’t get much easier than that. Honestly. And they smelled so good while they were cooking. When I dished them up to eat with dinner, my roommate took the first bite and said that they reminded her of when I made kale chips.
NICE!
You know what? She was right. This is definitely my favorite way to eat Brussels sprouts. Nothing fancy. Just letting the vegetable shine. Who would have thought something this basic, this simplistic could win my taste buds over.
Now I know exactly what to do next time Brussels sprouts turn up in my bin.
Awhile back, I did a gluten-free version of a recipe that came from The Brokeass Gourmet that intrigued me. It was a Brown Butter Pumpkin Mac and Cheese. And it was delicious.
It is definitely the time of year for pumpkin flavored things, so when the office potluck luncheon rolled around this week, I decided I would make the Brown Butter Pumpkin Mac & Cheese. And then, after pondering for a bit, I decided to do things a little differently. For one thing, it was going to be vegan, as we do have a vegan in the office and I wanted him to be able to eat it too. Secondly…I was going to do a different recipe that put a little more emphasis on the pumpkin portion of the entree.
So, after some searching I found a recipe that originally came from The Inventive Vegetarian and modified it to fit the ingredients I have (vegan & gluten-free). The end result…was better than I dreamed.
Recipe: Gluten-Free and Vegan Pumpkin Mac and “Cheese”
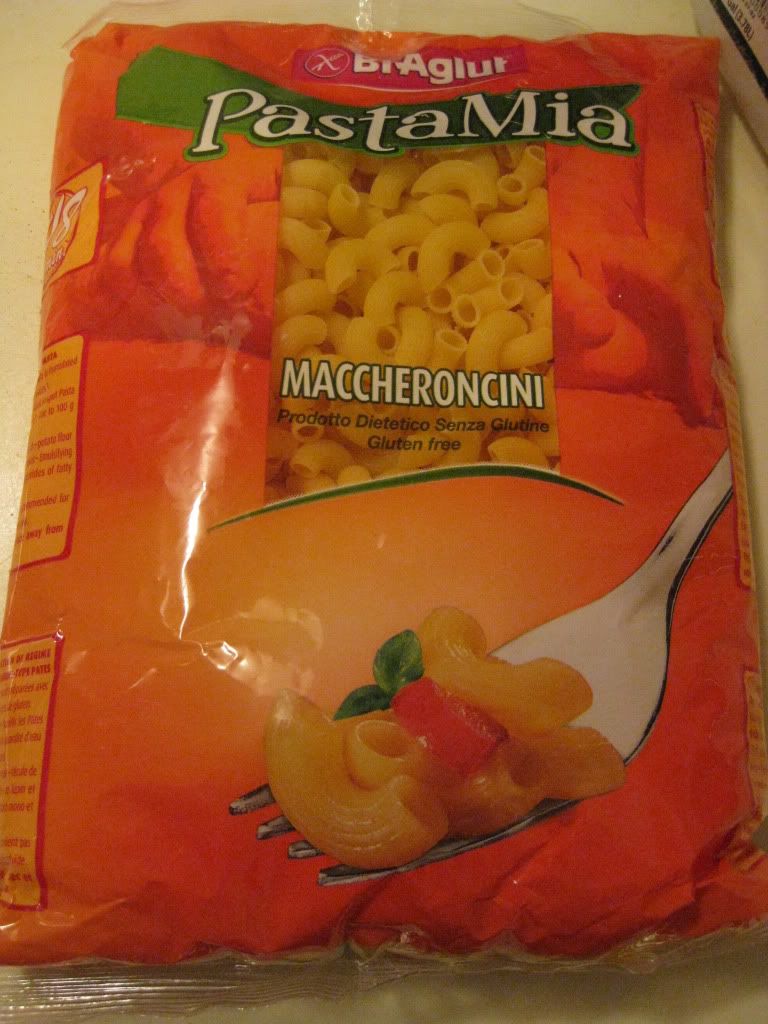
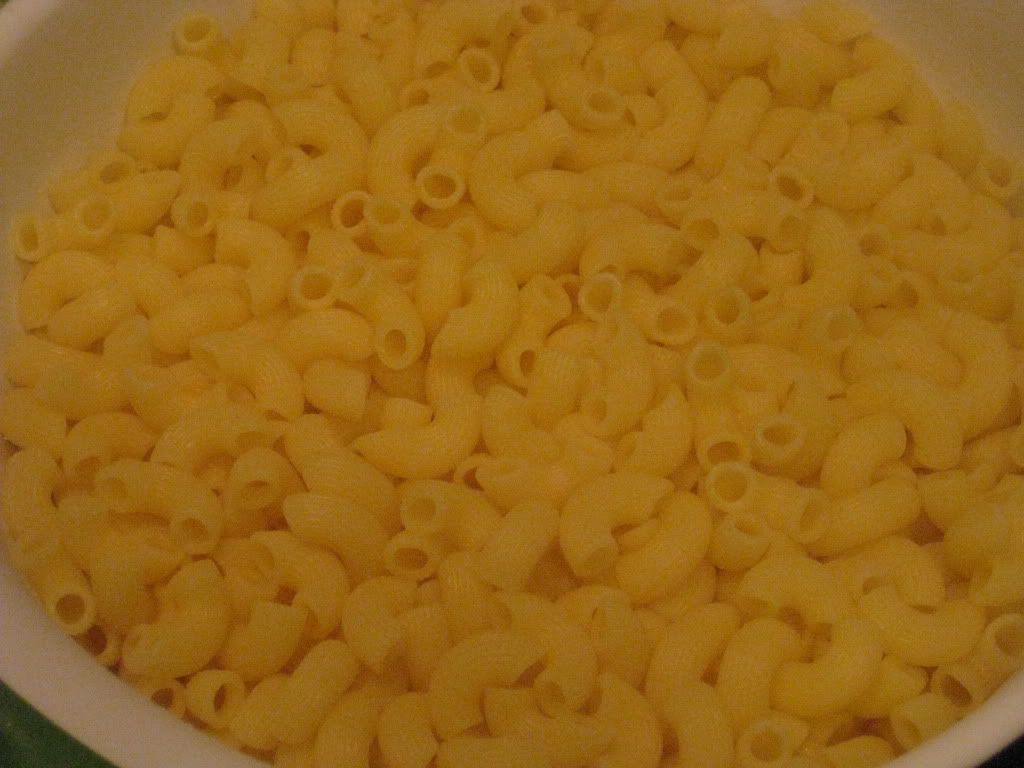
1 box elbow macaroni (I used BiAglut Gluten-Free Maccheroncini)
2 cups almond milk (I used unsweetened)
2 tablespoons olive oil
2 tablespoons all-purpose flour (I used Arrowhead Mills Gluten-Free All-Purpose Flour)
2 cups Daiya Cheddar Style Shreds (I prefer the Daiya wedges, so I just shredded an entire Daiya Cheddar Wedge)
1 can pumpkin puree
1 teaspoon soy sauce*
1/2 teaspoon cinnamon
1/4 teaspoon cloves
1/4 teaspoon allspice
1/8 – 1/4 teaspoon cayenne pepper (or more if you like heat)
Salt and pepper to taste
Directions:
Preheat oven to 375 degrees F.
Heat the almond milk in a small saucepan, but don’t boil it.
In a medium pot, heat the oil over medium heat and sprinkle in the flour. Whisk for about 2 minutes to create a smooth roux. The mixture should darken slightly during this time.
Still whisking, add the hot almond milk slowly and cook for a minute or two more, until the mixture has thickened. A good way to check is to dip a spoon into the mixture, then run your finger over the back of the spoon. If the mixture does not run into the streak made by your finger, it’s thick and good to go.
Add in the pumpkin puree and stir until smooth. Keep it on the heat for just a minute or two, until the puree is warmed through.
Take the almond milk mixture off the heat and stir in the vegan cheese, soy sauce, and spices. Partially cover and let the mixture sit as the cheese melts.
While waiting for the cheese to melt, bring a pot of water to a boil and cook your macaroni. Cook it just shy of al dente (subtract a minute or two from the al dente cooking time on the box). Drain the noodles when they’re done.
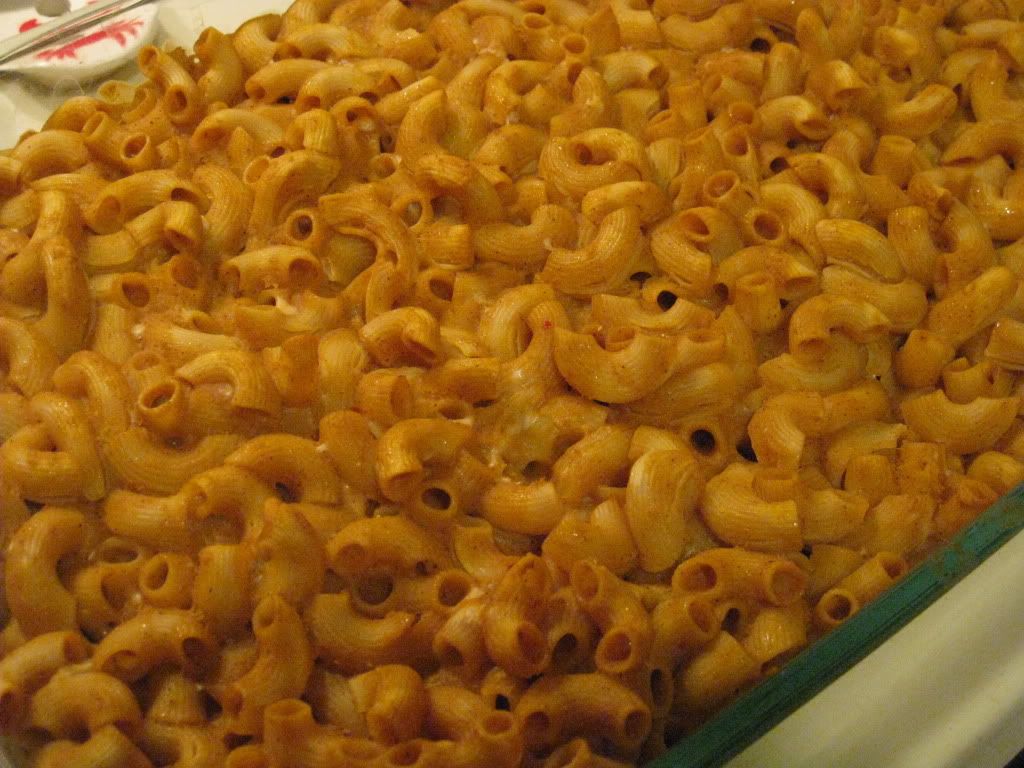
Once the cheese has fully melted (it will take a little longer with this stuff than with real cheese), taste and adjust any of the spices, as well as salt and pepper, to your liking. The whole mixture should now have a nice, velvety texture to it. Add the cooked macaroni (and the onions if you’re adding them) and stir well. Pour the whole mixture into a 9×13 baking dish, or a deeper casserole dish.
Bake for 40 to 50 minutes, or until the sauce is bubbly.
Enjoy!
~*~*~
The difference between this pumpkin mac and cheese and the previous one is the pumpkin flavor is definitely more pronounced in this one. I think that has to do with the seasonings used more than anything. It was creamy and delicious and those who ventured to try it at the office luncheon all said it was really good.
*Now, I do want to note that if you are using real cheese and not making this a vegan recipe…do not add the soy sauce. The soy sauce is basically used as a seasoning for the extra umami that soy cheese needs. Real cheese…you’re good to go without it.
Very impressed with this recipe. If you love pumpkin and mac & cheese…give this one a try.
I’m declaring it now. Right there in my subject line for this post. After all years of searching for the best pre-packaged gluten-free pasta, I think I may have finally found the crème de la crème. I didn’t think many things can live up to the standard that RP’s fresh gluten-free pasta set…and then I find it…just waiting to be discovered in my pantry.
Fresh pasta is always best, but it’s not always the most practical.
When it isn’t practical, BiAglut should be. Trust me, I have tried mostly every gluten-free pasta out there. Rice noodles, corn noodles, tofu noodles, quinoa noodles…I’ve had them all. Some do better than others. Some brands I prefer over others. Some are just easier and more cost efficient in the end. That being said, I think I would pay a pretty penny to have more noodles from BiAglut.
BiAglut is an Italian brand of gluten-free products that have been produced in Italy for more than 45 years by the Italian affiliate of H. J. Heinz Company. The company’s main focus is on individuals with Celiac disease, gluten intolerance, or those who follow a gluten-free diet. By keeping to this focus group, the brand offers a variety of gluten-free products to the market, including pasta, breads, bread substitutes, flours, cookies, crackers, snacks, and desserts.
But the main item that BiAglut is known for is…their pasta.
I was at a gluten-free expo awhile back and BiAglut was one of the companies there. It was a very small expo with very few vendors. But the people who were at the BiAglut table had me try some of their pasta and I loved it. Great texture. Great flavor. It was cold…but…well…you can’t have everything. After a little discussion, my roommate and I decided to go ahead and buy a bag of their noodles. They had very few options left (yes…it was going fast), so I snagged the very last bag of BiAglut Maccheroncini (elbows).
And then…it joined the plethora of other noodles in my pantry. And it sat…as I worked my way through the rest of them.
But, then we had another dreaded office potluck. I say that because, with the exception of one or two other people in the office, nothing brought in is something I can eat. Granted, being a gluten-free vegetarian does limit my diet, but it is nice when someone puts for the effort to make something that I can also eat so I’m not stuck with just two things on my plate (the two items I bring, mind you).
With that in mind, I signed up to bring two dishes…some crock pot caramelized apples and a vegan pumpkin macaroni and cheese.
I checked my pantry list and the next pasta noodle to have it’s day in the spotlight was the BiAglut Maccheroncini. I was kind of sad to be using this pasta on my office because I knew full well that since I was the person bringing it in…hardly anyone would touch it. It’s…weird. It’s…*GASP*…GLUTEN-FREE! I swear to God, no one in that office quite understands what that means and just won’t even try the food I bring in…which is why I hate to bring things in. I can cook for myself at home and it will save me money, time, and food that won’t go to waste because only 2-5 people are eating it.
BiAglut Maccheroncini (cooked and drained)
That being said, I sucked it up and went ahead and made the items I signed up for. Early that morning, I stood in the kitchen boiling a pot of water to pour the BiAglut Maccheroncini in and allow it to cook most of the way. It only took about 6 minutes to get to where I needed them to be. I mean…it was fast. Most gluten-free pasta noodles have to be boiled for around 12-16 minutes, if not longer, to get that perfect consistency. Not these. They were done so fast I had time to spare.
After I drained the noodles, I put them back into the big pot and poured my vegan pumpkin cheese sauce over the top of it. With a spatula, I stirred it all together, delighted in the fact that the noodles were holding together. They weren’t turning to mush. They weren’t falling apart in the sauce or with the movement of the spatula. I was already impressed. Then, the mixture was poured into the baking pan and into the oven it went for about 45 minutes.
When it emerged…the noodles were still perfect. They already survived boiling and baking. I was very surprised. I’m just not used to my gluten-free pastas being so sturdy. Well, before I could serve this to myself and the brave few who just might have a little taste at the office, I had to make sure it was good. I plucked a noodle from the casserole dish and…oh yeah…it was good. The noodle was a perfect al dente. Perfect. It cooked up beautifully in the sauce and didn’t fall apart in the baking process.
The true test was going to be lunch. So, about 10 minutes before lunch was to be served, I got to the kitchen and pulled my mac and cheese out of the fridge. I brought a splash of almond milk to add to the pasta for when I reheated it, and poured it over the top. Then, into the microwave it went. As I reheated it a few minutes at a time, I would stir it around to make sure it heated evenly. And the noodles held together. They didn’t crumble as I stirred them. They didn’t shred. They held. And I was so elated.
The moment of truth came – the office luncheon began. My roommate, myself, and the office vegan I knew would be eating the macaroni and cheese. Others seemed a bit hesitant. Some took just a smidge. Most didn’t even give it another look because…I made it…therefore it’s gluten-free and must be disgusting. Ignorant fools!
As I sat down to dig in…I was hoping I’d be as impressed with the BiAglut Maccheroncini as I had been this entire time leading up to the first actual bite. One bite and it was all the confirmation I needed. Through boiling, baking, and nuking, the BiAglut Maccheroncini not only held its shape, but it still tasted great. It didn’t mush up or disintegrate under pressure. It is pure, honest, gluten-free pasta perfection.
BiAglut Maccheroncini is made from cornstarch, potato flour, lupin flour and lupin proteins. No eggs. No dairy. And what comes of this is the best packaged pasta I have had to date. Gluten-free pasta is so tricky, but BiAglut held up to everything I could put it through and still tasted great in the end. And, on a personal note, it worked very well in my vegan and gluten-free pumpkin mac and cheese. Tasted great.
Best texture. Best quality. Best all-around when it comes to dry pasta. BiAglut is amazing. Now I wish I had purchased more of their products at the time. Guess I’m going to have to get online and place an order.
If you can find BiAglut…I encourage you to try it. It is heads and tails above the competition. It’s happiness in pasta form.
Gluten-Free Vegan Pumpkin Mac & Cheese made with BiAglut Maccheroncini
When you name your company So Delicious, you are definitely setting a high standard for not only your branding, but also the products that you put out. So far, I have yet to have a flop with the So Delicious items that I have tried. I know…most of said products have been in a non-dairy ice cream form.
That trend continues here…
My local grocery store had a great sale going on for the So Delicious quarts of ice cream awhile back. After sending my roommate out for an item I needed for something I was cooking, she returned with a huge surprise for me. Three quarts of So Delicious non-dairy ice creams to try. And since then, I have dug into the Chocolate Velvet and the Neapolitan flavors and fallen in love with each of them.
All that remained in my freezer was the Creamy Vanilla one. I really wanted to dress this ice cream up. I mean, we all love vanilla ice cream…but it is so versatile. I was thinking of melting chocolate over it…or getting some chocolate syrup from the store…or topping it with fruit and nuts…or sandwiching it between two gluten-free cookies. The possibilities were endless. I mean, vanilla ice cream is like being handed a blank piece of paper and a pencil. You can get as creative with it as you want.
Little did I know that in the end…I’d basically be enjoying it as it was made. Undressed. But…perfectly matched.
So Delicious Creamy Vanilla is a soy milk based ice cream that is vegan, kosher, and gluten-free. It is also non-GMO certified. YAY! That being said, this ice cream had been hanging in my freezer since the summer…so there was no way of telling what state I might find it in when I cracked it open last night. I almost expected freezer burn and ice crystals.
But…I was wrong. When I pulled the lid off the quart, a beautiful white surface looked back at me. Perfect vanilla. And it smelled of vanilla too. So amazing.
When I said perfectly paired just above I wasn’t kidding. You see, I have been watching Hotel Hell (Gordon Ramsay’s new show) and one of the hotels he went to help turn around was one that invented Apple Pie À La Mode. No joke. And I just happened to have a gluten-free apple pie in my freezer as well. Hmmm…what to do…
LIGHT BULB!
So, last night after hurrying through dinner in an attempt to make it out to a concert (The Dave Matthews Band was in town) on time, my roommate and I actually allowed ourselves a moment for a palate cleansing dessert. Never miss dessert. It is very important. I had thawed out the pie earlier that day so all I needed to do was toss it in the microwave (Gordon Ramsay would FLIP OUT!). While a tiny slice of pie was heating, I opened up the So Delicious Creamy Vanilla ice cream and got out a spoon.
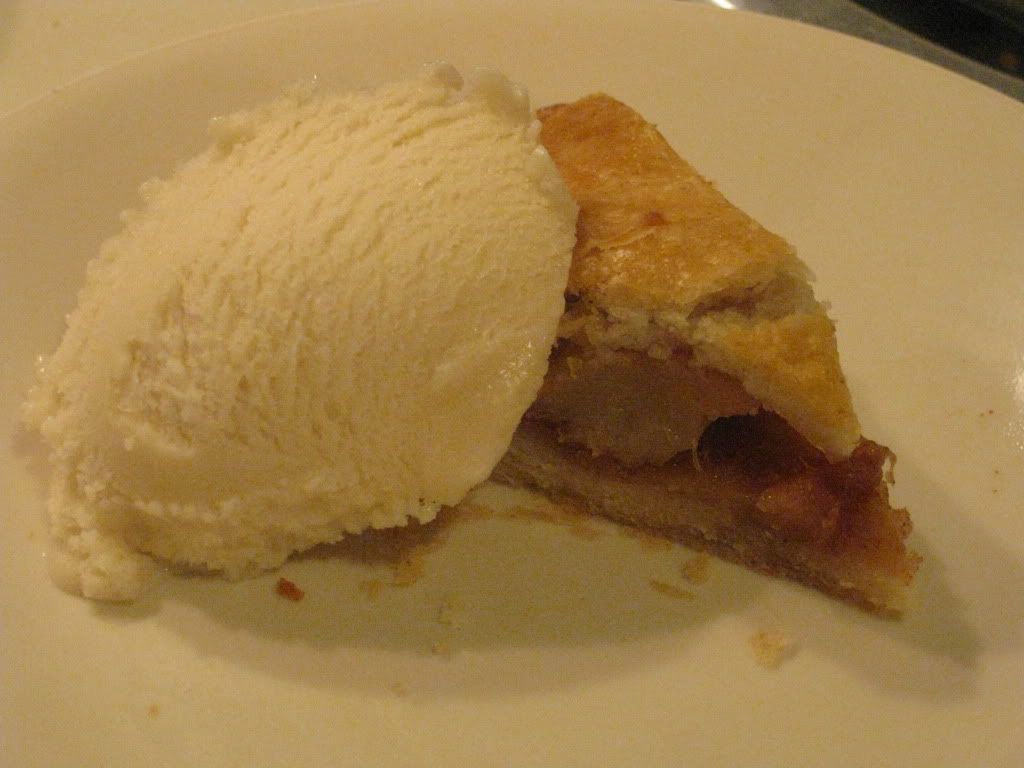
Apple pie à la mode is a slice of apple pie topped with vanilla ice cream. The warm pie melts the ice cream that is layered on top and what emerges is this amazing dessert that is both hot and cold and melty and yummy and…*DROOL*. Ahem. Sorry. Bit of a food nerd here. At least I’m a foodie who loves to eat (within my dietary restrictions that is!).
So, when the microwave tolled it’s completion of the heating process, I removed the plate with the slice of pie resting on it and eased my spoon into the ice cream.
Smooth. I expected something rock-hard, or flaky (some non-dairy ice creams can be crystallized and a bit hard to get a good, creamy scoop out of). But So Delicious really delivered here. The ice cream folded up in the spoon to create a perfect scoop. I set it alongside the pie (trust me, for calorie purposes, the serving size was halved and setting any ice cream on top of this itty-bitty slice was not an option). I repeated it with the other half of the slice and served one to my roommate and myself.
Oh. My. Foodie. God.
First of all, having a delicious gluten-free pie is one thing. But the ice cream. Oh, the ice cream just totally made this dessert. I loved how it mixed perfectly with the buttery, flaky goodness of the pie crust, and the hot apples in the center just aided in creating this hot/cold, flaky/melty mess of a dessert. And it was everything I dreamed it would be.
The So Delicious Creamy Vanilla won’t slap you in the face with its vanilla flavor. It is very subtle. That being said it is also very delicious. Trust me. I was highly impressed. I loved how it had just the right hit of vanilla flavor so that it wasn’t underwhelming or overwhelming. It was just perfect. I would buy this again in a heartbeat…and eat it straight. I might even still turn it into a sundae, or just put it in a gluten-free ice cream cone (I still have some of those in my pantry!).
Being lactose intolerant and gluten free doesn’t have to mean ice cream is off limits. It just means you find an ice cream that suits you. Preferably one that is So Delicious.
A scoop of So Delicious Dairy Free Creamy Vanilla Soy Milk Ice Cream over a small slice of Katz Gluten Free Apple Pie