Recipe: Oven Baked Broccoli Masala

This one time I went to an Indian restaurant…and got the Broccoli Masala.  It was something that I hadn’t seen on any other Indian restaurant menu in the area.  It intrigued me.  I took one bite and declared it the best thing I have ever eaten…which may or may not be true.  HA!

But, it was really, really damn good.

And during these cold winter months, I see a ton…and I mean a ton of broccoli.  For real.  Like…every week.  Last year my freezer was filled with broccoli.  But not this year.  Not this time.  I’ve gotten more than a little creative with the use of broccoli in the past few months.  And I’m proud of that.

But, instead of turning to a pizza crust…or some other culinary magic skill…this time…I attempted to recreate that dish for that local Indian restaurant.  Because, yes…I was craving and didn’t want to drive into Louisville.

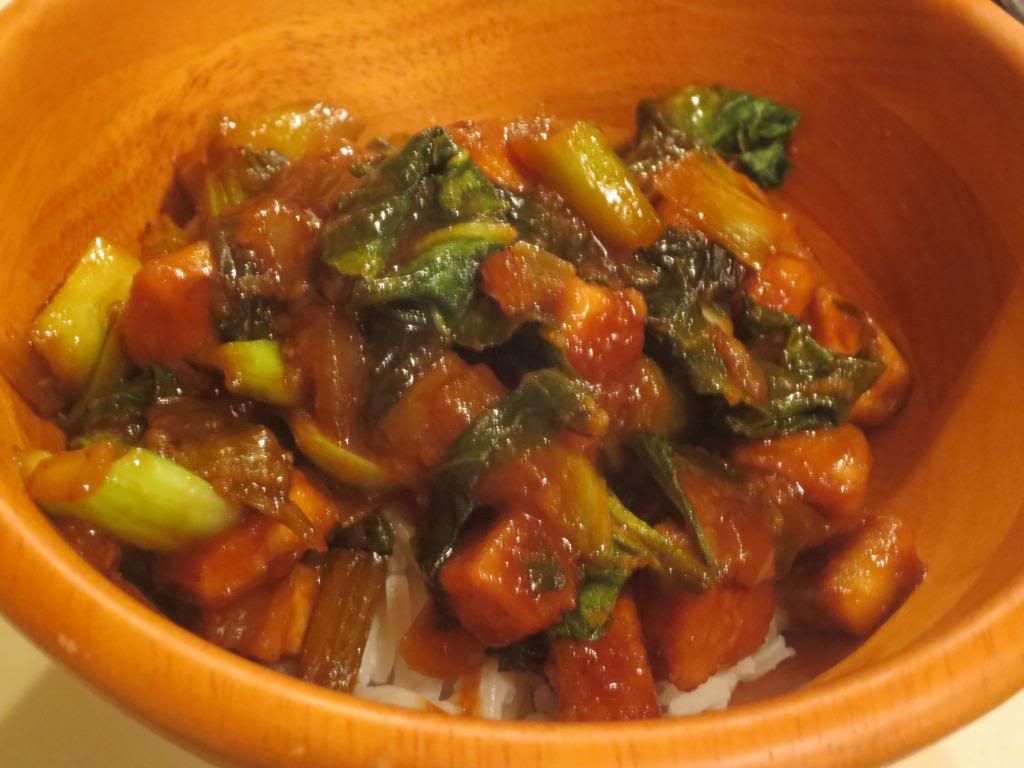
With the guidance of the blog Spicy Treats, I did an oven-baked version of this meal, adding it to caramelized shallots (which caramelized down to this beautiful sweet jam) and some Indian-spiced basmati rice.  The results…while not the same as the restaurant…were a very close alternative.  And I was quite happy with it.  I may or may not have hoovered this meal down in record time.

Recipe: Oven Baked Broccoli Masala

Oven Baked Broccoli Masala


Servings: 2
Time: Prep 10 minutes; Cook 20 minutes

Ingredients:

  • 2 medium-sized crowns of broccoli
    1-2 teaspoons olive oil
    salt (to taste)
    1 teaspoon chili powder
    1/4 teaspoon cumin powder
    1/4 teaspoon garam masala
    Pinch turmeric powder
    Squeeze of lime juice
    2 teaspoons finely chopped parsley/cilantro (optional)

Directions:

Preheat the oven to 350° F.

Wash and cut broccoli in to small florets.  Drain well and keep ready.

In a large bowl, add broccoli and salt and toss well.  Then add the other spice powders and lime juice and toss everything well.  Finally, add the olive oil and stir well, making sure everything is covered with the spices and oil.

Sprinkle cilantro over the top and mix everything well.

Line a baking tray with aluminum foil and grease it with a few drops of olive oil.  Spread the prepared broccoli florets on the baking sheet and bake it for 15-20 minutes, stirring after 10 minutes.

ENJOY!!

~*~*~

As I said above, I served mine with caramelized thinly sliced shallots (almost made a shallot chutney) and some Indian-spiced basmati rice.  The meal was amazing and the flavors were really good.  Nothing overpowered.  And it was still mild (because my roomie is a heat wimp), yet had just a little spice to keep each bite interesting.  While it is nothing like the dish I have every time I go to my favorite Indian restaurant…it was close enough and simply delicious.

Taste for yourself!

Product Review: Katz Gluten Free All Purpose Dough

Katz Gluten Free All Purpose Dough

Product: Katz Gluten Free All Purpose Dough – $4.99

Dear Katz Gluten Free:

I love you.  I love you more and more with each product that I try.  From your breads to your pies to your amazing donuts, you continue to keep me coming back, order after order, no matter the cost.  You are that good.  And I love you that much.

But…you really outdid yourself with the ready-to-use Gluten-Free All Purpose Dough.

Because of you…I could have a calzone for dinner again.

Because of you…I can make my own delicious pies…without the hassle of making my own crust.

Because of you…the gluten-free community continues to get quality food products.  Ones that I will continue to purchase…not just for myself but others.

Add the All Purpose Dough to my list.

Yes…I love you.

All my gluten-free love,
Me

Ease!  That’s the best part of this product.  It not only is peace of mind, but it’s so simple.  Thaw out dough.  Use.  No hassles.  No wondering if your own gluten-free concoction will cook up right.  This worked.  And it worked beautifully.

I’ve been wanting calzones for a long while now.  For real.  And with a plethora of vegetables that needed to be used up before the next CSA bin arrived, well, I figured I’d see how the dough would hold up to a little of my craving and baking magic.  I had this thought in my head that involved this dough, some squash, some crimini mushrooms, and some shallots.  I sauteed them up in a pan and added some marinara sauce as well.  All I needed now was the casing for the calzone.

Enter Katz Gluten Free All Purpose Dough.  I removed it from my freezer two days before.  The evening I was making the calzones, I cut out two very small pieces of dough, as it says it serves 8 and a serving size is only 2 ounces.  So…this was going to be a challenge.  But, I was up for it.  Using a rolling pin, I attempted to shape the dough into a large circle that wouldn’t break open when I added the filling and moved it to the baking sheet.  The first couple times, the dough was rolled too thin, so I knew these would be relatively small calzones.  I didn’t care.  I rolled out two very asymmetrical circles and piled in the filling on one half.  I carefully folded over the other half and did my best to crimp the small serving shut.  Sure, I could have used more dough, but I am so careful about serving sizes.  I stick to them.  I think next time I’ll throw caution in the wind and just add a little more.  But…I wanted to do it my way this time.  Into the oven the dough went…and when about 20 minutes passed, I opened up the oven and it was this gorgeous golden brown and the filling was sizzling (and peaking out of some holes in my dough).  Everything was ready.  Dinner was served.  And gluten-free calzones were on the menu.

Oh. Hell. Yes.

One bite…and I was hooked.  At first, it sort of reminded me of the crust of a potpie.  Golden and flaky and it sort of had that same texture and flavor.  But when you got a piece with the filling in it…magic.  Simple food magic.  The crust didn’t get soggy and held up to the marinara/vegetable mixture that I stuffed (and I mean literally stuffed) inside.  It was gluten-free and vegetarian food magic.  And it was made possible and easy because I took a chance with a new Katz product.  So easy.  So delicious.  I can’t wait to use it in other ways.

Katz Gluten Free Web site says the crust is perfect for pies, turnovers, knishes, or any other pasty imaginable.  It’s the go-to solution.  It’s what I (and other gluten-free foodies) need in their lives!  FOR REAL!

Katz Gluten Free All Purpose Dough is made from their own blend of gluten-free flour (which includes tapioca flour, white rice flour, sorghum flour, and corn flour), palm oil, water, eggs, sugar, salt, and xanthan gum.  Not a bad list of ingredients at all.  And that flour blend is pure magic.  Pure gluten-free food magic.

As for nutrition…there is a reason I stuck to the serving size.  A serving size is 2 ounces.  This serving (which is a small rectangle of the dough), will provide you with 260 calories and 18 grams of fat.  See why I wanted to stick to the serving size?  This serving also will give you 55 mg sodium and 2 grams of sugar.  Sadly, this dough does serve up about 9 grams of saturated fat and 35 mg cholesterol in each serving.  Another good reason to stick to the meager 2 ounce recommendation.  This dough also will give you 1 gram of fiber and 1 gram of protein.  So do not expect this dough to fill you up and leave you feeling full.  It won’t work that way.  But…that being said…it toasted up beautifully in calzone form on my pizza stone and made one delicious meal for me and my roommate.  We have 3 more servings each of this dough to use and I intend to see how many various ways I can use it.  I might attempt perogies next.

Yes, my dearest Katz Gluten Free…I do love you and your products.  You just make my life happy, full, and delicious again.  This All Purpose Dough will be something I’ll definitely consider using more of in the future. Simple.  And delicious.

Who could ask for anything more?

A gluten-free and vegetarian calzone made with Katz Gluten Free All Purpose Dough

Product Review: Sophie’s Kitchen Vegan Crab Cakes

Sophie's Kitchen Vegan Crab Cakes
Sophie’s Kitchen Vegan Crab Cakes

Product: Sophie’s Kitchen Vegan Crab Cakes – $5.99+

I’m probably not the best judge when it comes to comparing sea food products with vegan interpretations of them.  Honestly.  Now, growing up and before I became a vegetarian, I ate seafood.  Mostly shrimp.  Mostly fried, popcorn, scampi or creole.  I was not a huge fan of other fish…but I would eat them.  And, to say the least, I made a delicious lemon-crusted oven baked tilapia back in the day.

For real.

But…never, ever did I eat a crab cake before I became a vegetarian and then had to go gluten-free.  So, judging these by comparison isn’t going to happen.

Here’s what I can do though.  I can go off of flavor, texture, and overall taste.  And that was how I approached this product.

The product of which I speak is the Gluten-Free and Vegan Crab Cakes from Sophie’s Kitchen.  Now, I’m no stranger to Sophie’s Kitchen, having already tried the Gluten-Free and Vegan Fish Filets, Gluten-Free and Vegan Scallops, and the Gluten-Free and Vegan Breaded Shrimp.  While I was blown away by the shrimp, I felt the scallops were good, and the fish filets were…eh…okay.

So…crab cakes.  A new challenge for the allergic/intolerant foodie in me.

Sophie's Kitchen Vegan Crab Cakes (frozen)
Sophie’s Kitchen Vegan Crab Cakes (frozen)

What I love about Sophie’s Kitchen products is how easy they are to make.  The crab cakes could either be baked in the oven, or fried in a skillet on the stove.  I’m a health-nut, so I try not to fry things often.  I chose to bake them in the oven, which takes about 15 minutes to do.  Not too bad at all.  They don’t get golden cooking this way, the way the image looks on the box, but I didn’t mind the pale look to them.  Remember…never had a crab cake back when I even could.  I kept it simple when serving these.  I had thought about doing a crab cake sandwich, but didn’t thaw out my gluten-free buns from my local allergen-free bakery.  So, instead, I made some homemade kale chips and served the crab cakes over fresh bibb lettuce from my CSA bin.  I served a side of Veganaise Tartar Sauce with each cake and…dinner was served in less than 20 minutes.  Love that.

But how did it taste?

This is one of my favorite products from Sophie’s Kitchen that I have had the opportunity to try.  OH. MY. GLUTEN. FREE. VEGAN. GOD.  Seriously…packed with awesome flavor.  The texture was great…like lump crab…so that was kinda cool  And the blend of ingredients that Sophie’s Kitchen uses to give their faux seafood that fishy flavor worked SO well with these.  They are a close second in my favorite gluten-free and vegan things.  The first is the breaded shrimp from Sophie’s Kitchen.  These are fantastic.  They don’t taste fake of bad at all.  I loved every bite.  Thankfully, my roommate and I made a big dinner out of these…each of us having 2 of the crab cakes instead of the serving size of just one.

Speaking of which…it’s that time in the blog where I bring up the ingredients and nutrition for the products I try.  Let’s start with the ingredients.  Sophie’s Kitchen Vegan (and Gluten-Free) Crab Cakes are made up of water, pea protein, potato starch, canola oil, seaweed powder, rice flakes (from brown rice), konjac powder, rice vinegar (from brown rice), organic agave nectar, sea salt, celery powder, black pepper, bay leaf, nutmeg, ginger, paprika, dry mustard, cloves, calcium hydroxide.  So close to being clean eating…but that calcium hydroxide there at the end sort of killed that.

That being said…it is still a rather healthy choice and one I’d love to buy and indulge in again.  In fact, Sophie’s Kitchen Vegan Crab Cakes are soy-free, gluten-free, 100% vegan and plant based, contain no preservatives, colors or MSG, and have no artificial anything!!  Nice.

Speaking of indulging…a serving size of Sophie’s Kitchen Vegan Crab Cakes is 1 cake.  This serving will provide you with 120 calories and 6 grams of fat.  That’s not bad for a crab cake!!  The Vegan Crab Cakes contain only 170 mg sodium and less than 1 gram of sugar.  Gotta love that!  And, one crab cake also provides you with 2 grams of fiber and 3 grams of protein.  Not too shabby.

I am falling more and more in love with the products that Sophie’s Kitchen is bringing to the gluten-free and vegan world.  And I love that someone, like me, with food allergies, can safely indulge in a product that is vegan as well.  So often this is not the case, so it’s so nice when a company goes the extra mile.  And that’s why I continue to purchase and eat products by Sophie’s Kitchen.

And now…I must hit up my Whole Foods for more of these amazing crab cakes.  It’s happening!

Sophie's Kitchen Vegan Crab Cakes (baked), served over local bibb lettuce with homemade kale chips
Sophie’s Kitchen Vegan Crab Cakes (baked), served over local bibb lettuce with homemade kale chips

Recipe: Jamie Oliver’s Vegetarian Chilli

Ah, Jamie Oliver…I adore you.

Obviously.  Because when I went to Huntington, West Virginia, I made a point to go by Huntington’s Kitchen.

So, when I had some sweet potatoes that I needed to use up from my CSA bin this past week, my roomie suggested that I finally get around to making the vegetarian chilli recipe from your Web site.

We only needed a couple of items for the rest of the dish itself…so it was on!!

What I love about this recipe is how much depth of flavor the roasted sweet potatoes add to this dish.  It’s indulgent, but guilt-free.  So healthy.  I think it might be my favorite chilli so far.

So…thank you, Jamie Oliver.

And for my followers and readers…here is the recipe:

Recipe: Jamie Oliver’s Vegetarian Chilli

Jamie Oliver's Vegetarian Chilli
Jamie Oliver’s Vegetarian Chilli

Servings: 6-8
Time: Prep 10 minutes; Cook 50 minutes

Ingredients:

  • 2 medium-sized sweet potatoes, approximately 500g
  • 1 level teaspoon cayenne pepper, plus extra for sprinkling
  • 1 heaped teaspoon ground cumin, plus extra for sprinkling
  • 1 level teaspoon ground cinnamon, plus extra for sprinkling
  • olive oil
  • sea salt
  • freshly ground black pepper
  • 1 onion
  • 1 red pepper
  • 1 yellow pepper
  • 1 bunch fresh cilantro
  • 1 red chilli
  • 1 green chilli
  • 2 cloves garlic
  • 2 cans beans (I used black beans and great northern beans)
  • 2 cans chopped tomatoes (I used Muir Glen organic fire roasted tomatoes)


Directions:

Preheat the oven to 400°F.

Peel the sweet potatoes and cut into bite-sized chunks.  Sprinkle with a pinch each of cayenne, cumin and cinnamon, drizzle with olive oil and scatter with a pinch of salt and pepper.  Toss to coat then put them on a baking tray.

Peel and roughly chop the onion.

Halve, de-seed and roughly chop the peppers.

Pick the cilantro leaves and put aside, finely chop the stalks.

De-seed and finely chop the chillies.

Peel and finely chop the garlic.

Put the tray of sweet potato in the hot oven to cook for 40 minutes until soft and golden.

Meanwhile, place a large pan on a medium-high heat and add a couple lugs of olive oil.  Add the onion, peppers and garlic and cook for 5 minutes.  Add the cilantro stalks, chilli and spices and cook for another 5 to 10 minutes, stirring every couple of minutes.

Drain the cans of beans, then tip them into the pan with the tinned tomatoes.  Stir well and bring to the boil, then reduce to a medium-low heat and leave to tick away for 25 to 30 minutes.  Keep an eye on it, and add a splash of water if it gets a bit thick.

Get the roasted sweet potato out of the oven and stir it through your chilli with most of the cilantro leaves.

Taste and season with sea salt and freshly ground black pepper, if needed.

Scatter the remaining leaves over the top, and serve with some soured cream, guacamole and rice or tortillas.

~*~*~

Best vegetarian chilli I have ever made.  Or eaten.  I love the sweet potato.  It’s a super nice addition to the ingredients and really sets this chilli apart from other vegetarian chillies.  It has a mild heat…which is perfect for my roomie.  I like mine a little spicier, so if you’re like me, feel free to turn up the heat as you desire.

This recipe freezes really well, which is great, because you’ll definitely want more!

Recipe: Almost the Best Ever Gluten-Free Potato Soup

Okay…claims are made all the time about something being “the best ever _____” and they hardly ever live up to the reputation they have just put out there in public.  Trust me…I’ve been disappointed many times.

That’s life.

Life also is a smorgasbord of different tastes, textures, and ingredients.  So, when I’m in the kitchen, sometimes I like to change things up…get a little creative.  And that’s what happened.  You see, I was sitting at work on Monday trying to figure out the best way to use up some bin ingredients that I have yet to touch.  Sometimes my week gets too busy and cooking with the items from my CSA bin isn’t always possible.  I tend to make it up the following week as another week of CSA bin goodies are cramming my fridge.  I love it…but it can be overwhelming.

That being said, I messaged my roomie and told her I had red potatoes that needed to be used…and she sent me a recipe from Gluten Hates Me (.com) for what was being described as the BEST gluten-free potato soup…EVER!  EVER!  That’s a huge, huge claim to be making.  But, there were only 5 ingredients, so…I figured why not?  I had most of them on hand anyway.

The best part is…this soup cooks in the slow cooker.  I started mine after dinner the night before and it was ready for me to tackle it with the immersion blender when I woke up.  EASY!!  This recipe is easy.  Is it the best gluten-free potato soup ever?  Probably not…but I will tell you this…it is rich, creamy, and packed with flavor.  I even added a few touches of my own, which I’ll include in this recipe.

Recipe: Almost the Best Ever Gluten-Free Potato Soup

Almost the Best Ever Gluten-Free Potato Soup

Servings: 8
Time: Prep 15 minutes; Cook 10 hours

Ingredients:

  • 2.5 pounds Russet potatoes, washed but NOT peeled, and diced into 1/2 inch(ish) cubes (I used red potatoes)
  • 1 small yellow onion, diced
  • 5 cloves of garlic, peeled and left whole
  • 4 cups gluten free vegetable broth (I used Pacific.  Do make sure yours is gluten-free!)
  • Cinnamon
  • Salt
  • Cumin
  • 8 ounces cream cheese (I used Tofutti Better Than Cream Cheese)

Directions:

Put the diced potatoes, onion, garlic, and vegetable broth into the crock pot.  Season with your chosen seasonings.  I used cumin, cinnamon, and salt.  Stir to combine.  Cover and cook on low for 10 hours or on high for 6 hours.

Once it has cooked, cube your cream cheese into 2-inch cubes and stir it into the crock pot.

Then, using an immersion blender, carefully blend the soup in the crock pot.  If you do not have an immersion blender, don’t add the cream cheese into the crockpot.  Simply put it in the blender with 1/3 of your soup and blend.  Then reincorporate it back into the crockpot.  This will give you a chunkier soup…so I do recommend the immersion blender.

Top off however you like.  I topped mine with green onion and vegan cheese.

~*~*~

Simple flavors, but what a combination they had.  The soup is this rich, thick, creamy consistency, aided by the cream cheese.  It is really fantastic and just wows the taste buds.  It is definitely soup season and this was a hearty, delicious, and rather healthy soup to add to the winter lineup.  I was very impressed with every bite.  And I have more in my fridge and freezer…just waiting for another cool evening.

Enjoy!

Recipe: Garlic and Herb Roasted Fingerling Potatoes

It was Friday.

Yep.  Friday.  Which many of you know means…BIN DAY!!  I love my CSA bin.  The problem was…I had a lot to use up still from the previous week.  Like…potatoes.  Both red potatoes and fingerling potatoes.  The fingerling potatoes were actually from two bins ago…so I knew I needed to do that first.

Thankfully, I have a board for that on Pinterest…so I hit that up and found a recipe that sounded absolutely delicious.  My version is a slight variance on a recipe from Bon Appétit.  Really…it was delicious.

Better yet…it was easy to make.

Even better…healthy…and delicious!!

Recipe: Garlic and Herb Roasted Fingerling Potatoes

Garlic and Herb Roasted Fingerling Potatoes

Servings: 2-4
Time: Prep 5 minutes; Cook 45-55 minutes

Ingredients:

  • 6 sprigs of fresh herbs, chopped (I used rosemary and thyme)
  • 4 garlic cloves, peeled, grated
  • 1 pound fingerling potatoes, unpeeled
  • 2 tablespoons extra virgin olive oil
  • Kosher salt
  • Freshly ground pepper

Directions:

Preheat oven to 375°F.

Place herbs, garlic, potatoes, and oil in a large bowl.  Season with salt and pepper and toss to coat.

Place in a large baking dish or rimmed cookie sheet and toss.

Bake for 45-55 minutes.

Serve hot.

~*~*~

See how easy that is.  The difficult part is smelling the potatoes as they cook because it really smelled amazing and delicious.  I was ready to dive in when I pulled them out of the oven.  Total win with the potatoes.  It was nice to cook them up differently this time around.  I am going to search for more fun and different potato recipes for the very near future.

Until then…give this one a try.  I promise…you’ll fall in love with it.  Especially if you like potatoes.

I just happen to LOVE potatoes.  YUM!


Recipe: Gluten-Free Sweet-and-Sour Tofu with Bok Choy

Bok Choy.

It seems to be a seasonal favorite of my CSA bin as of late.  For two weeks in a row, it has been one of the components of my bin.  Now, normally I would simply make a stir-fry out of it…but I’ve been attempting to expand on my culinary skills a little.  Step a little outside the comfort zone.  Do something…different.

I think I accomplished that last night when I cooked up a meal inspired by the blog Big Girls Small Kitchen.  I had all the components on hand in my pantry and fridge…including the bok choy and tofu.

What emerged was a fantastic meal that really worked together.  I served mine over basmati rice…which I cooked up while I was working on the rest of the dish as well.  It was a fantastic meal and not too difficult to create either.

Recipe: Gluten-Free Sweet-and-Sour Tofu with Bok Choy

Gluten-Free Sweet-and-Sour Tofu with Bok Choy

Servings: 2
Time: Prep 10 minutes; Cook 20 minutes

Ingredients:

  • 6 ounces firm tofu
  • 2 tablespoons flour (I used Better Batter Gluten-Free All Purpose Flour)
  • Pinch salt
  • 2 tablespoons safflower, grapeseed, or other neutral oil
  • 1/4 cup lemon juice
  • 1/4 cup honey
  • 1/4 cup soy sauce
  • 1 tablespoon grated ginger (I used 1 teaspoon ground ginger)
  • 1 tablespoon grated garlic (3 cloves)
  • Sriracha
  • 2 bunches baby bok choy, rinsed, trimmed and cut into bite-sized pieces
  • 3 scallions, white and green parts chopped and separated (I substituted 1/2 a white onion)

Directions:

Cut the tofu into slices about 1 inch thick. Press the water out of the slices, then cut them into 1-inch square cubes. In a baggie or on a wide plate, toss the tofu with the flour and salt until all the pieces have a thin coating.

Mix the lemon juice, honey, soy sauce, sriracha, garlic and ginger in a small bowl.  Add 1 tablespoon water.

In a frying pan, warm the oil.  In one layer, brown the tofu (in two batches if your pan is small), about 4 minutes per side.

Return all the tofu to the pan if you browned it in two batches.

Put in the onions and the crunchy part of the bok choy and cook for 2-3 minutes, stirring constantly.  Add the green leaves and cook 1 more minute.

Add the sauce.

Bring the tofu to a boil, then lower the heat and let is simmer until the sauce has reduced and coats the tofu thickly, about 10 minutes.

~*~*~

I was so happy with the way this meal turned out.  The tofu was perfectly cooked, the flour giving it this slight texture to it, even after cooking in the sauce.  The bok choy and onion, along with the sauce brought this amazing flavor to every component.  I loved this sauce.  It smelled amazing and it had the perfect balance of sweet and sour…nothing overpowering the other.

This meal is a great source of protein.  As I said, I served mine over a serving of basmati rice…and it was delicious.  This meal was so easy to put together and cook…perfect for those nights where you don’t want to spend all night in the kitchen cooking up dinner.

Recipe: Crispy Potato Chips and Sautéed Cabbage

So…I know I have the ability to change out the items I receive in my CSA bin.  The truth is…sometimes I don’t want to.  Sometimes I like to be challenged by an ingredient…sit there for a couple days and ponder exactly how to best use this piece of produce that I don’t commonly have on hand, nor would I normally buy.  Why do I do this?  To keep my culinary skills up, of course.

Well, this week’s big challenge was this gorgeous head of cabbage.  While I could easily make a coleslaw with it…my roomie despises coleslaw and I’m not a big fan of it myself.  So…I was hoping to figure out a unique way to utilize it in a breakfast.  With a little guidance form a blog called Ditch The Wheat, I got inspired to make my own little cabbage breakfast, adding a bit of texture with some homemade potato chips.  That would give them some crunch.  I also added a hint of flavor by adding some sliced shallots and some minced garlic to my sautéed cabbage.

And…to make it all breakfast-like…I topped each bowl off with a fried, over-easy egg.  Surprisingly…very delicious and really packed with flavor.

Recipe: Crispy Potato Chips and Sautéed Cabbage

Crispy Potato Chips with Sautéed Cabbage

Servings: 2
Time: Prep 10 minutes; Cook 10 minutes

Ingredients:

  • 4 fingerling potatoes
  • 1 shallot, sliced
  • 2 cloves garlic, minced
  • 1 cup sliced cabbage
  • salt
  • pepper
  • 2 organic eggs

Directions:

Slice the fingerling potatoes thin like a chip.  I recommend using a mandolin.

Pour enough olive oil into the pan to lightly fry the potato slices.  Turn the pan to medium. Place the potato slices into the pan, sprinkle salt on them and flip when one side is crispy and sprinkle salt on them again.  These are done when both sides are crispy.  (NOTE: I used the Mastrad Topchips Chip Maker instead of pan frying them…or you could even bake them in the oven.  I’m not big on frying…but not everyone has a chip maker like I do).

Take out all of the sweet potato chips and place on paper towel.

Place the shallot in the oil and stir, allowing to soften slightly.  Add the cabbage and saute until desired crispiness.  I prefer it to be well done.  When you have about a minute left, add the garlic and stir.

While the cabbage finishes up, in a small pan, crack an egg and allow to fry on one side.  Carefully flip the egg to cook the white through, but keep the center a little runny (unless you hate runny yolks, in which case…cook the hell out of that egg).

When the cabbage is done take out of the pan and mix with the chips.  Place in two bowls and add a fried egg on top of each one.  Serve immediately.

~*~*~

I admit…I was surprised with how good this recipe turned out to be.  I found elevating the flavor with shallot and garlic was a great call.  The cabbage cooked perfectly, just slightly browned by the heat of the pan, giving it this nice caramelization.  And the egg on top just made all the difference.  One very healthy, nutritious, and different breakfast for sure.  But one that I would repeat…in a heartbeat!

Restaurant Review: Husson’s Pizza, Huntington, West Virginia

Husson's Pizza, Huntington, West Virginia
Husson’s Pizza, Huntington, West Virginia

Restaurant: Husson’s Pizza, Huntington, West Virginia

It was the night before a marathon and I was in Huntington, West Virginia.  Trust me…when it comes to dining gluten-free, Huntington, West Virginia is not where you’d want to find yourself.  Why?  There just aren’t a lot of options out there.

But…it’s tradition.

Race = fuel = gluten-free pizza.

Thankfully, before he left the running group and the state to move to Dayton, Ohio, my good friend Keith mentioned this place called Husson’s…not far from Marshall University.  As this was the Marshall University Marathon…I was going to be in that area anyway.  So Husson’s Pizza was kept in the back of my mind.  And I recalled it as the date of the race grew closer and I traveled from Louisville to Huntington.

After a very busy day of traveling and race related stuff…I was ready to tuck into my gluten-free pizza around 5 p.m.  My roomie and I had planned on splitting one of the 10 inch gluten-free pizzas.  So when we drove down to Husson’s Pizza on Hal Greer Boulevard, we parked the car, and headed toward the establishment.  Huntington, West Virginia is a mix of really beautiful buildings and some that are run down.  Husson’s was definitely one of the ones that looked down.  And if I had been traveling through, without the recommendation from my friend Keith, I probably never would have stopped there to eat.  At all.

But, looks can be deceiving.

We stepped inside, and while the place definitely looks dated, you can’t argue with the affordability of their food.  We already had an idea of what we wanted to eat…so we stepped up to the counter.  We were greeted by a very friendly guy working the register who was ready to take our order.  Cathy inquired about the gluten-free crust and they confirmed they did have it.  So, as it was the day before a marathon…we kept the flavors simple.

A gluten-free pizza with tomatoes and pineapple ($10.99).  YUM!  It’s great because you can actually choose up to 5 toppings for the pizza without being charged extra for it.  And a $10.99 gluten-free pizza is awesome.  What a great price.  With our order in, Cathy and I settled in at one of the tables and awaited our food.

A short while later, our pizza arrived.

It smelled absolutely fantastic.  It looked a mess…but…if it was as good as it smelled we were certainly in for a treat.  I snapped a picture for the blog…and we each took our first slices.

So, the pizza is really nothing to right home about.  Which was more than disappointing.  The gluten-free crust was a simple cracker crust.  Not much flavor.  And it crumbled.  It crumbled under the sauce, cheese, and our two toppings.  I had no silverware to eat my pizza with (and I normally eat pizza with a fork and knife), so as the pizza would fall apart, I would have to scoop it up with my fingers.  The sauce, however, was awesome.  It was definitely the star of the entire pizza.  I loved the smokey, rich flavor that came with this simple red sauce.  It was fantastic.  I could have eaten an entire jar of the sauce.  I loved how the pineapple and tomatoes were chopped up small…but they were just casually thrown onto the top…so it was a bit…uneven with the toppings on the 8 slices.  Like I said…decent enough pizza…but nothing that really made me want to go back for more.

While I appreciate a decent, affordable, gluten-free meal as much as the next person, I was truly hoping for an epic pizza experience.  As it was, with the exception of the sauce, this was a complete let down.  Not bad.  And if I were back in town, I would probably head here for food again…because I know they have gluten-free food I can eat.  I just…wish it had been more spectacular than it was.

When you eat a lot of gluten-free pizza…and I do…you just need a bit more than a cracker crust and a splash of sauce and a dusting of toppings.  I want my taste buds to be wowed and my stomach to be full.  This pizza didn’t accomplish that at all.  Again, it wasn’t horrible or bad…it just wasn’t what I had anticipated.  I’ve been spoiled by too many really damn good gluten-free pizzas that when I get something like this…it’s a complete let-down.

At least tradition remained thanks to Husson’s Pizza.

Husson's Pizza's Gluten-Free Pizza with Tomatoes and Pineapple
Husson’s Pizza’s Gluten-Free Pizza with Tomatoes and Pineapple

Rudi’s Gluten-Free Bakery launches new product and a giveaway!

Rudi's NEW Gluten-Free Savory Herb Stuffing
Rudi’s NEW Gluten-Free Savory Herb Stuffing

With Halloween over…the next big holiday coming up is none other than Thanksgiving.  And we all have a lot to be thankful for this year.

Do you know what I’m thankful for?

Stuffing.

Yep…you read that right.  Stuffing!

You see, Rudi’s Gluten-Free Bakery just recently launched its first ever Gluten-Free Savory Herb Stuffing.  Yep…just in time for the holidays.  I mean, if being gluten-free isn’t stressful enough at the holidays, tackling the homemade buffet at the dinner table can be enough to set you on edge.  But not anymore.  Not this year.  Rudi’s wanted to help make the holidays brighter and easier this season, and they have certainly accomplished that with their delicious…yummy…made for everyone (not just the gluten-free) stuffing.  The stuffing is a blend of Rudi’s Gluten-Free Multigrain and Original breads with savory spices that will tie in with any holiday dish on the table.  Guaranteed.  Oh, and it only takes 5 minutes to prepare…and is free of dairy, soy, and (of course) gluten.  However, this product will only be available for a limited time…while supplies last through the 2013 holiday season.  If you want to see what stores in your area carry Rudi’s Gluten-Free Savory Herb Stuffing, you can check out their Facebook page!

But…that’s not all!  To celebrate the launch of their Gluten-Free Savory Herb Stuffing, Rudi’s is also providing a giveaway on their Facebook page, running from November 4-15.  Every day, for 10 days straight, Rudi’s Gluten-Free Bakery is giving away daily prizes of fun “stuff” for their fans to use and enjoy over the holidays with their family.  In addition, fans can also download a coupon for $1 off any Rudi’s Gluten-Free Savory Herb Stuffing through the More Fun Stuff(ing) Giveaway app.

How do you enter?

Hop over to Rudi’s Gluten-Free More Fun Stuff(ing) Giveaway and enter the information needed…and who knows…you might be chosen to win one of the prizes!

GOOD LUCK!!  And stuff your holidays with delicious goodness this season with Rudi’s Gluten-Free Savory Herb Stuffing!