I have never been shy about my love of the products that Schar Gluten Free puts out on the market. I have never had a complaint about any version of their gluten free take on a bread, cookie, candy, cracker, etc. But one of my most favorite things that have introduced has to be their Gluten Free Honeygrams.
Gluten free graham crackers, my friends.
SO GOOD!
Well, with the weather cooling down…bon fires and s’mores are in season!! And thanks to these amazing Honeygrams, the gluten-free community will never lack for the perfect vehicle for marshmallows and chocolate bars.
Are you drooling yet?
I was sent a fantastic Smores kit from Schar and got to work on a recipe. Immediately, I knew I wanted to do something that I have great passion for…
Yep.
Breakfast. And yes…SCONES!! Although bagels were my second choice. I might do that in the very near future!
Below is the recipe…but before you check that out, be sure you head over to http://www.smoreschar.com/ for a free sample pack and a coupon for $1.00 off!
And then come back and check out my recipe for these S’mores Scones, made with the help of Schar’s Honeygrams!
Recipe: Gluten Free S’mores Scones
Ingredients:
For the Scones
1 cup gluten free bread mix (I used Mina’s Purely Divine)
1 cup gluten free all-purpose flour (I used Cup4Cup)
1/2 cup graham cracker crumbs (about 6 Schar Honeygram crackers put through a food processor or blender)
1/3 cup sugar
1 teaspoon baking powder
1/2 teaspoon baking soda
1/2 teaspoon salt
1/2 cup unsalted butter (I used Earth Balance)
1/2 cup plain Greek yogurt (I used So Delicious)
1 egg, slightly beaten
1 teaspoon vanilla extract
2 tablespoon milk (I used Silk Unsweetened Cashew Milk)
1/2 cup chocolate chunks/chocolate chips
2/3 cup mini marshmallows
For the Glazes
1 tablespoon butter
1-1/2 tablespoon water
1/2 cup mini marshmallows
1/2 cup confectioner’s sugar
1/8 teaspoon salt
1/3 cup dark chocolate chips or chocolate bars
Directions:
Preheat oven to 350.
Line a baking sheet with parchment paper or a baking mat.
In a large bowl, whisk together flours, graham cracker crumbs, sugar, baking powder, baking soda, and salt.
Cut in butter with pastry blender, two forks, or your hands until mixture resembles coarse crumbs.
Add in yogurt, egg, vanilla, and milk. Mix until just combined. Stir in chocolate chunks and marshmallows.
Turn dough out onto a lightly floured surface. Knead about 5-6 times until dough just comes together. Shape dough into an eight inch circle. Cut into 8 pieces and place on prepared baking sheet.
Bake for 15-18 minutes or until just starting to turn light golden brown. Remove from the oven and allow to cool.
While scones are cooling, whisk together confectioner’s sugar and salt. Melt butter and water together over medium low heat. Add in marshmallows and stir until melted. Add to sugar mixture and whisk until combined and smooth. Drizzle over cooled scones.
Melt chocolate according to package instructions. Drizzle over scones. Allow to cool and harden before serving.
Serve.
Devour.
~*~*~
These are fantastic. And they do bring that entire Smores experience and taste to your breakfast table. Scones are fluffy and crumbly and these have an extra benefit of a sweet twist as well.
Remember to head over to Schar and get your sample pack of Honeygrams. Trust me…no other gluten-free graham crackers taste like these. Even better than the real thing!
Gluten Free Sugar Cookies made from Pillsbury Gluten Free Sugar Premium Cookie Mix (and topped with Dollop Gourmet Hot Chocolate Spread Frosting and sprinkles)
I blame my neighbor. I do. Because she knows how much I like to cook and bake and make tasty treats for myself, my roomie, my friends, my co-workers, and just…people in general. So, while she was out at one of the discount stores, she snagged me four (4)…yes…FOUR…boxes of the Pillsbury Gluten Free Sugar Premium Cookie Mix and one (1) box of the Immaculate Baking Company’s Gluten Free Fudge Brownie Cookie Dough. I love it when she surprises me with gluten free goodies.
All that being said…I was out at Michael’s a couple of weekends ago and spotted a T-Rex cookie cutter. Don’t judge. My roommate loves dinosaurs. Yes…she’s in her mid-30s…but…that’s just who she is. And then…there was the Unicorn cookie cutter. UNICORN COOKIE CUTTER. I used to have a unicorn collection. I am a Boston Marathon runner. Unicorns are sort of my spirit animal.
Now, sugar cookies and I don’t have the best relationship. Every time I have attempted to make them, be it from a mix or from scratch…they have been ultimate fail. And, while the Pillsbury Gluten Free Sugar Premium Cookie Mix gives instructions for round cookies, I really wanted to make cut-out cookies. So, learning from my past in sugar cookie baking, I made up the dough and wrapped it in Saran wrap before sticking it in the back of the fridge and letting it chill while I was out and about running errands that day.
That afternoon, when I returned…and called my dad to wish him a Happy Father’s Day…I set out rolling out the chilled dough between two pieces of plastic wrap, flattening it out. Then, I took my new cookie cutters and carefully (there were some really tiny parts that were not easy to come out of the cookie cutter (hello unicorn horn)) cut out T-Rex and Unicorn shapes as I chatted with my dad. The mix set up perfectly for this…and I kept it chilling when I wasn’t using it. So, onto a baking sheet these cookies went and…BAM…into a preheated 375°F oven.
So, while these are virtually baking in my blog, let me tell you how easy this mix is to make. All you need is the cookie mix, 1/2 cup of butter (I used Earth Balance Vegan Butter Sticks – room temperature), 1 tablespoon water, and 1 egg. Simply combine all of the ingredients in a medium bowl and mix until soft dough is formed. From here, you can form dough by rounded teaspoons and put onto a baking sheet 2 inches apart…or you can chill it like I did (this was me being stubborn…I wanted cut-out cookies, dammit!) and roll it out after it’s chilled and cut out fun shapes like dinosaurs and unicorns. Adults can have fun-shaped sugar cookies too, you know?
I lost track on the first batch as my dad was a fun and worthwhile distraction. These bake for about 8-10 minutes, except in my oven, because it is old and doesn’t get as warm as it says at times. So, the cookies weren’t ready after 10 minutes, so I figured I’d go for 2 more minutes. Didn’t set a timer, and as I was rolling out the second batch and chatting with my dad…remembered those were in there and pulled them out. The edges got a little toasted, but they were still fine. I noted, much to my dad’s amusement, that the unicorns became fat unicorns. They did spread slightly…but still resembled the original shape.
T-Rex and Unicorn Cut-Out Sugar Cookies made from Pillsbury Gluten Free Sugar Premium Cookie Mix
While out grocery shopping early that weekend, I picked up a jar of Dollop Gourmet Hot Chocolate Spread Frosting. And some green sparkle sprinkles for the dinosaur cookies. I had rainbow sprinkles at home already for the unicorn cookies. HA! So, after the cookies cooled and I was off the phone and not browning the edges of the rest of the cookies, I cooked dinner…and knew these cookies would be dessert.
I snagged one T-Rex and one Unicorn cookie and gave each a schmear of the Dollop Gourmet Hot Chocolate Spread Frosting. Topped each off with some sprinkles…and dessert was ready.
I have been really impressed with the Pillsbury Gluten Free products, and these were no exception. This mix was not only easy to make…but tasted great. I always had a soft spot in my heart for sugar cookies (I used to bake them with all the neighborhood kids at a neighbor’s home every Christmas)…because they are so versatile. Top them off with frosting, sprinkles, stuff them with ice cream, or more frosting…add nuts or chocolate chips…the possibilities are endless. Sugar cookies are the ultimate decoration cookie. And while I’m not big on frosting at all (I really am not a fan), these required delicious frosting (hence…Dollop Gourmet), and sprinkles…because sprinkles are awesome.
Know what else is awesome? These cookies. They have that buttery flavor, with a touch of the sweetness from the sugar in the mix. I asked my roommate what she thought and she said they tasted just like “regular” sugar cookies. And they should. The only difference is rice flour and tapioca starch and potato starch replace the all-purpose flour that would go into regular ones. These cookies have that nice crunch on the outer edge with a soft center. SO good. And this made SO many of these. So, I have sugar cookies for days…and am wondering if I’ll ever run out at this point. At least they are amazing and yummy.
So, let’s discuss what Pillsbury puts into their Gluten Free Sugar Premium Cookie Mix, shall we? This mix is a blend of sugar, rice flour, tapioca starch, canola oil, potato startch, contains 2% or less of: salt, baking soda, cellulose, xanthan gum, cellulose gum, natural and artificial flavors.
As for nutrition information…keep in mind…these are sugar cookies. Mmmm…cookies. COOKIE MONSTER strikes again. Anyway, a serving size is 1/18th of the mix (if you make the drop cookies, this box makes 3 dozen; if you make the cut-out cookies, it varies. I got 22 cookies in mine). A serving size (for drop) is 2 cookies and for the cut-outs 1 cookie. This serving (when prepared per package instructions) will provide you with 160 calories, 6 grams fat, 3.5 grams saturated fat, 0 grams trans fat, 25 mg cholesterol, 240 mg sodium, 24 grams carbohydrates, 14 grams sugars, 1 gram protein.
I am very happy with the mix that Pillsbury has created for those of us who, perhaps, missed the amazing cookies that a company like Pillsbury puts out. I am also intending to use a box of this to make Strawberry Streusel Bars or Peanut Butter & Jelly Bars for the office birthday party that is happening next week. Just have to decide on which one I want to make. Trust me, with an office that usually turns its nose up at anything that is gluten-free, I wouldn’t serve this mix to them if I didn’t think it was worth it.
Thank you, Pillsbury, for making gluten-free baking mixes for those of us who love to have an easier and more convenient way to make cookies. Especially sugar cookies. Because sugar cookies are evil. But this was so easy and my cut-out cookies were…perfect.
So, this past weekend, I did something I have never done before…but, believe it or not…it was on my Summer Bucket List. I went and picked blueberries. Yes…I went out…in nature…to a local blueberry farm and spent 2 hours with my roommate, Cathy, picking over 10 pounds of blueberries.
What does one do with 10 pounds of blueberries, you might ask.
Well…I make a killer blueberry jam. And I did that with 5 pounds of them. And then…before we even picked them, back when only jam was in the plan, she kept saying that I was going to make Lemon Blueberry Scones. This was news to me…but I seriously hate to disappoint. So, after spending an afternoon making gluten-free sugar cookies and then…my famous blueberry jam…I got to work on some scones.
I LOVE scones, but haven’t made them in quite a long time. But…any excuse for scones, right? So…I got to work and this is what I baked up…
2 cups (240g) all-purpose flour, plus more for hands and work surface (I used 1-2-3 Gluten Free All-Purpose)
6 Tablespoons (75g) granulated sugar
2-1/2 teaspoons baking powder
½ teaspoon salt
zest of 1 large lemon
1/2 cup (115g) vegan butter, cold and grated (I used Earth Balance)
1/2 cup (120ml) coconut cream
1 large egg (or egg replacer)
1 teaspoon vanilla extract
1 cup blueberries (fresh or frozen)
Glaze Ingredients:
1/2 cup confectioners’ sugar, sifted
2 Tablespoons fresh lemon juice
1 Tablespoon lemon zest
Directions:
Preheat oven to 400°F. Adjust baking rack to the middle-low position.
Line a large baking sheet with parchment paper or a silicone baking mat. Set aside.
In a large bowl, whisk the flour, sugar, baking powder, salt, and lemon zest.
Grate the cold butter (I use a box grater; a food processor also works). Toss the grated butter into the flour mixture and combine it with a pastry cutter, a fork, or your fingers until the mixture resembles coarse meal. Set aside.
In a small bowl, whisk the cream, egg, and vanilla together. Drizzle it over the flour mixture and then toss the mixture together with a rubber spatula until everything appears moistened.
Slowly and gently fold in the blueberries. Try your best to not overwork the dough at any point. Dough will be a little wet.
Work the dough into a ball with floured hands as best you can and transfer to a floured surface. Press into a neat 8″ disc and cut into 8 equal wedges with a very sharp knife. Place scones at least 2 inches apart on the prepared baking sheet. Brush top with extra coconut cream and sprinkle with lemon (or plain) turbinado sugar.
Bake for 20-25 minutes or until lightly golden and cooked through. Remove from the oven and allow to cool for a few minutes.
To make the glaze, simply whisk the confectioners’ sugar and 2 Tablespoons lemon juice together until smooth. Add 1 Tablespoon of lemon zest. Drizzle glaze over scones.
~*~*~
These scones are best enjoyed right away, although leftover scones will keep at room temperature for 2 days. These freeze well for up to three months. Just thaw overnight in the refrigerator and heat up to your liking.
Want an amazing way to start your day…you gotta bake up some of these!! ENJOY!
1. I love eating healthy
2. I love sweets (especially chocolate)
What we have here, my friends, is a constant battle of sheer willpower. But, the fact of the matter is…sometimes you just have to find a way to treat yourself. Naturally, I stick to my necessary gluten-free, dairy-free, vegetarian lifestyle…however, this doesn’t mean that I don’t enjoy some of the finer things in life.
That being said, 2016 is a year of change for me. I’m trying to improve myself, my body, my soul, my mindset…I’m trying to reach both long-term and short-term goals. And part of that is definitely making certain tweaks to the diet.
I’m not saying I am cutting out sweets and desserts entirely. That’s inhuman. But, I am cutting back on them. And once the current ones in the pantry are moved out…they aren’t coming back in. I buy gluten-free…so I’m too cheap to just toss the stuff away.
That being said, I’m always game for trying new ways to make an indulgence healthier. And awhile back, the amazing Lottie Bildirici, better known in the social media world as “Running on Veggies” posted about the treat she made for Kara Goucher (yes…THE Kara Goucher) when she was coming to NYC to run the NYC Marathon. Kara chose blondies as her treat and Bildirici got to work researching and coming up with a recipe that would not only seem like a treat, but be made with real ingredients, nothing processed, and be healthy. When the recipe posted, I was beyond intrigued. Granted, my foray into baking using beans as a base resulted in brownies that tasted like black beans, so I did have my reservations going into this…but I decided to give it a try.
Blondies made without flour…and by using garbanzo beans (chickpeas) and dates as the sweetener. Well…there was only one way to find out how this would turn out. I hoped for the best, since Kara Goucher was a fan…but…hey…some things you have to try yourself.
So this was what I put into my food processor this past Sunday afternoon:
Everything but the dairy-free dark chocolate chips, that is. Any nut butter (or nut-free butter) will work, but I’m a huge fan, and an ambassador, for NuttZo…and it really is the best stuff on the market. Find it. Trust me…it’s worth the price!
After giving everything a whirl in the food processor, I was left with a light and fluffy fatter. I folded in the chocolate chips, sprayed down some muffin tins and began to evenly distribute the batter into 24 muffin tins.
After baking for around 40 minutes, I removed the pans from the oven and let everything sit, untouched for over an hour. At that point, I moved everything to a sheet pan (carefully) and then into the freezer. But not without trying one.
First of all, they don’t taste bean-y…and they don’t taste like dates either. They actually taste like a decadent little dessert or muffin. Especially when warmed up in the microwave for about 30 seconds or longer. Although, I love them frozen too…but I’m weird like that. These are an amazing treat and one that I don’t feel bad about eating because…it was made from real food.
I know a lot of people look down on those who enjoy a treat every now and again…but the fact of the matter is…we’ve got it all wrong. Not all calories are created equal. Just like now not all carbohydrates and fats are either. That’s the being said, I am a firm believer in counting nutrition, not calories. And that’s what making something like this is all about.
And trust me…they are SO good.
If you want to give them a try…you can get the recipe here! They are easy to make, and delicious. Trust me…you’ll want to keep these on hand! Breakfast, lunch, dinner, or a snack or dessert…these are truly a delicious and healthy treat.
Eat real food. These treats are more like a healthy choice than an indulgence. And what’s not to love about that?!
Of all the products that I received when I was a subscriber to Cuisine Cube, the ones that took me the longest to get to were the bread mixes. I have another mix (which I hope to make in the next few weeks) for gluten-free tortillas…so…this is not an anomoly. It’s just that I already have my own gluten-free bread/dinner roll flour blend that I make amazing bread with. So, why use a mix?
Besides, my bread baking skills in the gluten-free realm are…sort of hit or miss.
But my March 2015 Cuisine Cube brought me a lot of amazing goodies that I have already blogged on. The only hold-out from that cube was…none other than the lunch option (weird, I know…but probably under the impression that sandwich bread would be the end result). And that lunch option was the Sevierly Good Gluten Free Organic Bread Mix.
For those of you who are not familiar with Cuisine Cube, let me give you the rundown. Cuisine Cube is a subscription service that delivers 5-6 gluten-free, full-size products to your door for as little as $34.99/month. Inside the cube, you will discover full-size products (not sample sizes) that are made by local and smaller, artisan companies, rather than those that you can find at the average grocery store. It has introduced me to so many new and delightful products. Each box contains a breakfast, lunch, dinner, snack, and dessert product…and then, sometimes, an extra bonus item. Who doesn’t love a little something extra, right? Keep in mind, however, that Cuisine Cube has gone through some changes as of May. No longer do they strictly only offer gluten-free cubes. In addition to their gluten-free option, they now also offer Artisan and Vegan cubes as well. The Artisan cube means that you have no food allergies and foods that contain common food allergens will be included. The Vegan cubes contain products that are dairy and animal free. And, they still have the Gluten Free cubes, which will have products that contain no gluten or wheat. So, if you’re really interested in being introduced to the smaller, lesser-known, artisan companies, give Cuisine Cube a try! It’s like…Christmas…or your birthday…every month! Who doesn’t love that?! I did love it and I hope I’m able to resubscribe next year.
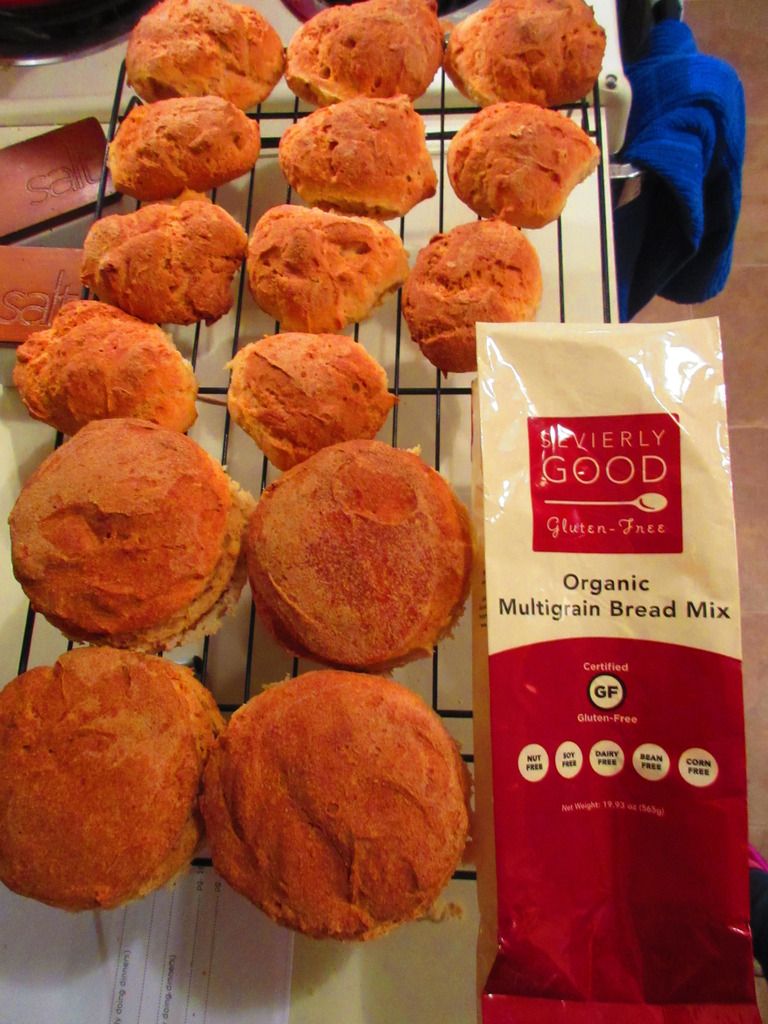
So, the March 2015’s lunch option was filled by the Sevierly Good Gluten Free Organic Multigrain Bread Mix. Sevierly Good began with the Sevier family, who began their business when they realized how difficult it was to find good, local resources for the things they enjoyed eating. The company blossomed from the need for their family to eat a gluten-free diet due to high gluten intolerances. So, with a completely different diet now being served up, the Seviers decided to get into the kitchen and begin to experiment.
With past experience in the baking industry and some great resources, the family created a list of recipes to begin with…and from there, a set of mixes that are versatile and easy to make emerged. For two (2) years, the Sevier Family made each mix by hand in a local, commercial kitchen. Since then, they have expanded to working with a manufacturer, enabling them to grow their dream and their product. Now, Sevierly Good Gluten Free products can be found in the more stores throughout the United States.
This was actually my first introduction to any of the Sevierly Good Gluten Free products. And while I don’t always appreciate a bread mix…I do love to bake. So, I sucked it up and got together the very few ingredients needed to mix up this bread and set it to baking. Except…I decided not to make a loaf. I wanted to make hamburger buns and dinner rolls. So…I got out the rings I use to make homemade gluten free hamburger buns and got the oven preheating.
All I had to do was mix together the Organic Multigrain Bread Mix with the (included) yeast packet, 2 large eggs (or egg substitute), 2 cups of warm water, and 1/4 cup olive oil. Once mixed together, if you’re baking a loaf, you pour it into an oiled loaf pan and pat/spread it into place with the spatula. For dinner rolls, drop onto an oiled cookie sheet in the desired size. I filled the hamburger bun rings…and the rest i made into 12 small dinner rolls. After they were on the baking sheet, I covered them with lightly oiled cling wrap and let it rise in a warm place for about 30-40 minutes. Then, it goes into the oven for 10 minutes at 400°F, then I turn down the temperature to 375°F and allow it to finish baking. For a loaf of bread, that’s around 40-50 more minutes. Less for the dinner rolls…but this isn’t indicated on the package. So, watch those rolls!! I got mine out before they got too baked. But, what I did notice was how golden brown they got on the top. I allowed them to cool on a rack…and then…I had to try one immediately.
I admit…I was skeptical. After finally having an amazing gluten-free dinner roll recipe of my own…I don’t stray from it often. But, this product was in my pantry and calling to me to (FINALLY) bake it up. To be honest…I was impressed. This is, perhaps, the best sandwich bread that I ever baked up from a mix. They did actually rise in the rising period, which was a step ahead of most mixes. And then, they baked up to golden rolls just ready for the dining room table. I sliced one in half, finding the center to be soft (a nice contrast to the crispy outer crust) and the texture reminded me so much of what traditional bread was like. Seriously, this is a mix that a hearty bread lover will love, even if they don’t have to eat gluten free. I was so happy with each bite of the roll. So, now I have a backup for when I’m low on ingredients for my own. Completely surpassed all my expectations.
So, let’s take a look at the ingredients. The Sevierly Good Gluten Free Organic Multigrain Bread Mix is made from organic brown rice flour, organic sorghum flour, organic tapioca starch, organic quinoa flour, organic evaporated cane juice, xanthan gum, yeast, and salt. It is non-GMO, certified gluten-free, nut-free, soy-free, dairy-free, bean-free and corn-free. Wholesome and wholegrain goodness in one little pouch.
As for the nutrition facts, the Sevierly Good Gluten Free Organic Multigrain Bread Mix has 12 servings in a package. A serving size is 1 slice of bread. Each serving will give you 110 calories, 0.5 grams fat, 0 grams saturated fat, 0 grams trans fat, 0 mg cholesterol, 45 mg sodium, 23 grams carbohydrates, 1 gram fiber, 1 gram sugars, and 2 grams protein.
One would think that with the low amounts of fiber and protein that this bread would not be filling. But I made vegan BLTs for lunch today, using one of the hamburger buns for the sandwich portion instead of bread from my freezer. I toasted the buns in the oven and then topped them with vegan mayo, baby spinach, heirloom tomato slices, and vegan (and gluten-free) bacon. This bread was…AMAZING. I loved using it for this sort of sandwich as it didn’t get soggy (even with toasting) and crumble and fall apart. It’s wonderful to have a traditional bread feel…but be able to bake it up in various ways, without having to blend all the flours myself.
I, once again, have to commend Cuisine Cube for introducing me to the Sevierly Good Gluten Free brand. The Organic Multigrain Bread Mix was amazing…like no other bread mix I have ever baked from before. Now I sort of wish that I had done up an actual loaf, just to see how it turned out. But…that’s why I can order more.
And you can too. If you can’t fiend Sevierly Good Gluten Free products in your area, head over to their Products page and have their mixes shipped directly to you. Then get into your kitchen and bake up something Sevierly Good!
Orders can also be placed online from our Products page and shipped direct to your home.
And, as many have said…”It’s more than good, it’s Sevierly Good”. We thank you for your business!
I have to give major kudos to the kitchen giant that is Williams-Sonoma…aka…that store that is like crack to me…really out of my price range, but, dammit, I keep going back to it. HA! When Cup4Cup was first introduced to the gluten free market, it was done through Williams-Sonoma stores. And that was where I first bought it…for a price tag as extravagant as the one you see attached to this little package of bread mix.
But…sometimes…the price is worth the product.
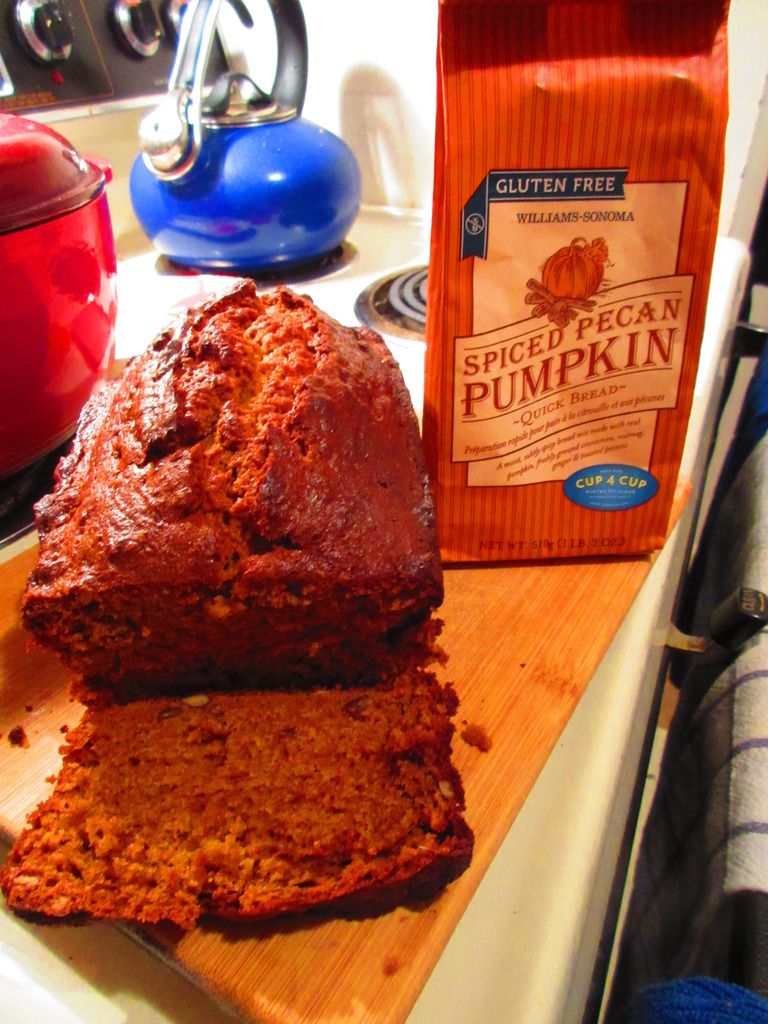
Last year, Williams-Sonoma unveiled a plethora of holiday mixes and even offered a gluten-free version of some of them. One such product was the Gluten Free Spiced Pecan Pumpkin Quick Bread mix. When I saw it, I didn’t care that it was $15, I took it up to the register and purchased it. The reason I mention Cup4Cup above is that this quick bread mix is made with Cup4Cup Gluten Free flour! I took it home and put it in my pantry, excited beyond belief to have this bread mix.
And then never got around to making it.
But the great pantry purge is on…and this was still just sitting there…begging to be made. Last night, while The Voice was on television, I set out with a mission. Not just to bake cookies (which I did), but to make this bread. I don’t know why I waited so long. It was SO easy.
In a large bowl, I simply poured the Williams-Sonoma Gluten Free Spiced Pecan Pumpkin Quick Bread mix and added 1 stick of melted vegan butter, which I let cool slightly, 1 cup water, and 2 eggs. That was it. Easy-peasy. I gave it a stir until it was smooth and blended…then poured the batter into a greased bread pan. Into a preheated 350°F oven it went for around one hour.
The wait was difficult because, as it baked, it smelled amazing. I was doing my PT stretches and practically drooling. Seriously. And when the timer finally went off and I pulled the loaf pan from the oven, it was all I could do to wait the 10 minutes for it to cool before turning it out and being able to at least sample a piece. I did manage to wait, but the minute that timer went off…it was game on.
I sliced off the very end of the bread, loving how moist and rich it felt as I sliced with a sharp knife. I could see the scattering of pecans throughout the loaf. Not only did it smell amazing, it looked amazing too. But the test always comes with the first bite.
WOW. Moist, soft, packed with flavor. It tastes like fall…giving off hints of cinnamon, nutmeg and ginger. Every bite was a delight. No joke. I loved the speckled bits of pecans throughout, which gave the moist and soft slice a bit of texture as well. The crust on the outside got to this beautiful golden shade and, while it is a pumpkin bread, it wasn’t just loaded with the pumpkin flavor. I think that’s a bit of a disappointment for me, but the spices really shine this way, and that’s not such a bad thing. It’s now dessert and possibly the base of a French toast this coming week. Seriously…I am so in love with this bread.
Let’s discuss the ingredients of the Williams-Sonoma Gluten Free Spiced Pecan Pumpkin Quick Bread. This mix is made from gluten free flour (cornstarch, white rice flour, brown rice flour, milk powder, tapioca flour, potato starch, xanthan gum), sugar, dried pumpkin flakes, unsalted pecans, buttermilk powder, korintje cinnamon powder, sodium bicarbonate, salt, nutmeg, and ginger.
As far as nutrition goes, a serving of the Williams-Sonoma Gluten Free Spiced Pecan Pumpkin Quick Bread is 1/15 dry mix (34 grams) or 1 slice (48 grams) of the baked quick bread. There are about 15 servings per container. A serving of the mix will give you 130 calories, 2 grams of fat, 0 grams saturated fat, 0 grams trans fat, 0 mg cholesterol, 190 mg sodium, 28 grams carbohydrates, 1 gram fiber, 15 grams sugars, and 2 grams of protein. When prepared, the bread goes up in calories to 190 calories per slice, which isn’t bad for a sweet bread of sorts. The package also comes with instructions for a cream cheese icing…but I didn’t have all of the ingredients on hand…and I love it plain anyway. But the option is there!
I was really impressed with how well this bread baked up, how moist and delicious it is. I love how it just tastes like fall. I was hooked in one bite. And now I can’t wait to try other seasonal gluten-free quick bread mixes from Williams-Sonoma…because they really won me over with the Gluten Free Spiced Pecan Pumpkin Quick Bread. I might have to go pick up another package before it disappears (and then not wait so long to make it this time!).
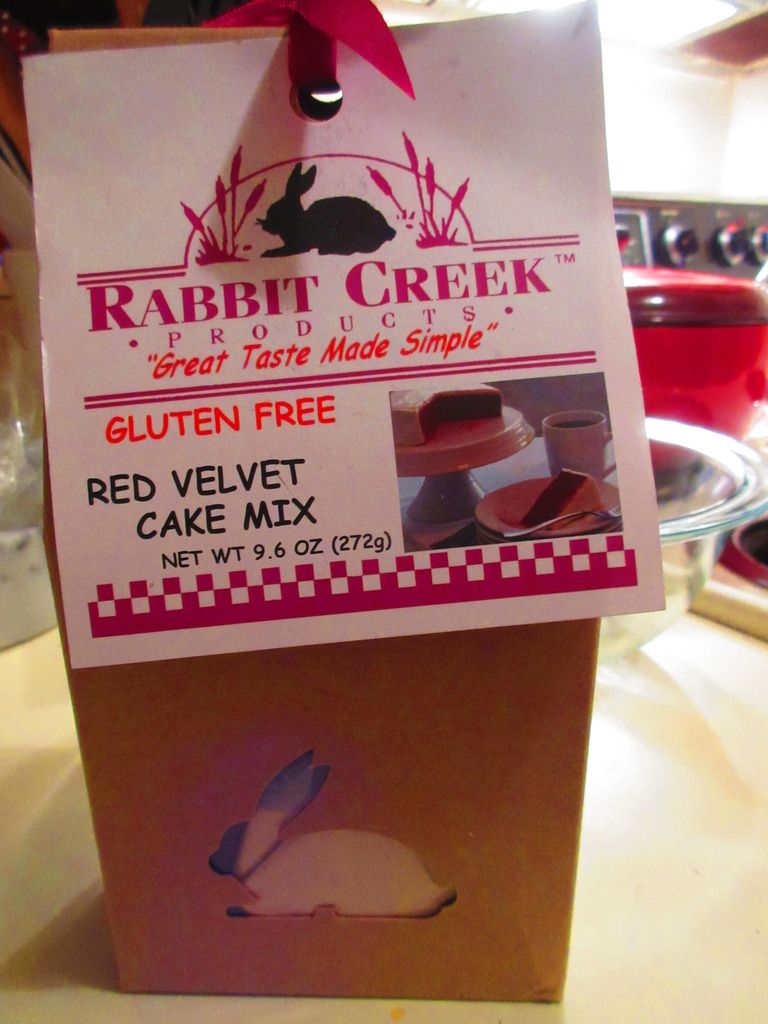
Rabbit Creek Products Gluten Free Red Velvet Cake Mix
Product: Rabbit Creek Products Gluten Free Red Velvet Cake Mix – $8.75
So, this was it…my last Cuisine Cube…and this…this product was the last one that I had from the May (Is For Mom) 2015 Cuisine Cube that I received. I had to cancel my subscription due to budget constraints…and that wasn’t an easy decision. I loved…LOVED…this company and I loved discovering new products through them.
Yeah…that’s what Cuisine Cube is all about. And one day, I sincerely hope to be able to go back to them and subscribe again. That being said, before I get to the product that I lasted until now, let me tell you a little more about Cuisine Cube.
Cuisine Cube is a subscription service that delivers 5-6 gluten-free, full-size products to your door for as little as $34.99/month. Inside the cube, you will discover full-size products (not sample sizes) that are made by local and smaller, artisan companies, rather than those that you can find at the average grocery store. It has introduced me to so many new and delightful products. Each box contains a breakfast, lunch, dinner, snack, and dessert product…and then, sometimes, an extra bonus item. Who doesn’t love a little something extra, right? Keep in mind, however, that Cuisine Cube has gone through some changes as of May. No longer do they strictly only offer gluten-free cubes. In addition to their gluten-free option, they now also offer Artisan and Vegan cubes as well. The Artisan cube means that you have no food allergies and foods that contain common food allergens will be included. The Vegan cubes contain products that are dairy and animal free. And, they still have the Gluten Free cubes, which will have products that contain no gluten or wheat. So, if you’re really interested in being introduced to the smaller, lesser-known, artisan companies, give Cuisine Cube a try! It’s like…Christmas…or your birthday…every month! Who doesn’t love that?!
The last product from my May Is For Mom 2015 Cuisine Cube box was none other than the dessert product – Rabbit Creek Products Gluten Free Red Velvet Cake. Why the long wait to use this? Well, believe it or not, with as much of a sweet tooth I am…I am not really big on cake. Secondly…I’m not a big fan of red velvet either. Hence…the reason it sat so long on my shelf. But, as I’m working on clearing out items from my pantry and fridge, prepping for a new year and new goals…this product was up. And instead of baking a cake (again…not a fan of cake or red velvet), I decided to bake cookies.
Before I talk about the product any further, let me tell you a little about Rabbit Creek Products. Rabbit Creek Products gets its name from a creek that runs through a small eastern Kansas town. The founder, Donna Cook, a self-described “country girl” grew up in the heart of Kansas, offering a diverse array of food from traditional country with influences from Germany, Sweden, and other reaches of the world. She founded Rabbit Creek Products determined to capture the taste of old fashioned cooking with a designer style and share it with people everywhere. Her innovative mixes make Rabbit Creek a leader in the gourmet industry. Cook was named business woman of the year in Kansas in 1995. Holding that title to its highest standard, Cook insists that Rabbit Creek does the same with their products. Rabbit Creek has over 350 different mixes, including dips, soups, quick breads, beer breads, brownies, desserts, and scones mixes, among others. And…now gluten free products have made their appearance on their product list.
Thanks to Cuisine Cube, I had the opportunity to try out the Rabbit Creek Products Gluten Free Red Velvet Cake Mix. As stated before…I am not a fan of cake nor of red velvet, so this was a tricky one. But, instead of baking up a cake…I decided to attempt to make cake mix cookies out of this mix. The recipe will follow below…and, I wasn’t exactly sure this was going to work…but I figured…I love cookies…why not give it a go?
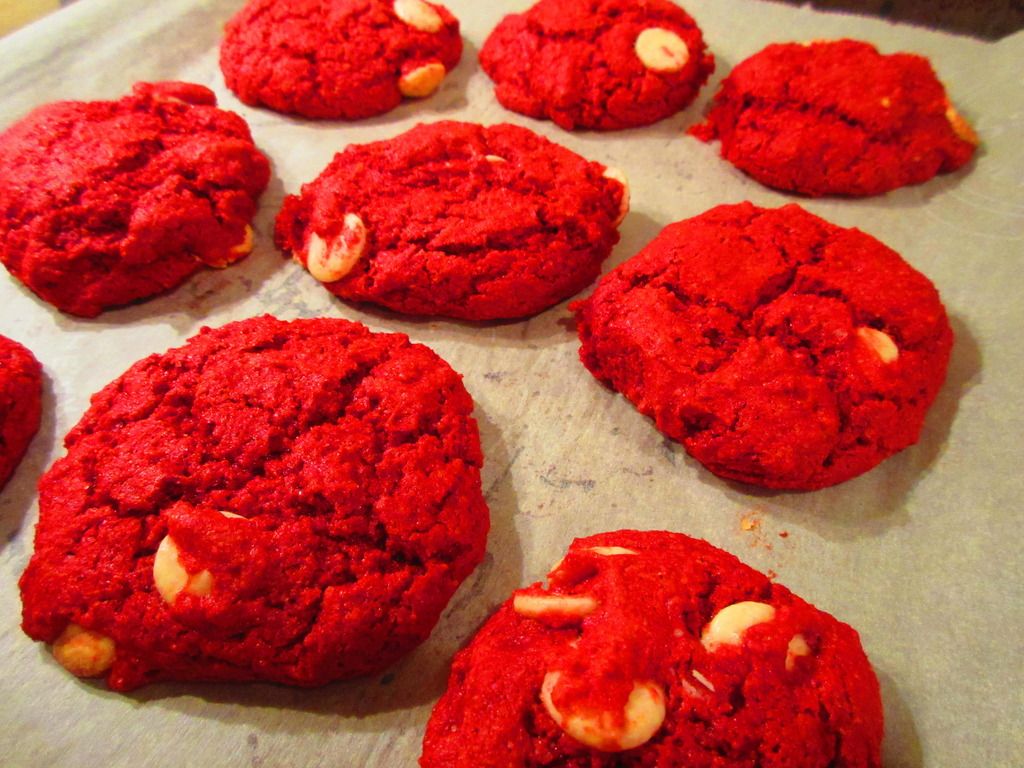
By mixing the Rabbit Creek Products Gluten Free Red Velvet Cake Mix with baking powder, eggs, vegetable oil, vanilla and folding in Greek Yogurt baking chips…I actually managed to create a decent enough, fluffy, light dough that had a cake-y and a cookie-ish like texture to it. I scooped it into little balls and placed the dough on a cookie sheet, forming 12 perfectly round cookies. Then, I put them into a preheated oven and let them bake for about 12 minutes. Out came amazing looking cookies. I let them cool for a few minutes, then…it was time to test them out.
I will say this…Rabbit Creek Products really is elevating the world of mixes. Honestly. I was amazed with how well the Gluten Free Red Velvet Cake Mix worked in this recipe. I had my doubts, but what emerged were light, chewy, soft red velvet cookies that had great flavor and weren’t overly sweet. One problem I usually have with red velvet is how sweet it tastes. While these did taste like a treat, they weren’t overly sugary and helped me feel really good about choosing to make them into cookies rather than baking a cake. The texture was soft, light, and amazing. Chewy and delicious. I brought these to work, and got so many compliments on how good these were! Definitely impressed.
So, let’s talk about the ingredients that go into the Rabbit Creek Products Gluten Free Red Velvet Cake Mix. This mix is made from gluten free flour (rice flour, brown rice flour, modified potato starch, modified tapioca starch, modified corn starch, xanthan gum), sugar, cocoa, baking powder (sodium acid pyrophosphate, sodium bicarbonate, corn starch, monocalcium phosphate, red dye #40 and natural and artificial flavor. This product is made in a dedicated kitchen.
Now let’s talk nutrition! The Rabbit Creek Products Gluten Free Red Velvet Cake Mix contains 16 servings. One serving of the package (about 17 grams) will dish up 60 calories, 0 grams fat, 0 grams saturated fat, 0 grans trans fat, 0 mg cholesterol, 50 mg sodium, 13 grams carbohydrats, less than 1 gram fiber, 6 grams of sugar, and 1 gram of protein.
And here’s how I made the cookies…with a recipe loosely based off of the Strawberry Chocolate Chip Cookies made by Sally’s Baking Addiction. I just made changes where I needed for weight of the mix and measure of ingredients. But it worked like a charm!
Recipe: Gluten Free Red Velvet Cake Mix Cookies
Red Velvet Cake Mix Cookies made from Rabbit Creek Products Gluten Free Red Velvet Cake Mix
1 package (9.6 oz) Rabbit Creek Products Gluten Free Red Velvet Cake Mix
1/2 teaspoon baking powder
2 large eggs
2 tablespoons + 2 teaspoons vegetable/canola oil
1/4 teaspoon vanilla extract
1/2 cup Greek Yogurt Baking Chips (or White Chocolate Chips would work!)
Directions:
Preheat oven to 350°F.
Line large baking sheet with parchment paper or silicone baking mat. Set aside.
In a large bowl, mix together the cake mix and baking powder. Set aside.
In a smaller bowl, whisk together the eggs, oil, and vanilla by hand. Add the egg mixture to the cake mixture and stir to form a dough- stir vigorously until all of the pockets of dry cake mix are gone. Gently mix in the the baking chips chips.
Drop rounded balls of dough, about 2 tablespoons each, onto prepared baking sheet. Stick a few more chocolate chips on top of the cookie dough balls if you want them for looks, if desired. Make sure the balls of dough are taller than they are wide.
Bake for 10-12 minutes not allowing the cookies get brown. Cool on baking sheet for 3 minutes; they will be very soft at first. As they cool, the tops may settle down; press them down gently with your fingers if they are not sinking much. Transfer to a wire rack to cool completely. Store in an airtight container for up to one week.
~*~*~
Seriously…this cake mix made amazing chewy, deliciously flavorful, yummy red velvet cookies. And this from someone who is not a fan of red velvet or cake. HA! I do love cookies though. And the addition of the baking chips definitely was a nice touch.
So, thank you, Cuisine Cube, for the introduction to the products that Rabbit Creek puts out. And if any of you want to give their products I try, I urge you to visit their Web page and place an order.
My neighbors are awesome. Let me just reiterate that fact now, if I haven’t said it enough in my previous blogs.
MY. NEIGHBORS. ARE. AWESOME.
I was downstairs having dinner with my amazing neighbors and friends on Sunday night (after a very entertaining game of cornhole), and we were just talking about anything and everything, as we very often do. For awhile, they were trying out a gluten free and casein free diet for their young son, but it wasn’t making much of an impact…so they dropped off the wagon for now. That being said, for a few weeks now, Michelle (that’s one of said neighbors) had been mentioning that Kroger now carried gluten-free and casein free cookies in the refrigerated section. I am rarely over that way, so after feeding me delicious red lentils for dinner (they had bison burgers, but she made these AMAZING lentils for me and for others to use as a side), she was packing up leftovers. They were keeping the remaining gluten-free and vegan corn pudding I made and she surprised me with a package of the very cookies she was talking about.
Immaculate Baking began with a cookie. Now that’s the best start to any story, don’t you think? Creator, Scott Blackwell used his garage to manifest a simple dream…to create perfect, mouth-watering, wholesome, homemade cookies that he could share with the world. Today, that dream is becoming a reality. Immaculate Baking offers cookies, sweet rolls, biscuits, pie crusts, and even…gluten-free cookies. All products remain true to the company’s commitment to use simple and carefully-selected ingredients…so that every bite is packed with amazing, mouth-watering, crave-worthy flavor and texture.
I have had the Gluten Free Chocolate Chip Cookie Dough that is made by Immaculate Baking, and have to still give the Gluten Free Peanut Butter Cookie Dough a try…but last night was all about chocolate. My roommate was craving it and I never say no to a cookie or chocolate. Two of my favorite things. So, out of the refrigerator (after being in there less than 24 hours) and onto a baking sheet these went. Yep…it is that easy. These break and bake cookies are little balls of dough that you pull apart and then set on the baking sheet. Place in a preheated 325°F oven for about 13-15 minutes and…at the end…you get an amazing, chocolatey-scented home…and fantastic little rounds of cookies.
Of course, the test is always with the taste. And so, I dished one up to my roommate and one to me. One bite…one bite and I was in chocolate cookie heaven. This reminded me, at first bite, fresh from the oven, of a warm pudding cake that I used to beg my mom to make for me. Fantastic chocolate flavor. Rich, chewy, and decadent. These are an amazing, chewy bite of cookie. Think about merging a dense, chewy brownie with a cookie…and that happy marriage is what this cookie is all about. I was enamored with it. I was lucky to hold myself to one. That’s how good these are. This is everything a cookie, gluten-free or not, should be. I’m beyond impressed.
Let’s talk ingredients, shall we? The Immaculate Baking Gluten Free Fudge Brownie Cookie Dough is made from palm fruit and canola oil, semisweet chocolate pieces (sugar, chocolate liquor, cocoa butter, soy lecithin, vanilla), powdered sugar (cane sugar, corn starch), potato starch, cane sugar, tapioca starch, rice flour, eggs, molasses, cocoa pressed with alkali, water, vanilla extract, xanthan gum, sea salt, guar gum and baking soda. These cookies are certified gluten free.
As far as nutrition goes, the decadent Immaculate Baking Gluten Free Fudge Brownie Cookie Dough makes 12 cookies…and a serving size is 1 of these cookies. This one cookie will provide you with 150 calories, 8 grams fat, 3.5 grams saturated fat, 0 grams trans fat, 5 mg cholesterol, 55 mg sodium, 19 grams carbohydrates, less than 1 gram fiber, 12 grams sugars, and less than 1 gram of protein. A sweet, not going to fill you up treat.
When a cookie that you don’t even have to dirty a bowl by mixing up a bunch of ingredients can spark memories and satisfy the biggest chocolate craving, you know something is amazing about them. Immaculate Baking made a cookie that is for the serious chocoholic. This cookie monster was beyond impressed…because it was everything I wanted in one perfect cookie. And, with the chewy and fudgy texture, you’d never guess these were gluten free.
I’m in a chocolate cookie coma…and I’m happy there. Join me!
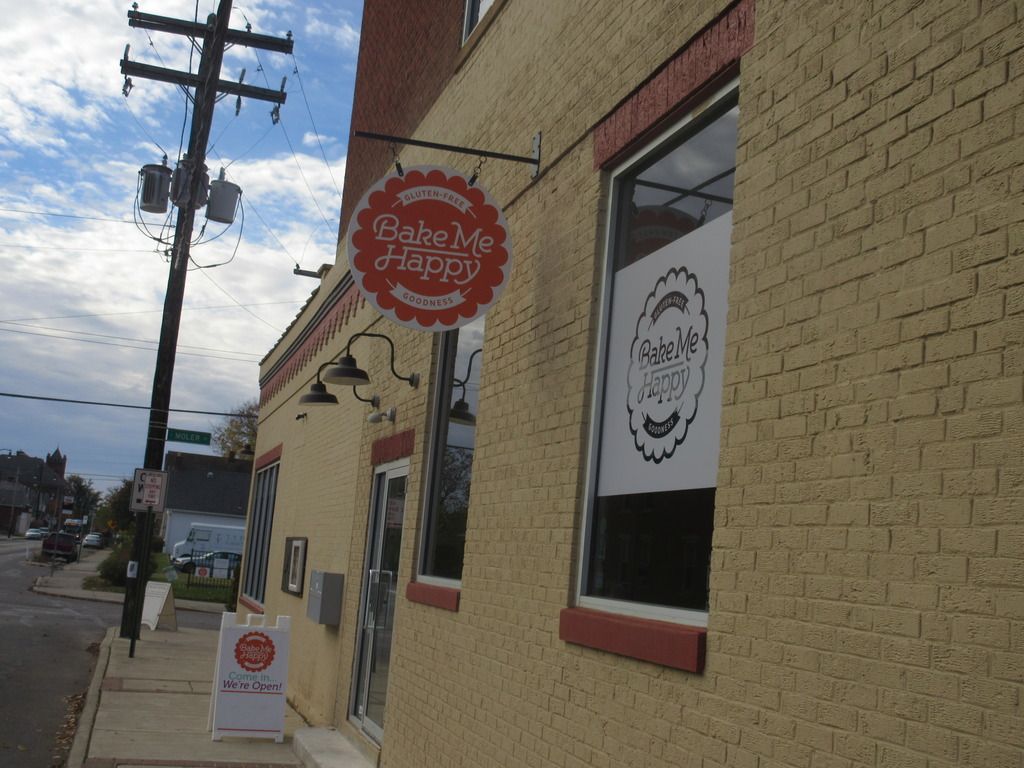
Okay…technically this is not a restaurant. There is no open seating, no tables, no hostess…none of that. This is a bakery. Not just any bakery though. This bakery has huge kitchen space to work out of, and in turn, offers up quite a lot of gluten-free goodies in their store.
Bake Me Happy was started by the lovely Wendy and Letha, committing themselves to making each and every bite that you have from their products the most decadent thing you’ve had since sliced bread. Sliced bread, however, is not on their menu. After being self-diagnosed with gluten intolerance in 2006, Wendy immediately felt relieve from a life of digestive issues. The only problem was…the gluten-free food choices available lacked flavor and texture, seriously limiting what she would be willing to consume (and who can blame her!?). After many years of self-study, she decided to take the plunge and signed up for an immersion course at the Culinary Institute of America, experimenting with recipes and trying them out on unsuspecting friends. Soon, both friends and family began requesting her treats for parties, and none of them were gluten intolerant. From there, Wendy expanded and began offering her products to the public. And from the huge response she got from her goodies…Bake Me Happy, the bakery, was born. And because Wendy understands what it is like to have a food intolerance , you can guarantee that she takes great care and pride in the products that she puts out for the public. Not only does she understand the importance of what she does, she also knows that a perfect recipe cannot be rushed and that the best things in life are worth waiting for.
Just over a month ago, I wrote up a review on Bake Me Happy’s Cream-Filled Spongies (think Twinkies), which I found in the freezer at Raisin Rack in Columbus, Ohio. While they were…okay…they didn’t wow me. And in response to my post about their product, the owners very kindly invited me to check out the bakery the next time I was in the Columbus area. As one of my best friends lives in that area, I make the trip there numerous times a year. And…this past Halloween weekend…that was where you found me. And, I recalled their invite to check out what fresh goodness they had at their bakery, instead of a freezer at a natural foods store…so…that morning after breakfast, my friends and I journeyed over to their Merion Village retail location to check out what fresh goodies awaited.
First of all, I was completely blown away by the amount of space they had in there. HUGE location. I am so accustomed to my gluten free bakeries being little, tight spots that have a few seats and a small kitchen. Not to say they don’t turn out quite a lot of products (Annie May’s Sweet Cafe and Cherbourg Bakery, I’m looking at you!), but this kitchen space was unbelievable. You step inside and it’s just open and not congested, even if there is a line. It was nice. Their storefront contains a counter that was jammed full of fresh baked goodness, and a smaller fridge that kept items like their cheesecake bars and other dairy-based goodies chilled and fresh. It was organized. It was adorable. And I already knew I wanted one of their soft t-shirts before I left. HA!
Bake Me Happy’s Gluten Free Pumpkin Cream Cheese Mummy Tart, Gluten Free Lemon Blueberry Bundt, and Gluten Free Pumpkin Spice Donut Muffin
So, after going back and forth on a few items (I really wanted one of the huge Apple Dumplings, but the roomie, who I was splitting everything with, was less enthusiastic), we finally got our turn at the counter and we made our selections, keeping it reasonable and promising to return to try more. So, four items. It was hard to narrow it down. In the end, we ended up going with a Pumpkin Cream Cheese Mummy Tart, a Pumpkin Spice Donut Muffin, a Lemon Blueberry Bundt, and (not pictured above because I devoured it on the car ride home) a Almond, Coconut & Chocolate Chip Scone. In addition to that (and for a later blog) I purchased a box of their Take-And-Bake scones in the Blueberry, Goat Cheese & Basil flavor (roomie’s choice!).
So, let’s start with what I ended up eating first. The (not pictured) Gluten Free Almond, Coconut & Chocolate Chip Scone ($3.50) sounded like a dream to me. Like…a baked treat version of an Almond Joy. Delicious, right? Absolutely right!! This is the first time I have had a gluten-free scone that lived up to the scone name. I make scones, but none of them get the layers of pastry, and that flaky and crumbly texture to them. This one had exactly that. It was the most perfect scone I have had since going gluten free. It had that hard outer layer and inside was a dry, crumbly, but not dense. More biscuit-like. I was in love. And the blend of the sweet coconut and chocolate with the nuttiness of the almond made for more love and praise than I can even convey in words here. Needless to say, the scone was devoured in record time. And I loved every single bite. I might have licked my fingers clean too. You can get Bake Me Happy’s Gluten Free Scones in the following flavors: Almond, Coconut and Chocolate Chip; Ham, Cheese and Chives; Maple Cream, Bacon and White Cheddar; Blueberry, Goat Cheese and Basil; Jalapeño, Pepper Bacon and Pepper Jack Cheese; Apricot, White Chocolate and Macadamia Nut; and Dill, White Cheddar and Stone Ground Mustard.
As I visited the bakery on Halloween, they had quite a few Halloween themed treats. One of these was the adorable Gluten Free Pumpkin Cream Cheese Mummy Tart ($3.50 (I think…)). I mean, come on…they are tarts that look like mummies. Eyes and everything. Bonus…pumpkin flavored. YUM YUM!! This was the first thing I ate the next day when I set out to devour half of each pastry (with my roommate, who is not gluten-free) consuming the other half and giving me her thoughts. I loved, loved, LOVED the light and flaky pastry that these tarts are made from. It reminded me of puff pastry…flaky, buttery, amazing, delicious, heavenly. And the pumpkin cream cheese filler was the perfect amount. Not too much. Not heavy handed. But just enough to make it feel like you were taking a bite out of an amazing pumpkin pie. I was in pumpkin-everything heaven, let me tell you!! So happy. The first thing I said to Cathy when I took a bite was, “OH MY GOD THIS PASTRY!” Blown away. This was the first pastry crust that has actually impressed me since I’ve been gluten free. Total win. Totally want another one…or ten.
The Gluten Free Lemon Blueberry Bundt ($4.50) was Cathy’s (the roomie) choice when it came to items that we selected. She is a sucker (see what I did there?) for anything lemon. So, I had a feeling when we were making our selections that she would go that route. Next time I want a flippin’ apple dumpling. Because I have never seen a gluten free apple dumpling before. But…no matter. The bundt cake was dense, but not heavy. I loved how moist and sticky good this little cake was. The blueberries brought a nice pop of sweetness. Cathy didn’t think there was enough lemon flavor in it, but I thought it struck a nice balance. The lemon was complimentary to the blueberry, not overpowering or underwhelming. Just right. I might have saved this for my last bite because, while dense, I found the texture quite light, airy, and amazing. And I thought the flavor was above and beyond what I expected. Crazy good.
And, last but not least, falling under the category that if it’s pumpkin I want to eat it…is the Gluten Free Pumpkin Donut Muffin ($3.00). Strangely enough, this turned out to be Cathy’s favorite thing that we bought at Bake Me Happy. I was shocked when she told me that. But, quite honestly, this was one of the most perfect gluten-free donut anythings that I’ve had in a long time. The texture was perfect. Not too dense, but not too light either. Perfect balance. The flavor was AMAZING. Seriously. It was pumpkin, and it was rolled in this fantastic cinnamon sugar topping that made each bite both savory and sweet and I loved it. I devoured each and every forkful. And I wish I had bought more of them. Pumpkin flavored or their standard donut muffin, it wouldn’t matter. This is the consistency of donuts that I’ve been searching for…for years now. Nailed it. And I loved it enough to lick the plate. No joke.
I have to say…fresh beats a freezer any day and Bake Me Happy sure did impress me with their fresh, made right there in the bakery, treats. There was so much to choose from and not enough room in my budget or stomach for all of it. That being said, I happily am ready to bake up some scones this weekend. And I can’t wait to add this place to my list of stops for every single time I visit Columbus, Ohio. I was beyond impressed. And the staff was so friendly and helpful. I didn’t get to meet the owners, as they were at the Celiac Conference that was going on (and that I didn’t know about until Friday as I was traveling), so hopefully next time I will be able to talk them up some.
If you are in or around Columbus, make it a point to drop by Bake Me Happy. Buy a shirt (they are SO SOFT!) and buy up their goodies. You won’t be disappointed. Not one bit. They certainly changed my tune. Fresh is best. And why not get some great gluten-free treats fresh out of the kitchen of a place that loves to bake up happiness?
It was one of those moments where you receive an e-mail with a recipe…and you’re out of town visiting a friend, who happens to keep gluten-free goodies at her house just for you! And every ingredient needed for said recipe that caught your attention is already in her pantry, fridge, or freezer.
To me, that sounds like a sign to make something for sure. And as it is traditional for the two of us to cook at least once together when visiting…this recipe seemed to fit the bill.
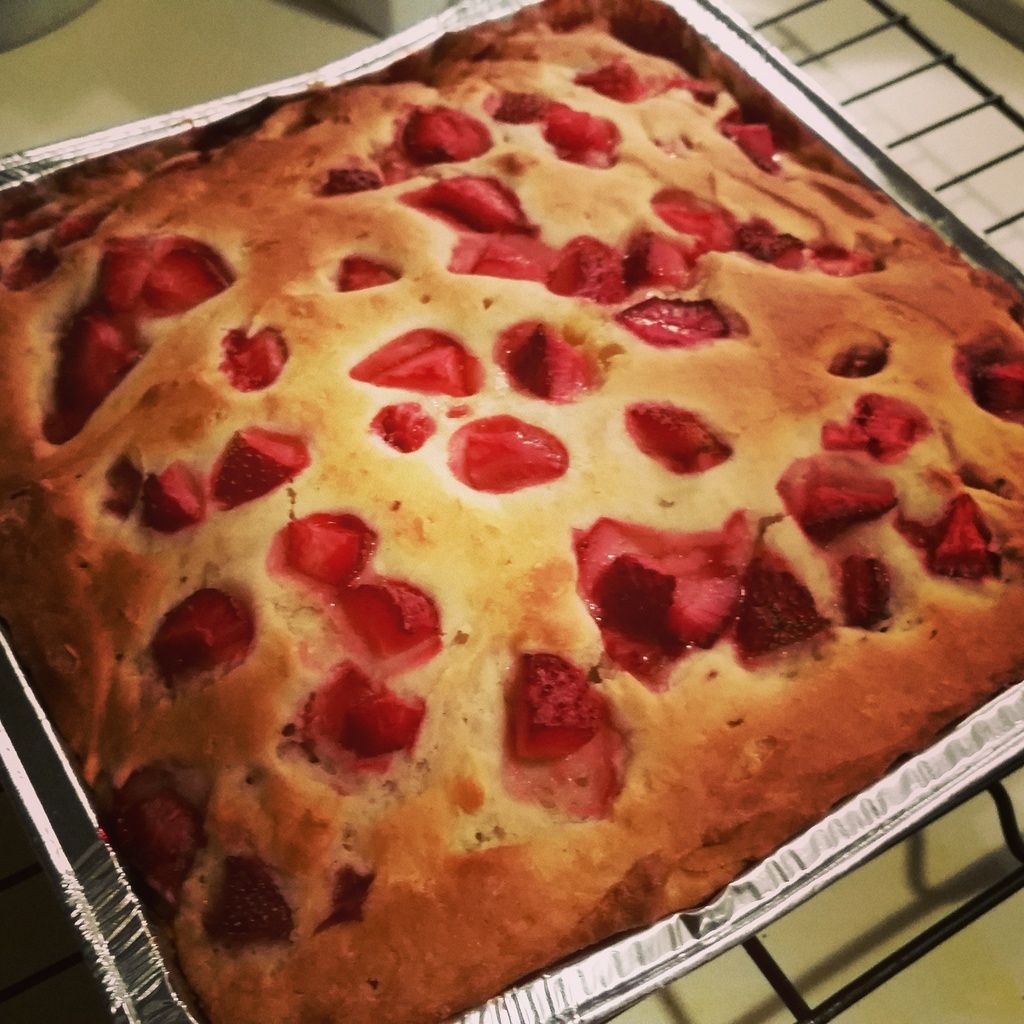
And why did it catch my eye? First…the word “breakfast” was involved. We all know that my favorite meal of the day is breakfast. Secondly…the word “cake.” Yes…CAKE FOR BREAKFAST!
I have actually made this recipe twice now…and found the flour I used for it the second time (Mina’s Purely Divine Gluten Free All-Purpose Flour) worked a lot better than the Trader Joe’s Gluten Free All Purpose that we used at Jenn’s. I served this up to my parents, my sister, and my nephews…and all loved it as much as my roommate, Jenn, and I did. So…this is forever being made.
The original recipe was from Gluten Free on a Shoestring…posted by Udi’s Gluten-Free. The recipe below…is how I make it!
Cake for breakfast…it sounds so sinful, but, even more importantly…it’s delicious.
4 tablespoons unsalted butter, at room temperature (I used Earth Balance)
1/2 cup + 1 tablespoon vanilla Greek yogurt, (If dairy-free, use soy/almond/coconut yogurt) (you make need to add more to mix)
2 eggs, beaten
1-1/4 cups fresh roughly chopped strawberries
Directions:
Preheat your oven to 350°F. Grease an 8-inch square baking pan, then line it with crisscrossed sheets of unbleached parchment paper, overhanging both sides of the pan. Set the pan aside.
Make the batter.
In a large bowl, place the flour, baking powder, baking soda, salt and sugar, and whisk to combine well.
Create a well in the center of the dry ingredients and add the butter, yogurt and eggs, mixing to combine after each addition. The batter will be thick.
Add 1 cup of the chopped strawberries and mix gently until the strawberries are evenly distributed throughout the dough, taking care not to crush the strawberries.
Scrape the batter into the prepared pan and spread into an even layer with a wet spatula. Scatter the remaining 1/4 cup chopped strawberries over the top of the batter, pressing them gently into the batter.
Bake the cake.
Place the pan in the center of the preheated oven and bake until a toothpick inserted in the center comes out clean and the top is very lightly golden brown (about 25 minutes). Remove from the oven and allow to cool in the pan for 10 minutes before lifting out by the overhung parchment paper and placing on a wire rack to cool (peeling off the parchment from the bottom of the cake if possible). Allow to cool completely before slicing into 16 squares and serving.
**NOTE: I store this in the fridge and give it a 20-30 second heat up in the microwave before eating. It is DIVINE!**
~*~*~
This cake is not just for breakfast, but it is a rather healthy, low-calorie, and amazingly moist and delicious way to have breakfast. Nothing better than having your cake (for brekkies) and eating it too! I was so impressed by this recipe, and totally made only a few slight adjustments to the recipe, but it came out perfect. And I intend to make it again very soon. It’s easy, it’s delicious…it’s what breakfast should be.