Mmmm. I love a good breakfast. I love doing something different and outside the box. I love breakfast so much that I could (and have) eat it for every meal of the day. Seriously. But when you get a little tired of various ways to do breakfast food, there is always another option out there. And, thankfully, for me, I discovered a great looking recipe via I Heart Eating’s blog, which I adapted to be dairy-free and gluten-free…for an overnight French toast recipe.
Sort of like a breakfast bread pudding.
But with bananas. And vegan cream cheese. And rum.
Yes. RUM!
And that is why, the day after I ran a marathon, I found myself in my kitchen baking up a fantastic breakfast treat. It was Easter morning, and that meant something special needed to start off the day. Aside from a short shakeout run…my only other plans that morning was to bake up this breakfast. I had actually prepared it the night before and all night it was marinating in my fridge…just waiting to be placed in that warm oven.
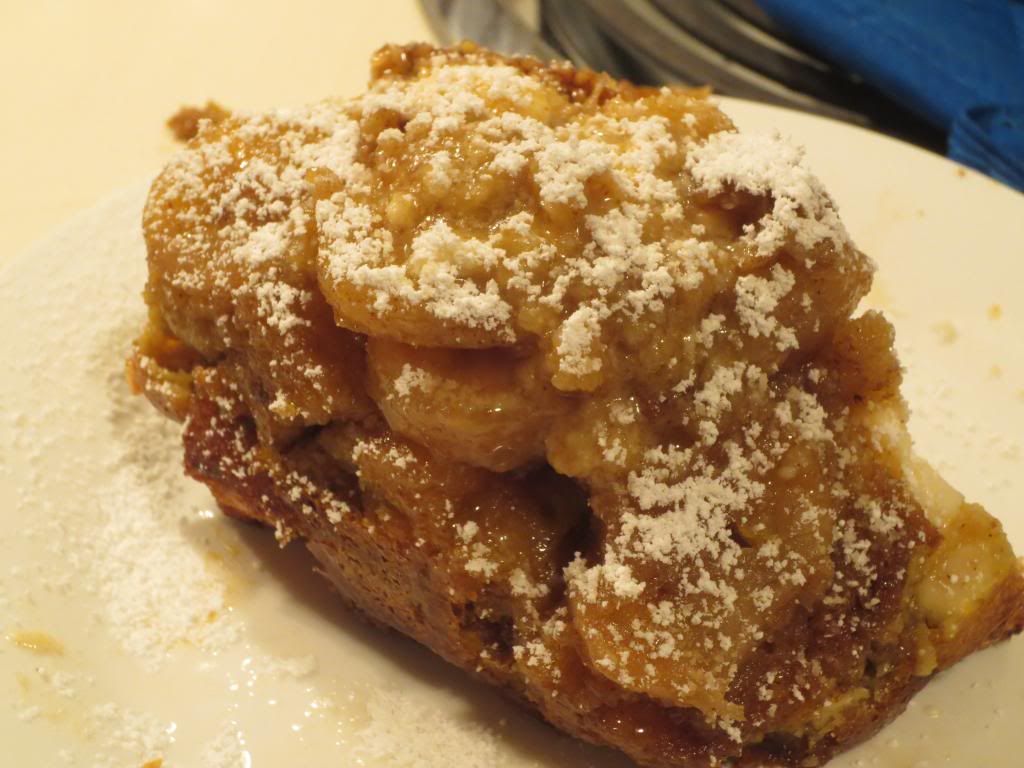
So, without further adieu…I give you the recipe for Gluten-Free and Dairy-Free Overnight Bananas Foster French Toast Casserole!
Recipe: Gluten-Free and Dairy Free Overnight Bananas Foster French Toast Casserole
Gluten-Free and Dairy-Free Overnight Bananas Foster French Toast Casserole
4 tablespoons butter, melted (I used Earth Balance)
2/3 cup brown sugar
2 tablespoons light corn syrup
1 teaspoon vanilla extract
1/2 teaspoon dark rum
1/2 tsp. ground cinnamon
2 medium ripe (not overripe) bananas, sliced
French Toast
2/3 loaf gluten-free challah bread, cut into cubes (I used Katz Gluten-Free)
4 ounces Toffutti Better Than Cream Cheese
6 large eggs
1 cup unsweetened almond milk
1/4 cup granulated sugar
1/2 teaspoon ground cinnamon
1/4 teaspoon ground nutmeg
1 teaspoon vanilla extract
Pinch of salt
Powdered sugar (for dusting)
Directions:
Make the banana topping by stirring together the melted butter, brown sugar, corn syrup, vanilla extract, dark rum, and cinnamon. To make banana topping, stir together butter, brown sugar, corn syrup, extracts, and cinnamon.Lightly grease a 9×9-9nch baking pan.Pour the butter sauce into the prepared pan.Place banana slices over the sauce.Layer half of the bread cubes over the bananas.Dot the bread cubes with the vegan cream cheese.Cover with the remaining bread cubes.Whisk together eggs, milk, sugar, vanilla extract, cinnamon, nutmeg, and salt in a medium bowl. Be sure to mix it well.Pour the egg mixture over the bread. Smoosh the bread down a little so that the bread can absorb the egg mixture.Cover and refrigerate overnight.In the morning, remove the pan from the refrigerator and leave it out while preheating the oven to 375°F.
Uncover and bake on a rimmed cookie sheet (in case the topping bubbles out…mine didn’t…but you can’t be too careful) for about 30-40 minutes or until the eggs have set.
Allow it to cool in the pan for 5-10 minutes.
Invert to serve and sprinkle with a dusting of powdered sugar.
Enjoy!
~*~*~
While I have made plenty of overnight recipes before, there was definitely something special about this one. The flavor was fantastic. The banana portion, once inverted was rich and creamy, and the bread toasted to perfection, giving a nice play on both taste and texture. I was beyond impressed with the way this turned out. It totally made for the most amazing Easter breakfast I have made yet.
It was an ordinary day when I set out to go grocery shopping at the nine different stores I frequent when I need to go grocery shopping. Hey, when you are a gluten-free vegetarian, you make time to go to the shops you know have the best deals on the stuff you need. In this case, I was at my second stop of the day – the local Whole Foods. I was actually sticking to my list…minding my budget (hard to do in Whole Foods)…
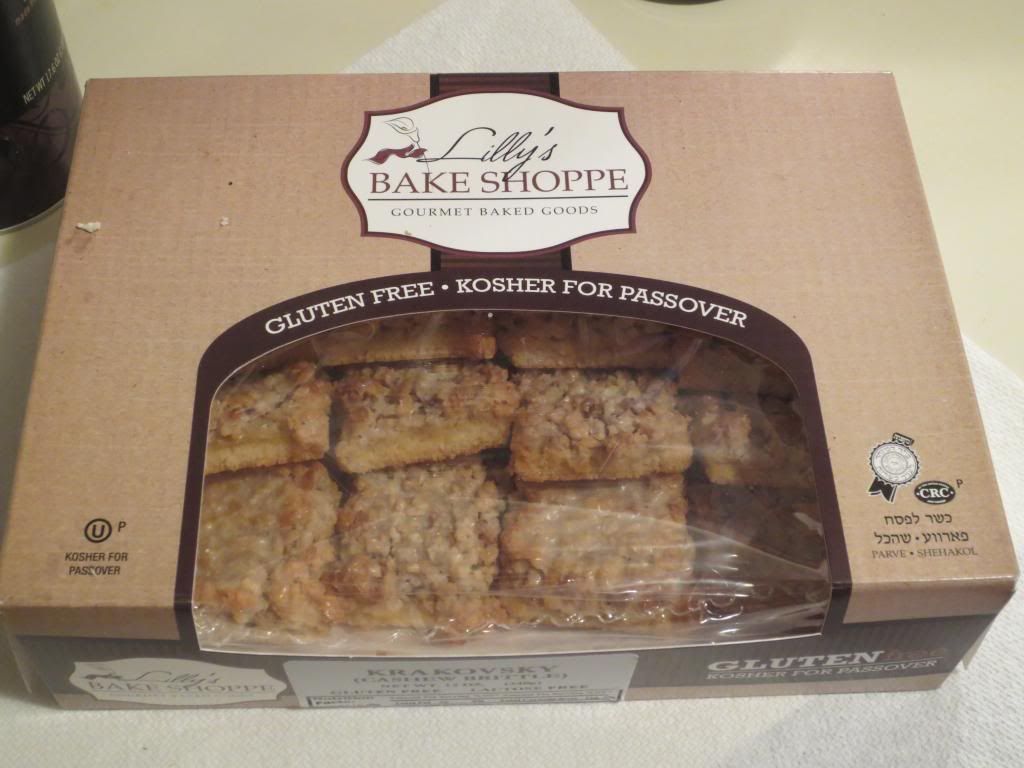
…until the roomie spotted something we hadn’t seen there before. As this was prior to Easter and during the Jewish holiday of Passover…Whole Foods had an entire table of products from Lilly’s Bake Shoppe. I had never heard of Lilly’s Bake Shoppe, but everything that was laid out on this display was not only kosher for passover, but also gluten-free.
And the roomie said the magic words…”Go ahead and pick one of them to try.”
The hard part, of course, was choosing which product to try. There were nut rolls and chocolate rolls and cakes and cookies and…it just all sounded so amazing and looked fantastic too. But…I decided to go with an interesting sounding, and not as appealing as far as visual goes…Krakovsky, or Cashew Brittle.
We paid for the treat with the rest of the groceries that were on the list and headed out to complete the rest of the grocery shopping expedition. As is normally the case, we were polishing off other sweet treats as dessert, so I didn’t actually get to these until last week. They just sort of beckoned to me every morning from the counter…”EAT ME!” I felt like Alice in Wonderland…and obviously had to resist the urge to break into the box and give it a try. But…after a visit from a friend, we were in need of an easy dessert…and this was the answer to our prayers.
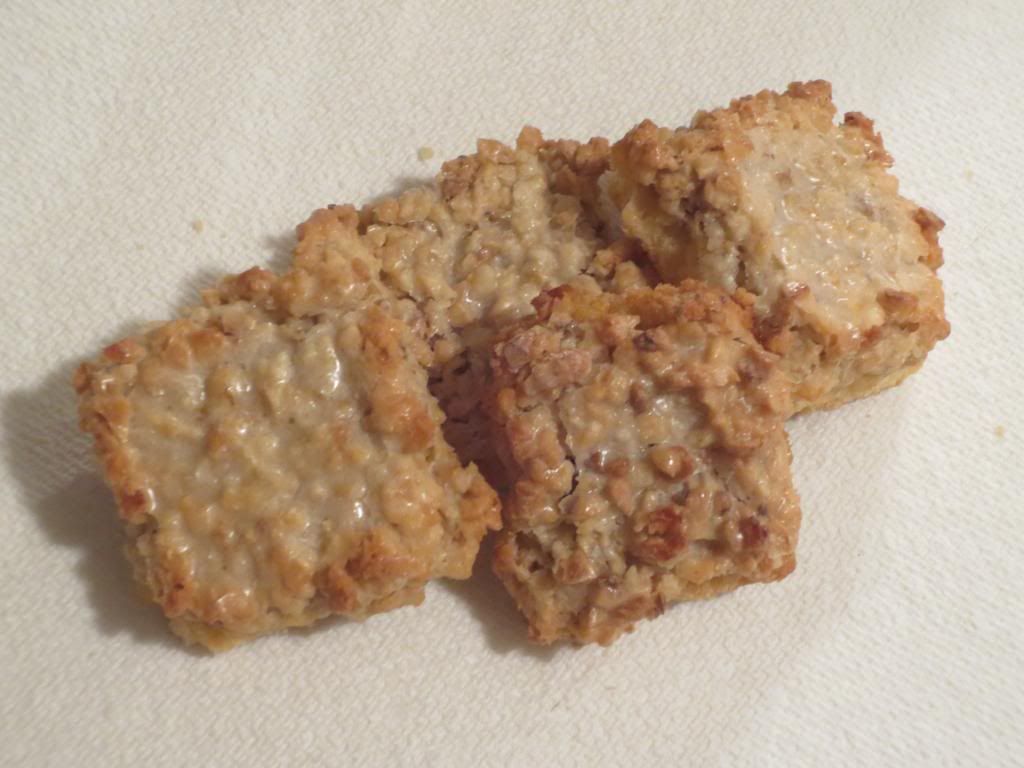
I noticed, through the little window in the box, that these actually look like little blondies that have a crumble over the top. They are sort of a light brown color, with a touch of gold…like they were baked to that perfect color to get the right look and taste to them. I pulled them out of the box, opened up the sealed package and pulled out 2 of the little bars for myself and for the roomie. I expected, upon hearing the word “brittle” that these would be hard in texture, sort of like the brittle you get at Christmas time. But, these felt like a brownie, to be honest. I snapped a picture for the blog and served them up.
I took a bite and wasn’t sure what to expect. But…what I got was a taste of shortbread with this layer of sweetness on top. It was rich and buttery and decadent. The “shortbread” like cookie base was soft and flaky. Absolutely amazing. But it is that cashew brittle top that really makes Lily’s Bake Shoppe’s Krakovsky a stand out. Totally good. You definitely find all the sweetness in this treat in that topping. The cookie-like base is soft, yet holds the topping well. And it just tastes absolutely amazing. Seriously…not too sweet…but sweet enough to make you realize that this is a treat. I loved how light these were, not dense or heavy, which was what I expected being that it is made with nuts. And the cashew wasn’t overpowered at all. I loved the hint of vanilla and lemon that you get with each bite. Simply awesome. I might be hoping that this isn’t a Whole Foods special just for passover. Because I want to try everything else they had on that table. And with Passover ending…I’m afraid I might have held off too long. These…are fantastic.
Lilly’s Bake Shoppe’s Krakovsky (Cashew Brittle) is made from cashews (this should always be the first ingredient!), sugar, eggs, apricot jam, potato starch, vanilla extract, kernel paste, shortening, almond meal, tapioca starch, lemon flavor, and salt. It is kosher, gluten-free, cholesterol free, and lactose free.
Nutrionally speaking, Lilly’s Bake Shoppe Krakovsky (Cashew Brittle) isn’t looking so bad. A serving size is 1 ounce and there are 12 servings per box. This serving size will serve you up 12o calories and 6 grams of fat. That isn’t bad for a dessert. You will also be taking in 10 mg sodium and 13 grams of sugar. I am trying to cut back on sugar, but for a baked good, this isn’t too bad. Especially since it is a dessert. This product has no dietary fiber in it, but will provide you with 2 grams of protein.
In the end…the main thing to understand is…if you want to try something different…something like a nutty, sweet shortbread…with a crumbly, yet substantial mouthfeel, then this….this is the treat for you. Lilly’s Bake Shoppe totally blew me away with their Krakovsky (Cashew Brittle). I love the way each bite gives you layers of flavor, starting with that shortbread-like base and working through the nutty-sweet topping. I am in love with this treat. I’m so glad we splurged a little that day to give it a try. Also happy I haven’t devoured this entire box…yet.
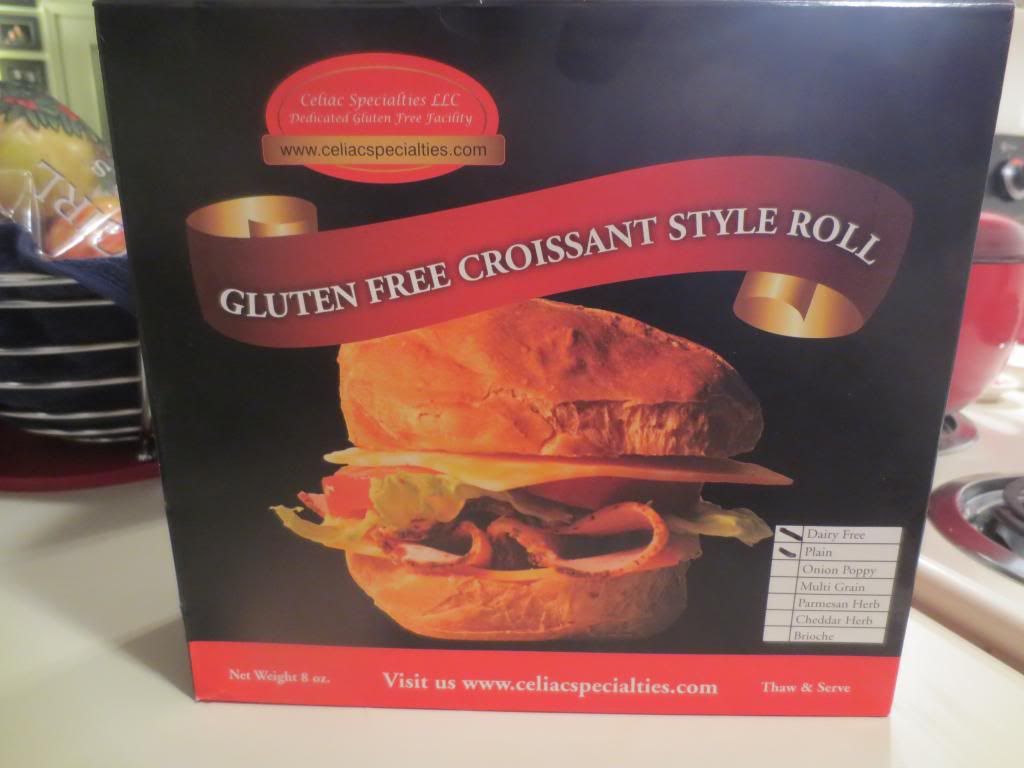
I mean…here I was…walking through the freezer section of a natural food store in Columbus, Ohio…and there you are…just screaming at me from your shelf in the freezer: CROISSANT.
Seriously…that was all I needed before jamming it into my rapidly filling basket and hoping the giant box wouldn’t take up too much of my allotted room. My roommate was treating me to gluten-free treats…things I couldn’t get anywhere else…but I had one medium-sized basket. My friend Jenn and I were pretty certain that we could “Tetris the shit” out of the basket with the products that were inside if needed. But…I was rapidly filling up and this box was one of the last items I put in. Mostly due to package size.
But…CROISSANT STYLE ROLLS! HELLO!
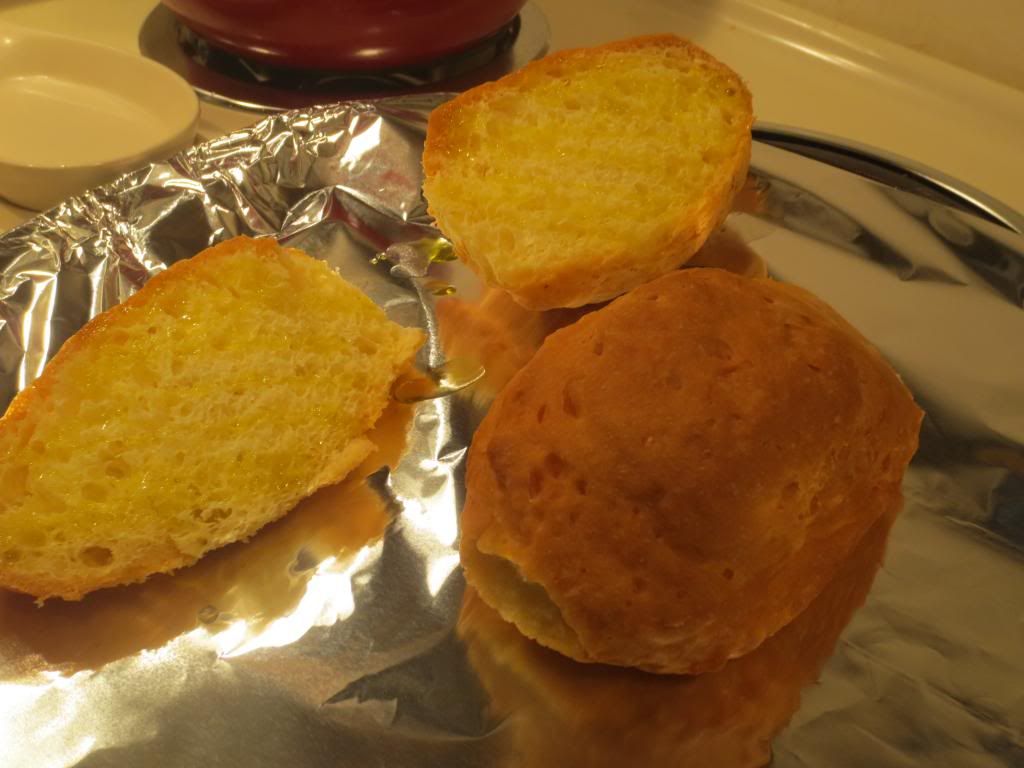
I wasn’t sure exactly how I wanted to utilize these, but I knew they were coming home with me. Fast forward to another meager living out of the pantry, fridge, and freezer week (I was out of town again, so no CSA bin). I happened to have some avocado on hand (because I always have that on hand) and a can of chickpeas, so I whipped up a delicious chickpea and avocado salad. I needed a vehicle in which to serve this on…and the Celiac Specialties Gluten-Free Plain Croissant Style Rolls were screaming (once again) to me from my own freezer. BINGO!
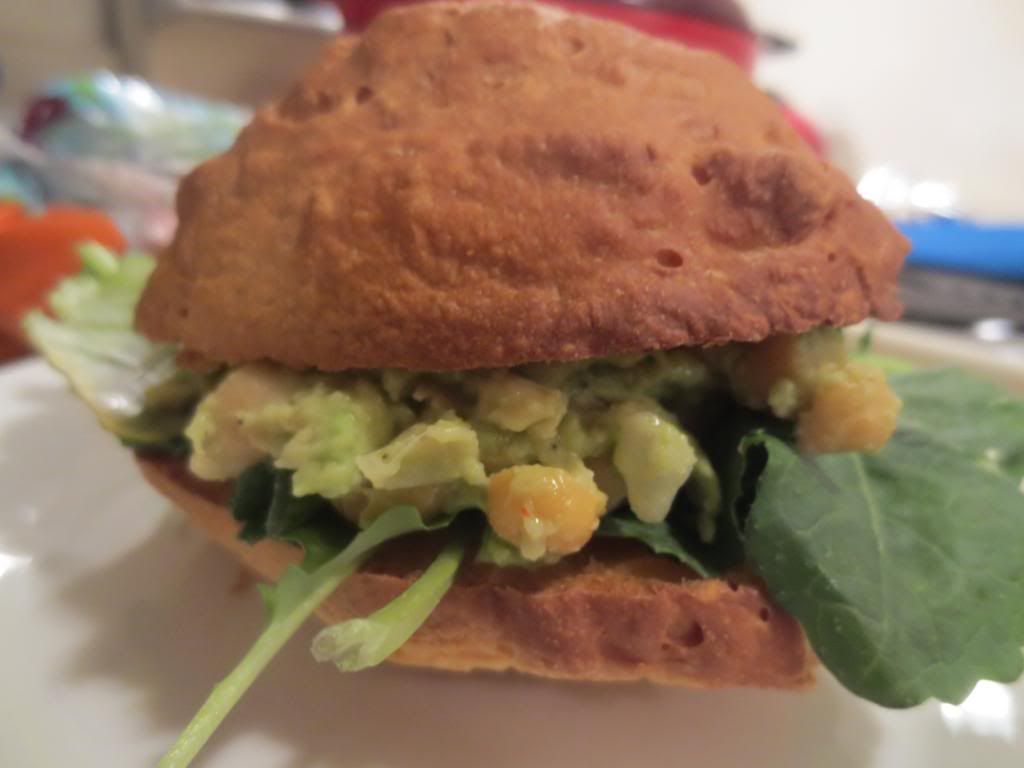
So, after a long day at work, I was ready for an easy dinner. I had set two of the four rolls in the box out on the counter to thaw in a bag. They did so beautifully. You can just eat them straight like that, but I like to toast my bread. So, I sliced the Gluten-Free Plain Croissant Style Rolls in half, drizzled lightly with olive oil, and popped them in the oven for about 5 minutes to lightly toast. While that occurred, I washed some baby kale and got the chickpea and avocado salad put together. When the Plain Croissant Style Rolls were ready, I popped them out of the oven and plated them. Then on went the kale and then a scoop of the chickpea and avocado spread.
Dinner was simple…and served.
When I first got these rolls out to toast, I noticed how light they were. Well, they were still light. Very light. In fact, toasting them didn’t really add any additional weight to them. I love that. Because so often bread can overshadow the dish. There is just so much of it. Well, this was not the case here. And upon taking my first bite, I found it to taste exactly like fresh bread right out of the oven. It had that crusty, warm, delicious, lightness to it. And it didn’t have any weird aftertaste or horrible flavor. It was just…plain bread. Very good plain bread. In a croissant roll form. And it was really, really good. I mean, really good. I was sad I only had 2 days worth of it, honestly. I liked it that much. Anything that can remind me of homemade, fresh bread is okay by me. Sure, this wasn’t seasoned with special flavors, but it’s honest-to-goodness good. And that’s all that matters.
Let’s look at the ingredients, shall we? Celiac Specialties Gluten-Free Plain Croissant Style Rolls are made from water, whole egg, tapioca starch, corn starch, corn flour, canola oil, potato starch, xanthan gum, sugar, rice flour, active dry yeast, and salt. That’s it. They are gluten-free and dairy-free.
As for nutrition… a serving size is 1 roll. In this roll, you will be consuming 110 calories and 3.5 grams of fat. One of the Celiac Specialties Gluten-Free Plain Croissant Style Rolls contains 50 mg cholesterol, 140 mg sodium, and 1 gram of sugar. That’s not too bad for bread. Trust me. You will also be taking in only 1 gram of fiber and 2 grams of protein. They are light and fluffy, remember…but not very filling. So, be sure you sandwich it up with something good and packed with both fiber and protein (like chickpeas and avocado!).
I wasn’t sure what these were going to taste like…and I admit, after my initial excitement, I was a bit worried that they would taste like cardboard…or worse. But that wasn’t the case. These actually tasted like real, “normal” bread rolls and I was thrilled that I made the decision to go ahead and give them a try. I hope I can find more of the various products that Celiac Specialties sells so I can give those a try as well.
Next time…two boxes.
Chickpea and Avocado Salad Sandwich made with Celiac Specialties Gluten-Free Plain Croissant Style Rolls
You know…I’ve had a difficult time finding decent and delicious gluten-free bagels. Being that I grew up in New York, bagels are more than just breakfast. They are a thing. No…really. They are religion. And when you are able to eat “normal” bagels, finding a good one isn’t a problem, even outside of the Bagel State of the World.
When you are gluten-free, however…this can be a task. I struggled to find a tasty and authentic bagel after I had to go gluten-free. There were so many failures. In texture, taste, and even size. I am a bagel connoisseur. I know what makes a good bagel…and the gluten-free ones just weren’t making the cut. And I was depressed.
My friend, Sara, who at the time was gluten-free, pointed me in the direction of Udi’s bagels. They were pricey…but…damn…they tasted just like the bagels I grew up eating. I was beyond impressed. And to this day, they are one of (now three) brands that I will all-out purchase because I trust that they will be good. O’Doughs Gluten-Free Bagel Thins are another. And…Katz Gluten Free rounds out the Trifecta of Gluten Free Bagel Awesomesauce™.
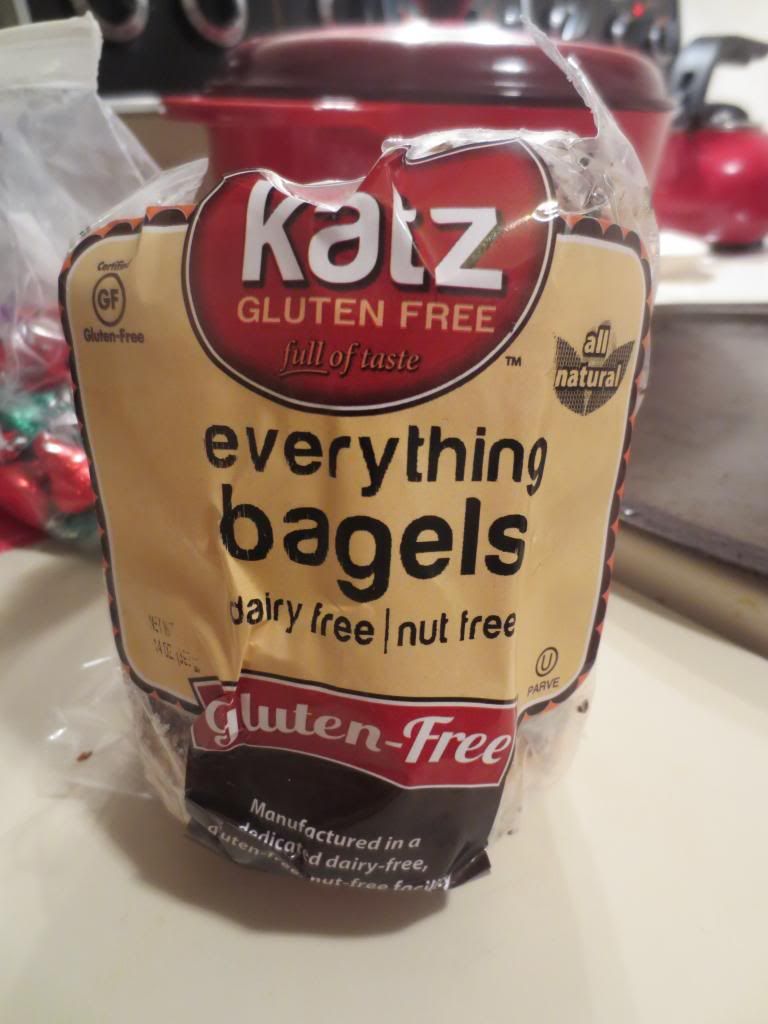
Katz Gluten Free introduced the bagels to their already amazing lineup of delicious gluten-free baked goods last year. I was stoked. I couldn’t wait to try them. But then…I just never got around to ordering them. When I had to order the $35 loaf of Gluten Free Braided Challah Bread…I added on some items to take me to $50 for the free shipping. One of these items was the Katz Gluten Free Everything Bagels.
FINALLY!!
And this morning, I pulled them out of my freezer to finally give them a try.
Katz Gluten Free Everything Bagels
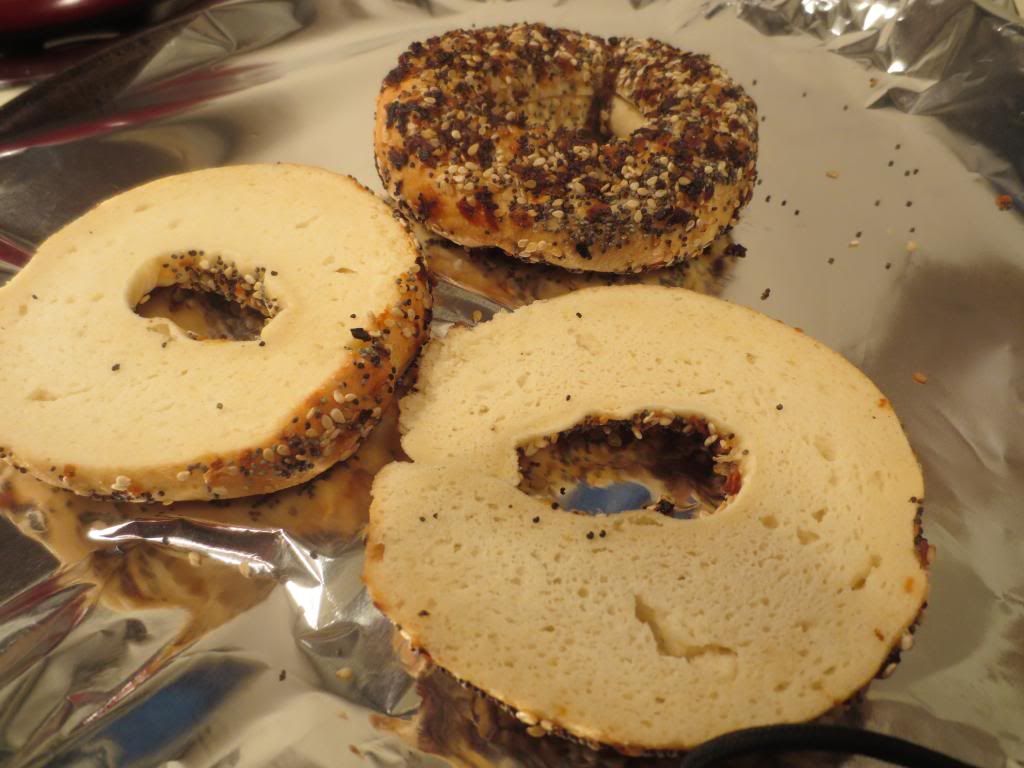
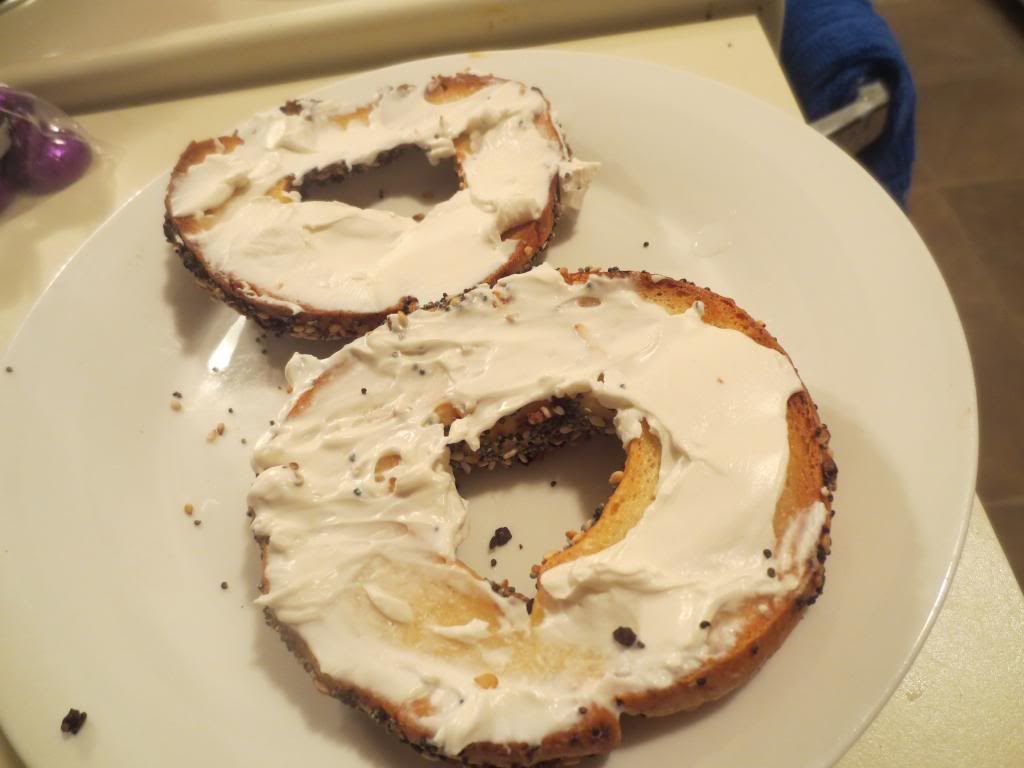
First of all…keep in mind that Everything Bagels are not meant to be clean. As in…they are coated in seeds and seasonings and…well…you are going to make a mess. It just happens. But, you see, Everything Bagels are the iconic bagel. They have all the best toppings in one place. They are legendary. And they are delicious. I hoped the Katz Gluten Free version would be as good as the ones I grew up eating.
After allowing two of the four bagels that come in a pack thaw on the counter while I went to my spin class, I returned home and turned on my oven. I removed the bagels from the ziplock bag I had them in to thaw and eased their pre-sliced halves apart. I set each one on a baking sheet and threw them into the oven to toast while I took a quick shower before having to head to work.
They toasted up beautifully. Sheer bagel toasting perfection. As I emerged, now dressed for work and no longer a hot, sweaty mess I pulled them from the oven and put a schmear of vegan cream cheese on each half. I served up one bagel to my roommate (who has had Everything Muffins, but not an Everything Bagel) and allowed her to dive in while I put the cream cheese on my own halves, poured my coffee, and went to tuck in to my own brekkies.
One bite…and I was transported back to my bagel-eating days of yore. For real. These bagels are packed…and I mean packed with flavor and all the authentic ingredients of a “real” Everything Bagel. Katz Gluten Free knows exactly how to make bagels. This was spot-on perfect in taste, texture, and…yes…even size. Udi’s Gluten Free Bagels can be a bit…large (but, OMG…SO YUMMY!), and the bagel thins are made to be thin without as much bread. This…this is the happy medium. Seasoned to perfection. No lacking in any of the toppings. Gluten Free Bagel of Everything and More!! WOW!
I’m already salivating knowing I still have two more in my freezer.
Let’s talk ingredients, as we always do. The Katz Gluten Free Everything Bagel is made from a gluten-free flour blend (tapioca, white rice, brown rice, potato, soy, corn), egg whites, water, cellulose fiber, oil, corn syrup, sugar, cellulose gum, yeast, salt, corn fiber, soy lecithin, lactic acid, sesame seeds, poppy seeds, minced garlic, and minced onion! Yep…that’s an Everything Bagel to me. These are not just gluten-free but also dairy-free.
Nutritionally speaking, these aren’t bad for bagels. Not at all. A serving size is one bagel. This serving will provide you with 250 calories and 9 grams of fat. You will also be getting 150 mg sodium and 6 grams of sugar. These are cholesterol-free. In addition, you will be consuming 12 grams of fiber and 6 grams of protein, so you will certainly feel full. That’s always nice!
Oh yeah…Katz Gluten Free Everything Bagels are definitely a hit. I intend to stock my freezer with them more often. For sure. If you haven’t tried them yet…get right on it. You will thank me for it later.
Katz Gluten Free Everything Bagel toasted with a schmear of Tofutti Better Than Cream Cheese
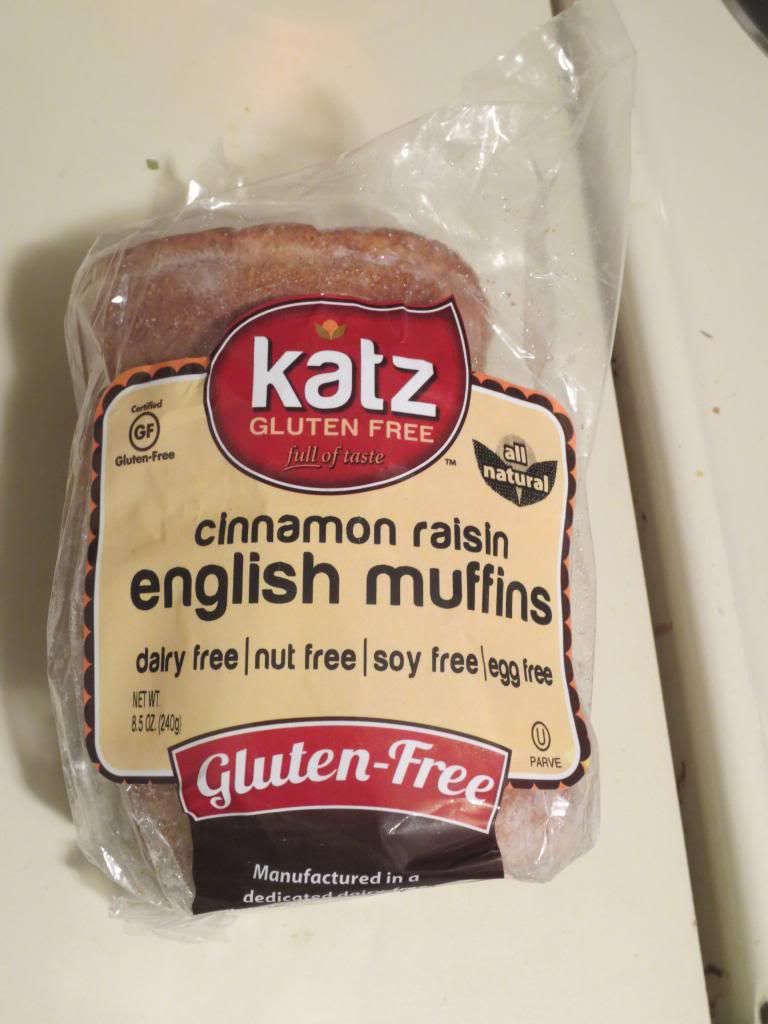
Product: Katz Gluten Free Cinnamon Raisin English Muffins – $4.99
When it comes to gluten-free goodies…it doesn’t get much better than Katz Gluten Free. Honestly. I have never, ever, ever, ever, ever…etc. been disappointed by anything that I have ordered from Katz Gluten Free on their Web site. In fact, I strongly encourage others to take the plunge and try some of Katz Gluten Free products. If you are lucky, you won’t have to always order online. Perhaps one of your local natural food stores carries some of their products. Which is great…if that is the case.
For me…I can find the pies and the breads…but for the most part…my luck stops there. So when something else catches my eye…that’s when I hit the Web site to place an order.
Trust me…you won’t ever regret hitting that check out button.
This time, after ordering the Gluten-Free Large Braided Challah Loaf, I figured I’d order a few extra items in order to round out the amount I was spending to get free shipping. I was over halfway there with just the challah…so I felt it was worth it. After perusing the items available, I made a decision to try the Katz Gluten Free Cinnamon Raisin English Muffins.
Now, I’ve tried their Gluten Free Original English Muffins before and absolutely loved them. They taste like real English muffins. Perhaps even better. So, since I love cinnamon raisin things, I figured this would be right up my alley to try. Since I was out of town and don’t have a CSA bin to prepare meals from this week, my gym mornings were spent noshing down on things in my freezer. One such item…the Katz Gluten Free Cinnamon Raisin English Muffins.
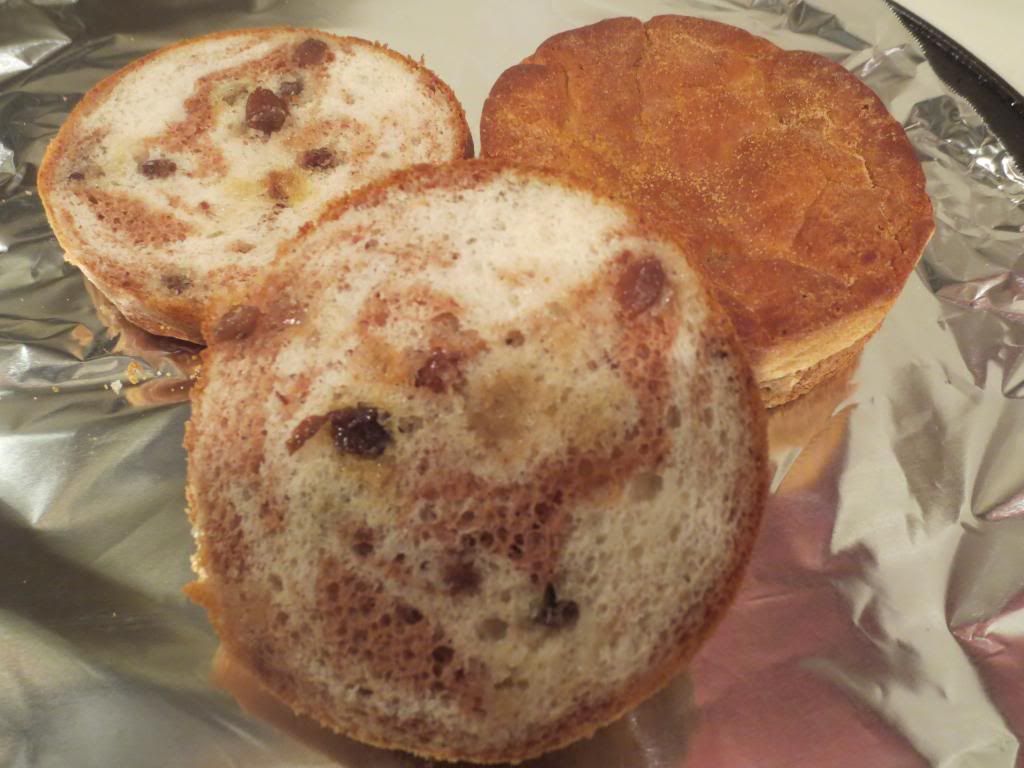
I pulled two of the English muffins (one for me and one for my roomie) out the night before to thaw in a plastic bag. I sliced them in half before packing them up while I went to the gym. I got into office after my sweat session and put these on a dedicated plate, put them in the toaster oven, and let them get all toasty and golden and warm. It took about 8 minutes from the time I put them in the toaster oven.
When they came out, they were golden and gorgeous…and smelling like cinnamon rolls. No…seriously. And we all know I love my cinnamon rolls. I put a little butter and honey on one half…and on the other half I tried out a new kind of almond butter (Wild Friends Vanilla Espresso Almond Butter). I served up a plate to my roommate and went to tuck into my hard-earned brekkies.
First bite and I was hooked. I started with the side with the butter and honey, knowing the flavor would shine through more. I was totally right about that. I loved the hint of spice from the cinnamon and the sweetness from the raisins. The texture was light…airy…perfect. These are in no way dense at all. They have the right amount of heft to them. And…that cinnamon raisin flavor is outstanding. When I tried it with the super-special almond butter, I might have fallen deeper in love. These English muffins are fantastic. Katz did amazing things with the original flavor. They are doing even better things with the Gluten Free Cinnamon Raisin English Muffins. I am hooked. And now I wish I had ordered more. Dang it.
Let’s talk ingredients. Katz Gluten Free puts the following into their Gluten Free Cinnamon Raisin English Muffins: gluten free flour (mix of potato flour and rice flour), water, potato starch, quinoa, tapioca starch, canola oil, sugar, dry yeast, baking powder, guar gum, salt, corn flour, cinnamon, and raisins. They are completely cholesterol free, gluten-free, nut-free, soy-free, dairy-free, and egg-free.
Nutrition-wise, these are actually really good on the dietary scale. For English muffins that is. One serving of Katz Gluten Free Cinnamon Raisin English Muffins is one English muffin. This will provide you with 170 calories and 3.5 grams of fat. You will also be taking in 260 mg sodium and 7 grams of sugar. Not bad for a gluten-free baked item. Honestly. In addition, you will be consuming 2 grams of fiber and 2 grams of protein.
Seriously…if you love English muffins…you will definitely fall in love with these. Katz Gluten Free really knows how to put a quality item out on the market. And if you can’t find these in your local natural foods store…go to their Web site and place an order. I promise, you won’t ever regret doing that! I never do. And all I get out of it is tasty gluten-free goodies.
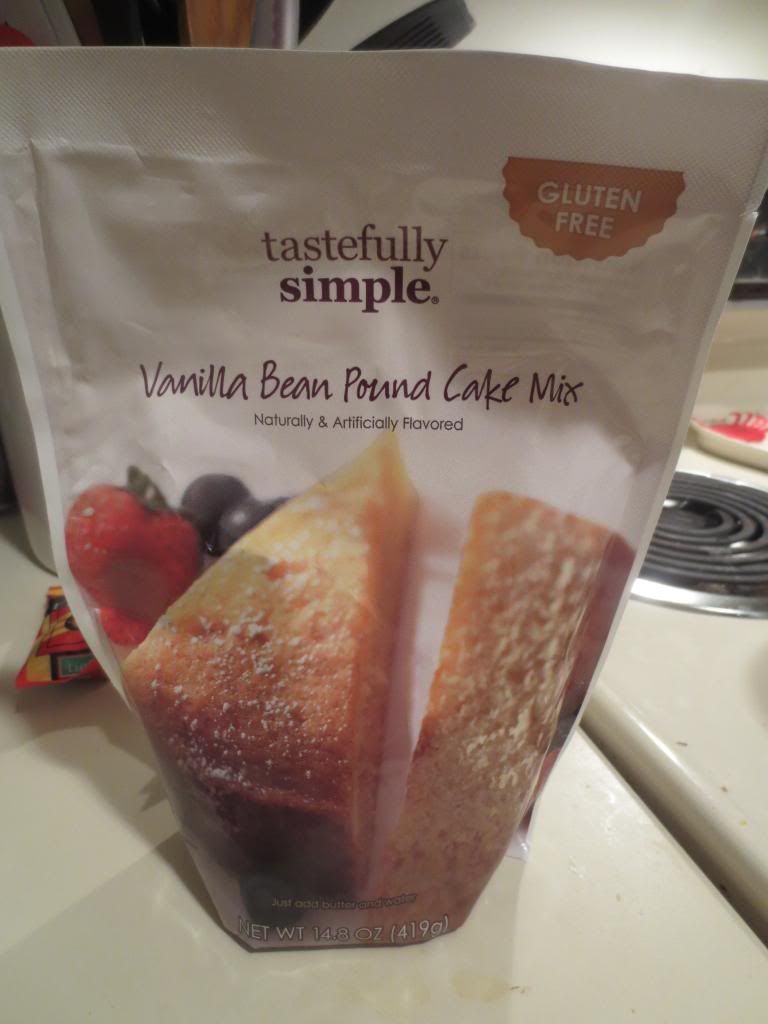
It’s no secret by now…I have a sweet tooth. I also, fortunately, love to bake! But sometimes, the art of gluten-free baking is more trouble than it’s worth. Like…a simple pound cake can mean, in order to get the right texture and density…a whole lot of different flours being mixed together with the hope that it just…tastes…good.
Well, thanks to Tastefully Simple…a pound cake no longer has to be a daunting task. In fact…it isn’t daunting at all. The mixing part is done for you. All you need to do is add one stick of melted butter and 2/3 cup water. Mix it together until it is smooth…put it in a loaf pan and put it in an oven at 350°F for around 50 minutes.
Word to the wise…pay attention to your oven heat and the time it’s in there. I’m just sayin’…
More on that later.
Now, baking should always be this simple. That’s one of the biggest draws of Tastefully Simple. Two ingredients get added to the mix. You whip it together and you bake it. Simple. Basic. And…perfection.
I could smell this amazing pound cake baking. The vanilla bean made my apartment smell so warm and inviting. I kept breathing in the aroma as I was busying myself with other tasks…such as updating Facebook, doing some of my stretches for my recovering sprained ankle, cleaning up around the living room…
The time was ticking down…and when the microwave beeped…I was ready to see what awaited me in the oven.
Except…my oven is really old…and even though it was set for 350°F…it cooked at 375-380°F. When I opened the oven, the amazing aroma of a vanilla bean pound cake flooded the walls of my apartment. But the outside was quite dark. Not burnt. Not to that point, but I silently cussed out my old oven for getting so hot. This is my lesson I learn…either set it lower when baking and check constantly on that temperature to make sure it isn’t rising above what it should be baking at…or…check on the baked goods throughout the baking process. Don’t get so wrapped up in other things.
That being said…while the outside crust got slightly darker than I would have liked…it wasn’t burnt and it wasn’t ruined. I let the Gluten-Free Vanilla Bean Pound Cake sit in the pan for about 15 minutes before running a knife along the edge of the loaf pan and turning it out. I put it on a wire rack to cool the rest of the way before wrapping it up in foil to have for dessert the following night. I was actually really excited about this. It has been three years since I’ve been able to have pound cake. And if the Gluten-Free Beer Bread from Tastefully Simple was any indication of the quality of their products…I was really excited to be trying this out. I LOVE POUND CAKE!! And I love anything vanilla. So this was the best of both worlds.
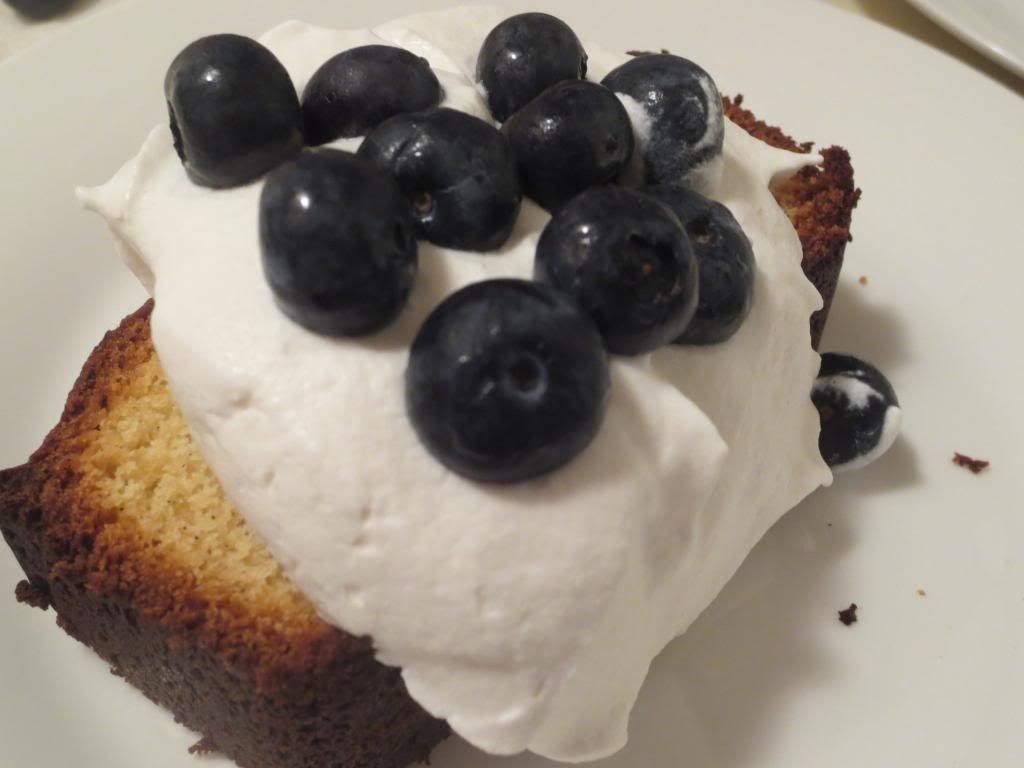
After a long day at the office and a quick dinner…my roommate and I decided it was time to slice into the Tastefully Simple Gluten-Free Vanilla Bean Pound Cake. The pouch the mix comes in says that it serves 8, but I am totally getting about 12 slices out of this cake. Honestly. I had picked up some fresh organic blueberries at the store and had some TruWhip in the freezer, which I put in the fridge while I was at work to thaw. Pound cake for dessert was a go. I sliced into the loaf, laying each slice down on the plate. I topped it off with a healthy dollop on TruWhip, then tossed a handful of the organic blueberries on top. Dessert was as simple to put together as the pound cake was to bake. I settled in with my slice and cut into it with my fork.
It was moist and and soft, yet didn’t have that graininess and that potential to crumble like so many gluten-free baked goods. Even with a darker crust on the cake, it was still packed with amazing vanilla flavor and it was still moist and soft and amazing. It was everything that a pound cake should be…but it’s gluten-free and no one would even know it. I loved the specks of vanilla bean that you find throughout the slices of pound cake. It was so good that it brought tears to my eyes, since it had been forever since I had actually been able to eat one. This…was so easy to make…and was so full of flavor and amazing texture.
Ingredient-wise, the mix that is sent to you contains: sugar, rice flour, non-fat milk, egg. potato starch, maltodextrin, tapioca flour, less than 2% of emusifier, baking powder, salt, vanilla bean seeds, xanthan gum, artificial flavors.
Nutritionally speaking, a serving, which is 1/8 of the cake, provides you with 220 calories and 2.5 grams of fat. You will also be taking in 90 mg cholesterol, 230 mg sodium, and 28 grams of sugar. It is a cake. So don’t freak out, okay? In addition, you will be provided with less than 1 gram of fiber and 5 grams of protein. So…you will feel full, but it won’t keep you full. Of course, those stats are simply for the dry mix. You still have to figure in the stick of butter that you add. Another reason I managed to portion this cake out to 12 smaller servings. Trust me…you won’t even notice.
Tastefully Simple…you totally win once again. The Gluten-Free Vanilla Bean Pound Cake Mix bakes up the most perfect, delicious, so-good-you-won’t-guess-it’s-gluten-free, pound cake that I’ve ever tasted. Ever. It’s fantastic. And I’m totally in love with Tastefully Simple. I have my friend, Rebecca Fifield, to thank for sending me this product. If you are interested in trying it, please check out her page… https://www.tastefullysimple.com/web/bfifield. She will be more than happy to get you the products you want to try! And, trust me, this is worth it.
A slice of Tastefully Simple Gluten-Free Vanilla Bean Pound Cake (topped with TruWhip and organic blueberries)…my oven was too hot so it got a little dark…but it still rocked my gluten-free dessert life!
There is one thing that I love to do over at my friend Jenn’s house…and that’s cook. Especially a breakfast on Sunday. Saturday we sometimes cook in…sometimes we out. But Sunday…we normally always make something. And that was the case this past weekend after we discovered a drool-worthy recipe on Pinterest…hosted on Smitten Kitchen’s blog. What drew my attention to it was the salted caramel portion of the bread pudding recipe. It sounded divine.
So…I planned it out with Jenn. I’d order the gluten-free challah bread if she could get the rest of the necessary ingredients.
The plan to bake this on Sunday morning was totally on. And that morning, with my ginormous gluten-free braided challah loaf from Katz Gluten-Free ready to slice…we set to work. While this recipe does take some time to prep…it’s worth it. I’d make this again in a heartbeat. And I will. I have plenty of extra bread to use up. So…go ahead…try it. Don’t be intimidated. My modifications were made to make it gluten-free. It didn’t take away from any part of this dish. The texture and flavors were to DIE for.
One word of warning…that caramel can get pretty hard…so make sure you don’t do what we did and throw it in the freezer. LOL!! Lesson learned.
Recipe: Gluten-Free Morning Bread Pudding with Salted Caramel
Gluten-Free Morning Bread Pudding with Salted Caramel
3/4 cup plus (optional) 2 tablespoons granulated sugar
6 tablespoons unsalted butter
1/4 teaspoon flaky sea salt or just 2 or 3 pinches of a coarse one
10 to 12-ounce loaf brioche or challah bread (cut into slices about 1/2-inch thick and about 3 inches square or round, which sounds really persnickety, but they really do fit better in the pan this way) (I used Katz Gluten Free Large Braided Challah Loaf)
6 large eggs
1 cup mascarpone cheese, divided (1/4 cup for custard; 3/4 cup for serving)
1 cup milk
1/4 teaspoon almond extract
Directions:
First, choose your baking dish. We opted to use a 9-inch round cake pan, which was a squeeze, but we made it work. Other options would be 2-quart oval gratin/roasting dish, a 9- to 10-inch cast iron skillet, a 2-quart casserole dish or 1 deep-dish pie pan.
If your dish is safe for the stove top, use this to make the caramel. If not, use a small, heavy saucepan and place 3/4 cup sugar, butter and sea salt and heat over medium heat. The butter will melt and, after 7 to 10 minutes, the sugar will dissolve and begin to brown. Reduce heat to medium-low and stir with a spoon or spatula so that it browns evenly. The butter does separate from the sugar, but that’s okay. Just continue to stir them together. It will all work out in the end even if it splits. I know…because ours did!
If you’re using a saucepan, your caramel is done when it reaches a copper color. Pour it over the base of your baking dish.
If you’re making the caramel in your dish (like a cast iron skillet), your caramel should be taken off the stove a step sooner, a shade more pale than copper, something of a medium brown; this is because it will continue cooking and darkening for a minute off the stove.
Regardless of what you choose to bake it in, place the dish in refrigerator and chill until caramel is cold and solid, about 30 minutes. Once chilled, arrange the bread slices. Place the heel of the bread in the center and do what you can to fan the slices around it, overlapping each slightly and knowing with complete confidence that even if your dish doesn’t resemble a blooming rose, nobody will care at all. Mine looked nothing like a blooming rose…and, honestly, no one cared.
In a large bowl whisk together eggs, remaining 2 tablespoons sugar (if using; I skipped this) and 1/4 mascarpone cheese (save rest for serving), until very smooth. Add milk and almond extract. Pour this over the bread, making sure to saturate all of it. Cover tightly with plastic wrap and chill for about 30 minutes to an hour. You can let it soak overnight if you have that sort of time or plan that far in advance. If you bread seems too high in the vessel to get a good soak, you can weight it with a plate in the fridge.
After the allotted time (or in the morning), take your dish from the fridge. Heat oven to 375°F. Remove plastic from dish and bake 30 to 35 minutes, until moist but not wet in center. Remove from oven and run a knife around edge of dish, loosening bread from sides. Place a serving plate over top of dish (bottom side up), and, using potholders, hold pudding over sink and flip pudding onto the plate. Lift baking dish off plate; scrape any extra caramel from pie dish over pudding.
Serve, cutting it into wedges at the table and spooning a healthy dollop of mascarpone onto each plate.
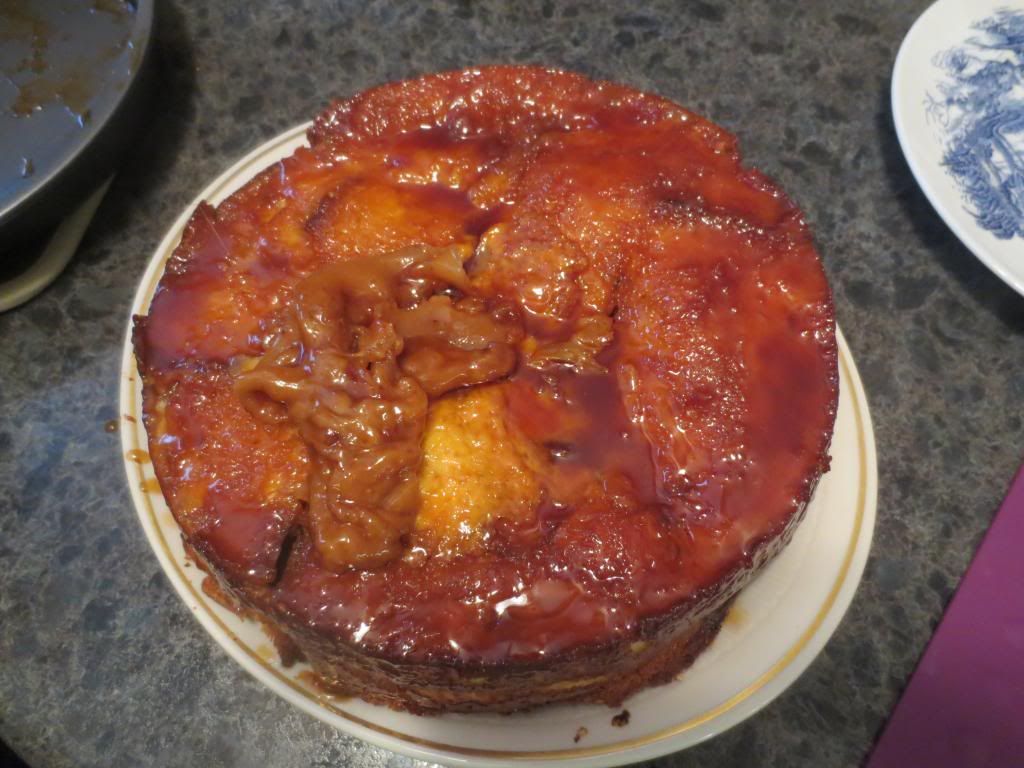
A slice of Gluten-Free Morning Bread Pudding with Salted Caramel
~*~*~
While the original recipe called for this to soak overnight, we were busy watching Thor 2…so that didn’t happen. The fact that we only let it soak for about 30 minutes in the fridge did not, at all, make the dish any less of a delicious treat. It worked perfectly. So, don’t feel like you have to make it the night before…unless you have that sort of time. Do plan ahead though, because this does take some time. Jenn and I took out 2 of the eggs from the original recipe as we thought 8 eggs was a bit much. I think we made a good call. This cooked up to a beautiful perfect meal. And we all sat and enjoyed it…and kept the leftovers for the next couple of mornings. SO amazing and delicious!!
Product: Katz Gluten Free Large Braided Challah Loaf – $35.00
Let me tell you…I adore products from Katz Gluten Free. I have been pimping the quality, taste, and everything about their variety of products since I have tried so many of them. However…in order to make a gluten-free breakfast bread pudding with a friend of mine…I needed some gluten-free challah. And I knew the only place to get it was from Katz Gluten Free.
I debated for a long moment over whether to go ahead and order the very, very, very pricey Large Braided Challah Loaf…or just skimp on that line of thinking and get either the sliced challah loaf or the rice challah. I debated. Price had a lot to do with it. I mean…holy gluten-free gods…$35 was a lot to spend on a loaf of bread. But…I figured I wanted to go for quality of what we were making and opted to go ahead and place an order for Katz Gluten Free Large Braided Challah Loaf. I just hoped it was worth the $35 I was spending on it. Oy!
A few days later, the loaf arrived via UPS…and I was really excited to take a look at what a $35 loaf of bread looked like.
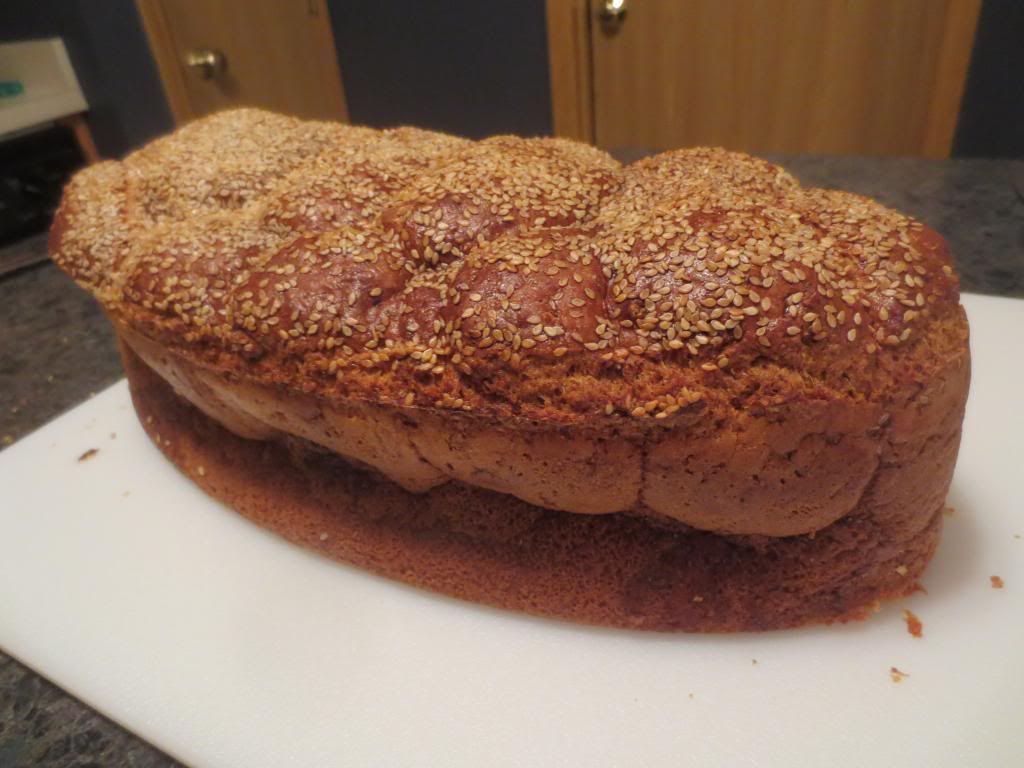
Little did I know that when the loaf is called a large braided loaf…it really is LARGE!! Seriously…the size of two of my heads put together. That is not an exaggeration!
I only hoped the Large Braided Challah Loaf was worth the investment in the end. I’d find out on Sunday morning…after a short run…when my friend, Jenn, and I raided her kitchen and began working on a recipe for Gluten Free Morning Bread Pudding with Salted Caramel. We had the recipe picked out prior to the get-together weekend…and I told her if she got the rest of the ingredients, I would get the bread. And with both of us following through on the deal…it was time to open up this monster loaf and see if I made a wise investment.
The bread smelled fantastic the moment I got that plastic wrap off of it. I mean…almost like it was fresh out of the bakery. So amazing. I sniffed the air quite a few times, ignoring the slight hunger rumbles in my belly. There was a lot of time between this moment and breakfast time…so I had to focus on getting it made if I wanted to get myself fed. I sliced off the end piece and, instead of using it as the center of the bread pattern as suggested by the recipe…we cut it up to sample.
Gluten-Free Morning Bread Pudding with Salted Caramel made with Katz Gluten Free Large Braided Challah Loaf
OMG…it was good. It was really, really good. I loved the taste of the crust and the actual challah bread itself. The sesame seeds that are scattered on the top of the loaf are a brilliant touch and a very tasty addition. I wouldn’t have though that those little seeds could be so important, but the taste and texture was only elevated with their presence. I was impressed. And, let me tell you…this is one very soft and fluffy loaf of bread. You’d never guess it because it feels so heavy…but you slice into it and it is just super airy and light. It’s so weird, I know…but that’s the truth. It didn’t crumble or fall apart as I sliced into it, as so many loaves of gluten-free bread can do. And the taste was out-of-this-world delicious. It tasted like it had just been made and pulled out of the oven. It didn’t even need a reheat to make it taste edible. It can go straight from the freezer to the counter top with only a quick defrost. Amazing. Totally worth all $35 I paid for it.
I don’t know how this ranks nutrition-wise as no nutrition information is available on the site. Just know this bread loaf is HUGE!! HUGE!! The recipe we were making called for about 12 ounces and I used less than 1/3 of the loaf. Honestly. The rest is sitting in my freezer until my next culinary adventure arises.
I can, however, list off the ingredients that Katz Gluten Free uses to make its legendary Large Braided Challah Loaf. This gigantic loaf is made from a mix of gluten-free flour (white rice, tapioca, arrowroot, corn, soy, and potato), fresh eggs, palm oil, brown sugar, honey, xanthan gum, yeast, salt, flaxseed, and apple cider vinegar. Mine came topped with sesame seeds, however you can choose to purchase the loaf without the seeds on top. However, if you don’t have an allergy…I highly recommend keeping them on there.
This bread was amazing in the bread pudding that we baked up for breakfast. It’s amazing on its own. It’s amazing with a little butter schmeared on it. It’s amazing with pizza toppings cooked on it. It’s awesome as a grilled cheese sandwich. It holds up to anything and everything. It won’t fall apart on you. The flavor is amazing. The texture is more than superb. And the versatility this loaf offers is unmatched. And you’ll want to use it in a variety of ways…since there is so damn much of it. Not a complaint anymore. One of my favorite gluten free breads I have ever eaten. I will definitely spend another $35 in the future without a second thought.
Thanks Katz Gluten Free…for this amazing addition to my gluten-free menu!!
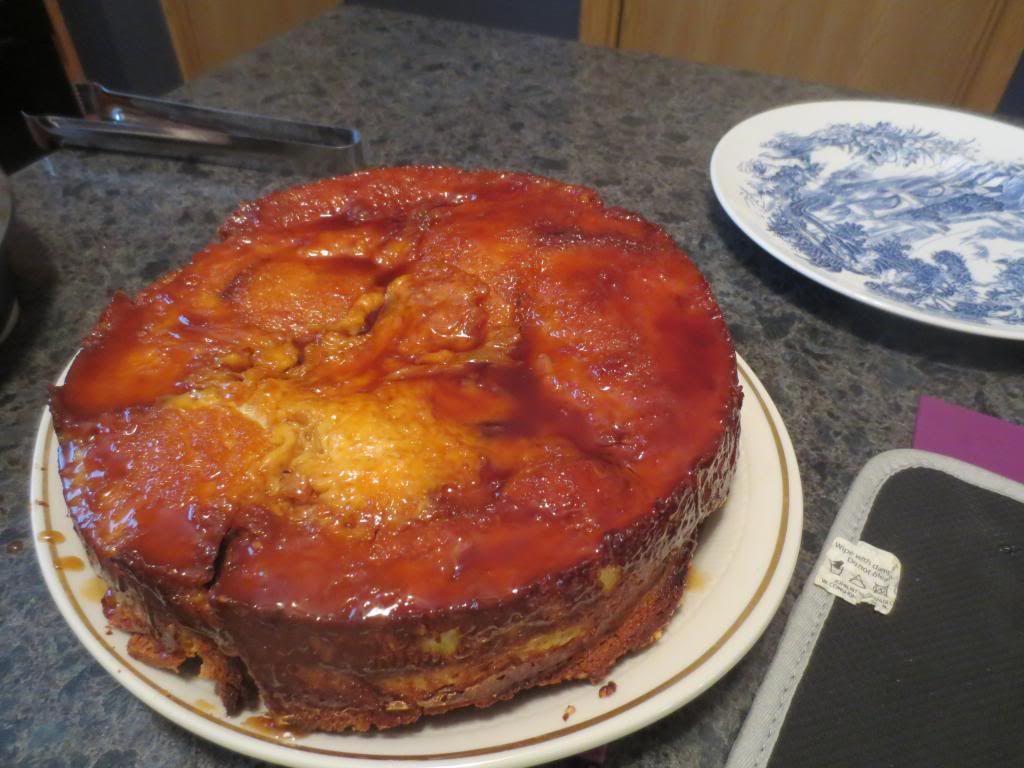
A slice of Gluten-Free Morning Bread Pudding with Salted Caramel made with Katz Gluten Free Large Braided Challah Loaf
My refrigerator has something incredible in it. Really.
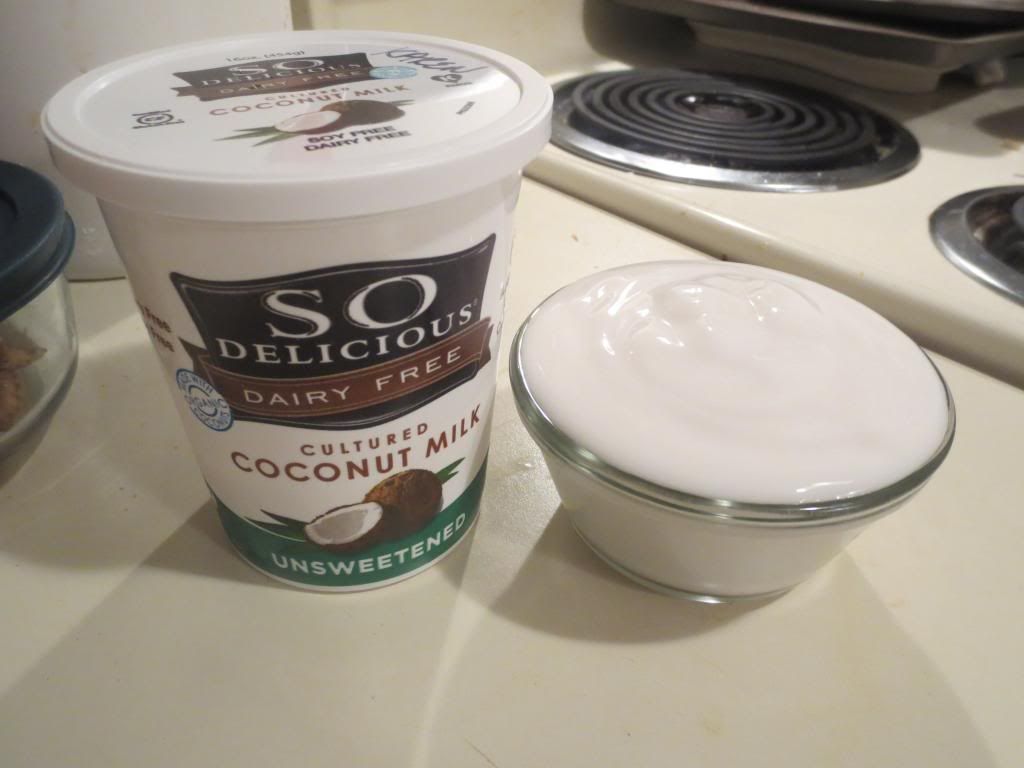
I have these cartons of So Delicious Dairy Free Unsweetened Cultured Coconut Milk.
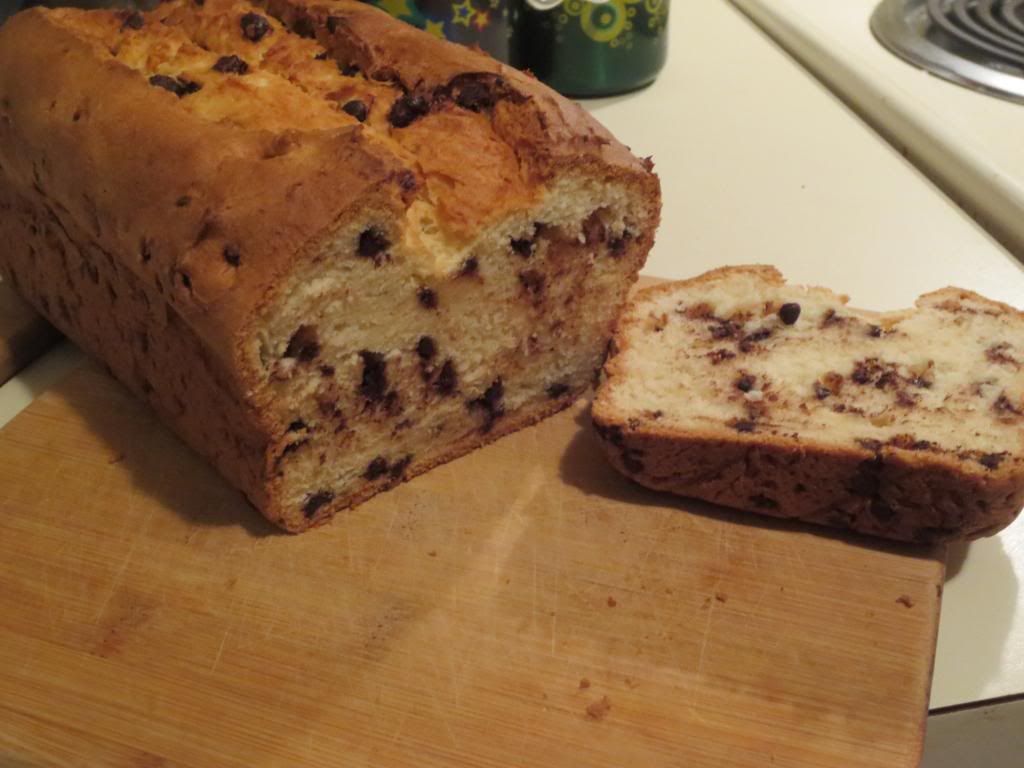
Let me tell you…these were the most fantastic yogurts to ever enter into my life. And I was feeling the need to bake last night. Using a guide recipe from Gluten-Free on a Shoestring, I baked up what is turning out to be one of my favorite breads I have ever made. Made with Enjoy Life Mini Chocolate Morsels, Better Batter Gluten-Free All-Purpose Flour, and So Delicious Dairy Free Unsweetened Cultured Coconut Milk, this is a recipe that will wow your friends and family. You might even surprise yourself with how moist and delicious this bread is when it is baked and cooled and finally…sliced. All of this was from scratch and, as luck would have it, I had everything necessary already in my apartment. Check out the recipe below.
Recipe: Gluten-Free and Dairy-Free Chocolate Chip Yogurt Quick Bread
Gluten-Free and Dairy-Free Chocolate Chip Yogurt Quick Bread
1-3/4 cups all-purpose gluten-free flour (I used Better Batter)
6 tablespoons cornstarch
1 teaspoon xanthan gum (omit if your blend already contains it)
1-1/2 teaspoons baking powder
1/2 teaspoon baking soda
1/2 teaspoon kosher salt
3/4 cup granulated sugar
6 tablespoons unsalted butter, at room temperature (I used Earth Balance)
1 cup plain yogurt, at room temperature (I used So Delicious Dairy Free Unsweetened Cultured Coconut Milk)
2 eggs, at room temperature, beaten
3 ounces miniature chocolate chips, tossed with 1 teaspoon cornstarch (I used Enjoy Life Semi-Sweet Mini Chocolate Chips)
Directions:
Preheat oven to 350°F. Grease well a standard 9-inch by 5-inch loaf pan and set it aside.
In the bowl of a stand mixer (or a large bowl with a hand mixer), place the flour blend, cornstarch, xanthan gum, baking powder, baking soda, salt and sugar, and whisk to combine well with a separate, handheld whisk. Create a well in the center of the dry ingredients, and add the butter, yogurt and eggs. Mix on medium speed to combine with the paddle attachment (or your handheld mixer) after each addition. The batter will be thick. Add the chocolate chips tossed with cornstarch, and mix with a spatula or spoon until the chips are evenly distributed throughout the batter. Scrape into the prepared baking pan and, with wet hands, smooth the top. To create a dome shape, run a wet spatula along the edges of the pan and pull the batter toward the center. For a uniform split down the center as the bread rises in the oven (instead of a more haphazard split), slash down the center of the loaf with a sharp knife, about 1/4-inch deep.
Place the pan in the center of the preheated oven and bake for 30 minutes. Reduce the oven temperature to 325°F, and continue to bake for another 20 minutes, or until the top of the loaf springs back when pressed lightly and a toothpick inserted in the center comes out with, at most, a few moist crumbs attached. Remove from the oven and allow to cool in the loaf pan for 15 minutes before transferring to a wire rack to cool completely. Slice once cool and serve.
~*~*~
You will love this bread. Light, moist, and packed with flavor. And using the Unsweetened Cultured Coconut Milk meant adding flavor without the added sugar. It was fantastic. And the bread…definitely one of my new favorites. This is amazing. I can’t wait to make more breads using the Cultured Coconut Milk. Fantastic.
Love is finding a product that you can literally do just about anything with…and getting creative with it. I love to come up with new ways to make things when I’m in my kitchen. I love to see just what I can accomplish with what I have on hand.
Currently, in my refrigerator, I have two 16 ounce cartons of So Delicious Dairy Free Unsweetened Cultured Coconut Milk.
What is cultured coconut milk? Glad you asked.
It’s the dairy-free, coconut milk based version of a creamy, dreamy yogurt. Yes…all you dairy-free people who have lamented the loss of yogurt in your diet…welcome to the world of So Delicious and their fantastic coconut milk based yogurts. Also known as…cultured coconut milk.
I love that So Delicious has released two new varieties of their cultured coconut milk products. I already reviewed the Unsweetened Vanilla Cultured Coconut Milk…but now it is simply the Unsweetened Cultured Coconut Milk. First of all, as someone trying to keep their sugar intake in check, the unsweetened offering makes me so happy. Even better…it has great texture and good flavor. It actually has a bit of a tang to it, reminding me of a sour cream. And, certainly, this could easily be used in place of sour cream. But…not in my case.
I got into my kitchen last night and decided to use some of the So Delicious Dairy Free Unsweetened Cultured Coconut Milk…to make bread. Yep. Bread. Delicious…dairy free and gluten-free Chocolate Chip Yogurt Bread.
Here’s what I found out…my bread cooked up amazing. The Unsweetened Cultured Coconut Milk made this a very light, very moist bread when all was said and done. The best part was how it tasted. Because this also adds flavor without adding more sugar. And that…that is an amazing thing. I love how versatile this product is. It can be used in dressings, breakfast parfaits, smoothies, as a garnish for meals…you name it. And it does it all with style and without upping the sugars you’re consuming. LOVE!
A serving of the So Delicious Dairy Free Unsweetened Cultured Coconut Milk is 1/2 cup or 4 ounces. This serving will provide you with 50 calories and 4 grams of fat. You will be provided with 95 mg sodium and 1 gram of sugar. The Unsweetened Cultured Coconut Milk doesn’t provide any protein, but you do get 4 grams of fiber. This product is cholesterol free, gluten-free, vegan, kosher, non-GMO, and made with organic ingredients.
I have truly fallen in love with this product. I am so glad I have two containers of it chilling in my fridge. There are tons of other things I want to try this with. But…below, take a look at how amazing my bread baked up using the So Delicious Dairy Free Unsweetened Cultured Coconut Milk. I am beyond impressed. You will be too!
Gluten-Free and Dairy-Free Chocolate Chip Yogurt Quick Bread made with So Delicious Dairy Free Unsweetened Cultured Coconut Milk