Product Review: Lotus Foods Rice Ramen + Recipe Bonus

Cuisine Cube
Cuisine Cube

Product Review: Lotus Foods Rice Ramen – $2.75+

Say it with me…

FINALLY!

Finally the gluten-free world gifts me with…gluten-free ramen!  I have been waiting a long time for this.

I know what you’re thinking…

“Really?  Ramen?”

Trust me…when you are faced with never being able to eat something again…finally is what comes to mind when you suddenly are given that something.  I never knew how much I missed ramen…until I was suddenly able to have it again.

And for this great pleasure, I once again have to credit the amazing Cuisine Cube!  Honestly, this is the best money I have ever spent each month.  It is always a surprise as to what is inside the cube that arrives in the mail.  And I am like a kid at Christmas when I open it up.  Back in October’s box…Cuisine Cube included not just one, but two, packages of Lotus Foods Gluten Free and Reduced Sodium Rice Ramen.

Two flavors: Millet & Brown Rice with Miso Soup as well as Forbidden Rice with Miso Soup.

Color me excited.  I was so ready to make some ramen.  After all, I studied Japanese all through college and ramen is a way of life in Japan.  Now…it was back in mine.

Let’s talk about Lotus Foods for a moment, shall we?  The products produced by Lotus Foods are recognized for their exceptional cooking quality, taste, texture, and superb nutritional value.  The ancient and new rices that compose their products are grown on family farms in limited quantities, on healthy, chemical-free soils.  The rice and rice products that are produced by Lotus Foods are found in specialty gourmet, natural food markets, grocery stores, white tablecloth restaurants throughout the United States, becoming a fast favorite of consumers who are seeking healthier options, as well as chefs and foodies across the country.

I decided to do an even mix when it came to the two packages of Lotus Foods Rice Ramen that I received from Cuisine Cube.  I’d prepare one package as is stated on the package itself.  The other…I would cook up in a recipe.

Lotus Foods Millet & Brown Rice Ramen with Miso Soup

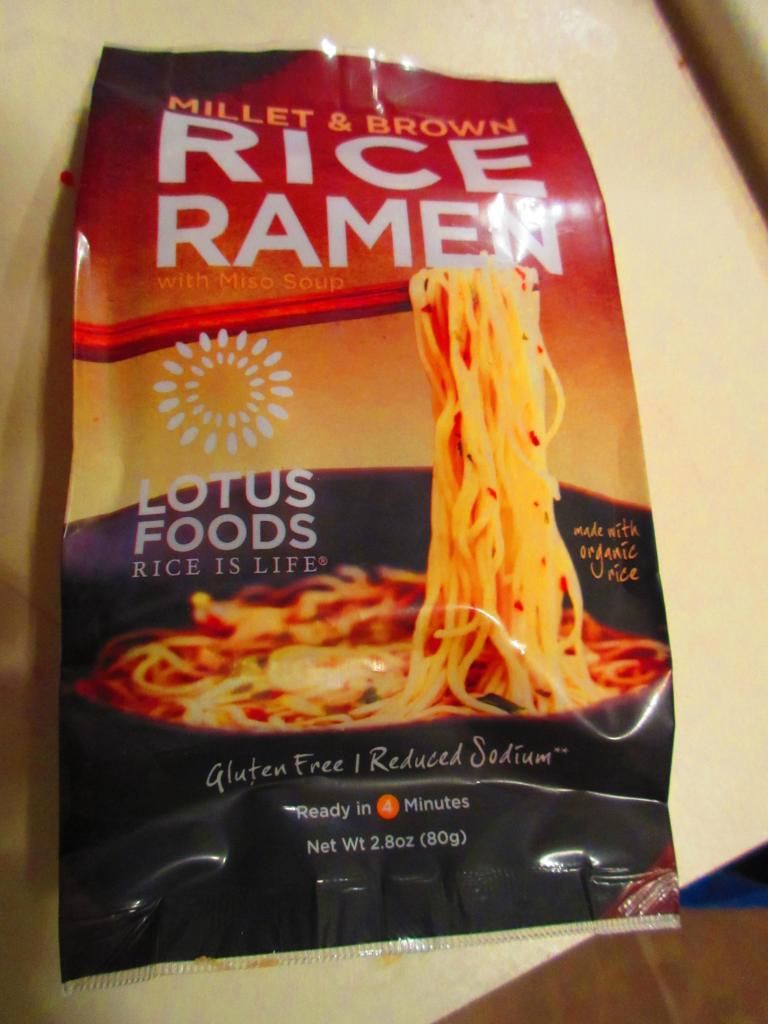
The one that I chose to shine on its very own was the Lotus Foods Millet & Brown Rice Ramen.  These traditional Japanese-style noodles are created using their specialty rice instead of wheat.  Not only are these gluten-free, but both millet and brown rice are some of the most nutritious and easily digestible grains.

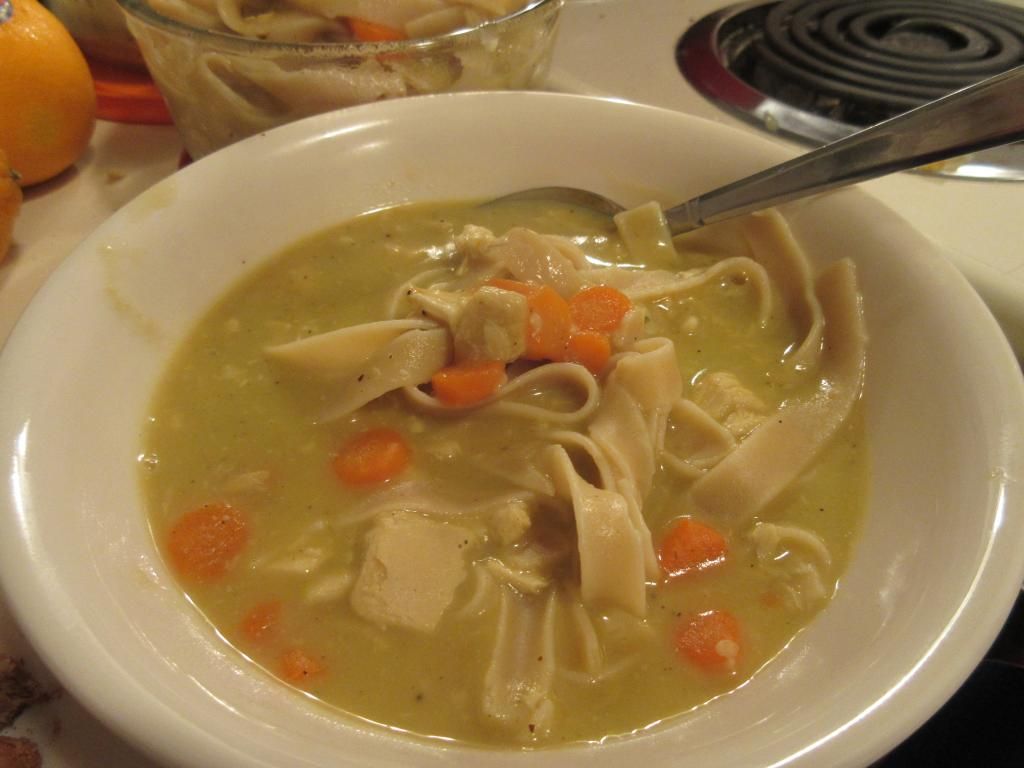
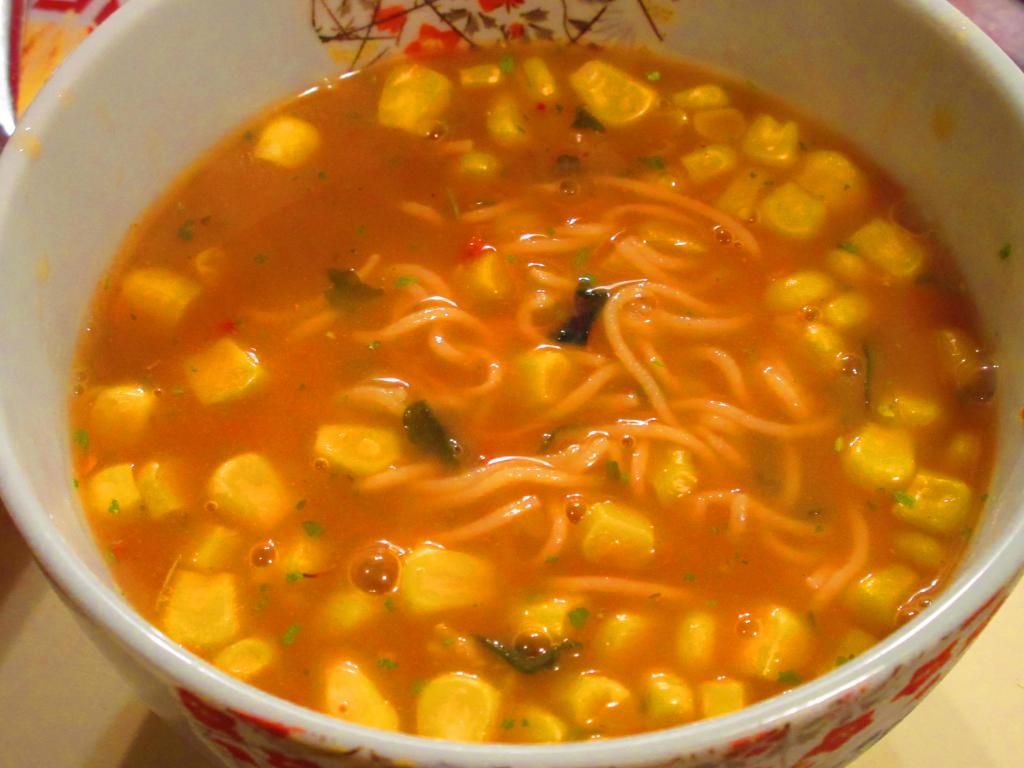
Nothing could be easier to cook.  Simply bring 2 cups of water to a boil.  Add in the ramen and simmer for about 4 minutes.  Stir every now and again, breaking the noodles apart.  When the noodles are soft, remove the pot from the heat and mix in the contents of the enclosed soup package.  You can then add in any additional veggies and protein as you wish.  I added some corn…because I happen to have a lot of fresh corn in my freezer leftover from this summer.

So…what emerged was a hearty, but delicious miso soup.  One that is not only gluten-free, but also vegan and non-GMO.  All of Lotus Foods rice products are made from organic rice…and that includes the rice ramen.

So…how did it taste?  Fantastic.  I love that this is also reduced sodium, as a lot of ramen on the market is overflowing with unneeded sodium.  I was impressed with that stat on the nutritional information immediately.  But as for the taste…the millet and brown rice lend a rich and nutty taste to the noodles themselves.  And the soup pack provided a ton of flavor to the hot water.  I love the mix of spices that brought a slight bit of heat and sweetness to the entire dish.  It was simple to cook and fun to eat.  Chopsticks not included.

Lotus Foods Millet & Brown Rice Ramen with Miso Soup (prepared with corn)

Let’s look at the ingredients in Lotus Foods Millet & Brown Rice Ramen.  The ramen is made from organic brown rice flour, organic millet flour, water, and organic white rice flour.  The soup pack contains red miso powder (cultured soybeans and rice, salt) tamari powder, salt, red onion powder, dried wakame seaweed, sugar, garlic powder, ginger powder, dried parsley, and dried chili peppers.  It is gluten-free, cholesterol free, organic, high in fiber and protein, non-GMO, low fat, vegan, and truly delicious!

As for the nutritional information…well…the Lotus Foods Millet & Brown Rice Ramen packs contain 2 servings, so a serving isze is 1/2 ramen with the seasoning.  This serving will provide you with 140 calories and 1.5 grams of fat.  This portion will also give you 460 mg sodium and 1 gram of sugar.  See how amazing that sodium level is?!  It has 25% less sodium than regular ramen soup.  This serving also provides 2 grams of fiber and 5 grams of protein.  It may not seem like much when you look at it…but trust me…you will feel full after eating your bowl of this ramen.

In addition to the Millet & Brown Rice variety, Cuisine Cube threw in the Lotus Foods Forbidden Rice Ramen as well.

Lotus Foods Forbidden Rice Ramen with Miso Soup

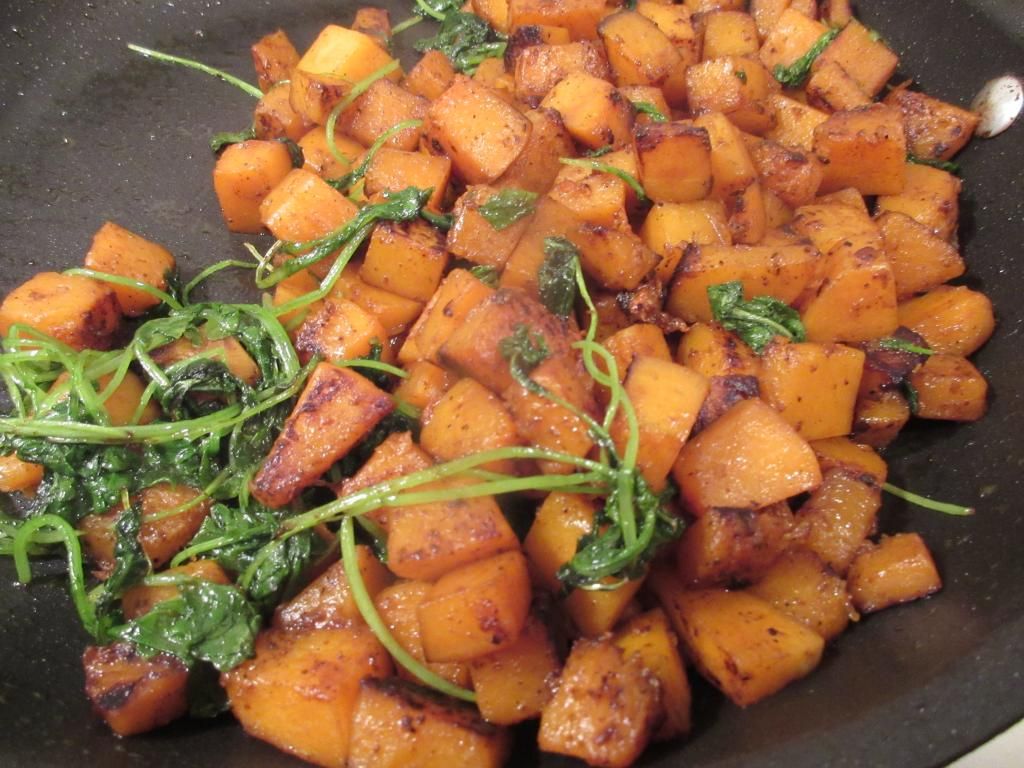
Forbidden Rice is one of the most nutritious ancient grains.  It is made from Lotus Foods heirloom black rice instead of wheat.  I love the purple color that these noodles take on.  It’s really fantastic.  Instead of cooking these up according to the package, I incorporated these into a recipe.  But…I’m getting ahead of myself.  The forbidden rice ramen also has a delicious nutty taste and a great texture to them. In addition, these noodles are a natural source of antioxidants.  This package comes with a savory white miso broth  to create the noodle soup with.  I, instead, incorporated it with the recipe I made.  I added a ton of extra vegetables to create a delicious meal.  The recipe will follow the ingredients and nutritional information.

Taste was superb.  The noodles are amazing and perfect.  I wish Cuisine Cube had included more.  But, that’s why they have a Stock Up page on their Web site…to stock up.  I hope to do just that…because…YUM!

The Lotus Foods Forbidden Rice Ramen noodles are made from organic black rice flour, organic brown rice flour, and organic white rice flour, and water.  The soup pack is made from white miso powder (cultured soybeans and rice, salt), salt, white onion powder, tamari powder, soybean powder, mushroom powder, dried parsley, and dried carrots.  It is gluten-free, cholesterol free, organic, non-GMO, low fat, and vegan.  WOOT!

As far as nutrition goes, Lotus Foods Forbidden Rice Ramen serves 2 people per pack, so a serving size is 1/2 of the package with the seasoning.  This serving will provide you with 140 calories and 1.5 grams of fat.  In addition, this portion gives you 400 mg sodium and 1 gram of sugar.  Yes, the Forbidden Rice Ramen contians 33% less sodium than regular ramen.  That’s fantastic.  And, finally, you will have less than 1gram of fiber and 3 grams of protein.  With less of these final two nutritional factors, load this up with hearty vegeatbles or your protein of choice.

Or…do what I did…

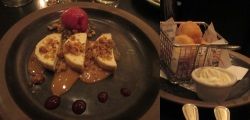
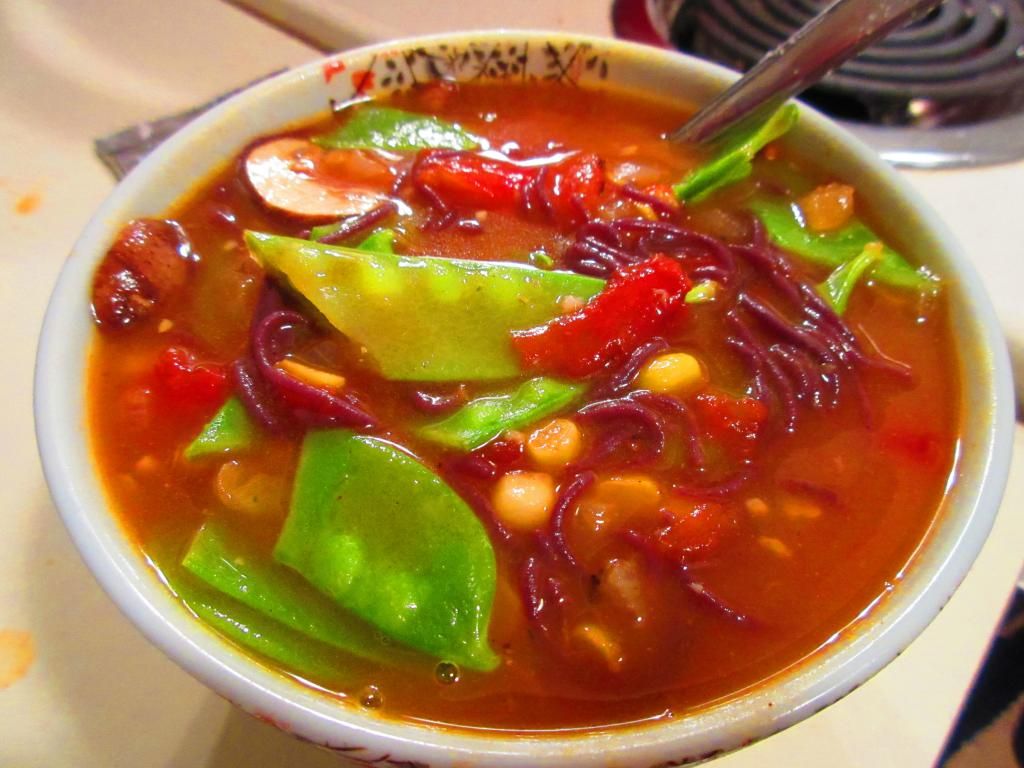
Recipe: Ramen Noodle Soup with Sugar Snap Peas, Mushrooms and Corn

Ramen Noodle Soup with Sugar Snap Peas, Mushrooms, and Corn

Servings: 4-6
Time: Prep 15 minutes; Cook 20 minutes

Ingredients:


  • 2 Tbs. olive oil
  • 2 shallots, chopped
  • 4 cloves garlic, minced
  • 6 cups vegetable broth
  • 1 packet of Lotus Foods Forbidden Rice Ramen noodles (dried ramen noodles)
  • 1 can diced tomatoes
  • 1-1/2 cups sugar snap peas, trimmed and halved diagonally
  • 1/2 cup corn
  • 1/2 cup crimini mushrooms, sliced
  • Salt and freshly ground pepper
  • Hot sauce, such as Sriracha, for serving


Directions:

In a large, heavy pot, warm the oil over medium-high heat.

Add the shallots and garlic and saute for 3 minutes.

Add the mushrooms and saute for another 3 minutes.

Add the broth and bring to a boil.

Add the ramen noodles and tomatoes and cook, stirring occasionally, for 5 minutes.

Add the sugar snap peas, corn, and the seasoning packet from the Lotus Foods Forbidden Rice Ramen and cook for 2 minutes.

Season with salt and pepper and serve.  Add hot sauce, if desired.

~*~*~

Let me tell you, I was amazed with how good this recipe was.  And thanks to Lotus Foods Forbidden Rice Ramen Noodles…I was able to create this and cook it up.  It had rich depth of flavor.  The Forbidden Rice Ramen noodles added a nice hit of bold color.  And the soup itself had this great umami flavor.  It was rich and loaded with nutrients and fresh vegetables.  It was love at first slurp.  And there was a ton of slurping going on.

If you haven’t looked into a subscription to Cuisine Cube, I do highly recommend it.  In addition, I encourage you to seek out or order Lotus Foods Rice Ramen and give it a try.  Especially, if you’re like me, and didn’t even remember what you were missing.  It was so delicious.  Or, as they say in Japan, “Taihen Oishikattadesu!”

Another product I love, brought to me with great thought and great care from Cuisine Cube.  I’m loving this service.

Product Review: Whitney’s Castleton Gluten Free Cheddar Crisps + Recipe Bonus

Whitney's Castleton Gluten Free Cheddar Crisps
Whitney’s Castleton Gluten Free Cheddar Crisps

Product: Whitney’s Castleton Gluten Free Cheddar Crisps – $4.00+

‘Twas the month of December and I was starting to contrive
Brand new recipes for when my Cuisine Cube was due to arrive…

Yes!  The December cube is here!  It arrived on Monday and I happily dug right in, wondering what sort of goodness lay under the flaps of cardboard and paper.  What I was met with was a delightful array of items.  It was like Christmas had come early as I sorted through the breakfast, baking, lunch/snack, dessert dinner, and other dessert options.  I was ready to dive right in and have a little of everything.  But, self-control does still in handy at times.

First of all, let’s discuss Cuisine Cube.  I’ve blogged on items I’ve received since signing up in May.  Cuisine Cube is a gluten-free delivery service put together by a team of enthusiastic eaters, food professionals, and allergy suffers from New York City.  They have scoured the country looking for lesser known brands made by small artisan producers that taste better than the highly processed and subpar items you can find at virtually every grocery store.  This was a way to help support small businesses.  These products are meticulously selected and then delivered right to your door.  So, you get to try a new brand or item you may never have discovered otherwise.  It’s a great, efficient, and fantastic service.  One that I always look forward to each month.

So, this month, I selected Whitney’s Castleton Gluten Free Cheddar Crisps to lead off my month of delicious eating.  I thought they looked a lot like the Glutino Bagel Chips that you can find in most grocery stores these days.  But, I didn’t just want to eat these straight out of the package…or just throw them on top of a salad.  I wanted to do something a little different with them.  And I did.

But…not without trying one first.  I can’t just re-purpose a product without trying it out as it is first…

There you have it…I opened up the package and popped one of the crisps into my mouth.  And I was immediately greeted with the crunchy texture.  I love that for these kinds of crisps.  They are called crisps for a reason…they should be crispy.  But, even more importantly…the flavor!  Before I had to go gluten-free…and before I started to really pay attention to what I ate, I was a Cheeze-It connoisseur.  And the cheddar flavor in these crisps…reminded me of those.  But better.  WAY better.  I was almost sad to repurpose these for my recipe…because they were amazing on their own.

But my creative chef mind was calling…

So…the rest of these amazing and delicious crisps went into my food processor and got pulverized.

Now, before I share this recipe with you, let’s talk about the Whitney’s Castleton Gluten Free Cheddar Crisps.  As far as ingredients go, these are made from sorghum flour, tapioca flour, brown rice flour, white rice flour, xanthan gum, Vermont Farmstead’s Farmstead Cheddar, milk, white vinegar, brown sugar, baking soda, kosher salt, dry mustard and cayenne pepper.  These are produced in a designated gluten-free facility.

Nutritionally speaking, a serving is 1 ounce of these crisps…and the package holds 4 servings.  One serving will provide you with 120 calories and 3 grams of fat.  You will be consuming 10 mg cholesterol, 230 mg sodium, and 2 grams of sugar.  In addition, these have 1 gram of fiber and 3 grams of protein.

So, what came of these crisps?

Well, back before I became a vegetarian, and definitely back before I was diagnosed as a Celiac…one of my favorite things to order at Red Lobster was the Fried Calamari appetizer.  My roommate would eat the calamari…I wanted the fried broccoli and red peppers that were served with it.  Honestly, one of my favorite foods (and definitely not good for you by any means…but it was so good)…which I hadn’t even thought about in years…

But I happened to have a red bell pepper and some broccoli from my CSA bin in my fridge…and now…a breading.  I do not fry anything.  I just don’t.  So, I set out to recreate the infamous Red Lobster vegetables…by baking them.  And thanks to Whitney’s Castleton Gluten Free Cheddar Crisps…I now had the perfect gluten-free breading.

Recipe: Crispy Broccoli and Red Peppers

Crispy Broccoli and Red Peppers (made with Whitney's Castleton Gluten Free Cheddar Crisps)
Crispy Broccoli and Red Peppers (made with Whitney’s Castleton Gluten Free Cheddar Crisps)

Servings: 2-4
Time: Prep 10 minutes; Cook 20 minutes

Ingredients:

  • 1-2 cups fresh broccoli florets
  • 1 red pepper, sliced into strips
  • 1-2 egg whites (beaten)
  • 4 ounces gluten-free breading (I used a package of Whitney’s Castleton Gluten Free Cheddar Crisps)

Directions:

Preheat the oven to 350°F.

In a large plastic bag, place in the broccoli florets and red pepper slices.  Add the egg white(s).  Close the bag and shake to coat.  Add the gluten-free breading.  Reseal the bag and shake again.  Spread the vegetables onto a baking sheet and bake for 15-20 minutes, until crispy.

~*~*~

Guess what?  This was so close to how I remember the original tasting.  I love the flavors that baking something in the oven can really coax out of things like vegetables.  And the Whitney’s Castleton Gluten Free Cheddar Crisps made the perfect coating for these vegetables.  It gave it a nice cheese flavor on top of turning a beautiful golden color in the oven and really making the apartment smell fantastic.  I was smelling a great cheddar aroma after these were in the oven for only 5 minutes.  Way beyond impressed.  I sort of want these in my pantry for always.

So, if you are curious about the Whitney’s Castleton Gluten Free Cheddar Crisps, head over to their site and read more about their products and order some for yourself.  Or order from Cuisine Cube’s stock up site!

And if you want to give Cuisine Cube a try, head over to their Web site and check out their subscription options…joining for a monthly, three month, or six month subscription.  This Cube (box of goodies) will arrive at your door within the first week of each month and you will have at least 5 full-size gluten-free items inside.  I encourage you to give it a try…

…because I never would have heard of these crisps without the aid of Cuisine Cube.

And yeah…they were really fantastic…on their own and in my dish.

Product Review: Olivia’s Gluten Free Rosemary & Sage Stuffing + Recipe Bonus

Olivia's Gluten Free Rosemary & Sage Stuffing
Olivia’s Gluten Free Rosemary & Sage Stuffing

Product: Olivia’s Gluten Free Rosemary & Sage Stuffing – $6.50+

There are a lot of Thanksgiving foods that, as a gluten-free vegetarian, I no longer indulge in at the dinner table.  That being said, my Thanksgiving meal usually consists of a scoop of vegetables, some plain potatoes, and usually a fruit of some sort…or whatever I brought with me for the occasion.

This year for my contribution to the Thanksgiving meal, I brought desserts.  YAY!  I also, however, brought gluten-free stuffing.  From my local gluten-free bakery.  I actually pre-ordered it prior to receiving my November 2014 Cuisine Cube.  But…this just gave me the opportunity to have stuffing…all over again.

And this is a good thing.  Because I absolutely LOVE stuffing!  I never ate it much as a kid, because, prior to going vegetarian, my family’s go-to Thanksgiving meal was shrimp creole, not turkey, but sometimes, on Christmas, my mom would cook up a turkey and I would request stuffing.  And…it was usually Stove Top.  But, to me, it was amazing!

So, stuffing was one of my guilty pleasures that I rarely indulged in, but would devour every time I had the chance.

When my Cuisine Cube happened to have a box of a gluten-free stuffing in it, I might…might…have done a happy dance of joy with a few bounces and jumps and squeals of happiness.  This isn’t uncommon each month when I open up my Cuisine Cube…but we are talking GLUTEN FREE STUFFING!!  Did I make that clear yet?

Olivia's Gluten Free Rosemary & Sage Stuffing
Olivia’s Gluten Free Rosemary & Sage Stuffing

So, since I had my local allergen-free bakery make me some gluten-free stuffing for the big meal on Thursday, I got to have some fun and get a little creative with my box of Olivia’s Gluten Free Rosemary & Sage Stuffing.  But, this still meant that I needed to cook it up properly.  And this stuffing is really easy to make!  I cut up some onion and celery per the instructions on the box, cooked it in my vegan butter, and then added some vegetable broth.  I transfered the liquid into a large mixing bowl and added in the Olivia’s Gluten Free Rosemary & Sage Stuffing mix.  I gave it a stir and let it sit for about 8-10 minutes, until the cubes were moist and the liquid was completely absorbed.  After that, I put the mix into a baking dish and baked it for 30-40 minutes per the instructions on the box until it was beautifully golden and ready to eat.

I won’t lie…I had a small serving of it then.  I had to.  The smell as it was baking was phenomenal.  Really.  I was practically salivating the entire half hour it was cooking.  So, yeah…I wanted to try it so I could tell you, my readers, how it was before I had some fun with it.

It was amazing.  No joke.  Freakin’ fantastic.  The chunks of bread got to that perfect golden crispness, while the vegetables and the absorbed liquid kept it moist and delicious.  The level of flavors was spot on.  Definitely perfect on its own.  I didn’t even need to add any additional salt and pepper.  Olivia’s Gluten Free Rosemary & Sage Stuffing was better than any stuffing I have ever eaten in my life.  Way better.  That goes for the boxed stuff as well as the stuff made from scratch.  This was an total win.  I wish I had made it up for dinner at my roommate’s family’s home.  Perhaps next year.  They wouldn’t even begin to guess that it was gluten-free…except for I’d be eating it, so they would know!

Olivia's Gluten Free Rosemary & Sage Stuffing (prepared)
Olivia’s Gluten Free Rosemary & Sage Stuffing (prepared)

I am so in love with this stuffing.  My only complaint was there was only one box of it.  Good thing I can order more through Cuisine Cube and Olivia’s Gluten Free Web site.  Trust me…this will be happening!

Let’s talk about the ingredients in Olivia’s Gluten Free Rosemary & Sage Stuffing.  This stuffing is made from gluten-free bread, certified non-GMO canola oil, granulated onion and garlic, rosemary, sage, thyme, celery seed, sea salt and pepper.  It is cholesterol free, gluten-free and made in a dedicated gluten free facility.

As far as nutritional information goes, Olivia’s Gluten Free Rosemary & Sage Stuffing makes about 9 servings per container.  If you use it traditionally.  A serving size is 3/4 cup prepared.  This serving will provide you with 110 calories and 4 grams of fat.  You will also be taking in 200 mg sodium and 1 gram of sugar.  In addition, you will be consuming only 1 gram of fiber and 1 gram of protein.  On its own, this stuffing won’t make you feel stuffed, but you will love every single bite of it.  Trust me.

But…as I mentioned earlier…I had some fun with this stuffing.

Why eat it straight up when you can do something a little outside the box, right?  Well, on Black Friday, I picked up a new waffle maker (shaped like Mickey Mouse!) and I really wanted to test it out.  I’m like a child…I get something new and I want to try it out right away.  So, on Saturday night, I took the stuffing that I cooked up out of the fridge and put it into a big mixing bowl.  It was time to use the “leftovers” in a new way.  Prepare yourself…

Recipe: Gluten Free Leftover Stuffing Waffles

Gluten Free Leftover Stuffing Waffle (shaped like Mickey Mouse)

Servings: 4 large waffles
Time: Prep 5 minutes; Cook 10 minutes

Ingredients:

  • 4 cups crumbled leftover gluten free stuffing
  • 2 large eggs
  • 1/4 cup vegetable broth (or chicken broth if you’re not vegetarian)


Directions:

Preheat the waffle maker and grease it with cooking spray.

Gluten Free Leftover Stuffing Waffle with Vegan Homemade Vegan White Gravy and Cranberry Chutney

In a large bowl, stir together the leftover stuffing and eggs.  Add 1/4 cup of vegetable broth and mix until well combined.  Continue adding broth as needed until the mixture is well-moistened.

Scoop the stuffing mixture into the prepared waffle maker, spreading it evenly.  (The stuffing will not spread or expand like regular waffle batter as it bakes, so arrange it in an even, thin layer).   Close the lid and let the waffle bake until golden brown and the egg is cooked throughout.  Stuffing waffles take longer to cook than regular waffles, as the egg must be completely cooked throughout.  Don’t be afraid to let the waffle bake until it’s golden brown and crispy!

Transfer the waffle to a serving plate then repeat the filling and baking process with the remaining stuffing.

Serve.

~*~*~

I know what you’re wondering…you are pondering what I served these waffles with.  Simple.  I prepared a gluten-free white gravy and took some fresh cranberries from my CSA bin and made a cranberry chutney.  I poured a bit of the warm gravy over the waffle with a side of the cranberry relish and…BAM…dinner was served.

It tasted amazing.  Mine, being in a Mickey Mouse waffle maker, was shaped like Mickey Mouse…but it came to this perfect golden crispiness on the outside.  It paired great with gravy, making it a savory dinner.  And the cranberry chutney tied it all together.  A great way to use up some of those holiday leftovers for sure!

TRUST ME!

Thanks to Cuisine Cube for including a box of Oliva’s amazing Gluten-Free Rosemary & Sage Stuffing in my box for Thanksgiving.  I am forever thankful!

Recipe: Fresh Corn with Avocado, Onion, and Spiced Vegan Scallops

I’m doing my best to make do without my CSA bin for the past month.  And that means I’ve been doing a lot with some products and foods that I have in my fridge and freezer.  My freezer happened to have an open box of Sophie’s Kitchen Gluten Free Vegan Breaded Scallops and this amazing corn that I cut off the cob and froze for later use.  My fruit bowl is holding one of my favorite things in life…avocados.  And yesterday, I purchased an onion for use in my previous recipe.

So, when I spotted a recipe on Health.com for a meal that involved fresh corn, avocado, scallions and scallops, I knew I could easily adapt the recipe to use ingredients I had on hand, and keep it vegan.  Of course, if you eat seafood, feel free to use regular scallops.

With the seasoning and the fresh vegetables, this was one fantastic meal.

Recipe: Fresh Corn with Avocado, Onion, and Spiced Vegan Scallops

Fresh Corn with Avocado, Onion, and Vegan Spiced Scallops

Servings: 2
Time: Prep 10 minutes; Cook 5 minutes

Ingredients:

  • 1 medium diced peeled avocado
  • 1 tablespoon fresh lime juice
  • 1-1/4 pounds sea scallops (I used Sophie’s Kitchen Gluten Free and Vegan Breaded Scallops)
  • 1/4 teaspoon salt
  • 1/4 teaspoon pepper
  • 1 teaspoon ground cumin, divided
  • 2 teaspoons olive oil
  • 2 cups fresh or frozen corn kernels, thawed
  • 1/2 cup chopped yellow onion
  • 1/4 cup dry white wine (I used 2 tablespoons white wine vinegar and 1 tablespoon lemon juice)


Directions:

In a small bowl, toss avocado and lime juice.

Sprinkle scallops with salt, pepper, and 1/2 teaspoon cumin. Heat oil in a large nonstick skillet over medium-high heat. Add scallops; cook, turning once, until golden and cooked through (about 3 minutes).

Transfer scallops to a plate.

Add corn, scallion, white wine, and remaining cumin to skillet; cook corn until tender, stirring constantly (about 2 minutes).

Spoon corn mixture onto 4 serving plates, add avocado and top each with half of the scallops.

~*~*~

This was one fantastic meal.  I loved the healthy fat that came into the dish with the avocado.  The seasonal corn was an amazing ingredient on its own, but when seasoned and cooked with all the other ingredients, it became elevated.  The scallops, simply seasoned with salt, pepper, and cumin made the perfect protein and topper for this dish.

Give it a try!  Vegan, vegetarian, or pescatarian…you’ll really enjoy this meal.  I’ll definitely be making this again!


Recipe: Sweet Chili Vegetable Quinoa Bowl

On Friday, I was quickly scrolling through the blogs I follow on WordPress and came across a blog from Clean Eating Veggie Girl, who posted this amazing recipe for a quinoa bowl, inspired by her friend Molly.  I had virtually everything necessary to make this meal, save for an onion and some frozen stir-fry vegetables, which I could easily pick up at the store over the weekend and prepare this for dinner Sunday evening.

I actually spent most of my day helping my roomie’s sister paint some of her house…so grocery shopping actually didn’t get completed until much later, and it was past 6 p.m. by the time I back to my apartment to cook.  Thankfully, this is a super-easy and super-fast meal to create.

Oh…and super delicious too!

Recipe: Sweet Chili Vegetable Quinoa Bowl

Sweet Chili Vegetable Quinoa Bowl

Servings: 2
Time: Prep 10 minutes; Cook 20 minutes

Ingredients:

  • 2 cups cooked quinoa (1/2 cup dry + 1 cup water)
  • 2 cloves garlic, minced
  • 1 tablespoon fresh ginger, minced (I used 1/8 teaspoon ground ginger)
  • 1/4 medium yellow onion, chopped
  • 16 oz bag frozen stir-fry vegetables
  • 1/8 cup Bragg’s liquid aminos (I used San-J Gluten Free Low Sodium Tamari)
  • 1/3 cup sweet chili sauce
  • Sriracha sauce, optional
  • 2 to 3 large eggs, optional*

*Recipe is vegan without the eggs


Directions:

If you do not already have the quinoa cooked, prepare according to package directions.

Line a large skillet with a thin layer of water.  Heat over medium-high heat until very hot.  Once hot, lower the heat to medium and add garlic, ginger, and onions to the pan.  Cook for approximately 5 minutes, adding additional water as necessary.

Add frozen stir-fry vegetables to the skillet.  Cover with a lid and cook for approximately 5 minutes.

Once the vegetables are cooked through, turn the heat to low and stir in cooked quinoa.

Add liquid aminos/tamari sauce and sweet chili sauce to the skillet.  Stir until well-combined.  Cook an additional 3 to 5 minutes, or until your vegetable and quinoa mixture is hot.

If you are adding an egg to the bowls, cook each one to your liking during the last 3 to 5 minutes of cooking time.  I poached mine, but fried or scrambled would work as well.

Scoop the vegetable and quinoa mixture into bowls and, if desired, drizzle with sriracha sauce and top with an egg.

~*~*~

This quinoa bowl is fantastic.  It’s a little bit sweet and a little bit spicy.  And if you love eggs, the runny yolk from a poached egg just really ties the entire meal together.  I was beyond impressed.  It was nice to create a healthy, protein-rich meal for dinner after such a busy day.  I also appreciated how quickly the entire meal came together.  Fantastic.

Product Review: Jovial Gluten Free Brown Rice Tagliatelle

Jovial Gluten Free Brown Rice Tagliatelle

Product: Jovial Gluten Free Brown Rice Tagliatelle – $5.49+

Sometimes I get big ideas and then wait awhile to actually try them out.  When I first spotted the words “traditional egg pasta” on a box of gluten-free tagliatelle from Jovial…I thought immediately of soup.

What?

You don’t immediately think soup?

The reason I thought of soup was, as I was growing up, my mom would make a homemade Chicken Noodle Soup, which required an egg noodle in the recipe.  So…this immediately sparked that in my memory.  So, I told myself that I could easily make my mom’s recipe…but make it vegetarian.  After all, I had one last package of Beyond Meat “Chicken” in the freezer, and for some reason, I think I was mentally saving it to make soup.  So…the perfect opportunity presented itself for sure.  The only big change was I didn’t make the stock myself.  I couldn’t.  I wasn’t using real chicken.  So, instead…I picked up a couple of the Imagine Vegetarian No Chicken Broth and adjusted the recipe from there.

It worked out brilliantly in the end.

But…that’s not what I’m here to talk about.  I am here to discuss the use of the Jovial Gluten Free Brown Rice Tagliatelle.  The pasta is actually the last thing that gets added to the soup.  Not only does this help to thicken the broth a little bit, but it also brings a heartiness to the dish.  I love a good, comforting bowl of soup.  And as we were in the low teens temperature-wise last week…this was the ideal food to have on hand.  And my roomie and I ate it…three days in a row.

Jovial Gluten Free Brown Rice Tagliatelle (uncooked)

Jovial Gluten Free Brown Rice Tagliatelle was the ideal and perfect noodle for this soup.  It is a thin, but longer noodle.  Sort of like fettuccine, but different.  Did you follow that?  HA!  It cooked perfectly in the broth with my not-chicken “meat” and my carrots.  These noodles absorbed the flavors of the broth and the items cooking in it.  And, for the first time, the fake chicken didn’t taste…fake.  That was more the broth than the noodle…but that’s an observation I thought I should share.  Anyway…Jovial actually managed to make a brown rice noodle that didn’t turn gummy and didn’t fall apart when it cooked.  I loved how these noodles held their shape and were so prominent throughout the soup.  What’s the point of having a “chicken” noodle soup if the noodles don’t hold up?  They really did bring the dish up to where it needed to be.  And, even on a reheat, they were perfect.  Three days in a row…noodle perfection.

I was beyond impressed.  I would purchase these again in a heartbeat to use in other dishes, including pasta dishes with a simple sauce.  They went above and beyond my expectations.

Let’s discuss the ingredients that go into Jovial’s Gluten Free Brown Rice Pasta, shall we?  These shelf-stable noodles are made from organic brown rice flour and organic eggs.  Yes…they really are made from only two ingredients.  In addition to being gluten-free, these noodles are also free of casein, tree nuts and peanuts.  These are also certified kosher.

As for nutritional information, as far as pasta goes, this is right in line with even the regular stuff.  A serving of Jovial Gluten Free Brown Rice Tagliatelle is 2 ounces of pasta.  There are 4 servings in the package.  A serving will deliver 210 calories and 3 grams of fat.  One serving will also provide you with 40 mg cholesterol, 15 mg sodium, and no sugar at all!  You will also be taking in 2 grams of fiber and 5 grams of protein.  So, yes…these will make you feel full.  Trust me.  I made vegan grilled cheese sandwiches to eat with them and I was stuffed at the end of my bowl of soup and sandwich.

Another win for Jovial in the gluten-free pasta.  Seriously continuing to fall in love with this brand when it comes to my pastas.  Great noodles that are easy to cook and use…and don’t fall apart like some other brown rice pastas.  That is definitely a win!

Gluten Free and Vegan
Gluten Free and Vegan “Chicken” Noodle Soup made with Jovial Gluten Free Brown Rice Tagliatelle

Product Review: Improveat’s The Pure Wraps

Improveat's The Pure Wraps
Improveat’s The Pure Wraps

Product: Improveat’s The Pure Wraps

Looking for a good tortilla alternative?  Hey…sometimes we are.  I know I’m usually searching for some sort of wrap that I can use…in some fashion.  And I managed to find a few options in other areas of the country…but never really in my state or region.  One product that I have seen, but haven’t gotten the nerve to try are The Pure Wraps.  I spotted these at a few of my local natural food stores on end caps and the like…but I just haven’t managed to talk myself into getting them.

Enter my monthly delivery from Cuisine Cube!  If I haven’t gotten you curious enough to sign up for a month of this delivery…then you aren’t human.  Seriously, click on the link above and check them out.  It is affordable and you really do get some interesting and otherwise unknown products each month delivered right to your door.  All gluten-free.  How’s that for amazing?

So, in only my second cube to arrive, back in June, one of the products included were The Pure Wraps from Improveat.  Hmmm…now I didn’t have to talk myself into purchasing them.  I now had them within my clutches.  Thanks Cuisine Cube!  Anyway, I tucked these away in my hall pantry, and sort of had the fact that they were there lingering in my mind for awhile.  I just needed a good reason to get them out and try them.

Filling form y quesadillas: The Pioneer Woman's Butternut Squash & Kale
Filling form y quesadillas: The Pioneer Woman’s Butternut Squash & Kale

That moment presented itself in the week following my trip to Walt Disney World to run the Disney Wine & Dine Half Marathon.  My roommate and I are getting back on track with our clean eating and I still happened to have a butternut squash from my bin a couple weeks before.  I purchased some organic kale and whipped up a recipe from The Pioneer Woman for her Butternut Squash and Kale.  She had a link using it as a stuffing for quesadillas.  And I thought…well…I do have those Pure Wraps in my pantry.  I wasn’t sure how well it would work, but I figured…it was at least worth a try.

So, that evening, I managed to properly cut a butternut squash without almost losing a finger and without much problem.  I cooked up the delicious squash and kale mixture and then it was time for the quesadilla part.  I retrieved the packet of Improveat’s The Pure Wraps and opened it up.

Improveat's The Pure Wraps (raw)
Improveat’s The Pure Wraps (raw)

What I pulled out were squares of what almost looked like thin paper.  I was now wondering how these would work with the whole “drop in some butter to crisp up the outside” method for the quesadillas.  I figured there wasn’t much to lose, so, into the pan one went.  It took a moment to begin to brown, but it did…so I flipped it.  These didn’t exactly crisp up right away, so when I went to do the other one, I set the first on a paper towel.  That’s when it began to crisp up.  Maybe it would work.  Maybe not.  If not, just wrap it around the filling and eat it like…shawarma or something.

But…it did work.  In fact, I was pleasantly surprised when the wraps charred up and did become solid enough to hold the amazing filling I prepared simply with local squash and organic kale…and a little bit of seasoning.  Mmmm.  So, there it was…dinner.  It wasn’t a normal looking quesadilla,but it wasn’t made with your typical ingredients.  So…I cut them in half…and they crumbled slightly, but it worked.  Dinner was served.

I was actually so happy with the way Improveat’s The Pure Wraps tasted.  Considering they are made from only three ingredients, and not a typical tortilla, I wasn’t sure how well this would work.  But they worked perfectly.  And it was a different take on how to eat them.  Next time, and there will be a next time, I think I will leave them in their natural state.  But, even with the attempt at crisping them up, I still got the bit of sweetness from the coconut these wraps are made from.  And this really paired well with the earthy and spicy flavors of the squash and kale that I placed inside.  I was beyond satisfied with these wraps and honestly will be heading out to the store for more.  I’m excited about them.  I fell in love with them.  And, they fall right into the clean eating regimen that my roomie and I are trying to get back on.

So, what exactly are Improveat’s The Pure Wraps made from?  Simple.  Each wrap is made from only three ingredients: young coconut, coconut water, and Himalayan sea salt.  Boom.  That’s it.  You can’t get more pure than that!  The entire purpose of these wraps being created by Improveat (based out of Atlanta, Georgia) was to have a healthy bread/tortilla substitute that was highly nutritious, free of major food allergens (including gluten!) and convenient for today’s busy lifestyle.  It took over two years of research and testing to come up with the right product, realizing the vision of the creators without sacrificing their high standards.  Talk about a labor of love…and one that really paid off.  These wraps are gluten-free, raw, alkalline, corn-free, soy-free, dairy-free and egg-free.

As far as nutritional information goes, Improveat’s The Pure Wraps come in a package containing four wraps.  A serving size is one of these wraps.  One wrap will serve up 60 calories and 2.5 grams of fat.  They are cholesterol free.  You will be consuming 240 mg sodium and less than 1 gram of sugar.  Don’t you love that.  These wraps won’t make you feel bloated or stuffed either.  Each one contains less than 1 gram of fiber and they have no natural protein.  Thanks to the coconut that goes into each one, you also get a bonus of 120 mg potassium.  Gotta love that.

And you will love these wraps.  Honestly.  I can’t wait to try them again, and this time just use them in the simple manner they are prepared.  Just fill, roll and enjoy.  But, on a whole, these were very good the way I prepared them too.  They held up to even cooking, which I wasn’t sure how that would work but it did.

So, once again, Cuisine Cube, you have made a believer out of me.  Thank you for giving me the opportunity to try a product that I had been too nervous to try before.  Stepping out of your comfort zone when it comes to food is important, and this made it easy to do so.

Gluten-Free Butternut Squash and Kale Quesadillas made with Improveat's The Pure Wraps
Gluten-Free Butternut Squash and Kale Quesadillas made with Improveat’s The Pure Wraps


Restaurant Review: Via Napoli Ristorante e Pizzeria – Epcot – Disney World

Via Napoli - Italy Pavilion - Epcot
Via Napoli – Epcot – Disney World

Restaurant: Via Napoli Ristorante e Pizzeria – Epcot – Disney World

It was Epcot Day!  YAY!  I love Epcot Day.  I don’t know why…because so much of it features the World Showcase…which during the Food & Wine Festival…features foods from all over the world.  Even the regular pavilions that are standard in the showcase don’t offer much for a gluten-free vegetarian.  But I still love Epcot Day.

Since we were in Epcot, on our final night, we wanted to go somewhere in the park for dinner.  It took a little bit of back and forth, but we finally decided on Via Napoli Ristorante e Pizzeria.  It had gluten-free pasta on the menu, so we were good.  Something I could eat.  Which, definitely was important on Epcot Day…as our morning actually started at the Magic Kingdom…where we at Dole Whip for breakfast.  Pictures were taken for proof.  I am not ashamed.

But…let’s fast forward.

The entire day was spent doing a few rides and exploring the World Showcase.  My friend, Jenn, was having a difficult time on the last day.  Her feet…her poor feet…had blisters in places I didn’t know one could get blisters.  It was a slower moving day, but I was fine with that.  Take in the showcase.  Stop and watch the new Lumberjack Show.  I miss Off Kilter though…I’m not going to lie.  Cathy snagged a lunch in Morocco (she had to have her lamb shawarma!), while Jenn and I toddled over to Brazil for the (naturally gluten-free) Pao de Queijo (Brazilian Cheese Bread).  I later had one of my protein bars and half of a clementine (Jenn had the other half) because dinner reservations weren’t until 7:45 p.m.  Late.

But, we made use of our time…checking out different things along the way, resting when Jenn needed to get off her feet, exploring the different countries, and shopping.  Of course.  We got in line for the Gran Fiesta Tour Starring The Three Caballeros at the Mexican Pavilion…and that sort of ate up (see what I did there?) the rest of the evening down time before food.  It was a bit of a stroll back to Italy in Epcot…but Jenn was a trooper…and she got there.

I went up to the hostess desk in the very crowded lobby and let her know we were there for our reservation.  She asked me some questions, it was hard to hear her over the din of the lobby.  But we got it worked out.  And, of course, my food allergy thing.  So, there was a short wait…but after about 5 or so minutes, the lobby was emptying and we were up next.  The really nice hostess took us all the way to the back for a table with a bench and two chairs.  Cathy and I sidled up on the bench.  Jenn took the chair this time.

We. Were. Starving.

I perused the menu and noted that, yes, gluten-free pasta was the only option for me.  The downside…none of the listed pasta dishes on the menu were vegetarian.  Yikes.  As I was just starting to look at the menu, the customer liaison came over to speak to me about my food allergy.  He noted the gluten-free and pointed out that they do not have gluten-free pizza but any of the pasta can be done gluten-free.  And then he was off.

Which left our poor waiter to be the one who would have to seriously help me out.  Not that he minded.  And as I am the tricky one…I ordered first.  And my first statement was…

“Well, I am a gluten-free vegetarian…so…”

He came over to my side of the table to look at the pasta dishes.  “Gluten-free…it’s easy,” he said.  “The vegetarian…”  He looked at all the pasta options again and finally said, “I tell you what…we will have the chef prepare some mushrooms and vegetables with our marinara sauce.”

Works for me.  Order in.

Jenn opted for the Lasagne Verde, which is a white lasagna that is stuffed with spinach, parmesan, ricotta, and a besciamella sauce ($22.00).  Cathy went for her go-to when we first go to an Italian restaurant…the Spaghetti e Polpettine, which contained hand-crafted veal meatballs in a tomato sauce ($21.00).  I have to say, I usually giggle a little when Jenn orders something with cooked spinach or vegetables in it…because most of those veggies get tossed to the side of the plate.  But…she is Italian…and she knows her Italian food.

We waited for a bit…no gluten-free rolls or any bread at all at the table.  We watched a woman at the table next to us devour an entire pizza on her own, while her dining companions watched her.  And as she was taking her last few bites, their food arrived.  It was weird.  We couldn’t figure out if they were just there to watch her eat (like some crazy Disney World food challenge or something)…but…who knows.  She then got to watch all of them eat so…turn around is fair play…or something?

But, soon our attention turned to our own food as our dishes arrived and were delivered before us.

Pasta with Veggies and Marinara
Pasta with Veggies in Red Sauce

I have to say, my bowl of pasta was beautiful.  A good helping of marinara sauce (which would have been awesome with a gluten-free bread product of some type!) with a variety of vegetables cooked in.  I spotted zucchini, tomatoes, peppers and mushrooms immediately.  And the gluten-free pasta was fusilli…so twisty and perfect for capturing delicious sauce.  I will call this dish…”Pasta for the strange gluten-free vegetarian at the table in the back.”  Or…more simply…Pasta and Veggies in Red Sauce ($22.00).

Now, this is the second Italian restaurant I have visited at Disney World.  Normally we just head over to Hollywood Studios and enjoy our food (complete with gluten-free dinner rolls and gluten-free dessert!) at Mama Melrose’s.  But since were were in Epcot…we figured it would be easier to eat there than park hop.

I sort of wish we park hopped…

It’s not that Via Napoli was bad.  It wasn’t.  The food was actually quite good.  It was just…average though.  The pasta in my dish was actually cooked to perfection.  A lot of gluten-free pastas, especially when crafted from rice flours, tend to get gummy and fall apart.  These were a perfect al dente and held up to the marinara and the vegetables.  But…there was a lot of pasta in that dish and I ended up picking out the veggies at the end and leaving the noodles alone.  I ate about 3/4 of the dish…and that was it.  I was done.  The marinara had a lot of flavor to it.  And the vegetables were a nice touch and I appreciate the chef at Via Napoli for doing that to accommodate my dietary needs.  I just…had better.  Elsewhere.

Jenn enjoyed her lasagna…after she picked out most of the spinach.  And Cathy made sure to eat all of her meatballs.  They were much smaller than what she normally gets in a spaghetti and meatball dish, so she appreciated that too.  But she too had to soldier on and leave some of her pasta noodles behind.

No dessert here for us…we had plans.  Cathy wanted her chocolate cannoli from one of the gelato carts in the World Showcase, and I headed to France to get some Salted Caramel Gelato from an ice cream shop there.  Yummy!

So, as it stands, Via Napoli put out good food.  I can’t think of anywhere at Disney where I have had bad food.  It’s just…Mama Melrose’s had more options for me…and a bit more to offer.  So next time…I think I’ll return to Mama Melrose’s.  But, thank you, Via Napoli, for the fine cuisine.  A little taste of Italy never goes wrong with me.

Restaurant Review: Red Rooster, Harlem, New York

Red Rooster, Harlem, New York

Restaurant: Red Rooster, Harlem, New York

I totally broke tradition.  I did.  I was in New York City to run the TCS New York City Marathon…and so far I had managed really amazing gluten-free pizza the night before the race.  Normally, after I race, my friends and I go to a pub to celebrate the occasion.

Not. This. Time.

But, it was of my own doing that we ended up in Harlem just after 6 p.m. on Sunday evening.

How?

Well…since we were going to be in New York City, I thought it might be fun to check out a restaurant that belongs to one of my favorite chefs of all time.

The venue: Red Rooster.

The chef: Marcus Samuelsson.

After all, we were celebrating my finish at the marathon earlier that afternoon.  Why not make it special.  So, yeah…I broke tradition and decided to forgo the pub for something…a little different.  And I have never made a better decision in my life.

Prior to heading to New York City, I had told Cathy that I really wanted to go into Harlem and eat at Red Rooster.  She knows how much I adore Marcus Samuelsson.  And, honestly, we’re both foodies…she was right there with me.  So, she went ahead and called the restaurant and talked to them about reservations on marathon eve.  She mentioned that I was a gluten-free vegetarian and they said that food for me would not be an issue.  With that done, Cathy set up a reservation for 6 p.m., giving me plenty of time to run, shower, walk around, come back and change, and get there with my group of friends.  We had reservations for 4 people…me, Cathy, Heather, and my good friend Marisa.

So, that night, I dressed up in this elegant vintage dress…but kept on my recovery compression socks (and wore them with my heels, HA!), and my three friends and I went down to the subway and hopped the train to Harlem.  We emerged steps away from Red Rooster.  Literally.

And about 10 minutes late.  Whoops.  But…we got there…before they handed our table away.

We were seated near the kitchen, which was fantastic for me because I could see the people bustling around in there, working hard at the various stations.  I loved the feel of Red Rooster…very chic casual.  A fun, vibrant, laid back, but classic vibe.  It was the kind of place I would want to return to and bring everyone I know…at least once.  Totally my style.

Our server, Ryan, came over to greet us.  He said that if we had any questions regarding the menu to let him know.  I mentioned that I was a gluten-free vegetarian, and he said that wouldn’t be a problem.  In fact, he would go and talk to the chef and see what they could do for me.  I thanked him and we all studied the different menu options.  At one point, I know Cathy was trying to convince Marisa to try the soup with tripe in it, but that wasn’t happening.

Ryan returned, and said that he mentioned that I had run the TCS New York City Marathon and was a gluten-free vegetarian, to which he said the chef would like to create a dish for me.  I was thrilled and thanked him for checking.

Glasses of Brotherhood Riesling

With that said, Cathy took one matter into her own hands.  We were, after all, celebrating.  So, she ordered a bottle of wine for the table.  We went with a sweet wine (Heather prefers dry…but she was a good sport), opting for a local Riesling – the 2013 Brotherhood from Washingtonville, New York ($48.00).

We were ready to order, it seemed.  Ryan already had mine.  He said the chef was going to do up a Vegetable Plate ($21.00) for me.  So, I was excited to see what would emerge from the kitchen.  Cathy went with Marcus Samuelsson’s signature dish – Helga’s Meatballs, which are served with lingonberries, braised green cabbage, and buttermilk mashed potatoes ($23.00).  Heather ordered the Triple-Double Burger, which is served with bacon, jarlesburg, and rooster sauce ($19.00).  Marisa did a little picking and choosing, and went with the Upstate Farms Squash Soup, which includes yogurt, honeycrisp apples, and lentils ($12.00) with a side of the Cornbread ($4.00).  And, because they sounded good…Heather and I split a side of the Hearth Roasted Brussels Sprouts ($8.00).

Red Rooster Entrees: Helga's Meatballs, Upstate Farms Squash Soup, and Triple-Double Burger
Red Rooster Entrees: Helga’s Meatballs, Upstate Farms Squash Soup, and Triple-Double Burger

Ryan went to put or order in and we all got down to talking about New York, about work, about life, about the race, about food, about events…whatever we wanted to talk about.  We were in no rush and the restaurant was not rushing us.  I loved being able to just drink in the atmosphere.

Just before the food arrived, Ryan returned with our Riesling bottle, pouring a little bit into Cathy’s glass.  Cathy lifted the glass and took a sip.  And it was love at first taste for her.  So he poured some in each of our glasses, and I made sure to keep drinking my water too.  No dehydration here.

And then…our entrees arrived, each one settled down in front of us carefully.

The plates…were gorgeous!

Chef Creation: Vegetable Plate - Curried Black Eyed Peas, Charred Broccolini, Berbere Carrots and Parsnips, and Hearth Roasted Brussels Sprouts
Chef Creation: Vegetable Plate – Curried Black Eyed Peas, Charred Broccolini, Berbere Carrots and Parsnips, and Roasted Brussels Sprouts

The chef created a fantastic dish for me.  In a bowl on my left was Curried Black Eyed Peas.  And on the platter beside it…Charred Broccolini, Berbere Carrots and Parsnips, and Roasted Brussels Sprouts.  Oh…I will note, these Brussels Sprouts tasted different than the side that Heather and I were splitting.  It was chef magic.  And it was a beautiful and gorgeous plate.  One that I looked forward to eating.

Let’s start with the Curried Black Eyed Peas.  Just…WOW.  WOW!  So much flavor.  Lots going on.  And yet…simple.  I like to traditionally have black eyed peas on New Years Day…and this is how I would want them this year.  For real.  Just this incredible depth of flavor with the curry spices.  Not hot…just simply bringing out more of the peas themselves.  One of the best dishes involving peas of any sort I have ever had in my life.  And, trust me, I’ve eaten plenty.

The vegetables that the chef prepared were a delicious and filling treat for me.  The broccolini was gorgeously cooked and vibrant green.  It had the right amount of crisp to it, yet, still soft and easy to bite through.  I love broccolini, and this was just as it should be…simple and delicious.  The Brussels Sprouts were roasted to perfection, giving that outer layer some depth of flavor, yet keeping the vegetable itself soft on the inside.  Fork tender perfection.

My favorite thing, however, on that plate was the Berbere Carrots and Parsnips.  HOLY COW!  This side is exactly why I rushed out to a spice store in order to purchase berbere.  This spice is awesome.  It has this great flavor to it, followed with a little bit of heat at the end.  It paired beautifully with this root vegetables.  In fact, these were what I saved for my last bite.  Completely in love with a plate of vegetables.  How amazing!  My compliments to the marathoning chef.  My meal was sheer perfection.

Red Rooster's Hearth Roasted Brussels Sprouts
Red Rooster’s Hearth Roasted Brussels Sprouts

And I know you’re wondering about the Hearth Roasted Brussels Sprouts that Heather and I split, right?  Of course you are!  These were different from the ones that were on my plate.  These sprouts had this amazing char to them, but also hit up with a bit of a lemon or citrus flavor.  Sprinkled on top were macadamia nuts.  It was a combination that I hadn’t had before with Brussels sprouts…and I liked it.

But, wait…there is more!

Because when we celebrate we get dessert too!  We were handed the menus so we could peruse the options.  Ryan was taking care of another party at that moment, so I asked the new server about gluten-free options.  She highly recommended The Green Apple Viking Delight ($11.00).  I was game.  Heather actually ended up doing that too.  Leave it to the Scandinavian Minnesotans to order something with the word “viking” in it.  HA!  Cathy knew she wanted to have cheesecake in New York City, so her choice was the obvious one…Vanilla Cheesecake, served with yogurt, a granola crumble and pomegranate sorbet ($11.00).  Marisa went for the signature dessert of the restaurant, the Red Rooster Doughnuts, which are filled with sweet potato and coated in cinnamon and sugar ($12.00).  It came with an icing to dip them in as well.

Red Rooster's Vanilla Cheesecake and Red Rooster Doughnuts
Red Rooster’s Vanilla Cheesecake and Red Rooster Doughnuts


Red Rooster's Green Apple Viking Delight
Red Rooster’s Green Apple Viking Delight

Desserts arrived shortly after and…yeah…we were quite happy with our choices.  I thought The Green Apple Viking Delight was like a cold crème brûlée.  It was a green apple sorbet set on top of a white chocolate fennel cream.  On the side was chopped apple and fennel.  And a little tuile was set on top, giving it a little crunch and texture.  I was totally in love with the flavors, even though I wasn’t completely certain, at first, that they would work.  They complimented each other perfectly and each bite was a burst of sweetness, with a bit of richness from the white chocolate.  Divine.

Cathy loved her cheesecake (it looked deconstructed…so cool!) and Marisa was more than pleased with the doughnuts.  Needless to say…we are girls.  Desserts are awesome.  But these…these took awesome up to the next level.  Which I guess is phenomenal.  Or, in the culinary world, a sweet note to end the night on.

We left the restaurant completely satisfied with the meal.  The ambiance of Red Rooster was like no other restaurant that I have been in to date.  A live jazz band had started to play during our desserts and we really just took a moment to not only savor the food, but savor the experience as well.

I have been a Marcus Samuelsson fan for years…being able to eat at his restaurant was a dream come true.  Having a dish created for me, and having a careful and very caring staff made it unforgettable.  I was congratulated so many times on finishing the marathon.  It was an amazing day, but that night really just sealed it as one of the best days of my life.  Good race…good friends…good food…good times.

Thank you, Marcus Samuelsson and Red Rooster.

Restaurant Review: Moerlein Lager House, Cincinnati, Ohio

Moerlein Lager House, Cincinnati, Ohio

Restaurant: Moerlein Lager House, Cincinnati, Ohio

It had been a long day for me.  No…really.  And, while a part of me was super stoked that I was leaving right from work to drive up to Cincinnati, Ohio, with my roommate, for a concert, another part of me just wanted to curl up under a blanket on the sofa at home.  But…there was music to be enjoyed.  And she had purchased a set of tickets to see Bastille in Cincinnati awhile back to help cheer me up.

This foot injury has had me pretty down since July…and she thought a surprise and a band I love might just help lift my spirits.  It did.  but this was a crazy, intense week at work, and my brain was ready to shut down.

Thankfully, that mindset changes when you actually get on the road to an event that you are really looking forward to.

So, at 4 p.m., we departed the office and hit the road up to Cincinnati, Ohio.  A couple of days prior, Cathy had made reservations with a place not to far from US Bank Arena (the venue for the show) due to some gluten-free options available on their menu.  I love trying out new food places so…WOOHOO!  Even better…it had fish and chips readily available for her.  YAY!  She made the reservations for 6:30 p.m., which would give us some time to hit traffic and get into the city, park, and get to the venue.  The last-ditch food option would be Chipotle, if the traffic gods were not with us.

But they were…and we arrived in Cincinnati just before 6 p.m., having only hit some traffic in Covington, Kentucky, just before crossing into Ohio and hitting Cincinnati.  We readily found parking and got out, making the short stroll from the parking garage (with it’s $20 event parking!) to the restaurant, which was literally one block up and then over…down toward the river walk.  Beautiful night too.  Perfect weather.

We walked up the stairs to Moerlein Lager House and stepped inside.  There were a few people ahead of us, but most went right to the bar.  We stepped up and Cathy mentioned that we were early, because traffic wasn’t as bad as we anticipated…and they were more than happy to sit us down early.  Nice.  We were shown to a very nice table, somewhere between the rowdy bar and the floor to ceiling windows, which offered a spectacular view of the riverfront.  We were given our menus and a menu that had the specials on it, where if any item were ordered off that menu, a donation would go towards a charity.  Tempting, but there really wasn’t anything on there for me…and Cathy had her heart set on fish and chips.  Our waitress, Kelly, came over to see if we wanted something to drink.  We started with water.  And when she returned, she asked if we wanted any appetizers or had any questions on the menu.  Cathy mentioned that I was a gluten-free vegetarian…and she came over.  I think she missed the “vegetarian” part following gluten-free…because she highly recommended the crab cakes.  But…hey…she tried.  And…working in it’s favor – the restaurant labeled everything V for vegetarian and GF for gluten-free.  And wouldn’t you know it…they had a dish that fit both requirements.

Cathy ordered her Fish and Chips ($18.00), which was cod that was battered with their house beer, Hudelphol, and served with a jalapeno tartar sauce, coleslaw, and fries…and decided she’d live dangerously with a non-alcoholic beer (I agree with some friends of mine on this…what’s the point??!), Einbecker ($7.00) to have with her entree.

As for me…I happily placed an order for the Crispy Balsamic Tofu ($17.00).  YES!  You read that right.  This entree was served with a spinach basil risotto and roasted tomatoes, cipoline onions, and wild mushrooms, topped with shaved asparagus and preserved lemon salad.  It had actually been a toss-up between that entree, or ordering a few sides and dining on that.  Cathy pointed out I could get those sides offered virtually anywhere…but the tofu dish was an original.  I agreed…and that’s what I ordered.

Moerlein Lager House's Crispy Balsamic Tofu
Moerlein Lager House’s Crispy Balsamic Tofu

While we waited for food, we discussed the concert…the music…my upcoming marathon…my foot (which to this day still bothers me!)…and the restaurant itself. And, when our food arrived, we were both certainly ready to dive in and devour.

My dish looked beautiful.  It was a true culinary work of art.  The tofu was sliced on the diagonal, making perfect triangles that had this great crispy coating on the outside.  It was all set over this mound of perfectly creamy risotto with the vegetables framing the outside of the dish.  Shaves asparagus topped it all off and there was this gorgeous balsamic reduction that was drizzled over the plate.  I felt bad slicing into it…but I was hungry, so that moment only lasted briefly.

One bite was all I needed to realize how much I loved this meal.  The tofu had this great crispy outside, but inside it was still rich and soft.  It was glazed perfectly with the balsamic reduction and the hit of lemon just made it shine.  The shaved asparagus was cooked to a perfect al dente and used as not only a garnish, but as a great addition to the roasted vegetables on the plate.  The onions were spectacular and the tomatoes were soft and juicy.  But the star…the absolute star of this entree was the spinach basil risotto.  It was phenomenal.  Creamy and rich and packed with great earthy and herby flavors.  I was already telling Cathy after one bite that I wanted to recreate this dish at home.  She sampled the risotto and understood why.  I also had her try the tofu…and she really liked that as well.  This dish hit on everything I liked.  It had a nice tang to it, but the flavors were simple and real.  And I ate the entire thing…possibly in record time.

A dessert menu was brought to our table and after a bit of discussion…and the mention of a Chocolate Creme Brulee ($7.00), Cathy and I decided that we could treat ourselves and split the dessert.  Cathy checked with Kelly to make sure the Creme Brulee was gluten-free.  She said she thought it was, but would check.  It was…and after a small wait, the delicious looking dessert was arriving at our table with two spoons.  Holy Moses!  This was one spectacular and rich dessert.  The burnt sugar on top was fun to crack through, but what it gave way to was this rich and decadent chocolate cream.  Cathy described it as high-class pudding.  HA!  And that’s what it tasted like.  It was amazing.  And I think once we set the spoons down, Cathy might have licked the bowl a little bit.

Honestly, the service was amazing and I didn’t feel nervous about eating here.  The clearly labeled items on the menu helped make it very easy to navigate and to make sure I got what I needed and wanted.  And what would be safe for me.  Cathy loved her meal, and even enjoyed the jalapeno tartar sauce.  She said it was her second favorite tartar sauce she’s had yet.  That’s something.  The food was outstanding.  I mean…it’s not every day I can get a vegetarian dish that is also gluten-free at a restaurant without it being…a salad.  So, this was a nice treat, indeed.  And one day, when I run the Flying Pig Marathon…you better believe this is the place I’ll be hitting up for dinner.

Thank you, Moerlein Lager House…you exceeded my expectations!

Moerlein Lager House's Chocolate Creme Brulee
Moerlein Lager House’s Chocolate Creme Brulee