Glutino’s Gluten-Free Blueberry Breakfast Bar a good on-the-go option

Glutino Gluten-Free Blueberry Breakfast Bars

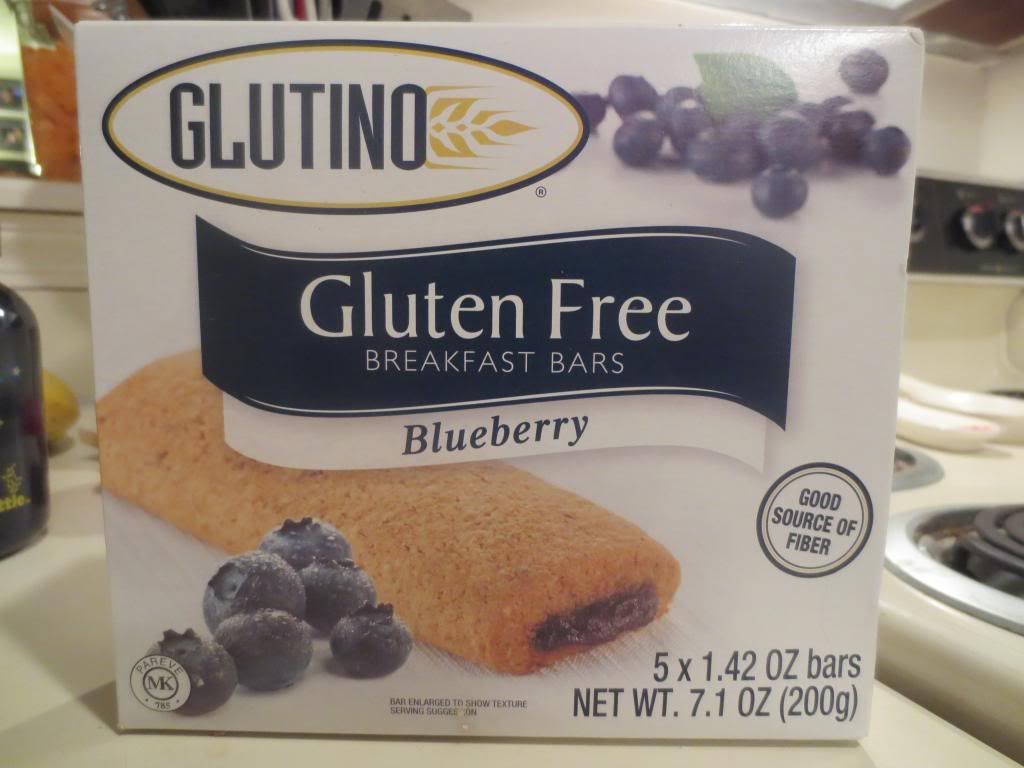
Product: Glutino Gluten-Free Blueberry Breakfast Bars – $5.99+

Breakfast bars.

They are tricky.  They really are.  I have eaten them since I was little…and the one thing is always the same.  The fruit tastes fake (because it mostly is), the actual bar is usually dry and rather tasteless, and they just make me thirsty when I eat them.

All of that holds true for Glutino’s Gluten-Free Blueberry Breakfast Bar, the second flavor I have ever tried from their line up of gluten-free bars, which include apple, cherry, and strawberry.  Prior to this, I have only had the strawberry variety.  And that was a year and a half ago.  Honestly.  It was also my first ever taste of a gluten-free breakfast bar.

You know…when you first bite into something that you haven’t had for ages…you tend to get lost in that moment.  For me, when I had that first breakfast bar back then, I remembered growing up and eating those Nutri-Grain bars for snack at school.

That’s what these taste like.  Exactly.

Glutino Gluten-Free Blueberry Breakfast Bar (wrapped)

Glutino’s Gluten-Free Blueberry Breakfast Bar is actually really good.  It was the first sample of a bar I ever had, at a Gluten-Free Tasting Fair at a local natural food store.  One bite and I was in heaven.  I had to buy my own box, and that was when I went with the strawberry variety.  I ended up with the Glutino Blueberry Breakfast Bars, however, because my mom had purchased a box of them for me while I was in town last time, running a race and visiting the family.  I never was home enough to eat them…so, she told me to take them with me.  I’m not one to turn down free food.

I’ve had a lot to work through in my pantry, but these were now getting their time as my afternoon snack.

Glutino doesn’t disappoint when it comes to hitting tastes and textures for their snack foods and their products.  Honestly, they are a name I trust.  When it comes to gluten-free foods, Glutino really focuses a lot on the taste, flavor, texture and how people perceive their product.  That is a big deal because if it isn’t good…if it tastes bad or is tasteless, no one will purchase it, right?

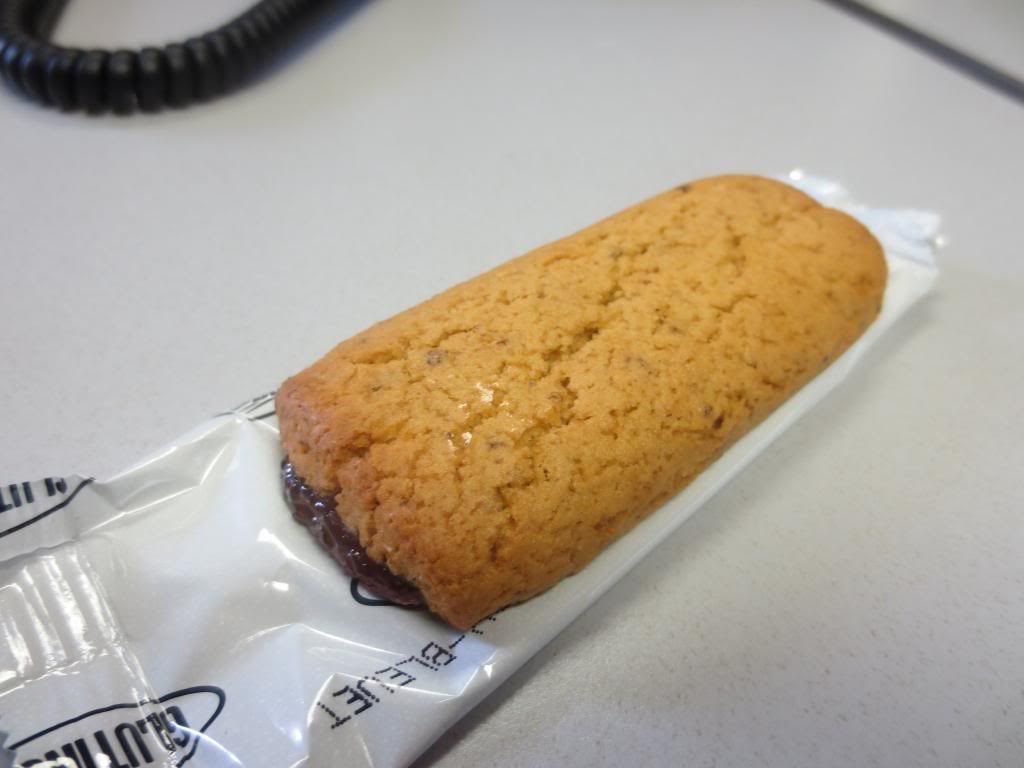
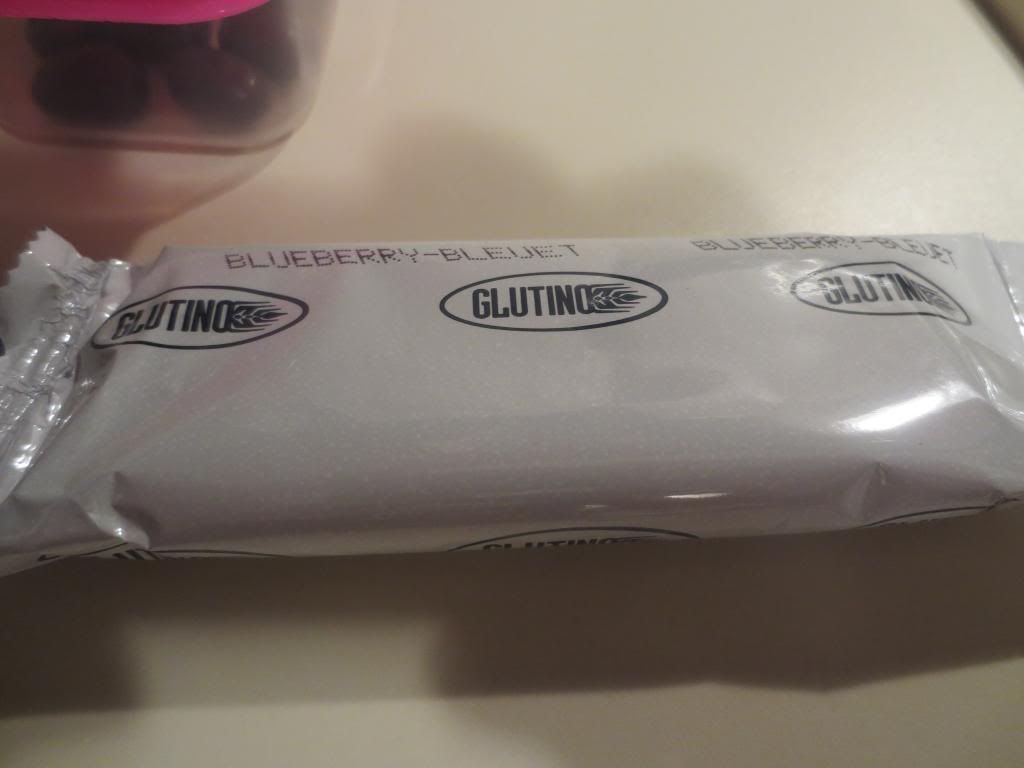
Well, the Glutino Gluten-Free Blueberry Breakfast Bar…is good.  I mean…when you need something fast or on-the-go, it’s handy to have around.  They slip right into a bag or purse without any problems…and that’s important.  You want ease when you’re an on-the-go sort like me.  The bar itself does have that dry breakfast bar flavor…the one that every breakfast bar has.  But, the fruit puree in the middle is packed with flavor.  These bars are soft, easy to chew, and yes…they are good.  Tasty.  Not perfect.  Not wonderful.  But…good.

Amazing how the more products you eat, the more gluten-free foods you work through, the more you change the way you eat, the less fantastic something seems when you return to it.  Like I said…these bars are good.

I’ve always been a label reader when I go shopping, but never really payed too close of attention to the ingredient lists on certified gluten-free foods.  With the way I am shifting my diet, per my sports nutritionist, I am actually really saddened by the amount of unnatural ingredients that go into these.  It’s a bit of a turn-off.  While it does contain actual blueberries, they aren’t listed until 5th on the list.  The first ingredient is, sadly, sugar.  And the blueberry portion of this bar is a mix of that sugar, with some chemical ingredients I can’t pronounce, a blend of fruit and vegetable juices (white grape, carrot, blueberry, and pear) as well as a raisin paste, more sugar (fructose), and the pastry-like casing seems to be a mix of chickpea flour, white rice flour, tapioca starch, and potato starch.  While I admire that they do, in fact, use real blueberries and blueberry juice, I just wish there were more of that and less of the chemicals in these bars.

That being said…in a pinch…these would be a good option to grab.

Nutritionally speaking, these bars provide you with 140 calories per bar and 2 grams of fat.  So, they are a healthier choice than some things out on the market.  These contain only 60 mg of sodium and are cholesterol free.  In addition, you are provided with 3 grams of fiber and 2 grams of protein.  A little low, but leaving you feeling satisfied after eating it.  You won’t be starving in the next couple of hours after consuming this bar.  So, as far as the numbers go…not bad.

As far as the flavor goes…very reminiscent of the breakfast bars I ate growing up, before I had to go gluten-free as an adult.  If you’re in a pinch, these are a good option to have on hand to take with you, in case hunger strikes.

Nicely done, Glutino.

Glutino Gluten-Free Blueberry Breakfast Bar (unwrapped)

Purely Elizabeth keeps it simple but tasty with Original Ancient Grains Granola Cereal

Purely Elizabeth Original Ancient Grains Granola Cereal

Product: Purely Elizabeth Original Ancient Grains Granola Cereal – $6.99+

Pure.  Simple.  Original.  Natural.  Organic.  Gluten-Free.

That is a love letter of goodness if you ask me.  Because this only proves that you don’t need to dress up something to make it taste good.  You can let the pure, simple, clean ingredients speak for themselves.  And that is exactly what Purely Elizabeth brand Original Ancient Grains Granola Cereal does.  Let me tell you, I could eat this stuff by the handful, without anything to top it off or add flavor.  Honestly…it’s amazing on its own.

But I tend to use granola in my infamous breakfast parfaits, teaming it with Greek yogurt and fresh fruit of some variety (whatever may have been in the CSA bin that week).  So, if it works well on its own, chances are it will be brilliant when paired with something else of equal deliciousness.  And Greek yogurt and fresh fruit…is definitely winning!

So…let’s start with the basics of this very basic (but highly impressive) granola.  The Original Ancient Grains Granola Cereal is a blend of organic certified gluten-free oats, organic coconut palm sugar (for sweetness), organic raw virgin coconut oil, organic puffed amaranth, organic quinoa flakes, organic sunflower seeds, organic chia sees, organic cinnamon, and sea salt.  I think I spy some organic, all-natural ingredients.  Not one chemical or preservative is listed.  This is the real deal and it’s packaged to be as clean and as healthy as possible.  This granola is non-GMO project certified, free of refined sugar, soy-free, loaded with good-for-you fats, sweetened with organic coconut sugar.  It is certified vegan, contains no artificial colors or flavors.  All of it is hand baked and obviously made with love.

A serving of Purely Elizabeth Original Ancient Grains Granola Cereal

Don’t let the fact that it isn’t paired with dried fruits or something to bring it extra flavor deter you from this variety.  This version doesn’t need it.  Honestly, it is full of amazing flavor all on its own.  The oats, puffed amaranth, quinoa flakes, sunflower seeds, and chia seeds are perfectly coated with the right amount of sweetness, pulled from the organic palm sugar.  The hint of cinnamon adds a little bit more flavor.  And all of it, the taste, the texture, the fantastic flavor…it is just rockstar.  I can’t even imagine going back to other granola after continuing to be impressed by each variety of Purely Elizabeth granola cereals that I have tried.

So…nutritionally speaking, a serving of Purely Elizabeth Original Ancient Grains Granola Cereal is 1/3 cup.  This serving will provide you with 140 calories and 6 grams of fat.  There are 2 grams of fiber in each serving and 4 grams of protein.  In addition, this granola is cholesterol free and low in sodium (110 mg).  So…delicious and oh, so good for you.  Loving it.

If I were to purchase only one brand of granola from here on out…Purely Elizabeth would be the brand I would choose.  It’s addictively good…and good for you.  Give it a try…you won’t be disappointed.  And don’t think Original means plain.  There is nothing plain about this version of the granola.  Simply put…it’s purely delicious.

Fresh Strawberry and Greek Yogurt Breakfast Parfait with Purely Elizabeth Original Ancient Grain Granola Cereal

Recipe: Gluten-Free Avocado Toast

Sometimes the simplest and best meal ideas come from the most unlikely places.  Honestly.  And this recipe is no exception.  Why do I say that?  Because this recipe comes from a cookbook called It’s All Good: Delicious, Easy Recipes That Will Make You Look Good and Feel Great.  What?  That doesn’t sound strange?  What if I told you that the cookbook author is none other than actress Gwyneth Paltrow.

I was at the library last week and spotted this book on the shelf of the new releases.  I picked it up and paged through it, seeing a few recipes of interest.  So, I had my roommate check it out for me (I didn’t have my library card with me) so I could look through it some more when I had more time.  The cookbook pretty much sat on the coffee table until Saturday morning.  I had a race in Frankfort, Kentucky.  Cathy was driving, so this gave me some time to page through the story in the beginning about why this cookbook came to be and a little bit about the author and co-author, Julia Turshen.  And then…I got to soak in the recipes.

One of the most enticing sounding recipes was one that actually didn’t have ingredients listed off.  It didn’t need it.  But when Gwyneth Paltrow compares a recipe to a favorite pair of jeans – “so reliable and easy and just always what you want” – I admit…I get intrigued.  And it sounded so easy.  And so delicious.  And now…I will share it with you.

Recipe: Gluten-Free Avocado Toast

Gluten-Free Avocado Toast

Servings: 2
Time: Prep 5 minutes; Cook 5 minutes

Ingredients:


  • 2 slices gluten-free bread (I used Udi’s Gluten-Free Millet-Chia Bread)
  • 1 avocado
  • Vegenaise (or other vegan mayonnaise)
  • Sriracha (optional)
  • Salt
  • Pepper
  • Red pepper flakes (optional)
  • Lemon juice (optional)

Directions:

Toast the gluten-free bread.  Spread it generously with Vegenaise (or other vegan mayonnaise) and top it off with a few slices of a perfectly ripe avocado, ever so gently pressing the avocado into the bread.  Hit it with a nice pinch of salt or Vege-Sal and a few grinds of fresh black pepper.

~*~*~

Yep…that’s it.  Do make note that I mixed a splash of Sriracha into my Trader Joe’s Vegan Mayonnaise to give it a little kick.  I also hit mine up with a bit of red chili flakes for some added heat.  Gwyneth also suggests adding a little zip to the recipe by giving a squeeze of fresh lemon juice over the avocado toast.  But, the fact is…the sandwich is fantastic on its own with the holy trinity of Vegenaise, avocado and salt.  Simple, but delicious.

If I had a restaurant…this would be on the menu.  For real.

Thank you, Gwyneth Paltrow…for giving me a new breakfast to make.  Because I intend to make this often.  It is so delicious and so healthy…and yes…so easy to make.

GalloLea Gluten-Free Pizza Kit is exactly what NOT to do to gluten-free pizza

GalloLea Gluten-Free Pizza Kit

Product: GalloLea Gluten-Free Pizza Kit – $10.99+

Let’s face it, my gluten-free friends.  When it comes to pizza crust, we usually have two options – make it ourselves…or use the frozen pre-packaged cracker crust pizza shells made by numerous gluten-free companies.  While these aren’t all bad…I have been fortunate enough to go to a few restaurants that actually make gluten-free pizza crust that isn’t crunchy thin and tastes like…real…awesome…pizza…crust.

But, tradition for me is a gluten-free pizza before the night of a big race.  For 5Ks…I’m apathetic on the tradition, but on a 10K or higher…you better believe I want my gluten-free pizza the night before.  I’m a superstitious athlete…and this has just been my magic night-before-the-race fuel.  It just works for me.  But…recently I’m on a tighter-than-usual budget (I blame race fees!), so instead of dropping money at a restaurant, I decided to pull out this kit I purchased at my local Earth Fare awhile back and give it a shot.  It would be…the best of both worlds.  A crust made from a mix that I got to roll out like a real pizza…without it feeling or, hopefully tasting, like those gluten-free cracker crusts of gluten-free pizza monotony.

I should trademark that…

Anyway…

It had been a long day at work and I was rather hungry when I walked inside from a long day at the office.  Immediately I settled into the kitchen to get this pizza working.  I opened up the kit, pulled out the vacuum-sealed pizza crust mix, the sauce packet, and the baking paper that they provided.  I preheated the oven to 450 degrees and put my pizza stone in there to warm up.  So far…so good.  Now came the fun part.

I call this the fun part because this is where I felt like I was really, truly, making a real…yes a REAL pizza.  The crust was vegan, which means it had no eggs added to it and no dairy was involved in making it.  In fact…it took 1/2 cup of water, warmed in the microwave for about 30 seconds, then the pizza crust mix that was provided.  This was a simple blend of organic brown rice flour, organic buckwheat flour, teff flour, sweet rice flour, yeast, organic raw sugar, sea salt and vitamin C.  Seems legit, yes?  Well, I did as instructed and poured the mix into the warmed water, stirring it until it was all incorporated and then making a dough ball, as instructed, in the bowl, covering it with the provided baking paper, and letting it sit for 10 minutes to rise.

While that was happening, I prepared the rest of the toppings…which is whatever you want.  For me…vegan Daiya cheese, avocado, pinapple, tomato, onion, green pepper, and broccolette.  Mmmm…veggie pizza with a hit of sweet pineapple.  It would be epic.  I just knew it.

With my veggies chopped and ready for the pizza, I removed the baking paper…and noticed my dough ball hadn’t even altered in size.  It looked just like it did when I rolled it into a ball and left it there.  Hmmm…

Well, I ran with it.  The baking paper was placed on the counter and I put two teaspoons of olive oil on it.  The dough ball was plopped onto the paper and rolled around into the olive oil, then I grabbed my rolling pin and rolled it out into a 12-inch circle as best I could, doing a horrible job at crimping the edges.  No surprise.  This isn’t my forte.  Anyway, I slid the baking paper with my crust base over to the warm pizza stone and set it on the low rack to begin cooking for about 10 minutes.

GalloLea Gluten-Free Pizza Kit includes a gluten-free pizza crust mix, a sauce pack, and baking paper

When that 10 minutes was up, I pulled it out and did as I was instructed by the kit…I poured the sauce packet on top and spread it out to coat the crust.  The sauce, by the way is a simple blend of organic whole peeled tomatoes, organic tomato paste, organic extra virgin olive oil, organic garlic, organic raw sugar, organic basil, organic oregano and more organic spices.  It sounded organically awesome, honestly.  Pure, natural ingredients.  I like it.  Then, over the sauce I added all the toppings and a scattering of my Daiya mozzarella shreds.  Vegan pizza…is awesome.  Trust me.  And back into the oven it went for another 10 minute baking session, allowing the crust to cook more, the toppings to warm, the cheese to melt, and that pineapple to caramelize.

When 10 minutes was up…the pizza stone came out and my pizza was done and ready to eat.  All of this is around 30 minutes time.  Not too bad for a dough you prep by hand.  That was, actually, my favorite part of this process.  I felt like I was eating something real.  Not just a frozen mass of dough already pre-made for my convenience.  I like getting my hands into things and making and rolling the dough was a nice step in that direction.

So…here it is…the truth, the whole truth…and nothing but the truth.

GalloLea Gluten-Free Pizza Kit let me down.  It just…let me down hard.

I went to slice through the crust and found that it was…very difficult to slice into.  My hopes of having this beautifully crisp yet soft pizza crust flew immediately out the window.  I was already frustrated with the crust and I hadn’t even tasted it.  Once I managed to slice it into fourths and then into smaller pieces for consumption purposes, I took a serving (1/4 of the pizza) to my roommate and served up another serving for myself.  I settled in, hoping the taste would make up for the tough to slice through crust.

Nope.  This crust turned out to be completely tasteless.  It was crunchy and bland…reminding me more of the cardboard flavored gluten-free products of yesterday rather than the amazing flavor, texture, and taste that can come with gluten-free products that are done right.  SO frustrating and aggravating.  I was let down.  The underside of the pizza crust got this amazing crunch to it, but the top, the part that was sauced, turned into a soggy mess.  I’m sorry…pizza crust should not be soggy.  Ever.  It was lackluster, uninspired, bland, and just plain…disgusting.  I almost didn’t want to save the other half of the pizza for the following evening.  But I did…because I didn’t want to waste money.  Ugh.  I reheated it the following night in a skillet, hoping it might improve the crust some.  Nope.  Still a bland, soggy mess of a pizza.

GalloLea…you did everything wrong with this mix.  I mean, who says that pizza crust has to be bland and just…not worth the effort to make it.  I was so disappointed with the time I spent rolling out this dough and preparing it.  The sauce was bitter and didn’t taste good at all.  I’d recommend using your own sauce if you happen to have one of these in your pantry.  I’m just saying.

As for the nutritional worth of this bland pizza crust…with the sauce included…the serving of 1/4 of a pizza will set you back 170 calories, and that’s without counting the toppings you add to it.  There is only 1 gram of fat in the mix and sauce, however, and it does provide 3 grams of fiber and 6 grams of protein.  This mix is also low on sodium (220 mg) and contains only 3 grams of sugar.  It is cholesterol free as well.

Unfortunately…it is also disgusting.  And I was so disappointed that once again I was stuck with a less-than-satisfying pre-race pizza.  I want a good pizza before a race, dammit.  Is that too much to ask?

My recommendation…make your own gluten-free crust.  Don’t rely on mixes.  And if you are pressed for time, there are plenty of tasty, frozen, pre-made gluten-free pizza crusts out there to throw into the oven with your own sauce and toppings.  Don’t waste your time and money on the GalloLea Gluten-Free Pizza Kit.  You will regret it.  I sure did.

GalloLea Pizza Crust stopped with my amazing toppings.  The toppings were the best part.  The crust was horrible!
GalloLea Pizza Crust stopped with my amazing toppings. The toppings were the best part. The crust was horrible!

The Good Bean bakes up amazing Sea Salt chickpea snack

The Good Bean Sea Salt Roasted Chickpea Snacks

Product: The Good Bean Sea Salt Roasted Chickpea Snacks – $2.99+

I’m on a mission.  A mission that was set forth by my sports nutritionist.

Yes…I have a sports nutritionist.

Why?  Because I’m preparing to run my first marathon and I want to make sure I am doing everything right.  From following a good training plan to making sure I am fueling my body to the best of my abilities.  This is important to me.  So, as I work through some of the stuff that is in my pantry…as I am cheap and won’t throw it away…I am already looking for new things to replace some of these snack items with.

I found a winner at World Market a couple weeks ago.  I broke them out on Friday as my snack at work and I fell in love at the first bite.

The product: The Good Bean Sea Salt Roasted Chickpea Snacks.

Yes…roasted chickpeas.

And yes…I am quite aware that I could easily make these myself, but my life is pretty busy and hectic as it is.  Maybe when things settle down in a couple months I’ll work more toward making a lot of my own food items.  But…this is pretty much as healthy as it gets when it comes to a snack.  Let’s start with the nitty-gritty and work into my opinion on these.

These are…what the bag says they are…roasted chickpeas.  I love chickpeas and I have my mom to thank for that (Thanks, Mom!).  However, I had never tried them roasted (but have pinned many recipes for this very snack on Pinterest to try…one day).  I chose to start with a trial on the original.  The very first snack by The Good Bean – roasted chickpeas flavored simply with…sea salt.  This concept was inspired by street vendors in Indian cities, who roast chickpeas in salt, resulting in hard little beans that give off this nutty, crispy, buttery texture of awesomesauce.  Yes…that is an accurate description.  Building off this concept, the people at The Good Bean roast their chickpeas in salt, bringing out the natural deliciousness of the chickpea itself.  Let’s face it…chickpeas are awesome.  They are a powerhouse of nutrition and just taste really good.  They taste even more badass when they are roasted.  Trust me.

So, let’s talk numbers.  No one likes numbers…but these…these are impressive.  The Good Bean Sea Salt Roasted Chickpea Snacks will only set you back 140 calories for a serving of 1/4 cup (which is the serving size).  This will also serve you up only 2 grams of fat (the healthy kind you get from beans!), 6 grams of fiber, 7 grams of protein, and only 260 mg of sodium.  Nice.  These chickpeas are low fat, nut-free, gluten-free, cholesterol-free, contain nothing over-engineered, nothing artificial, and are just SO good for your body, your heart, your waistline, and for giving you energy.  Nutritional powerhouses…that’s what these are.

But what about taste, right?  You gotta go off of taste!

Mark my words…these are totally AWESOME!!  Crunchy, tasty, with just the right about of salt to excite the taste buds.  Oh yeah…these are full of yumminess.  I loved the buttery texture and how, instead of having a mushy bean, you get this crunchy snack.  It’s like eating potato chips that are good for you.  Honestly.  I was so impressed by these.  In fact, I bought two of the other flavors today while grocery shopping.  That’s how yum-tastic these are.  As I move towards cleaner eating, these are more of the snacks I’ll be turning to.  Thankfully…these are delicious!!

So, if you’re looking to break your potato chip habit, I totally recommend The Good Bean’s roasted chickpea snacks.  Start with the basics…Sea Salt was the ideal place to start with me.  But if you want to be bold…try one of the other three flavors available.  I promise…you’ll love every crunchy bite of them.

The Good Bean Sea Salt Roasted Chickpea Snacks

Freedom Foods Tropico’s brings nothing artificial to the breakfast table

Freedom Foods Tropico's Cereal
Freedom Foods Tropico’s Cereal

Product: Freedom Foods Tropico’s Cereal – $2.99+

Oh yeah.  You read that right.

Nothing.  Artificial.  Nothing.  Zero.  Zilch.  Nada.

Let me reiterate this once more – NOTHING ARTIFICIAL!

So what exactly is this Froot Loops-like cereal made from…and why am I blogging about them?

Well, I’m blogging about this cereal because it was a new gluten-free item that I spotted at Whole Foods.  And it was inexpensive for a gluten-free cereal.  And I hadn’t had Froot Loops since I was really, really little.  And sometimes, even as an adult…you just want something to remind you of your childhood.  The only thing I looked at on the box was the sugar, and it was low for a cereal, so I put it in my shopping basket as I was going to need gluten-free cereal anyway…and away I went.

I wasn’t sure what to expect.  Normally I equate inexpensive gluten-free foods with disgusting gluten-free cardboard flavor.  So, when my current cereal was gone and I popped this box open yesterday…I was almost hesitant to settle in for breakfast.  I can be quite adventurous, but I also was on a tight schedule yesterday and not liking my cereal would have put a big crimp in the morning activities and energy level, for sure.  But, after my first spoonful…I worried no more.

Not only do these taste better than Froot Loops, but you can tell they aren’t laden down with unnecessary sugar either.  The flavors are all natural, because, as I said, Freedom Foods believes very strongly in their products having nothing artificial in them.  That means the colors are all natural and the flavors are all natural.  So…what does this mean?  It means this fantastic fruit flavor is coming from…yep…natural fruit flavor.  Imagine that.  Getting a fruit flavor from…fruit.  And the proof is on the taste buds.  While these are definitely not as sweet as Froot Loops, these are definitely packed with great flavor and offer a gluten-free version of that childhood classic.  As for the color…that is also all-natural, being drawn from turmeric, fermented rice powder, gardenia flower extract, and sweet potato extract.  For real!  Sure, the colors aren’t as bold or bright or unnatural as the original Kellogg’s brand cereal…but I don’t need my colors to pop.  I need cereals that don’t use artificial dyes and sweeteners.  And Freedom Foods is offering that.  And these aren’t just for kids…obviously.  The fruity flavor is really amazing and I dug in, spoonful after spoonful until it was, sadly, gone.

Freedom Foods is free from gluten, wheat, nuts, dairy, sesame, soy, and eggs.  As I mentioned before, the colors and flavors are all natural.  This cereal is low in salt, a great source of fiber, and completely preservative free.  No BHT here.  You’ll find it in Froot Loops though.  You’ll find soy, wheat, and hydrogenated oils in Froot Loops too.  Oh…and artificial colors.  Why eat something artificial when you can eat something that comes from natural ingredients.  That’s how food should be made.  It’s even better when the food is as delicious as this turned out to be.

Nutritionally speaking, a serving is 1 cup of Tropico’s cereal, which will set you back 130 calories and only less than 1 gram of fat.  This serving will also provide you with a scant 40 mg of sodium, 8 grams of sugar, 2 grams of fiber and 2 grams of protein.  While Kellogg’s Froot Loops variety has fewer calories, it has a little more fat, definitely more sodium, and 12 grams of sugar.  I think I’ll take the 20 extra calories for something that is all natural and has less sugar in it.  Thank you very much.

Freedom Foods Tropico’s is just one cereal that I found.  There are quite a few others lining the shelves.  And, according to the Web site, some other options as well that Whole Foods might not have yet.  That being said, I am looking forward to trying another type of their cereal because they have completely wowed me with this one.  Maybe I’m still a kid at heart, but this is a cereal parents can feel confident giving to their children and adults can enjoy as well.  It’s all natural…and all good.

Nature’s Earthly Choice turns up the power of protein with Easy Quinoa Mushroom & Vegetable Medley

Nature's Earthly Choice Mushroom & Vegetable Medley Easy Quinoa
Nature’s Earthly Choice Mushroom & Vegetable Medley Easy Quinoa

Product: Nature’s Earthly Choice Mushroom & Vegetable Medley Easy Quinoa – $3.99+

By now…many of you know that I am obsessed with quinoa.  I mean…obsessed with it.  It is always in my pantry, ready for me to cook up, fluff up, and serve in a variety of ways.  It is so versatile and can be used not only in cooking, but in baking too.  This ancient grain is a protein powerhouse, something that I love about it.  And it cooks up quicker than rice…and is way  better for you too.

But…sometimes I just need something easy for dinner.  Something I can just throw on the stove and not have to do anything else too.  That’s when Nature’s Earthly Choice steps in with their handy-dandy boxes of Easy Quinoa.  I picked up all four varieties that were available last year when I was in Minneapolis, Minnesota.  Why?  Because I had never seen this item before in any of my grocery stores (a few of my natural food stores now carry these) and…it was quinoa.  QUINOA!!

Yes…that did say last year.  I was in Minnesota to run a race and spend time with my family…and as a reward for doing so well on my run…I picked up some items I had never seen before.  Or even heard of for that matter.  These little boxes of quinoa goodness were just some of what ventured home in my luggage.  As I have tried two of the four varieties so far, you will recall that one was a hit and one was a miss.  So…the other night as I was prepping to head out for a fun run with my running group in Louisville, I needed something easy to make and easy on the stomach.

I pulled one of the Easy Quinoa boxes out of the pantry and hoped for the best.  My selection: Mushroom & Vegetable Medley.

Sounded appetizing enough. I love mushrooms.  I love veggies.  I love quinoa.  Had to be something to it, right?

Cooking this up takes about 20-25 minutes total.  Something I didn’t consider when I thought I would be reaching for something quick.  I sort of missed my group run and ended up running it on my own…by myself.  Ah well.

Quinoa and seasoning packets for Nature’s Earthly Choice Mushroom & Vegetable Medley Easy Quinoa

As I was saying, once the water is boiling, the rest is easy.  But you do need to account for the time it takes to bring the water to a boil.  In a saucepan, add 2 cups of water and the pouch of quinoa and bring it to a vigorous boil.  Reduce the heat to a simmer and add the vegetable and seasoning packet.  Give it a good stir so that everything blends together well.  And then you just let the quinoa cook until it is tender and chewy (white spiral threads appear around each grain) and all the water is absorbed.  Remove the pan from the heat and give this mixture a good fluffing with a fork.

Dish into bowls and settle in to eat.  My roommate and I split the box between the two of us…but there are 3.5 servings per box.  With this already being mentioned, I might as well hit you up with the down and dirty nutritional facts.  One serving will provide your body with 160 calories and 2.5 grams of fat.  The sodium content for something that comes from a box is very low, topping off at 230  mg per serving.  You get 3 grams of fiber and an amazing protein hit of 6 grams.  Awesome.

Every ingredient is something that I recognize.  These include: quinoa, potato starch, onion powder, mushroom extract, dry milk, salt, yeast extracts, sugar, olive oil, soybean oil, garlic, tomato powder, glucose syrup, maltodextrin, celery flakes, spices, natural flavorings, citric acid.

So…how does this concoction of quinoa and dried veggies and spices taste?  Better than I thought it would.  The entire time it was cooking, I kept thinking that it smelled like chicken noodle soup…or some soup of that respect.  It had a really great taste to it though.  The onion and the spices really shine.  I didn’t really get the mushroom flavor, but I’m sure it was blended in there.  What mattered was how good it was.  It had this savory, slightly salty flavor in each bite.  The quinoa was cooked to perfection.  And the flecks of veggies throughout the mix rehydrated really well when added to the water and allowed to cook into the quinoa.  Everything just worked together really well and provided a distinct, and delicious flavor.

You could easily bulk this up into a main dish by adding a protein of choice (for me…tofu…for others, perhaps chicken, shrimp, beef or pork).  Or…adding some sauteed vegetables or even some potato might really turn up the volume.  The possibilities are endless…and that’s what is so great about Nature’s Earthly Choice Easy Quinoa.  And, while the Sundried Tomato Florentine is still my favorite, this one is definitely a close second.  I only have one more variety to try…and I’m really looking forward to it.

Search for these at your local grocery stores and/or natural food stores.  Cook up a delicious protein-filled side or meal in no time flat.  Yep…it really can be that simple.

Nature's Earthly Choice Mushroom & Vegetable Medley Easy Quinoa (prepared)
Nature’s Earthly Choice Mushroom & Vegetable Medley Easy Quinoa (prepared)

Purely Elizabeth Blueberry Hemp Ancient Grain Granola a step above the rest

Purely Elizabeth Blueberry Hemp Ancient Grains Granola Cereal

Product: Purely Elizabeth Blueberry Hemp Ancient Grain Granola Cereal – $6.99+

Flavor.  Texture.  Taste.  Ingredients.

Everything that goes into a granola has to be spot on.  Because a good granola will not be laden with sugar.  If you are currently consuming a granola with a high sugar content…STOP!  Just stop…now.  There are better, healthier, more filling options out there that give your body the proper balance of nutrients it needs…instead of filling you up (briefly) with sugar.

One such brand…is Purely Elizabeth.

I originally tried the Purely Elizabeth Pumpkin Fig granola a couple months ago…and fell in love with it.  I was a bit leery about it…but it surprised me.  Even more, the fact that it wasn’t laden down with chemicals, sugars, and unhealthy things made it all the more enjoyable to consume.  Flavor was top of the line.  It is one of the more expensive gluten-free granola on the market…but it’s worth it.  Trust me.

That being said, when I found myself laden with fresh fruits and berries in my CSA bin this week…I picked up some Greek yogurt and figured breakfast parfaits would be an amazing addition to my favorite meal of the day.  But…I’d need granola.  And while there is a wide variety of gluten-free options out there, I was biding my time while hitting the various grocery stores that I haunt week in and week out.  On my very last stop, I decided I would just go with whatever was there.  And what was there were quite a few options…but imagine my joy at seeing the bags of Purely Elizabeth Ancient Grain Granola Cereal on the bottom shelf.  I didn’t hesitate for a moment.  Well…one moment…but that was just because I needed to choose a flavor.  Only two remained…the Pumpkin Fig, which I had already tried previously…and the Blueberry Hemp.

Blueberry Hemp won and found its way into my shopping cart…then in my shopping bag…then in my pantry.

It was opened up and tried the very next morning.

A serving of Purely Elizabeth Blueberry Hemp Ancient Grain Granola Cereal

Let’s start with the basics of this variety and brand.  The Purely Elizabeth Blueberry Hemp Ancient Grain Granola is made with all natural, organic, and gluten-free ingredients that include quinoa, amaranth, chia seeds, and raw virgin coconut oil.  What these ingredients impart on the cereal is a nutritious blend of protein, b vitamins, omega-3 fatty acids, fiber, antioxidants, energy-providing fatty acids, as well as anti-viral and anti-microbial properties.  It sounds like a lot of technical mambo-jumbo, I understand.  But it boils down to…you aren’t getting any GMO ingredients, any refined sugars, no artificial colors, some good-for-you fats, and lots of overall vitamins and good stuff for your body.  Not.  Just.  Junk.

The evidence is in the ingredients: organic certified gluten-free oats, organic coconut palm sugar, organic raw virgin coconut oil, dried blueberries, organic puffed amaranth, organic quinoa flakes, organic sunflower seeds, organic hemp seeds, organic chia seeds, organic cinnamon, sea salt.

Anything you don’t recognize?  Exactly my point.  If you can honestly say you know what everything in a product is…I’d say that product is safe to consume.

But…that big looming question awaits…

How does it taste?

There aren’t enough words…but it is SUPER delicious.  AMAZING.  Really YUMMY!  It is, perhaps, my favorite gluten-free granola I have bought yet.  I mean…the texture is really good.  Crispy, with a hint of sweetness from the coconut palm sugar.  The dried blueberries give it an added boost of sweetness that ties in so wonderfully with the ancient grains and seeds that help give this granola its fantastic, crunchy texture.  This…is granola with the volume turned up to 11.  It’s, by far, the best one I have ever eaten…and trust me…go back through my blog…I have sampled quite a few.

Nutritionally speaking…a serving of Purely Elizabeth Blueberry Hemp Ancient Grain Granola is 1/3 cup.  With this serving, you are consuming 140 calories and 6 grams of fat, much of which is the healthy fats your body uses for energy.  Loving that.  This serving will also give you 2 grams of fiber and 4 grams of protein.  As for that sugar content…only 6 grams in a serving.  That’s awesome from a granola.  This granola is also cholesterol free and low in sodium (only 110 mg).

Granola that supplies your body with nutrients and not sugar…I’m perfectly okay with that.  Even better…it’s not only good for you…it tastes great too.  SOLD!!  Go ahead…find it at your local stores and try it.  Believe me…it’s worth the price tag.  So…so worth it.

Fresh Fruit and Greek Yogurt Breakfast Parfait with Purely Elizabeth Blueberry Hemp Ancient Grain Granola Cereal

It’s Qrunch time…and veggie burgers have never tasted so good!

Qrunch Foods Original Qrunch Burgers

Product: Qrunch Foods Original Qrunch Burgers – $5.99+

Sometimes a product comes along…and it’s intriguing.  It sounds like it could be the most amazing thing ever.  It’s vegan.  It’s gluten-free.  It’s a veggie burger that I don’t have to sit there and ponder the contents of the box.  It’s all laid out…right on the packaging.  No second guessing.  No searching the internet for an FAQ on the company.  No secrets.  Nothing to hide.

That’s what I first loved about Qrunch Foods Qrunch Burgers.

What is a Qrunch Burger, you might ask.  Aside from the earlier prelude that this is, in fact, a veggie burger…let me explain a little more.  Because this is not your ordinary veggie burger.  Not one bit.  In fact, it may be the ultimate veggie burger.  I’ve eaten every brand of gluten-free veggie burger out on the market that I can find in this area.  And while I have raved about many, disliked a few…believe me when I state that the Original Qrunch Burger is…

THE BEST VEGGIE BURGER EVER!

Don’t believe me?  Try it yourself.  But…trust me…you’ll want to believe me.

Where was I?

Oh yes…what is a Qrunch Burger.  The answer to this is simple.  It’s a veggie burger that is “powered” by the superfood – quinoa.  And, as a gluten-free vegetarian, we all know that quinoa is one of my most favorite things in this world.  But the awesomeness doesn’t end there.  This burger is also loaded with organic millet and organic vegetables.  It is free of virtually all common allergens (gluten-free, dairy-free, soy-free, corn-free, wheat-free, egg-free, nut-free) and made in a gluten-free facility.  These burgers are made from all natural ingredients and do not contain any artificial flavors, colors or GMOs.

Even better…it’s fantastic.

Being that it is Memorial Day, my roommate and I decided that we would have the customary all-American holiday feast.  But for us…that means veggie burgers (as opposed to hamburgers) and hand cut shoestring fries, which I bake in the oven to crispy perfection.  I had a box of the Original Qrunch Burgers in my freezer.  As I received a CSA bin with plenty of fresh veggies that I could utilize for these burgers.  Yep…we were good to go.

Qrunch Foods Original Qrunch Burger patty

So, after I made fresh guacamole to go on the burgers (trust me…it’s awesome) and I got the potatoes cut, seasoned, and into the oven, it was time to turn my attention to the actual burgers.  I pulled out my skillet and got it warming up while I pulled the box of Original Qrunch Burgers out of the freezer.  Once my skillet was properly heated, the patties were put on to cook through.  This takes about 5 minutes on each side.  I went ahead and put a slice of vegan cheese on the patties to go along with the rest of the Memorial Day festivities.  Once each side had been properly warmed and browned on the skillet, it was time to dress the burgers.

I didn’t have any gluten-free hamburger buns on hand this week…so I used gluten-free bread.  I dressed the bread with a light coating of vegan Sriracha sour cream, then placed the red leaf lettuce down.  The Original Qrunch Patty was next, followed by a tomato, red onion, and then a spoonful of my homemade guacamole.  I adorned each plate with a healthy serving of my hand-cut shoestring fries.  With the burger assembled, it was now time to settle in for the holiday feast.

I wasn’t sure what to expect when I took my first bite.  I’ve had some pretty epic fails when it has come to taste and texture of veggie burgers.  While most have been passable, the gluten-free varieties just don’t seem to live up to the standard other veggie burgers I used to be able to eat (can’t anymore…because they have gluten in them) laid down.

That is not the case anymore.  I took one bite of my Original Qrunch Burger and was in a new happy place.  Honestly.  What I loved about these was not just the flavor, although it is definitely the best I have had…to date.  The texture is awesome.  The outside of the patty gets this nice crunch to it.  The inside…soft, with that perfect “meatiness” to it that actually makes you believe you are, in fact, eating a burger.  I loved how seasoned this patty was.  You can even see the organic onion, organic carrots, organic broccoli, and organic spinach in the patty.  Nothing fake about these burgers.  Seasoned to perfection with garlic and kosher salt.  The flavors just popped in my mouth.  I was so happy that it took everything in me not to just go into devour mode and shove as much each bite into my mouth at a time.  I savored…and I’m glad I did.

Nutritionally speaking, these burgers do rate a little higher on the calorie scale.  One patty is 190 calories and contains 11 grams of fat.  So…probably not one of the leaner options out there, but not bad as a whole.  I’ve definitely encountered worse.  Each patty will also supply you with 2 grams of fiber and 4 grams of protein.  Love that quinoa…a protein powerhouse!  In addition, these patties are low in sodium, topping out at 150 mg.  Loving it.

For a burger that elliminates so many foods and allergens from their line-up of ingredients, what emerges is one of the most amazing veggie burgers I have ever had the simple joy of eating.  I don’t think any other burger will find its way back into my freezer.  Qrunch Foods has definitely raised the bar with their highly delicious and very tasty Original Qrunch Burgers.

In fact, it seems that other people agree.  In a recent taste test done by the Washington Post Food Section, the Qrunch veggie burger came in third on overall merits.  And…it was the only allergen-free burger in the top seven.  So, it’s not just me.  Others agree that Qrunch Burgers are something special.

I noticed these are also available in a Spicy Italian flavor.  Oh yeah…I’m going to be trying that out.  And very soon.

If you’re looking for a different flavor or a different sort of veggie burger…Qrunch is the way to go.  Honestly.  Veggie burgers have great potential…but these blew away the competition.  No question about it.  Qrunch rocks!

A burger made from Qrunch Foods Original Qrunch Burger and served with homemade hand-cut shoestring fries

Recipe: Gluten-Free and Vegan “Clam” Chowder

Awhile back, Prevention magazine did a profile on Kris Carr.  If you’ve never heard that name before, you’d be inspired by this woman.  She is a best-selling author, a wellness activist, and a cancer thriver.  Yes…thriver.  You see, on Valentine’s Day in 2003, Carr was diagnosed with a rare and incurable stage 4 cancer.  This diagnosis made her want to feel better, love harder, and enjoy life more fully.  She wanted to live life to the fullest…and live it like she meant it.

Part of that journey was changing the way she ate.  She went to a complete lifestyle makeover.  She switched to a nutrient dense, plant-based diet, began exercising, and found joy and fun in everything.

Really…this woman is amazing and her story was one I remembered from the plethora of magazines I receive each month.  I appreciate Prevention for profiling her…because it led me to her book: Crazy Sexy Kitchen.

This book just happened to be on the shelf of my local library.  And after flipping through it briefly…I went ahead and borrowed it.  Immediately I had recipes I wanted to try…but the one that interested me most is the one I made for dinner tonight…and, believe me when I say, it’s worth the effort to make.  I had to make modifications with the ingredients at times, but in the end…it turned into a beautiful dish.

The recipe is below.

Recipe: Gluten-Free and Vegan “Clam” Chowder

Gluten-Free and Vegan
Gluten-Free and Vegan “Clam” Chowder

Serves: 12
Time: Prep 60 minutes; Cook 15 minutes

Ingredients for Cashew Cream:

4 cups whole raw cashews, rinsed under cold water

Ingredients for Kombu Broth:

4 pieces kombu seaweed (I didn’t pick this up, so I used sheets of nori)
2 quarts water

Ingredients for Smoked Mushrooms*:

1 tablespoon small hickory chips
1 heaping cup diced king trumpet mushrooms

*(NOTE: I had 10 ounces of crimini mushrooms on hand and no stovetop smoker, so I improvised…)

Ingredients for Chowder Assembly:

1 tablespoon canola oil
1 cup diced white onion
1/2 cup diced celery (I used diced carrot because I didn’t have celery, but I did have plenty of carrots)
1 cup peeled and diced baking potato
2-1/2 to 3 cups water
1 teaspoon lemon juice, more to taste
1/2 teaspoon Tobasco or other hot sauce, more to taste (I used Sriracha)
2 teaspoons kosher salt, more to taste
1 teaspoon black pepper, more to taste

Directions:

Prepare Cashew Cream:  Put the cashews in a bowl and cover with water.  Cover with plastic wrap and refrigerate to soak overnight.

Drain the cashews and rinse under cold water.  Place the cashews in a high-speed blender (this will need to be done in a couple of batches) and add enough water to cover by an inch.

Purée until completely smooth.  If needed, pass the cashew purée through a fine strainer to remove any course bits; the final “cream” should have a smooth, thick consistency of heavy dairy cream.  This will make about 3 cups cream (consistency will depend on the amount of water added while blending, and can vary from just over 2 cups to about 3-1/2 cups; thin as desired)

Prepare Kombu Broth*: Combine the combu and water in a medium pot and bring to a simmer.  Reduce the heat to a gentle simmer and cook 40 minutes, then strain.  This makes about 5 cups kombu broth, more than is needed for the remainder of the recipe.  The broth will keep, covered and refrigerated, up to 10 days.

*(Note: I didn’t have kombu on hand, so I used nori sheets, and followed the instructions as if they were kombu.  The flavor was probably milder than it would have been…but this worked.  I did, however, have to press on the nori to wring out the rest of the broth)

Prepare Smoked Mushrooms*: Prepare a stovetop smoker: Spread the chips in the base of the smoker, directly over the burner.  Place the drip pan (if using) over the chips and a rack on top of the drip pan.  Place the diced mushrooms on the rack (be sure to use a rack fine enough so the mushrooms don’t fall through) indirectly over the chips (do not place the mushrooms directly over the chips, as this can cause them to oversmoke and turn bitter).  Partially cover the smoker with a lid, leaving it open a cuple of inches.  (If you do not have a commercial stovetop smoker, you can substitute by using a heavy roasting pan, a cake rack, and heavy duty foil to cover the pan as a lid.)

Heat the smoker over medium heat just until you see smoke escaping through the opening.  Close the smoker entirely and gently smoke just to infuse the mushrooms with smoke flavor, not to cook, 3 to 5 minutes.  Be careful not to oversmoke, or the mushrooms will become bitter.

*(Note: I don’t have a stovetop smoker or anything I could have used to do the makeshift one…so instead I went about this a little differently.  After rinsing my mushrooms and cutting the stems even to the caps, I put them in a bowl with 1/4 cup olive oil, 2 teaspoons of Liquid Smoke (make sure it is a gluten-free brand), a touch of salt, and some kelp granules.  I mixed this until everything was coated then placed them on a baking pan and roasted in a 350°F oven for 45 minutes.  I then diced them as the recipe called for. It yielded perfect results.)

Assemble Chowder: Heat the oil in a medium-size soup pot over medium-high heat.  Add the onion, celery (in my case, carrots), and potato.  Sweat the ingredients, stirring frequently, until softened, 8-10 minutes.

Add 1-1/2 cups each of the Kombu Broth, Cashew Cream, and all the smoked mushrooms.  Reduce the heat, and cook over low heat, stirring frequently, for 10 to 15 minutes to develop and marry the flavors.  The Cashew Cream will thicken as it cooks, and you will need to add water from time to time to thin and adjust the consistency.  We added about 3 cups of water as the soup cooked.

Season with lemon juice, Tobasco (or hot sauce of choice), salt, and pepper.  Taste and adjust the seasonings as desired.  This makes a generous 2 quarts of soup.

~*~*~

This recipe looks labor intensive at first glance, but I soaked the cashews overnight and making the cashew cream was a synch.  As for the broth, I made that ahead as well and let it chill in the fridge.  Then, when I needed it, I poured out the amount for this recipe and it was all set to go.  All I really needed to do was chop the vegetables and get everything cooking.

And what emerged was a flavorful, creamy, delicious vegan clam chowder.  The flavors were awesome.  And the texture of the mushrooms after roasting in the oven for that long was just like a clam tasted (back before my vegetarian days and when chowder was safe to eat).  I wasn’t sure what to think about this as I started to cook everything together in my big pot on the stove, but the end result was awesome.

I can’t wait to heat up more and enjoy it all over again.

As a side note, this soup is freezer-friendly.  So go ahead and freeze the extra if needed and allow it to thaw when you’re ready to have more.  Otherwise, the soup does keep for about 1 week in the fridge.

This is TOTALLY going to be made over and over again.  Shockingly delicious.  But, then again, Kris Carr enlisted the help of Chef Tal Ronnen for this one…so it’s no surprise this soup is packed with awesomeness.

Make it.  Go ahead.  I dare you!