Product Review: Tasty Bite Ginger Lentil Rice

Tasty Bite Ginger Lentil Rice

Product Review: Tasty Bite Ginger Lentil Rice – $2.49+

Tasty Bite, as many of you know, is one of my favorite go-to quick meals…especially for busy nights/days or just nights where I don’t have much in the pantry/freezer/fridge…or just don’t want to spend my entire evening on my feet in the kitchen prepping and cooking something.

The great thing about the Tasty Bite meals is that they are clean…healthy…and beyond delicious.  I only have a few remaining packages in my kitchen pantry, but they were perfect after returning from my recent trip to Florida.  Without last week’s check in the bank (the boss still has it), my roommate and I are honestly living off what we have in our apartment…and trust me…that means Tasty Bite meals, pancakes, eggs, or pasta.  This is no joke.  And for the rest of this week, the budget purse strings are being pulled tighter than ever to try to recover from our much-needed and totally fun (but expensive) vacation.

So, after disembarking at the Louisville airport on Tuesday…just before noon…we returned home with hungry stomachs.  I do not do fast food.  I can’t.  Not with my food allergies.  And I’m okay with that.  I actually do not miss fast food at all.  Not one bit.  The drive-thru was never my friend anyway…so my dietary restrictions put a total kibosh on them.  No problem.  I’d rather prepare my food anyway.

That being said…with a practically empty apartment food-wise, I was happy to dig out a few pouches of Tasty Bite products.  I’m down to one Indian meal and a couple of rice options.  I opted for a rice option with some added protein…because I’m in recovery mode from my 48.6 mile running adventure.

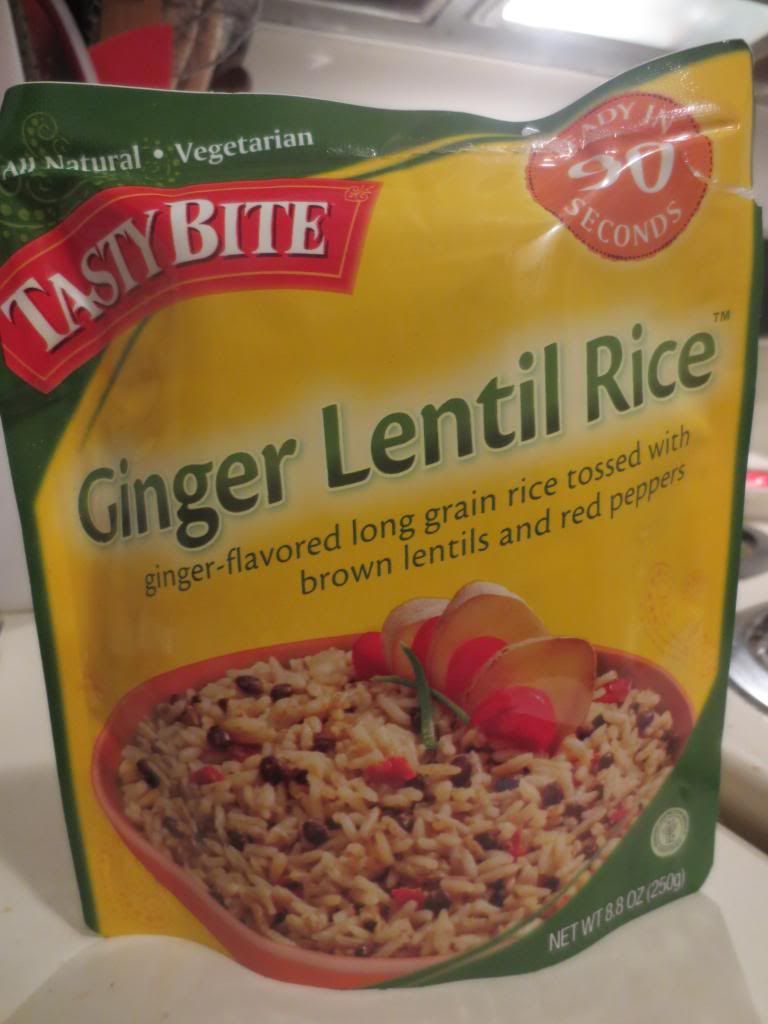
My choice – Tasty Bite’s Ginger Lentil Rice.

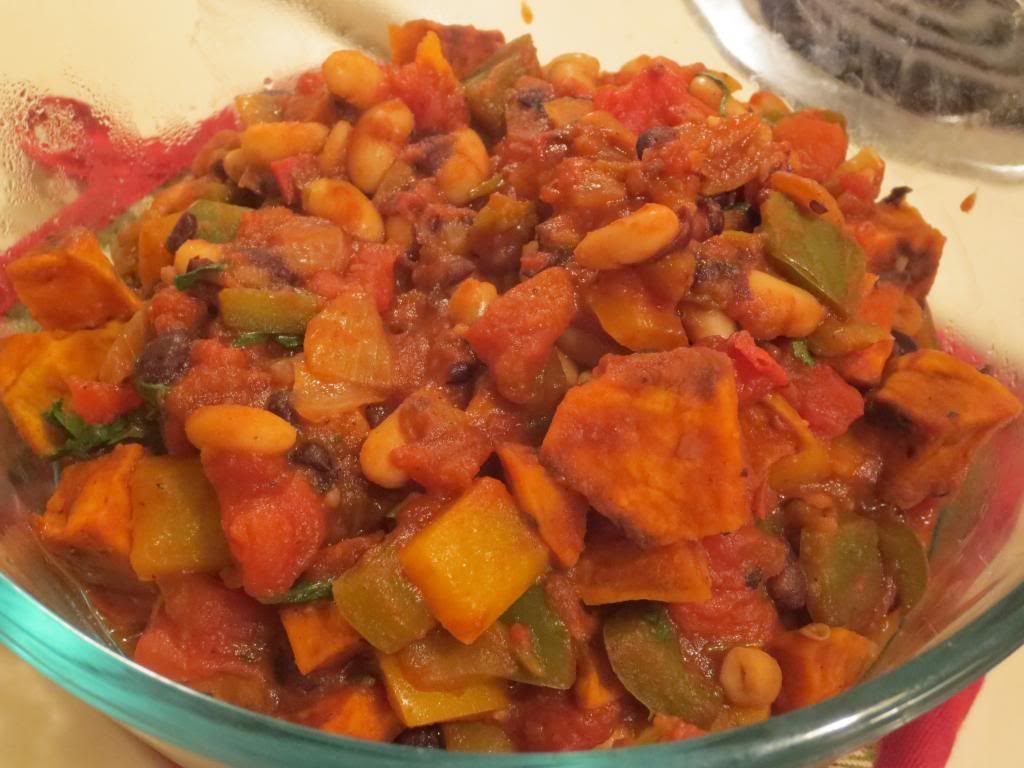
Yes…this is exactly what it sounds like…ginger-infused long grain rice that is tossed with brown lentils and red peppers.  It makes a colorful and flavorful plate…trust me.  The package simply gets put in the microwave for about 90 seconds, and BAM…into a bowl and enjoy!  Totally that easy.  And don’t be dissuaded by the fact that this comes in a pouch on a shelf in the microwave.  It still fits into clean eating.  Observe the ingredients: water, rice, onions, whole brown lentils, red pepper, coconut milk, sunflower oil, ginger, garlic, salt, curry powder, chilies, sugar.  Quick…Clean…Eating.

And the taste…was fantastic.  Seriously.  The ginger, garlic, curry, chilies all provide layers and depth of flavor to each bite.  The lentils add great texture and the rice actually steams up to perfection in that 90 seconds.  All the components work together and make magic with each bite.  Each freakin’ tasty bite.  I used some Glutino Gluten-Free Sea Salt Snack Crackers to scoop up the rice and add a nice crunch to my plate.  It was a magical, quick lunch after returning from the Happiest Place on Earth.  I savored each bite…chewed slowly…and just let the flavors roll over my tongue.  This one is amazing.  It’s not just rice.  It’s rice that is so much more.

Nutritionally speaking, this meal is a healthy choice as well.  One serving is half the pouch.  This serving gives you 190 calories and 3.5 grams of fat.  This serving will also give you 380 mg sodium and 2 grams of sugar.  That is amazing for a processed food.  And a serving will also give you 3 grams of fiber and 5 grams of protein.  So it is filling as well.  Loving it.

So, if you’re concerned about Indian food…not sure you’d like it…or just not ready to try something new…then give Tasty Bite a chance through their flavored rices.  In fact…I highly encourage purchasing the Ginger Lentil Rice.  The flavors will wow you…and just might encourage you to give those Indian meals a try after all.

I promise…you won’t be disappointed.

A serving of Tasty Bite Ginger Lentil Rice

Product Review: Hilary’s Eat Well Original Veggie Bites

Hilary's Eat Well Original Veggie Bites
Hilary’s Eat Well Original Veggie Bites

Product: Hilary’s Eat Well Original Veggie Bites – $5.69+

Sometimes, when I get my roommate a little tipsy and then take her grocery shopping, I get to purchase some of the products I’ve practically salivated over trying since I spotted them, but get told “next week” by the roommate and then “next week” turns into never.  Song and dance of my life since having to change my diet over two years ago.

So…when I mix in a little alcohol and a twist of grocery shopping, sometimes I can worm a few products into the cart that normally wouldn’t be allowed due to the tight food budget.  Ah…I miss drunken grocery shopping.

However, on one such occasion when it happened…I managed to get my roommate to agree to the purchase of Hilary’s Eat Well Original Veggie Bites.  They intrigued me.  They looked…interesting, sounded phenomenal, and weren’t too difficult to prepare.  So, at first glance in the freezer section, they were a win with me.  I kept pointing them out to my roommate on each venture to the grocery store…but the hint never sunk in.  The “next week” line was given.  Or…the budget was waved in front of my nose.

*sigh*

But…suddenly…she her grocery shopping tyrant barriers were down…and I had one shot.  And…persistence and patience paid off.  For sure.  Because these little treats were in the basket, rung up at the register, and in my freezer before she could sober up.

According to Hilary’s Eat Well Web site, the company is dedicating to making delicious, convenient, and amazing food that is always gluten-free, dairy-free, corn-free, egg-free, soy-free, yeast-free, and nut-free.  The company is best known for their original product, The World’s Best Veggie Burger, which debuted at owner Hilary Brown’s restaurant, Local Burger, in Lawrence, Kansas.  With customer demand so high, Hilary’s Eat Well was developed so that she could bring her culinary creations to people who want to live healthy and sustainable lives, but still eat food that is easy to prepare at home and tastes great.  The rest of the products that have been created since…must live up to these expectations.

So, why the Original Veggie Bites?  What was it that made me glance at them on more than one occasion?  They just sounded…interesting.  Different.  And, yes…all the “free from” on the packaging was also a draw.  I love being able to tell if I can safely eat something quickly without having to pull it out of the freezer or off the shelf.  So, that helped.

As I am prepping for a journey out of town, my CSA bin goodies have all been used up, I’m trying to keep the clean eating vibe going.  These definitely, while processed, fit that bill.  And they were easy enough to make, allowing for a stress-free dinner tonight.  My roommate and I just split the bag between the two of us.

Cooking them is super easy.  The packaging gives two options: oven and skillet.  I love to bake things up in my oven, so I chose that option instead of pulling out a frying pan and oil.  Besides, given the option, I always bake rather than fry.  So, I set the oven for 400°F and put the Original Veggie Bites on a baking sheet.  Then, into the oven they went, for 20 minutes.  I flipped them over halfway through the baking process.  I will say…they smelled phenomenal as they cooked up.  And when they were done, I let them stand for 2 minutes, then served them up with some steamed broccoli.  Healthy dinner, yes?

Of course…because Hilary’s Eat Well Original Veggie Bites are made from real ingredients.  Seriously.  In fact, the packaging lists water, organic millet, organic quinoa, organic expeller-pressed coconut oil, organic spinach, organic onion, organic garlic, organic psyllium husk powder, organic arrowroot, organic sweet potato, real salt, and organic apple cider vinegar.  See…real…organic…ingredients.

And a serving…get this…is 2 of the Original Veggie Bites.  My roommate and I each had 8 bites each.  These 2 Original Veggie Bites serve up only 40 calories and 2.5 grams of fat.  These tasty bites are cholesterol free and a serving only has 140 mg of sodium.  Love that low sodium!  In addition, a serving will also give you 1 gram of fiber and 1 gram of protein.  So, probably not the most filling thing you can eat…but I’m still full and I ate 2 hours ago.

But…how do they taste?  Hmm?  Well…they taste like really amazing tater tots.  The texture is even very similar to tater tots.  You can really taste the quinoa and the veggies.  I loved how they crisped up on the outside, getting that nice golden crust, and then were soft and savory in the middle.  These were one of the most amazing things I have eaten from the grocer’s freezer in a long time.  And it really makes me excited to try the veggie burger mentioned above in the very near future.  These are honestly fantastic.  I think they may always be kept in stock in my freezer.  I love an easy meal.  And one that is good for you too.

I was beyond impressed with my first taste of a product from Hilary’s Eat Well.  I have only heard good things about this company and look forward (and even anticipate) my next purchase of one of these delicious products.  Honestly, if you find them in your freezer…purchase them immediately and enjoy them for yourself.

I’m won over by Hilary’s Eat Well.  For real.

Hilary's Eat Well Original Veggie Bites (baked)
Hilary’s Eat Well Original Veggie Bites (baked)

Product Review: Annie May’s Sweet Café Allergen Free Pancake and Waffle Mix

Annie May's Sweet Café Allergen Free Pancake and Waffle Mix
Annie May’s Sweet Café Allergen Free Pancake and Waffle Mix

Product: Annie May’s Sweet Café Allergen-Free Pancake and Waffle Mix – $5.00

I am a lucky one!

I am.  I am one lucky lady.

And I’m about to tell you why.

I live just outside of Louisville, Kentucky.  One short drive over a bridge and I am in the city.  I can see Louisville from my apartment.  I’m that close.  But it’s not the city itself that makes me feel lucky.  It’s the gem that sits at the heart of it.

Recently, Louisville has really come onto the foodie scene.  With chefs showing up on television shows, the restaurant scene exploding (especially over in NULU), and features in food magazines like Food & Wine, Louisville really has something to offer for everyone.

Yes.  Everyone.

Including me – a gluten-free vegetarian.

The place – Annie May’s Sweet Café, located at 3110 Frankfort Avenue.  It’s a short little journey there…and one that I make weekly…if I’m in town.  I don’t miss any opportunity to support this business and the people who make this genuinely good food.  And trust me…you don’t need to have a food allergy to enjoy the products that they put in their case and offer Tuesday – Saturday.

Really, trust me.  My roomie eats there every week with me.  I’ve taken my running friends Natalie and Harry there.  I’ve taken my sister there.  I’ve taken my friend Greg there…and he is hooked on her Allergen-Free Double Chocolate Brownies.  Trust me…he always buys at least two when he’s in town.  In fact, you’d be hard pressed to tell her food was gluten-free or dairy-free it wasn’t advertised.  Seriously.  Good eats.  All around.

But today, I am not just going to talk to you about the business.  Today…I want to talk to you about one of the mixes that is available for purchase from Annie May’s.

I’m talking about Annie May’s Sweet Café Allergen-Free Pancake and Waffle Mix.

Yes.  More pancakes.  The world would be a better place if more pancakes were consumed.  But…they must be good pancakes.  I’ve eaten a lot of different pancakes since going gluten-free.  Frozen, from mixes, from restaurants.  And this mix really does cook up some fantastic pancakes.  I actually utilized the mix two ways to be honest.  I did my first four pancakes just plain…made as the bag instructed me to make them.  But for the second batch…I added Enjoy Life Mini Chocolate Chips…and made chocolate chip pancakes for the following day.  The mix is so easy to make and it has a great texture.  I just had a good feeling when I put it all together in my mixing bowl and then scooped up the 1/4 cup to set on the skillet.

The pancakes cooked to perfection.  No joke.  Golden and crusty on the outside.  They were a thing of beauty.  In fact, I might have let out a little squee of glee and did a little hop-dance of joy in the kitchen after I flipped the first one.  Because it was gorgeous.  A stunning and perfect pancakes.  I only had to be sure not to burn them.  And…I didn’t.  I totally rocked these out and they fluffed up and got all soft and hot in the middle.  I am drooling just writing about them.  Then, after serving them up with real maple syrup…I devoured.  And as I was savoring and scarfing all at the same time…I got the chocolate chip version cooking.

Once again…perfection.  I tucked these into a container and put them in the fridge.  I had a spinning class to take on Friday morning, so I figured when I got back from that, I could pop these bad boys in the microwave, nuke them to reheated perfection, and serve them up with that maple syrupy goodness.  I was so pleased with how well these reheated.  Honestly.  So many times you just get a soggy, mushy mess.  While these don’t get that golden crust they have fresh off the skillet, they don’t wilt and fall apart after a day in the fridge either.  They reheated really well and maintained the integrity of the previously consumed pancakes…still so delicious…down to the last bite.

I have two pancakes left.  Can you guess what I’m eating Sunday morning?  HA!  I can’t eat them tomorrow…I’m going to Annie May’s Sweet Café for their amazing breakfast menu.  Might even splurge and get a few extras.  Because…I can.  And I want to.  And so…I will.

Don’t be disheartened if you don’t live in or near Louisville, Kentucky.  Annie May’s Sweet Café ships!  Yes…they ship.  Just go to this page and place an order.  Trust me…you will not be disappointed.  And, yes…the Allergen-Free Pancake and Waffle Mix is available for order.  So…don’t think.  Just do.  DO IT!

And…I still count myself as one very lucky lady to live near a place that has a restaurant that I feel totally and completely at ease in.  I know I can get good food there…and I will continue to bring my friends and family there.  So far, no one has been disappointed.

And to Annie May, Kenna, and the staff…keep up the good work.  See you tomorrow morning!

Perfect pancakes made from Annie May's Sweet Café Allergen Free Pancake and Waffle Mix
Perfect pancakes made from Annie May’s Sweet Café Allergen Free Pancake and Waffle Mix

Product Review: Road’s End Organics Gluten-Free and Dairy Free Penne & Chreese

Road's End Organics Gluten-Free and Dairy Free Penne & Chreeze
Road’s End Organics Gluten-Free and Dairy Free Penne & Chreese

Product: Road’s End Organics Gluten-Free and Dairy Free Penne & Chreese – $3.49+

For the past two weeks…I have been without my CSA bin.  It has been…tough.  I have been trying to make a point, however, to attempt to use up products/items from my fridge, freezer, and pantry.

Fast forward to Friday night.  It was the first full day back in town for me after having flown in the day before after visiting my family for Christmas.  Without fresh produce readily available, and a tight, tight budget due to the holidays…it was time to make due with what was in the apartment.  No big deal…there is plenty to choose from.

And it just so happened I remembered picking up a box of Road’s End Organics Gluten-Free and Diary Free Penne & Chreese (yes…chreese!) when I spotted it on a super closeout at my local grocery store.  For fear that I might never try it otherwise or never have the opportunity due to possibly not being able to find it anywhere else…I panicked and purchase one box.  Just one.  Just to have on hand.

I am so glad I did that, because after a stressful day of travel, a long night, an early morning, a full day at the office, and a lot on my mind…an easy dinner was just what I needed.  And this…just sounded good.

If it wasn’t…I had a backup plan.  Don’t laugh.  I often do this when I try new products.

Anyway…nothing could be more stress-free than this!  I came home from work and got a pot of water boiling on the stove.  As soon as it had come to a boil, I poured in the noodles and allowed them to cook for about 10-12 minutes.  I didn’t want to overcook them, because, let’s face it…pasta, especially brown rice pasta…gets really gummy when it’s overcooked.  I wanted that perfect al dente.  I managed it too.  I drained the noodles just as they reached that perfect state, then…in the same sauce pan…poured in 1/2 cup of almond milk and the powdered chreese packet which came in the box.  I stirred them together until they combined and had no clumps.  Then, back onto medium heat, and the pasta was added back in.  I gave it a stir, and let it cook for another couple of minutes, to thicken the chreeze mixture as it blended with the noodles.  Done.

I poured half into a bowl for my roomie and saved the other half for me.  Time to dig in.

I was actually a little worried about not liking this one.  But…this is definitely one of my favorite boxed gluten-free mac and cheese.  Don’t laugh.  It’s true.  What did I love about it?  Aside from noodles that were normal size, and not teensy-tiny, it cooked up perfectly.  The dairy-free cheese (chreeze) mixture thickened up beautifully after the noodles were put back in.  And the flavor was remarkable.  I loved how the cheese sauce clung to the noodles.  I love how my noodles weren’t left swimming in sauce, as most gluten-free boxed mac and cheeses do.  I loved the thick, rich flavor of the chreese.  It had a great balance of flavor…the creamy richness of an Alfredo with the flavor of cheddar.  So good.  It was major mac and chreeze love.

I love saying chreese!

Anyway…the nitty-gritty basics.

Road’s End Organics Gluten-Free and Dairy Free Penne & Chreese contains a gluten-free rice penne.  As for the gluten-free Chreese (vegan cheese), that is a blend of organic brown rice flour, organic tapioca starch, enriched nutritional yeast, organic green lentil flour, salt, organic garlic powder, organic yellow mustard seed, organic onion powder, and annatto powder.  The ingredient list is all recognizable…no chemicals, no weird preservatives.  Just awesome gluten-free goodness.

Nutritionally speaking, Road’s End Organics Gluten-Free and Dairy Free Penne & Chreese contains 2 servings per box.  A serving contains 320 calories and 3.5 grams of fat.  That’s not bad for a mac and cheese.  And you get a lot.  This pasta is cholesterol free, contains only 350 mg sodium, and has less than 1 gram of sugar.  Awesome!  In addition, a serving provides 6 grams of fiber and 9 grams of protein.  See what I mean?  You will feel full…and you’re only eating a cup.  That’s the serving size!  Awesome!

I was pleasantly surprised with how much I enjoyed chowing down on this fantastic boxed macaroni and “cheese.”  They vegan cheese that is used in place of real cheese doesn’t taste fake at all.  I loved the flavor.  And it is easy on my tummy…as I am lactose intolerant and cheese can really be an issue at times.  So…YAY!!  I would definitely recommend this to everyone.  Even cheese lovers, like my roommate, will eat it.  She loved the richness and the texture.  And, yeah…it doesn’t lack in flavor.  SO damn good!

Find it.  Try it.  Love it.

Road's End Organics Gluten-Free and Dairy Free Penne & Chreese
Road’s End Organics Gluten-Free and Dairy Free Penne & Chreese

Product Review: Nature’s Path Gluten-Free Pumpkin Spice Waffles

Nature's Path Gluten-Free Pumpkin Spice Waffles
Nature’s Path Gluten-Free Pumpkin Spice Waffles

Product: Nature’s Path Gluten-Free Pumpkin Spice Waffles – $4.99+

FINALLY!

Just…FINALLY!

As much as I love gluten-free waffles made from scratch…these days it seems impossible to find the time to actually make them.  Trust me…it is an undertaking and a half.  Seriously!  And, my favorite homemade gluten-free waffles to prepare are…pumpkin!  Yep…pumpkin.  Delicious.  Tasty.  And we all know how much I love pumpkin flavored things.  Just…YUM!!

These days, however, I just am never home long enough to actually work through the recipe and get the pumpkin waffles made from scratch.  So…waffles have been off the menu.  Because, regular waffles can be a task and a half to make as well.  So…it’s been pancakes, Greek yogurt parfaits with fruit and gluten-free granola, cereal, and things with roasted potatoes…or just gluten-free bagels.  No waffles.  Not for a very long time.

But that changed.  That changed the moment I stepped into the freezer section of my local Whole Foods and spotted…one of the most wonderful things I have ever encountered in that aisle.  Gluten-Free Pumpkin Spice Waffles.  YES!  GLUTEN-FREE PUMPKIN SPICE WAFFLES!!  Shout it from the rooftop friends.  I did another happy dance of joy in the aisle.  I should really stop doing that…but I just get so excited!

This box of frozen waffles is made by Nature’s Path.  I tried one other variety of their gluten-free waffles a year or two ago…but don’t remember too much about them.  Other than that Van’s gluten-free versions blew them out of the water.  For real!

But…let bygones be bygones…and…Van’s doesn’t make pumpkin spice waffles…so…HA!  These were in my basket and at the register before my roomie or I could talk ourselves out of the purchase.  The deed was done.

And with me taking an early morning spin class a couple mornings a week…these are the perfect thing to throw in the oven to toast while I shower off before work.  And that’s exactly what I did on Friday.  Friday was already crazy.  I had just gotten back in town from my Christmas trip to see my family.  My luggage had gone missing and was returned late that night.  I was worn out…but really wanted to get a little activity in before settling back into my routine for one day.  Spinning did that.  And I just happen to get home right as my roomie is waking up.  So, I put these waffles in the oven and went to shower.  They were done just as I finished off dressing.  I warmed up some of my agave maple syrup to pour over them and…just like that…brekkies was served.

Oh…these definitely made an impression on me.  The pumpkin spice flavor is there…but not overpowering.  There is pumpkin and then there is PUMPKIN.  I love pumpkin flavors…but I want to taste the other spices too.  In this case…cinnamon and nutmeg.  Perfect compliments.  The waffles toasted up beautifully…their orange color turning a deep golden as they reached the perfect level of toastiness.  This gave them this great crunch on the outside, but that soft, steamy center that make every waffle perfect.  Oh…it was bliss.  Bliss in a pumpkin-y waffle-y form.  These made my hectic morning easy…and super delicious.  I hope these aren’t a seasonal thing because I really want to stock up!

Nature’s Path Gluten-Free Pumpkin Spice Waffles are made from water, organic pumpkin puree, organic brown rice flour, organic potato starch, organic yellow corn flour, organic soy oil, organic tapioca starch, organic cane sugar, organic potato flour, baking powder, organic flax seeds, organic soy lecithin, organic pear and/or grape juice concentrate, organic quinoa, organic amaranth, organic spices, and sea salt.  Whew.  It seems like a lot of ingredients, but I recognize every single one of them.  That’s something.  And I love how a majority of the ingredients are also organic.

So, let’s talk nutrition.  A serving of Nature’s Path Gluten-Free Pumpkin Spice Waffles is 2 waffles.  This pair of pumpkin waffle yumminess will serve you up 210 calories and 7 grams of fat.  These waffles contain no cholesterol, have only 385 mg sodium, and 6 grams of sugar.  Not too bad.  They also have 2 grams of fiber and 2 grams of protein…so not too filling…but I wasn’t starving all morning either.  Definitely a healthier choice for breakfast if you have to do the “from-the-freezer” grab on a busy morning.  Seriously…worth it.

These waffles are amazing.  I love the pumpkin flavor.  I loved the texture and taste.  The crunch with the warm, soft center.  Oh yeah.  Perfect for those busy mornings…and always good drizzled with syrup.  Makes these winter mornings cozy and warm.  Let me tell you…I think I’m in love with a new gluten-free waffle.

Delish!

Nature's Path Gluten-Free Pumpkin Spice Waffles (toasted)
Nature’s Path Gluten-Free Pumpkin Spice Waffles (toasted)

Recipe: Oven Baked Broccoli Masala

This one time I went to an Indian restaurant…and got the Broccoli Masala.  It was something that I hadn’t seen on any other Indian restaurant menu in the area.  It intrigued me.  I took one bite and declared it the best thing I have ever eaten…which may or may not be true.  HA!

But, it was really, really damn good.

And during these cold winter months, I see a ton…and I mean a ton of broccoli.  For real.  Like…every week.  Last year my freezer was filled with broccoli.  But not this year.  Not this time.  I’ve gotten more than a little creative with the use of broccoli in the past few months.  And I’m proud of that.

But, instead of turning to a pizza crust…or some other culinary magic skill…this time…I attempted to recreate that dish for that local Indian restaurant.  Because, yes…I was craving and didn’t want to drive into Louisville.

With the guidance of the blog Spicy Treats, I did an oven-baked version of this meal, adding it to caramelized shallots (which caramelized down to this beautiful sweet jam) and some Indian-spiced basmati rice.  The results…while not the same as the restaurant…were a very close alternative.  And I was quite happy with it.  I may or may not have hoovered this meal down in record time.

Recipe: Oven Baked Broccoli Masala

Oven Baked Broccoli Masala


Servings: 2
Time: Prep 10 minutes; Cook 20 minutes

Ingredients:

  • 2 medium-sized crowns of broccoli
    1-2 teaspoons olive oil
    salt (to taste)
    1 teaspoon chili powder
    1/4 teaspoon cumin powder
    1/4 teaspoon garam masala
    Pinch turmeric powder
    Squeeze of lime juice
    2 teaspoons finely chopped parsley/cilantro (optional)

Directions:

Preheat the oven to 350° F.

Wash and cut broccoli in to small florets.  Drain well and keep ready.

In a large bowl, add broccoli and salt and toss well.  Then add the other spice powders and lime juice and toss everything well.  Finally, add the olive oil and stir well, making sure everything is covered with the spices and oil.

Sprinkle cilantro over the top and mix everything well.

Line a baking tray with aluminum foil and grease it with a few drops of olive oil.  Spread the prepared broccoli florets on the baking sheet and bake it for 15-20 minutes, stirring after 10 minutes.

ENJOY!!

~*~*~

As I said above, I served mine with caramelized thinly sliced shallots (almost made a shallot chutney) and some Indian-spiced basmati rice.  The meal was amazing and the flavors were really good.  Nothing overpowered.  And it was still mild (because my roomie is a heat wimp), yet had just a little spice to keep each bite interesting.  While it is nothing like the dish I have every time I go to my favorite Indian restaurant…it was close enough and simply delicious.

Taste for yourself!

Product Review: Vegenaise Tartar Sauce

Vegenaise Tartar Sauce

Product: Vegenaise Tartar Sauce – $4.49+

Ah…tartar sauce.

I have a love-hate relationship with this condiment.

For one thing, when I used to eat fish, I normally would drown it in ketchup.  Mmmm…ketchup.

But every now and again, I’d give the tartar sauce a try.  And I never really liked it.  Sometimes…I was pleasantly surprised and then lulled into this sense of false hope…and I would try it somewhere else and it would be gross and just…not to my taste.

Then, when I had to go dairy-free…I totally ditched this sauce all together.

But, when I was reviewing some items from Sophie’s Kitchen (vegan sea food, FTW!), my friend Kari mentioned the crab cakes with the tartar sauce from Vegenaise.  Vegan. Tartar. Sauce.

Okay…I was intrigued.  I knew two local grocery stores carried the vegan crab cakes from Sophie’s Kitchen…and I knew Whole Foods had the Tartar Sauce from Vegenaise.  So…I set out a spot in the budget to purchase and then consume both.

My roomie was on board and so…we hit up Whole Foods and purchased both items.  Dinner was going to be interesting.  I just prayed it all was good.

So…a little while ago, I pulled the vegan crab cakes out of the freezer and said that dinner would be those…with a healthy helping of homemade kale chips.  And I would serve the cakes over bibb lettuce from my bin.  Originally I was going to place them between gluten-free buns…but I was out of those.  So…this was my compromise.  I heated the crab cakes as instructed on the box, and while that was working, I got the vegetables working and finally…the sauce.

My roommate has the same sort of love-hate relationship with tartar sauce as well.  She is not gluten-free nor vegetarian, but since I am the cook in the apartment, that’s what she eats.  She is a huge aficionado for fish and chips when we go out to eat, however…and she has made a habit to at least try the house tartar sauce.  Sometimes she raves…sometimes she picks up the ketchup and goes to town.  But we thought we would give Vegenaise a fair shake.  So, into a little dish, I spooned out a serving of the Vegenaise Tartar Sauce.  The crab cakes finished, I plated everything…and it was time to dig in.

I was a little worried about flavor, but I trusted my friend Kari.  She raved.  She and I like a lot of the same flavors and foods…so…I was worried, but I had high hopes.  I know now to always trust Kari…because the Vegenaise Tartar Sauce was some of the best sauce I have tasted in my life.  Not just tartar sauce either…spanning ALL THE SAUCES! Filled with a tangy, delicious flavor, it was the perfect compliment to the vegan crab cakes and the greens I served them on.  OMG…so freakin’ good!  It was love at first taste and I took the opportunity to pile it onto my vegan crab cakes until it was gone.  Now I keep thinking of other vegan sea food dishes where I could utilize this sauce.  It is SO good.

Veganaise Tartar Sauce is made from a base of Vegenaise (vegan mayonnaise), sweet relish, yellow onion puree, white wine vinegar, vegan Worcestershire sauce, black pepper, and xanthan gum.  Not bad when it comes to ingredients, right?  My thoughts exactly.  And nothing is weird…it’s all ingredients I have heard of and trust.  Vegenaise is also vegan, gluten-free, dairy-free, non-GMO, and soy-free.  Loving it!

Nutritionally speaking, on serving is 2 tablespoons.  This serving will serve you up a side of 120 calories and 13 grams of fat.  It seems high, but it is a vegan mayonnaise-based sauce, right?  And regular mayonnaise would be the same way.  So, it’s really not too bad for what it is.  This small serving also gives you 125 mg sodium and 2 grams of sugar.  That’s awesome.  This is also trans-fat free and cholesterol free.  In addition, this sauce has no fiber in it, but you do get 2 grams of protein.  So, yeah…it’s not totally healthy, but it isn’t bad for you either.

And did I mention how freakin’ good it is?  Seriously.  In love with a sauce.  It’s my new favorite.  YUMMY!!

A serving of Vegenaise Tartar Sauce

Product Review: Sophie’s Kitchen Vegan Crab Cakes

Sophie's Kitchen Vegan Crab Cakes
Sophie’s Kitchen Vegan Crab Cakes

Product: Sophie’s Kitchen Vegan Crab Cakes – $5.99+

I’m probably not the best judge when it comes to comparing sea food products with vegan interpretations of them.  Honestly.  Now, growing up and before I became a vegetarian, I ate seafood.  Mostly shrimp.  Mostly fried, popcorn, scampi or creole.  I was not a huge fan of other fish…but I would eat them.  And, to say the least, I made a delicious lemon-crusted oven baked tilapia back in the day.

For real.

But…never, ever did I eat a crab cake before I became a vegetarian and then had to go gluten-free.  So, judging these by comparison isn’t going to happen.

Here’s what I can do though.  I can go off of flavor, texture, and overall taste.  And that was how I approached this product.

The product of which I speak is the Gluten-Free and Vegan Crab Cakes from Sophie’s Kitchen.  Now, I’m no stranger to Sophie’s Kitchen, having already tried the Gluten-Free and Vegan Fish Filets, Gluten-Free and Vegan Scallops, and the Gluten-Free and Vegan Breaded Shrimp.  While I was blown away by the shrimp, I felt the scallops were good, and the fish filets were…eh…okay.

So…crab cakes.  A new challenge for the allergic/intolerant foodie in me.

Sophie's Kitchen Vegan Crab Cakes (frozen)
Sophie’s Kitchen Vegan Crab Cakes (frozen)

What I love about Sophie’s Kitchen products is how easy they are to make.  The crab cakes could either be baked in the oven, or fried in a skillet on the stove.  I’m a health-nut, so I try not to fry things often.  I chose to bake them in the oven, which takes about 15 minutes to do.  Not too bad at all.  They don’t get golden cooking this way, the way the image looks on the box, but I didn’t mind the pale look to them.  Remember…never had a crab cake back when I even could.  I kept it simple when serving these.  I had thought about doing a crab cake sandwich, but didn’t thaw out my gluten-free buns from my local allergen-free bakery.  So, instead, I made some homemade kale chips and served the crab cakes over fresh bibb lettuce from my CSA bin.  I served a side of Veganaise Tartar Sauce with each cake and…dinner was served in less than 20 minutes.  Love that.

But how did it taste?

This is one of my favorite products from Sophie’s Kitchen that I have had the opportunity to try.  OH. MY. GLUTEN. FREE. VEGAN. GOD.  Seriously…packed with awesome flavor.  The texture was great…like lump crab…so that was kinda cool  And the blend of ingredients that Sophie’s Kitchen uses to give their faux seafood that fishy flavor worked SO well with these.  They are a close second in my favorite gluten-free and vegan things.  The first is the breaded shrimp from Sophie’s Kitchen.  These are fantastic.  They don’t taste fake of bad at all.  I loved every bite.  Thankfully, my roommate and I made a big dinner out of these…each of us having 2 of the crab cakes instead of the serving size of just one.

Speaking of which…it’s that time in the blog where I bring up the ingredients and nutrition for the products I try.  Let’s start with the ingredients.  Sophie’s Kitchen Vegan (and Gluten-Free) Crab Cakes are made up of water, pea protein, potato starch, canola oil, seaweed powder, rice flakes (from brown rice), konjac powder, rice vinegar (from brown rice), organic agave nectar, sea salt, celery powder, black pepper, bay leaf, nutmeg, ginger, paprika, dry mustard, cloves, calcium hydroxide.  So close to being clean eating…but that calcium hydroxide there at the end sort of killed that.

That being said…it is still a rather healthy choice and one I’d love to buy and indulge in again.  In fact, Sophie’s Kitchen Vegan Crab Cakes are soy-free, gluten-free, 100% vegan and plant based, contain no preservatives, colors or MSG, and have no artificial anything!!  Nice.

Speaking of indulging…a serving size of Sophie’s Kitchen Vegan Crab Cakes is 1 cake.  This serving will provide you with 120 calories and 6 grams of fat.  That’s not bad for a crab cake!!  The Vegan Crab Cakes contain only 170 mg sodium and less than 1 gram of sugar.  Gotta love that!  And, one crab cake also provides you with 2 grams of fiber and 3 grams of protein.  Not too shabby.

I am falling more and more in love with the products that Sophie’s Kitchen is bringing to the gluten-free and vegan world.  And I love that someone, like me, with food allergies, can safely indulge in a product that is vegan as well.  So often this is not the case, so it’s so nice when a company goes the extra mile.  And that’s why I continue to purchase and eat products by Sophie’s Kitchen.

And now…I must hit up my Whole Foods for more of these amazing crab cakes.  It’s happening!

Sophie's Kitchen Vegan Crab Cakes (baked), served over local bibb lettuce with homemade kale chips
Sophie’s Kitchen Vegan Crab Cakes (baked), served over local bibb lettuce with homemade kale chips

Recipe: Gluten-Free Thin Mint Cookies

The cookie monster strikes again!

But this time…for a good reason!

You see, one of the people I run with…a lot…had a birthday.  And he also recently ran yet another marathon, making 11 for this year, I believe.  Well, birthdays and marathons are things to be celebrated.

Originally, I was going to make a Boston Cream Pie to bring to the run group…but I just couldn’t figure out a way to make it dairy-free with the custard inside.  Well, I could…but it wasn’t going to be easy and time was a little tight.  So, I changed my mind at the very last minute, while standing in my kitchen, and instead threw together a version of the Girl Scout favorite (which I haven’t been able to indulge in since my diagnosis three years ago!).  Guess what?  They were a hit.

The recipe came together with a little help from Gluten-Free On A Shoestring.  So, check out the recipe and give it a go.  They brought back so many happy memories and made a lot of people happy that night.

Recipe: Gluten-Free Thin Mint Cookies

Gluten-Free Thin Mint Cookies

Servings: 30 larger cookies (I made 65 small cookies)
Time: Prep 15 minutes; Bake 7 minutes

Ingredients:

COOKIES

  • 5 tablespoons unsalted butter (I used Earth Balance)
  • 4 ounces semi-sweet chocolate, chopped (I used Enjoy Life morsels)
  • ¼ teaspoon pure vanilla extract
  • ½ teaspoon pure peppermint extract
  • ¾ cup high-quality all-purpose gluten-free flour (I used Better Batter)
  • ¼ teaspoon xanthan gum (omit if your blend already contains it)
  • ½ cup unsweetened natural cocoa powder
  • ¼ teaspoon baking soda
  • ½ teaspoon kosher salt

GLAZE

  • ½ pound dark chocolate, chopped
  • pure peppermint extract, to taste

Directions:

Preheat your oven to 300° F.  Line rimmed baking sheets with unbleached parchment paper, and set them aside.

In a medium-size microwave-safe bowl, place the butter and all of the semi-sweet chocolate except for 3 to 4 1-1/2-inch-size chunks.

Microwave at 70% power for 45 seconds at a time, stirring in between, until melted and smooth.  Add the reserved chunks of chocolate, and stir until the chocolate has begun to thicken a bit and the chunks have melted.

Add the vanilla extract and peppermint extract, and stir to combine.  Set the chocolate aside.

In a large bowl, place the flour, xanthan gum (if using), cocoa powder, baking soda, salt and sugar, and whisk to combine well.  Add the chocolate mixture, and mix until the dough comes together and is well-integrated.  Press the cookie dough into a disk.

Place the dough between two sheets of unbleached parchment paper, and roll it out until it is about 1/4 inch thick (any thinner and the cookies are more likely to burn in the oven, and they will crack when you try to coat them in chocolate).  Cut out rounds that are about 1-1/2 inches in diameter, and place them, 1 inch apart, on the prepared baking sheets.

Place the baking sheet in the center of the preheated oven and bake, rotating once, for 7 minutes.

Remove from the oven, and allow the cookies to cool completely on the baking sheet.

Once the cookies are cool, make the glaze.

Place all of the dark chocolate except for 3 to 4 1-1/2 inch-size chunks in a medium-size, microwave-safe bowl.

Microwave at 70% power for 45 seconds at a time, stirring in between, until melted and smooth.  Add the reserved chunks of chocolate and the peppermint extract, and stir until the chocolate has begun to thicken a bit and the chunks have melted.

Place the cookies, one at a time, in the glaze.  Press down on the cookie with the tines of a fork, then flip it gently in the chocolate.  Pull the cookie out of the chocolate by slipping the fork under it and bobbing the cookie on the surface of the chocolate a few times before pulling it along the edge of the bowl and carefully placing it on a clean sheet of parchment paper.  Allow the chocolate to set at room temperature.

Serve and enjoy!

~*~*~

While it has been ages since I have last been able to eat a Thin Mint Cookie (or 12 in one sitting)…these reminded me SO much of the cookies I grew up devouring.  I loved them enough to have as much trouble stopping myself from eating them as I did the real things.  So, from this one-time Girl Scout to all of you Celiacs and gluten-intolerant people out there…don’t give up hope.  You can now make your own Girl Scout favorite in the comfort of your own kitchen.

They’re probably less expensive too.  *WINK*

Recipe: Jamie Oliver’s Vegetarian Chilli

Ah, Jamie Oliver…I adore you.

Obviously.  Because when I went to Huntington, West Virginia, I made a point to go by Huntington’s Kitchen.

So, when I had some sweet potatoes that I needed to use up from my CSA bin this past week, my roomie suggested that I finally get around to making the vegetarian chilli recipe from your Web site.

We only needed a couple of items for the rest of the dish itself…so it was on!!

What I love about this recipe is how much depth of flavor the roasted sweet potatoes add to this dish.  It’s indulgent, but guilt-free.  So healthy.  I think it might be my favorite chilli so far.

So…thank you, Jamie Oliver.

And for my followers and readers…here is the recipe:

Recipe: Jamie Oliver’s Vegetarian Chilli

Jamie Oliver's Vegetarian Chilli
Jamie Oliver’s Vegetarian Chilli

Servings: 6-8
Time: Prep 10 minutes; Cook 50 minutes

Ingredients:

  • 2 medium-sized sweet potatoes, approximately 500g
  • 1 level teaspoon cayenne pepper, plus extra for sprinkling
  • 1 heaped teaspoon ground cumin, plus extra for sprinkling
  • 1 level teaspoon ground cinnamon, plus extra for sprinkling
  • olive oil
  • sea salt
  • freshly ground black pepper
  • 1 onion
  • 1 red pepper
  • 1 yellow pepper
  • 1 bunch fresh cilantro
  • 1 red chilli
  • 1 green chilli
  • 2 cloves garlic
  • 2 cans beans (I used black beans and great northern beans)
  • 2 cans chopped tomatoes (I used Muir Glen organic fire roasted tomatoes)


Directions:

Preheat the oven to 400°F.

Peel the sweet potatoes and cut into bite-sized chunks.  Sprinkle with a pinch each of cayenne, cumin and cinnamon, drizzle with olive oil and scatter with a pinch of salt and pepper.  Toss to coat then put them on a baking tray.

Peel and roughly chop the onion.

Halve, de-seed and roughly chop the peppers.

Pick the cilantro leaves and put aside, finely chop the stalks.

De-seed and finely chop the chillies.

Peel and finely chop the garlic.

Put the tray of sweet potato in the hot oven to cook for 40 minutes until soft and golden.

Meanwhile, place a large pan on a medium-high heat and add a couple lugs of olive oil.  Add the onion, peppers and garlic and cook for 5 minutes.  Add the cilantro stalks, chilli and spices and cook for another 5 to 10 minutes, stirring every couple of minutes.

Drain the cans of beans, then tip them into the pan with the tinned tomatoes.  Stir well and bring to the boil, then reduce to a medium-low heat and leave to tick away for 25 to 30 minutes.  Keep an eye on it, and add a splash of water if it gets a bit thick.

Get the roasted sweet potato out of the oven and stir it through your chilli with most of the cilantro leaves.

Taste and season with sea salt and freshly ground black pepper, if needed.

Scatter the remaining leaves over the top, and serve with some soured cream, guacamole and rice or tortillas.

~*~*~

Best vegetarian chilli I have ever made.  Or eaten.  I love the sweet potato.  It’s a super nice addition to the ingredients and really sets this chilli apart from other vegetarian chillies.  It has a mild heat…which is perfect for my roomie.  I like mine a little spicier, so if you’re like me, feel free to turn up the heat as you desire.

This recipe freezes really well, which is great, because you’ll definitely want more!