Product Review: So Delicious Dairy Free Minis Organic Super Strawberry Bars

So Delicious Dairy Free Minis Organic Super Strawberry Bars

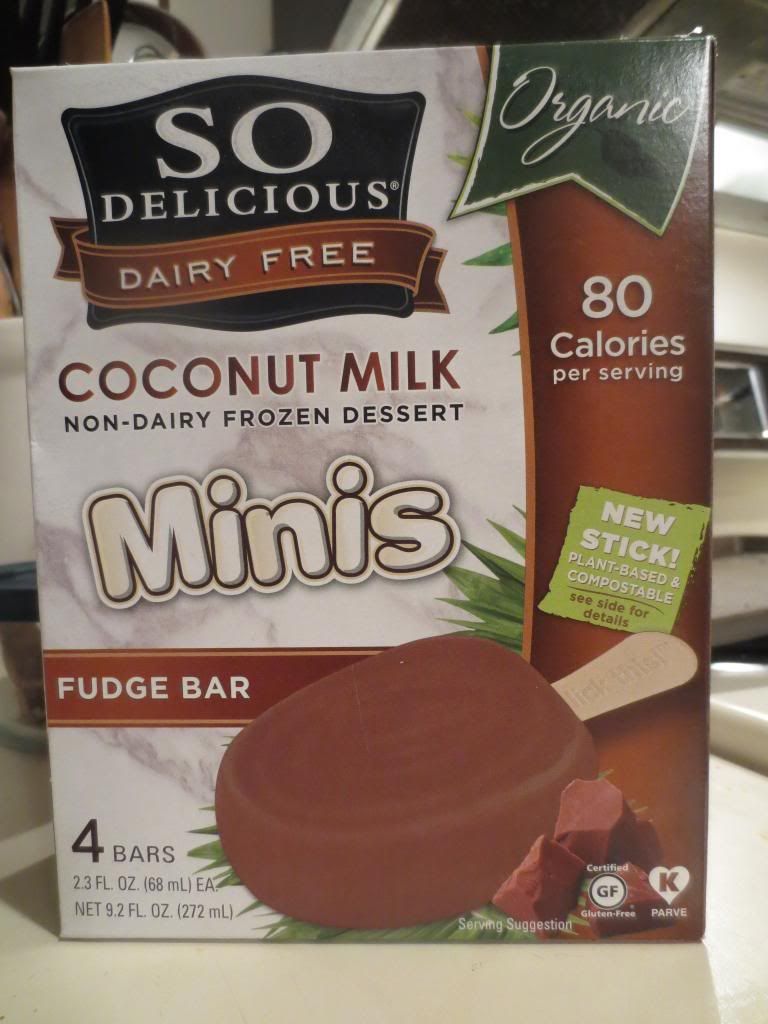
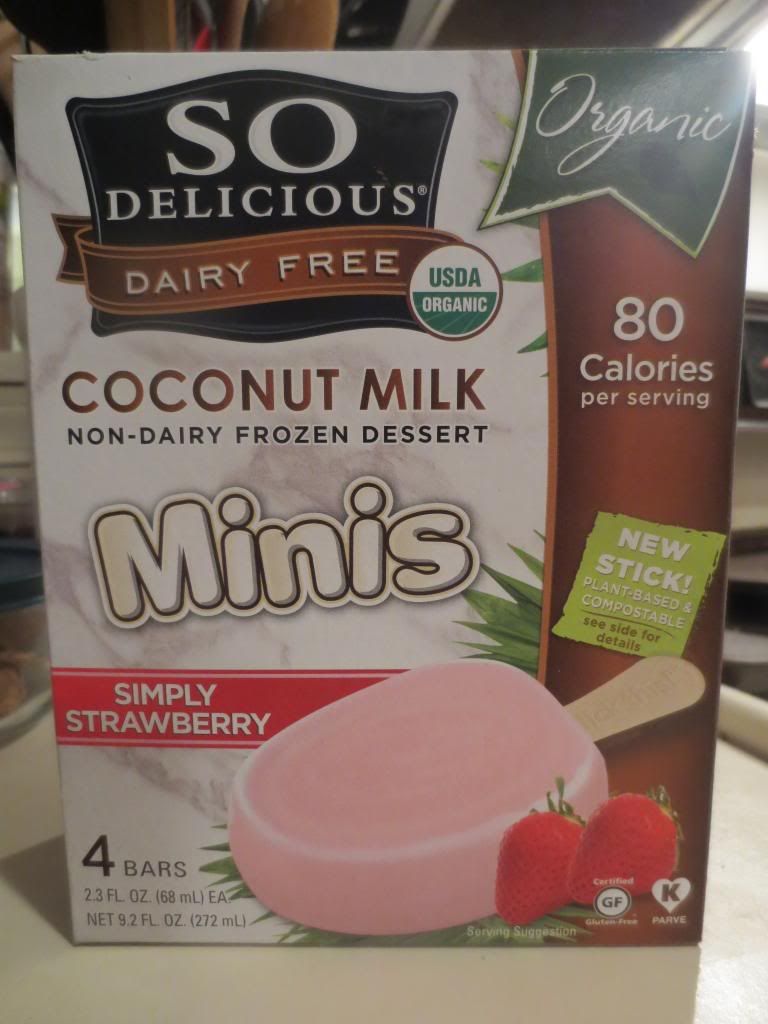
Product: So Delicious Dairy Free Minis Organic Super Strawberry Bars – $4.99+

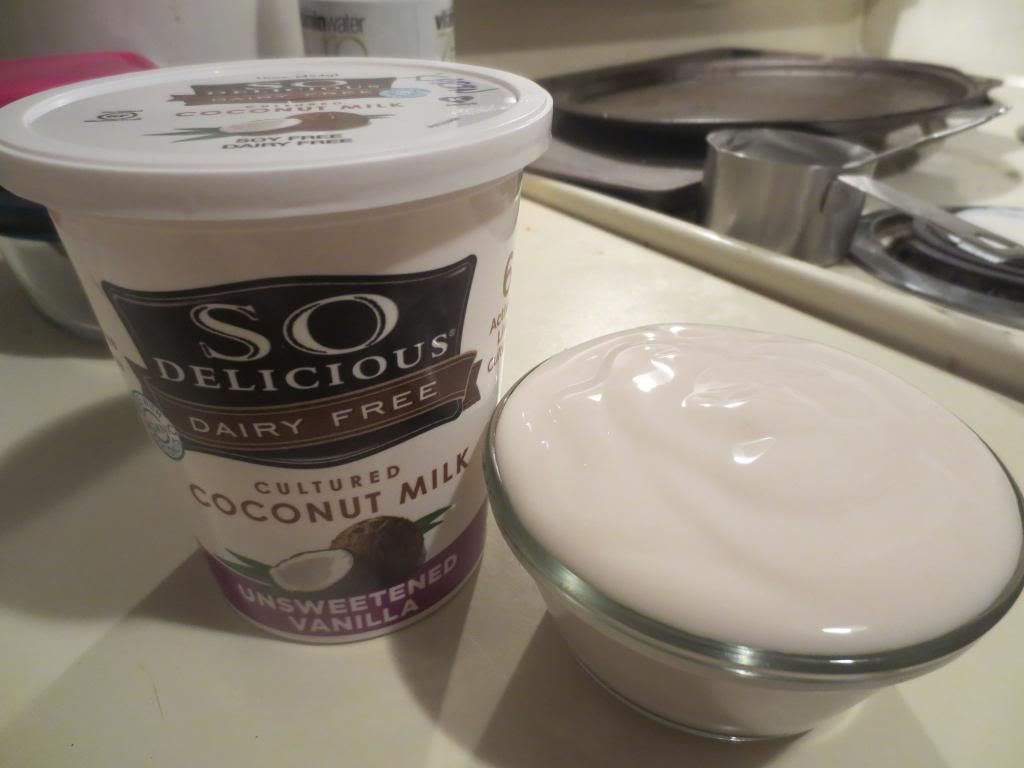
I have one person to blame for my obsession with anything So Delicious!  Honestly.  Because I was turned onto these fantastic products simply by having some of the vanilla coconut milk at my friend Heather’s apartment one morning when I was visiting.  She asked if I had tried it and then went on and on about how wonderful it was.  I took a sample.

I was hooked.

So…I’m not pointing the finger at you, Heather…I am thanking you.  Because of you, I have this love affair with products from So Delicious Dairy Free.

Recently they launched a couple of new products…one of which is some mini coconut milk dessert bars.  Yes…coconut milk based dessert bars.  They do it brilliantly.  I reviewed the Minis Organic Fudge Bars the other night…but a new flavor steps into the spotlight tonight.  And right there with chocolate, this happens to be one of my favorite flavors in life.

Strawberry.

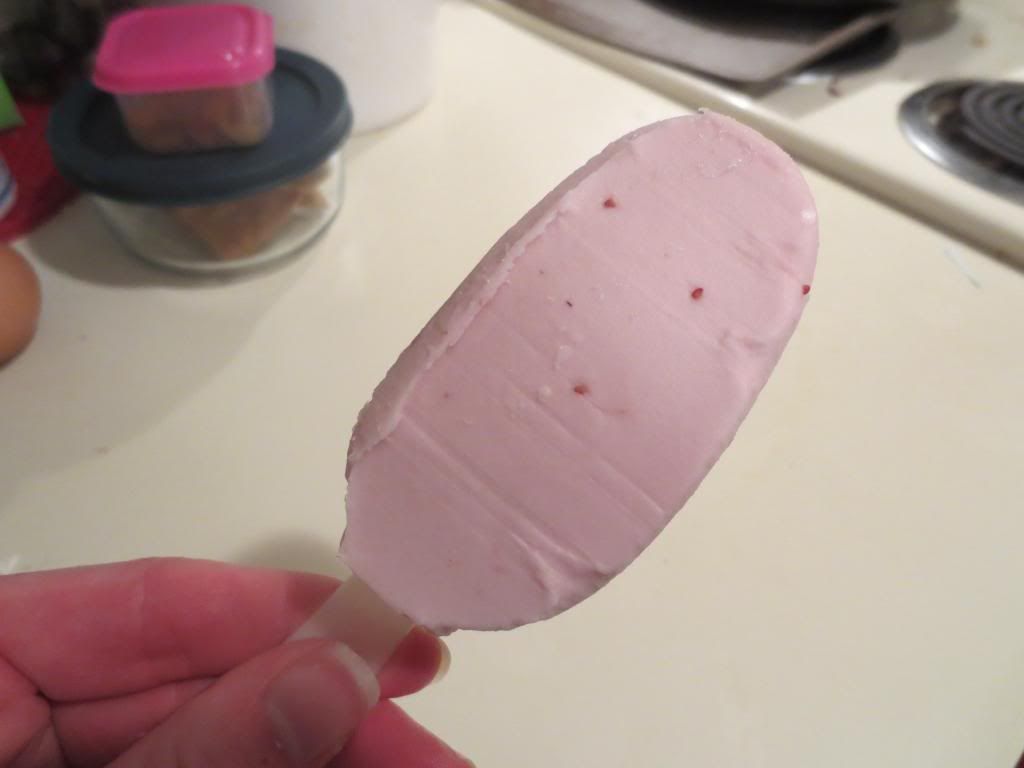
I love strawberries.  I love strawberry flavored things.  I apparently love strawberries and coconut milk in a frozen form.  Because from my first taste of this bar, I was hooked.  So Delicious Dairy Free Minis Organic Super Strawberry Bars are…well…super.  I’m not kidding.  If you want to taste something that tastes like real strawberries…look no further than this dessert.  And it isn’t fake strawberry flavor either.  That amazing strawberry taste…that’s real strawberries.  Organic strawberries at that.  It’s amazing what real ingredients to do the flavor of food.  I was instantly a fan of this frozen treat.  Instantly.  It was all I could do to saver each taste until it was all gone.  I wanted it to last forever.  But these little bars are mini…and they melt.  So…it can’t go on forever.  But, there are four to a pack, so you can indulge three more times after that first initial one.

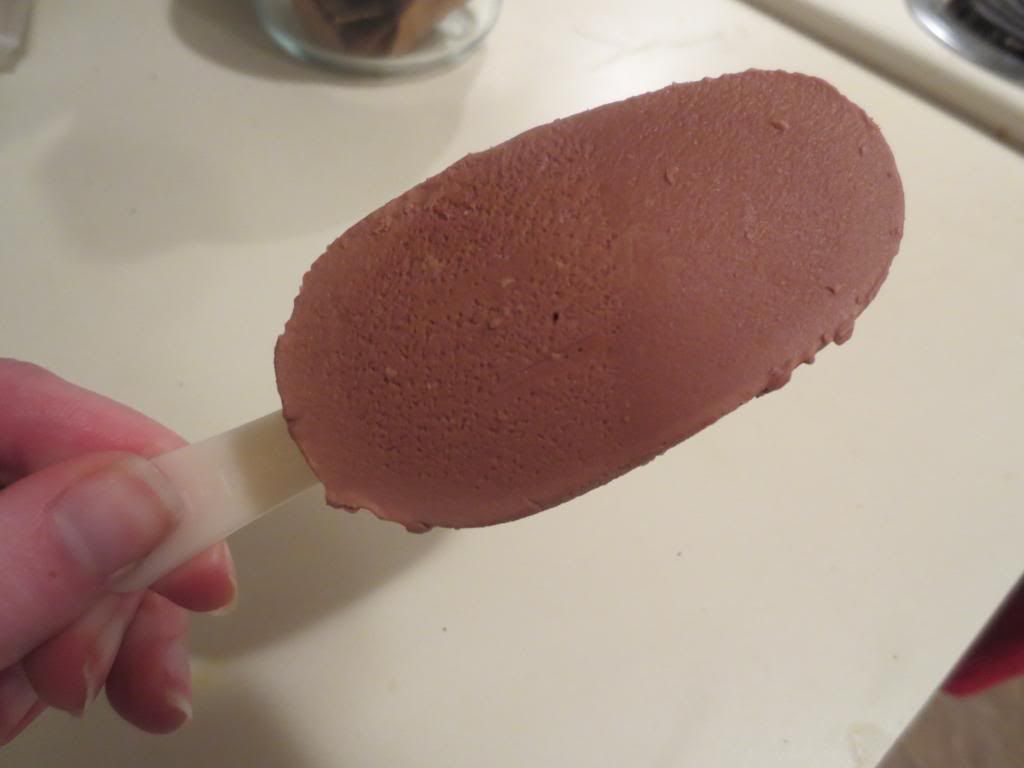
And you’ll want to.  Rich, smooth, creamy…it’s hard to believe that these don’t have any dairy in them.  Who says you can’t make a fantastic frozen dessert without real milk and cream.  These bars are proof.  Not only are they creamy and dreamy, but they taste amazing.  And I love that they are the perfect size too.  So often, desserts can outweigh the dinner entree.  Not here.  You get a great portion and great flavor.  This company is named So Delicious for a reason!

Let’s talk ingredients.  According to the package, the So Delicious Dairy Free Minis Organic Super Strawberry Bars are made from organic coconut milk, organic dried cane syrup, organic strawberries, organic inulin, natural flavor, organic guar gum, ascorbicacid, organic locust bean gum, and organic beet juice concentrate.  Not bad.  I know what all the ingredients are.

Nutritionally speaking…you’ll love these!  One serving is one of the mini bars.  This will provide you with 80 calories and 3.5 grams of fat.  You will also be taking in 5 mg sodium (love that!) and 9 grams of sugar.  Considering much of that sugar is coming from real fruit…that’s not bad.  Not bad at all.  A serving will also give you 5 grams of fiber.  These bars, however, contain no protein.  These are cholesterol free, gluten-free, vegan, kosher, non-GMO and certified organic.  YAY!

If you love strawberries…you’ll dive right into these bars.  Taste-for-taste they just get better as you go along.  I absolutely loved everything about the SO Delicious Dairy Free Minis Organic Super Strawberry Bars.  Everything.  Down to the plant-based and compostable stick.  Saving the environment the So Delicious way.

So Delicious Dairy Free Minis Organic Super Strawberry Bars (unwrapped)

Product Review: A Taste of Thai Pad Thai for Two

A Taste of Thai Pad Thai for Two

Product: A Taste of Thai Pad Thai for Two – $3.59+

I’m very fortunate that I live near one of the best Thai restaurants in the nation.  Yes.  I will go as far as to say that.  However, that being said…I also can’t afford to eat out much these days.  My money is better spent on travel and food experiences outside of my own neighborhood.

And race fees.

But…that’s a horse of a different color.

As I’m getting through a very long two weeks of no CSA bin filled with fresh fruit and vegetables, I’m scraping my pantry, fridge and freezer for things to eat until Friday.  It’s coming.  But it’s been a very rough two weeks of eating processed foods.  Some good…some better…none horribly bad.  I do pay a lot of attention to nutrition information when I shop and when I do buy something in a box or package…I mind the ingredient list and nutrition information above everything else.

Anyway…with nothing real to make food out of, save for a container of organic baby kale and a red onion…I pulled the final Thai food box out of my pantry.  This time it was the Pad Thai for Two from A Taste of Thai.  It sounded brilliant and the picture on the box looked drool-worthy.  One thing I didn’t take into account was that the box literally only contained rice noodles and the Pad Thai sauce.  No joke.  So…I had to think.  And I thought…kale and onions…caramelize…sauté…add noodles…BAM!  Dinner.  Why not?  My roomie seemed game for that too, so I set to work.

Pad Thai Sauce and Rice Noodles in A Taste of Thai Pad Thai for Two

I boiled some water and put the rice noodles into a large bowl, covering it with the hot water and letting it sit for 20 minutes.  As the noodles were soaking, I went ahead and sliced up the last of my red onion and got it into a pan over medium heat to begin the caramelizing process.  I, not thinking, started this in a smaller sauté pan…remember this later.  The onions were caramelizing beautifully, so I went ahead and added a couple handfuls of organic baby kale.  I sautéed it until it wilted down and turned bright green.  When the noodles were ready, I drained them and then added them to the small sauté pan, realizing then my error.  Somehow, I managed to contain it all in the pan and still swoosh it and stir it.  I didn’t risk tossing it as the pan was rather full of Thai goodness.  After about 4 minutes, I added some chopped (and toasted) cashews that I decided to add at the last moment, and then the packet of sauce.  All of this was mixed in that itty-bitty pan, but it got the job done.  And soon, I was dishing it up into two bowls and after about 30 minutes…dinner was served.

Was it worth it?  Yes!!  It was.  I enjoyed this little boxed meal more than I thought I would.  I thought the onion, cashew and kale were perfect additions (and very non-traditional, I know!) to the mess of noodles and sauce because they brought different flavors and textures to the meal.  The rice noodles actually ended up being cooked perfectly.  They didn’t stick together, as I was afraid they would because normally that’s what happens with rice noodles.  I was pleasantly surprised.  The sauce was tangy and sweet more than spicy, which was a nice change of pace (but you know I love my spicy foods!).  And it was easy to eat this noodle dish with chopsticks without making a huge mess.  No mess at all, in fact.  I found that I truly enjoyed eating this meal.  I would definitely consider buying it again for one of those quick-to-make meals where I have time for a little prep work and cook time…but it isn’t a flash in the microwave either.  LOVED it!

So, let’s talk ingredients, yes?  As I mentioned, the box contained a packet of rice noodles and a packet of sauce.  The rice noodles are simply made from rice flour, water, and modified (I hate that word!) tapioca starch.  The Pad Thai sauce was made from palm sugar, tamarind juice, water, shallot, sweet radish, garlic, soybean oil, potassium chloride, maltodextrin, miso, salt, hydrolyzed vegetable protein, yeast extract, paprika oleoresin, citric acid, alpha-tocopherol, and chili oleoresin.  I know…not very clean…and some very hard to pronounce words.  Ugh.  So much promise…

Let’s now talk nutrition.  A serving is 1/2 of the package.  This serving will provide you with 391 calories and 3 grams of fat.  This will also provide you with 433 mg sodium and 16 grams of sugar.  That sugar is off-the-chart.  YIKES!!  As for the sodium…it’s under 600 mg, so I can live with that.  Without the additions…this dish has no fiber, but does provide 5 grams of protein.  Of course, then I added onions, kale, and cashews and that really bumped up some of those nutrients, but hardly added any calories at all.  Love it.

So…yes…this is a highly processed item…and the nutrition factors aren’t fantastic, but they aren’t totally bad either.  The sugar content is high, but that is mostly contained to the sauce.  And the overall taste and textures were a huge hit.  My roommate and I loved eating them, but will probably try to do  more from scratch.  But, in a pinch, on those just scraping by weeks…this will do!

A Taste of Thai Pad Thai for Two (prepared with caramelized onion, kale, and cashews)

Product Review: So Delicious Dairy Free Unsweetened Vanilla Cultured Coconut Milk

So Delicious Dairy Free Unsweetened Vanilla Cultured Coconut Milk

Product: So Delicious Dairy Free Unsweetened Vanilla Cultured Coconut Milk – $5.99+

Do you know what love is?

Love is…a new and fabulous product from a company who prides itself on good quality products.  And, lucky me…I had the opportunity to test drive a few of these new products from So Delicious!!  I have not been disappointed.

One of the new products out there from So Delicious Dairy Free is their 16 ounce containers of Unsweetened Cultured Coconut Milk.  They have two varieties of the unsweetened ones…plain and vanilla.  And let me tell you…these do not disappoint.

I am a huge smoothie fan.  And, for Christmas, I was given a personal blender.  So smoothie making is SO much easier now.  They are great for pre-run and post-run fueling and nutrition…as long as you use the right ingredients.  Well, I’m not running much right now due to a severely sprained ankle.  But…smoothies are still one of the best things in life.  So…this week, I broke out a tub of the So Delicious Dairy Free Unsweetened Vanilla Cultured Coconut Milk.

It was brilliant.  I put 1 cup of the Unsweetened Vanilla Cultured Coconut Milk into my blender, then added 1/4 cup pineapple juice, 1 tablespoon of flaxseed, and then a tropical fruit mixture of frozen fruit (mangoes, pineapple, strawberries, and peaches)…gave it a whirl…and viola.  Smoothie.

Let me tell you…this makes a smooth, rich and creamy smoothie without adding sugar to the mix.  There is plenty of sugar via the fruit that is used.  I love having that option as I am trying to cut back a bit on the sugar I consume.  This is one of my new favorite products from So Delicious.  And it is so versatile.  I used one of the plain ones in a very…very different manner and I’ll post about that in a bit.  The fact of the matter remains, the vanilla doesn’t overpower or overwhelm.  The cultured coconut milk is creamy and dreamy.  It makes this velvety smooth, low sugar smoothie and it is fantastic.  Every last bit of it.  Fantastic.  Slurp that smoothie down…it’s good for you.  The bit of coconut flavor really played well with my tropical fruit blend.  So much love.

This product is nutritionally sound too!  A serving size is 4 ounces, or about 1/2 cup.  This serving will dish you up 60 calories and 3.5 grams of fat.  You will also be taking in 95 mg sodium and only 1 gram of sugar.  LOVE IT!  This product has no protein in it, but you do get 4 grams of filling fiber.  If you need a protein boost…use a good and trusty protein powder.  This product is cholesterol free, gluten-free, and vegan.

I can’t say enough good things about this product.  I am over the moon for it.  And I can’t wait to share what I did with the plain unsweetened either.  Although the vanilla would have worked just as well too.  I don’t think my fridge will ever be without this now.  I am, above all else, hooked.  Loving it!  I promise…you will too!

Tropical Smoothie made with So Delicious Dairy Free Unsweetened Vanilla Cultured Coconut Milk

Product Review: So Delicious Dairy Free Minis Organic Fudge Bars

So Delicious Dairy Free Minis Organic Fudge Bars

Product: So Delicious Dairy Free Minis Organic Fudge Bars – $4.99+

Many of you already know that I am a huge fan of So Delicious.  Their coconut milk and almond milk (as well as products made from said non-dairy milk) are amazing.  I have yet to try something that I don’t like.  That’s the thing about a company named So Delicious…it has to live up to it.

Recently, So Delicious Dairy Free released a couple of new coconut milk products.  And I was fortunate enough to receive some of these products in the mail.  I was out of town this past weekend, so I didn’t get to dive right in…but now that I’m back…I’m was beyond eager to give these products a try.

I started…with one of the most basic ones.

My choice: So Delicious Dairy Free Minis Organic Fudge Bars.  These little fudgsicle like treats are a coconut milk dairy-free frozen dessert.  And they are chocolate.  And you know…one of the ways to my heart is through chocolate.  I’m a choc-o-holic.  I owe that to my grandma because she ate the heck out of chocolate.  It was her favorite thing in life.  And I can’t blame her.  So, not only are these frozen bars made with delicious chocolate, but also that sweet hit of coconut milk.  Sounds like the perfect snack, yes?

You better believe it.  The Mini Organic Fudge Bar was my dessert tonight.  I was so eager to rip into the wrapper and devour.  But…I paced myself.  Because dessert is meant to be savored.  And this frozen treat is worth every moment of savoring.  It won’t last too long though, because it does melt.  So…do keep that in mind, okay?

First of all, this is the perfect and ideal size treat.  Not too much and not too little.  As Goldilocks would say…it’s just right.  And it is.  Honestly.  The actual bar itself is around 3.5 inches in length, so in the grand scheme of things…not as mini as the product name might lead you to think.  That’s a nice bonus.  The consistency is so ice cream like you won’t believe that you’re not eating a full-blown-to-the-max-with-dairy ice cream bar.  No cows were used in the making of this chocolate treat.  Seriously.  Velvet smooth.  And the flavor is incredible.  I fell in love with the rich flavor of the chocolate combined with that smooth coconut milk flavor.  It is a winning combination in my book.  I think my roommate got tired of hearing me comment on how delicious dessert was.  Best of all, I didn’t have to bake it or make it.  It was in my freezer just waiting for me…begging me…to just try it.

There is no going back.  I want this in my freezer for life.  For afterlife too, if that’s possible.  This sweet tooth was beyond satisfied.

As far as ingredients go, the Mini Organic Fudge Bars contain coconut milk, organic agave syrup, organic inulin, organic cocoa, organic dried cane syrup, water, carob bean gum, guar gum, natural flavor, salt, and carrageenan.  These bars are vegan, cholesterol free, and gluten-free.  All ingredients are also non-GMO!  I totally approve.

As far as nutrition goes, you will absolute do a flip for these.  A serving is 1 bar.  The box comes with 4 inside.  One of the So Delicious Dairy Free Minis Organic Fudge Bars will serve you up only 80 calories and 3.5 grams of fat.  You will be consuming 10mg sodium and 8 grams of sugar.  Not bad for a treat!  And you will be provided with 3 grams of fiber and 1 gram of protein.

Super yum!!  Thank you, So Delicious, for introducing me to this new product!

I’m doing my best right now not to go raid my freezer for another one.

Because…I want another one.

Do search out this new product from So Delicious Dairy Free.  Nothing is better after a long day than a sweet treat without the guilt.  Enjoy!

So Delicious Diary Free Minis Organic Fudge Bar (unwrapped)

Product Review: Trader Joe’s Latin Style Black Bean Soup

Trader Joe's Latin Style Black Bean Soup
Trader Joe’s Latin Style Black Bean Soup

Product: Trader Joe’s Latin Style Black Bean Soup – $2.79+

The weather outside is back to being frightful.  I wish it would just warm up.  Honestly.  I am so done with winter.

One thing, however, that is good about colder temperatures outdoors is…soup!  Granted, I can happily eat soup in the spring, summer and fall, but it just feels so right and homey when consumed in winter.  Especially on really bitterly cold days.

My roommate and I actually had picked up this box of soup at Trader Joe’s awhile back.  But other soups came first…mostly homemade.  And this kept its place in the pantry.  That is until last night.  What was so different about last night?  Well…I had nothing in my fridge or pantry due to being out of town and cancelling my CSA bin for another week.  Sure, I grabbed a few items at the grocery store, but nothing condusive to a soup.  And I really, really wanted soup.

Thank goodness my pantry is usually stocked with some sort of soup or vegetable broth.  I chose to make vegan and gluten-free BLT sandwiches and serve it with bowl of the Trader Joe’s Latin Style Black Bean Soup.  An easy, stress-free dinner.  Just what I needed as my day had been rather tiring and long, mostly on the road.  Cathy said she was okay with that dinner and so…that’s what I ended up making.  I pulled the soup box out of the pantry and put 2 cups of it into a bowl, reserving the other 2 cups for today when I make the same dinner again because…well…I can and I have everything!

The soup was easy enough to warm up, so while it warmed on the stovetop, I toasted some bread to top with baby kale, tomato slices, and slices of vegan and gluten-free bacon that I made a week ago.  It’s good to go from freezer to pan and it is awesome.  I posted the recipe a couple weeks ago and just linked it there.  Anyway, the soup was a crazy purple-brown color.  So, yeah…not the most appetizing looking soup, but it smelled fantastic as it cooked.  I stirred it on occasion while taking care not to burn the bread in the oven nor the bacon in a pan on the stove.  I managed.  And as everything finished up and the bread slices were spread with Veganaise and topped with the vegetables and bacon, I got out a ladle to dish up the soup.

I filled the bowls with a serving each and settled in for dinner.  Soup and sandwich.  Classic…and one of my favorite combinations.  I almost did gluten-free and vegan grilled cheese…but the BLT was too tempting.  And it worked so well with this soup!

First of all, this soup was not much to look at, but HELLO FLAVOR!  The seasoning of this soup was beyond amazing.  It had a little bit of heat and layers and depth to each spoonful.  I tend to dip my sandwiches into my soup, especially when it’s a non-chunky soup like this, and it meshed really well with the vegan and gluten-free BLT.  I thought as far as flavor went, this soup had it going on.  The spice was just enough…not too strong.  And the other flavors, garlic, cumin, and chipotle didn’t overpower.  I sipped at this soup, really just taking it in to form my opinion.  And when I asked my roommate what she thought of it, she echoed exactly what I was thinking.  It was good…but it was lacking something.  It was just…black bean broth.  It was missing…something.  That’s the thing about boxed soups, all you get is the flavor base.  When you make it at home, it’s usually thicker, maybe chunky, has more depth.  That’s what this lacked.  It wasn’t bad, don’t get me wrong…but it was just lacking.  That’s why when I cooked the rest of it up tonight, I made some homemade crackers to float on top.  HA!  I can be resourceful.

That being said, Trader Joe’s Latin Style Black Bean Soup is made up from filtered water, black beans, onion, red bell pepper, green bell pepper, flavor concentrate (tomato puree, sea salt, sugar, canola oil, spices, chipotle pepper, natural flavor), tomato paste, garlic, sea salt, olive oil, cumin, guar gum, and black pepper.  For being the last ingredient listed, the black pepper and chipotle flavors really do stand out the most.  But, I like heat, so I’m okay with that.  None of these ingredients raised any flags to me.  I recognized them all.

Nutritionally speaking, Trader Joe’s Latin Style Black Bean Soup is almost a rockstar.  A serving is 1 cup of the soup.  This 1 cup bowlful will provide you with 70 calories and 1 gram of fat.  A serving also dishes up 520 mg sodium and 3 grams of sugar.  While it seems a bit high in sodium, it is a packaged soup and I knew that when I purchased it.  And, in the grand scheme of things and compared to other soups on the market, 520 mg of sodium isn’t the worst I have seen.  A serving of this soup also provides 4 grams of protein and 4 grams of fiber.  So, you will feel full…trust me…after eating this soup.  Yes…even without the chunks.

So, the basic feeling on this soup is that, it is good and tasty, but definitely lacking.  I liked the spices and the heat, but the texture was just…not quite what I expect when I hear the term black bean soup.  I was disappointed there, but would definitely consider getting this soup again, perhaps to use more as a base for a chili, or next time add some rice or vegetables or…even black beans, instead of a soup on its own.

Trader Joe's Latin Style Black Bean Soup (with my homemade crackers)
Trader Joe’s Latin Style Black Bean Soup (with my homemade crackers)

Product Review: Food Should Taste Good Harvest Pumpkin Tortilla Chips

Food Should Taste Good Harvest Pumpkin Tortilla Chips

Product: Food Should Taste Good Harvest Pumpkin Tortilla Chips – $2.50+

Pumpkin.

I am obsessed with it.  Not just in the fall, either.

ALL. THE. TIME.

No joke!  I look forward to all those delicious pumpkin flavored coffee drinks in the fall.  I love to cook with pumpkin and bake with pumpkin and eat pumpkin seeds…

Pumpkin is like my BFF for life.

And now…it’s a tortilla chip.

Yes.  A tortilla chip.

Now, some of you may not think this sounds appetizing at all.  But trust me…it works.  It actually works.

The brand is Food Should Taste Good, which has never made chip I haven’t liked.  And while I don’t consume chips often, my roomie spotted this at the grocery store and brought them home for me as a surprise.  She knows my obsession with pumpkin well…and…I thanked her for them.  I had other treats to devour first, but with my lack of a CSA bin this week and a tight food budget…it was bare necessities time.  And with that came…dig through the pantry to find your snacks this week.

Enter Food Should Taste Good Pumpkin Harvest Tortilla Chips.  Confused?  Don’t be.  The basic premise is that this chip is pumpkin flavored, kissed with a hint of nutmeg and cinnamon.  The pumpkin flavor actually sweetens the chip, which still has that corn tortilla texture and underlying flavor.  But the sweetness isn’t too much, as the spices sort of tame it and make it…an interesting but delicious bite.  They would be really awesome with a guacamole or hummus.  But I like to eat them on their own.  I love the soft crunch, the sweet notes in each bite, and that little hint of fall spice.  It’s like eating a crunchy pumpkin pie…without the overwhelming pumpkin flavor and that nasty texture that pumpkin pie has (yes…I am a pumpkin freak but SO dislike pumpkin pie).

I. AM. IN. LOVE.

Let’s look at ingredients, shall we?  What I love about Food Should Taste Good is that they use real ingredients.  Nothing unidentifiable; nothing unpronounceable.  No chemicals or preservatives.  Just sheer awesome and real ingredients.  The Harvest Pumpkin Tortilla Chips are made from stone ground corn, high oleic sunflower oil and/or safflower oil and/or canola oil, cane sugar, dried pumpkin, pumpkin, cinnamon, allspice, nutmeg, sea salt and clove.

Nutritionally speaking, a serving of the Food Should Taste Good Harvest Pumpkin Tortilla Chips is 28 grams (I always dish up servings by weight)…or about 12 chips.  This serving will provide you with 130 calories and 6 grams of fat.  This serving will dish up 80 mg sodium and only 2 grams of sugar.  LOVE that.  Low sodium…low sugar.  YES!  You will be consuming 2 grams of fiber and 2 grams of protein.  These chips are cholesterol free and gluten-free.

And they are made of pumpkin-y love.  And I am hooked on them.  It’s a good thing I’m insistent about dishing out proper serving sizes and NOT eating out of the bag.  It is only for that reason that I still have some chips in my bag in the pantry.  Might have to try these with some hummus or guac.  Hmmm…

Anyway…don’t be afraid.  They are actually rather amazing to bite into and enjoy.  If you are a fan of pumpkin…you’ll be a fan of these.  If you aren’t a fan of pumpkin, don’t count these out.  They won’t overwhelm you with their pumpkin flavor.  Just a hint of sweetness before that salty corn tortilla undertone kicks in.

I am in love with these chips.  For life.

Product Review: Nana’s No Gluten Lemon Cookie

Nana's No Gluten Lemon Cookie
Nana’s No Gluten Lemon Cookie

Product Review: Nana’s No Gluten Lemon Cookie – $2.99+

The cookie monster has struck again.

I need to stop finding all these different brands of gluten-free cookies.  Wait…no.  No, I don’t.  Because I forever will love cookies.  Especially a good cookie.

I have actually spotted Nana’s No Gluten cookies at a local natural food store.  However, I never really thought to stop and purchase one and give it a try.  Why?  I don’t know.  I must not have been thinking clearly.  Or, perhaps I was actually obeying my budget.  Or…was overwhelmed by the amount of sheer awesome gluten-free goodies at that store.  Whatever the case may be…that changed.  But while I was visiting my family in Birmingham, Alabama.

My roomie and I stopped by the organic store my mom took us to the last time we were in town.  It’s called Organic Harvest and their gluten-free selection is mesmerizing.  For real.  On the very bottom shelf, my roommate spotted the Nana’s No Gluten Lemon Cookie.  Because if lemon is involved, she’s going to find it.  Trust me.  So, it didn’t take much pleading to make that one of the purchases we made while there.  Good thing too, because when we drove home, we had nothing really left for dessert.  So…guess what was dessert last night?

Now, I love a soft, chewy cookie.  I really do.  And Nana’s No Gluten Lemon Cookie looked very soft and very chewy.  I opened up the package and was greeted with the best smell of lemon citrus flavor.  YUMMY!  I only hoped that the lemon flavor wouldn’t overpower.  I split the cookie in half and gave half to my roomie and kept the other half for me.  She dug in immediately, as lemon is her favorite flavor, and I asked her how it was.  She liked it.  I asked if it was too lemony and she said that it was right on the edge.  It was perfect.  I hoped she was right.  I settled in to my own half, took a bite and…WOW!!  Super soft, for one thing.  Love that.  Moist.  You’d never believe that these were vegan (no dairy, no eggs, and an added bonus of no refined sugar).  The lemon flavor was at the right level for sure.  Any more and it would have been too tart.  But the sweetness of the cookie actually perfectly balanced out the tartness of the lemon.  I was beyond impressed.  I devoured the half of a cookie in record time.  The texture was a hybrid of a shortbread cookie and a moist, dense molasses cookie.  Right in between.  No joke.  It was melt-in-your-mouth nom-a-licous.  Honestly.  And I love that the cookie is sweetened by fruit juice.  Amazing.

So, let’s talk ingredients, shall we?  Nana’s No Gluten Lemon Cookie is made from brown rice flour, white rice flour, fruit juice (a combo of pear, apple and grape), rice dextrins (a natural and unmodified starch), non-GMO expeller pressed canola oil, white rice crisp, tapioca flour, lemon, baking soda, non-aluminum baking powder, natural flavoring, natural vanilla extract, xanthan gum, salt.  As far as ingredients go, not too bad.  Not great…but not too bad either.  Better than some I have eaten (and loved).

Nutritionally speaking, a serving is half the cookie.  Yes…half.  Not the whole cookie.  Just half.  In this half of a cookie, you will be consuming 180 calories and 7 grams of fat.  This half of a cookie also contains 85 mg sodium and 10 grams of sugar.  For a cookie, 10 grams of sugar isn’t bad, specially when it all comes from fruit juice.  You also get 1 gram of fiber and 2 grams of protein.  So, don’t expect this cookie to fill you up.

The light, fresh, moist, delicious taste of this cookie is so amazing and enticing.  I was sad that we only bought one.  Honestly, one of the best gluten-free cookies on the market.  I’m already hoping to try more of Nana’s No Gluten Cookies…even if I have to order them online.  Delicious!  If you love cookies and you are a fan of lemon…you won’t want to miss out on this treat.  Trust me.

I’m already craving another one.

Nana's No Gluten Lemon Cookie (unwrapped)
Nana’s No Gluten Lemon Cookie (unwrapped)

Product Review: A Taste of Thai Peanut Noodles Quick Meal

A Taste of Thai Peanut Noodles Quick Meal

Product: A Taste of Thai Peanut Noodles Quick Meal – $5.49+

Love Thai food?

Me too.  We have a great authentic Thai place not too far from where I live.  It isn’t even in Louisville.  It’s in Jeffersonville, Indiana.  I love that place.  I haven’t been there in ages, but I contacted them awhile back and they said they could make anything gluten-free for me.  That’s the joy of Thai food…it is easy to accommodate.

That being said, when a sale is happening…my roomie and I tend to go a little crazy at the grocery store.  No lie.

A long time ago in a far away (or perhaps local) grocery store, we encountered a sale on A Taste of Thai products.  We picked up two of the Peanut Noodle Quick Meals (they serve 2 in each box) and a Pad Thai for Two…which we have yet to make as well.

Tonight, after a long day of travel from Birmingham, Alabama back home…and with no CSA bin this week, I needed a quick and simple meal.  Trust me, I haven’t been in the mood to get creative with the food.  And, honestly, after sitting all day in the car and being the sad sot that I am right now (injured runner…stand back!), I didn’t really want to whip up something from scratch that might take…ages.

Thank goodness for these meals in the pantry.

So easy to make too.  Remove all of the envelopes that contain coconut milk powder, the peanut sauce, peanuts and noodles.  Place a cup of water into the box and then add the sauce, the coconut milk, then the noodles.  Microwave on high for 3 minutes.  Stir.  Microwave again for another minute.  Then, let stand for 1 minute.  Afterwards, add the peanuts.  Stir and then serve.

Simple.  Easy.  And ready in 5 minutes.  Gotta love it.

Packets inside A Taste of Thai Peanut Noodles Quick Meal

So, how was it?  Better than I expected.  For one thing, the “sauce” packet was a powder, which threw me off for a moment.  So was the coconut milk portion as well.  But those both go in the water first and they mix in all proper like.  The noodles actually do soften up in the 4 minutes of heating and 1 minute of resting.  I promise.  No hard noodles were found in the consuming of this product.  And the flavor was awesome.  Not as awesome as real Thai food, but as close to awesome real Thai food as one can get without being at an authentic Thai restaurant…or in Thailand.  I swear.  There was a little bit of heat…just enough to keep the flavor interesting.  The peanuts gave a nice texture to the overall dish.  The noodles were perfect.  Not crunchy.  Not mushy or sticky.  Perfect.  And the sauce…it was delicious.  I might have licked my bowl.  Maybe.  A little.

So, how does this stand up nutritionally?

Let’s look at ingredients first.  The sauce contains: sugar peanuts, chili powder, kaffir lime leaf powder, lemongrass powder, modified tapioca starch, salt, hydrolyzed vegetable protein, dextrose, tricalcium phosphate (to prevent caking), yeast extract, malic adid.  The coconut milk powder is made up of coconut maltodextrin, mono and diglyceride (an emulsifier), dipotassium phosphate (a stablizer) silicon dioxide (to prevent caking).  And the peanuts contained peanuts and silicon dioxide (to prevent caking).  The rice noodles were simply made from rice flower, water, and modified food starch.  Do I like all those modified ingredients.  Not one bit.  I bought these back before I was paying attention to that.  Kind of shocking when I look at it and type it up.

As for nutrition…this box contains 2 servings.  In one of these servings, you will consume 340 calories and 10 grams of fat.  Not bad for a saucy noodle dish, I think.  You will be taking in 320 mg of sodium and 13 grams of sugar.  The sugar is a bit high, but I believe that is from the sauce.  You get 2 grams of fiber and 5 grams of protein.  It is cholesterol free, gluten-free, and preservative free.

So, while it is not the cleanest of eats, it was quick and easy.  I do dislike the modified ingredients.  Not a fan.  But I am a fan of the taste, flavor, spice, and texture.  For an every-now-and-again dinner, not a bad choice at all.

Recipe: Homemade Gluten-Free and Vegan Bacon

It was almost five years ago that I made a decision to become a vegetarian.  And as of this month…three years ago that I had to go gluten-free.  My…time sure does fly!  That being said, when I first became a vegetarian, my life was filled with Morningstar Veggie Bacon Strips and faux meat products…which…looking at now makes me cringe due to the number of chemicals and processed crap that are in them.  Besides that…most all processed-to-death faux meat products contain vital wheat gluten…which means…I can’t consume it anyway.

Honestly, after three years I’ve worked around this.  But, you see, my roommate has a love of BLT sandwiches.  As you know, Cathy eats what I eat at home, so she’s 80% gluten-free and vegetarian.  But when we go out…meat is her treat (think those Beggin’ Strips commercials…).  Anyway…she’s acquired this taste for BLT sammies…and with a plethora of lettuce from my CSA bin, she put in that request.

So…I needed bacon.  And no one makes a gluten-free and vegetarian version of this.  So, I had to make it myself.  And it’s mainly made up with…beans.  So…beancon?  I guess?  The recipe was adapted from the No Meat Athlete…and now…will forever be made and kept in my kitchen.  What’s even better…after you cook the batter up and slice it, the slices can be kept in the freezer and go immediately from the freezer to the pan.  Oh yeah…beancon time!

Recipe: Homemade Gluten-Free and Vegan Bacon

Homemade Gluten-Free and Vegan Bacon

Servings: 24-32
Time: Prep 20 minutes; Bake 10 minutes

Ingredients:

  • 1/2 cup dried adzuki beans, or other small red beans
  • 1/3 cup whole grain buckwheat groats (not buckwheat flour)
  • 1 tsp onion powder
  • 1/3 tsp garlic powder
  • 1/3 tsp rubbed sage
  • 1/2 tsp thyme
  • 1-1/2 tsp smoked paprika
  • 1 tsp liquid smoke (not all brands are gluten-free, but Colgin is…and that’s what I use)
  • 3 tbsp pure maple syrup
  • 1-1/2 tbsp coconut aminos (I subbed San-J Gluten-Free Tamari)
  • 1 tbsp tomato paste
  • 1-1/2 tbsp nutritional yeast (optional)
  • 1 tsp coconut oil (may sub any oil you prefer)
  • 1/2 tsp salt

Directions:

Rinse the beans and buckwheat, place in large bowl covered with several inches of cold filtered water; let soak overnight.

Preheat the oven to 400°F.

Drain and rinse the soaked beans and buckwheat.  Place in the bowl of a food processor fitted with an s-blade, along with all of the other ingredients. Pulse several times to combine, scrape down the sides and bottom of bowl and continue pulsing until uniform, but not completely pureed.

Line a 9 x 13 casserole dish or rimmed baking sheet with parchment paper and spray with baking spray. Place bacon batter in pan and spread evenly with a spatula.  You may choose to spray another piece of parchment paper lightly with baking spray and press the paper on top of the mixture and flatten with your hands.  Remove and discard the top piece of parchment paper, then use a spatula to spread over and fill in any bare spots.

Bake for 10 minutes.  Remove from oven and let cool for 10 minutes.  Slice into 24-32 strips, whatever size you prefer, I cut mine into 1 inch by 4 inches slices (Do this by making one lengthwise cut down the center, and then 12-16 cuts across the shorter side).

At this point freeze any strips your don’t plan on eating immediately. Frozen strips can go straight into the skillet at a later date, no need to thaw first. To fry, heat a skillet with a small amount of oil and fry both sides to desired level of crispiness. You may also choose to fry slices in cooking spray, for a less crispy, but still very delicious result.

~*~*~

The liquid smoke gives it that smokey feeling of bacon and they taste great.  Honestly.  I made this once before and used them on breakfast sandwiches, to pair with pancakes, and now…on BLTs.  Brilliant recipe.  Bacon really can be for everyone…even gluten-free vegetarians and vegans.  Because this no meat treat is a delicious, homemade, and easy recipe.  And no chemicals.  Real food.  Real good!

Gluten-Free and Vegan BLT Sandwich

Recipe: Shredded Rainbow Salad

You ever look at the food you have in your fridge and wonder what you might be able to make with all of it?  Especially when, in the next couple days, another fresh produce delivery will land on your doorway and you’ve barely scratched the surface of the last bin as it was delivered later than usual due to weather?  Or something to that affect?

That’s my life these days.  The Polar Vortex caused there to be a delay in my CSA bin delivery…which isn’t a problem…but it gave me fewer days to work through the fresh produce.  I’ve managed some…but I still have plenty left.

That being said…Jamie Oliver came to my rescue tonight.  For dinner I got out my brand-spankin’-new food processor and whipped up a delicious, healthy, and colorful salad from the fresh produce I had on hand.  The dressing was a magical touch.  Talk about clean eating!

Recipe: Shredded Rainbow Salad

Shredded Rainbow Salad

Servings: 8
Time: 20 minutes

Ingredients for Salad:

  • 2 raw medium beets (any color) trimmed, scrubbed & quartered
  • 4 leaves kale
  • 2 large carrots, scrubbed & trimmed
  • 1/4 white cabbage, quartered
  • 1 apple, quartered
  • 1 cup walnuts, roughly bashed


Ingredients for Dressing:

  • 1 teaspoon Dijon mustard
  • 3 tablespoons apple cider vinegar
  • 6 tablespoons extra-virgin olive oil
  • sea salt & ground pepper
  • Gluten-Free Tamari
  • hot sauce (I used Sriracha)


Directions:

Put a coarse grater attachment into a food processor and push ingredients through in the following order (to stop the beets from staining everything): beets, kale, carrots, white cabbage and apple. (If your food processor is small, do this in batches.)

Turn vegetables out onto a platter so get a pile of rainbow colors.

Mix the mustard, vinegar, and oil, then season with salt, pepper, tamari, and hot sauce.

Add walnuts and toss everything together until you get a big, beautiful plate of dressed vegetables.

~*~*~

Simple…but the flavors are amazing and work well together.  You get this great sweetness from the beets and the apple.  The cabbage and carrots give this earthy flavor.  And the kale…just a bit of that bitter zing.  Topping it with walnuts gives an added boost to the texture.  And the dressing…necessary.  It ties it all together.

My roommate declared this her favorite way to eat a salad.  Me…I devoured it!  Healthy and delicious.  Definitely making this again!