It is naturally gluten free. It is cheesy. It is soft and gooey and amazing. It is one of the most amazing things you will ever eat. I first made Brazilian cheese bread when I used a Chebe bread mix a long, long time ago. But after having the real thing at the Disney World Wine & Dine Festival…Pão de Queijo has been on my mind.
This weekend, I am visiting my friend, Jenn, and we are having a culinary cooking experience, as usual. Last night, to accompany our delicious gluten-free gnocchi main course…we baked up a batch of this amazing Brazilian cheese bread. And…were we ever impressed! Holy cheesy gods of goodness!
So…here’s how we did it…
Recipe: Pão de Queijo (Brazilian Cheese Bread)
Pão de Queijo (Brazilian Cheese Bread)
Servings: 12-30 (we got 30 out of ours)
Time: Prep 10 minutes; Bake 20 minutes
Ingredients:
1 egg
1/3 cup olive oil
2/3 cup milk
1 1/2 cups (170 grams) tapioca flour
1/2 cup (packed, about 66 grams) grated cheese – I used mature cheddar
1 teaspoon of salt (or more to taste)
Directions:
Preheat the oven to 400°F.
Grease a mini muffin tin. Put all the ingredients in a blender, pulse the mixture till smooth. (This mixture keeps in the fridge for up to a week, so you can pre-mix some of this for a quick snack during the week).
Fill the muffin tin, slightly more than two thirds full.
Bake in the oven for 15-20 minutes or until slightly golden.
Serve fresh and warm from the oven.
~*~*~
Seriously…a great bread to serve up with whatever dinner you are eating. Or have it with breakfast (we are this morning!). Or as a snack. The outside gets golden and a little crispy…but that inside…it is just gooey and soft and just amazing. I am going to make the hell out of this recipe. Over and over and over and over again!
Even if you aren’t gluten-free…you will seriously love these bite-size breads of cheesy goodness. Bake some up now. Do not try to substitute the tapioca flour for a different flour. It won’t be the same. Bake it. Bake it up now!
Back in November, when I ran the TCS New York City Marathon, my friends and I celebrated my finish by going out to eat…at Marcus Samuelsson’s restaurant, Red Rooster, in Harlem. Amazing meal and amazing experience. When my server came to the table, we explained that we were celebrating my completion of my final marathon of the year and then mentioned my food allergies. He said he would go speak to the chef.
The chef was also a marathon runner and asked if he could create a dish for me. I never turn down this opportunity. I love it when chef’s get a bit creative with the ingredients they have on hand to produce a dish off the cuff. I was more than happy to allow him to do so.
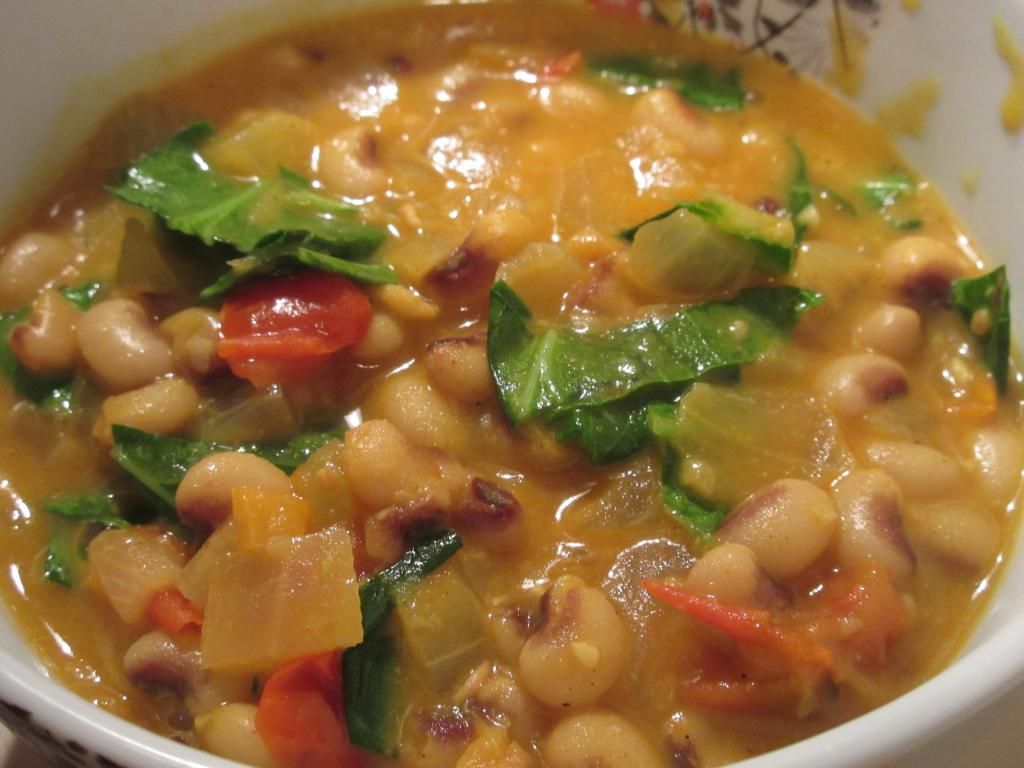
One part of the dish was this amazing curried black-eyed pea dish. I was beyond impressed. So, naturally, I went hunting online for a recipe. And while this is not the exact dish that I had at Marcus Samuelsson’s restaurant, this was one amazing dish. One I was beyond happy to cook up.
I made a few minor tweaks, substituting the cilantro with collard greens. I also used dried ginger instead of fresh. The habanero is important. It adds sweetness and a bit of heat (but it is seeded, so not too much!). Do not leave it out. Also, invest in berbere seasoning. It is my favorite spice on my spice shelf at the moment.
Recipe: Black-Eyed Peas with Coconut Milk and Ethiopian Spices
Black-Eyed Peas with Coconut Milk and Ethiopian Spices
In a large saucepan, cover the peas with water and bring to a boil.
Simmer over moderately low heat until tender, about 40 minutes. Add a generous pinch of salt and let stand for 5 minutes, then drain well.
Meanwhile, in a large saucepan, melt the butter.
Add the onion, ginger, garlic and chile and cook over moderate heat, stirring occasionally, until softened and just starting to brown, about 10 minutes.
Add the berbere and turmeric and cook, stirring, until fragrant, about 2 minutes.
Add the tomatoes and cook, stirring, until softened, about 5 minutes.
Stir in the coconut milk and stock and bring to a boil. Simmer over moderately low heat, stirring occasionally, until the tomatoes break down and the sauce is thickened, about 20 minutes.
Add the peas to the sauce and cook over moderately low heat, stirring, until the peas are lightly coated, about 10 minutes.
Fold in the collards and serve.
~*~*~
This definitely had a bit of bite to it. I almost thought it would be too spicy for my roommate, but she said that she could just handle it. I absolutely loved it. Definitely not the dish I had at Red Rooster, but amazing and delicious all its own. And with the New Year almost here, it is often considered lucky to have black-eyed peas and collard greens on New Year’s Day in the South. So, here is an easy, delicious dish where you can enjoy both in a new and different way.
I have the leftovers in my freezer. Can’t wait to enjoy it again at a later date.
Finally the gluten-free world gifts me with…gluten-free ramen! I have been waiting a long time for this.
I know what you’re thinking…
“Really? Ramen?”
Trust me…when you are faced with never being able to eat something again…finally is what comes to mind when you suddenly are given that something. I never knew how much I missed ramen…until I was suddenly able to have it again.
And for this great pleasure, I once again have to credit the amazing Cuisine Cube! Honestly, this is the best money I have ever spent each month. It is always a surprise as to what is inside the cube that arrives in the mail. And I am like a kid at Christmas when I open it up. Back in October’s box…Cuisine Cube included not just one, but two, packages of Lotus Foods Gluten Free and Reduced Sodium Rice Ramen.
Two flavors: Millet & Brown Rice with Miso Soup as well as Forbidden Rice with Miso Soup.
Color me excited. I was so ready to make some ramen. After all, I studied Japanese all through college and ramen is a way of life in Japan. Now…it was back in mine.
Let’s talk about Lotus Foods for a moment, shall we? The products produced by Lotus Foods are recognized for their exceptional cooking quality, taste, texture, and superb nutritional value. The ancient and new rices that compose their products are grown on family farms in limited quantities, on healthy, chemical-free soils. The rice and rice products that are produced by Lotus Foods are found in specialty gourmet, natural food markets, grocery stores, white tablecloth restaurants throughout the United States, becoming a fast favorite of consumers who are seeking healthier options, as well as chefs and foodies across the country.
I decided to do an even mix when it came to the two packages of Lotus Foods Rice Ramen that I received from Cuisine Cube. I’d prepare one package as is stated on the package itself. The other…I would cook up in a recipe.
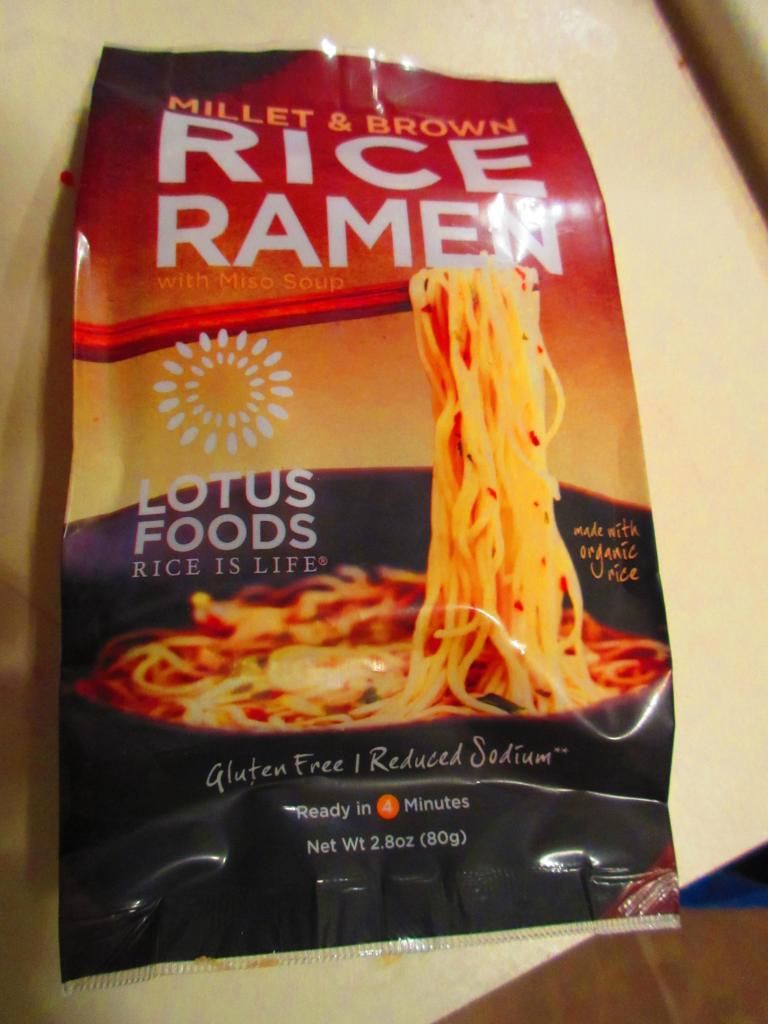
Lotus Foods Millet & Brown Rice Ramen with Miso Soup
The one that I chose to shine on its very own was the Lotus Foods Millet & Brown Rice Ramen. These traditional Japanese-style noodles are created using their specialty rice instead of wheat. Not only are these gluten-free, but both millet and brown rice are some of the most nutritious and easily digestible grains.
Nothing could be easier to cook. Simply bring 2 cups of water to a boil. Add in the ramen and simmer for about 4 minutes. Stir every now and again, breaking the noodles apart. When the noodles are soft, remove the pot from the heat and mix in the contents of the enclosed soup package. You can then add in any additional veggies and protein as you wish. I added some corn…because I happen to have a lot of fresh corn in my freezer leftover from this summer.
So…what emerged was a hearty, but delicious miso soup. One that is not only gluten-free, but also vegan and non-GMO. All of Lotus Foods rice products are made from organic rice…and that includes the rice ramen.
So…how did it taste? Fantastic. I love that this is also reduced sodium, as a lot of ramen on the market is overflowing with unneeded sodium. I was impressed with that stat on the nutritional information immediately. But as for the taste…the millet and brown rice lend a rich and nutty taste to the noodles themselves. And the soup pack provided a ton of flavor to the hot water. I love the mix of spices that brought a slight bit of heat and sweetness to the entire dish. It was simple to cook and fun to eat. Chopsticks not included.
Lotus Foods Millet & Brown Rice Ramen with Miso Soup (prepared with corn)
Let’s look at the ingredients in Lotus Foods Millet & Brown Rice Ramen. The ramen is made from organic brown rice flour, organic millet flour, water, and organic white rice flour. The soup pack contains red miso powder (cultured soybeans and rice, salt) tamari powder, salt, red onion powder, dried wakame seaweed, sugar, garlic powder, ginger powder, dried parsley, and dried chili peppers. It is gluten-free, cholesterol free, organic, high in fiber and protein, non-GMO, low fat, vegan, and truly delicious!
As for the nutritional information…well…the Lotus Foods Millet & Brown Rice Ramen packs contain 2 servings, so a serving isze is 1/2 ramen with the seasoning. This serving will provide you with 140 calories and 1.5 grams of fat. This portion will also give you 460 mg sodium and 1 gram of sugar. See how amazing that sodium level is?! It has 25% less sodium than regular ramen soup. This serving also provides 2 grams of fiber and 5 grams of protein. It may not seem like much when you look at it…but trust me…you will feel full after eating your bowl of this ramen.
In addition to the Millet & Brown Rice variety, Cuisine Cube threw in the Lotus Foods Forbidden Rice Ramen as well.
Lotus Foods Forbidden Rice Ramen with Miso Soup
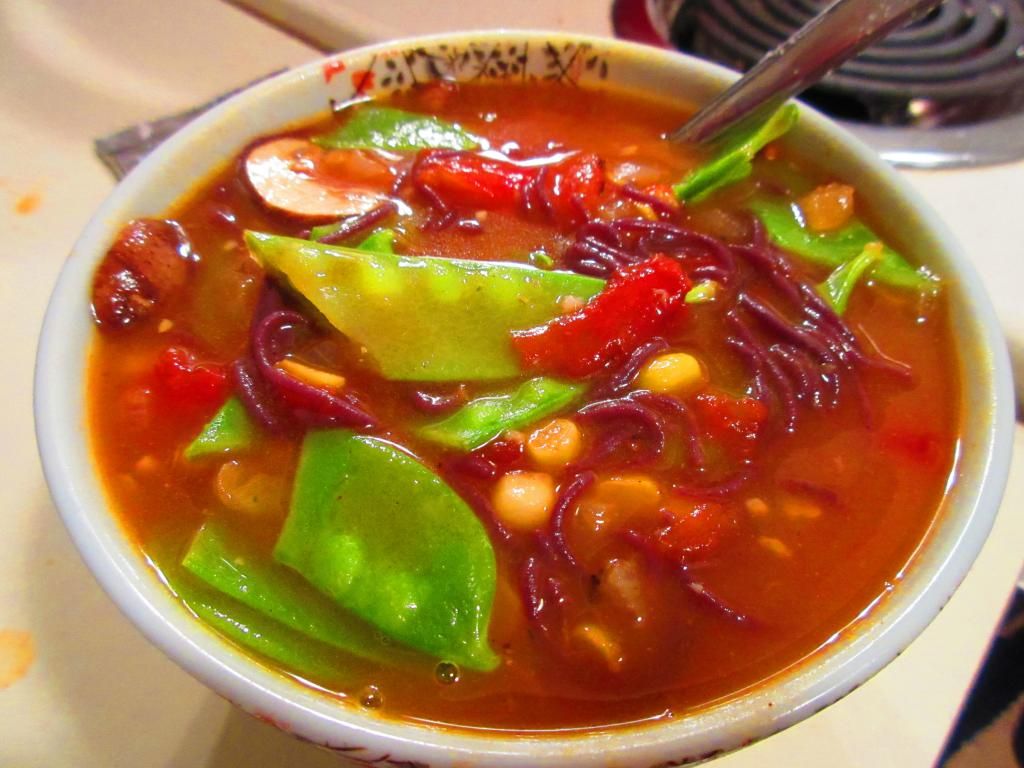
Forbidden Rice is one of the most nutritious ancient grains. It is made from Lotus Foods heirloom black rice instead of wheat. I love the purple color that these noodles take on. It’s really fantastic. Instead of cooking these up according to the package, I incorporated these into a recipe. But…I’m getting ahead of myself. The forbidden rice ramen also has a delicious nutty taste and a great texture to them. In addition, these noodles are a natural source of antioxidants. This package comes with a savory white miso broth to create the noodle soup with. I, instead, incorporated it with the recipe I made. I added a ton of extra vegetables to create a delicious meal. The recipe will follow the ingredients and nutritional information.
Taste was superb. The noodles are amazing and perfect. I wish Cuisine Cube had included more. But, that’s why they have a Stock Up page on their Web site…to stock up. I hope to do just that…because…YUM!
The Lotus Foods Forbidden Rice Ramen noodles are made from organic black rice flour, organic brown rice flour, and organic white rice flour, and water. The soup pack is made from white miso powder (cultured soybeans and rice, salt), salt, white onion powder, tamari powder, soybean powder, mushroom powder, dried parsley, and dried carrots. It is gluten-free, cholesterol free, organic, non-GMO, low fat, and vegan. WOOT!
As far as nutrition goes, Lotus Foods Forbidden Rice Ramen serves 2 people per pack, so a serving size is 1/2 of the package with the seasoning. This serving will provide you with 140 calories and 1.5 grams of fat. In addition, this portion gives you 400 mg sodium and 1 gram of sugar. Yes, the Forbidden Rice Ramen contians 33% less sodium than regular ramen. That’s fantastic. And, finally, you will have less than 1gram of fiber and 3 grams of protein. With less of these final two nutritional factors, load this up with hearty vegeatbles or your protein of choice.
Or…do what I did…
Recipe: Ramen Noodle Soup with Sugar Snap Peas, Mushrooms and Corn
Ramen Noodle Soup with Sugar Snap Peas, Mushrooms, and Corn
1-1/2 cups sugar snap peas, trimmed and halved diagonally
1/2 cup corn
1/2 cup crimini mushrooms, sliced
Salt and freshly ground pepper
Hot sauce, such as Sriracha, for serving
Directions:
In a large, heavy pot, warm the oil over medium-high heat.
Add the shallots and garlic and saute for 3 minutes.
Add the mushrooms and saute for another 3 minutes.
Add the broth and bring to a boil.
Add the ramen noodles and tomatoes and cook, stirring occasionally, for 5 minutes.
Add the sugar snap peas, corn, and the seasoning packet from the Lotus Foods Forbidden Rice Ramen and cook for 2 minutes.
Season with salt and pepper and serve. Add hot sauce, if desired.
~*~*~
Let me tell you, I was amazed with how good this recipe was. And thanks to Lotus Foods Forbidden Rice Ramen Noodles…I was able to create this and cook it up. It had rich depth of flavor. The Forbidden Rice Ramen noodles added a nice hit of bold color. And the soup itself had this great umami flavor. It was rich and loaded with nutrients and fresh vegetables. It was love at first slurp. And there was a ton of slurping going on.
If you haven’t looked into a subscription to Cuisine Cube, I do highly recommend it. In addition, I encourage you to seek out or order Lotus Foods Rice Ramen and give it a try. Especially, if you’re like me, and didn’t even remember what you were missing. It was so delicious. Or, as they say in Japan, “Taihen Oishikattadesu!”
Another product I love, brought to me with great thought and great care from Cuisine Cube. I’m loving this service.
‘Twas the month of December and I was starting to contrive
Brand new recipes for when my Cuisine Cube was due to arrive…
Yes! The December cube is here! It arrived on Monday and I happily dug right in, wondering what sort of goodness lay under the flaps of cardboard and paper. What I was met with was a delightful array of items. It was like Christmas had come early as I sorted through the breakfast, baking, lunch/snack, dessert dinner, and other dessert options. I was ready to dive right in and have a little of everything. But, self-control does still in handy at times.
First of all, let’s discuss Cuisine Cube. I’ve blogged on items I’ve received since signing up in May. Cuisine Cube is a gluten-free delivery service put together by a team of enthusiastic eaters, food professionals, and allergy suffers from New York City. They have scoured the country looking for lesser known brands made by small artisan producers that taste better than the highly processed and subpar items you can find at virtually every grocery store. This was a way to help support small businesses. These products are meticulously selected and then delivered right to your door. So, you get to try a new brand or item you may never have discovered otherwise. It’s a great, efficient, and fantastic service. One that I always look forward to each month.
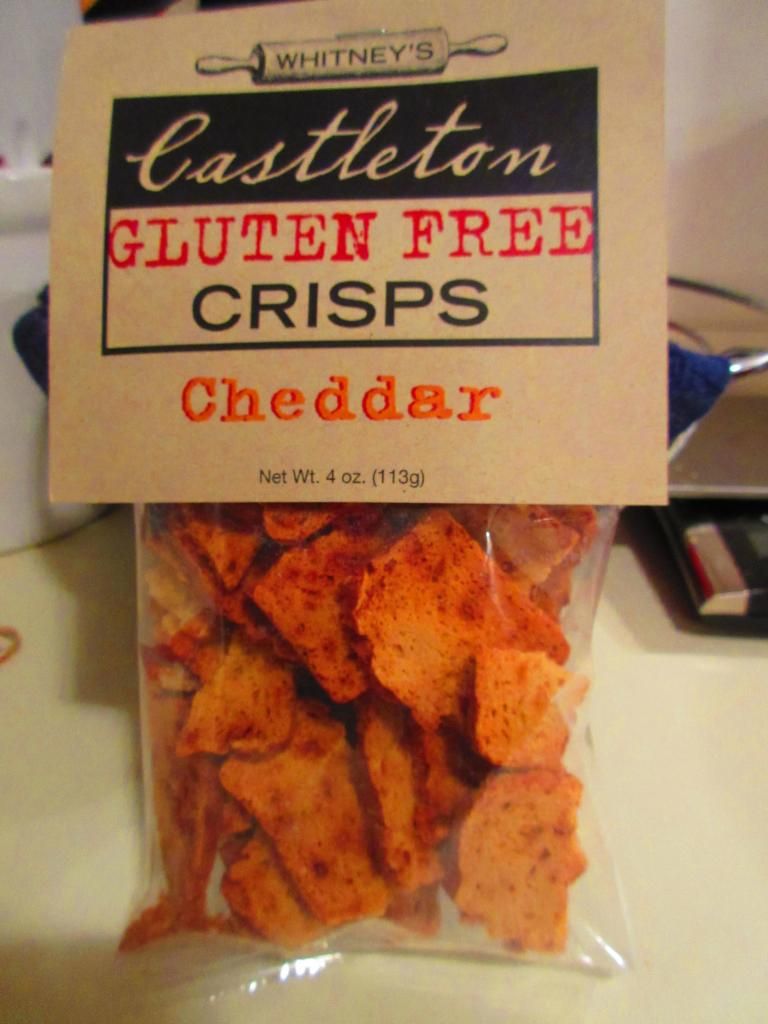
So, this month, I selected Whitney’s Castleton Gluten Free Cheddar Crisps to lead off my month of delicious eating. I thought they looked a lot like the Glutino Bagel Chips that you can find in most grocery stores these days. But, I didn’t just want to eat these straight out of the package…or just throw them on top of a salad. I wanted to do something a little different with them. And I did.
But…not without trying one first. I can’t just re-purpose a product without trying it out as it is first…
There you have it…I opened up the package and popped one of the crisps into my mouth. And I was immediately greeted with the crunchy texture. I love that for these kinds of crisps. They are called crisps for a reason…they should be crispy. But, even more importantly…the flavor! Before I had to go gluten-free…and before I started to really pay attention to what I ate, I was a Cheeze-It connoisseur. And the cheddar flavor in these crisps…reminded me of those. But better. WAY better. I was almost sad to repurpose these for my recipe…because they were amazing on their own.
But my creative chef mind was calling…
So…the rest of these amazing and delicious crisps went into my food processor and got pulverized.
Now, before I share this recipe with you, let’s talk about the Whitney’s Castleton Gluten Free Cheddar Crisps. As far as ingredients go, these are made from sorghum flour, tapioca flour, brown rice flour, white rice flour, xanthan gum, Vermont Farmstead’s Farmstead Cheddar, milk, white vinegar, brown sugar, baking soda, kosher salt, dry mustard and cayenne pepper. These are produced in a designated gluten-free facility.
Nutritionally speaking, a serving is 1 ounce of these crisps…and the package holds 4 servings. One serving will provide you with 120 calories and 3 grams of fat. You will be consuming 10 mg cholesterol, 230 mg sodium, and 2 grams of sugar. In addition, these have 1 gram of fiber and 3 grams of protein.
So, what came of these crisps?
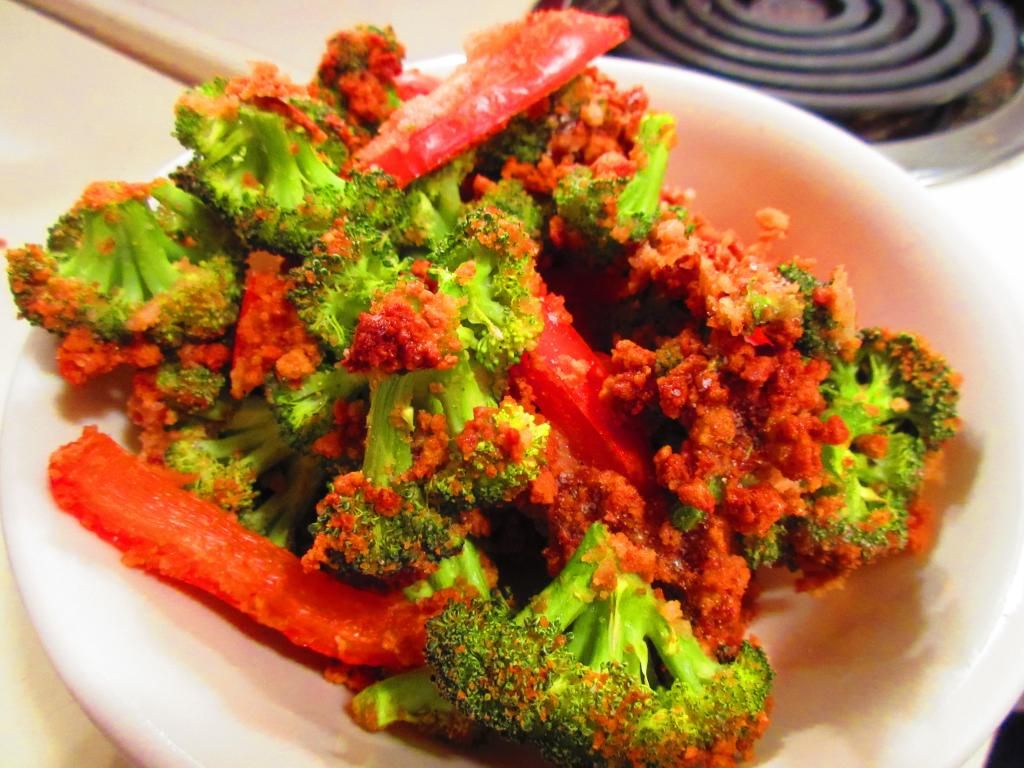
Well, back before I became a vegetarian, and definitely back before I was diagnosed as a Celiac…one of my favorite things to order at Red Lobster was the Fried Calamari appetizer. My roommate would eat the calamari…I wanted the fried broccoli and red peppers that were served with it. Honestly, one of my favorite foods (and definitely not good for you by any means…but it was so good)…which I hadn’t even thought about in years…
But I happened to have a red bell pepper and some broccoli from my CSA bin in my fridge…and now…a breading. I do not fry anything. I just don’t. So, I set out to recreate the infamous Red Lobster vegetables…by baking them. And thanks to Whitney’s Castleton Gluten Free Cheddar Crisps…I now had the perfect gluten-free breading.
Recipe: Crispy Broccoli and Red Peppers
Crispy Broccoli and Red Peppers (made with Whitney’s Castleton Gluten Free Cheddar Crisps)
4 ounces gluten-free breading (I used a package of Whitney’s Castleton Gluten Free Cheddar Crisps)
Directions:
Preheat the oven to 350°F.
In a large plastic bag, place in the broccoli florets and red pepper slices. Add the egg white(s). Close the bag and shake to coat. Add the gluten-free breading. Reseal the bag and shake again. Spread the vegetables onto a baking sheet and bake for 15-20 minutes, until crispy.
~*~*~
Guess what? This was so close to how I remember the original tasting. I love the flavors that baking something in the oven can really coax out of things like vegetables. And the Whitney’s Castleton Gluten Free Cheddar Crisps made the perfect coating for these vegetables. It gave it a nice cheese flavor on top of turning a beautiful golden color in the oven and really making the apartment smell fantastic. I was smelling a great cheddar aroma after these were in the oven for only 5 minutes. Way beyond impressed. I sort of want these in my pantry for always.
So, if you are curious about the Whitney’s Castleton Gluten Free Cheddar Crisps, head over to their site and read more about their products and order some for yourself. Or order from Cuisine Cube’s stock up site!
And if you want to give Cuisine Cube a try, head over to their Web site and check out their subscription options…joining for a monthly, three month, or six month subscription. This Cube (box of goodies) will arrive at your door within the first week of each month and you will have at least 5 full-size gluten-free items inside. I encourage you to give it a try…
…because I never would have heard of these crisps without the aid of Cuisine Cube.
And yeah…they were really fantastic…on their own and in my dish.
It’s my favorite time of year! I love the Christmas holidays. Why? Because I get to make people some of my baked goodies. And I absolutely love doing this and then handing them over. I do this for the people at my bank…the gas station…my neighbors…my adoptive family…and my apartment office. I do it for friends and family. I just love, love, love, love to create something in my kitchen and then bring a little joy and sweetness to the people in my life.
Well, as my roommate and I have made friends with our new downstairs neighbors…we wanted to make some Christmas cookies for them. After asking if their young son had any food allergies (he doesn’t)…I went ahead with my plan to make these adorable Melted Snowman Cookies. I was just crossing my fingers the entire time that they would work out. They did. They require a little work when it comes to the faces…but totally worth it.
Recipe: Gluten Free Melted Snowman Cookies
Gluten Free Melting Snowman Cookies
Servings: 20-28 cookies
Time: Prep 50 minutes; Bake 9-11 minutes
Ingredients:
1/2 cup shortening
1/2 cup peanut butter
1/2 cup granulated sugar
1/2 cup packed brown sugar
1 teaspoon baking powder
1/4 teaspoon salt
1/8 teaspoon baking soda
1 egg
3 tablespoons milk
1/2 teaspoon vanilla
1/4 cup unsweetened cocoa powder
1-1/2 cups gluten-free all-purpose flour (I used Cup 4 Cup)
Mini M&Ms for the face (which I separated ahead of time while the cookies cooled so they were ready to go!)1/4 teaspoon salt1 egg
Directions:
Preheat oven to 350°F.
In a large mixing bowl, beat shortening and peanut butter with an electric mixer on medium to high speed for 30 seconds. Beat in the granulated sugar, brown sugar, baking powder, salt, and baking soda until combined, scraping sides of bowl occasionally. Beat in egg, milk, and vanilla until combined. Beat in the cocoa powder and as much of the flour as you can with the mixer. Stir in any remaining flour.
Shape dough into twenty 1-3/4-inch balls. Place balls 2 inches apart on ungreased cookie sheets.Bake for 9 to 11 minutes or until edges are just firm. Cool on cookie sheet for 2 minutes. Transfer to a wire rack and let cool.
Line a baking sheet with waxed paper. Place cooled cookies on prepared baking sheet. In a medium microwave-safe bowl microwave candy coating on 50% power for 2-1/2 to 3 minutes or until melted and smooth, stirring every 30 seconds. Spoon melted coating over each cookie to cover cookie and resemble melted snow. While coating is still tacky, add a peanut butter cup for a top hat and decorate with mini M&Ms or other candies to resemble snowman faces.
Let stand until set.
~*~*~
These cookies are not only adorable but they are amazing too! Lots of flavor. And they are so easy to make, but it looks like you spent hours in the kitchen making them. The difficult part is letting that candy coating cool so you can package them up. HA! If you are looking for a cute Christmas cookie idea…I highly recommend these!
There are a lot of Thanksgiving foods that, as a gluten-free vegetarian, I no longer indulge in at the dinner table. That being said, my Thanksgiving meal usually consists of a scoop of vegetables, some plain potatoes, and usually a fruit of some sort…or whatever I brought with me for the occasion.
This year for my contribution to the Thanksgiving meal, I brought desserts. YAY! I also, however, brought gluten-free stuffing. From my local gluten-free bakery. I actually pre-ordered it prior to receiving my November 2014 Cuisine Cube. But…this just gave me the opportunity to have stuffing…all over again.
And this is a good thing. Because I absolutely LOVE stuffing! I never ate it much as a kid, because, prior to going vegetarian, my family’s go-to Thanksgiving meal was shrimp creole, not turkey, but sometimes, on Christmas, my mom would cook up a turkey and I would request stuffing. And…it was usually Stove Top. But, to me, it was amazing!
So, stuffing was one of my guilty pleasures that I rarely indulged in, but would devour every time I had the chance.
When my Cuisine Cube happened to have a box of a gluten-free stuffing in it, I might…might…have done a happy dance of joy with a few bounces and jumps and squeals of happiness. This isn’t uncommon each month when I open up my Cuisine Cube…but we are talking GLUTEN FREE STUFFING!! Did I make that clear yet?
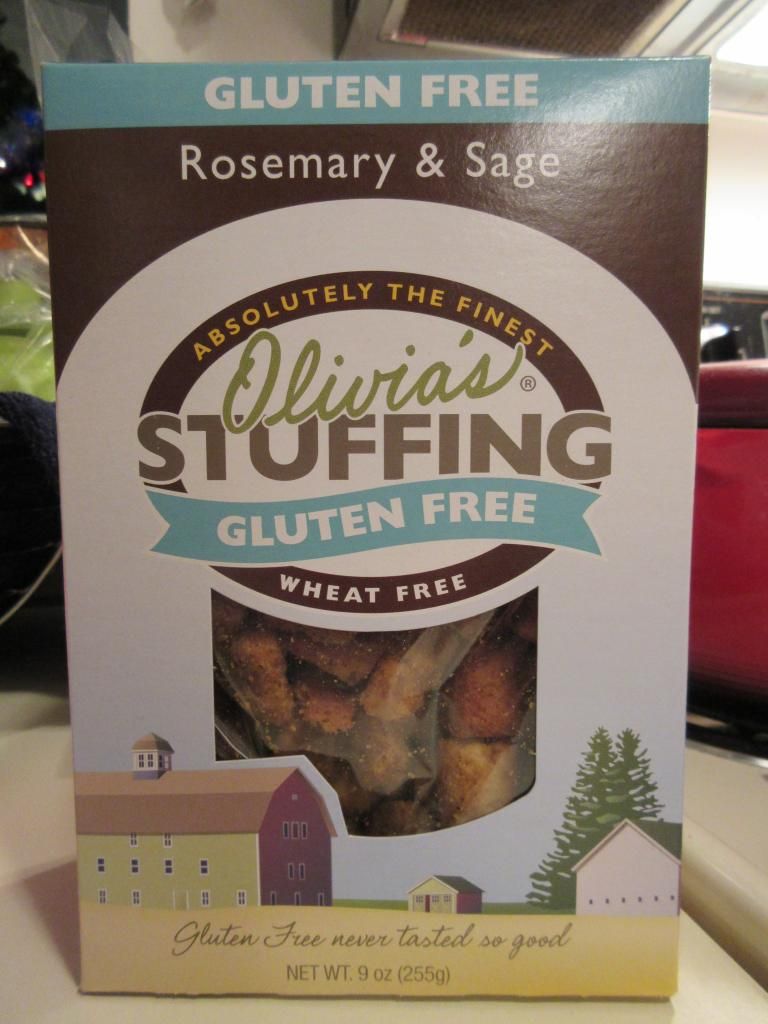
Olivia’s Gluten Free Rosemary & Sage Stuffing
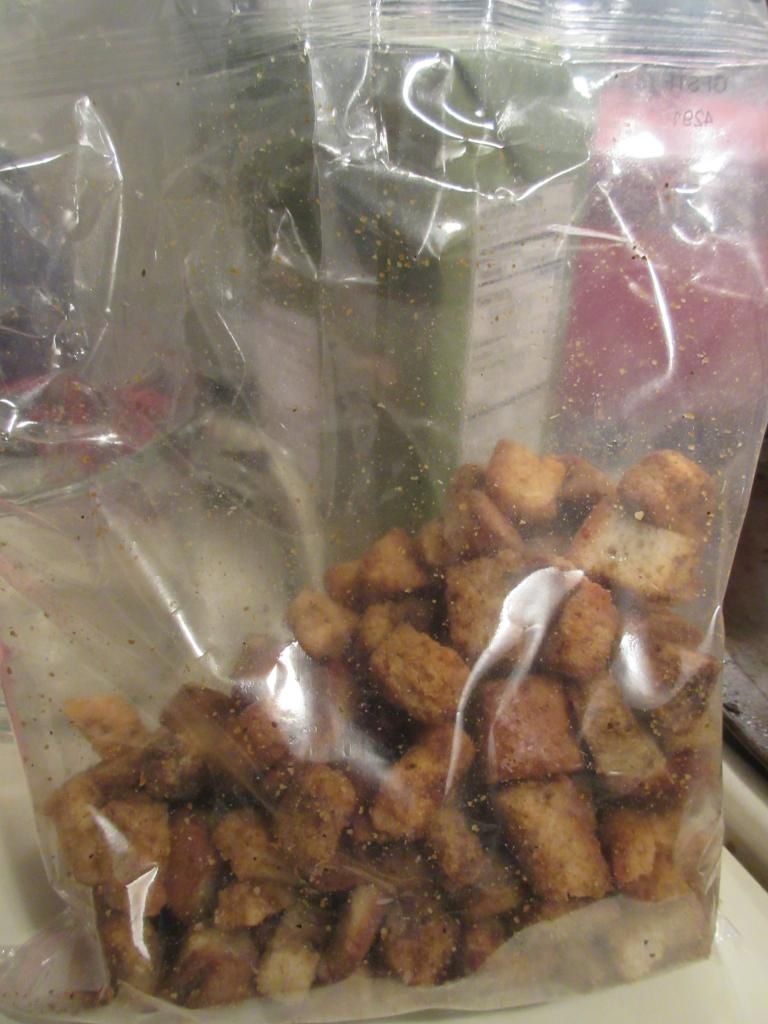
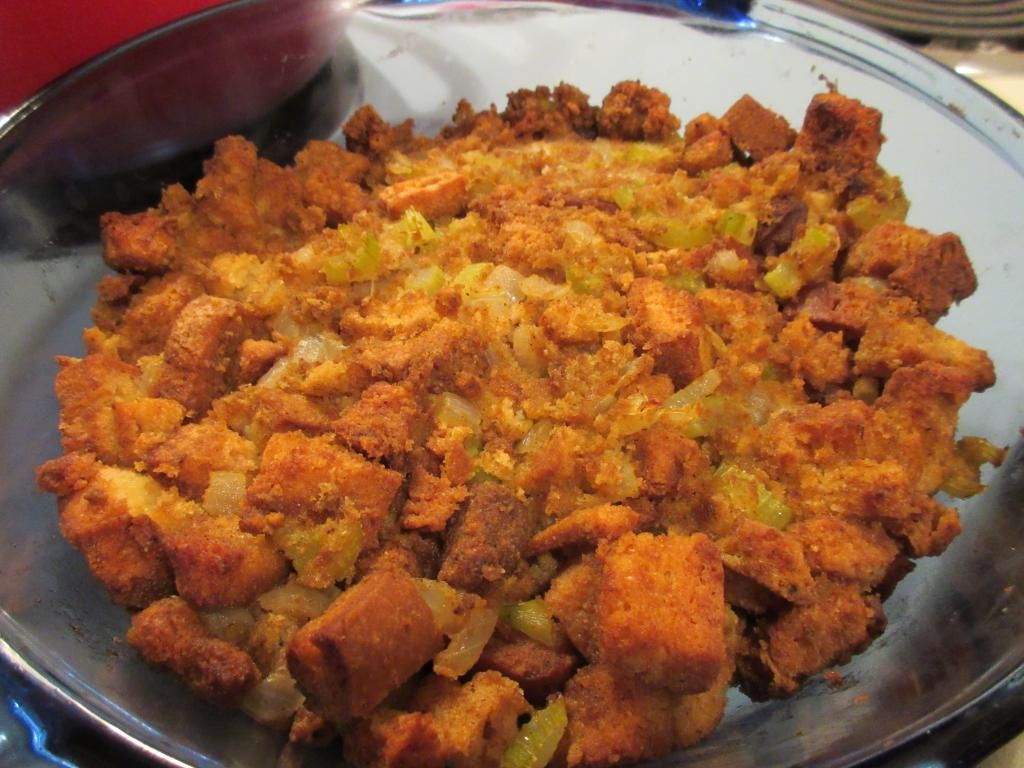
So, since I had my local allergen-free bakery make me some gluten-free stuffing for the big meal on Thursday, I got to have some fun and get a little creative with my box of Olivia’s Gluten Free Rosemary & Sage Stuffing. But, this still meant that I needed to cook it up properly. And this stuffing is really easy to make! I cut up some onion and celery per the instructions on the box, cooked it in my vegan butter, and then added some vegetable broth. I transfered the liquid into a large mixing bowl and added in the Olivia’s Gluten Free Rosemary & Sage Stuffing mix. I gave it a stir and let it sit for about 8-10 minutes, until the cubes were moist and the liquid was completely absorbed. After that, I put the mix into a baking dish and baked it for 30-40 minutes per the instructions on the box until it was beautifully golden and ready to eat.
I won’t lie…I had a small serving of it then. I had to. The smell as it was baking was phenomenal. Really. I was practically salivating the entire half hour it was cooking. So, yeah…I wanted to try it so I could tell you, my readers, how it was before I had some fun with it.
It was amazing. No joke. Freakin’ fantastic. The chunks of bread got to that perfect golden crispness, while the vegetables and the absorbed liquid kept it moist and delicious. The level of flavors was spot on. Definitely perfect on its own. I didn’t even need to add any additional salt and pepper. Olivia’s Gluten Free Rosemary & Sage Stuffing was better than any stuffing I have ever eaten in my life. Way better. That goes for the boxed stuff as well as the stuff made from scratch. This was an total win. I wish I had made it up for dinner at my roommate’s family’s home. Perhaps next year. They wouldn’t even begin to guess that it was gluten-free…except for I’d be eating it, so they would know!
I am so in love with this stuffing. My only complaint was there was only one box of it. Good thing I can order more through Cuisine Cube and Olivia’s Gluten Free Web site. Trust me…this will be happening!
Let’s talk about the ingredients in Olivia’s Gluten Free Rosemary & Sage Stuffing. This stuffing is made from gluten-free bread, certified non-GMO canola oil, granulated onion and garlic, rosemary, sage, thyme, celery seed, sea salt and pepper. It is cholesterol free, gluten-free and made in a dedicated gluten free facility.
As far as nutritional information goes, Olivia’s Gluten Free Rosemary & Sage Stuffing makes about 9 servings per container. If you use it traditionally. A serving size is 3/4 cup prepared. This serving will provide you with 110 calories and 4 grams of fat. You will also be taking in 200 mg sodium and 1 gram of sugar. In addition, you will be consuming only 1 gram of fiber and 1 gram of protein. On its own, this stuffing won’t make you feel stuffed, but you will love every single bite of it. Trust me.
But…as I mentioned earlier…I had some fun with this stuffing.
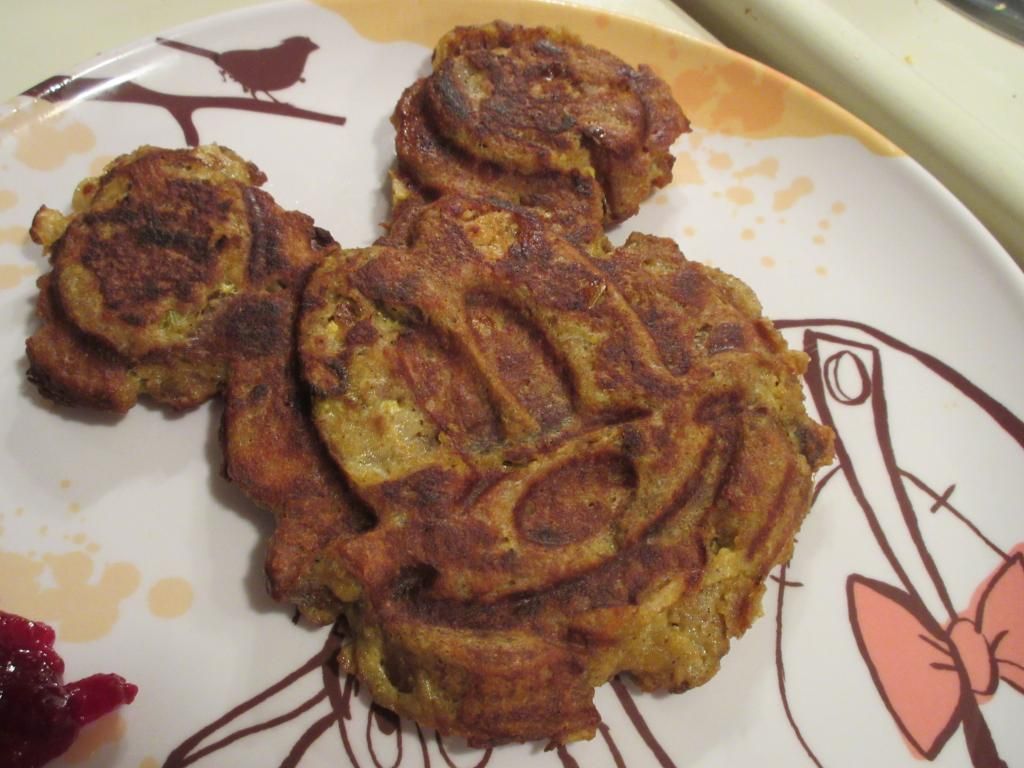
Why eat it straight up when you can do something a little outside the box, right? Well, on Black Friday, I picked up a new waffle maker (shaped like Mickey Mouse!) and I really wanted to test it out. I’m like a child…I get something new and I want to try it out right away. So, on Saturday night, I took the stuffing that I cooked up out of the fridge and put it into a big mixing bowl. It was time to use the “leftovers” in a new way. Prepare yourself…
Recipe: Gluten Free Leftover Stuffing Waffles
Gluten Free Leftover Stuffing Waffle (shaped like Mickey Mouse)
1/4 cup vegetable broth (or chicken broth if you’re not vegetarian)
Directions:
Preheat the waffle maker and grease it with cooking spray.
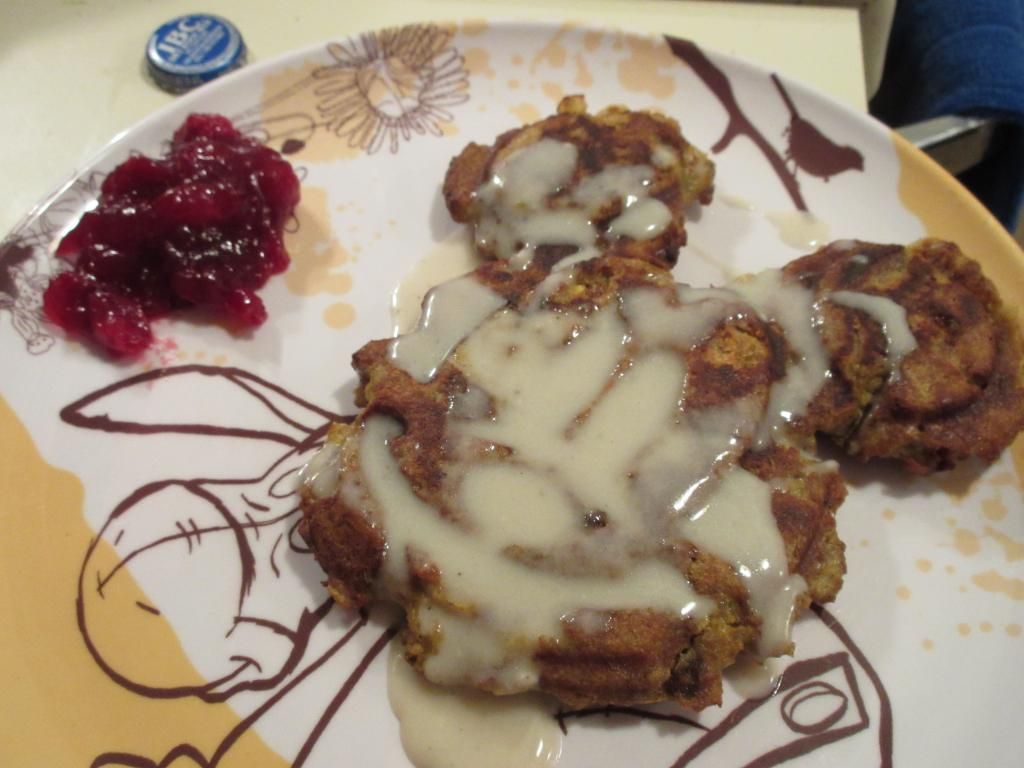
Gluten Free Leftover Stuffing Waffle with Vegan Homemade Vegan White Gravy and Cranberry Chutney
In a large bowl, stir together the leftover stuffing and eggs. Add 1/4 cup of vegetable broth and mix until well combined. Continue adding broth as needed until the mixture is well-moistened.
Scoop the stuffing mixture into the prepared waffle maker, spreading it evenly. (The stuffing will not spread or expand like regular waffle batter as it bakes, so arrange it in an even, thin layer). Close the lid and let the waffle bake until golden brown and the egg is cooked throughout. Stuffing waffles take longer to cook than regular waffles, as the egg must be completely cooked throughout. Don’t be afraid to let the waffle bake until it’s golden brown and crispy!
Transfer the waffle to a serving plate then repeat the filling and baking process with the remaining stuffing.
Serve.
~*~*~
I know what you’re wondering…you are pondering what I served these waffles with. Simple. I prepared a gluten-free white gravy and took some fresh cranberries from my CSA bin and made a cranberry chutney. I poured a bit of the warm gravy over the waffle with a side of the cranberry relish and…BAM…dinner was served.
It tasted amazing. Mine, being in a Mickey Mouse waffle maker, was shaped like Mickey Mouse…but it came to this perfect golden crispiness on the outside. It paired great with gravy, making it a savory dinner. And the cranberry chutney tied it all together. A great way to use up some of those holiday leftovers for sure!
TRUST ME!
Thanks to Cuisine Cube for including a box of Oliva’s amazing Gluten-Free Rosemary & Sage Stuffing in my box for Thanksgiving. I am forever thankful!
I’m doing my best to make do without my CSA bin for the past month. And that means I’ve been doing a lot with some products and foods that I have in my fridge and freezer. My freezer happened to have an open box of Sophie’s Kitchen Gluten Free Vegan Breaded Scallops and this amazing corn that I cut off the cob and froze for later use. My fruit bowl is holding one of my favorite things in life…avocados. And yesterday, I purchased an onion for use in my previous recipe.
So, when I spotted a recipe on Health.com for a meal that involved fresh corn, avocado, scallions and scallops, I knew I could easily adapt the recipe to use ingredients I had on hand, and keep it vegan. Of course, if you eat seafood, feel free to use regular scallops.
With the seasoning and the fresh vegetables, this was one fantastic meal.
Recipe: Fresh Corn with Avocado, Onion, and Spiced Vegan Scallops
Fresh Corn with Avocado, Onion, and Vegan Spiced Scallops
Servings: 2
Time: Prep 10 minutes; Cook 5 minutes
Ingredients:
1 medium diced peeled avocado
1 tablespoon fresh lime juice
1-1/4 pounds sea scallops (I used Sophie’s Kitchen Gluten Free and Vegan Breaded Scallops)
1/4 teaspoon salt
1/4 teaspoon pepper
1 teaspoon ground cumin, divided
2 teaspoons olive oil
2 cups fresh or frozen corn kernels, thawed
1/2 cup chopped yellow onion
1/4 cup dry white wine (I used 2 tablespoons white wine vinegar and 1 tablespoon lemon juice)
Directions:
In a small bowl, toss avocado and lime juice.
Sprinkle scallops with salt, pepper, and 1/2 teaspoon cumin. Heat oil in a large nonstick skillet over medium-high heat. Add scallops; cook, turning once, until golden and cooked through (about 3 minutes).
Transfer scallops to a plate.
Add corn, scallion, white wine, and remaining cumin to skillet; cook corn until tender, stirring constantly (about 2 minutes).
Spoon corn mixture onto 4 serving plates, add avocado and top each with half of the scallops.
~*~*~
This was one fantastic meal. I loved the healthy fat that came into the dish with the avocado. The seasonal corn was an amazing ingredient on its own, but when seasoned and cooked with all the other ingredients, it became elevated. The scallops, simply seasoned with salt, pepper, and cumin made the perfect protein and topper for this dish.
Give it a try! Vegan, vegetarian, or pescatarian…you’ll really enjoy this meal. I’ll definitely be making this again!
On Friday, I was quickly scrolling through the blogs I follow on WordPress and came across a blog from Clean Eating Veggie Girl, who posted this amazing recipe for a quinoa bowl, inspired by her friend Molly. I had virtually everything necessary to make this meal, save for an onion and some frozen stir-fry vegetables, which I could easily pick up at the store over the weekend and prepare this for dinner Sunday evening.
I actually spent most of my day helping my roomie’s sister paint some of her house…so grocery shopping actually didn’t get completed until much later, and it was past 6 p.m. by the time I back to my apartment to cook. Thankfully, this is a super-easy and super-fast meal to create.
1 tablespoon fresh ginger, minced (I used 1/8 teaspoon ground ginger)
1/4 medium yellow onion, chopped
16 oz bag frozen stir-fry vegetables
1/8 cup Bragg’s liquid aminos (I used San-J Gluten Free Low Sodium Tamari)
1/3 cup sweet chili sauce
Sriracha sauce, optional
2 to 3 large eggs, optional*
*Recipe is vegan without the eggs
Directions:
If you do not already have the quinoa cooked, prepare according to package directions.
Line a large skillet with a thin layer of water. Heat over medium-high heat until very hot. Once hot, lower the heat to medium and add garlic, ginger, and onions to the pan. Cook for approximately 5 minutes, adding additional water as necessary.
Add frozen stir-fry vegetables to the skillet. Cover with a lid and cook for approximately 5 minutes.
Once the vegetables are cooked through, turn the heat to low and stir in cooked quinoa.
Add liquid aminos/tamari sauce and sweet chili sauce to the skillet. Stir until well-combined. Cook an additional 3 to 5 minutes, or until your vegetable and quinoa mixture is hot.
If you are adding an egg to the bowls, cook each one to your liking during the last 3 to 5 minutes of cooking time. I poached mine, but fried or scrambled would work as well.
Scoop the vegetable and quinoa mixture into bowls and, if desired, drizzle with sriracha sauce and top with an egg.
~*~*~
This quinoa bowl is fantastic. It’s a little bit sweet and a little bit spicy. And if you love eggs, the runny yolk from a poached egg just really ties the entire meal together. I was beyond impressed. It was nice to create a healthy, protein-rich meal for dinner after such a busy day. I also appreciated how quickly the entire meal came together. Fantastic.
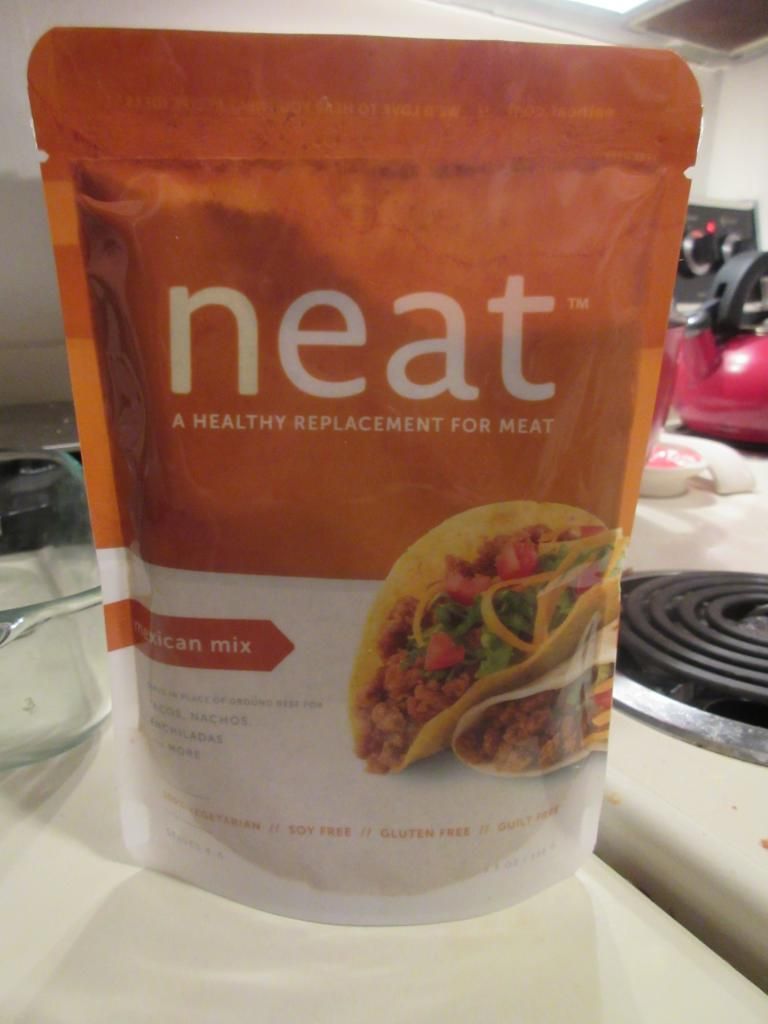
Product: Neat – A Healthy Replacement For Meat Mexican Mix – $4.99+
For the last few issues, I’ve noticed that my Delight Gluten Free magazine has had ads for this vegan meat replacement called Neat. I was beyond intrigued and immediately went on the hunt in my local natural food stores. Sadly, but not surprisingly, no one in my area carried this product. At least not yet. I said I’d get online and see if I could order it, but, naturally, I forgot to do that. Story of my life.
I can’t help it. I have too much to think sometimes and these mental notes and reminders get lost in the shuffle.
But then…it was as if they felt the need to answer my unspoken prayer…my favorite monthly delivery arrived. Cuisine Cube’s October cube arrived in the mail and I immediately tore into it, wondering what sort of surprises awaited inside. And if you haven’t looked into ordering a Cuisine Cube yet…get over to their Web site and try it out. Seriously, this is one of the best investments I have ever made. Receiving gluten-free items from smaller and lesser known companies each month has become a treat I look forward to every month. So…if you have made a mental note to check them out, and it’s gotten lost in the shuffle…click on the link above and check it out. For real.
Now back to your regularly scheduled blog…
So, October’s Cuisine Cube arrived and one of the items inside was…you guessed it…because I’m blogging about it…Neat – A Replacement For Meat! The version included in the box was the Mexican Mix. Neat, for the record, also has an Original Mix (for burgers/chili), an Italian Mix (for “meatballs” and lasagna), and also a Breakfast Mix (for quiches and breakfast sandwiches). Let me tell you…I did this happy little dance of joy and might have squeaked a bit when I pulled that pouch out of the cube. Seriously…after reading about it and looking for it…I finally had it in my clutches!
As a gluten-free vegetarian, vegan/vegetarian meat substitutes are hard to come by. Most vegan/vegetarian meat substiutes have some sort of vital wheat gluten in them. And a lot of companies refuse to go the gluten-free route because it would “jeopardize the integrity of the product.” BOOOO!! So, up until recently, I’d just season up some tofu and work with that. But…it’s not the same.
So, what exactly is Neat? Neat is a meat replacement that is derived from nuts and other non-GMO natural ingredients. It is a product that was created by a mother of two children who decided that they were going to become vegetarians. At first she would puree beans into sauces to help her girls get the protein they wanted, but after awhile, everyone got tired of it. And that was when she got into the kitchen, experimented, and created what is now marketed at Neat.
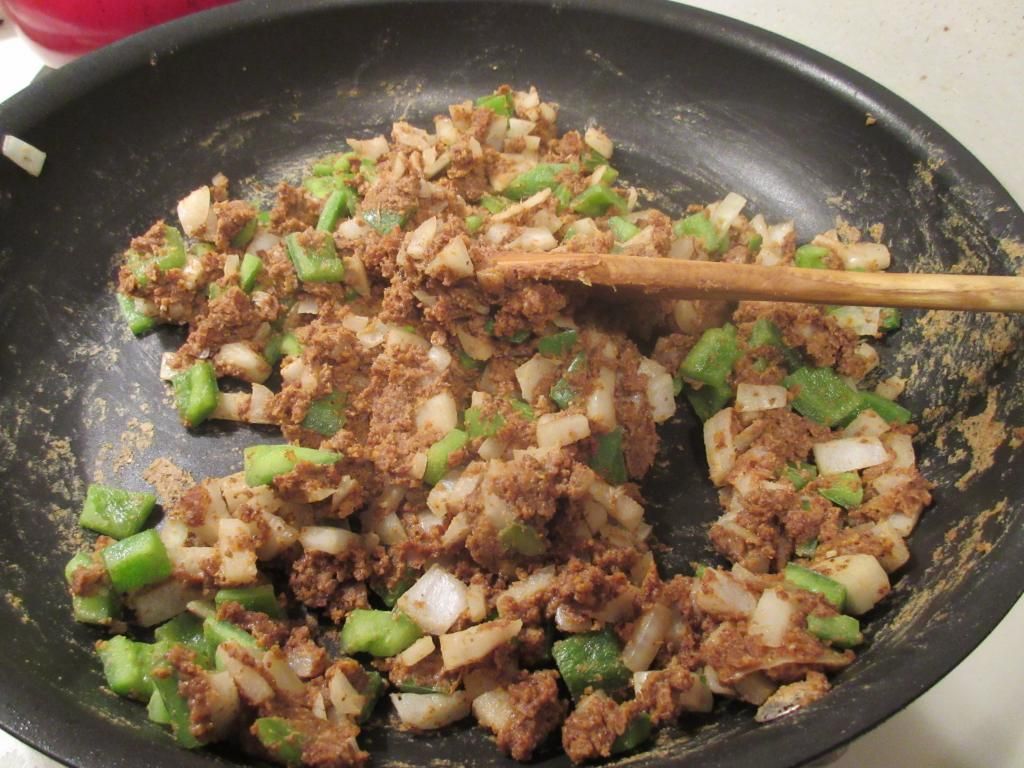
Neat – A Healthy Replacement For Meat Mexican Mix (in a skillet with chopped onion and chopped green pepper)
Neat comes in this shelf-stable pouch in a powdered form. All you do to prepare it is pour the pouch into a bowl, add two eggs (or a vegan egg replacer), plus two tablespoons of water. Stir all the ingredients together and throw it into a skillet over medium heat, just as you would ground beef, for about seven minutes. To make it into crumbles, as it cooks, stir and chop it up, and what you end up with is this perfect texture of meat crumbles that is not just completely vegan/vegetarian…but also gluten-free!
Now…gluten-free and vegetarian tacos are sort of something I’m famous for. I have gotten really creative with how to prepare tacos (Tour De Taco happens often at my apartment) to make them not just gluten-free, but also meat free. And a meat replacement hasn’t been used in a long time. So, while I had a pouch of the Mexican Mix from Neat, I decided to bring back an old favorite of mine as a kid, back when I ate meat and would basically beg my mom to make this for dinner.
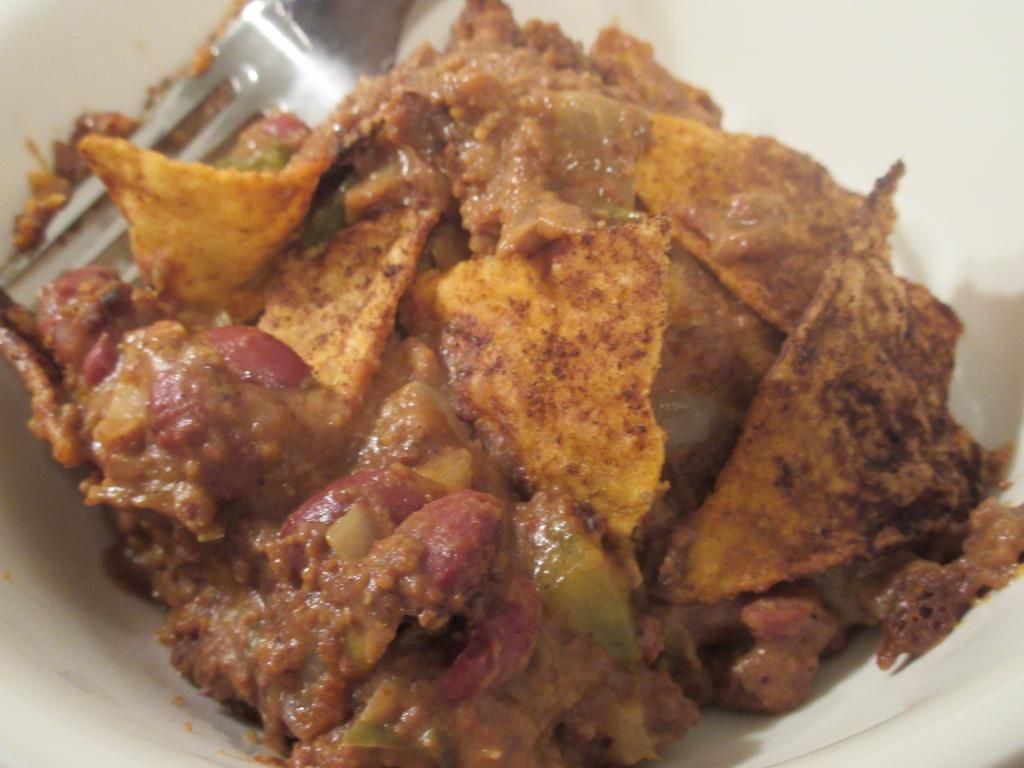
What I did was cook up my mom’s famous Enchilada Hotdish. Normally this is made with ground beef, but this meant I could use the Neat Mexican Mix for a different purpose. Tacos…been there, done that. Enchilada Hotdish…haven’t had that in AGES!! So, that’s what I did. I picked up a gluten-free and vegetarian can of chili and I got a roll of Teese Vegan Nacho Cheese…and the rest was vegetables and seasonings I already had at home. Perfect.
So, tonight…I pulled out the Cuisine Cube treat of Neat – A Healthy Replacement For Meat Mexican Mix and set out to prepare it. I chopped up the vegetables that were needed and then retrieved the can of chili and the vegan nacho cheese (which I substituted for the cheddar cheese soup) and had them ready with my seasoning. First things first…preparing Neat.
Super easy. I poured the powdered contents of the package into a medium mixing bowl. Then, per the instructions, I added two eggs and the water and mixed it up. It created this…sludge of sorts…but I trusted it and went with it. I had a non-stick skillet on the stove and put the Neat into it to start browning. The vegetables were also added so they could start to get soft before I added the rest of the ingredients. With everything in the pan, and heated through, I began to assemble the hotdish itself. This meant putting the “meat” mixture into the casserole dish, then layering it with tortilla chips, then repeating it. Into the oven it went to bake and about 30 minutes later…viola!! I was enjoying a version of my mom’s Enchilada Hotdish.
So…how was it?
It is not an exaggeration when I say I want to marry Neat. For real. WOW! I was SO impressed, not only with the flavor, but how great the texture it. Here is a company that is getting ti right. Going into the pan to cook, it didn’t look appetizing or promising, but it all came together. And it was the perfect meat substitute for the beef that would have been normally used in this recipe. I am thrilled with this product and think I’ll be placing an order to try ALL the Neat products. And, I also might straight-out make tacos next time. But, I figured I should really put this product to the test. Trust the hype…it’s amazing.
Also…tested it out straight from the pan on the tortilla chips and…oh…yum. Makes a great dip too! HA!
Gluten-Free and Vegetarian Enchilada Hotdish (made with Neat – A Healthy Replacement For Meat Mexican Mix)
Let’s first delve into the nitty-gritty ingredients and nutrition of Neat – A Healthy Replacement For Meat Mexican Mix. The Mexican Mix version of Neat is made from pecans, garbanzo beans, organic whole grain gluten free cornmeal, sea salt, and spices. So, where this is meat-free and dairy-free, and also gluten-free…it is NOT nut-free. So, if you have a nut allergy…this product is not for you.
As for nutrition, a serving of Neat Mexican Mix is 40 grams and each pouch contains 4 servings. This serving will give you 21o calories and 15 grams of fat (healthy fat as it is coming from beans and nuts). A serving will provide you with 333 mg sodium and 2 grams of sugar. And, trust me, the 5 grams of fiber and 5 grams of protein will leave you feeling full…whether you’re making a hotdish or having taco night.
But…there is more!
I’ve decided, since it worked out so well, that I would share the recipe I used this product in. This is a family recipe of my mom’s and it is SO delicious!! If you are not a vegetarian, you can use 1 pound of lean ground beef…and if you can handle dairy, please use your cheddar cheese soup (as long as it is gluten-free!)…but this is how I prepared the dish tonight…with great success!!
1 package Neat – A Healthy Replacement For Meat Mexican Mix
2 organic cage-free eggs
2 tablespoons water
1 cup chopped onion
1 cup chopped green pepper
1 tablespoon chili powder
1 package Teese Vegan Nacho Cheese Sauce
1 can vegetarian chili (I used Amy’s Organic Light in Sodium Medium Chili)
1/2 can water
Directions:
Preheat the oven to 350° F.
Pour the Neat – A Healthy Replacement For Meat Mexican Mix into a medium bowl. Add two eggs (or egg replacer if vegan) and 2 tablespoons of water. Mix well.
In a non-stick skillet over medium heat, brown the Next Mexican Mix, onion, and green peppers. Cook until vegetables begin to soften and the Neat can be chopped into a meat texture. Add the chili powder, vegan cheese sauce, chili and water to the mix and mix well. Allow it to heat through for a few minutes to marry the flavors together.
In a 9×9 oven-proof dish, place in layers, alternating the meat mixture with 1 package of tortilla or nacho chips.
Bake for 30 minutes.
~*~*~
Thanks to Cuisine Cube and Neat – A Healthy Replacement For Meat, I was not only able to recreate a version of an old family favorite, but it tasted so much like how I remembered it tasting when I was growing up. I couldn’t have been happier tonight as I sat and devoured my dinner. I can’t wait to get my hands on the other Neat products. Talk about having a desired product land in your lap!!
Seriously…seek out this product!! I highly recommend it! The product is so versatile…beyond just a protein base for tacos. Try out the recipe above or use it in one of your own family favorites. You will not be disappointed. I promise!
Twas the day before I left for vacation and I still had a lot…and I mean a lot of fresh produce left from my bin. Sometimes I think I should cancel it the week I go out of town, but never really want to. After all, I love my local and organic fresh produce being delivered to me and I hate these weeks I get back from a trip and have nothing in my fridge resembling a fresh fruit or vegetable. I had to do something with the plethora of produce that remained…and I wasn’t exactly sure what I could manage.
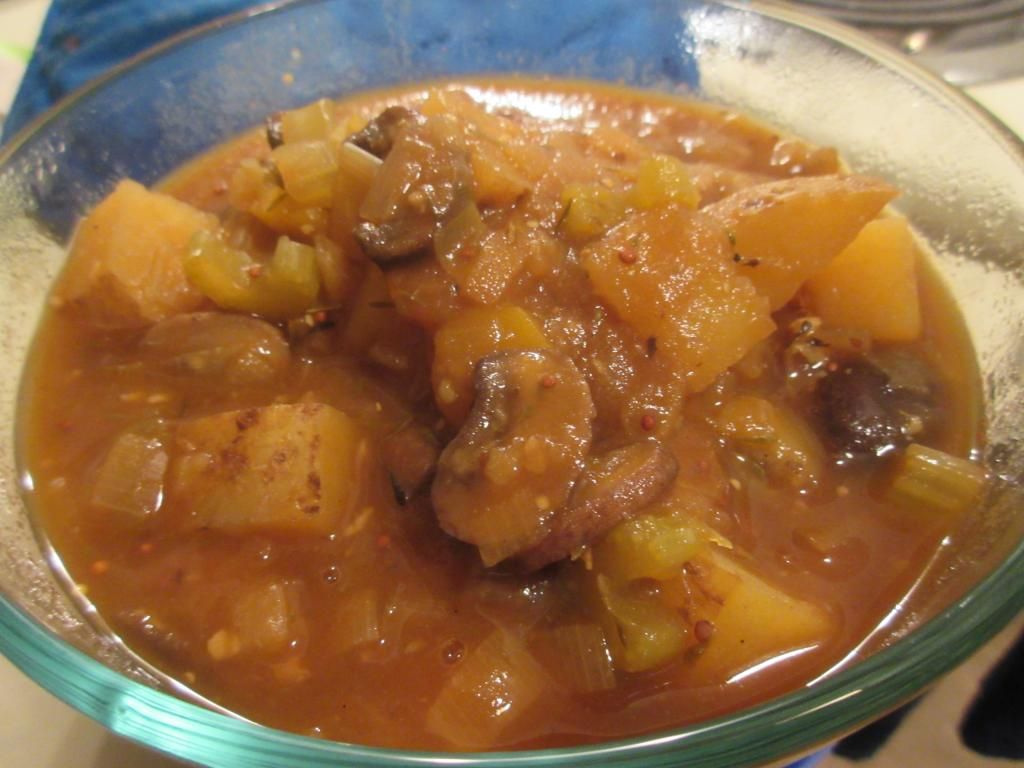
All hail the Happy Herbivore. In the cookbook, Happy Herbivore Light & Lean, which, for those of you keeping track, is the same book I got the Garden Vegetable Chili recipe from, I found an amazing recipe for Irish Stew. Yes…vegetarian Irish Stew. Her recipe was not gluten-free…but I made a couple of adjustments…and added a more nontraditional ingredient (to use it from my crisper drawer before leaving, naturally) to make the recipe work for me. Honestly…it is delicious. And so easy to prepare. Like any stew, chili, or soup…just let it simmer and let all those flavors soak in. That’s what it’s all about.
2 portobello mushrooms (I used 16 ounces of crimini mushrooms)
2 cups No-Beef Broth (I used 2 cups organic vegetable broth)
1 onion, diced
4 garlic cloves, minced
4 thyme twigs, fresh, de-stemmed, or 1-2 tsp dried thyme
2 large carrots, peeled and chopped
2 celery stalk, sliced
2 medium white potatoes, diced
1 cup Guinness stout (I used Redbridge Gluten Free Bear)
2 tablespoons tomato paste
1 tablespoon Dijon mustard
2-3 bay leaves
1-2 tablespoons Vegan Worcestershire Sauce (I used gluten free low sodium tamari)
**(In addition, I added 2 leeks to this stew…as I had them in my crisper…and why the hell not?)**
Directions:
Remove stems from portobello mushrooms and discard. Cut the mushroom caps into strips and set aside.
Line a large pot with 1 cup of no-beef broth. Saute onion and garlic over high heat until onions are translucent, about a minute or two.
Add thyme, carrots, celery, potatoes, stout, and tomato paste, and stir.
Bring to a boil, cover, reduce heat to low, and continue to cook for about 10 minutes.
Add mushrooms on top, along with Dijon, bay leaves, 1 tablespoon Worcestershire sauce, and remaining broth. Bring to a boil again, cover and simmer for at least 30 minutes, stirring every so often.
Continue to cook until mushrooms and potatoes are very soft – past fork-tender.
Taste, adding more Worcestershire sauce if desired.
Add a generous amount of black pepper and salt if desired.
Remove bay leaves and serve.
~*~*~
This is definitely a healthy and hearty stew. It has that great ‘stick-to-your-ribs’ feel to it, yet is completely plant based. Gotta love that. And I thought my addition of the leeks actually worked quite well. As I had to use a beer instead of a stout, the flavor is a bit more mild, but this has Ireland written all over it. A little nontraditional…but very good.
I froze a few servings of it and this thaws out and reheats beautifully. Trust me. You’ll love this! Especially as we enter the perfect time for soups!! And with just over 115 calories per 1-3/4 cup serving…you won’t feel guilting indulging in this stew either. I can’t wait to try out more of the Happy Herbivore dishes!