Recipe: Snap Pea and Veggie Risotto

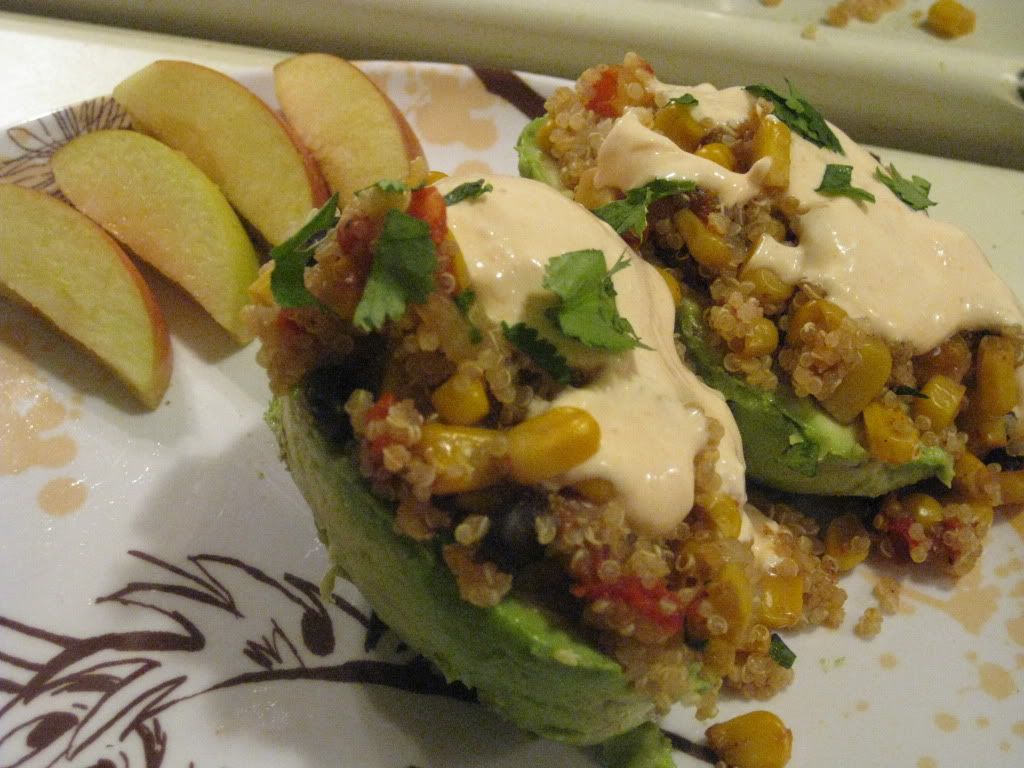
Do you know what happens when I forget that I have a certain item from my CSA bin in my crisper drawer until the day the new bin is to arrive and I’m attempting to make room for it?  I’ll tell you what happens…I start to panic and then think up, as quickly as possible, one of the most efficient ways to use up said ingredient.

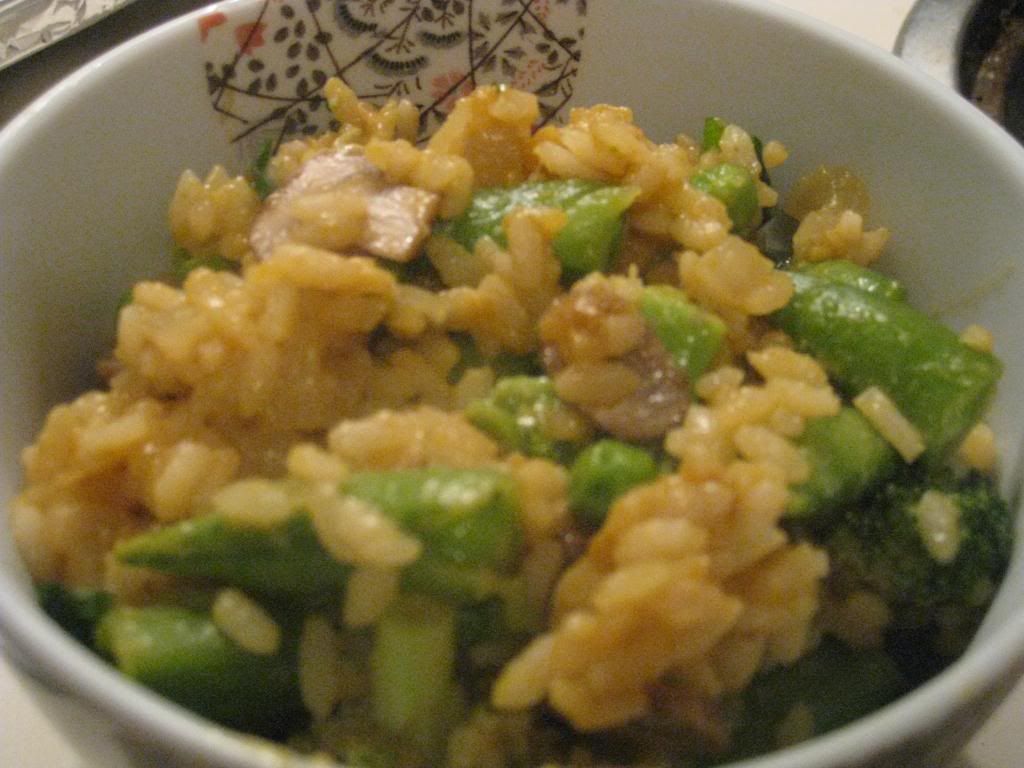
Normally with snap peas, I would totally stir-fry them.  But I had just polished off a stir-fry and wasn’t feeling it this week.  So, instead, I decided to make a risotto.

I have more than a lot of rice in my pantry…and two large bags of Arborio rice.  So…why not?  Everything that got added to this risotto was something I already had in my pantry or fridge or freezer from previous bins or the current one…

And, since it’s been awhile since my last recipe post…I figured it was time to shake things up in the kitchen.

Recipe: Snap Pea and Veggie Risotto

Snap Pea and Veggie Risotto

Servings: 4
Time: Prep 10 minutes; Cook 50 minutes

Ingredients:

  • 1/2 cup crimini mushrooms, sliced
  • 1 cup snap peas, chopped in half
  • 2 scallions, chopped
  • 1 cup broccoli
  • 1/2 cup frozen green peas
  • 4 cups vegetable broth, warmed on stove
  • 1/2 medium onion, chopped
  • 1/2 cup Parmesan cheese (or nutritional yeast)
  • 3 tablespoons olive oil
  • salt and pepper to taste

Directions:

Heat about half the olive oil in a medium pan on medium-high heat.  Add the mushrooms and the onions to the pan.  Don’t stir for a moment.  Add a pinch of salt and allow to cook.  Give the onions and mushrooms a stir every now and again, allowing the onions to soften and the mushrooms to brown slightly.  Remove the mushrooms and oions from the pan, reserving in a dish.

Add the remainder of the olive oil to the pan.  Pour in 1 cup of rice.  Stir for 3-4 minutes, coating the rice with oil.  Add one cup of the warm veggie stock and stir until absorbed.  Continue to add broth, one ladleful at a time.  While the rice is cooking, put the broccoli, snap peas, and green peas into a bowl and cover with a plate.  Place in the microwave for about 4-5 minutes and allow to steam and soften.  Carefully remove.

Once risotto has achieved a soupy, creamy consistency and the rice is cooked, toss in the snap peas, green peas, broccoli, onions, mushrooms, scallions and Parmesan stir to incorporate throughout the rice.  Season with salt and pepper and give it one final stir.

Serve immediately with a little more Parmesan if desired.

~*~*~

I am a huge fan of risottos and I loved the way this one came out.  The vegetables were a nice touch, and each with different textures…it all just fit in with the starchiness of the Arborio rice.  It was filling and highly nutritious being that much of the serving was vegetables as opposed to the rice.  I really love a good veggie risotto and this was was rather good.  Any vegetable can be substituted for your favorite veggie or what you have on hand, of course.

I’d make this again in a heartbeat though.  Yes, risottos are tricky and do mean a lot of standing over the stove and stirring…but I always love the end product.
ENJOY!

Recipe: Vegetarian Mushroom Gravy

Truth time.

I am not big on gravy.  Never have been.  Probably never will be.  So…why make it?  Well…two reasons, really.  First of all…I had mushrooms in my CSA bin and I’m heading out of town on Thursday morning…so I need to use items up.  Secondly…my roommate has been craving biscuits and gravy.  So, I figured if I could cook up a decent enough gravy for her…we could certainly have a vegetarian and gluten-free version of biscuits and gravy for breakfast this week.

So…I went and started searching for gravy recipes that would be easy…and tolerable by me…a disbeliever in the power of gravy.  So, I managed to stumble upon one from Daphne Oz on the Web site for The Chew.  I sent the link to my roomie to look over…and she approved.  So last night…I set out to cook it up so upon returning from my 10 mile run, breakfast would just need a simple reheat.  That being said, I also had to bake up some gluten-free biscuits…so…yeah.  Busy night in the teeny-tiny kitchen.

However, this is actually a fantastic recipe and it didn’t take long to cook up.  And the flavor…outstanding.  Really earthy and rich and just…yum!  So…if even I like it…that’s saying something.

Recipe: Vegetarian Mushroom Gravy

Vegetarian Mushroom Gravy

Servings: 6
Time: Prep 15 minutes; Cook 15 minutes

Ingredients:

  • 3/4 cup mushrooms (shitake/oyster/chanterelle/portabello/button) chopped (I used white button mushrooms)
  • 1 small yellow or white onion (minced)
  • 1/4 cup butter
  • 2 cup vegetable broth (I used Imagine Organic Low Sodium Vegetable Broth)
  • 1/2 cup white wine
  • 2 tablespoon soy sauce or tamari (I used San-J Low Sodium Tamari)
  • 1/4 cup flour or whole-wheat flour (I used Hodgson Mill Gluten-Free Multi-Purpose Flour)
  • 1/2 teaspoon sage (I used tarragon)
  • 1/2 teaspoon thyme
  • salt and pepper to taste

Directions:

In a large skillet, melt the butter and add onion and mushrooms.  Sauté for just a minute or two over high heat.

Reduce heat to medium and add vegetable broth, wine and soy sauce.

Slowly add flour, stirring well to combine and prevent lumps from forming.  Bring to a simmer or a low boil, and then reduce heat.

Add seasonings, salt and pepper.  Allow to cook for 8-10 minutes, stirring regularly, until gravy thickens.

~*~*~

Yep…it truly is that easy of a recipe.  It came together so perfectly in the skillet too.  I was very impressed.  Even more so when I liked it.  This morning, I tossed it over some gluten-free ‘buttermilk’ biscuits and topped it off with a poached egg…and the marriage of all the ingredients was magic.  The gravy was the highlight though.  And the roomie…raved about her breakfast…especially the gravy.  Her craving for biscuits and graving…satisfied.  YES!

Maybe my mind can be changed when it comes to gravy.  Especially if they come as packed with flavor and taste like this one did.  YUM!

Recipe: Gluten-Free Mac & Cheese Broccoli Bake

My friend Julie Sullivan is a saint.  A saint, I tell you.

The other day, she posted this picture of her dinner…this amazing pasta-ish casserole, with the caption “Mac & Cheese Broccoli Bake.”  Well, I was intrigued.  I was drooling.  Why?  Because it looked absolutely fantastic, that’s why.

And…I did what any good hungry girl would do.  I asked for the recipe.

She was kind enough to pass it on…as I wasn’t the only one begging for it.  And she even mentioned how I could make it gluten-free.  And, amazingly enough, I had everything I needed in my pantry and fridge.  Gotta love that.  So…after polishing off my Vegan Gumbo last night, I was set to cook up another fantastic meal to get me and my roommate through another couple of days.

Thanks to Julie…I did just that.

Recipe: Gluten-Free Mac & Cheese Broccoli Bake


Gluten-Free Mac & Cheese Broccoli Bake


Servings: 6
Time: Prep 30 minutes; Bake 20 minutes

Ingredients:


  • 12oz uncooked twisted pasta (I used Bi-Aglut Fusilli)
  • 2 1/2 c. uncooked broccoli
  • 1 tsp salted butter (I used Smart Balance)
  • 1/3 c. fresh bread crumbs (I used Katz Gluten-Free Bread Crumbs…because they ROCK!)
  • 3 Tbsp. plus 1/2 c. grated Parmesan cheese, divided
  • 2 1/2 c. skim milk (I substituted unsweetened almond milk)
  • 1/3 c. all purpose flour (I used Hodgson Mills Gluten-Free Multi Purpose Flour)
  • 1/2 c. onion, diced
  • 1 c. shredded cheddar cheese
  • 1 tsp. Dijon Mustard
  • 1 1/2 tsp salt
  • 1/2 tsp black pepper

Directions:

Preheat oven to 375 degrees.  Coat a shallow 2 quart baking dish with cooking spray (I used butter to grease it).

Cook pasta, adding broccoli to water for the last 3 minutes of cooking time.  Drain and return to pot.

In a large saucepan, melt butter over medium heat, add bread crumbs and cook until light golden brown.  Remove from heat and transfer to a small bowl, stir in 3 Tbsp of Parmesan cheese and set aside.

In same saucepan (can wipe clean easily) whisk together milk and flour, add onion.  Bring to a boil over med-high heat, whisking often.  Reduce heat to low and simmer until thickened, about 2 minutes.

Remove from heat and stir in cheese, mustard, salt and pepper.

Pour pasta and broccoli into baking dish, cover with cheese mixture, stirring to coat evenly.  Top with breadcrumbs.

Bake until edges are bubbly, about 20-25 minutes.

~*~*~

Yes…it really is that easy.  And even more…it really is that tasty.  I was in love with the flavor and taste of this.  Those breadcrumbs add an amazing texture and flavor to the entire dish.  And while I didn’t get to use the cheese I had wanted and intended to use on this, the back-up plan worked out better than imagined (I like bold flavors and I had no extra sharp cheese to supplement when I found my original cheese plan had…gone bad).  This was easy to throw together and allow to bake.  The apartment smelled awesome.

And when my roomie and I sat down to taste…we devoured it.  Honestly.  It’s a good thing I pre-portion these meals out because I think we could have eaten the entire pan on our own…in one sitting.  That is how much we raved about it.

So…again…thank you, Julie!

And now…to the rest of you…I encourage you to get cooking.  This one is totally worth it.

Recipe: Gumbo for Vegans

Tomorrow, my dear friends, is Fat Tuesday.

It’s that time of year when everyone is getting into the Mardi Gras spirit.  King Cakes are being baked, brought into office/home, and consumed.  Cajun food is a big, big thing.  And it lasts…all the way through Mardi Gras.

But most Cajun food is very sausage and seafood heavy.  And for someone like me…a gluten-free vegetarian, that’s not a good thing.  Especially since…I love Cajun food.  Red beans and rice…heck yeah!  Gumbo…bring it!  Jambalaya…oh yeah.  Loved it all.  And ate plenty of it prior to becoming a vegetarian.

Some Cajun food does happen to be vegetarian friendly.  Some is even gluten-free friendly.  But finding a combination of the two isn’t easy.  Especially out in the wild.

So, with the upcoming Fat Tuesday falling tomorrow, I took a recipe from Top Chef alumni (and fan favorite) Fabio Viviani and made a few changes to it in order to truly make it gluten-free and vegan.  And I cooked this all up on Sunday night for dinner…and it made enough for my roommate and I to dine on it all the way through Fat Tuesday.  Gotta love that.

Below is the recipe with my modifications.  What emerges is a delicious dish and meal that will satisfy even the most savvy Cajun carnivore.  I hope to make it again sometime soon.

Recipe: Gumbo for Vegans

Gumbo for Vegans
Gumbo for Vegans


Servings: 6
Time: Prep 20 minutes; Cook 30 minutes

Ingredients:

  • 2 tbsp flour (I used Hodgson Mill Gluten-Free Multi-Purpose Flour)
  • 3 tbsp olive oil
  • 1 chopped onion
  • 1 chopped green bell pepper (I used a red pepper because they just looked better at the grocery store)
  • 2 chopped celery stalks
  • salt and pepper
  • 1 tbsp Worcestershire Sauce (I  used Colgin Liquid Smoke)
  • 1 tbsp file powder (I used cornstarch)
  • 1 tsp smoked paprika
  • 2 cups vegetable broth (I used Pacific Natural Foods low sodium)
  • 1 lb chopped baby collard greens (I used rainbow chard)
  • 10 oz frozen black-eyed peas (I couldn’t find frozen, so I used one can of organic black-eyed peas)
  • 1 cup dried jasmine rice

Directions:

In a saucepan, bring 1 cup of dried jasmine rice and 2 cups of water to a boil.  Cover and allow to simmer for about 20 minutes.

While the rice cooks, in a large saucepan, cook 2 tablespoons of flour in 3 tablespoons olive oil until golden, about 3 minutes.

Add the chopped onion, pepper, celery stalks, salt and pepper.  Cook the vegetables until soft, about 8 minutes.

Stir in 1 tablespoon of Liquid Smoke, cornstarch, and 1 teaspoon smoked paprika.

Add 2 cups vegetable broth.

Bring all the ingredients up to a boil and add in the chopped baby collard greens and the black eyed peas.  Simmer until tender, about 15 minutes.

Serve over white rice.

Recipe: Gluten-Free Hearty Rice and Bean Vegan Nachos

Twas the day of the Super Bowl and I made my roomie one simple promise.

Nachos.

No…really.  She had been craving nachos and I decided, despite us not watching the big game (instead we watched cooking shows…for real!), I told her Super Bowl Sunday would be the perfect day to break out some nachos for dinner.  Of course, the one catch to me being the chef of the apartment is…I make them my way.

Thankfully…she’s quite okay with that…and words like gluten-free and vegan don’t phase her one bit.

I know…awesome!

So…after a major cleaning spree that day, I started to piece together our not-too-bad for you version of Super Bowl Snack Awesomeness.  And we dug in while watching an Emeril Lagasse show on Vegetarian Main Dishes.  I can’t make this up, friends!!  This is a true story.  But the best part of this story is…how awesome and filling these nachos turned out to be!

Recipe: Gluten-Free Hearty Rice and Bean Vegan Nachos

Gluten-Free Hearty Rice and Bean Vegan Nachos

Servings: 2
Time: Prep 60 minutes; Cook 10 minutes

Ingredients:

  • 1 cup brown rice (I used Lundberg Family Farms)
  • 5 ounces (about 6 1/2 cups) Tortilla Chips (I used Garden of Eatin’ Blue Corn Chips)
  • 3/4 cup cooked no-salt-added black beans, rinsed and drained if canned
  • 4 ounces Teese Nacho Vegan Cheese Sauce
  • 1/4 cup milk (I used unsweetened almond milk)
  • 1 avocado, sliced
  • 1 fresh Serrano pepper, seeded and finely chopped (optional) (I roasted mine with my red pepper)
  • 1 red pepper, roasted and chopped
  • 1/2 sweet onion, chopped
  • 1/2 cup prepared salsa
  • 1/2 cup chopped fresh cilantro
  • 1/2 lime

Directions:

Preheat the oven to 450°F.

Cook the brown rice according to package directions.  While rice cooks, saute the onion in a small skillet and set aside.

In a small saucepan over medium heat, add Teese Nacho Vegan Cheese Sauce and 1/4 cup milk.  Stir together until creamy and sauce thickens.  Add half of the roasted peppers.

Spread chips in a 9×13-inch baking dish and spoon rice over top.  Sprinkle with black beans beans, onions, and the rest of the roasted peppers (red and Serrano).  Bake until the nachos are very hot, 8 to 10 minutes.  Remove from oven and add the avocado slices.  Spoon the vegan nacho cheese over the nachos, add salsa, sprinkle with cilantro.  Squeeze lime over the top.

Serve.

~*~*~

These were so amazing and delicious.  I was so happy with the way this turned out.  It was definitely the perfect food for Super Bowl Sunday.  Nothing better than some junk food on a big game night, even if you are not watching the game.  And as far as recipes go…this isn’t too bad for you.  Packed with protein (thanks to the beans…and quinoa could be substituted for the rice), vegetables, and vegan cheese…it was guilt-free snack food for dinner.

And my roommate has already requested I make them again sometime.

I only take that as a good thing.

Recipe: Roasted Potato and Curry Soup

I know it’s early in the week, but I am already trying to work through my CSA bin produce to make room for the following week.  I was pretty darn successful when I stumbled across this recipe on Pinterest yesterday.  Yes…yesterday…which I then proceeded to make for dinner.  Why?  Because I had all the necessary ingredients.

Except celery.  But instead of rushing out to buy that…I substituted sliced carrots.  You know what?  That worked.  It worked amazingly well.

This recipe is actually based off of one by the amazing and inspiring Kris Carr from her CrazySexyWellness page.  Love this lady and find her battle to be one amazing journey of courage, strength, and determination.  If you don’t know about her…look up her page and read a bit about her life with cancer.  She’s super-inspiring.

As for the recipe…super delicious and filling.  It was love at first soupy slurp.

Recipe: Roasted Potato and Curry Soup

Roasted Potato and Curry Soup


Servings: 8
Time: Prep 20 minutes; Cook 50 minutes

Ingredients:

  • 2-1/2 tablespoons olive oil
  • 2 pounds potatoes of choice, cubed (I used French fingerling)
  • 1 medium yellow onion, chopped
  • 2 cloves garlic, minced
  • 5 medium carrots, chopped (the original recipe just asks for 2 stalks of celery, chopped, FYI)
  • 32 ounces gluten-free vegetable broth/stock (I used Imagine)
  • 3 tablespoons tapioca flour/starch
  • 1/2 fresh lime, squeezed
  • 1 teaspoon red chili paste
  • 1 tablespoon red curry paste
  • 1/2 cup light coconut milk
  • sea salt and pepper, as desired

Directions:

Preheat oven to 425° F.

Chop all potatoes and place on a baking sheet.  Drizzle potatoes with 1 tablespoon olive oil.  Roast for 30 minutes.

In a medium pot, heat remaining 1-1/2 tablespoons olive oil, then add onions, garlic and celery, sautéing for about 5 minutes.  Slowly add broth. Add tapioca starch and lime juice, stirring thoroughly.  Add chili paste and red curry paste, stirring until combined.  Bring to boil, then reduce to simmer (with lid on pot) for 5-6 minutes.

While soup is simmering, combine coconut milk and 1 cup roasted potatoes in a high speed blender or food processor.  Puree and then add mixture to pot.  Add remaining roasted potatoes and simmer for additional 10 minutes, adding salt and pepper to taste.

~*~*~

It’s simple.  It’s amazing.  It’s chunky.  It’s a little sweet and a little spicy.  It’s soup perfection.  Completely vegan.  Completely packed with flavor.  I was so happy with how this turned out.  The most time consuming part is all the prep of chopping the vegetables, but in the end, the soup is nicely balanced and full of flavor.

And who doesn’t love potato soups?

I’d make this again in a heartbeat!

Recipe: Gluten-Free Lemony Lemon Brownies

When your CSA bin hands you a bunch of lemons…

…make lemon brownies?

Okay…it sounds a bit esoteric…perhaps a little strange.  Maybe even weird.  However, don’t judge a recipe by its cover.  No…these are not chocolate brownies (although when I first mentioned making them to my roommate, she thought they were with lemon in them.  All I can say is…EW!).  These are brownies that are made with an all-purpose flour…and instead of cocoa…you add lemon juice and lemon zest…creating this mellow lemon base which then gets topped off with two layers of lemon glaze…which makes this entire recipe SING!

Trust me.

I discovered this recipe (shock!) on Pinterest and it originally comes from Becky Charms.  So glad I ran across it because I never would have imagined making lemon “brownies” before this.

If you love lemon…make some lemon brownies tonight.

Recipe: Gluten-Free Lemony Lemon Brownies

Gluten-Free Lemony Lemon Brownies

Servings: 16
Time: Prep 20 minutes; Bake 25 minutes

Ingredients for “brownie” batter:

  • 3/4 cup all-purpose flour (I used Better Batter Gluten-Free All Purpose)
  • 3/4 cup granulated sugar
  • 1/4 teaspoon salt
  • 1/2 cup (1 stick) unsalted butter, softened
  • 2 large eggs
  • 2 tablespoons lemon zest
  • 2 tablespoons lemon juice

Ingredients for tart lemon glaze:

  • 1 rounded cup powdered sugar
  • 4 tablespoon lemon juice
  • 8 teaspoons lemon zest

Directions:

Preheat oven to 350°F.

Grease/Spray an 8 x 8-inch baking dish with butter/cooking spray and set aside.

Zest and juice two small/large lemons; set aside.

In the bowl of an electric mixture fitted with the paddle attachment, beat the flour, sugar, salt, and softened butter until combined.

In a separate bowl, whisk together the eggs, lemon zest, and lemon juice until combined.  Pour into the flour mixture and beat at medium speed until smooth and creamy, about 2 minutes.

Pour into baking dish and bake for 23-25 minutes, or until just starting to turn golden around the edges and a toothpick inserted into the center of the brownies comes out clean.  Allow to cool completely before glazing.  Do not overbake, or the bars will be dry (even with the yummy glaze).

When brownies are cooled completely, make the glaze.

Sift the powdered sugar, add lemon zest and juice, and whisk together all three ingredients.

Spread 1/2 the glaze over the brownies with a rubber spatula.  Let glaze set.  Spread the remaining glaze over the bars, and let it set.  This glaze does not harden like most.  Cut into bars, and serve!

~*~*~

Lemony, lemony goodness.  These are definitely not the brownies you’re used to having.  Nothing brown about these.  But what they are are lemony-fresh, delightful on the palate, and just really, really damn tasty.  They are very easy to make and all the effort pays off in the end…because it was love at first bite with these.  I am a lemon fiend and these totally filled my lemon-lover craving.

I made mine gluten-free…but you can certainly use any all-purpose flour instead.  I will totally make these again.  In a heartbeat.

Recipe: Gluten-Free BBQ Mushroom Sliders

I don’t know what I did before Pinterest.  Honestly.

Last week, I was surfing around on my favorite time-suck and came across a delightful recipe for sliders…but instead of meat, these were portobello mushroom sliders.  Oooooh.  They looked absolutely fantastic too.  Seasoned, covered in melted cheese, caramelized onion, avocado…and dripping with barbeque sauce.

*mouth waters*

So, when the crimini mushrooms I received in my CSA bin turned out to be freakishly large…I thought to myself, “Hey…I bet I can make those sliders out of these.”

The only thing I lacked would be gluten-free slider-sized buns, which I solved by baking up my own from a bread mix I had in my pantry.  WINNING!

With that taken care of…I set out to make this recipe up for a light dinner after a very busy day out and about.  And the results…were epic.  Delicious.  And I wish I had made more than just two sliders each for myself and my roommate because these were beyond super yummy.  They were mushroom slider epic wonders of culinary proportions.

The original recipe came from the blog How Sweet It Is.  I just adapted it to fit my dietary needs and the ingredients I had on hand.

Recipe: Gluten-Free BBQ Mushroom Sliders

Gluten-Free BBQ Mushroom Sliders


Servings: 6
Time: Prep 10 minutes; Cook 20 minutes

Ingredients:

  • 6 baby portobello stuffing mushrooms (I used really large crimini mushrooms)
  • 6 slider buns (I made my own, gluten-free, using Chebe Gluten-Free All Purpose Bread Mix)
  • 1 teaspoon smoked paprika
  • 1 teaspoon onion powder
  • 1/2 teaspoon chili powder
  • 1/2 teaspoon black pepper
  • 1 tablespoon olive oil
  • 1 red onion, sliced
  • 2-3 ounces Gouda, sliced into squares (I used Veggie Slices Pepper Jack Flavored)
  • 1 avocado, sliced
  • 1/2 cup BBQ sauce, for drizzling and dipping (I used Stubbs Original BBQ Sauce)

Directions:

Heat a skillet on medium-low heat and add 1/2 tablespoon olive oil.

Add sliced onions with a pinch of salt and let caramelize, stirring occasionally.  Cook for about 8-10 minutes, then turn off heat and set aside.

While onions are caramelizing, brush mushrooms with remaining olive oil and sprinkle both sides with pepper, paprika, onion and chili powder.  Heat a skillet ( or a grill) on medium heat and cook until mushrooms are juicy and tender – about 5 minutes on each side.  With 1-2 minutes remaining, add a slice of cheese on top to melt.

Assemble sliders by placing the mushroom on the bun, then top with onions, avocado, and a hefty drizzle of bbq sauce.

~*~*~

Yeah…it doesn’t get much easier than that.  And the fact of the matter is…these are super-delicious.  Honestly.  I was blown away by how amazing these were.  They were that perfect level of balance in flavor and the mushroom was definitely the star of the dish.  The avocado was a nice addition and when mixed with the caramelized onions, the cheese, and the sauce…it made for one of the best vegetarian sandwiches I have had to date.  And…this was definitely my first vegetarian and gluten-free slider dish.

I’d make this again in a heartbeat.  No questions asked.  Packed with flavor and not heavy like regular sliders can be.  That’s the joy of using mushrooms.  Delicious, light, and just filling enough.

Dinner perfection.

Recipe: Crispy Baked Parmesan Green Bean Fries

As a vegetarian, I am always looking for new and different ways to eat vegetables.  That’s more than true these days since I began receiving a CSA bin of fresh, organic, local produce from my area.  Finding a new way to prepare a favorite vegetable is always fun and I’ve been enjoying playing with new techniques and recipes.

And…thanks to the magic and wonder of Pinterest…I stumbled across this recipe.  It was originally posted by Dashing Dish…and it truly caught my eye.  Well, I made it tonight and couldn’t have been happier with it.  A little crispy, a little savory, a little salty…and lots of yummy.

Recipe: Crispy Baked Parmesan Green Bean Fries

Crispy Baked Parmesan Green Bean Fries


Servings: 4
Time: Prep 10 minutes; Bake 20 minutes

Ingredients:

  • 4 cups fresh whole green beans (or 1 14 ounce bag of frozen whole green beans)
  • 1/4 cup Parmesan cheese, grated
  • 1/2 teaspoon garlic powder
  • 1/4 teaspoon salt (or to taste)
  • 1/8 teaspoon pepper (or to taste)

Directions:

Preheat oven to 425 degrees.

Line a baking sheet with foil, and spray with non-stick cooking spray.

If using frozen green beans, pop the bag of green beans in the microwave for 3-4 minutes, or until just de-thawed (or you could leave them out at room temperature for a few hours).  If using fresh green beans, wash and snip off the ends.

Place green beans on prepared baking pan, making sure they are evenly spread out, and none are laying on top of each other, (this will ensure even crispiness!)  Sprinkle seasonings and Parmesan cheese evenly over green beans.

Place green beans in the pre-heated oven and bake for 10-15 minutes, or until golden brown and crispy!  (To make them extra crispy, broil them for an extra 1-2 minutes before pulling them out of the oven).

Enjoy immediately with low sugar ketchup or dipping sauce of choice.

~*~*~

Taking that whole enjoy with a dipping sauce of choice, I whipped up a simple vegan Sriracha aoili…and it went with these fries perfectly.  Mine didn’t crisp up as much as I hoped, but I was also baking gluten-free/vegan no chicken nuggets in the oven as well, which took some of the heat source away from the green beans.  Regardless…these were amazing and fantastic…and I intend to make them again tomorrow with the other half of the green beans from my CSA bin.  Yeah…they were that good.

Perfect healthy side dish for any meal, honestly.  What better way to serve your veggies?

Recipe: Spicy Quinoa Stuffed Avocados (with a Vegan Sriracha Sour Cream)

I know…this sounds bizarre, even for someone like me…but the fact of the matter was…I had produce that needed to be used up before Friday…and two of the items still staring at me were amazing organic avocados.  Now, I could have done my usual standbys with these…guacamole…or put it into a breakfast scramble of sorts.

But why?  Why when I run across such interesting and different recipes such as this one, which I pilfered from the blogg Bullfrogs & Bulldogs, and adjusted to make it easier and more time efficient for me…the non-stop busy-body!  It’s very nutritious, packing a high protein punch with the quinoa, and the healthy fat of the avocado.  Awesome.

So…if you love avocado, love quinoa, and just plain love delicious things…here is a great recipe for you…done up the way I do it.  And I’ll even include my recipe for Vegan Sriracha Sour Cream.

Yes…I love you guys that much…

Recipe: Spicy Quinoa Stuffed Avocados

Spicy Quinoa Stuffed Avocado with a Vegan Sriracha Sour Cream

Servings: 2
Time: Prep 10 minutes; Cook 15 minutes

Ingredients:

Spiced Quinoa:

  • Avocados (1 small avocado per person)
  • 1/2 cup quinoa
  • 1 can Green Giant Southwest Style Corn
  • 1/4 yellow onion, chopped
  • 2 tablespoons chopped cilantro + some for garnish
  • 1 tbsp taco seasoning (I crated my own using chili powder, red pepper flakes, cumin, and garlic powder)

Vegan Sriracha Sour Cream

  • 1/4 cup Tofutti Better Than Sour Cream
  • 2 teaspoons Sriracha

Directions:

Rinse the quinoa well and place it in a sauce pan and toast for about two minutes until the quinoa starts to smell ‘toasty.’ Add one cup of water or vegetable broth and bring to boil.  Once boiling, reduce heat to simmer and cover.  (To get fluffy quinoa, it’s really important to not stir it, just let it be, keeping a close eye on it).

Chop the onion drain the can of Southwest Style Corn.  Combine both ingredients in a bowl and mix well with the taco seasoning.  Cover and heat in the microwave for 3 minutes.  Remove from microwave, uncover, and allow to cool slightly.

Once the quinoa is finished, fluff with a fork and allow it to sit for 15 minutes, until it has cooled slightly.  Add  it to the vegetable mixture.

Make the sour cream by measuring out 1/4 cup of vegan sour cream and adding the Sriracha to it.  Stir it together until well blended.

To assemble the avocados, begin by cutting them in half, removing the skin and the pit.

Scoop about ½ a cup of the quinoa mixture into each avocado, more if you can fit it.

Top it with a little Sriracha Sour Cream and some chopped cilantro and serve.

Enjoy!

~*~*~

Creamy, rich, smooth, amazing, delicious, totally yummy and just plain good!  The blend of cool avocado with the slight spice from the quinoa/vegetable mixture as well as the vegan Sriracha sour cream on top is just…perfection.  With a healthy does of belly-flattening fats from the avocado and the blast of protein from the quinoa, this makes for one very healthy dish to have for lunch or dinner…or whenever your little heart desires.

I had more than half of the quinoa/veggie mixture left so I sense a run to the grocery store for more avocados in my very near future.

A great meal…guilt free.  Awesome.