Wholesome Cravings Gluten-Free Caramel Apple Protein Snack Cake brings unwholesome taste and unwelcome texture

Wholesome Cravings Gluten-Free Caramel Apple Protein Snack Cake Mix

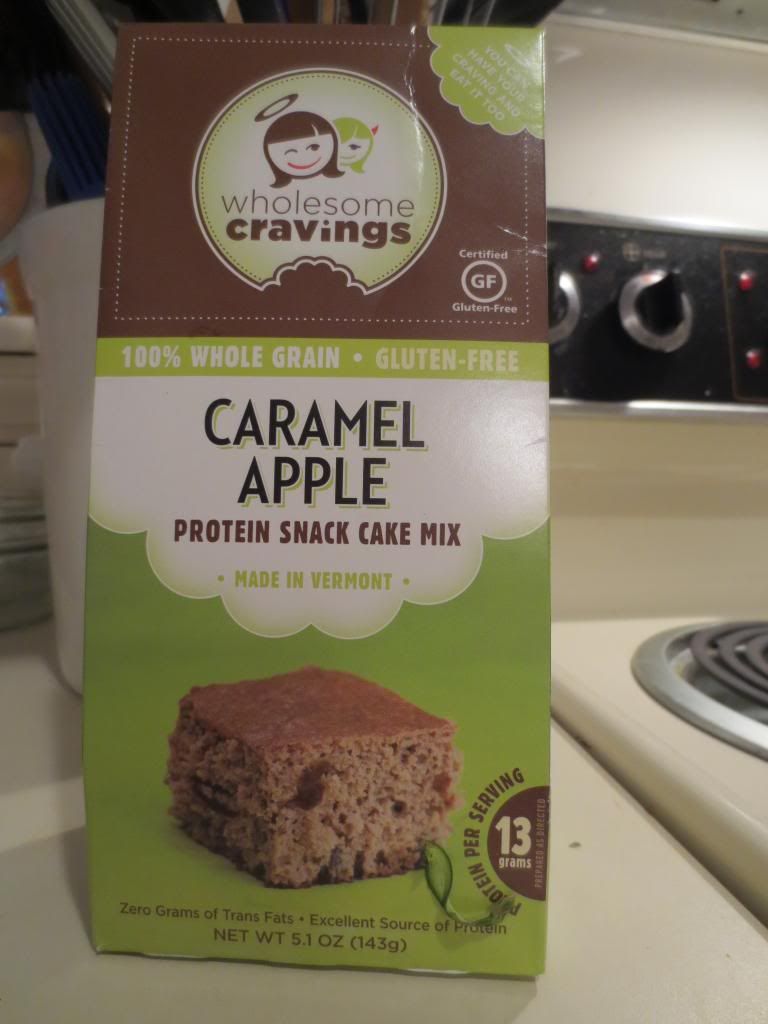
Product: Wholesome Cravings Gluten-Free Caramel Apple Protein Snack Cake Mix – $4.99+

Thank you, Wholesome Cravings, for teaching me an important lesson when it comes to new products.

What lesson might that be?

No matter what, always try the new product out while at home.  Do NOT think that just because it smells amazing while baking that it will taste good too.

That was my mistake I made when I baked up this Gluten-Free Caramel Apple Protein Cake from Wholesome Cravings this past weekend to use for breakfast on gym mornings this work week.  Streamline.  Make something that can be eaten throughout the week.  Perfect.  And, hello, cake…for breakfast.  Sounds like a dream come true.  And an apple cake at that.  I love apples!

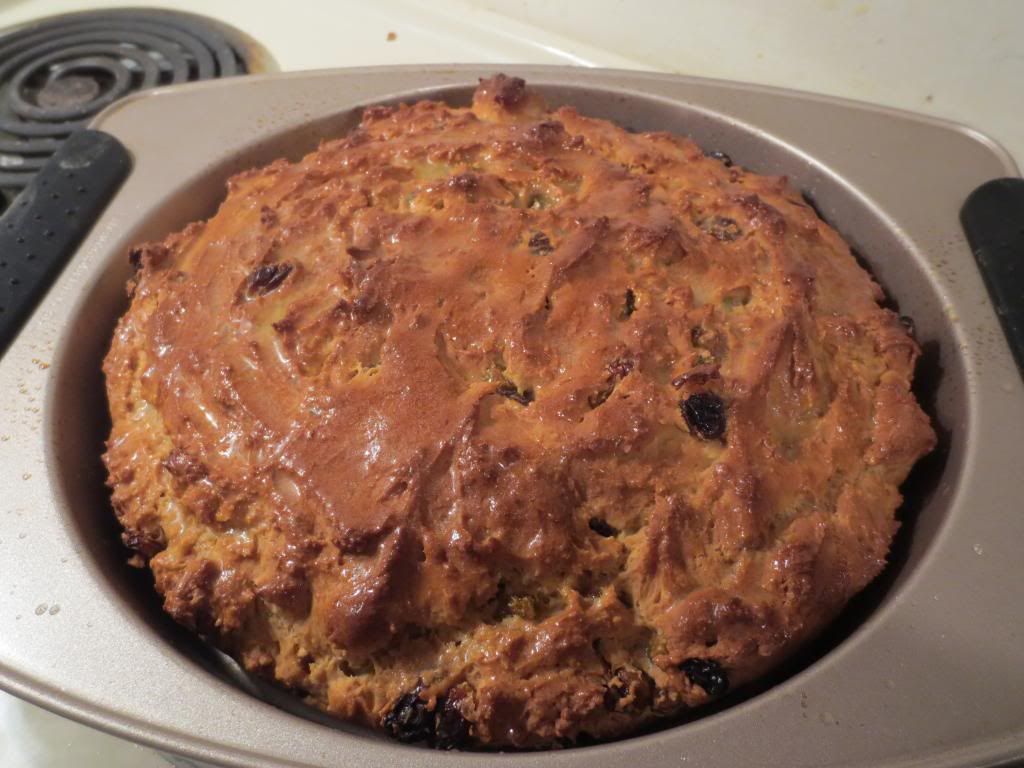
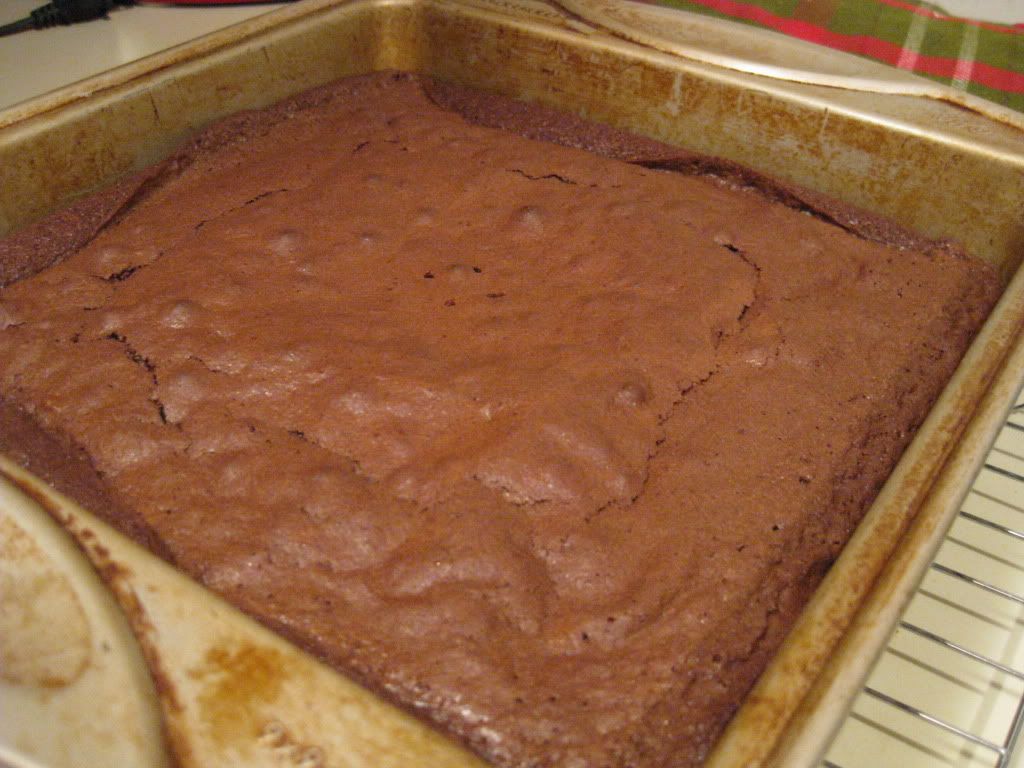
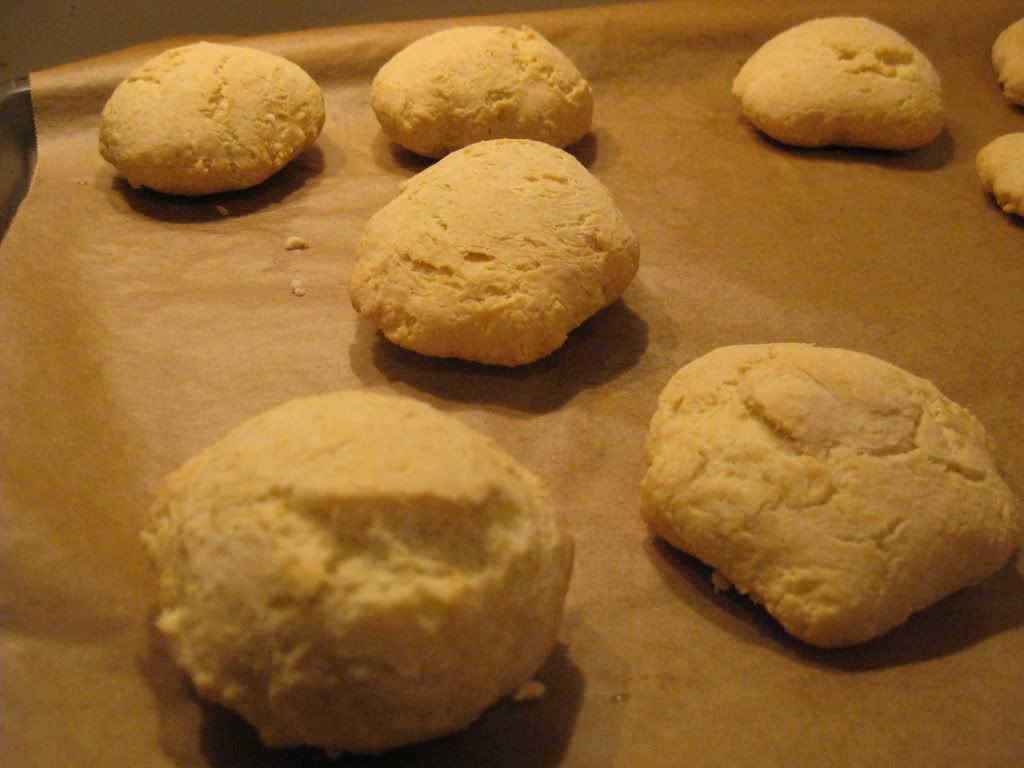
I also loved how easy this cake was to make.  Simply mix together 3 eggs, 1/4 cup of zero calorie sweetener, and 1 cup of unsweetened applesauce, then add the mix to the other ingredients, make sure they are blended well, and pour into a cake pan.  Bake as directed at 330°F.

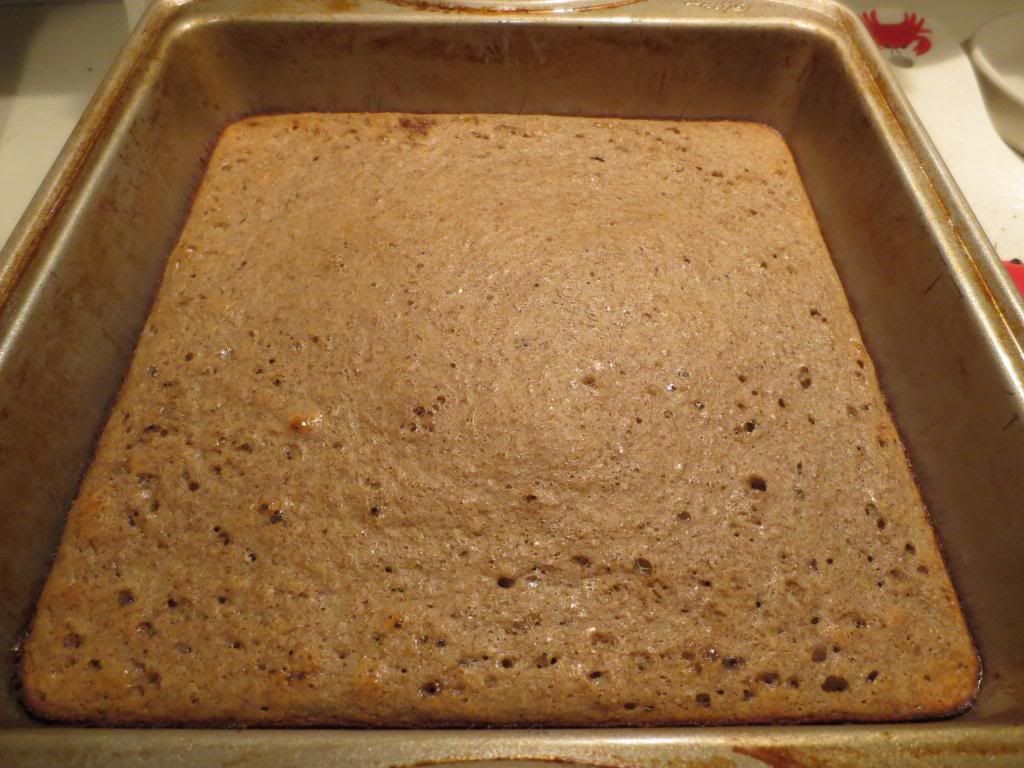
Simple.  Efficient.  And, I wasn’t lying when I said that this cake smelled fantastic as it baked.

But…scents can apparently be very deceiving.  I know this now.

Wholesome Cravings Gluten-Free Caramel Apple Protein Snack Cake

The following morning, I sliced two pieces of this cake and packed it into a container to take to the office for my roommate and I to enjoy after working out at the gym.  We had a great workout…and when we were done, we were both famished and ready for some food.  We headed over to the office and I went into the kitchen to peel some blood oranges and throw a slice of the cake into the microwave to warm up for our cake-for-breakfast pleasure.  It still smelled amazing.

I took my roomie her slice first, and then went to warm mine up.  As I walked back toward my desk, I stopped by hers and asked what she thought of the cake.  She gave me an unenthusiastic, “Eh, it’s okay…I mean…I’ll eat it.”  That is never a good sign.  I thought perhaps she was exaggerating.  So, I went and settled in at my desk and took my first bite of the cake.

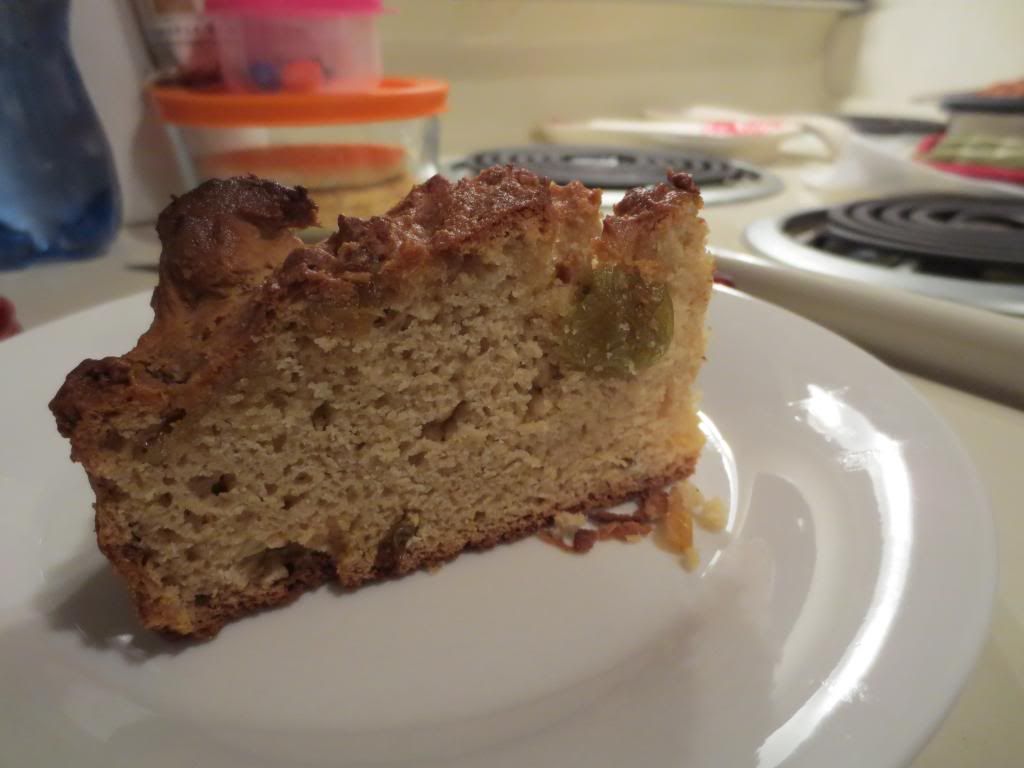
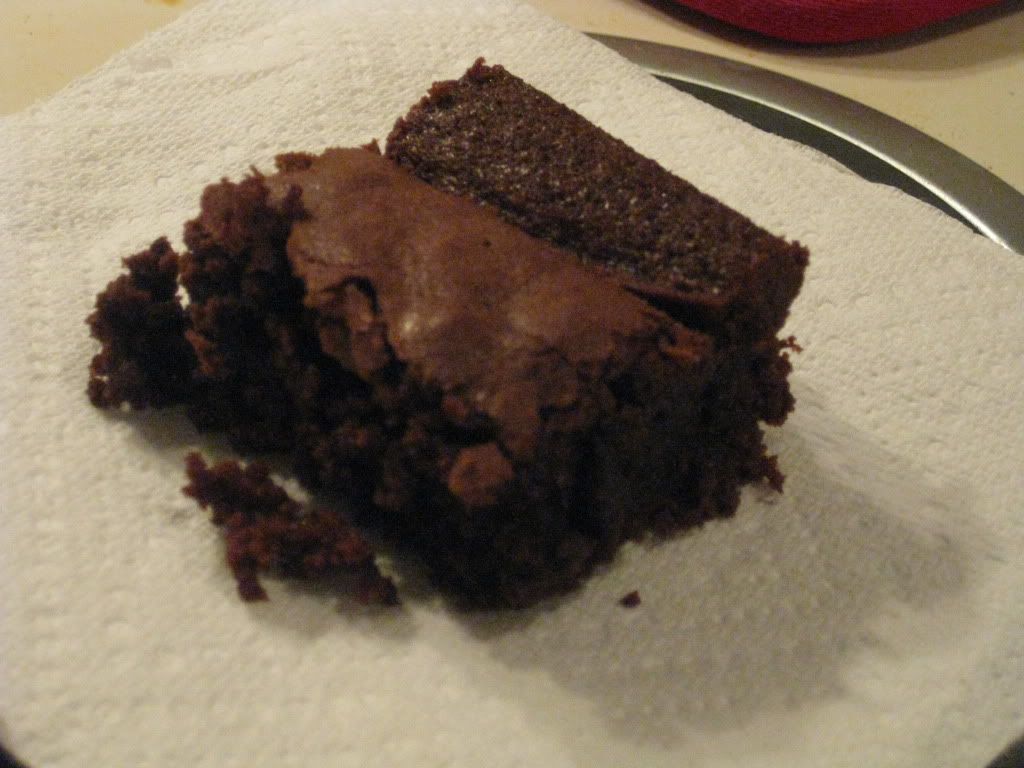
First of all, the texture is rather spongy.  Yep.  Spongy.  I really didn’t like that at all.  It really didn’t sit well on my taste buds.  I mean, food needs to have a pleasing texture, so when it feels like you are gnawing on a sponge, something is definitely wrong.  The flavor…chemically.  The apple tasted fake and the caramel flavor was rather nonexistent.  I was not impressed.  In fact, I messaged my roommate and told her that I would eat this slice because I was hungry, but when I got home, the rest of the cake was going into the garbage.  I didn’t like it at all.  I think I disliked it more than her because I didn’t even want to eat it.  The things exercise induced hunger drive you to.

Totally unimpressed.

Totally disgusted by it too.  It certainly doesn’t make me want to try any of the other cake offerings from Wholesome Cravings.

In case you like fake apple-flavored spongy cakes, though, the nutritional breakdown is this.

A serving is 1/7 of the cake.  Who cuts a cake into 7 pieces?  I made it 8.  The calories per serving once prepared (and done in 8 servings) are 118 calories per slice and only 4 grams of fat.  That’s not bad for a cake, right?  Right.  Too bad it tastes so awful.  Also of note, each slice of cake serves up a healthy dose of protein, in this case, 12 grams.  And you also get 2 grams of fiber.  This cake made of 100% whole grains, contains zero trans fats, has no preservatives or artificial sweeteners, and is 100% all natural.

But none of that can save it from the fact that it is just…bizarre, in flavor and in texture.  I was not a fan.  And I really don’t recommend anyone wasting their money on this product.  I’m more than a little upset that I did…because I feel cheated out of what should have been a delicious breakfast cake.  Perfect, with the protein content, for post workout eats.  But…instead…I got one of the more disgusting gluten-free products I have tried yet.

Disappointed?  You have no idea.

A slice of Wholesome Cravings Gluten-Free Caramel Apple Protein Snack Cake

Recipe: Gluten-Free Irish Soda Bread

There are a couple of things I really remember and cherish about the four times I have been to Ireland.  One of them…is drinking hot tea and enjoying a piece of Irish Soda Bread.  Most people don’t immediately relate Ireland with food…but this is me we’re talking about.  And I live for my food.

Luckily…I also love to cook and bake.  And while I have done gluten-free Irish Soda Bread before…it really hasn’t impressed me or anyone else.

Imagine my delight, then, to find an easy recipe for Irish Soda Bread on the back of a box of, believe it or not, Gluten Free Pantry (Glutino) Brown Rice Pancake & Waffle Mix.  It looked so easy.  Too easy, perhaps.  I was leery…I didn’t know how bread would work coming from a mix meant for delicious, carby, breakfast goodness.  But, isn’t that what bread is anyway?  Why not.  As I happened to have all of the ingredients in my pantry and fridge…I went for it.  All I would be out was a box of pancake mix that was nearing expiration anyway, and a few pantry staples.

Lucky for me…what emerged was SO not what I expected and everything I hoped and prayed it would be.  Easy.  Delicious.  Dense without being heavy (like real Irish Soda Bread).  Buttery.  And not dry and flaky.  Perfection.

And here…is the recipe, straight off the back of the box of Glutino’s Gluten Free Pantry Brown Rice Pancake & Waffle Mix.

Recipe: Gluten-Free Irish Soda Bread

Gluten-Free Irish Soda Bread

Servings: 12
Time: Prep 10 minutes; Bake 35 minutes

Ingredients:

  • One box of Gluten Free Pantry Brown Rice Pancake and Waffle Mix
  • 2 organic eggs
  • ¾ cup low-fat organic milk (I used unsweetened almond milk)
  • 2 tablespoons melted organic butter or vegetable oil (I used Earth Balance)
  • ¾ cup organic raisins (I used golden raisins)
  • 2 teaspoons caraway seed (optional)
  • 2 teaspoons grated organic orange rind
  • 1 tablespoon melted organic butter to brush top of bread

Directions:

Preheat oven to 350°F.

Lightly oil an 8-inch cake pan.  Set aside.

Empty contents of one box of mix into medium mixing bowl.

Blend in caraway seeds and orange rind, if using.

Combine eggs, milk and 2 tablespoons butter or oil and beat into mix.

Fold in raisins.

Spread into prepared cake pan.

Bake 35-40 minutes or until top is brown.  Brush with 1 tablespoon melted butter.

Cool slightly.  Cut into wedges and enjoy!

A wedge of Gluten-Free Irish Soda Bread

~*~*~

Oh.  My.  Goodness.  Honestly, I wasn’t expecting much from this recipe at all.  I mean, come on, it’s being made from, not a flour blend or all-purpose flour.  Nope.  A pancake and waffle mix.  I had my doubts.  But this came out of the oven a rich golden color, all fluffy and amazing smelling.  It looked awesome.  I sliced it up into 12 wedges and served them up for breakfast.

SO delicious.  Dense, like real soda bread, and packed with awesome flavor.  The orange zest really does add a nice zing to the loaf, so I do recommend adding that.  I skipped the caraway seeds in my recipe.  I love this bread.  I can’t wait to make it again in the very near future.  If you love Irish Soda Bread…give this recipe a try.  You’d never guess it was gluten-free.  And, even better, you’d never know it came from a pancake and waffle mix.

This is for breakfast again today.  YUM!

Glutino’s Gluten Free Pantry Brown Rice Pancake & Waffle Mix serves another delicious purpose

Glutino's Gluten Free Pantry Brown Rice Pancake & Waffle Mix
Glutino’s Gluten Free Pantry Brown Rice Pancake & Waffle Mix

Product: Gluten Free Pantry (Glutino) Brown Rice Pancake & Waffle Mix – $4.49+

I love, love, love, love pancakes and waffles.  No, for real.  I make pancakes sometimes in the morning before work and waffles…well, those tend to be my weekend treat.  So, finding a good mix in order to make these simple, but delicious breakfast treats is sometimes a challenge.  Especially when you have food allergies.

Now, I’m not saying that all gluten-free pancake mixes will fall short of expectations.  In fact, most of the ones I have tried have been decent enough to continue using…and…in some cases, purchase again.

Awhile back, I purchased a box of Gluten Free Pantry Brown Rice Pancake & Waffle Mix.  And, true to form, I used everything else ahead of it while this sat in my pantry…waiting…waiting.  I mean, the box is green and white…screaming at me to grab it and make some breakfast magic with it.  And…still…it sat.

But, that is no longer the case.  You guessed it…the expiration date was drawing close and I needed to use this mix…STAT!  This is a habit that I am truly working myself out of.  No more stocking up for the zombie apocalypse anymore (okay…not really why I have so much gluten-free goodness in my pantry…but it sounds good).  This expiration date, however, was so close that I told my roomie that we’d be having pancakes every day this week for breakfast.  Including gym mornings.  Reheated pancakes are never as good as fresh of the griddle…but you have to make sacrifices.

And then…as luck would have it…I flipped the box over to look at their directions for making pancakes with this mix…and spotted another recipe.  And this one utilized the entire box.

It was for Irish Soda Bread…and I just happened to have every single ingredient for it in my fridge and pantry.  Lucky, lucky me.  My mind was made up.  Irish Soda Bread for breakfast this week.  I’d make 12 slices out of it…and we would literally have one piece of it with some fruit for breakfast every day.  It would mean only one morning of baking…and the rest, as long as the results were delicious, would be ready for a light reheat on regular mornings and those mornings we hit the gym.

Gluten-Free Irish Soda Bread made from a box of Glutino's Gluten Free Pantry Brown Rice Pancake & Waffle Mix
Gluten-Free Irish Soda Bread made from a box of Glutino’s Gluten Free Pantry Brown Rice Pancake & Waffle Mix

This recipe was super easy.  I just used the entire Gluten Free Pantry Brown Rice Pancake & Waffle Mix and to it added eggs, melted butter, unsweetened almond milk, raisins, and orange zest.  Caraway seeds were an optional ingredient and I chose not to add them.  I mixed all the ingredients together and poured the batter into a 8 inch cake pan.  Put it in an oven at 375°F for 35 minutes.  And when I pulled it out of the oven, just as my roommate was getting up on Monday morning for breakfast, it was golden brown.  I brushed the top with some more melted butter, let it cool for only a couple of minutes, and then sliced it up.

My roommate loves her bread with butter, so she gets a schmear of that.  I eat my bread plain most of the time and this was no exception.

I was really, really leery about turning a pancake and waffle mix into a loaf of Irish Soda Bread, but this…WORKED!  For real.  The result was amazing.  The wedges of bread were sturdy and dense, just like real Irish Soda Bread.  The raisins remained plump and juicy.  And the orange zest adds that needed zing to the actual bread itself.  The mix baked up beautifully, not becoming dry or brittle in the slightest.  This bread was so easy to slice through.  And the taste…well, you would never in a million years guess that this bread was gluten-free.  Nor would you know that it came from a pancake and waffle mix.

I am very happy with the way this mix created this delicious Irish Soda Bread.  If you are having some difficulty locating Gluten Free Pantry items…there’s a reason.  It’s Glutino, and they have changed their packaging.  So look for Glutino’s Brown Rice Pancake & Waffle Mix and you’ll be finding the same exact product that I used here.  Now you know how long I’ve had this mix.

It may have taken me awhile to actually use this mix…but I am so happy that I finally did.  And, I am more than pleased to have utilized it in a manner that isn’t just pancakes and waffles.  Have a hankering for Irish Soda Bread…or perhaps those pancakes and waffles sound like just what you need in your life.  In either case, for an easy, handy mix, I encourage you to get Glutino’s Gluten Free Pantry Brown Rice Pancake & Waffle Mix.

Bake or flip your way to gluten-free breakfast goodness.

A wedge of Gluten-Free Irish Soda Bread baked from a box of Glutino's Gluten Free Pantry Brown Rice Pancake & Waffle Mix
A wedge of Gluten-Free Irish Soda Bread baked from a box of Glutino’s Gluten Free Pantry Brown Rice Pancake & Waffle Mix

Recipe: Gluten-Free Grasshopper Pancakes

Ah, St. Patrick’s Day.  It brings out a little Irish in all of us.  And, for some reason…it makes me want to make green food.  And not just green food…minty green food.  I can’t explain it.  It just happens.  It’s one of those things.

Well, originally, my plan for St. Patrick’s Day breakfast was going to be some elaborate Irish breakfast of sorts…done vegetarian and gluten-free, of course.  But, then my roommate woke up much earlier than expected so I executed Plan B.

Which was…pancakes.

But…how to do Irish pancakes?  I mean, aside from potato pancakes (or boxty…which I could have made…but didn’t…), how can you get your Irish flap-jack on?

Minty-green pancakes, of course.

Below is my recipe for these exciting, duel colored pancakes.  This is a super-easy recipe to make.  And you can use any baking and pancake mix for the batter.  As I am gluten-free…I do that.

So, give this a go…and enjoy!

Recipe: Gluten-Free Grasshopper Pancakes

Gluten-Free Grasshopper Pancakes

Servings: 4
Time: Prep 20 minutes; Bake 20 minutes

Ingredients:

  • 1 c baking and pancake mix (I used Pamela’s Products Gluten-Free)
  • 1 tablespoon sugar (I used Truvia)
  • 1.5 tablespoons baking powder (this is NOT a typo…not teaspoons…tablespoons!)
  • Pinch of salt
  • 1 cup milk (I used unsweetened almond milk)
  • 2 tablespoons organic pumpkin
  • 1/2 teaspoon Mexican vanilla (or any vanilla extract)
  • 1/2 teaspoon peppermint extract
  • green food coloring (optional…but fun!)
  • 1/3 cup Nestle’s dark chocolate and mint morsels
  • 3 tablespoons cocoa powder

Directions:

Turn griddle to medium heat.

Combine dry ingredients in a large bowl, excluding the cocoa powder and the dark chocolate and mint morsels.

In a separate bowl, combine the wet, excluding the peppermint extract, and then add them to the dry.

Stir until just combined and no large lumps remain.

Split the batter into two bowls.

Add another splash of milk and the cocoa powder to one.

And add several drops of green food coloring and the peppermint extract to the other.

Split the dark chocolate and mint morsels between the two bowls and gently fold them into the batter.

Spoon about 1/4 cup of each batter onto the greased griddle.  Carefully flip when bubbles appear on top or the edges look dry, then cook for 1-2 minutes more.

Top with extra dark chocolate and mint morsels and maple syrup.

Serve and enjoy!

~*~*~

I loved the play of colors in these pancakes.  The only difference in my recipe is that in the chocolate pancake batter I folded in Guittard’s green mint chips and in the minty green batter I folded in Hershey’s Semi-Sweet Chocolate Chips.  Only because I had them in my pantry.  Otherwise, they would have gotten the Nestle’s Dark Chocolate & Mint Morsels in each batter.  I did, however, use the dark chocolate and mint morsels to top off each serving of pancakes that morning.

And these were a huge success.  Minty, fresh, hot, and chocolatey all at once.  It made for a great breakfast.  And I was very happy with the way the pancakes fluffed up, even without eggs, and how light they were.  The flavors were definitely spot-on for a fun St. Patrick’s Day breakfast.  But, why just do this for St. Patrick’s Day?  There is something so amazing and delicious about mint and chocolate…these are honestly good any time.

Nothing could be easier…and oh…so delish.

1-2-3 Gluten Free bakes up not-so-light-and-fluffy, but quite delicious Southern Glory Biscuits

1-2-3 Gluten Free Southern Glory Biscuit Mix

Product: 1-2-3 Gluten Free Southern Glory Biscuit Mix – $7.99+

Do you know what has been seriously lacking in my life since I had to go gluten-free?  Light, fluffy biscuits.  Yes.  Light AND fluffy biscuits.  They just…don’t seem to be possible either from a mix or from scratch.  The closest I have ever come to what i seek was a light and fluffy dinner roll from Sinfully Gluten-Free in Dayton, Ohio.  Those were awesome.  But I don’t live in Dayton…and, technically, those aren’t really biscuits.

*sigh*

However…the great purge of the gluten-free selection at my local grocery store was going on and one of the items that was on closeout just happened to be 1-2-3 Gluten Free Southern Glory Biscuits.  The box lays it all out:  Light & Fluffy.  Completely gluten-free, wheat-free, dairy-free, casein-free, peanut-free, tree nut free, egg-free, and soy-free.  Whew.  On the Web site for the company, it might, just might even hint that these biscuits taste better than biscuits that contain gluten.

So…I figured…why not?  Since my roomie was craving biscuits and gravy and I had just whipped up a vegetarian mushroom gravy for the occasion…the biscuits were next.  Now, the instructions on the back of the box are rather daunting.  I will warn you about that.  The easiest way to make these would be in a food processor…but mine is so tiny it wasn’t an option.  So, for the first part of the process, I used my blender…then did the rest by hand.

But…first things first.  I am lactose intolerant…so the rest of the ingredients weren’t going to work for me.  Sure, I could use heavy whipping cream and half and half…but my stomach may not like it after I eat a couple of these.  However, 1-2-3 Gluten Free has a suggestion on the bottom on how to make non-dairy buttermilk biscuits.  So, I poured 1-1/3 cup of warm unsweetened almond milk and added 4 tablespoons of apple cider vinegar to it.  I let it sit for about 25 minutes allowing it to thicken.  Once it got there…the biscuits were on track to be made.

Into my blender went the package of Southern Glory Biscuit Mix along with the butter, cut up into pieces.  I pulsed it until it resembled a coarse meal, then added the ‘buttermilk’ to the mix.  This is where my blender stopped being of use, so everything got poured into a bowl and I ended up kneading the dough until it came together into a ball.

The next step was to roll out the dough to about a 1-1/2 inch thickness and cut the biscuits with a biscuit cutter or a glass.  I used a biscuit cutter and ended up getting 18 biscuits from the dough.  Then, into the refrigerator these went to cool.  The box says that the colder the dough, the higher the biscuits would rise.  Well, I wanted some really tall biscuits, so I left them to chill for about an hour (the box says to go for at least a half hour).  Then, I preheated the oven to 375°F.  Each biscuit got a light wash of almond milk and a sprinkling of salt before the pan went into the oven to bake for about 20 minutes.  Mine actually took about 30 minutes because my heating element is STILL off.

And when they came out of the oven…they really hadn’t risen all that much.  Which…made me sad.  My roommate and I decided to go ahead and split one to see how they tasted.  They were still a little doughy in the middle, so I put the pan back in the oven for a little longer.  But from the half we each were eating…we seemed to like it.  It tasted like a real buttermilk biscuit.  They weren’t exactly light…or fluffy…but they tasted good.  So, that was at least half the battle.

This morning, after a 10 mile run, I came home to assemble breakfast.  These biscuits, topped with a homemade vegetarian mushroom gravy and one poached egg.  My roommate requested biscuits and gravy…as she has been craving.  And in this house, she eats what I cook and I cook what I can eat.  So, sometimes allowing the gluten-free vegetarian to be the cook doesn’t always work out to her advantage.  Lucky for her…I had a biscuit mix that needed to be used and some gravy that I could make thanks to some fresh produce from my CSA bin.

So, I reheated the gravy, then popped the biscuits into the microwave to warm them back up.  With breakfast assembled, I went to settle in to enjoy.  And, sadly, the biscuit, while it tasted awesome, was still just heavy and dense.  Not light and fluffy.  It made me weep a little on the inside because all I really want is to be able to cook up an amazing biscuit to have every once in awhile.  While the taste is spot-on with this mix from 1-2-3 Gluten Free…sadly the texture is still not right for me.  Still too heavy.  Still too dense.

The promise of a light and fluffy biscuit might have fallen…flat…but the flavor…the taste…that is on point.  It reminded me of the buttermilk biscuits from restaurants that I used to go to for breakfast.  So…at least the taste hit a high-note for this gluten-free girl.

Would I buy these again?  Perhaps if they were on sale.  My search for the perfect gluten-free biscuit continues.  While these delivered on flavor, they completely fell short on texture.  Light and fluffy…not so much.  I’ll keep on searching…

“Buttermilk” Biscuits from 1-2-3 Gluten Free Southern Glory Biscuit Mix

Heartland Gourmet bakes up perfectly light and lemony from Gluten-Free Lemon Cupcake Mix

Heartland Gourmet Gluten-Free Lemon Cupcake Mix

Product: Heartland Gourmet Gluten-Free Lemon Cupcake Mix – $5.99+

I have a weakness for new companies and new products that I haven’t seen before.  Yes…I admit this freely.  Completely.  I have a gluten-free product problem.  I just can’t resist the urge to buy a product when I see it on a shelf at a store…that I have never, ever seen before.

Such was the case when I went into World Market a couple months back.  I was just there to look around.  Yep.  Just browse.  Which, as we have discovered, is dangerous ground for me.  Because I normally find something and…yes…purchase it.

And that’s what happened.

There was a beautiful endcap at my local World Market store that contained quite a few gluten-free products.  Most of which I had tried.  But one simple white box with a tartan border did catch my eye.  I had never seen it before.  And the company, Heartland Gourmet, was one I never heard of before.  But…even better…this particular box was for a Gluten-Free Lemon Cupcake Mix.  Mmmm…lemon cake.  One of life’s best pleasures is that sweet/tart flavor of lemon baked goods.  Hence my obsession with lemon bars, lemon icing, lemonade (LOL!).  If it’s lemony…I’m going to try it.

Needless to say…I go a little overboard with baking mixes at times…so this, like a lot of things, sat untouched in my pantry.  Until I noted on my ever-helpful pantry list that the expiration date was fast approaching.  As I had just polished off my gluten-free brownies last night, I took the opportunity to grab this mix and bake up another sweet treat for this coming week and weekend.  And with something lemon…how could it go wrong?

One of the most appealing parts of this mix is how little you truly have to do to it.  All I had to do was mix the cupcake mix together with 1/2 cup of oil and 1/3 cup of water.  Then, after that is blended on low, in goes three eggs.  Mix again until all is well blended, this time on medium, and then put into cupcake pan.  Now, the box says this makes 12 cupcakes, but I could have easily gotten 15-18 out of this.  Instead, my cupcakes were going to be huge. but…you know…you only live once.  I filled my wrappers as full as I dared, then ended up pulling out another pan and putting the rest into one more cupcake wrapper and baking the ‘test cupcake’ that the roomie and I would share.

Heartland Gourmet Gluten-Free Lemon Cupcakes fresh from the oven

Into the oven they went for 15 minutes at 350°F.  Or…that was the plan.  Lo and behold, upon purchasing a thermometer for my oven, I discovered that it won’t stay at a constant temperature.  In fact…it can be off by as much as 15-20 degrees at times.  And that explains why so many of my baked goods have had to cook for so much longer than the boxes have indicated.  Good to know.  I actually called my landlord this morning to see about having this fixed.  Here’s hoping it happens.  So, after a total time of 25 minutes (not the mix’s fault…totally my oven’s fault), I pulled out the cupcakes to give them a little time to cool.

The box actually does come with a recipe for a cream cheese icing…but I’m not big on icing or frosting, so I made a citrus glaze, utilizing powdered sugar, orange zest, orange juice, lemon juice, a little oil, and some water.  Then, before my cupcakes could completely cool, I drizzled each cupcake with the glaze and allowed it to sit.  Well…except for the test cupcake.  That was unwrapped and drizzled with glaze almost immediately.  Then, sliced in half and my roommate and I decided to see if this mix was worth it in the end.

Read my words, fellow blog followers…THIS. IS. DELICIOUS.

The lemon in the cupcakes is there…but it doesn’t overwhelm the flavor of the cake.  It doesn’t take a backseat either.  What Heartland Gourmet managed to do was create the ideal balance between the cake-ness and the lemony aspect of this mix…so when it bakes up…it has the perfect level of each.  Nothing overwhelms the other.

And here’s another amazing thing…this cupcake isn’t heavy or dense or any of that gluten-free nonsense.  Not only was this one of the lightest cakes I have ever had emerge from my oven, it had those little air pockets that regular cupcakes have when they are cooked to an airy, light perfection.  I loved that about these cupcakes because after eating a meal, I want a light dessert, not something that I feel I am gorging on.  And this definitely takes…the cake.  (Forgive me!)

Nutritionally speaking, this mix has it going on.  For one thing, the mix itself, when done into 12 large cupcakes, is only 170 calories.  That’s awesome for a treat.  I also love that this product is fat free and packs a 2 gram protein kick.  And this mix also is low on sodium.  Remember…this is a cupcake, so while sugars seem high…it’s a treat and should be recognized as one.

As for the company itself, Heartland Gourmet is actually a family operated business is dedicated to putting healthy, wholesome, delicious gluten-free, gourmet and organic baking mixes and kits into the market so that they are simple to put together and easy to bake, giving you more time with your family.  You gotta love that sort of commitment and dedication.  And I always enjoy helping out a family owned business.  They just seem to put more attention and better things into their ingredients and products.

So, a kick of lemon, glazed with a sweet and tart glaze on a light and fluffy cupcake…yeah…this is heaven.  Heaven in lemon cupcake form.  And I have Heartland Gourmet to thank for it.

Gluten-Free Lemon Cupcake with an Orange Citrus Glaze (made from Heartland Gourmet Gluten-Free Lemon Cupcake Mix)

Gluten-Free brownies that are fudgy and cake-like perfection by Better Better Fudge Brownie Mix

Better Batter Gluten-Free Fudge Brownie Mix

Product: Better Batter Gluten-Free Fudge Brownie Mix – $7.99+

Better Batter.

Why?  Why did it take me so long to actually try you out?

You blew me away…like…totally blew me away the first time I used your Gluten-Free All-Purpose Flour.  I never stopped raving about you.  I never bought you…because you are expensive.  But, now I understand that you are completely worth the cost.  Every.  Single.  Dollar.

Because not only did you manage to wow me with your Gluten-Free All-Purpose Flour (which I received as a complimentary box at a gluten-free expo I attended in Birmingham, Alabama), but you have blown me away with the taste, texture, and all around chocolatey goodness of your both fudgy AND cake-like brownies.  And there is something so magical and fantastic about finding that perfect level of balance when it comes to brownie perfection.  Even more…the difficulty that comes with having to be gluten-free.

But somehow, my dearest, beloved Better Batter…you did it.

After having amazing results making cookies using your Gluten-Free All-Purpose Flour, the other box that my roommate and I got for free at the expo was…the Gluten-Free Fudge Brownie Mix.

Now, I love brownies.  I am not big on cake…but offer me brownies and I am your friend for life.  Thus…brownies were the obvious choice for me.

However, I had a lot of gluten-free brownie mixes to go through.  And while some have been…good…others…great…yours, Better Batter…yours were AMAZING!!  Yours are the ones that I will rave about until the day I go to my gluten-free grave.

And here’s why…

Better Batter Gluten-Free Fudge Brownies (baked)

While I am not a fan of cake, I prefer the cake-like brownies over the heavier fudge versions.  So, I did the version with three eggs, not two.  I mixed together the water, oil, eggs, and the mix as directed by the box, then poured them into my pan and baked…all the while, that rich chocolate scent was filling my apartment.  I couldn’t wait to pull these out of the oven and let them cool.  And when they were cooked through, I let them sit while I ran a few errands and returned home…ready to treat myself to them for dessert.

These brownies are packed with chocolate flavor.  I mean, packed.  So if you are a chocoholic like me…you will love this.  Every bite is rich, decadent, moist and…just awesome.  Yep…awesome.  There is no strange aftertaste from the gluten-free mix.  It’s all about flavor.  Good, amazing flavor.  My roommate doesn’t even have to eat gluten-free…but she devoured these as fast as me.  Seriously…these are the top-of-the-line when it comes to brownies.  I know I raved about my Bob’s Red Mill…and they are my second place…but these…these are reigning supreme!

If heaven were encapsulated in brownie form…it would look and taste like these.  Despite being cake-like brownies, these have that rich fudgy flavor of the fudge brownies…without the heaviness.  That’s the best part.  They are so light…so it’s always tempting to go back for more.  And being a chocoholic…this is not easy to stop myself from doing.  So far, however, I have managed.

So far.

Nutrition-wise, these are…brownies.  So moderation is key.  You get 20 servings out of one box…so make sure you cut it up in the proper portions.  The mix itself has 110 calories in it…then add the oil and eggs to it and it bumps it up a little more…but still in the 160 calorie range.  Remember…this is a treat and you should always treat it as one.  Even if you do want to go and eat the entire pan…as I often do.  Restraint and moderation.

Better Batter…I love you.  I can’t even put into words how much I love you.  You entranced me with your basic All-Purpose Flour…and you won me over with the fantastic taste and texture and flavor of your Gluten-Free Fudge Brownies.  I am one happy gluten-free girl.

And now…yes…I will shell out the money for your mixes.  I can’t wait to try what other products I can create from your plethora of mixes and tasty treats.

Back to the grocery store I go for more of your gluten-free goodness in a box.

Can’t wait!

A serving of Better Batter Gluten-Free Cake-Like Fudge Brownies (I was out of plates...dont judge!)
A serving of Better Batter Gluten-Free Cake-Like Fudge Brownies (I was out of plates…dont judge!)

XO Baking Co mixes up perfect Gluten-Free Banana Bread

XO Baking Co. Gluten-Free Banana Bread Mix

XO Baking Company Gluten-Free Banana Bread Mix – $7.99+

It happened once upon a time…back a couple years ago when I was instructed by my doctor to adopt a gluten-free diet.  I attempted, from scratch, to make banana bread.  And…it failed.  Miserably.  It was dense, heavy, and…WET!  And I disliked it enough to throw it away.  And from that moment on…I never attempted it again.  Never.  I designated any over-ripe bananas to another cause.

And then, while out shopping one afternoon and randomly stopping into a Home Goods store, I stumbled across their gourmet food section.  Danger, Gluten-Free Will Robinson, Danger!!  They actually had quite a good selection of gluten-free foods and products.  And I…just had to try them.  The one that seriously caught my eye, however, was the XO Baking Co’s Banana Bread Mix.

I mean…it had been forever since I had had good banana bread.  I was craving.  For real!

So, it and a few other items made their way into a basket I ran back to the door to get and soon I was checking out with a plethora of new gluten-free goodness.  Or…at least I hoped.

And then, because my pantry is overflowing with gluten-free goodies…this had to sit and wait…and wait…and wait…and wait…

…and then I realized that the expiration date was approaching…so I dug it out and intended to make it over the weekend.  Without reading the back for ingredients, I went grocery shopping for my regular items…and then came home to get to work on my bread (which would serve as breakfast for the entire week!)

It was only then that I realized that I required three large overly-ripe bananas for the bread mix.  DUH!  I don’t know why I assumed this would magically taste like banana on its own.  So, my roomie and I dashed back out to the grocery store.  And NONE of the stores had any overly ripe bananas.  In fact…they were all very green.  I mean…GREEN!

What to do?  We finally discovered a couple at Target…but needed one more.  So, we grabbed on that wasn’t quite as green as the rest and decided to just run with it.  When you are handed under-ripe bananas…you attempt to do your best to make banana bread.

Back at home, mixing this together was easy.  I mashed the bananas then put them into my Kitchenaid mixer.  To that, I added eggs, oil, and almond milk.  That got beat together until just combined.  Then, in went the bread mix straight from the package.  A little more mixing and it was done.  As I’m working on shrinking the amount of items in my pantry, I added the rest of the chopped pecans (about 1/2 cup) and then put in 1/4 cup of Reeses peanut butter chips and 1/4 cup chocolate chips.  I folded these into the batter, poured them into the pan and baked for about an hour.

The entire time it baked, I couldn’t help but return to the kitchen to steal another whiff of the bread.  It smelled fantastic as it cooked up.  And when it emerged, it was a beautiful golden color on the outside.  I allowed it to cool in the pan before turning it out and setting it to cool the rest of the way.

The big test came the following morning when I sliced it up to make some French toast with it.  O.M.G.  No…for real.

I didn’t do anything fancy to the French toast batter.  Just egg, a little light coconut milk, vanilla and cinnamon…dunked the bread and put it on my skillet.  Flipped it once it got golden, then served it with a bit of hot maple syrup (homemade and delicious from my friend Erica).

This bread is packed with flavor.  Even done up as though it were French toast (which definitely was preferred to the usual gluten-free sandwich bread I use).  The nuts, the peanut butter chips, and the chocolate chips really compliment that banana flavor.  The texture isn’t too dense or heavy.  In fact, it seemed perfect for this kind of loaf of bread.  I was enamored with the variety of flavor that hit my palate.  BUT…to be fair, I needed to taste it without dressing it up too much.  So, the following morning, I just gave the bread a light toasting in the oven to warm it.  Then a small schmear of vegan butter and a drizzle of honey…and BAM.  Banana bread perfection.  The sweet honey worked well with the nuts and different flavor chips that were baked in.

Oh…this is a definite must have for your gluten-free pantry.  If you can’t make a good banana bread from scratch, then you should totally give this mix a try.  The guess work when it comes to what flour to use and how long to bake is taken out of the equation.

This mix is created using a gluten-free flour blend (which includes cassava flour, unmodified potato starch, organic coconut flour, and xanthan gum).  Brown sugar adds a nice hint of sweetness to it.  Baking powder gives it that necessary lightness to rise, baking soda, sea salt, and organic vanilla flavor.  That’s it.

As for the nutrition standing…the mix contains 110 calories for 1/12 of the loaf.  I went ahead and sliced mine into 12 slices so that I was certain of the servings when I began carving into it.  That’s not bad.  Not bad at all.  This mix is also completely all natural, rice-free, trans fat free, gluten-free, wheat-free, and soy-free.

And in the end, you are left with a delicious, moist, banana-flavored bread that you can dress up however you like or just leave with simply bananas.  Any way you slice it…it is AMAZING!  XO Baking Co. is off to a good start and winning me over already.

Pastariso is making gluten-free mac & cheese easy with instant meals

Pastariso Gluten-Free Instant Brown Rice Mac & Cheese Cup
Pastariso Gluten-Free Instant Brown Rice Mac & Cheese Meal

Product: Pastariso Gluten-Free Instant Brown Rice Mac & Cheese Meal – $2.99+

Before I had to go gluten-free, I admit it…I would indulge in an Easy Mac every now and again.  I mean…mac and cheese is awesome, right?  And Easy Mac meant that it was ready in seconds…straight from the microwave.  Mmmm…just like the boxed stuff with the crazy neon cheese powder that somehow creams up and makes a decent enough mac and cheese.

Oh…there are days I would long for that simplicity, and other days I would mock it.

But then…while at the Gluten-Free Trading Company in Milwaukee, Wisconsin…I came across something I hadn’t seen before.  Anywhere.

A form of gluten-free Easy Mac.  These little microwavable pasta bowls were made with white rice pasta and brown rice pasta.  I chose brown rice pasta; my roomie went for the white rice pasta.

Pastariso is making the dine and dash meal easy for the gluten-free community.  There are times, like on Mondays when I have to get home from work, eat something, and head out to Louisville for my fun run with my running store group, that I don’t have time to prepare something.  Not even a gluten-free grilled cheese sandwich.  No problem if you happen to be able to find the Pastariso Mac & Cheese Instant Meal Cups somewhere nearby.

Now, no store in my area carries these, which is one reason why I had to pick them up.  And tonight…I sat down to enjoy mine.

Preparation is simple…just like Easy Mac.  Pull off the paper lid and fill the cup with water to the line.  Stir well.  Pop into the microwave for 3 1/2 minutes.  Well, most microwaves would have it ready in 3 1/2 minutes.  Mine is from the 80s…so it usually takes longer.  That was the case here.  6 minutes later and I was ready to sit down with a piping hot bowl of instant mac and cheese.

A little bit about these little treats…

The company that makes the instant mac and cheese meal cups is Maplegrove Gluten-Free Foods.  They are a family owned business that specializes in gluten-free products.  Even more interesting, Maplegrove is North America’s largest manufacturer of gluten-free pasta products.  Their products are manufactured in a completely gluten-free environment and they personally guarantee high quality foods.  That’s a lot for a small company.  But they understand the importance of keeping gluten-free foods safe and delicious.  Many of their employees are gluten-intolerant or have Celiac.  This is not just a choice…it’s a mission…it’s dedication.

So…how was it?  Once I got it heated enough so that the water absorbed into the noodles and the cheese became thicker and not just cheesy soup water…I settled in to actually try it.  Well, needless to say…it was pretty good.  It tasted sweet…and not as cheesy as I would have liked.  But…it was decent enough for an instant meal.  The powdered cheese in the water was really hard to stir, but it incorporated itself as it warmed in the microwave.  Overall…I’d rather make mac and cheese from scratch…for for something quick…I’d eat this again.

That is if I could find it somewhere…around here…

The nutrition information isn’t too bad as far as pre-packaged, processed gluten-free pastas go.  The entire cup is only 212 calories with 4 grams of fat.  The sodium level is a little on the high side at 670 mg.  And as for protein, this does deliver 6 grams in the serving.  So…all-in-all…it’s not too bad on the nutrition front.

So, it’s nothing fantastic, but it’s a quick bite for those very busy days that all of us tend to have at some point or another.  It’s like Easy Mac…you hate yourself for eating it…but sometimes it’s the only option you have.

That’s what Pastariso Instant Brown Rice Gluten-Free Mac & Cheese Cup is…a quick option that delivers on speed, but not so much on flavor.  But gluten-free beggars can’t be choosers.

Pastariso Gluten-Free Instant Brown Rice Mac & Cheese Meal (cooked)

Chebe Gluten-Free All Purpose Bread Mix slides in just short of really good gluten-free bread

Chebe Gluten-Free All Purpose Bread Mix

Product: Chebe Gluten-Free All Purpose Bread Mix – $3.29+

You know…I raved once, almost two years ago, I believe, about Chebe Cheese Bread Mix.  I had made up the little breaded balls of goodness to accompany a pasta dinner I was preparing for a friend who was coming for the weekend.  Much to my delight…Greg (the guest), my roommate, and I all loved the taste, texture, and fluffiness these had.

So, Chebe rose to the top of my gluten-free go-to’s.  Even though I didn’t really purchase anything further of the brand until my local grocery store put their entire gluten-free section on closeout.  Picture me in panic mode as I grabbed a huge shopping cart and began tossing items I had wanted to try, but never got the chance to, into my cart for the reduced price.

One such product was Chebe Gluten-Free All Purpose Bread Mix.

The great thing about Chebe Gluten-Free All Purpose Bread Mix is how allergen friendly it is.  Not only is it gluten-free, but it is also soy free, corn free, rice free, potato free, yeast free, peanut free, tree nut free, egg free (unless you use it in the mix instead of egg substitute), lactose/casein free, iodine free, and sugar free.  This mix is also non-GMO and certified kosher!

Well, my pantry is quite full of numerous mixes and delicious things to try.  So, this just sort of sat.  But with the expiration date fast approaching…it was time to give them a shot.  And, I was thinking something light and savory for dinner.  So, I hit up Pinterest and found a recipe for BBQ Portobello Sliders.  Now, I didn’t have portobello mushrooms, but had rather large crimini ones in my fridge from my CSA bin.  I had the rest of the ingredients too.  What I lacked was the most obvious part of the slider…the slider buns.

Then…it dawned on me that I had this mix in my pantry…and it was getting close to the time it needed to be used up.  So, out it came and I got to work on making up my own little gluten-free slider buns.

Slider buns made from Chebe Gluten-Free All Purpose Bread Mix

This was a simple process.  Following the instructions on the box, I simply poured the bread mix into a bowl, added two eggs and 2 tablespoons of olive oil…mixed that together…then slowly added exactly 1/4 cup of water.  Once that was all incorporated and blended, I kneaded the dough with my hands until it was smooth and all one large lump of bread dough.

And here is where I went off script.  The rest of the recipe created 4 sandwich buns…but I wanted slider buns.  So I made 10 little rolls out of the lump of bread, flattened them down into little round disks like the recipe said, and brushed each one with olive oil.  I then put it in my oven at 375° F for about 25 minutes and allowed them to bake.

When time was up, I removed them from the oven and allowed them to cool on the baking sheet while I prepared the mushrooms, caramelized the onions, and sliced an avocado.

First of all, I was hoping these would crisp into a beautiful golden-brown…but they never quite did.  They looked anemically pale.  It was a bit off-putting, but…that was the last of my problems.  The mix, prior to putting everything together was a very white, very thin powder.  That being said, this Chebe mix is made up simply of tapioca powder, modified tapioca starch, cream of tartar, sea salt, and sodium bicarbonate.  You can add cheese to the mix, but I didn’t…as the sliders were going to have cheese on them.  Still, with the brushing of olive oil…one would think there would still be some golden crust forming.

That was the first disappointment.  The second disappointment was that they really didn’t puff up much.  The flat little disks of dough rose only slightly in the heat of the oven.  So…these made for very flat slider buns.

Finally…the third disappointment was…the taste.  Not that these tasted bad…they just weren’t light and soft like the Cheese Bread that I made from Chebe.  This dough wasn’t too dense, but it was definitely not soft and squishy like a slider bun should be.  It just felt…wrong.  The flavor was fine…but it was the texture that was just all wrong for me this time.  It just didn’t work.

But…I went ahead and sliced the flat rolls in half (as best I could) and filled them up with my mushroom caps, vegan cheese slices, caramelized onions, avocados and a drizzle of barbeque sauce and used them for the purpose I baked them up for.  It wasn’t bad.  I just wish they had been softer and a bit fluffier.

That being said, I have six more rolls in my fridge that I’ll use up tomorrow by making breakfast slider sandwiches.  I am kind of sad about the way this mix turned out, because I have raved about Chebe in the past and was really hoping for that trend to continue.  Sadly…this one failed to win me over.

Maybe, with some convincing, I’ll give another mix a try.  But this one…won’t find it’s way into my pantry again any time soon.

BBQ Mushroom Sliders sandwiched between buns made from Chebe Gluten-Free All Purpose Bread Mix