I have never been shy about my love of the products that Schar Gluten Free puts out on the market. I have never had a complaint about any version of their gluten free take on a bread, cookie, candy, cracker, etc. But one of my most favorite things that have introduced has to be their Gluten Free Honeygrams.
Gluten free graham crackers, my friends.
SO GOOD!
Well, with the weather cooling down…bon fires and s’mores are in season!! And thanks to these amazing Honeygrams, the gluten-free community will never lack for the perfect vehicle for marshmallows and chocolate bars.
Are you drooling yet?
I was sent a fantastic Smores kit from Schar and got to work on a recipe. Immediately, I knew I wanted to do something that I have great passion for…
Yep.
Breakfast. And yes…SCONES!! Although bagels were my second choice. I might do that in the very near future!
Below is the recipe…but before you check that out, be sure you head over to http://www.smoreschar.com/ for a free sample pack and a coupon for $1.00 off!
And then come back and check out my recipe for these S’mores Scones, made with the help of Schar’s Honeygrams!
Recipe: Gluten Free S’mores Scones
Ingredients:
For the Scones
1 cup gluten free bread mix (I used Mina’s Purely Divine)
1 cup gluten free all-purpose flour (I used Cup4Cup)
1/2 cup graham cracker crumbs (about 6 Schar Honeygram crackers put through a food processor or blender)
1/3 cup sugar
1 teaspoon baking powder
1/2 teaspoon baking soda
1/2 teaspoon salt
1/2 cup unsalted butter (I used Earth Balance)
1/2 cup plain Greek yogurt (I used So Delicious)
1 egg, slightly beaten
1 teaspoon vanilla extract
2 tablespoon milk (I used Silk Unsweetened Cashew Milk)
1/2 cup chocolate chunks/chocolate chips
2/3 cup mini marshmallows
For the Glazes
1 tablespoon butter
1-1/2 tablespoon water
1/2 cup mini marshmallows
1/2 cup confectioner’s sugar
1/8 teaspoon salt
1/3 cup dark chocolate chips or chocolate bars
Directions:
Preheat oven to 350.
Line a baking sheet with parchment paper or a baking mat.
In a large bowl, whisk together flours, graham cracker crumbs, sugar, baking powder, baking soda, and salt.
Cut in butter with pastry blender, two forks, or your hands until mixture resembles coarse crumbs.
Add in yogurt, egg, vanilla, and milk. Mix until just combined. Stir in chocolate chunks and marshmallows.
Turn dough out onto a lightly floured surface. Knead about 5-6 times until dough just comes together. Shape dough into an eight inch circle. Cut into 8 pieces and place on prepared baking sheet.
Bake for 15-18 minutes or until just starting to turn light golden brown. Remove from the oven and allow to cool.
While scones are cooling, whisk together confectioner’s sugar and salt. Melt butter and water together over medium low heat. Add in marshmallows and stir until melted. Add to sugar mixture and whisk until combined and smooth. Drizzle over cooled scones.
Melt chocolate according to package instructions. Drizzle over scones. Allow to cool and harden before serving.
Serve.
Devour.
~*~*~
These are fantastic. And they do bring that entire Smores experience and taste to your breakfast table. Scones are fluffy and crumbly and these have an extra benefit of a sweet twist as well.
Remember to head over to Schar and get your sample pack of Honeygrams. Trust me…no other gluten-free graham crackers taste like these. Even better than the real thing!
So, this past weekend, I did something I have never done before…but, believe it or not…it was on my Summer Bucket List. I went and picked blueberries. Yes…I went out…in nature…to a local blueberry farm and spent 2 hours with my roommate, Cathy, picking over 10 pounds of blueberries.
What does one do with 10 pounds of blueberries, you might ask.
Well…I make a killer blueberry jam. And I did that with 5 pounds of them. And then…before we even picked them, back when only jam was in the plan, she kept saying that I was going to make Lemon Blueberry Scones. This was news to me…but I seriously hate to disappoint. So, after spending an afternoon making gluten-free sugar cookies and then…my famous blueberry jam…I got to work on some scones.
I LOVE scones, but haven’t made them in quite a long time. But…any excuse for scones, right? So…I got to work and this is what I baked up…
2 cups (240g) all-purpose flour, plus more for hands and work surface (I used 1-2-3 Gluten Free All-Purpose)
6 Tablespoons (75g) granulated sugar
2-1/2 teaspoons baking powder
½ teaspoon salt
zest of 1 large lemon
1/2 cup (115g) vegan butter, cold and grated (I used Earth Balance)
1/2 cup (120ml) coconut cream
1 large egg (or egg replacer)
1 teaspoon vanilla extract
1 cup blueberries (fresh or frozen)
Glaze Ingredients:
1/2 cup confectioners’ sugar, sifted
2 Tablespoons fresh lemon juice
1 Tablespoon lemon zest
Directions:
Preheat oven to 400°F. Adjust baking rack to the middle-low position.
Line a large baking sheet with parchment paper or a silicone baking mat. Set aside.
In a large bowl, whisk the flour, sugar, baking powder, salt, and lemon zest.
Grate the cold butter (I use a box grater; a food processor also works). Toss the grated butter into the flour mixture and combine it with a pastry cutter, a fork, or your fingers until the mixture resembles coarse meal. Set aside.
In a small bowl, whisk the cream, egg, and vanilla together. Drizzle it over the flour mixture and then toss the mixture together with a rubber spatula until everything appears moistened.
Slowly and gently fold in the blueberries. Try your best to not overwork the dough at any point. Dough will be a little wet.
Work the dough into a ball with floured hands as best you can and transfer to a floured surface. Press into a neat 8″ disc and cut into 8 equal wedges with a very sharp knife. Place scones at least 2 inches apart on the prepared baking sheet. Brush top with extra coconut cream and sprinkle with lemon (or plain) turbinado sugar.
Bake for 20-25 minutes or until lightly golden and cooked through. Remove from the oven and allow to cool for a few minutes.
To make the glaze, simply whisk the confectioners’ sugar and 2 Tablespoons lemon juice together until smooth. Add 1 Tablespoon of lemon zest. Drizzle glaze over scones.
~*~*~
These scones are best enjoyed right away, although leftover scones will keep at room temperature for 2 days. These freeze well for up to three months. Just thaw overnight in the refrigerator and heat up to your liking.
Want an amazing way to start your day…you gotta bake up some of these!! ENJOY!
So…it’s a thing that we do whenever there is a weekend at my friend Jenn’s house (aka: Weekend at Jenn’s)…where we bake up or cook up something different, fun, unsual, and (hopefully) delicious every Sunday morning. It’s nice because it’s a great way to spend the morning, and, it means that Cathy and I depart with full bellies to get us home to Louisville. It’s a fun little tradition. And, both Jenn and I make it a point to find interesting recipes to attempt each time.
Except, as this past weekend approached, we realized we hadn’t done our usual scouring of Pinterest for something new, exciting and fun. So, aside from the Pink Salad (a must!) that she makes and that we managed to eat in 2 days, we thought of revisiting the the Gluten Free Strawberry Breakfast Cake, which we made the last time we were there. And, while this was definitely a tasty option, I was in the mood to try something new.
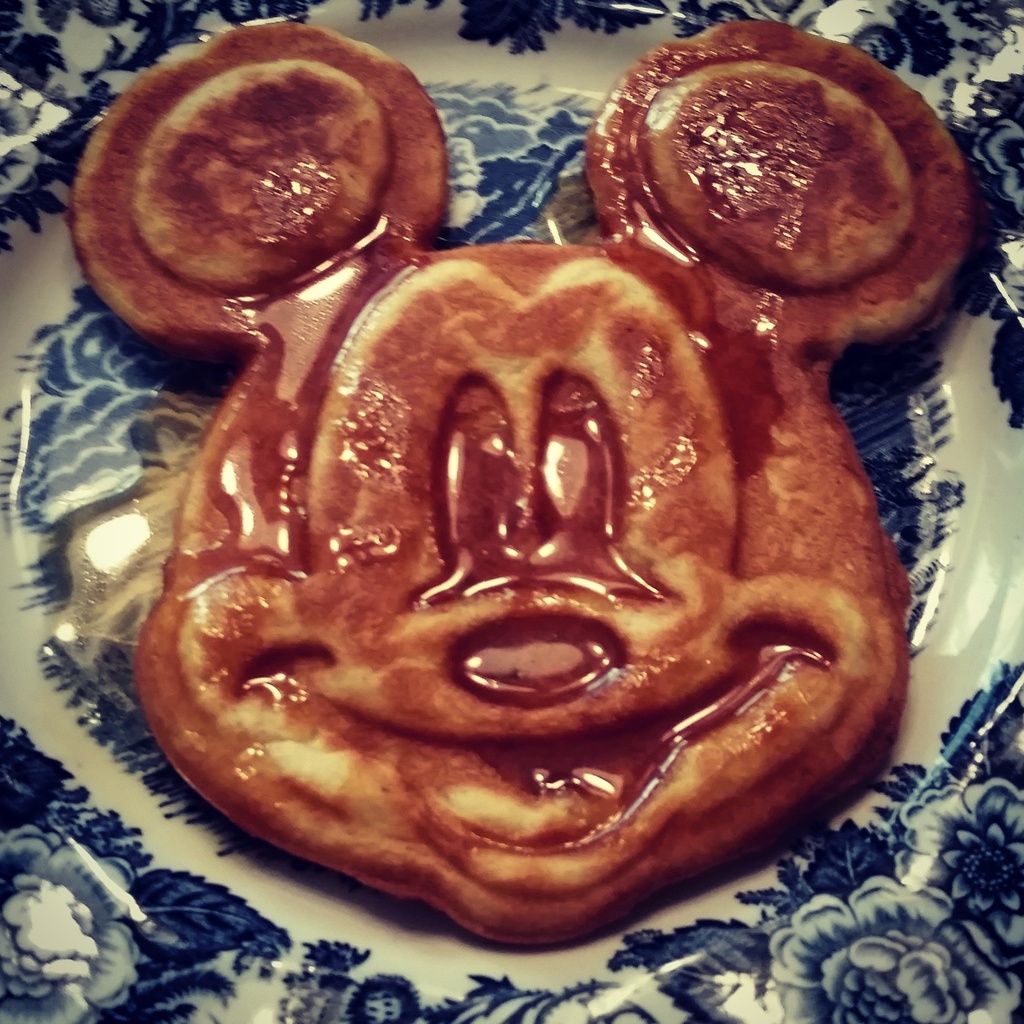
And, for some reason, I was thinking waffles!
So, after a bit of google-fu, I stumbled across the website Buttercream Blondie: Flirt With Desserts. And the google search that brought me there involved Magners Irish Cider (the best hard cider!) and the word…WAFFLES. Hence, her recipe for the Magners Hard Cider Brown Butter Waffles. Jenn and I simply had to swap out the flour with some of the gluten-free ones she keeps on hand (because she is awesome like that!) and we had breakfast in the making. We also adjusted some of the measurements because we were not going to open up a bottle of Magners and only use part of it at 8 am in the morning. Not happening. So, below is the adjusted recipe to fit my diet and what we had on hand! Guess what…theses were phenomenal.
Mickey shape not required…but with a Disney trip in the planning stages, I figured it was appropriate!
Recipe: Gluten Free Magners Hard Cider Brown Butter Waffles
Gluten Free Magners Hard Cider Brown Butter (Mickey) Waffles
Servings: 7-8 (depending on waffle iron)
Time: Prep 15 minutes; Cook 10 min per waffle
Ingredients for Waffles:
2 cups Gluten Free All Purpose Flour (we used King Arthur Gluten Free All Purpose Baking Mix)
Bring Magners and light brown sugar to a boil in a medium-size sauce pan.
Reduce heat to medium and allow mixture to buble away for about 10-20 minutes. It should reduce down to about 5 ounces or so. Stir in 1 tablespoon of unsalted butter.
Meanwhile…make the waffles.
Brown the butter. To do this, simply start melting butter over medium heat in a pan with a light-colored bottom so that you can keep track of the color. Swirl the pan occasionally to be sure that the butter is cooking evening. As it melts, the butter will begin to foam and the color will progress from lemony-yellow to golden-tan, and finally, a toasty-brown. Once you smell that nutty aroma, take the pan off the heat and transfer the browned butter to a heat-proof bowl to cool.
Heat the waffle iron.
In a bowl or measuring cup, mix together the milk (dairy or non-dairy), vanilla extract, and 2 egg yolks.
In a larger bowl, mix together all the dry ingredients (flour, baking powder, salt, brown sugar).
Add the cider, milk-yolk-vanilla mixture, and browned butter to the dry ingredients and whisk together until smooth.
Whip up 2 egg whites in a clean bowl until stiff peaks form. Fold the egg whites into the batter.
Spoon into waffle iron and cook until golden brown.
ENJOY!
~*~*~
Let me start by saying that I think that this syrup is the best syrup I have ever had the pleasure of drinking…er…pouring over my waffles. It is sweet and delicious and amazing. And yes…tastes like Magners (aka: BEST HARD CIDER EVER!). And when paired with a waffle, that has a batter that is prepared with the fizzy goodness of Magners, well, you have a winning combination. The waffles were crispy, golden, amazing on the outside, and boozy, soft, and warm on the inside. It was Disney Boozy Breakfast perfection. And I was one happy waffle-eating gluten-free girl.
This recipe is phenomenal. Especially the syrup. Just don’t over reduce the syrup or you’ll end up with Magners caramel…which happened to us on our first attempt to make the syrup. We ended up with boozy Magners caramels though, so it all worked out okay. And the second batch of syrup cooked up perfectly while I made Mickey waffles with the boozy-good batter. Best. Breakfast. Ever.
All you naysayers beware!! Just because something is gluten free and dairy free does not immediately mean it will be flavorless or taste like cardboard. I don’t know what cardboard tastes like since I’ve never had the urge to lick it or anything, but I promise you…this recipe will surpass all your expectations.
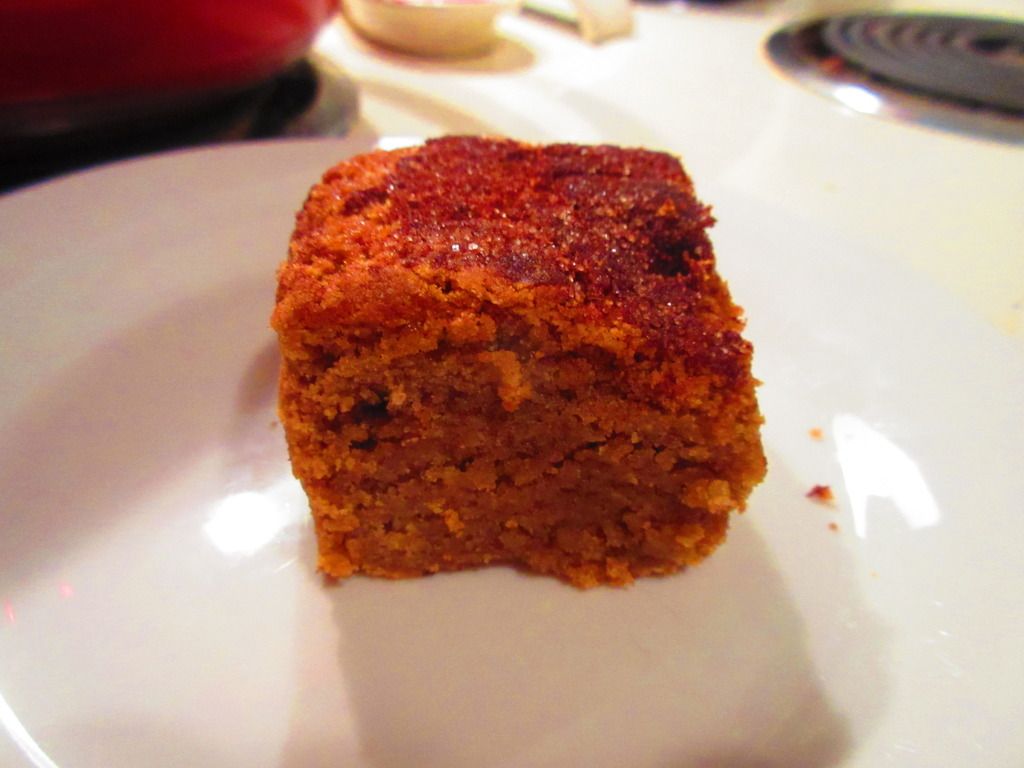
I was looking for a different sort of snickerdoodle treat to bake up for my amazing friends and neighbors downstairs. They had a rough couple of weeks, but with things starting to turn around, I wanted to make something to celebrate. That being said, I set out to bake up something snickerdoodle, that wasn’t necessarily the cookies themselves. I still have to play around with my mom’s snickerdoodle cookie recipe and attempt to convert it to gluten and dairy free.
So…I found a recipe on The Cool York and changed it up to fit the diet they are starting out following, which just so happens to coincide with mine. BONUS!!
2-2/3 cups gluten-free baking flour (I used Mina’s Purely Divine Gluten Free All-Purpose Flour)
2 tablespoons baking powder
2 cups brown sugar
1 cup Earth Balance Vegan Buttery Sticks (2 sticks) softened
2 eggs, room temperature
3 tablespoons white sugar
1 tablespoon cinnamon
Directions:
Preheat oven to 350°F.
Place the butter & brown sugar in the mixing bowl and cream together.
Add in the 2 eggs until combined.
Add the baking powder to the mixture. Now, add in the flour.
Line a 9 x 13 baking sheet (or 8 x 8 if you prefer them thicker, like me) with parchment paper. Spread the batter over the pan.
Combine the white sugar and cinnamon in a bowl and sprinkle generously over the batter.
Bake in the oven for 28-32 minutes (up to 40-45 min if using the 8 x 8 pan like I did).
Take out of the oven and let cool before serving!
Slice & enjoy
~*~*~
These blondies baked up light and soft and chewy and amazing. Seriously. I took half of the recipe and gave the rest to them. I am beyond words with how well this worked out, honestly. Totally delicious. I especially loved the gooey and rich texture that these had. I warmed mine up for about 20 seconds in the microwave and WOW!! Just WOW!! The original recipe called for 3 tablespoons of both sugar and cinnamon to top…but that was really heavy on the cinnamon. So I reduced it to 1/3 of the amount and it was that perfect sweet/spicy level. If you like snickerdoodles…you’re absolutely going to love these. And…if you don’t have to eat gluten-free or dairy free…regular flour and butter can be used, of course.
I am in love with my Gluten Free on a Shoestring books. I always have been. I always will be. Because the recipes utilize items you would normally have in your kitchen. Not only that, all of the recipes are super easy to prepare and have been DELICIOUS!
I mean…DELICIOUS!
I own three of the four Gluten Free on a Shoestring books by Nicole Hunn. However, this particular recipe I stumbled across through a post on Facebook…and it is not in any of her current books. That being said, I pinned it to my Pinterest account and then made arrangements to make it that weekend.
And I did. And it was awesome.
I loved how light and full of peanut butter flavor this bread was. While the chocolate chips are optional, I highly recommend it. Great topped off with jam or…as I enjoyed preparing it…as French toast…with blueberry maple syrup topping it off. Whether you like it plain, jammed up, buttered up, or French toast style…this quick bread is super easy to make and even easier to devour.
Recipe: One Bowl Gluten-Free and Dairy-Free Peanut Butter Quick Bread
One Bowl Gluten-Free and Dairy-Free Peanut Butter Quick Bread
1 cup smooth natural peanut butter (I used Trader Joe’s Organic Unsalted Natural Peanut Butter, but I bet any other nut butter, or non-nut-butter would work beautifully)
1-1/4 cups milk, at room temperature (I used Silk Unsweetened Cashew Milk)
2 eggs at room temperature, beaten
2/3 cup granulated sugar
1 teaspoon kosher salt
2 teaspoons baking powder
1/2 teaspoon baking soda
1-1/2 cups all purpose gluten free flour (I used Mina’s Purely Divine Gluten Free All-Purpose)
2 tablespoons cornstarch (or try arrowroot or potato starch) (I actually used arrowroot)
1-1/2 to 2 ounces semi-sweet chocolate chips (optional, but recommended!) (I used Enjoy Life)
Directions:
Preheat your oven to 325°F. Grease or line a standard 9-inch x 5-inch loaf pan and set it aside.
In a large, heat-safe bowl, place the peanut butter and microwave for 30-seconds on high power just to loosen up the peanut butter and make it easier to stir. Remove it from the microwave and whisk the peanut butter until smooth.
Add the milk, eggs, sugar, salt, baking powder and baking soda, whisking to combine well after each addition. The batter will be thin.
Switch to a large spoon or spatula, and add the flour and cornstarch, mixing to combine after each addition. The batter will be relatively thick.
Scrape the batter into the prepared loaf pan, and smooth the top with a wet spatula. Using a very sharp knife, score the center of the loaf along the length from one end to the other in one swift motion. Scatter the (optional) chocolate chips over the top of the batter, and press the chips gently into the batter to adhere.
Place the pan in the center of the preheated oven and bake until a toothpick inserted in the center comes out with a few moist crumbs attached (about 1 hour), rotating once during baking.
Remove from the oven and allow to cool in the loaf pan for 15 minutes before turning out onto a wire rack to cool completely.
Slice thickly and serve, topped off however you want. Wrap any leftover slices tightly in freezer-safe wrap and freeze until ready to use. Defrost at room temperature.
ENJOY!
~*~*~
Serious…serious yum! I mean…yum!! And if you want a protein-packed breakfast or snack, this is the bread to make. It has great flavor, great taste, great texture. It was light (not dense and heavy) and the chocolate chips gave it this nice touch of sweetness without overpowering the entire recipe. And, as I said, it is great as French toast. For real!! I was sad when my roommate and I polished this off on Friday for breakfast, but I will definitely be making this again.
It was one of those moments where you receive an e-mail with a recipe…and you’re out of town visiting a friend, who happens to keep gluten-free goodies at her house just for you! And every ingredient needed for said recipe that caught your attention is already in her pantry, fridge, or freezer.
To me, that sounds like a sign to make something for sure. And as it is traditional for the two of us to cook at least once together when visiting…this recipe seemed to fit the bill.
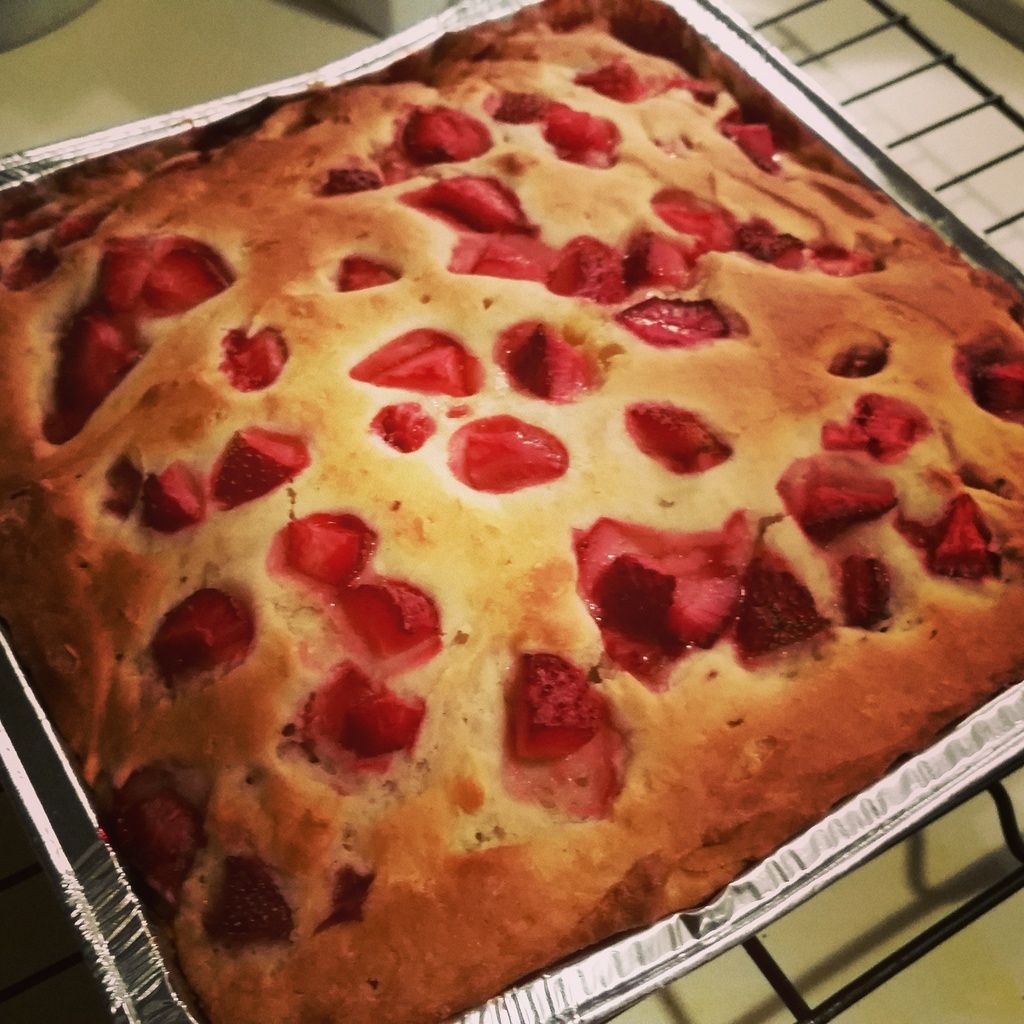
And why did it catch my eye? First…the word “breakfast” was involved. We all know that my favorite meal of the day is breakfast. Secondly…the word “cake.” Yes…CAKE FOR BREAKFAST!
I have actually made this recipe twice now…and found the flour I used for it the second time (Mina’s Purely Divine Gluten Free All-Purpose Flour) worked a lot better than the Trader Joe’s Gluten Free All Purpose that we used at Jenn’s. I served this up to my parents, my sister, and my nephews…and all loved it as much as my roommate, Jenn, and I did. So…this is forever being made.
The original recipe was from Gluten Free on a Shoestring…posted by Udi’s Gluten-Free. The recipe below…is how I make it!
Cake for breakfast…it sounds so sinful, but, even more importantly…it’s delicious.
4 tablespoons unsalted butter, at room temperature (I used Earth Balance)
1/2 cup + 1 tablespoon vanilla Greek yogurt, (If dairy-free, use soy/almond/coconut yogurt) (you make need to add more to mix)
2 eggs, beaten
1-1/4 cups fresh roughly chopped strawberries
Directions:
Preheat your oven to 350°F. Grease an 8-inch square baking pan, then line it with crisscrossed sheets of unbleached parchment paper, overhanging both sides of the pan. Set the pan aside.
Make the batter.
In a large bowl, place the flour, baking powder, baking soda, salt and sugar, and whisk to combine well.
Create a well in the center of the dry ingredients and add the butter, yogurt and eggs, mixing to combine after each addition. The batter will be thick.
Add 1 cup of the chopped strawberries and mix gently until the strawberries are evenly distributed throughout the dough, taking care not to crush the strawberries.
Scrape the batter into the prepared pan and spread into an even layer with a wet spatula. Scatter the remaining 1/4 cup chopped strawberries over the top of the batter, pressing them gently into the batter.
Bake the cake.
Place the pan in the center of the preheated oven and bake until a toothpick inserted in the center comes out clean and the top is very lightly golden brown (about 25 minutes). Remove from the oven and allow to cool in the pan for 10 minutes before lifting out by the overhung parchment paper and placing on a wire rack to cool (peeling off the parchment from the bottom of the cake if possible). Allow to cool completely before slicing into 16 squares and serving.
**NOTE: I store this in the fridge and give it a 20-30 second heat up in the microwave before eating. It is DIVINE!**
~*~*~
This cake is not just for breakfast, but it is a rather healthy, low-calorie, and amazingly moist and delicious way to have breakfast. Nothing better than having your cake (for brekkies) and eating it too! I was so impressed by this recipe, and totally made only a few slight adjustments to the recipe, but it came out perfect. And I intend to make it again very soon. It’s easy, it’s delicious…it’s what breakfast should be.
I have had this fun and passing relationship with the famous (in the gluten-free community, anyway) Jules Shepard, formerly known as Jules Gluten Free, now know as gfJules. When I had to go gluten-free three years ago, one of the first people I encountered through social media was none other than Jules Gluten Free. She was funny and knowledgeable, and she had these elusive product mixes (from all-purpose flour to bread mixes to cookie mixes to cake mixes to pizza crust mixes) that nowhere in my area carried. At one point, she was presenting in Lexington, Kentucky, and I had intended to drive down and see her presentation…until the Sherman-Minton bridge here in Louisville was closed indefinitely due to a large crack in the weight bearing portion…making going anywhere from the Indiana side of the river a real nightmare.
I finally met gfJules last year, at a Gluten Free Expo in Indianapolis, Indiana. I bought her cookbook. We talked. We laughed. We took a picture together. It was awesome. And it was like meeting a celebrity, to be honest. I have followed her Facebook page, saw her through the very public break from her partners in the company that she founded, Nearly Normal Cooking, and had grandiose plans to find and purchase her flour at some point. Or a mix. I didn’t care.
Until December 2014, that had yet to happen.
But then, my Holiday 2014 (December) Cuisine Cube arrived in the mail with loads of holiday goodness just ready to be explored and used. For those of you who may be new to some of my blogging, let me quickly tell you a little about Cuisine Cube!
Cuisine Cube is a subscription service that delivers 5-6 gluten-free, full-size products to your door for as little as $34.99/month. Inside the cube, you will discover full-size products (not sample sizes) that are made by local and smaller, artisan companies, rather than those that you can find at the average grocery store. It has introduced me to so many new and delightful products. Each box contains a breakfast, lunch, dinner, snack, and dessert product…and then, sometimes, an extra bonus item. Who doesn’t love a little something extra, right? Keep in mind, however, that Cuisine Cube has gone through some changes as of May. No longer do they strictly only offer gluten-free cubes. In addition to their gluten-free option, they now also offer Artisan and Vegan cubes as well. The Artisan cube means that you have no food allergies and foods that contain common food allergens will be included. The Vegan cubes contain products that are dairy and animal free. And, they still have the Gluten Free cubes, which will have products that contain no gluten or wheat. So, if you’re really interested in being introduced to the smaller, lesser-known, artisan companies, give Cuisine Cube a try!
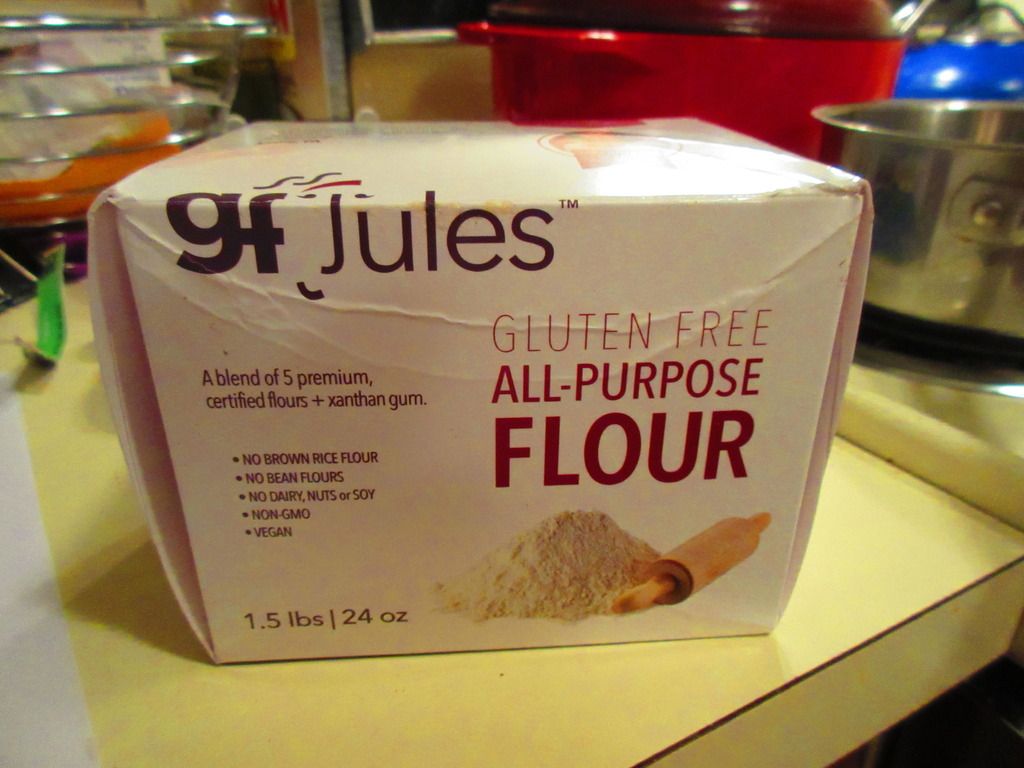
So…here I was…in December and inside my cube was a 1.5 ounce box of gfJules Gluten Free All-Purpose Flour. With this item, Cuisine Cube also provided a recipe card for Baguettes. I don’t have a baguette pan, so I tucked this box into my pantry to use…and then got distracted by the open bags of Better Batter and Cup4Cup in my pantry. It happens. But it shouldn’t. This product never should have gone untouched for that long. But, before I tell you why, let me first tell you a little bit about Jules Shepard.
Jules Shepard was diagnosed in 1999 as a Celiac. She didn’t see this diagnosis as the end of the world though. In fact, the former attorney was unwilling to accept the dry, gritty, vacuous foods that were the norm for the gluten-free diet back then. After two years of hard work in her kitchen, Shepard perfected an all-purpose gluten free flour blend that allowed her to continue to do something she loved – bake! Even she never would have guessed that this one thing would eventually set her apart in the gluten-free community as a leader, inspiration, and advocate. She perfected her ‘acts-just-like-wheat-flour’ blend, and word spread in her circles. People began to beg her to make her 5-flour blend for them. She introduced this flour to the gluten-free community at large in 2008, with her former company, Jules Gluten Free, but it is now developed and available exclusively through her new company, gfJules, which began in March 2014. From there, her journey has only become more amazing…and her products remain top of the line!
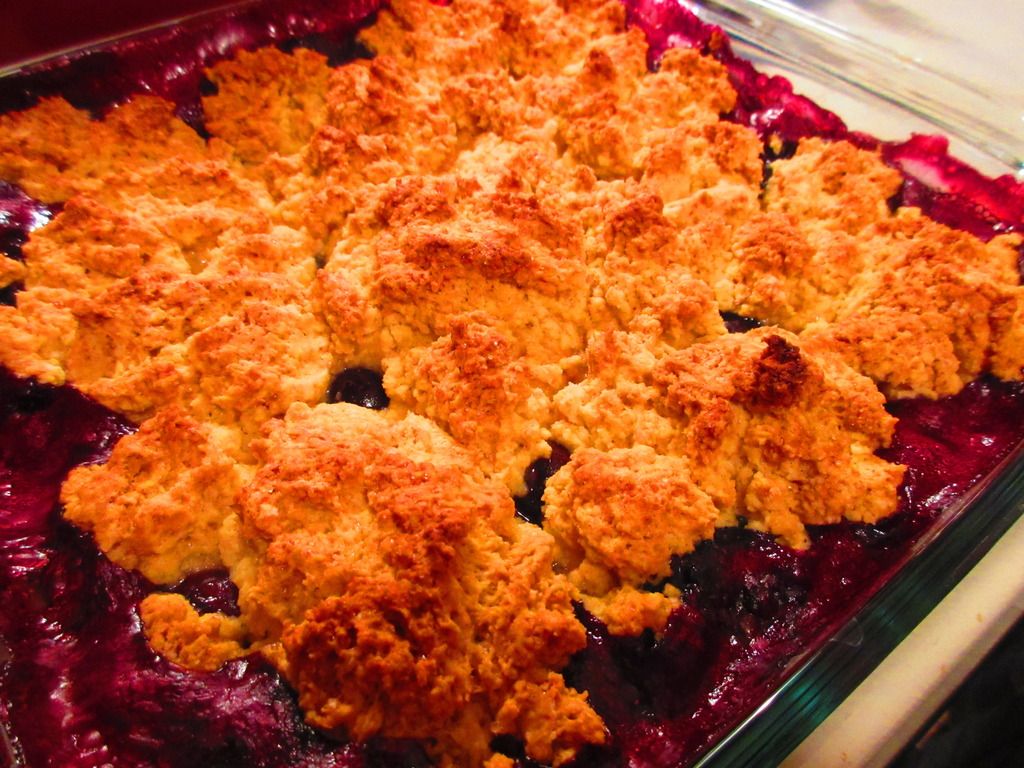
I can vouch for that, mind you, as I was preparing a dessert for a birthday party at the office (and 4th of July celebration) this week. I have delicious local blueberries that my friend, Harry, picked for me. I love blueberries, and always am happy to receive a bunch of his harvest. With all these amazingly fresh berries on hand, it occurred to me that I could make a festive and (hopefully) delicious blueberry cobbler. Because my kitchen is strictly gluten-free, everything I provide to office pitch-ins is gluten-free. Some people at the office won’t even give my food a try, but some do…and most are surprised by the flavor and texture…and how normal it is.
Well, my love affair with gluten-free flours just reached a whole new level. I actually found a recipe for the gluten-free (and vegan) blueberry cobbler on gfJules sight. And being that I had a box of gfJules Gluten Free All-Purpose Flour in the pantry. New recipe…why not go for broke and try a new flour too. As this was one of her recipes, I figured it was best to stick with the flour originally used to make it. Logic!
Let me tell you something…from the get-go, I realized how amazing this flour truly was. When I mixed it with the vegan butter and the egg substitute, it all just came together perfectly. It had this great biscuit texture to it. And this was before topping off my blueberries with it! How’s that for being impressed really early in the game. It worked as a thickener with the heated sugar and water that the blueberries were stirred into, and it produced the most amazing batter for the biscuit-y top that gets baked right on top of the fruit. I was nervous when I popped it into the oven to bake…but I should have never doubted it.
When my cobbler emerged from the oven, piping hot, it was warm and sweet on the bottom, and the cobbler part…that top bready portion, was this perfect crisp, golden brown. I had to wait until the following day to actually taste it…but when I did, I was beyond impressed. The flour really made this remarkable crusty top…and it didn’t have that weird gluten-free flavor or texture to it. No one, save for the fact that I brought it in, would have known it was gluten-free. Seriously…and everyone who was brave enough to try it gave only the highest praise for the treat. The perfect blueberries…with the perfect flour…made for the perfect summer dish for this little pitch-in. As I have failed miserably at gluten-free bread, this makes me want to pick up baguette pans so that I can give the recipe that accompanied this product in my Cuisine Cube. This might happen. Williams-Sonoma…I’m coming for you.
So, now that I’ve gone over why I fell in love with the gfJules Gluten Free All-Purpose Flour, let me tell you a little bit about what is inside. This flour is made from modified tapioca starch, potato starch, corn starch, corn flour, white rice flour, and xanthan gum. It is gluten-free, wheat-free, dairy-free, nut-free, soy-free, vegan, KOSHER – and now NON-GMO!
As far as the nutrition information goes, gfJules Gluten-Free All-Purpose Flour really falls in with others on the market. A serving size is 31 grams of flour, which will give you 110 calories, 0 grams fat, 0 grams saturated fat, 0 mg cholesterol, 10 mg sodium, 26 grams carbohydrates, less than 1 gram fiber, 0 grams sugars, and 1 gram of protein.
And if you don’t believe me, the truth is in the use!! And below is the recipe I used this flour in! You should really try it out. I think you’ll be impressed too!
Gluten Free Old Fashioned Blueberry Cobbler (made with gfJules Gluten Free All-Purpose Flour)
Ingredients:
3 Tbs. gfJules Gluten Free All-Purpose Flour
3/4 cup granulated sugar
1/2 cup water
1 tsp. pure vanilla extract
4 cups fresh blueberries
1 cup gfJules Gluten Free All-Purpose Flour
¼ cup lightly packed brown sugar or unrefined coconut palm sugar
¼ cup milk, dairy or non-dairy
1 egg or favorite egg substitute
2 tsp. baking powder
1/2 tsp. baking soda
¼ cup butter or non-dairy alternative (Earth Balance® Buttery Sticks)
Directions:
In a medium-sized saucepan, combine gfJules™ Flour, sugar and water. Stir and cook over medium heat until thickened, approximately 12-15 minutes. The mixture will over-boil and burn if not stirred often, so watch the pot and reduce the heat if the mixture is too bubbly or is browning. Add the vanilla extract.
Wash and remove all blueberry stems. Stir the blueberries into the cooked sugar mixture to coat.
Pour the filling into a 9- or 10- inch, deep pie plate (it’s important not to bake the cobbler in too small or too shallow of a plate, or the hot blueberry filling will bubble all over the sides).
Preheat oven to 375° F.
In a medium-sized bowl, whisk together gfJules™ Flour, brown sugar, baking powder and baking soda. Using a pastry cutter or two butter knives, cut in the butter until the flour looks like small gravel or pebbles.
In a separate bowl, stir the egg and milk to mix. Slowly add this mixture to the flour bowl and stir with a fork until completely combined.
Scoop several large spoonfuls of this batter onto the top of the filling in the pie plate. It will rise and touch the other spoonfuls as it bakes, to cover most of the top of the filling, as pictured.
Line the oven rack with foil and place the filled pie plate on top of the foil to prevent any bubbly mixture from falling onto your oven floor and burning.
Bake for 20-25 minutes, or just until the cobbler is browning and somewhat firm to the touch. A toothpick inserted into the cobbler, then removed, should be clean.
Serve warm or cold.
~*~*~
This flour is the best yet. Honestly, it bakes up perfectly. It is light, fluffy, and amazing. It would fool the unassuming person into not even guessing that it was gluten-free. This product is as amazing as the woman who created it. Thank you gfJules (Jules Shepard) and Cuisine Cube…for finally giving me the opportunity to try this fantastic flour. Now…to get more!
So…I’m totally addicted to Brussels sprouts. You may or may not be aware of this. The first time I ever cooked them up, I made them in a casserole. And then…it was all about the roasting. With olive oil and seasoning…or maple syrup and nuts…the possibilities were endless.
But…I have a lot of wine in my apartment. A LOT. And with a fresh bottle of white wine now open and in the fridge…I am coming up with clever ways of using it that doesn’t involve drinking it night after night after night. Not that there is anything wrong with that…but the medication I’m on for my hip sort of doesn’t mix well with alcohol. So…yeah…
With Brussels sprouts in my bin this past week and wine in the fridge, I went on a small hunt for recipe ideas. Because I was just going to roast them up…but that didn’t use any wine…
What I found was a recipe from Taste of Home, which I modified slightly to fit the ingredients I had on hand and to fit my dietary needs. And what emerged…was a nice twist on Brussels sprouts.
Recipe: Brussels Sprouts in a Gluten Free White Wine Sauce
Brussels Sprouts in a Gluten Free White Wine Sauce
1/4 cup gluten-free all-purpose flour (I used Cup4Cup)
1/2 teaspoon salt
1/4 teaspoon pepper
1 cup non-dairy milk (I used unsweetened cashew milk)
2/3 cup white wine
1 cup white onion, chopped
2 tablespoons raw whole almonds
1 tablespoons sliced almonds
Directions:
Place Brussels sprouts and a small amount of water in a microwave-safe dish. Cover and microwave on high for 2 minutes. Stir; microwave 1-2 minutes longer or until partially cooked. Let stand 5 minutes; drain and set aside.
In a large saucepan, melt butter. Stir in the flour, salt and pepper until smooth. Combine cream and wine. Gradually whisk into flour mixture. Bring to a boil. Cook and stir for 1-2 minutes or until thickened and bubbly. Stir in the onions, chopped almonds, and reserved Brussels sprouts.
Transfer to a greased 1-1/2 quart baking dish. Sprinkle with sliced almonds. Bake, uncovered, at 400°F for 20-25 minutes or until bubbly and Brussels sprouts are tender. Season with salt and pepper.
~*~*~
This was definitely a change from the oven roasted version, but it was good to step outside the box and do a little cooking with wine. And it was full of flavor and cooked up really well. Everything went together. I added a few red pepper flakes to my own bowl just to take it up a notch.
Back when I first went gluten-free, the receptionist at my office was on this diet kick. And she brought in these muffins that were made with only two ingredients: spice cake and a can of pumpkin. That’s it. I didn’t get to try them, despite her asking me to at least take a bite…because I didn’t want to feel ill the rest of the day, or perhaps the week. Everyone else who tried them though loved them.
That was over three years ago. And despite there being at least one gluten-free spice cake mix out on the market (made by Namaste Foods)…I hadn’t really gotten around to purchasing the mix and then giving a gluten-free version of those muffins a try.
And then…this past fall as I was strolling down the back aisle of my Whole Foods Market…I saw a display of gluten free fall baking items, all by Pamela’s Products. They were the new Gluten Free Pumpkin Bread Mix and the new Gluten Free Spice Cake Mix. I had just recently gotten a gluten-free pumpkin bread mix from a different company, but the spice cake mix…that made me happy. I turned to my roommate and asked if we could break the budget for this…because I had two ingredient muffins I wanted to make with it. She agreed. YAY! Home came the cake mix.
However, with the busy, hectic holidays…my time for baking things for me (I baked a lot of gluten-free goodies for family/friends/special businesses) and the muffins got pushed to the back burner. As a lot of my great ideas at the time…when I am purchasing something often do. Sadness. But sadness no more…because I needed some easy breakfast food this week…mostly because I’m attempting to get back into a workout routine, despite my injury, and have some early morning sessions at the gym planned out. The easier something is to make afterwards, the better!
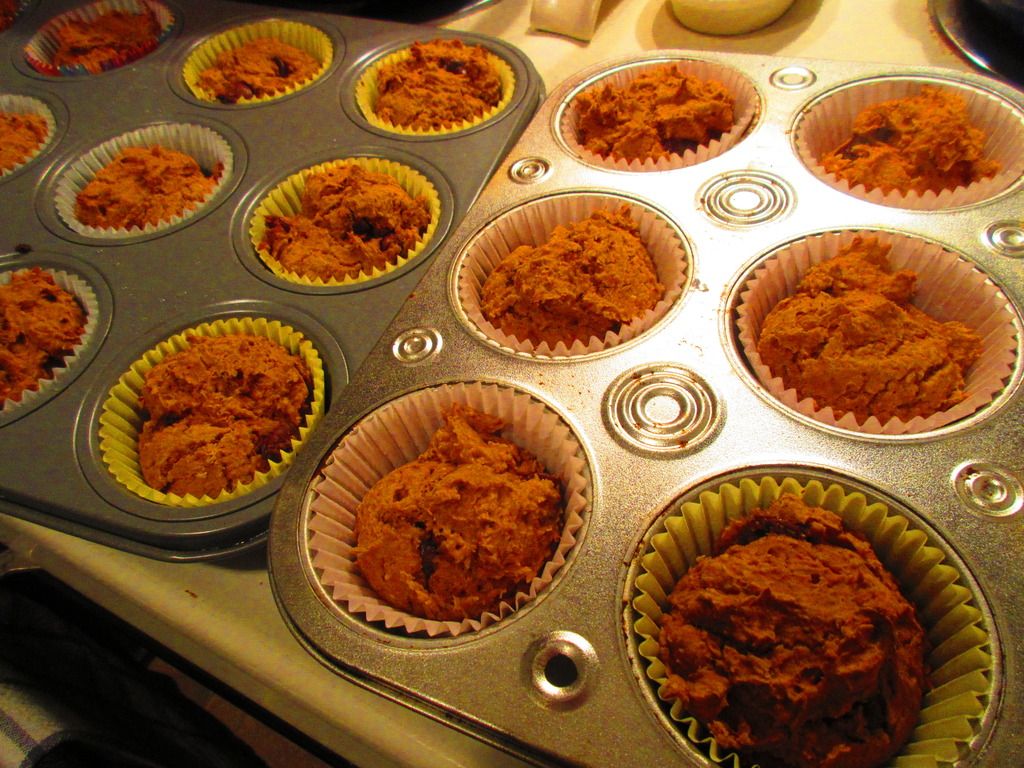
So, today, I got out a can of pumpkin (I keep cans of pumpkin on hand like they are going out of style!) from my pantry and snagged the bag of Pamela’s Products Gluten Free Spice Cake Mix from the baking shelf. It was time to make those muffins as planned.
So, into a bowl went the cake mix and the can of pumpkin. I beat it all together with an electric mixer and then folded in 1/2 cup of semi-sweet chocolate chips. So…I made mine with three ingredients. I wasn’t sure how a gluten-free cake mix would take to this recipe (a lot of times you should follow instructions on the package exactly or face epic, massive, culinary fail!), and who doesn’t like a touch of sweet chocolate with their breakfast, right? RIGHT! I filled 18 muffin cups with the mix and popped it into a 350°F oven, allowing them to bake for around 24 minutes. I removed them and let them cool before placing them in a container to keep for the upcoming week.
BUT…I can’t bake something and not try it, right? If it was an epic fail…well…I didn’t want to find out tomorrow morning when there was nothing to do about it.
My worry was for naught. I should have known. Pamela’s Products has always been delicious, no matter if I’m using her flour blends, or product mixes, or feasting on cookies, figgies, or granola bars. I have never met a Pamela’s Products product that I didn’t fall in love with or enjoy. And that continues to hold true.
The Pamela’s Products Gluten Free Spice Cake Mix has this delicious fall spice flavor to it. A hint of cinnamon, nutmeg, allspice, cloves, ginger and cardamom bring out that amazing taste of one of my favorite seasons! Nothing like a taste of fall at the height of spring, right? Maybe I was trying to forget that we were in the high 70s already this morning when I set out to make these. The pumpkin added this great flavor and moistness as well. And who doesn’t love a little touch of chocolate when all is said and done, right? Because the addition of the chocolate chips made these a sweet enough treat, without all the guilt. The muffins didn’t puff up, but that’s gluten-free mixes for you. They did bake up gorgeously though…with a golden brown top and a moist, cake-y middle. Loved it at the first bite and will truly enjoy devouring a couple of these each morning this week. Super easy to make…and super delicious in the finished product.
So, let’s discuss the ingredients that go into Pamela’s Products Gluten Free Spice Cake Mix, shall we? This mix is made from evaporated cane sugar, tapioca starch, white rice flour, potato starch, brown cane sugar, inulin, grainless & aluminum-free baking powder, rice bran, sea salt, cinnamon, gluten-free flavor, nutmeg, allspice, xanthan gum, cloves, ginger, cardamom, and black pepper. This mix is certified gluten-free, non-dairy, and kosher.
Let’s discuss the nutrition information of Pamela’s Products Gluten Free Spice Cake Mix, shall we? This mix makes 12 servings (I made 18 muffins though!), so it’s 1/12th of the dry mix or 1/12th of the finished cake that you bake. In this serving, you will be consuming 150 calories and less than 1 gram of fat. This mix will provide you with 340 mg sodium, 36 grams carbohydrates, 15 grams of sugar, 2 grams of fiber and 1 gram of protein. Not bad for a cake mix, right? Normally, this mix is prepared using eggs, butter and milk, so your nutrition facts will change when it’s mixed with baking ingredients.
For those interested, the nutrition information for the Gluten Free Pumpkin Spice Muffins that I made with this mix is that 1 muffin will give you 141 calories, 2 grams of fat, 228 mg sodium, 30 grams carbohydrates, 14 grams sugar, 2 grams of fiber and 1 gram of protein. Only three ingredients. Easy to bake. And…YUMMY!
I hope that the fall isn’t the only time I can find the Pamela’s Products Gluten Free Spice Cake Mix. I haven’t looked recently at my natural foods stores…but if they have another package of it, I’ll be more than happy to pick it up and bake up another batch of these muffins. Or, maybe next time, I’ll bake up the actual cake itself. As always, Pamela’s Products impresses me beyond all expectations. And this is why this is a big-name gluten-free brand I trust.
I know some pretty amazing people. I really do. One of such people is a friend of mine from high school. Awhile back, she contacted me and said that Tastefully Simple was releasing some gluten-free products that she would love for me to try. My friend, Rebecca Fifield, just happens to be a Tastefully Simple Consultant. So, she sent them to my. And then Tastefully Simple released more products…and I bought them and some of the ones that had originally just been sent to me. And I loved every one of them that had tried.
I think what I love most about what Tastefully Simple is doing with their gluten-free mixes is that they are making it so easy to make bread or pizza or cake cookies or pancakes. They take all that fancy flour mixing and make it so you have it in one easy place, and only need to add 2 ingredients to it. I love it. LOVE it.
And now, thanks to both Rebecca and my own trial-by-fire with the gluten-free products that Tastefully Simple offers (they’ve added cookies and pancakes since I last looked!)…I’m obsessed. Because, as much as I love baking and cooking and being in my teeny-tiny kitchen…I love simplicity too. Because baking can be stressful…gluten-free baking can be catastrophic if anything is off.
That’s the glory of Tastefully Simple. They take that guess work off.
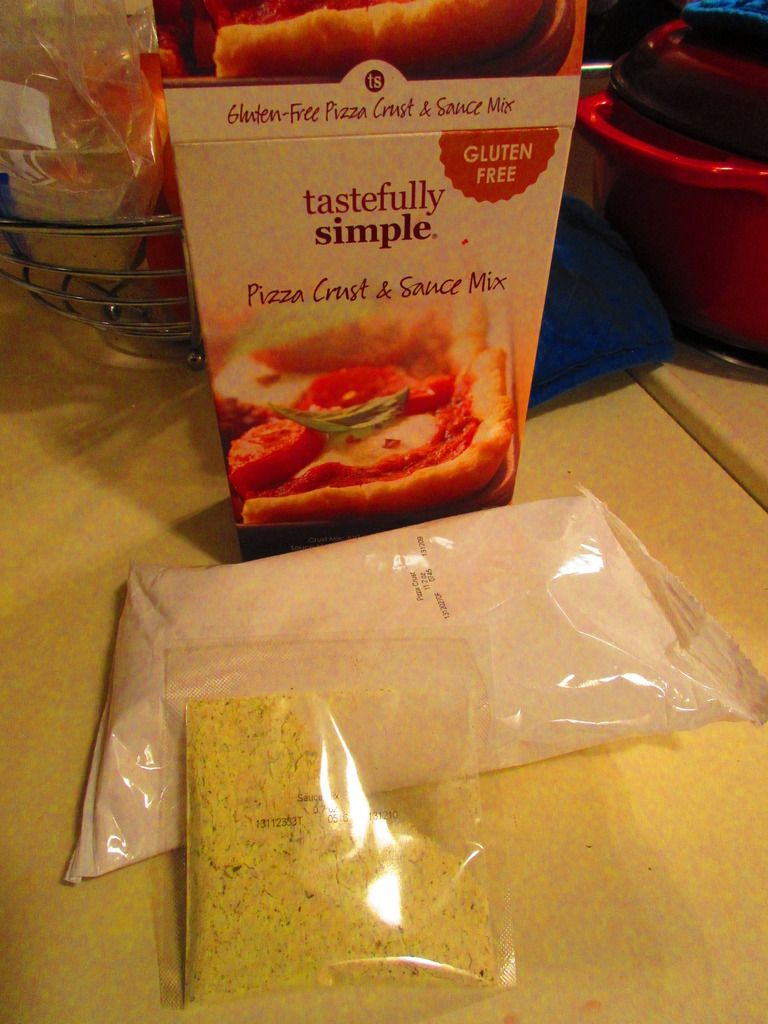
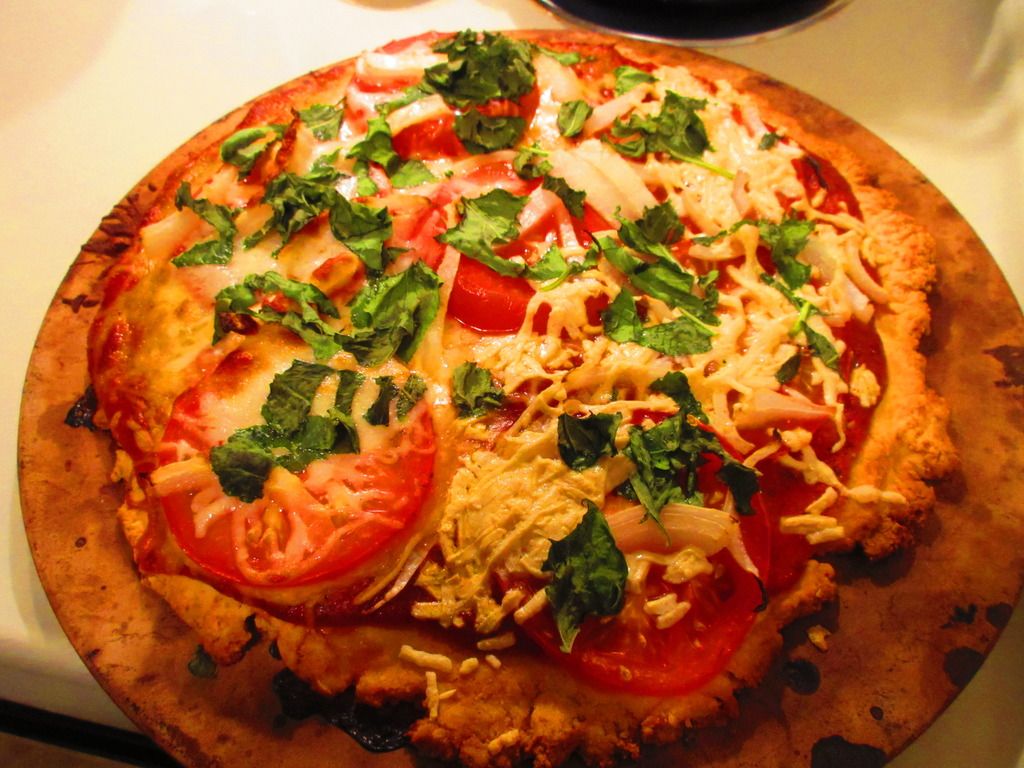
So, with me heading out of town on Friday evening, the main goal this week is to use up all the fresh produce that would otherwise go bad in my absence. So, with fresh basil and some tomatoes and onions lurking about, I remembered that I had a Tastefully Simple Gluten Free Pizza Crust & Sauce Mix in my pantry. So…pizza it would be. AND…it would last for three days between my roommate and I. Added bonus. No more cooking the rest of the week. YAY!
Preparing the Tastefully Simple Gluten Free Pizza Crust & Sauce Mix is super easy!! For real. That’s why there is the word “simple” in the brand. HA! To prepare the crust, simply combine the crust mix with 1 cup of water and 2 tablespoons of olive oil. The dough will be sticky. Cover it losely with plastic wrap and let it stand for 10 minutes at room temperature. Using lightly oiled hands to prevent sticking, spread the dough out on a pizza stone or a 12-inch greased pizza pan. Bake it for 10 minutes in a 400°F oven.
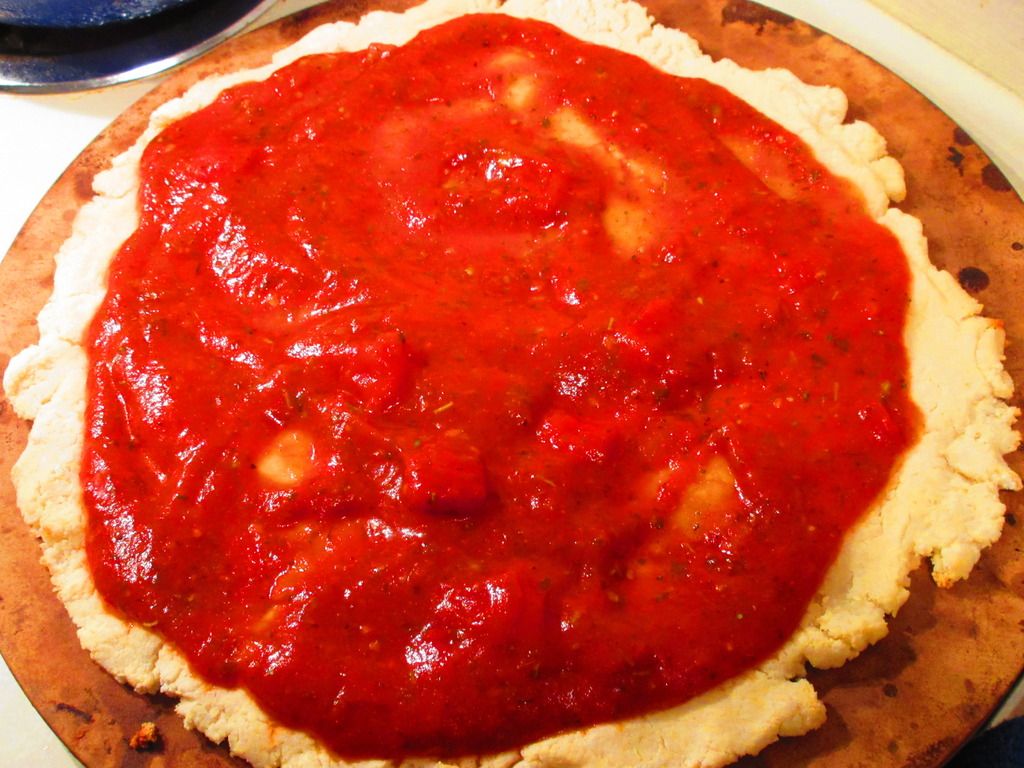
While it’s baking…mix up the sauce. It’s a breeze. Simply combine the sauce mix with the remaining 1 tablespoon of olive oil and tomato sauce. Spread it over the warm crust you have now baked for 10 minutes. Add your favorite toppings (in my case…tomato, onion, basil and Daiya vegan mozzarella cheese shreds) and place back in the oven to cook for another 17-20 minutes, until the crust is golden brown. Slice into 6 pieces and devour.
The quality, however, always comes in the taste test. And they totally nailed it. The dough wasn’t too sticky when I went to press it out on the pizza stone. And, it cooked up to this amazing crispy, golden brown. The sauce and toppings didn’t make it soggy. It held up to slicing and being moved onto plates. And I loved the flavor. It had this amazing crusty quality that just made it work. It was the perfect base for my toppings of choice. And it was one of my favorite crusts I have made at home. It was easy, and it didn’t take too long to bake up either. Perfect way to enjoy my dinner tonight. Tastefully Simple is not only making gluten-free delicious, but easy too!
So, let’s take a look at what Tastefully Simple puts into their Gluten Free Pizza Crust & Sauce Mix, shall we? This pizza crust mix is made from rice flour, tapioca flour, sugar, baker’s yeast, potato starch, cassava flour, salt, less than 2% hydrogenated palm kernel oil, soy lecithin, baking powder and, xanthan gum. The sauce mix is made from maltodextrin, dehydrated garlic, garlic powder, salt, dehydrated onion, spices, roasted dehydrated garlic, sugar, Romano cheese, less than 2% of natural flavors, toasted sesame oil, citric acid, whey, cheddar cheese, hydrolyzed soy protein, disodium phosphate, and silicon dioxide (anticaking).
As far as the nutritional information for the Tastefully Simple Gluten Free Pizza Crust & Sauce Mix goes, this isn’t bad for pizza. Really. A serving size is 1/6 of the package. This serving will dish up 200 calories, 1.5 grams of fat, no cholesterol, 810 mg sodium (it’s a little high, yes), 43 grams carbohydrates, 3 grams sugar, 1 gram fiber, and 4 grams of protein.
If you love pizza and want that “from scratch” appeal with a golden, crispy crunch, without it being the frozen cracker-crusts that the gluten-free community are otherwise delegated to having…then give Tastefully Simple’s Gluten Free Pizza Crust & Sauce Mix a try. Hop on over to my friend, Rebecca Fifield‘s, page and place an order. Not only will you be amazed with how easy this is to make, the taste, texture, and everything else will win you over. I promise you that.
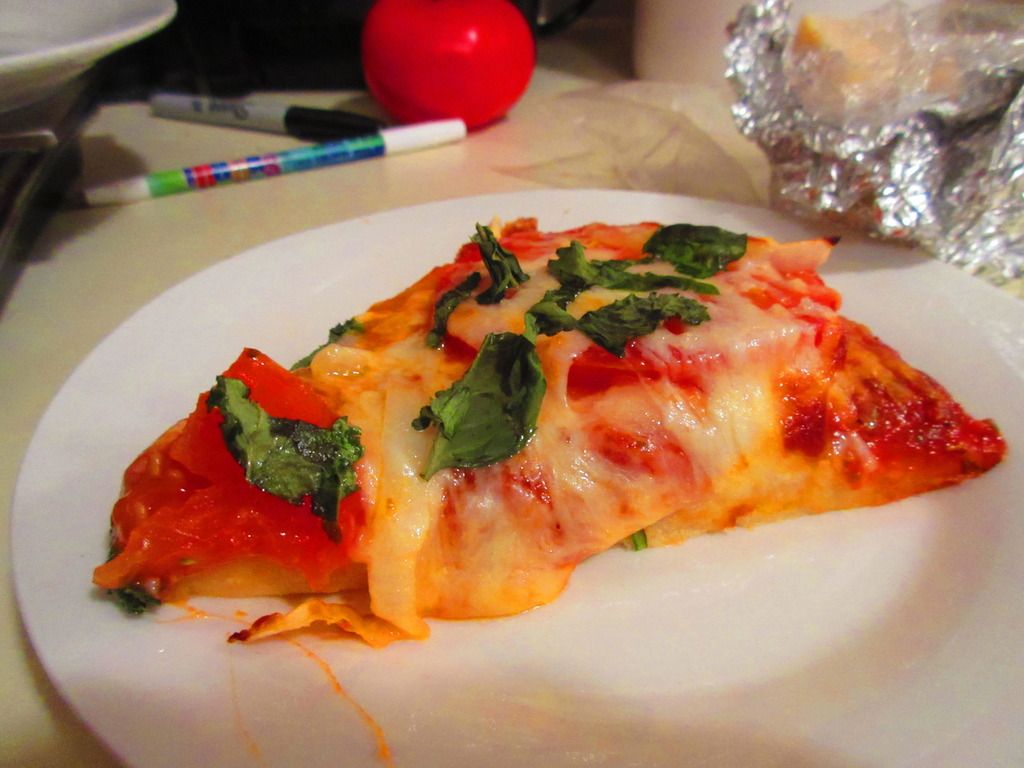
A slice of pizza made with Tastefully Simple Gluten Free Pizza Crust & Sauce Mix