Product Review: The Pfunky Griddle Gluten-Free Pancake Mix

The Pfunky Griddle Gluten-Free Pancake Mix

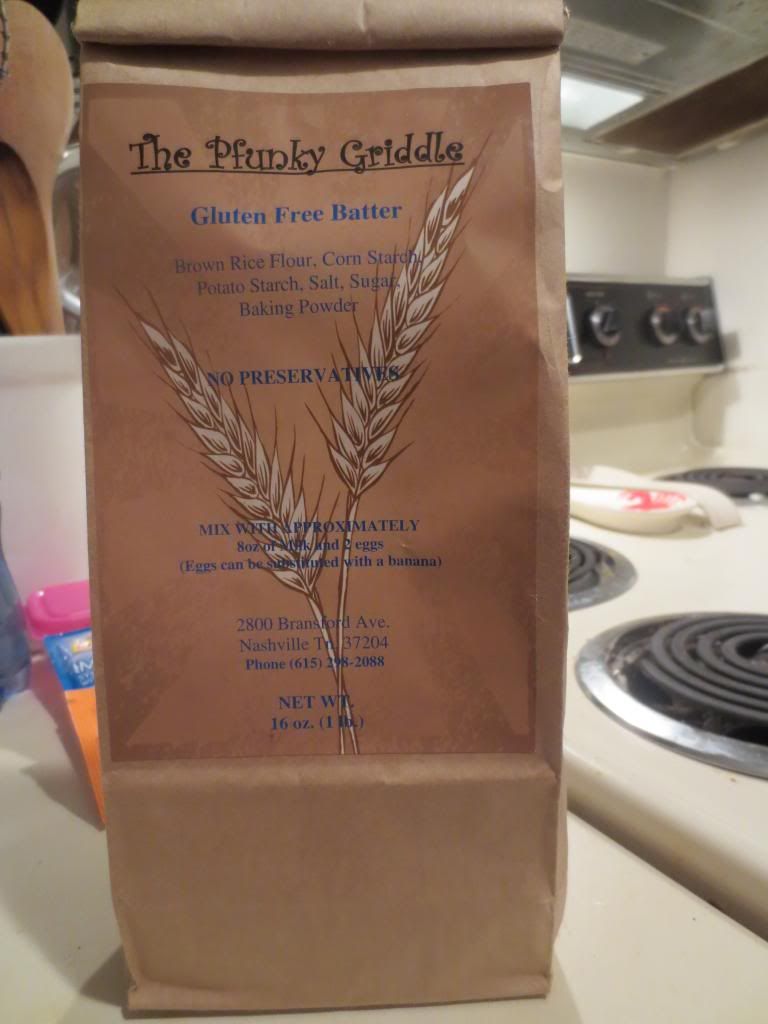
Product: The Pfunky Griddle Gluten-Free Pancake Mix – $7.99

Awhile back, on a return trip from visiting my family in Birmingham, Alabama, my roommate and I were hungry.  Very hungry.  And I got onto my Find Me Gluten-Free app to find somewhere in Nashville, TN, where we might be able to safely grab a bite to eat.  My app never steers me wrong…and it threw a few options at me.  But…we were very intrigued by The Pfunky Griddle.  And after a quick read of the reviews, I felt confident I could eat there and not get sick.

Breakfast food!  YES!!  They serve salads and sandwiches as well, but if you’re going to The Pfunky Griddle…you’re probably seeking out something to put on the griddle.  And that was what we did, splitting an order of the gluten-free pancake mix and topping them off with our toppings of choice.

While we were waiting on a table, however, I spotted my danger zone.  They sell their pancake mixes.  Seriously.  And one of the options they offered was their gluten-free pancake mix.  After eating the pancakes at the store, I wanted some to take home.  And after working through the plethora of gluten-free pancake mixes (I seriously LOVE pancakes)…I finally got to this one today.

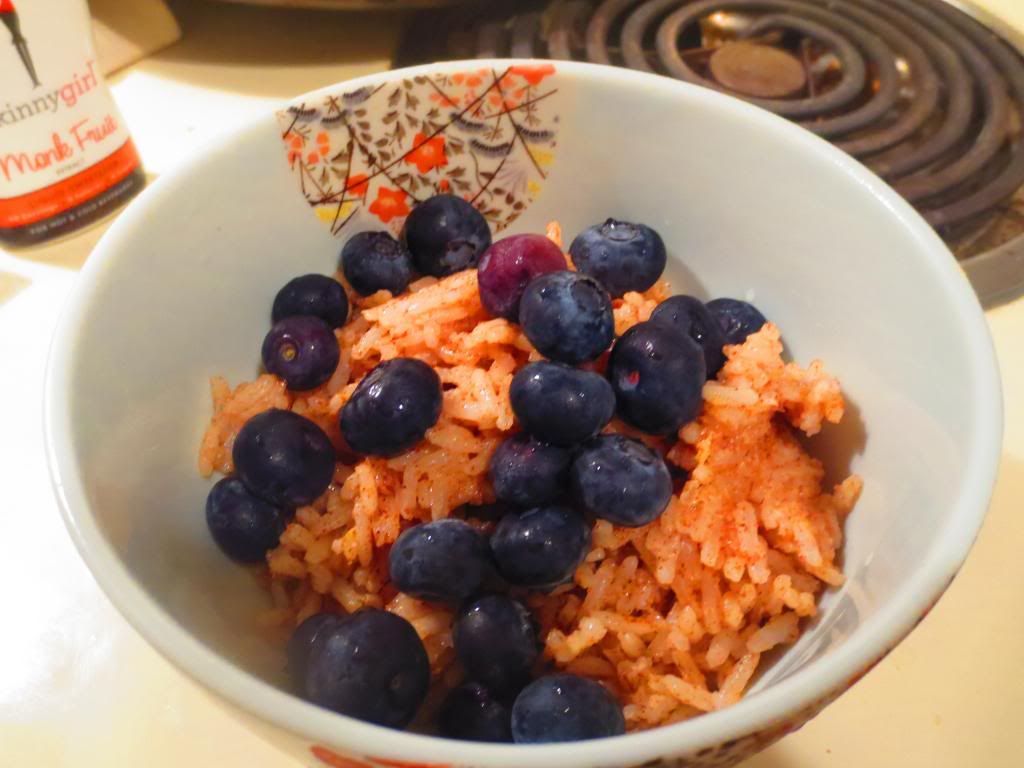
And…you know I can’t do anything simple.  The actual making of the batter is easy.  Add to mix 2 eggs and 8 ounces of milk.  I used my unsweetened almond milk.  That was actually the easy part.  I made 4 pancakes (1/4 cup of batter each) just plain…just the batter…so I could get an unadulterated taste of it.  Then, I made 4 pancakes with blueberries added to them.  And then, finally, I made 4 pancakes with white chocolate chips added to them.  One batter…3 servings of different pancakes.  I was excited, because from what I recall, I loved this batter when I ate at the restaurant.

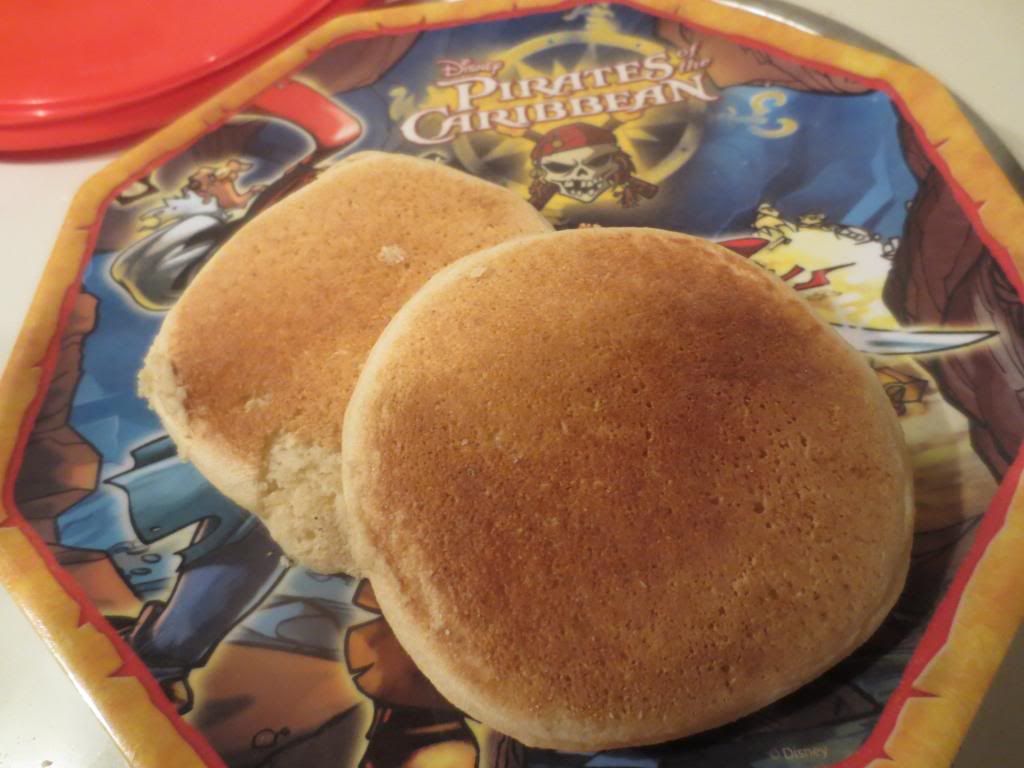
However…today…I was way less enthusiastic about it.  Not that it was bad; it wasn’t.  It just…it isn’t able to compare to some of the other mixes I have used in between eating at the restaurant and making them myself at home.  The pancakes actually cook up beautifully.  Thin little cakes, toasted evenly on each side to a gorgeous golden brown color.  The issue, I found, was that they actually tasted…gritty.  Now, sometimes gritty is good, but not with pancakes.  I was feasting on the plain pancakes this morning…my roommate said hers were pretty good.  Which, sometimes means she likes them…and sometimes means that she is just being polite.  I should learn not to ask her sometimes…

But, yeah…gritty.  Gritty is not a good thing when it comes to pancakes.  The batter was well mixed together…so it wasn’t an error on my behalf.  And it didn’t have a horrible flavor either.  Don’t get me wrong there.  They taste like delicious pancakes, but that gritty texture is a little…off putting.  In fact, I was happy to down these quickly and then finish off breakfast with my coffee instead of my usual vice-versa finish.  My biggest hope is that the pancakes with the added fruit or sweet white chocolate chips offset a bit of that odd, gritty texture.  Perhaps that’s why I didn’t notice it at the restaurant…because I was adding blueberries and bananas to my batter on the separate griddle pan.

The Pfunky Griddle Gluten-Free Pancake Mix is a blend of brown rice flour, corn starch, potato starch, salt, sugar and baking powder.  Not bad on the ingredients.  I managed to get 12 pancakes out of the mix.  And they were all of a very decent size too.

So, they weren’t bad…but I just wasn’t as impressed with them at home.  The gritty texture was a little…off for me.  But, the flavor was good.  I’ll give them that.  However, I probably wouldn’t buy this again, even if I do stop in at the restaurant for breakfast/brunch again.

Pancakes made from The Pfunky Griddle Gluten-Free Pancake Mix

Product Review: Tasty Bite Garlic Brown Rice

Tasty Bite Garlic Brown Rice

Product: Tasty Bite Garlic Brown Rice – $2.49+

As so many of you know, Tasty Bite is my go-to prefabbed food of choice when it comes to needing something quick and on-the-go.  I mean, honestly.  It doesn’t get much easier than a 90 second nuke in the microwave.  The food tastes fresh…like it wasn’t pre-packaged or sold on the shelf of your local grocery store.  All-natural…real ingredients help make this a healthy and better choice than other options out there.

Known for Indian and Asian cuisine (the Asian dishes are NOT gluten-free), these are little packets of amazingly flavorful food.  They are affordable, don’t take up much space in the pantry, and so easy to prepare.  If you haven’t jumped on the Tasty Bite train yet…what are you waiting for?

For those familiar with my blog, you might have read about the past few Tasty Bite meals being…rice.  Simply price.  I had one with lentils and one that was just plain brown rice.  And they were fantastic.  Still moist.  Still seasoned perfectly.  No need to add anything else.  Just…sheer, tasty perfection.

The rice trend continues.  This time with Tasty Bite Garlic Brown Rice.  First of all, I’m a total fan of brown rice.  I have been for ages.  I actually prefer it to the ultra-refined white rice.  I think the texture is better and I love that light, nutty flavor that comes with it.  Mmmm.  But Tasty Bite, this time, stepped it up.  They gave it an extra flavor boost with garlic.

And I LOVE, LOVE, LOVE garlic!

FOR REAL!

So…brown rice…garlic…how can you go wrong?  You can’t.  Tasty Bite seasoned and flavored this rice with the perfect balance of spices and added vegetables.  It made for one interesting and flavorful bite after another.  Seriously.  I served this with some sauteed baby bok choy.  I’m not joking.  As I sauteed it up with some garlic…it was a nice match.  But I kept them separate on the plate because I wanted to enjoy my rice on its own if I chose.  And a few bites…that is exactly what I did.  The rice is amazing.  It microwaves to perfection…still soft…still moist and fluffy.  The flavors melt right into each grain and make it one of the best rices that are pre-made.  Seriously.

And look at these ingredients: water, brown rice, carrots, corn, spinach, sunflower oil, garlic, salt, celery, sugar, cumin, chilies.  Real ingredients.  Recognizable ingredients.  What more could you ask for?

Nutritionally speaking…we’re talking good numbers here.  A serving is half of the pouch.  In this serving, you will be consuming 220 calories and 5 grams of fat.  That’s amazing.  And you do get a lot of rice in that serving.  You will also be treated to a cholesterol-free meal that contains only 420 mg sodium and 1 gram of sugar.  Finally, you will be provided with a filling 2 grams of fiber and 5 grams of protein.

Healthy.  Packed with flavor.  Fluffy.  Light.  Delicious.

TASTY!

If you have yet to try any of the Tasty Bite meals…I encourage you to do so.  And if you aren’t brave enough to go for Indian cuisine, give the rice a try.  The Garlic Brown Rice is amazing.  So if garlic is your thing…it won’t overpower, but it will add plenty of flavor to the rice.  Enjoy!

Tasty Bite Garlic Brown Rice (cooked)

Product Review: Health Is Wealth Sprouted Grains Chipotle Bean Sprout Burger

Health Is Wealth Sprouted Grains Chipotle Bean Sprout Burger

Product: Health Is Wealth Sprouted Grains Chipotle Bean Sprout Burger – $5.99+

Lately…I’ve been doing my best to make my own veggie burgers.  I’ve been a vegetarian for 4 years now and gluten-free for 3 years…and while there is definitely more of a market for gluten-free/vegan or vegetarian burger patties out there…not all veggie burgers are created equally.  I’ve done plenty of experimentation.  And, before I had to go gluten-free…I was all about the Morningstar patties.  There were none better.

Then…going gluten-free took them off the table and out of my freezer.  At first, I lamented this.  However, then I went back awhile ago and looked at the ingredient list on Morningstar patties…and cringed!  It’s mostly chemicals.  YUCK!  Maybe this gluten-free thing was a blessing in disguise.

That being said, I’ve found some great veggie burgers and some not-so-great veggie burgers.  I’ve had burgers that have fallen apart as they cooked and burgers that wowed me.

Tonight…I tried a different veggie burger.

Made by Health is Wealth, the company that once upon a time made vegan and gluten-free not-chicken nuggets.  They no longer make them anymore.  Which I still cry about.  BUT…they do make veggie burgers too.  And these, at least, are vegan and gluten-free.

My natural food store carried two of the varieties of Health is Wealth.  The burgers themselves are called Sprout Burgers.  Why?  Because they are actually made from organic sprouted grains – specifically quinoa, amaranth and millet).  These vegan and gluten-free burgers are made with non-GMO soy as well, are baked and never fried, and are packed with flavor.  They come in three flavor options – original, Chipotle Bean, and Mushroom and Onion.

With my plethora of romaine lettuce, red onion and roma tomato from my recent CSA bin, a gluten-free veggie burger dinner was definitely needed.  So, I pulled out the gluten-free sandwich rolls my local gluten-free bakery (shout-out to Annie May’s Sweet Café on Frankfort Avenue) from my freezer to thaw while I was at work.  When I got home, it was just a matter of getting the burgers cooked.

That task was easy.  While I toasted the rolls to make the buns, I put the Health Is Wealth Sprouted Grains Chipotle Bean Sprout Burgers on my skillet to cook through.  That took about 4 minutes on each side.  It didn’t take long at all.  I plated up the burgers on the toasted buns with the vegetables and some vegan sriracha sour cream…and dinner was served.

So…how good can the Health Is Wealth Sprouted Grains Chipotle Bean Sprout Burger taste?

AMAZING!  First of all, this burger does not crumble.  It won’t fall apart as you try to bite into it.  The texture is meaty and awesome.  The flavor is just the right amount of spice with the right level of spice.  It has just enough heat to keep it interesting.  The beans add a lot of protein.  And the flavor is amazing.  I was so impressed with the Chipotle Bean Sprout Burger.  I’m also excited that I have two more patties left in the freezer for my roommate and I to eat later this week.  These are fantastic.  Even meat eaters (like my roomie) will enjoy these.  They are hearty, healthy, and just amazing.

So…what sort of ingredients go into vegan and gluten-free burgers?  Well, in the case of the Health is Wealth Sprouted Grains Chipotle Bean Sprout Burger…the following: non-GMO hydrated textured soy protein, organic sprouted grains (millet, quinoa, amaranth), non-GMO isolated soy protein, black beans, corn kernels, canola oil, molasses, red pepper, seasonings (sea salt, tomato powder, garlic powder, lime juice), food starch, hydrolyzed soy protein, modified cellulose gum, oat fiber, garlic powder, caramel color, onion powder, sea salt, maltodextrin, yeast extract, lemon juice.

It seems like a lot…but at least it’s not just a load of chemicals and unpronounceable ingredients.

Nutritionally speaking, a serving of the Health Is Wealth Sprouted Grains Chipotle Bean Sprout Burger is one patty.  This one patty will serve you up 90 calories (REALLY good for a veggie burger) and 3 grams of fat.  These are cholesterol free, contain 420 mg sodium, and only 2 grams of sugar.  One serving also gives you 3 grams of fiber and 9 grams of protein.  You will definitely feel full.

I absolutely LOVED this burger.  My roomie did too.  In fact, we both said that we’ll have to try the other Health Is Wealth vegan and gluten-free burgers.  They were that great.  Loved the texture, the flavor, and everything about these.  The price isn’t too bad either.  Not for 4 patties in a box.  If you haven’t given these a try…make sure you do.  They are really fantastic.

Health Is Wealth Sprouted Grains Chipotle Bean Sprout Burger (cooked)

Recipe: Blueberry Breakfast Rice Bowl

Rice.

For breakfast.

You read that right.  All natural.  All things I had at home.  All healthy ingredients.  And the best part, it really does fill you up.  Fiber is a wonderful thing.  Trust me.

It was a bitter cold morning…around 0°F…and I didn’t want to have anything cold.  Nothing.  Hot coffee.  Hot breakfast.  So, I modified a recipe I spotted in a magazine and it proved to be as epic as it sounded.  I loved the play of flavors and the way everything was fresh, light, and filling.  This is definitely a hearty, no-guilt breakfast.

Recipe: Blueberry Breakfast Rice Bowl

Blueberry Breakfast Rice Bowl

Servings: 4
Time: Prep 5 minutes; Cook 20 minutes

Ingredients:

  • 1 cup brown rice
  • 1 tablespoon coconut oil
  • 2 teaspoons ground cinnamon
  • 1/2 teaspoon finely grated lemon zest
  • 1/4 teaspoon sea salt
  • 1/4 cup almond milk
  • 4 teaspoons pure maple syrup
  • 1/2 teaspoon pure vanilla extract
  • 1 packet stevia
  • 1 cup fresh blueberries

Directions:

Cook rice according to package directions.

In a medium bowl, combine rice, oil, cinnamon, orange zest and salt.  Divide among serving bowls.

In a small saucepan, bring milk and maple syrup to a boil on medium heat.  Remove from heat and stir in vanilla and stevia.  Drizzle over top of rice mixture and top with blueberries, dividing evenly.

~*~*~

I loved the warm, homey feel of this breakfast.  It was definitely something different.  Rice for breakfast…when done like this…doesn’t seem too different at all.  The spices and flavors all mixed really well.  The blueberries really played well with the cinnamon and lemon.  And I loved how everything just sort of played well together.

This is a new favorite.  And it is so easy to make.

Product Review: Simple Truth Gluten-Free Blueberry Waffles

Simple Truth Gluten-Free Blueberry Waffles

Product: Simple Truth Gluten-Free Blueberry Waffles – $2.49+

Okay…they aren’t Van’s Gluten-Free Waffles…but they aren’t half bad!

I admit it.  I had a coupon for Kroger’s organic brand of waffles from Simple Truth…and they happen to have two varieties of gluten-free waffles on the market…so I definitely took advantage of the coupon this past weekend.  And, no sooner had I bought them, I was whipping them out for a quick breakfast.  After all, I circuit trained and did spinning this morning.  This meant…easy breakfast that can toast while I showered and got ready for work.

Waffles.

Easy peasy!

Onto a baking sheet and into the oven they went (ever since being diagnosed as Celiac…the toaster went into the garbage due to cross-contamination problems…and was never replaced).  10 minutes later, I was pulling golden, perfectly toasted waffles from my oven.  They smelled amazing.  They toasted up perfectly.  And I could even see the blueberries inside the little waffle shapes.  Quick, but efficient breakfast was about to commence.  A little dab of butter and some maple-agave syrup over the top…and we were in business.  I paired it with some water and a cup of coffee.  Just the easy meal I needed after a hectic morning.

So, how were they?

Less soft and substantial than Van’s Gluten-Free Waffles.  But, for a freezer waffle…for a gluten-free freezer waffle…I give them a solid 8 out of 10.  The batter seemed really thin in parts, making them more of a crunchy waffle, rather than that crisp outside, soft middle that I associate with perfect waffles.  The blueberries weren’t even throughout…mine were mostly to one side of the waffle…but at least they were in there, right?  Yeah!  They were sweet, which I love…waffles should be sweet…and they had a good flavor.  And, when all is said and done, that is the most important thing.  Were they perfect?  Nope.  Were they edible?  Beyond edible.  They were tasty.  And organic…which you have to love.  And they, honestly, were good!

They just weren’t as good as Van’s Gluten-Free Waffles.  But…I haven’t found one that is yet either.

Let’s talk ingredients.  Simple Truth’s Gluten-Free Blueberry Waffles are made from water, brown rice flour, potato starch, vegetable oil, corn flour, organic tapioca starch, blueberry bits, sugar, potato flour, inulin, leavening, soy lecithin, fruit juice concentrate blend, natural flavors, and salt.  So…it’s sort of a mess…but not too bad.  Not really.  Not for a quick dine-and-dash morning meal anyway.  Especially one that is, honestly, coming out of a box in the freezer.

Nutritionally speaking, a serving is 2 waffles.  These waffles will serve you up 220 calories and 8 grams of fat.  Not great…but not bad either.  Van’s does better with 10 fewer calories and 2 grams less fat.  So…there is that.  The Simple Truth Gluten-Free Blueberry Waffles also will serve you up 350 mg sodium and 7 grams of sugar.  Van’s beats them here too, with way less sugar and 30 mg less sodium.  You will also have 2 grams of fiber an 1 gram of protein.  Not exactly a filling breakfast…but it’s a sugary treat from the freezer (and not one I make a habit of consuming either!).

So, the basic gist of this is…Simple Truth puts out a good gluten-free waffle.  The blueberries gave it a nice added bit of flavor.  And they had a nice crusty outside that toasted up perfectly.  They weren’t the best frozen waffles I have had since going gluten-free…but they are close.  I liked them.

So, if you can get Simple Truth products, I recommend trying the Gluten-Free Blueberry Waffles, or even the Gluten-Free Homestyle Waffles (which I’ll get next time I have a coupon).  They make a good, quick, and easy breakfast when you have a busy, busy morning.  Thumbs up.

Simple Truth Gluten-Free Blueberry Waffles (toasted)

Product Review: Tasty Bite Brown Rice

Tasty Bite Brown Rice

Product: Tasty Bite Brown Rice – $2.49+

Brown rice.

People either love it or hate it.

Me…I happen to love it.  It just…takes so long to prepare.  In fact, brown rice often takes longer to get to cook perfectly than white rice.  But with white rice being so refined, brown rice is always a better option.

I just don’t always have time to let it cook up on the stove.

Thankfully…Tasty Bite has me covered.

Yes.  Tasty Bite.

Yes…the makers of all those amazing little Indian meals I blog about from time to time.

The very same Tasty Bite.

They do rice too.  They do it well.  And they make it so easy to enjoy.

There isn’t too much I can say about Tasty Bite’s Brown Rice.  I mean…it’s brown rice.  But I can say this…

The package contains fully cooked brown rice that you simply reheat in the microwave for 90 seconds.  Yes.  90 seconds and you have two servings of rice as your fingertips.  It’s brilliant and very convenient.  Brown rice is full of vitamins, minerals and fiber, and is my favorite type of rice to incorporate into meals.  Tasty Bite’s Brown Rice has that nutty flavor and that tougher texture that regular brown rice has.  The flavor…is that of plain brown rice…which is why I served vegetarian baked beans over mine.  Hey…don’t mock.  I had vegetarian baked beans in the pantry…just begging to be used.  It actually worked together very well.

Let’s talk ingredients and nutrition then, since brown rice is…well…brown rice.  The Tasty Bite Brown Rice pouch contains water, brown rice, and sunflower oil.  That’s it.  As it is precooked, you’re steaming it back to life and then pouring it into a dish.  The microwavable pouch contains two servings of brown rice.

Half of the package, that being a serving, will dish you up 240 calories and 3 grams of fat.  This particular rice is cholesterol-free, sugar-free, and contains no sodium.  My roommate will love reading that.  This serving provides 2 grams of fiber and 5 grams of protein.  Filling.  Nutrition.  Delicious.  And the Tasty Bite Brown Rice is vegan, vegetarian, kosher, and gluten-free.  Loving it.

So, you don’t have to spend the better part of the evening at your stove waiting on your brown rice to cook to perfection.  Nope.  Let Tasty Bite do that for you…letting you have your rice ready in a minute and a half as opposed to 20-30 minutes (if not longer!).  The rice you get is fluffy, light, and seriously cooked to perfection.  It sure does make dinner a lot easier and quicker to get on the table.

Thank you, Tasty Bite…for taking the stress and guess work out of cooking brown rice.

Tasty Bite Brown Rice (cooked)

Recipe: Smashed Herbed Potatoes

I am a runner.  Carbs are my friend.  And I just happen to be a huge, huge fan of potatoes.  I love potatoes.  Any way you can serve them up, I will devour them.

Recently in my CSA bin, I received a huge bag full of fingerling potatoes.  Instead of roasting them up as I normally would, I wanted to do something different.  I wanted to think outside of the normal box I hem myself in when potatoes are in my kitchen.

So…that’s exactly what I set out to do.  I decided to finally get to smashing potatoes.  I’m not talking mashed potatoes.  I really mean…smashed potatoes.  I served mine with a dipping sauce of Spinach & Artichoke Hummus.

For real.  And yeah…it was super delicious.

Recipe: Smashed Herbed Potatoes

Smashed Herbed Potatoes (with Spinach and Artichoke Hummus)

Servings: 4-6
Time: Prep 30 minutes; Cook 25 minutes

Ingredients:

12 fingerling potatoes (or other small potatoes, like new potatoes, etc.)
3 tablespoons extra virgin olive oil
kosher salt, to taste
black pepper, to taste
Rosemary (or other herbs of choice), to taste


Directions:

Bring a pot of salted water to a boil.  Add the potatoes to the water and cook them until they are fork-tender.

On a sheet pan, generally drizzle olive oil.  Place the tender potatoes on the cookie sheet, leaving plenty of room between each potato.

With a potato masher, gently press down each potato until it slightly mashes, rotate the potato masher 90 degrees and mash again.  Do this to all the potatoes.  Then, brush the tops of each crushed potato generously with more olive oil.

Sprinkle the potatoes with kosher salt, fresh ground black pepper, and freshly chopped rosemary (or chives or thyme or whatever herb you have available).

Bake in a 450°F oven for 20-25 minutes until they are golden brown.

Serve.

~*~*~

OH. MY. GOD.

This is my new favorite way to eat potatoes.  For real.  I mean…packed with flavor.  The fresh herbs really draw out amazing flavors.  And dipping it into hummus was sheer genius.  Trust me.  This is one dish that is totally worth making.  It takes some time, but…you will be as addicted to these as I am.

I’m already wanting to make it again.  And thankfully, this week’s CSA bin is coming with fingerling potatoes.  Hmmm…

Get smashing and enjoy!

Recipe: Sautéed Garlic Greens with Caramelized Onion and Toasted Pine Nuts

I love, love, love kale.  Seriously.  I do.  I love that it is a nutrient powerhouse.  I use it often…and always!  Kale is high in fiber, unlike many other greens.  It’s a great source of nutrients, especially vitamin A and calcium.  It is a fantastic source of beta-carotene, which many nutrition experts believe is a major player in the battle against cancer, heart disease, and certain age-related diseases.  Kale also contains lutein and zeaxathin, carotenoids which help keep UV rays from damaging the eyes and causing cataracts.

Like I said…nutrient powerhouse.  And it always has a home in my kitchen.

That being said, I was using up the contents of my refrigerator not too long ago, and happened (as I often do) to have some greens inside.  It was, as it normally is, kale!  With a little inspiration from my Clean Food cookbook, I concocted a hearty and healthy dish with only a few ingredients, which I happened to have on hand.

Recipe: Sautéed Garlic Greens with Caramelized Onion and Toasted Pine Nuts

Sautéed Garlic Greens with Caramelized Onion and Toasted Pine Nuts


Servings: 6
Time: Prep 5 minutes; Cook 10 minutes

Ingredients:

2 bunches dark leafy greens (kale, collards, mustard greens, dandelion greens or chard)
2 tablespoons extra virgin olive oil
1/2 sweet onion, sliced thin
3 garlic cloves, minced
1 tablespoon dry sherry
Water, as needed
Sea salt
Toasted pine nuts (optional, but adds great texture)


Directions:

Remove dry stalk ends from the greens and chop the leaves into bite-size pieces.

In a Dutch oven or skillet over medium-low heat, sauté the onion, stirring often, to caramelize.  Add the garlic and cook for another 2-3 minutes, until soft.

Add greens and dry sherry and sauté for 1 minute.

Increase the heat to medium, add water (one tablespoon at a time) as needed to prevent sticking, cover, and cook until greens break down.

Remove from heat and toss with remaining tablespoon olive oil.  Season to taste with salt, top with pine nuts, and serve.

~*~*~

I fell in love with this dish.  The kale cooked down to perfection and mingled so well with the sweetness of the caramelized onion and the added flavor of the garlic and sherry.  The pine nuts really gave it a bit of texture, which just worked so well with the soft feel of the meal.  My roommate and I devoured this dish in no time flat.  Really delicious.

Loving finding new ways to enjoy my greens.  Can’t wait to make this one again.

Recipe: Kale and Black-Eyed Peas

In the South, it is customary on New Year’s Day to eat black-eyed peas to ensure good luck and prosperity.  Now, I am not a southern girl, but I did spend 6 years of my life in Birmingham, Alabama (where my family still resides).  Prior to that, I was a New Yorker all the way.  And now…relocated to Southern Indiana…where the Louisville, Kentucky food scene is taking flight, well…I can’t say that I don’t try anything new!

Granted, traditionally, this dish would be served with collard greens…but I’m a kale girl myself.  Love me some kale.  And I just happened to have kale in my crisper drawer…because…what girl doesn’t?  So, on New Year’s Day…I cooked up a my kale with black-eyed peas and hoped that it would bring luck and prosperity to me this year.

It’s too early to say whether this worked or not…but what I can say is…the dish was phenomenal.  I played around with a recipe out of my Clean Food cookbook.  Whether you have always followed this tradition or are just hearing about it, like me, I figured I had nothing to lose by cooking it up.  And neither do you!

Go ahead…eat up!

Recipe: Kale and Black-Eyed Peas

Kale and Black-Eyed Peas

Servings: 6
Time: Prep 10 minutes; Cook 10 minutes

Ingredients:

  • 1 large bunch of kale
  • 2 tablespoons extra virgin olive oil
  • 2 garlic cloves, minced
  • 1/2 onion, diced
  • water, as needed
  • 1-1/2 cups cooked black eyed peas
  • dash of apple cider vinegar
  • sea salt and freshly ground black pepper

Directions:

Remove the stems from the kale and chop the leaves into bite-size pieces.

In a large Dutch oven over medium heat, sauté garlic and onion in olive oil until soft.  Add the kale and stir until it turns bright green and wilts.  Add water 1 tablespoon at a time, as needed, to keep the kale from burning.

Add the black-eyed peas and vinegar and continue to cook for 3-4 minutes to heat through.  Season to taste with salt and pepper.

Serve.

~*~*~

It’s traditional.  It’s easy.  It’s delicious!  I was actually surprised.  I’m not a huge fan of Southern food…but this was fantastic.  Seasoned perfectly.  Really packed with flavor.  And carrying a traditional promise of good fortune and luck.  If nothing else…I at least got a fantastic meal out of it.

So go ahead…branch out.  Try something clean, something new, and something totally yummy!

Product Review: Ronzoni Gluten-Free Rotini

Ronzoni Gluten-Free Rotini

Product: Ronzoni Gluten-Free Rotini – $2.39+

I know what you’re thinking…pasta is pasta…it’s all about what you add to it.  Right?  Well…perhaps…unless you’re gluten-free.

Because then…pasta becomes an adventure in tastes and textures.  For example…quinoa pasta is my new favorite thing in life.  It cooks to perfect texture, phenomenal flavor, and doesn’t get mushy if you have to refrigerate it and have leftovers.  Rice pasta can get gummy…it can get mushy…it is fantastic if you eat it all the day you cook it…but even then, it sometimes just falls apart.  Corn pasta…well…I love the texture and the fact that it reheats beautifully, but I don’t put too much corn in my diet due to Monsanto…

Be that as it may, sometimes my roommate has surprises up her sleeve.  She was out on one of my last-minute errands one evening to the grocery store (for something I’m sure I thought I had in the pantry, but really didn’t), and upon her return she came back with a box of Ronzoni Gluten-Free Rotini.  Hmmm…a new gluten-free pasta I hadn’t heard of before.  This wasn’t common.  There are many I haven’t tried yet…but this brand I hadn’t even heard about yet.  Interesting.

Ronzoni Gluten-Free Rotini is pasta made from a multigrain blend, which includes white rice, brown rice, corn and quinoa.  So, it’s like everyone into the pool…let’s see what happens.  The box advertises that it tastes just as delicious as white pasta.  It has been forever since I have actually had white pasta…not just because of Celiac.  Years before even being diagnoses with an issues, I switched to whole wheat (or the irony!) pasta.  So…I address my roomie on this one…

…and her palate is messed up at times (she just had white pasta while in Disney World!) because she just said…”It tastes like pasta.”  Thanks…for not being helpful to this blog at all…

To her defense, she did follow that up with, “I would not be able to tell that was gluten-free…”

So…um…WIN?!

Okay…inconclusive on the taste-test portion of this with someone who doesn’t have to eat gluten-free pasta.

Ronzoni Gluten-Free Rotini (cooked)

The fact of the matter is…Ronzoni does put out a fantastic product.  I love the way the noodles cook.  It takes about 9 minutes to reach that perfect al dente.  No fooling around.  My roommate complimented me on both nights we’ve eaten this with how I cooked the pasta perfectly.  YAY!  The noodles hold up to the boiling process as well as the draining.  They don’t shred or fall apart when they are dumped into the marinara sauce.  Nor do they fall off the fork when pierced just before taking a dainty bite…or a mouthful…depending on hunger level.

What does all this say?

1.) The roomie isn’t always the best source for comparison reasons…as her palate is sometimes flighty…

2.) This is the gluten-free pasta of champions.

3.) Multigrain = gluten-free perfection for taste, texture, and flavor.

Ronzoni really turned up the competition when they got into the gluten-free market.  I like how they take a nice mix of all the gluten-free grains and incorporate them into a sturdy, satisfying noodle.  They currently offer Spaghetti, Penne Rigate, and Rotini in this line.  Oh, and the gluten-free pasta is produced in a dedicated gluten-free facility…and each ingredient is verified to be gluten-free.  Cross-contamination is not a problem because the pasta making process is strongly controlled to maintain the gluten-free status of the produt.  I love that Ronzoni took this extra step to guarantee safety for it’s gluten-free consumers.

I prepared the Ronzoni Gluten-Free Rotini for dinner the night I returned from Disney World.  I have pasta and marinara in my pantry.  It was a given.  I thought the noodles cooked to perfection in the boiling water.  I loved that when I drained them, I didn’t have bits of noodles…just full, and fully-cooked, pasta.  I love that the sauce didn’t distract from the flavor of the noodles.  I thought the starchiness was spot-on for a pasta.  And that everything held together with each and every bite.

Nutritionally speaking, Ronzoni Gluten-Free Rotini gives you the standard 2 ounce serving size (which is about 3/4 cup).  This serving gives you ample pasta which will leave you satisfied without feeling bloaty and overstuffed as so many pastas can do.  This serving will provide you with 200 calories and 2 grams of fat.  Not bad for a boxed pasta, I must say.  In addition, this pasta is cholesterol-free, sodium-free, and sugar-free.  You also get 2 grams of fiber and 4 grams of protein, which leaves you just on the right level of full.

I really am enjoying my Ronzoni Gluten-Free Rotini.  So, despite not being able to compare this pasta with ‘regular’ pasta when asked, the roomie rocked and choosing a new gluten-free pasta to try out.  I think this will be added to the quinoa pasta that I keep in the pantry as well.  So good.  Loved it all the way to that last forkful.

Spaghetti and pasta were my favorite thing growing up…and even going gluten-free…that hasn’t changed.  The gluten-free market has been expanding and thankfully, getting better and better with each version out there.  Forget mushy brown rice pasta…turn up the flavor and the texture.  Give Ronzoni Gluten-Free Rotini a try.

I’m so glad I did.

Ronzoni Gluten-Free Rotini (with Organicville Marinara Pasta Sauce)