Product Review: Whitney’s Castleton Gluten Free Cheddar Crisps + Recipe Bonus

Whitney's Castleton Gluten Free Cheddar Crisps
Whitney’s Castleton Gluten Free Cheddar Crisps

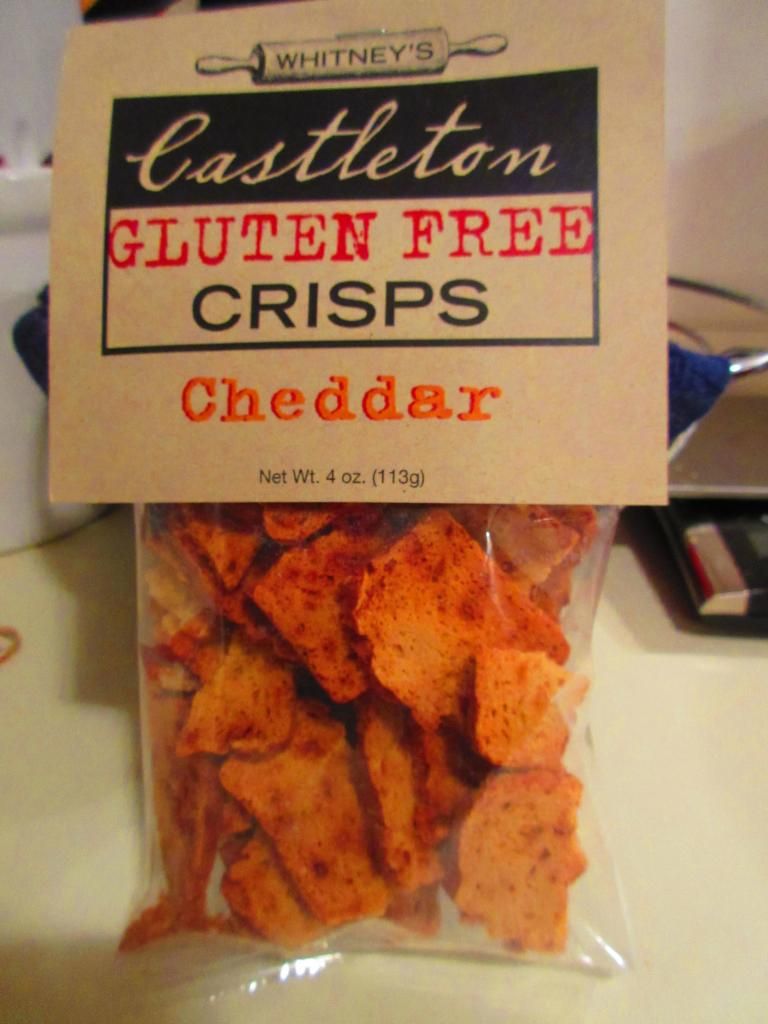
Product: Whitney’s Castleton Gluten Free Cheddar Crisps – $4.00+

‘Twas the month of December and I was starting to contrive
Brand new recipes for when my Cuisine Cube was due to arrive…

Yes!  The December cube is here!  It arrived on Monday and I happily dug right in, wondering what sort of goodness lay under the flaps of cardboard and paper.  What I was met with was a delightful array of items.  It was like Christmas had come early as I sorted through the breakfast, baking, lunch/snack, dessert dinner, and other dessert options.  I was ready to dive right in and have a little of everything.  But, self-control does still in handy at times.

First of all, let’s discuss Cuisine Cube.  I’ve blogged on items I’ve received since signing up in May.  Cuisine Cube is a gluten-free delivery service put together by a team of enthusiastic eaters, food professionals, and allergy suffers from New York City.  They have scoured the country looking for lesser known brands made by small artisan producers that taste better than the highly processed and subpar items you can find at virtually every grocery store.  This was a way to help support small businesses.  These products are meticulously selected and then delivered right to your door.  So, you get to try a new brand or item you may never have discovered otherwise.  It’s a great, efficient, and fantastic service.  One that I always look forward to each month.

So, this month, I selected Whitney’s Castleton Gluten Free Cheddar Crisps to lead off my month of delicious eating.  I thought they looked a lot like the Glutino Bagel Chips that you can find in most grocery stores these days.  But, I didn’t just want to eat these straight out of the package…or just throw them on top of a salad.  I wanted to do something a little different with them.  And I did.

But…not without trying one first.  I can’t just re-purpose a product without trying it out as it is first…

There you have it…I opened up the package and popped one of the crisps into my mouth.  And I was immediately greeted with the crunchy texture.  I love that for these kinds of crisps.  They are called crisps for a reason…they should be crispy.  But, even more importantly…the flavor!  Before I had to go gluten-free…and before I started to really pay attention to what I ate, I was a Cheeze-It connoisseur.  And the cheddar flavor in these crisps…reminded me of those.  But better.  WAY better.  I was almost sad to repurpose these for my recipe…because they were amazing on their own.

But my creative chef mind was calling…

So…the rest of these amazing and delicious crisps went into my food processor and got pulverized.

Now, before I share this recipe with you, let’s talk about the Whitney’s Castleton Gluten Free Cheddar Crisps.  As far as ingredients go, these are made from sorghum flour, tapioca flour, brown rice flour, white rice flour, xanthan gum, Vermont Farmstead’s Farmstead Cheddar, milk, white vinegar, brown sugar, baking soda, kosher salt, dry mustard and cayenne pepper.  These are produced in a designated gluten-free facility.

Nutritionally speaking, a serving is 1 ounce of these crisps…and the package holds 4 servings.  One serving will provide you with 120 calories and 3 grams of fat.  You will be consuming 10 mg cholesterol, 230 mg sodium, and 2 grams of sugar.  In addition, these have 1 gram of fiber and 3 grams of protein.

So, what came of these crisps?

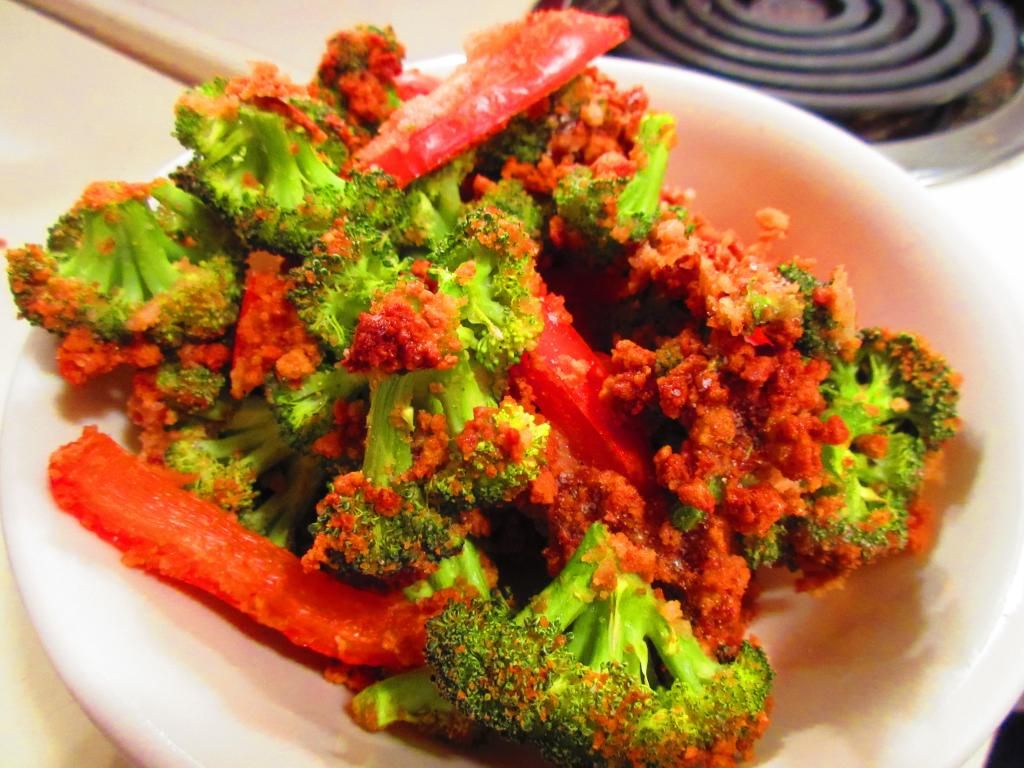
Well, back before I became a vegetarian, and definitely back before I was diagnosed as a Celiac…one of my favorite things to order at Red Lobster was the Fried Calamari appetizer.  My roommate would eat the calamari…I wanted the fried broccoli and red peppers that were served with it.  Honestly, one of my favorite foods (and definitely not good for you by any means…but it was so good)…which I hadn’t even thought about in years…

But I happened to have a red bell pepper and some broccoli from my CSA bin in my fridge…and now…a breading.  I do not fry anything.  I just don’t.  So, I set out to recreate the infamous Red Lobster vegetables…by baking them.  And thanks to Whitney’s Castleton Gluten Free Cheddar Crisps…I now had the perfect gluten-free breading.

Recipe: Crispy Broccoli and Red Peppers

Crispy Broccoli and Red Peppers (made with Whitney's Castleton Gluten Free Cheddar Crisps)
Crispy Broccoli and Red Peppers (made with Whitney’s Castleton Gluten Free Cheddar Crisps)

Servings: 2-4
Time: Prep 10 minutes; Cook 20 minutes

Ingredients:

  • 1-2 cups fresh broccoli florets
  • 1 red pepper, sliced into strips
  • 1-2 egg whites (beaten)
  • 4 ounces gluten-free breading (I used a package of Whitney’s Castleton Gluten Free Cheddar Crisps)

Directions:

Preheat the oven to 350°F.

In a large plastic bag, place in the broccoli florets and red pepper slices.  Add the egg white(s).  Close the bag and shake to coat.  Add the gluten-free breading.  Reseal the bag and shake again.  Spread the vegetables onto a baking sheet and bake for 15-20 minutes, until crispy.

~*~*~

Guess what?  This was so close to how I remember the original tasting.  I love the flavors that baking something in the oven can really coax out of things like vegetables.  And the Whitney’s Castleton Gluten Free Cheddar Crisps made the perfect coating for these vegetables.  It gave it a nice cheese flavor on top of turning a beautiful golden color in the oven and really making the apartment smell fantastic.  I was smelling a great cheddar aroma after these were in the oven for only 5 minutes.  Way beyond impressed.  I sort of want these in my pantry for always.

So, if you are curious about the Whitney’s Castleton Gluten Free Cheddar Crisps, head over to their site and read more about their products and order some for yourself.  Or order from Cuisine Cube’s stock up site!

And if you want to give Cuisine Cube a try, head over to their Web site and check out their subscription options…joining for a monthly, three month, or six month subscription.  This Cube (box of goodies) will arrive at your door within the first week of each month and you will have at least 5 full-size gluten-free items inside.  I encourage you to give it a try…

…because I never would have heard of these crisps without the aid of Cuisine Cube.

And yeah…they were really fantastic…on their own and in my dish.

Product Review: Envirokidz Cinnamon Jungle Munch Cereal

Envirokidz Cinnamon Jungle Munch Cereal

Product: Envirokidz Cinnamon Jungle Munch Cereal – $4.99+

So, recently, Envirokidz (owned by Nature’s Path) put out two brand new gluten-free cereals in the Envirokidz line of cold cereals.  And yes, I have no shame in eating a “kids” cereal.  I mean, come on, my parents send me Freedom Foods Tropico’s in the mail so I can get my “Froot Loop” fix.  Yeah…kids cereals are often more delicious than the grown up versions anyway.  And who puts an age limit on which cereals you eat?  My dad could polish off a box of Coco Puffs on his own…and did on numerous times…even though the cereal was bought for the three kids in my family.

Go figure.

Let it be said that when I saw that one that had the word “cinnamon” attached to it…I immediately knew that I needed to try it.  Honestly.  I mean, my favorite cookie is a snickerdoodle…cinnamon and I are, like, BFFs…or something.  Sure, the other one was chocolate…but my eye was drawn to the box with the happy elephant on the cover.  Cinnamon Jungle Munch.

I first spotted this cereal while out of town…and not in a place where I could just bring it home with me.  So, when it turned up soon after at one of my local natural food stores, I added some wiggle room to the food budget and picked it up.  It’s been a couple of weeks, but I needed to get caught up on blogs before opening a new cereal.

That happened…Monday.

My anticipation was high as I popped open the box and tore into the little plastic bag thingie that keeps everything fresh.  I measured out a serving, dumped on some almond milk, and took a bite.

And hated it.  I mean, seriously hated it.  Not enough to spit it out or not polish off the rest of the box (although it’s really hard to convince myself to eat it now).  I don’t know…it’s lacking a bit of sweetness.  The cinnamon just sort of overwhelms everything.  It’s more spicy than sweet.  The little corn puffs are coated in this and it just doesn’t work for me.  It just tastes…off. And I am, sadly, not a fan.  I love the crunch, but the flavor is just…eh…not right.  Too much cinnamon, not enough to balance it out.  So…I’m stuck with cereal for at least a week that I dislike.  Yay.

The Nature’s Path Web site describes Envirokidz Jungle Munch as a cereal with the “delicate sweetness of cinnamon.”  They also claim kids will love it.  Maybe kids will.  But this adult is giving it a hefty and loud…NO!

Let’s talk about ingredients!  Envirokidz Cinnamon Jungle Munch Cereal is made from organic whole grain corn meal, organic corn meal, organic brown sugar, organic molasses, organic cinnamon and sea salt.  That’s it.  It is gluten-free, cholesterol free, vegan, non-GMO, and made with whole grains.

As far as nutrition goes…a serving of Envirokidz Cinnamon Jungle Munch Cereal is 3/4 cup.  In this serving, you are taking in 120 calories and less than 1 gram of fat.  A serving also gives you 80 mg sodium and 9 grams of sugar.  I admit, that’s good for sugars in a cold cereal.  And you will be consuming 2 grams of fiber and 2 grams of protein.  So, you won’t feel full, but you won’t feel like you haven’t eaten either.

Cereals are not a one-size-fits-all sort of thing.  What I dislike, others may think is the greatest thing.  But this cereal really failed to impress me.  Which is too bad, because I was practically bouncing off the walls wanting to try it, once I was aware that it existed.  So, if you like cinnamon, you may or may not like it.  This cinnamon lover…definitely didn’t like it.  Maybe next time I’ll stick with the chocolate one.

Product Review: Olivia’s Gluten Free Rosemary & Sage Stuffing + Recipe Bonus

Olivia's Gluten Free Rosemary & Sage Stuffing
Olivia’s Gluten Free Rosemary & Sage Stuffing

Product: Olivia’s Gluten Free Rosemary & Sage Stuffing – $6.50+

There are a lot of Thanksgiving foods that, as a gluten-free vegetarian, I no longer indulge in at the dinner table.  That being said, my Thanksgiving meal usually consists of a scoop of vegetables, some plain potatoes, and usually a fruit of some sort…or whatever I brought with me for the occasion.

This year for my contribution to the Thanksgiving meal, I brought desserts.  YAY!  I also, however, brought gluten-free stuffing.  From my local gluten-free bakery.  I actually pre-ordered it prior to receiving my November 2014 Cuisine Cube.  But…this just gave me the opportunity to have stuffing…all over again.

And this is a good thing.  Because I absolutely LOVE stuffing!  I never ate it much as a kid, because, prior to going vegetarian, my family’s go-to Thanksgiving meal was shrimp creole, not turkey, but sometimes, on Christmas, my mom would cook up a turkey and I would request stuffing.  And…it was usually Stove Top.  But, to me, it was amazing!

So, stuffing was one of my guilty pleasures that I rarely indulged in, but would devour every time I had the chance.

When my Cuisine Cube happened to have a box of a gluten-free stuffing in it, I might…might…have done a happy dance of joy with a few bounces and jumps and squeals of happiness.  This isn’t uncommon each month when I open up my Cuisine Cube…but we are talking GLUTEN FREE STUFFING!!  Did I make that clear yet?

Olivia's Gluten Free Rosemary & Sage Stuffing
Olivia’s Gluten Free Rosemary & Sage Stuffing

So, since I had my local allergen-free bakery make me some gluten-free stuffing for the big meal on Thursday, I got to have some fun and get a little creative with my box of Olivia’s Gluten Free Rosemary & Sage Stuffing.  But, this still meant that I needed to cook it up properly.  And this stuffing is really easy to make!  I cut up some onion and celery per the instructions on the box, cooked it in my vegan butter, and then added some vegetable broth.  I transfered the liquid into a large mixing bowl and added in the Olivia’s Gluten Free Rosemary & Sage Stuffing mix.  I gave it a stir and let it sit for about 8-10 minutes, until the cubes were moist and the liquid was completely absorbed.  After that, I put the mix into a baking dish and baked it for 30-40 minutes per the instructions on the box until it was beautifully golden and ready to eat.

I won’t lie…I had a small serving of it then.  I had to.  The smell as it was baking was phenomenal.  Really.  I was practically salivating the entire half hour it was cooking.  So, yeah…I wanted to try it so I could tell you, my readers, how it was before I had some fun with it.

It was amazing.  No joke.  Freakin’ fantastic.  The chunks of bread got to that perfect golden crispness, while the vegetables and the absorbed liquid kept it moist and delicious.  The level of flavors was spot on.  Definitely perfect on its own.  I didn’t even need to add any additional salt and pepper.  Olivia’s Gluten Free Rosemary & Sage Stuffing was better than any stuffing I have ever eaten in my life.  Way better.  That goes for the boxed stuff as well as the stuff made from scratch.  This was an total win.  I wish I had made it up for dinner at my roommate’s family’s home.  Perhaps next year.  They wouldn’t even begin to guess that it was gluten-free…except for I’d be eating it, so they would know!

Olivia's Gluten Free Rosemary & Sage Stuffing (prepared)
Olivia’s Gluten Free Rosemary & Sage Stuffing (prepared)

I am so in love with this stuffing.  My only complaint was there was only one box of it.  Good thing I can order more through Cuisine Cube and Olivia’s Gluten Free Web site.  Trust me…this will be happening!

Let’s talk about the ingredients in Olivia’s Gluten Free Rosemary & Sage Stuffing.  This stuffing is made from gluten-free bread, certified non-GMO canola oil, granulated onion and garlic, rosemary, sage, thyme, celery seed, sea salt and pepper.  It is cholesterol free, gluten-free and made in a dedicated gluten free facility.

As far as nutritional information goes, Olivia’s Gluten Free Rosemary & Sage Stuffing makes about 9 servings per container.  If you use it traditionally.  A serving size is 3/4 cup prepared.  This serving will provide you with 110 calories and 4 grams of fat.  You will also be taking in 200 mg sodium and 1 gram of sugar.  In addition, you will be consuming only 1 gram of fiber and 1 gram of protein.  On its own, this stuffing won’t make you feel stuffed, but you will love every single bite of it.  Trust me.

But…as I mentioned earlier…I had some fun with this stuffing.

Why eat it straight up when you can do something a little outside the box, right?  Well, on Black Friday, I picked up a new waffle maker (shaped like Mickey Mouse!) and I really wanted to test it out.  I’m like a child…I get something new and I want to try it out right away.  So, on Saturday night, I took the stuffing that I cooked up out of the fridge and put it into a big mixing bowl.  It was time to use the “leftovers” in a new way.  Prepare yourself…

Recipe: Gluten Free Leftover Stuffing Waffles

Gluten Free Leftover Stuffing Waffle (shaped like Mickey Mouse)

Servings: 4 large waffles
Time: Prep 5 minutes; Cook 10 minutes

Ingredients:

  • 4 cups crumbled leftover gluten free stuffing
  • 2 large eggs
  • 1/4 cup vegetable broth (or chicken broth if you’re not vegetarian)


Directions:

Preheat the waffle maker and grease it with cooking spray.

Gluten Free Leftover Stuffing Waffle with Vegan Homemade Vegan White Gravy and Cranberry Chutney

In a large bowl, stir together the leftover stuffing and eggs.  Add 1/4 cup of vegetable broth and mix until well combined.  Continue adding broth as needed until the mixture is well-moistened.

Scoop the stuffing mixture into the prepared waffle maker, spreading it evenly.  (The stuffing will not spread or expand like regular waffle batter as it bakes, so arrange it in an even, thin layer).   Close the lid and let the waffle bake until golden brown and the egg is cooked throughout.  Stuffing waffles take longer to cook than regular waffles, as the egg must be completely cooked throughout.  Don’t be afraid to let the waffle bake until it’s golden brown and crispy!

Transfer the waffle to a serving plate then repeat the filling and baking process with the remaining stuffing.

Serve.

~*~*~

I know what you’re wondering…you are pondering what I served these waffles with.  Simple.  I prepared a gluten-free white gravy and took some fresh cranberries from my CSA bin and made a cranberry chutney.  I poured a bit of the warm gravy over the waffle with a side of the cranberry relish and…BAM…dinner was served.

It tasted amazing.  Mine, being in a Mickey Mouse waffle maker, was shaped like Mickey Mouse…but it came to this perfect golden crispiness on the outside.  It paired great with gravy, making it a savory dinner.  And the cranberry chutney tied it all together.  A great way to use up some of those holiday leftovers for sure!

TRUST ME!

Thanks to Cuisine Cube for including a box of Oliva’s amazing Gluten-Free Rosemary & Sage Stuffing in my box for Thanksgiving.  I am forever thankful!

Recipe: Fresh Corn with Avocado, Onion, and Spiced Vegan Scallops

I’m doing my best to make do without my CSA bin for the past month.  And that means I’ve been doing a lot with some products and foods that I have in my fridge and freezer.  My freezer happened to have an open box of Sophie’s Kitchen Gluten Free Vegan Breaded Scallops and this amazing corn that I cut off the cob and froze for later use.  My fruit bowl is holding one of my favorite things in life…avocados.  And yesterday, I purchased an onion for use in my previous recipe.

So, when I spotted a recipe on Health.com for a meal that involved fresh corn, avocado, scallions and scallops, I knew I could easily adapt the recipe to use ingredients I had on hand, and keep it vegan.  Of course, if you eat seafood, feel free to use regular scallops.

With the seasoning and the fresh vegetables, this was one fantastic meal.

Recipe: Fresh Corn with Avocado, Onion, and Spiced Vegan Scallops

Fresh Corn with Avocado, Onion, and Vegan Spiced Scallops

Servings: 2
Time: Prep 10 minutes; Cook 5 minutes

Ingredients:

  • 1 medium diced peeled avocado
  • 1 tablespoon fresh lime juice
  • 1-1/4 pounds sea scallops (I used Sophie’s Kitchen Gluten Free and Vegan Breaded Scallops)
  • 1/4 teaspoon salt
  • 1/4 teaspoon pepper
  • 1 teaspoon ground cumin, divided
  • 2 teaspoons olive oil
  • 2 cups fresh or frozen corn kernels, thawed
  • 1/2 cup chopped yellow onion
  • 1/4 cup dry white wine (I used 2 tablespoons white wine vinegar and 1 tablespoon lemon juice)


Directions:

In a small bowl, toss avocado and lime juice.

Sprinkle scallops with salt, pepper, and 1/2 teaspoon cumin. Heat oil in a large nonstick skillet over medium-high heat. Add scallops; cook, turning once, until golden and cooked through (about 3 minutes).

Transfer scallops to a plate.

Add corn, scallion, white wine, and remaining cumin to skillet; cook corn until tender, stirring constantly (about 2 minutes).

Spoon corn mixture onto 4 serving plates, add avocado and top each with half of the scallops.

~*~*~

This was one fantastic meal.  I loved the healthy fat that came into the dish with the avocado.  The seasonal corn was an amazing ingredient on its own, but when seasoned and cooked with all the other ingredients, it became elevated.  The scallops, simply seasoned with salt, pepper, and cumin made the perfect protein and topper for this dish.

Give it a try!  Vegan, vegetarian, or pescatarian…you’ll really enjoy this meal.  I’ll definitely be making this again!


Recipe: Sweet Chili Vegetable Quinoa Bowl

On Friday, I was quickly scrolling through the blogs I follow on WordPress and came across a blog from Clean Eating Veggie Girl, who posted this amazing recipe for a quinoa bowl, inspired by her friend Molly.  I had virtually everything necessary to make this meal, save for an onion and some frozen stir-fry vegetables, which I could easily pick up at the store over the weekend and prepare this for dinner Sunday evening.

I actually spent most of my day helping my roomie’s sister paint some of her house…so grocery shopping actually didn’t get completed until much later, and it was past 6 p.m. by the time I back to my apartment to cook.  Thankfully, this is a super-easy and super-fast meal to create.

Oh…and super delicious too!

Recipe: Sweet Chili Vegetable Quinoa Bowl

Sweet Chili Vegetable Quinoa Bowl

Servings: 2
Time: Prep 10 minutes; Cook 20 minutes

Ingredients:

  • 2 cups cooked quinoa (1/2 cup dry + 1 cup water)
  • 2 cloves garlic, minced
  • 1 tablespoon fresh ginger, minced (I used 1/8 teaspoon ground ginger)
  • 1/4 medium yellow onion, chopped
  • 16 oz bag frozen stir-fry vegetables
  • 1/8 cup Bragg’s liquid aminos (I used San-J Gluten Free Low Sodium Tamari)
  • 1/3 cup sweet chili sauce
  • Sriracha sauce, optional
  • 2 to 3 large eggs, optional*

*Recipe is vegan without the eggs


Directions:

If you do not already have the quinoa cooked, prepare according to package directions.

Line a large skillet with a thin layer of water.  Heat over medium-high heat until very hot.  Once hot, lower the heat to medium and add garlic, ginger, and onions to the pan.  Cook for approximately 5 minutes, adding additional water as necessary.

Add frozen stir-fry vegetables to the skillet.  Cover with a lid and cook for approximately 5 minutes.

Once the vegetables are cooked through, turn the heat to low and stir in cooked quinoa.

Add liquid aminos/tamari sauce and sweet chili sauce to the skillet.  Stir until well-combined.  Cook an additional 3 to 5 minutes, or until your vegetable and quinoa mixture is hot.

If you are adding an egg to the bowls, cook each one to your liking during the last 3 to 5 minutes of cooking time.  I poached mine, but fried or scrambled would work as well.

Scoop the vegetable and quinoa mixture into bowls and, if desired, drizzle with sriracha sauce and top with an egg.

~*~*~

This quinoa bowl is fantastic.  It’s a little bit sweet and a little bit spicy.  And if you love eggs, the runny yolk from a poached egg just really ties the entire meal together.  I was beyond impressed.  It was nice to create a healthy, protein-rich meal for dinner after such a busy day.  I also appreciated how quickly the entire meal came together.  Fantastic.

Product Review: Cup 4 Cup All Natural Gluten Free Pancake & Waffle Mix

Cup 4 Cup All Natural Gluten Free Pancake & Waffle Mix

Product: Cup 4 Cup All Natural Gluten Free Pancake & Waffle Mix – $5.99+

YES!!  FINALLY!!  At long last, I am trying out one of the Cup 4 Cup baking mixes.  I have been dying to do this since these products emerged on the scene back in 2012.  I had eyed the Cup 4 Cup Original Flour Blend back when it was exclusive only to Williams-Sonoma and online purchases.  The problem was, I couldn’t fathom paying the $20+ dollars to try a flour blend that was being touted as the best on the market.  I wish I could have made room in the budget for it, but I live paycheck to paycheck with very little wiggle room most weeks.  Especially having to eat gluten-free.

So, when I was in Columbus, Ohio at The Raisin Rack, and my roomie told me to fill up a basket with products I wanted to try…I knew, immediately, that I wanted one of the Cup 4 Cup baking mixes.  The problem was choosing which one.  The other one on the shelves at the time was the Pizza Crust Mix…and I have so many pizza crusts here just waiting to be made, the pancake mix seemed like the most obvious choice.  And so…it has the honor of being the first product by Cup 4 Cup that I have tried.

So, if you aren’t familiar with Cup 4 Cup or why I’m so enthusiastic about this product, you must take into consideration that I am a food and chef junkie.

This brand of gluten-free flour and baking mixes was created by Chef Lena Kwak, while serving as Research and Development Chef in the famed French Laundry in Yountville, California.  Her mentor, Chef and Owner Thomas Keller, knew they had stumbled upon something amazing when a guest at the restaurant tasted Lena’s gluten-free brioche and cried because she hadn’t tasted bread in years.  It was then that they knew they needed to share this product with the rest of the world.  Cup 4 Cup is not just great-tasting gluten-free flour, but it’s great-tasting flour for everyone.  The name comes from this brand’s ability to substitute all-purpose flour in traditional recipes, cup for cup, making it easy to translate some past favorites into a gluten-free version.  And no one will be the wiser.  Basically, Cup 4 Cup allows you to not only create, but also enjoy all the foods that you always loved…but now makes them gluten-free so that you can love them again.

It is a pretty high standard and tall order to hold yourself up to.  But you have to trust products when Thomas Keller is involved. Really!

On Friday, last week, I had made the decision to finally break into the Cup 4 Cup Gluten Free Pancake & Waffle Mix and make some pancakes.  This was going to be a little time consuming, as I rush home after my 5:30 a.m. spin class on Friday’s to shower, change, and eat something for breakfast.  But, the roomie and I had no real rush, so…I just had everything that I could prep ahead of time done and ready with all the rest of the ingredients out and waiting…with the glass mixing bowl.  I showered.  I changed.  I went into the kitchen, preheated my skillet, and got to work.

Making the Cup 4 Cup Gluten Free Pancake & Waffle Mix is easy.  Even when I doctored the mix up.  You see, I asked Cathy if she wanted just straight-out pancakes, or if she’d like the Lemon Poppy Seed version that was mentioned on the back of the pouch the mix was in.  She said, “You can’t throw lemon poppy seed at me and expect me not to want that!”  So, one quick trip to the grocery store very early that morning to get lemons…I zested and juiced them before heading to the gym so that I just had to melt the butter and mix things together before scooping it out onto the skillet.

Nothing could be easier.  With the skillet preheating, I poured the contents of the pouch into the mixing bowl and added milk and 1 egg to it.  I stirred this together, then added the melted butter and (optional) vanilla extract.  Then, I added the additional stuff to make it the Lemon Poppy Seed variety…1/4 cup sugar, the zest of 2 lemons, 1 tablespoon of lemon juice, and 1 teaspoon of poppy seeds.  With everything incorporated, I scooped 1/4 cup of the batter onto the griddle and repeated the process again.  With two pancakes cooking, I noticed that they were getting those perfect bubbles around the edges after a couple of minutes.  Time to flip the pancakes!

As I did, I noticed the gorgeous golden color on the other side.  These were not only properly crisping, but they were fluffing up to these gorgeous, thick, and light pancakes. I was beyond pleased with the look of them.  And they smelled amazing.  That lemon scent was so refreshing.  I checked the skillet side, and noticed it was now golden too…so they were moved to a plate and a new batch was started.  These got a light treatment of butter and some delicious maple syrup.  Breakfast was served.

Gluten Free Lemon Poppy Seed Pancakes made from Cup 4 Cup All Natural Gluten Free Pancake & Waffle Mix

Cathy got the first two pancakes that morning and when I saw her finish her first bite, I had to ask how they were, since mine were still cooking.  She immediately cut another piece and began to devour it.  “YUMMY” she said, with a mouthful of lemon poppy seed pancakes and maple syrup.

Mine finished up and I ate them in the kitchen while I prepared pancakes from the rest of the mix to have at a later time.  In fact, four of them are coming out of the fridge tomorrow for our post-gym breakfast at the office.  So, it will be interesting to see how they do on a microwave reheat.

That being said…these pancakes did have that perfect golden crust, giving it that amazing golden flavor and initial crunch as your fork slides through it.  These pancakes were not dense or heavy at all.  In fact, I found them rather light and airy in comparison to other pancakes I’ve made from baking blends.  The lemon flavor was incredible…and at just the right level.  Any more and it would have been too tart.  I was glad I left the vanilla extract in, despite it being an optional addition.  I just think it added to the flavor in the end.  Overall, I devoured these in record time, cleaning my plate of every last remnant of the pancakes.

In the end, I ended up making 12 pancakes from the mix itself.

So, let’s talk ingredients.  The Cup 4 Cup Pancake & Waffle Mix is made from cornstarch, white rice flour, sugar, brown rice flour, milk powder, tapioca flour, baking powder, potato starch, salt, and xanthan gum.  It is gluten-free…but trust me…you’d never know it.  No one would.  And these pancakes were definitely diner-style and diner quality.

As for the nutritional information…a serving of the Cup 4 Cup Pancake & Waffle Mix is 1/4 cup of the mix.  This serving provides 140  calories and is fat free.  It is also cholesterol free.  This serving also will provide 440 mg sodium and 8 grams of sugar.  One serving has less than 1 gram of fiber and 2 grams of protein.  Of course, all of that changes when you prepare it with the rest of the ingredients.  I used almond milk in mine, for the record.

Beyond impressed with Cup 4 Cup All Natural Gluten Free Pancake & Waffle Mix.  On a busy morning, breakfast was still simple to make.  And these really are some of the best pancakes I have had since going gluten-free.  I think having a product that was developed by chefs for consumers helps keep up the integrity.  And we all know that nothing that Thomas Keller touches would be sub-par.

I’m hooked.  I sort of always want to have these in my pantry.  Forever.

Product Review: Jovial Gluten Free Brown Rice Tagliatelle

Jovial Gluten Free Brown Rice Tagliatelle

Product: Jovial Gluten Free Brown Rice Tagliatelle – $5.49+

Sometimes I get big ideas and then wait awhile to actually try them out.  When I first spotted the words “traditional egg pasta” on a box of gluten-free tagliatelle from Jovial…I thought immediately of soup.

What?

You don’t immediately think soup?

The reason I thought of soup was, as I was growing up, my mom would make a homemade Chicken Noodle Soup, which required an egg noodle in the recipe.  So…this immediately sparked that in my memory.  So, I told myself that I could easily make my mom’s recipe…but make it vegetarian.  After all, I had one last package of Beyond Meat “Chicken” in the freezer, and for some reason, I think I was mentally saving it to make soup.  So…the perfect opportunity presented itself for sure.  The only big change was I didn’t make the stock myself.  I couldn’t.  I wasn’t using real chicken.  So, instead…I picked up a couple of the Imagine Vegetarian No Chicken Broth and adjusted the recipe from there.

It worked out brilliantly in the end.

But…that’s not what I’m here to talk about.  I am here to discuss the use of the Jovial Gluten Free Brown Rice Tagliatelle.  The pasta is actually the last thing that gets added to the soup.  Not only does this help to thicken the broth a little bit, but it also brings a heartiness to the dish.  I love a good, comforting bowl of soup.  And as we were in the low teens temperature-wise last week…this was the ideal food to have on hand.  And my roomie and I ate it…three days in a row.

Jovial Gluten Free Brown Rice Tagliatelle (uncooked)

Jovial Gluten Free Brown Rice Tagliatelle was the ideal and perfect noodle for this soup.  It is a thin, but longer noodle.  Sort of like fettuccine, but different.  Did you follow that?  HA!  It cooked perfectly in the broth with my not-chicken “meat” and my carrots.  These noodles absorbed the flavors of the broth and the items cooking in it.  And, for the first time, the fake chicken didn’t taste…fake.  That was more the broth than the noodle…but that’s an observation I thought I should share.  Anyway…Jovial actually managed to make a brown rice noodle that didn’t turn gummy and didn’t fall apart when it cooked.  I loved how these noodles held their shape and were so prominent throughout the soup.  What’s the point of having a “chicken” noodle soup if the noodles don’t hold up?  They really did bring the dish up to where it needed to be.  And, even on a reheat, they were perfect.  Three days in a row…noodle perfection.

I was beyond impressed.  I would purchase these again in a heartbeat to use in other dishes, including pasta dishes with a simple sauce.  They went above and beyond my expectations.

Let’s discuss the ingredients that go into Jovial’s Gluten Free Brown Rice Pasta, shall we?  These shelf-stable noodles are made from organic brown rice flour and organic eggs.  Yes…they really are made from only two ingredients.  In addition to being gluten-free, these noodles are also free of casein, tree nuts and peanuts.  These are also certified kosher.

As for nutritional information, as far as pasta goes, this is right in line with even the regular stuff.  A serving of Jovial Gluten Free Brown Rice Tagliatelle is 2 ounces of pasta.  There are 4 servings in the package.  A serving will deliver 210 calories and 3 grams of fat.  One serving will also provide you with 40 mg cholesterol, 15 mg sodium, and no sugar at all!  You will also be taking in 2 grams of fiber and 5 grams of protein.  So, yes…these will make you feel full.  Trust me.  I made vegan grilled cheese sandwiches to eat with them and I was stuffed at the end of my bowl of soup and sandwich.

Another win for Jovial in the gluten-free pasta.  Seriously continuing to fall in love with this brand when it comes to my pastas.  Great noodles that are easy to cook and use…and don’t fall apart like some other brown rice pastas.  That is definitely a win!

Gluten Free and Vegan
Gluten Free and Vegan “Chicken” Noodle Soup made with Jovial Gluten Free Brown Rice Tagliatelle

Product Review: Mrs. Leeper’s Gluten Free Beef Lasagna

Mrs. Leeper's Gluten Free Beef Lasagna
Mrs. Leeper’s Gluten Free Beef Lasagna

Product: Mrs. Leeper’s Gluten Free Beef Lasagna – $5.99+

Mrs. Leeper’s Gluten-Free products have yet to let me down.  Honestly.  The two I have had prior to this one have been out-of-this world delicious.  And, they reheat so well the following day or so as well.  So, I’m having a bit of a foodie love affair with the packaged and easy-to-prepare Mrs. Leeper’s dinners.

The Beef Lasagna was no different.

But…before you freak out…let me assure you…no beef was added to this dish.  Much like when I made the Mrs. Leeper’s Gluten-Free Cheeseburger Mac, I substituted the beef with the Trader Joe’s Soy Chorizo, which is also gluten-free.  So much love for Trader Joe’s for bringing that back to shelves!  WOOT!

Another big plus for these meals is how efficient, convenient, and easy they are to prepare.  Trust me.  I don’t have time every night to prepare something from scratch.  As much as I would like to…

And, as I haven’t had my CSA bin delivered in almost a month (this is what happens when you go out of town…then go out of town…then think you’re going out of town, but end up not going out of town…twice…and having already cancelled the bin), I’m basically living off my pantry/fridge/freezer.  This…has been my unfortunate life.  I hate not getting my fresh produce.  I’m trying to get back into the habit of more clean eating, less processed stuff…but it’s been hard when my fresh produce isn’t delivered to my door and my roomie isn’t big on purchasing it from the grocery.

So, instead of living off the land, I’m living off the stocked shelves of my various kitchen stock rooms.  So, thankfully I had the Trader Joe’s Soy Chorizo in my fridge because that meant…this box could move off my pasta shelf and make an easy dinner.  So…that’s what happened.

Preparing the Mrs Leeper’s Gluten Free Beef Lasagna was easy.  I heated up a skillet and put the soy chorizo into the pan.  I let it warm up a littie and then stirred in three cups of hot water and the packet of sauce mix included in the box.  That all had to come to a rolling boil, and then the pasta was added.  The heat was then reduced, the skillet covered, and the pasta allowed to cook for about 10 minutes (or until tender), with an occasional stir.  The skillet is then removed from the heat and left to stand for about 3 minutes to allow the sauce to thicken.

So, this dinner took about 15 minutes to prepare and it was totally legit and delicious.  The box says that ground turkey or tofu could be substituted for the beef, or the protein could be left out all together.  Any way you decide to serve it up, you have a delicious meal that is fast and easy to prepare…and…most importantly…DELICIOUS!

Because, yes…this, like the Mrs. Leeper’s meals that came before, was perfection.  The flavors were amazing.  The soy chorizo brought a nice touch of heat to the actual dish, but the rich tomato sauce was a great counter-balance to the heat.  And the corn pasta was, as always, brilliant.  I love corn pasta because it doesn’t fall apart, nor does it get gummy.  This cooked to a perfect al-dente, and when the leftovers were heated up later that week, the same held true.  I am actually quite addicted to these easy and fast meals.

Besides…I love pasta!

So, let’s talk ingredients.  The Mrs. Leeper’s Gluten Free Beef Lasagna is made from corn pasta, and a lasagna seasoning, which is a blend of tomato powder, sugar, salt, potato starch, whey, autolyzed yeast extract, onion and garlic powder, hydrolyzed soy protein, citric acid, spices, beet powder, extractives of turmeric and paprika, natural flavor, lactic acid, xanthan gum, caramel color and silicon dioxcide to prevent caking.  Not bad, but not clean eating either.

As for nutrition…the Mrs. Leeper’s Gluten Free Beef Lasagna serves 5.  Each serving contains 130 calories as packaged and 0 grams of fat.  You will also take in 0 mg cholesterol, 480 mg sodium, and 3 grams of sugar.  A serving will also provide 2 grams of fiber and 2 grams of protein.  Of course, that does change with the addition of your protein of choice.

Another brilliant pasta meal that is ready in about 15 minutes from Mrs. Leeper’s.  I am beyond impressed.  And, I’m certain I’ll be giving the remaining few Mrs. Leeper’s meals a try…with or without a substitute protein.  Guess it just depends on what I pick up and what might or might not work with it.  But, if you haven’t given the Mrs. Leeper’s Gluten Free pasta meals a try yet…do so.  It’s like Hamburger Helper…but SO much better!

Mrs. Leeper's Gluten Free Beef Lasagna (prepared)
Mrs. Leeper’s Gluten Free Beef Lasagna (prepared)


Product Review: Improveat’s The Pure Wraps

Improveat's The Pure Wraps
Improveat’s The Pure Wraps

Product: Improveat’s The Pure Wraps

Looking for a good tortilla alternative?  Hey…sometimes we are.  I know I’m usually searching for some sort of wrap that I can use…in some fashion.  And I managed to find a few options in other areas of the country…but never really in my state or region.  One product that I have seen, but haven’t gotten the nerve to try are The Pure Wraps.  I spotted these at a few of my local natural food stores on end caps and the like…but I just haven’t managed to talk myself into getting them.

Enter my monthly delivery from Cuisine Cube!  If I haven’t gotten you curious enough to sign up for a month of this delivery…then you aren’t human.  Seriously, click on the link above and check them out.  It is affordable and you really do get some interesting and otherwise unknown products each month delivered right to your door.  All gluten-free.  How’s that for amazing?

So, in only my second cube to arrive, back in June, one of the products included were The Pure Wraps from Improveat.  Hmmm…now I didn’t have to talk myself into purchasing them.  I now had them within my clutches.  Thanks Cuisine Cube!  Anyway, I tucked these away in my hall pantry, and sort of had the fact that they were there lingering in my mind for awhile.  I just needed a good reason to get them out and try them.

Filling form y quesadillas: The Pioneer Woman's Butternut Squash & Kale
Filling form y quesadillas: The Pioneer Woman’s Butternut Squash & Kale

That moment presented itself in the week following my trip to Walt Disney World to run the Disney Wine & Dine Half Marathon.  My roommate and I are getting back on track with our clean eating and I still happened to have a butternut squash from my bin a couple weeks before.  I purchased some organic kale and whipped up a recipe from The Pioneer Woman for her Butternut Squash and Kale.  She had a link using it as a stuffing for quesadillas.  And I thought…well…I do have those Pure Wraps in my pantry.  I wasn’t sure how well it would work, but I figured…it was at least worth a try.

So, that evening, I managed to properly cut a butternut squash without almost losing a finger and without much problem.  I cooked up the delicious squash and kale mixture and then it was time for the quesadilla part.  I retrieved the packet of Improveat’s The Pure Wraps and opened it up.

Improveat's The Pure Wraps (raw)
Improveat’s The Pure Wraps (raw)

What I pulled out were squares of what almost looked like thin paper.  I was now wondering how these would work with the whole “drop in some butter to crisp up the outside” method for the quesadillas.  I figured there wasn’t much to lose, so, into the pan one went.  It took a moment to begin to brown, but it did…so I flipped it.  These didn’t exactly crisp up right away, so when I went to do the other one, I set the first on a paper towel.  That’s when it began to crisp up.  Maybe it would work.  Maybe not.  If not, just wrap it around the filling and eat it like…shawarma or something.

But…it did work.  In fact, I was pleasantly surprised when the wraps charred up and did become solid enough to hold the amazing filling I prepared simply with local squash and organic kale…and a little bit of seasoning.  Mmmm.  So, there it was…dinner.  It wasn’t a normal looking quesadilla,but it wasn’t made with your typical ingredients.  So…I cut them in half…and they crumbled slightly, but it worked.  Dinner was served.

I was actually so happy with the way Improveat’s The Pure Wraps tasted.  Considering they are made from only three ingredients, and not a typical tortilla, I wasn’t sure how well this would work.  But they worked perfectly.  And it was a different take on how to eat them.  Next time, and there will be a next time, I think I will leave them in their natural state.  But, even with the attempt at crisping them up, I still got the bit of sweetness from the coconut these wraps are made from.  And this really paired well with the earthy and spicy flavors of the squash and kale that I placed inside.  I was beyond satisfied with these wraps and honestly will be heading out to the store for more.  I’m excited about them.  I fell in love with them.  And, they fall right into the clean eating regimen that my roomie and I are trying to get back on.

So, what exactly are Improveat’s The Pure Wraps made from?  Simple.  Each wrap is made from only three ingredients: young coconut, coconut water, and Himalayan sea salt.  Boom.  That’s it.  You can’t get more pure than that!  The entire purpose of these wraps being created by Improveat (based out of Atlanta, Georgia) was to have a healthy bread/tortilla substitute that was highly nutritious, free of major food allergens (including gluten!) and convenient for today’s busy lifestyle.  It took over two years of research and testing to come up with the right product, realizing the vision of the creators without sacrificing their high standards.  Talk about a labor of love…and one that really paid off.  These wraps are gluten-free, raw, alkalline, corn-free, soy-free, dairy-free and egg-free.

As far as nutritional information goes, Improveat’s The Pure Wraps come in a package containing four wraps.  A serving size is one of these wraps.  One wrap will serve up 60 calories and 2.5 grams of fat.  They are cholesterol free.  You will be consuming 240 mg sodium and less than 1 gram of sugar.  Don’t you love that.  These wraps won’t make you feel bloated or stuffed either.  Each one contains less than 1 gram of fiber and they have no natural protein.  Thanks to the coconut that goes into each one, you also get a bonus of 120 mg potassium.  Gotta love that.

And you will love these wraps.  Honestly.  I can’t wait to try them again, and this time just use them in the simple manner they are prepared.  Just fill, roll and enjoy.  But, on a whole, these were very good the way I prepared them too.  They held up to even cooking, which I wasn’t sure how that would work but it did.

So, once again, Cuisine Cube, you have made a believer out of me.  Thank you for giving me the opportunity to try a product that I had been too nervous to try before.  Stepping out of your comfort zone when it comes to food is important, and this made it easy to do so.

Gluten-Free Butternut Squash and Kale Quesadillas made with Improveat's The Pure Wraps
Gluten-Free Butternut Squash and Kale Quesadillas made with Improveat’s The Pure Wraps


Restaurant Review: Via Napoli Ristorante e Pizzeria – Epcot – Disney World

Via Napoli - Italy Pavilion - Epcot
Via Napoli – Epcot – Disney World

Restaurant: Via Napoli Ristorante e Pizzeria – Epcot – Disney World

It was Epcot Day!  YAY!  I love Epcot Day.  I don’t know why…because so much of it features the World Showcase…which during the Food & Wine Festival…features foods from all over the world.  Even the regular pavilions that are standard in the showcase don’t offer much for a gluten-free vegetarian.  But I still love Epcot Day.

Since we were in Epcot, on our final night, we wanted to go somewhere in the park for dinner.  It took a little bit of back and forth, but we finally decided on Via Napoli Ristorante e Pizzeria.  It had gluten-free pasta on the menu, so we were good.  Something I could eat.  Which, definitely was important on Epcot Day…as our morning actually started at the Magic Kingdom…where we at Dole Whip for breakfast.  Pictures were taken for proof.  I am not ashamed.

But…let’s fast forward.

The entire day was spent doing a few rides and exploring the World Showcase.  My friend, Jenn, was having a difficult time on the last day.  Her feet…her poor feet…had blisters in places I didn’t know one could get blisters.  It was a slower moving day, but I was fine with that.  Take in the showcase.  Stop and watch the new Lumberjack Show.  I miss Off Kilter though…I’m not going to lie.  Cathy snagged a lunch in Morocco (she had to have her lamb shawarma!), while Jenn and I toddled over to Brazil for the (naturally gluten-free) Pao de Queijo (Brazilian Cheese Bread).  I later had one of my protein bars and half of a clementine (Jenn had the other half) because dinner reservations weren’t until 7:45 p.m.  Late.

But, we made use of our time…checking out different things along the way, resting when Jenn needed to get off her feet, exploring the different countries, and shopping.  Of course.  We got in line for the Gran Fiesta Tour Starring The Three Caballeros at the Mexican Pavilion…and that sort of ate up (see what I did there?) the rest of the evening down time before food.  It was a bit of a stroll back to Italy in Epcot…but Jenn was a trooper…and she got there.

I went up to the hostess desk in the very crowded lobby and let her know we were there for our reservation.  She asked me some questions, it was hard to hear her over the din of the lobby.  But we got it worked out.  And, of course, my food allergy thing.  So, there was a short wait…but after about 5 or so minutes, the lobby was emptying and we were up next.  The really nice hostess took us all the way to the back for a table with a bench and two chairs.  Cathy and I sidled up on the bench.  Jenn took the chair this time.

We. Were. Starving.

I perused the menu and noted that, yes, gluten-free pasta was the only option for me.  The downside…none of the listed pasta dishes on the menu were vegetarian.  Yikes.  As I was just starting to look at the menu, the customer liaison came over to speak to me about my food allergy.  He noted the gluten-free and pointed out that they do not have gluten-free pizza but any of the pasta can be done gluten-free.  And then he was off.

Which left our poor waiter to be the one who would have to seriously help me out.  Not that he minded.  And as I am the tricky one…I ordered first.  And my first statement was…

“Well, I am a gluten-free vegetarian…so…”

He came over to my side of the table to look at the pasta dishes.  “Gluten-free…it’s easy,” he said.  “The vegetarian…”  He looked at all the pasta options again and finally said, “I tell you what…we will have the chef prepare some mushrooms and vegetables with our marinara sauce.”

Works for me.  Order in.

Jenn opted for the Lasagne Verde, which is a white lasagna that is stuffed with spinach, parmesan, ricotta, and a besciamella sauce ($22.00).  Cathy went for her go-to when we first go to an Italian restaurant…the Spaghetti e Polpettine, which contained hand-crafted veal meatballs in a tomato sauce ($21.00).  I have to say, I usually giggle a little when Jenn orders something with cooked spinach or vegetables in it…because most of those veggies get tossed to the side of the plate.  But…she is Italian…and she knows her Italian food.

We waited for a bit…no gluten-free rolls or any bread at all at the table.  We watched a woman at the table next to us devour an entire pizza on her own, while her dining companions watched her.  And as she was taking her last few bites, their food arrived.  It was weird.  We couldn’t figure out if they were just there to watch her eat (like some crazy Disney World food challenge or something)…but…who knows.  She then got to watch all of them eat so…turn around is fair play…or something?

But, soon our attention turned to our own food as our dishes arrived and were delivered before us.

Pasta with Veggies and Marinara
Pasta with Veggies in Red Sauce

I have to say, my bowl of pasta was beautiful.  A good helping of marinara sauce (which would have been awesome with a gluten-free bread product of some type!) with a variety of vegetables cooked in.  I spotted zucchini, tomatoes, peppers and mushrooms immediately.  And the gluten-free pasta was fusilli…so twisty and perfect for capturing delicious sauce.  I will call this dish…”Pasta for the strange gluten-free vegetarian at the table in the back.”  Or…more simply…Pasta and Veggies in Red Sauce ($22.00).

Now, this is the second Italian restaurant I have visited at Disney World.  Normally we just head over to Hollywood Studios and enjoy our food (complete with gluten-free dinner rolls and gluten-free dessert!) at Mama Melrose’s.  But since were were in Epcot…we figured it would be easier to eat there than park hop.

I sort of wish we park hopped…

It’s not that Via Napoli was bad.  It wasn’t.  The food was actually quite good.  It was just…average though.  The pasta in my dish was actually cooked to perfection.  A lot of gluten-free pastas, especially when crafted from rice flours, tend to get gummy and fall apart.  These were a perfect al dente and held up to the marinara and the vegetables.  But…there was a lot of pasta in that dish and I ended up picking out the veggies at the end and leaving the noodles alone.  I ate about 3/4 of the dish…and that was it.  I was done.  The marinara had a lot of flavor to it.  And the vegetables were a nice touch and I appreciate the chef at Via Napoli for doing that to accommodate my dietary needs.  I just…had better.  Elsewhere.

Jenn enjoyed her lasagna…after she picked out most of the spinach.  And Cathy made sure to eat all of her meatballs.  They were much smaller than what she normally gets in a spaghetti and meatball dish, so she appreciated that too.  But she too had to soldier on and leave some of her pasta noodles behind.

No dessert here for us…we had plans.  Cathy wanted her chocolate cannoli from one of the gelato carts in the World Showcase, and I headed to France to get some Salted Caramel Gelato from an ice cream shop there.  Yummy!

So, as it stands, Via Napoli put out good food.  I can’t think of anywhere at Disney where I have had bad food.  It’s just…Mama Melrose’s had more options for me…and a bit more to offer.  So next time…I think I’ll return to Mama Melrose’s.  But, thank you, Via Napoli, for the fine cuisine.  A little taste of Italy never goes wrong with me.