Product Review: Andean Dream Quinoa Spaghetti

Andean Dream Quinoa Spaghetti

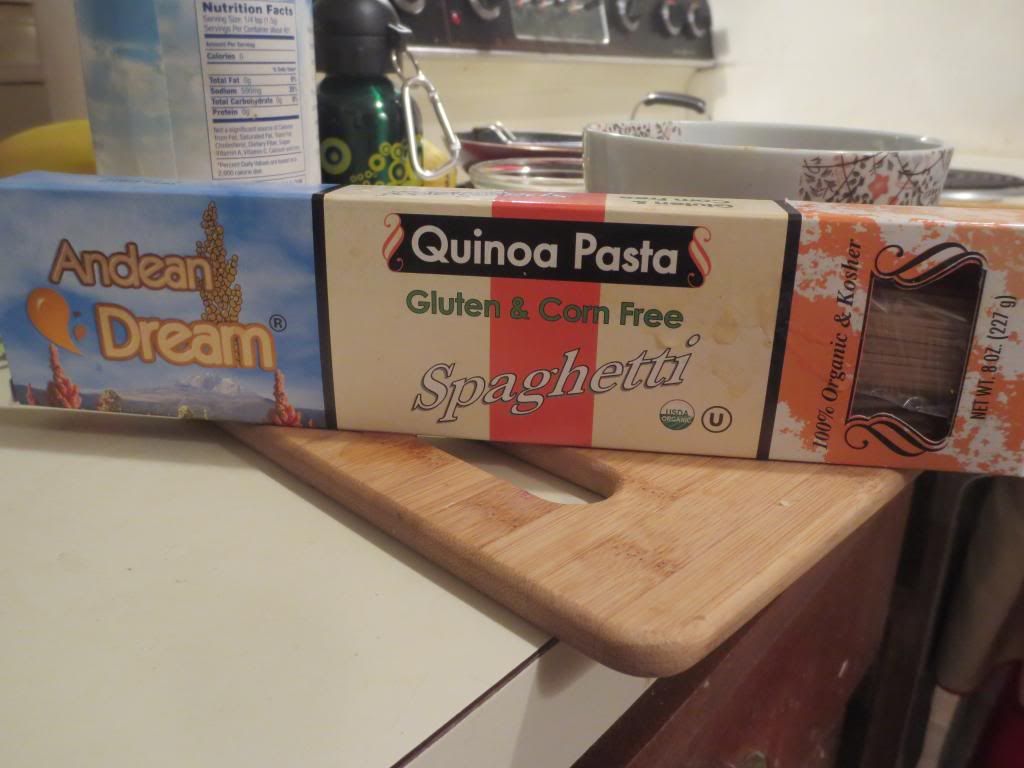
Product: Andea Dream Quinoa Spaghetti – $4.99+

Twas the night of my Monday fun run…and instead of doing my usual go-to meals…a Tasty Bite Indian meal or a grilled cheese sandwich…I went off the beaten path.  I decided…pasta would be good.  Mmmm…pasta.

I love pasta, and being gluten-free sometimes means I don’t get as good pasta as I used to be able to eat.  Rice pasta gets mushy and gummy.  Corn pasta is fine…but doesn’t always go with what I’m making.

And then…Andean Dream created the solution to my problem.  Quinoa pasta.  Yes…pasta made from quinoa.  I figured…why not give it a try?  So, I purchased a box of the spaghetti and took it home with me.  I have an overabundance of gluten-free pasta…because I love pasta…like…love, love, love…devour…mmmmm…good…carbs…pasta…kind of love…so this one sat in my pantry until it was it’s turn.

Well, on Monday…for some reason…I decided it would be pasta night.  Even though it was a hectic, busy, rushed night.  Traffic going to Louisville is bad.  I mean…BAD…every Monday and it’s only gotten worse with some of the construction going on…lane closures on the bridge…etc.  Why I thought pasta might be a good idea, who knows?  Things work out better in my head.  Timing works out better in my head.  But…that’s how life goes.

Live.  Learn.  Eat pasta anyway.

I made it home from work and immediately turned on the pot of water I left on the stove all day.  It was covered, so I hoped that would bring the water up to a boil faster.  I opened up the Andean Dream Quinoa Spaghetti and pulled out 4 ounces…or two servings.  The box says that it serves 4, so this was half of the box.  But you know me…I weighed it out.

The color and texture of the dried noodles remind me a lot of when I ate spelt pasta.  That was a good sign.  I loved my spelt pasta…until I could no longer eat it.  While waiting on the water to boil, I did busy work…like get changed, put together lunch and snack for the following day, and chop up some grape tomatoes and get them sauteing in a pan with some olive oil.  The water did boil and in went the Quinoa Spaghetti.  The box said it would take about 13-15 minutes to cook, so I let it go…stirring occasionally…and hoped that it wasn’t one of those pastas that really took about 20-25 to reach that perfect al dente.  It wasn’t.  It took all but 13 minutes.  I swear to the quinoa gods (which must exist for this to be a reality!).

Time to plate up.  I had my tomatoes in a pan, so I drained the pasta, threw it in the pan with the tomatoes, added my chopped fresh basil, and just gave it a toss, warming it all up all the way through, coating everything in the remnants of the olive oil and red wine vinegar.  Viola.  Dinner was served.  And…appropriately devoured…with a little slice of the gluten-free pull-apart bread I made and baked up over the weekend when my sister was in town.

So…how did the pasta stack up in flavor?

I only want to buy quinoa pasta from now on.  It is fantastic.  It didn’t get gummy or mushy.  It held up through the additional cooking with the tomatoes and basil…in the sauce.  It didn’t crumble or fall apart.  It was so good.  The texture reminded me not just of spelt pasta, but when I could eat whole wheat pasta.  It just…was wow.  Wonderful.  Not chewy, not mushy, not disappointing at all.  I was thrilled to cook it up again and have it perform equally as well on the second go-round.

Yes…Andean Dream has converted me.  Quinoa pasta…FOREVER!

A serving size of Andean Dream Quinoa Spaghetti is 2 ounces, which dishes up a delightfully tasty 207 calories.  Which is about right for a pasta.  Just slightly under most other pastas out there.  The Quinoa spaghetti has only 1 gram of fat.  In addition to all that, not only is this pasta wheat-free and corn-free, but it is also sodium-free.  That’s right!!  A serving also provides you with a meager 3 grams of sugar and fiber.  But, due to this pasta being made from quinoa and rice flour…a serving contains 6 grams of protein. Love that quinoa!!

Looking for a change or just want to step away from the strictly rice and corn based gluten-free pasta out on the market?  I highly recommend Andean Dream pasta noodles.  The spaghetti worked perfectly with my dinner and I can’t wait to try the other pastas that Andean Dream makes.  So happy with this…and wish I had dug it out sooner!!

Gluten-Free Caprese Pasta made with Andean Dream Quinoa Spaghetti

Restaurant Review: Shalimar Indian Restaurant, Louisville, Kentucky

Shalimar Indian Restaurant, Louisville, Kentucky

Restaurant: Shalimar Indian Restaurant, Louisville, Kentucky

I need to send out a big, huge, whopping THANK YOU to my darling little sister.  Because if it weren’t for her…it probably would have taken me forever…and ever…and even then I possibly would have put it off…to haul myself out to the Indian restaurant that is consistently voted THE BEST in Louisville, Kentucky.  Normally, I would rave and go on and sing praises for the Indian restaurant I have been going to since co-workers suggested it.  That being Dakshin, also in Louisville.

Oh.  My.  God.

I love Dakshin…but after the experience I had at Shalimar…it is out and Shalimar rightfully is where I want to go for my Indian food cravings.  Forever.  And ever.

Goodbye, Dakshin.

It was fun while it lasted.

Welcome to my Indian cuisine loving world, Shalimar.

I have mentioned quite a few times how my family grew up eating Indian food.  Authentic Indian food.  Our neighbors, who had children the same age as my little sister and my older brother, often invited us over to dinner when they were having curry.  And I loved it.  All the different spices and flavors…it was exciting and exotic.  It was…beyond delicious.  I was hooked at a young age.

So, as my sister’s husband isn’t as outgoing with food choices, when she told me she wanted to come visit me this past weekend, I wanted to get her to an Indian restaurant.  Normally, I’d haul out to the far end of Louisville to Dakshin…but not this time.  No way.  I wanted to take her to the place that Louisville always seems to deem the best.  This was a gamble…since I had never eaten there before.  But…with those kinds of reviews and awards…how could it be a bad choice?  I sent her the menu, although I knew that she’d be ordering the Chicken Curry…and comparing it to the stuff we grew up eating.

The big day, Saturday, came.  And after a fun day of walking around sight-seeing, shopping, and just having a good time, we decided we were starting to get a little hungry.  So…we headed over to Hurstbourne Lane to the strip mall where Shalimar is located.  Two snags.  First…traffic was ridiculous…so we ended up turning around and coming at the restaurant from another angle.  By the time we got there and parked, we realized that the hours posted said dinner on the weekend was 5:30 p.m.  We had about 40 minutes to kill.  We hopped across the way to Half Price Books and just kept making circuits and looking at different books until we couldn’t take it anymore.  Five minutes left…so we slowly meandered out of the store, got in the car, and headed back to the restaurant.

They were now open and people were being seated.  We were given a nice booth at the side of the dimly lit restaurant and allowed to peruse the menu.  I had looked over the menu before, but was going go give it a little more of a look while we had the time.  Our water glasses were filled and we were asked if we’d like anything else to drink.  We all decided to stick with water.  I had spotted something that sounded AMAZING on the menu…so I was now set.  Cathy was still deciding…but finally settled.  When our server returned…we placed our orders.

Cathy went with the Lamb Biryani ($11.95), which is a classic Muglai dish of curried meats cooked with basmati rice.  She made sure to specify that she wanted the spice on it as low as it could go.  The less spice the better.  Wimp.  She also ordered a side of the Naan Bread ($1.95) to go with her meal.  As predicted, my sister did order the Chicken Curry ($10.95), which is chicken that is cooked in a thick curry sauce.  She opted for medium heat.  She hoped it was as good as the Duggal’s.  As for me…I went with the Broccoli Masala ($9.95), which might just be my new favorite thing in life.  For real.  This is simply broccoli cooked in spices.  Except I ordered mine spicy!  I always love some heat with my food…especially when it’s ethnic.  And they promised they would do it up good for me.

Orders in, we talked a lot about growing up with Indian food in our lives…and just having some fun.  We took some selfies in the restaurant.  And…soon…our food arrived.

It all looked and smelled fantastic.  I mean…really, really, really fantastic. I hated that I had pause to take pictures of my food for the blog because I was ready to dive in.  My broccoli masala came with basmati rice, so after the photos were taken, I scooped up some rice onto my plate, then put some of the broccoli over it.  Time to dig in.

FLAVOR EXPLOSION OF AWESOME-SPICY-SAUCE!!

No joke.  If I were to pick something to eat as my last meal…this is definitely one of the front runners.  Honestly, there seem to be no words to properly describe how amazing this dish was.  I know…some of you are thinking that it’s just broccoli and spices…but it was more than that.  It was the perfect blend of spices…with the perfect heat level.  In fact…I probably could have taken it a little spicier.  The broccoli was tender and cooked to perfection.  The sauce…the sauce made it.  The rice gave me some oomph to the meal.  And I was even happier when I added a tomato chutney to it.  It was the perfect meal with the perfect people.

For the record, the Chicken Curry brought back happy memories for my sister.  Honestly.  She was thrilled and said it totally reminded her of the stuff we grew up eating.  And Cathy…loved her Lamb dish.  She’s big on rice…and this was a big heaping pile of rice.  For real.

We were so happy with the food and service that we got at Shalimar.  I don’t think I can bring myself to stray from this restaurant.  This is where you go to get authentic, delicious Indian food.  This is where you go to get the flavors, the tastes, and the experience of Indian cuisine.  This…is why Louisville consistently names this restaurant THE BEST Indian cuisine in the city.

In fact…I’m going back on Friday.  Seriously.

And I can’t wait.

Shalimar's Broccoli Masala with Basmati Rice
Shalimar’s Broccoli Masala with Basmati Rice

Recipe: Roasted Curried Cauliflower

Cauliflower is so versatile.  I have made “bread sticks” from a head of this vegetable.  I have made buffalo cauliflower florets as well.  Pizza crust.  I’ve put it in stir-fries.  I’ve made a tempura batter and fried them up.  But…when my CSA bin delivered me another gorgeous head of cauliflower…well…I wanted to do something different.  I have my go-to recipes…but I just wanted something different.

With the magic of Pinterest and a recipe that I built around from Nom Nom Paleo…I took this beautiful head of cauliflower, mixed it up with some healthy fats and a dose of curry, cumin, and seasoning.  Roasted it up in the oven…then topped it off with some fresh herbs.  And the result…pure magic.  Enough that I want to make it again…soon.  I need more cauliflower.

Recipe: Roasted Curried Cauliflower

Roasted Curried Cauliflower

Servings: 2-3
Time: Prep 5 minutes; Cook 40 minutes

Ingredients:

  • 1 head of cauliflower, cut into uniform florets
  • A generous glug of melted coconut oil
  • 2 tablespoons curry powder
  • Cumin
  • Kosher salt
  • Freshly ground black pepper
  • Half a lemon
  • 1/4 cup minced parsley leaves

Directions:

Preheat the oven to 450°F and move the rack to the lower middle of the oven.

Place the florets in a large bowl and toss them with a generous amount of the oil of your choice (about 2 tablespoons).

Add the curry powder, cumin, salt and pepper and toss until the florets are coated.

Pour the seasoned florets on a foil-lined baking sheet and cover it tightly with another sheet of foil.

Roast in the oven for 15 minutes, then remove the top layer of foil and continue to roast the cauliflower for 20 more minutes, flipping the florets every 8 or so minutes, until they are softened and browned in parts.

Plate the cauliflower and give each serving a squirt of lemon juice and top off with the minced fresh parsley.

~*~*~

Serious flavor.  Even Cathy was talking about the next time I made this dish.  I was so happy with the way it turned out.  It wasn’t too spicy, which worked in Cathy’s favor.  Just the right hint of seasoning.  Total perfection.  Tender…delicious…and amazing.

Liven up your cauliflower…I dare you!

Recipe: Vegan Potato Leek Soup

Just a couple minor changes to a recipe can make or break it.  Honestly.  But…a couple years ago, Cathy bought me the cookbook for Bouchon, Thomas Keller’s restaurant in Las Vegas.  In fact, we dined there when we were in Vegas and had one of the best food experiences of our life up to that point.  It was, in a word, heavenly.

And then…I just sort of let this gem of a cookbook sit on my shelf…never really pulling it out to explore.  But when my CSA bin gave me leeks, I remembered one of the dishes we had in Vegas was…Potato Leek Soup.  So, I pulled out my cookbook and got settled in to see if it was something I could, indeed, set out to make…and make properly.

There were a couple of minor tweaks necessary, for my food allergies and the like…like making it vegan.  It actually worked out perfectly.  Honestly.  I was so happy with the way this soup turned out that I am eager to make it again…and again…and again.  The best part was…save for a few minor ingredients (chives)…this recipe was made from items that were already in my pantry.

I will make not of my changes in parentheses.  But huge props to Thomas Keller for this amazing recipe.  And if I hadn’t eaten at Bouchon…well…I might never have experienced this or been inspired to make it for myself.

Recipe: Vegan Potato Leek Soup (inspired by Thomas Keller’s Bouchon recipe)

Vegan Potato Leek Soup

Servings: 6
Time: Prep 15 minutes: Cook 60 minutes

Ingredients:

  • 2 pounds (about 3 large) leeks
  • 4 tablespoons (2 oz.) unsalted butter (I used Earth Balance)
  • Heaping 1/2 cup sliced (about 1/4 in. thick) shallots
  • 1/3 cup sliced (1/4 inches thick) onions
  • Kosher salt and freshly ground black pepper
  • 1/2 pound (about 1 large) russet potato, peeled
  • 1 tablespoon minced garlic
  • Bouquet garni or sachet of 8 thyme sprigs, 2 Italian parsley sprigs, 2 bay leaves, 1/2 tsp. black peppercorn, wrapped in cheesecloth
  • 6 cups chicken or vegetable stock (I used a low-sodium organic vegetable broth)
  • 3/4 cup heavy cream (I used So Delicious Culinary Coconut Milk)
  • 1/2 cup minced chives
  • Extra virgin olive oil
  • Freshly ground black pepper

Directions:

Cut away and discard dark green leaves and roots from leeks, leaving only white and palest green sections.  Cut in half lengthwise, rinse in cold water to remove dirt between layers.  Place leeks cut side down and cut in 1/4 inch thick slices (yields about 3 cups).

Melt butter in large saucepan over med-low heat.  Add leeks, shallots, and onions.  Season generously with salt and pepper.  Increase heat to medium and sweat the veggies, stirring often, for 3 to 5 minutes – veggies should wilt but not brown.

Meanwhile, cut potato lengthwise into quarters, then cut crosswise into 1/4 in thick slices, yielding about 1-1/4 cups.

Add garlic to the sauteing veggies and cook for another minute, then add sachet and potatoes.  Cook for 2 to 4 min longer.

Add 6 cups stock, adjust seasonings.  Bring to simmer, then reduce and simmer for 30 min, or until potatoes are tender. Remove from heat and let soup cool for about 15 min.  Remove the sachet.  Transfer soup in batches to blender and puree, starting at low speed (to release heat remaining in soup), and then slowly increase speed until soup is smooth.  Don’t overfill the blender, since hot liquid can spurt out.  It is helpful to place your hand over the lid while holding a towel.  Strain through a fine sieve or the like if you want the soup to be extra smooth.  (That part is optional…I chose not to, and my soup was still smooth!)

To finish, return soup to a rinsed out pan and bring to simmer.  Add cream and simmer on low for 5 min – stir frequently and careful not to burn!  Remove from heat.  Stir in chives if serving hot.  If refrigerating, pour into container and place in ice bath to cool (it keeps about 2 days).  Serve sprinkled with chives and olive oil and fresh ground black pepper.

~*~*~

You would be hard-pressed to tell that this soup was vegan.  Honestly, the changes I made didn’t affect the creaminess or the taste of the soup.  It was so good, and Cathy and I feasted on it for three delightful evenings.  It was super packed with flavor and still super creamy.  Substituting culinary coconut milk for the heavy cream didn’t change the texture at all.  It worked brilliantly.

So…with soup season coming on strong…give this recipe a try.  Thomas Keller is a brilliant chef and this recipe is one of the best soups I have made so far.  Truly a delight.

Product Review: Peas of Mind Baked Apple Fries

Peas of Mind Baked Apple Fries

Product: Peas of Mind Baked Apple Fries – $5.99+

Sometimes…it happens.

Okay…with me it happens all the time…but let’s ignore that fact for a moment here.

Picture walking through the frozen food section of your local natural foods store (this was Whole Foods, in case you were wondering) and catching just a quick glimpse of an interesting sounding product.  That’s what happened here.  I normally never would have thought twice about this little green bag of sliced apples…but…the fact that they were frozen apple fries…that got my attention.  Baking apple strips and making them into a healthy alternative to potato fries.  BRILLIANT!

So…I bought them.  I had to.  I needed to give these a try.

The brand is Peas of Mind, and they tout all-natural eats for growing children.

Kid food.  Kids sometimes get the best food.  And the fact that these were all-natural, non-GMO, gluten-free, dairy-free, fat-free, egg-free, soy-free and vegan…well…they were definitely safe for me to eat.  I didn’t care that these were intended for children.  This kind of food was good for all ages.  That’s how I figured it.

Peas of Mind makes a variety of healthy eats for kids.  And their veggie fries come in a few different flavors, including carrots, broccoli, cauliflower, and apple.  YUM!  But the apple ones were the ones that caught my eye…so those were the ones making the trip to my freezer.

And, as with most things…I bought these and then kept forgetting to cook them up.  Until the last time I prepared my gluten-free veggie burgers.  I figured a side of fries would go nicely.  But instead of slicing up a sweet potato or potato and baking them up in the oven…I pulled these out of the freezer and prepared a baking sheet to get them cooking.  I have to say…they were a lot thicker than I anticipated…not the gorgeous fry-shape that is shown on the packaging.  But…my food doesn’t have to look like the package.  It just has to taste good.

Before we get to that, however, let’s hit up the ingredients and nutritional information.  The Peas of Mind Baked Apple Fries are made up of apple, dehydrated potato, water, canola oil, cinnamon, sea salt, and baking powder.  One serving is 57 grams (or about 14 fries).  In this serving, you will be consuming 70 calories and 0 grams of fat.  Remember…fat free!  You also get served 50 mg sodium and 2 grams of sugar.  These will not be very filling as that serving has only 1 gram of fiber and 1 gram of protein.  Each bag provides 6 servings of fruit.  Definitely healthy.  Definitely different.

So…how were they?

Different.  They were…different.  In fact, I’d venture to say they were slightly on the bland side.  I felt that they needed a dip of some sort.  Peas of Mind recommends (on the packaging) ketchup or honey.  I’m not a fan of honey on its own nor am I fan of apples in ketchup.  So…I ate them without.  Although now I”m tempted to do up a whipped agave dip for the next time I make these.  Hmmm.

Anyway…the apple flavor is barely there…and they seem to need more cinnamon, quite honestly.  The dehydrated potato sort of gave them this odd…blandness.  If it were just apple strips, these would have been amazing.  But the added flakes of potato just subtract from that sweet apple flavor.  So, they were definitely a disappointment.  I think next time I bake up a round from my bag in the freezer, I might sprinkle with a bit more cinnamon and try to draw out more flavor.

So, they weren’t bad…but they didn’t wow me either.  Next time…I might just slice an apple into slices and give them a good bake in the oven and see how that goes.  I wasn’t blown away, but I am definitely curious enough to try the other veggie varieties to see if they work out better than this fruity version.

Peas of Mind has definitely drawn me in…even though this first product I sampled from them didn’t really thrill me, I am eager to see what else they have to offer.  I love healthy alternatives to foods.  And this was definitely a healthy choice…just not one that was as delicious as it was healthy.  I hope that changes as I give the other versions of the veggie fries a chance in the future.

Peas of Mind Baked Apple Fries (prepared)

Product Review: Nuovo Gluten-Free Sweet Potato Gnocchi

Nuovo Gluten-Free Sweet Potato Gnocchi

Product: Nuovo Gluten-Free Sweet Potato Gnocchi – $5.99+

This was it.  The last of the gluten-free gnocchi that I randomly spotted and purchased from my local Earth Fare store.  I was so happy to find three varieties…all three had to come home with me that day.  I knew I wasn’t going to get to them that quickly…so I froze them until I was ready to try them out.  Smart move on my part…because it took a bit longer than originally anticipated.

I was thrilled…just thrilled with the Classic Potato and the Basil and Potato varieties that I devoured before.  I saved the Gluten-Free Sweet Potato version for last because…I love, love, love sweet potatoes.  Like…more than most foods in this world.  Sweet potatoes make me super happy.  And I will eat them in different ways too.  So…why not in a gnocchi?

Thanks to Nuovo, this was simple to do which made my evening a lot more enjoyable.  I didn’t have to spend most of the evening prepping my own dough for this gnocchi.  All I did was take it out of the freezer and place it in the fridge prior to going to work…when when I got home…put them in some salted boiling water and allowed them to cook just as the package stated.

Easy.  SO easy.  And I was already anticipating digging into a helping of this as it was cooking in the water…and I was warming a sauce (a marinara…because that was all I had on hand).  I drained them, tossed them with the sauce…and dinner was served.

So…with all the anticipation…was it worth it?  Was it just as I imagined it would be.

Nuovo Gluten-Free Sweet Potato Gnocchi (boiled and drained)

Well…not really.  In fact…I was more than underwhelmed by this particular variety.  Where I raved and applauded the gluten-free Classic Potato and gluten-free Basil and Potato varieties…I was…just disappointed with the one I was anticipating the most.  The Sweet Potato gnocchi definitely had a hint of that sweet potato flavor…however, it wasn’t the first thing to hit the palate.  It was okay…it was still good…but it just didn’t knock my culinary socks off.  The majority of the flavor came from the marinara sauce I tossed these potato pasta goodies in.  I just felt like these were missing something…not texture-wise, but definitely in flavor.  If you are going to be sweet potato…something…you need to have that sweet potato flavor there.  I wanted to taste the sweet potato, not feel that it was masked.  And that’s what I felt happened with these.

Nuovo is so very kind to offer a gluten-free version of their famous fresh pastas.  I totally enjoyed the other two versions of gnocchi that I had from Nuovo…but this one just didn’t kick it up like the other two did.  I think of them all, the Basil and Potato was my absolute favorite of the bunch.

Nutritionally speaking, the Nuovo Gluten-Free Sweet Potato Gnocchi serves up 2 servings…so my roommate and I split the pack.  This serving dished up 270 calories and 1 gram of fat.  A serving will also provide you with 350 mg of sodium and 11 grams of sugar (which I think is high…but it is a sweet potato…).  And finally, you will get 5 filling grams of fiber and 6 grams of protein.

Not bad for a potato-pasta!  Not at all.  I just wish they had a better all-over flavor to them.  But…you can’t win them all, right?  If you are looking for a great sweet potato flavor…spend the time to make your own.  Otherwise…Nuovo offers two other flavors in their gluten-free varieties that really rocked my gluten-free gnocchi loving socks!

Gluten-Free Sweet Potato Gnocchi in Mezzetta Napa Valley Bistro Homemade Style Marinara

Product Review: Tasty Bite Paneer Makhani

Tasty Bite Paneer Makhani

Product Review: Tasty Bite Paneer Makhani – $3.29+

Quick Indian meals are usually my Monday thing.  I mean…I have to get home from work, scarf something down, and get changed and out the door to head to my running group’s Monday meet-up at 6 p.m.  Not easy when construction is going on and often traffic is at a stand-still going across the river.  It can be frustrating.  And when trying to take a little bit of stress out of the day…the best thing to do is have a simple meal prepared.

But this time…this was a Wednesday thing.  I had eaten a big lunch on the way back from Chicago the Monday before I had this…so no food was necessary that evening.  Not a bite.  But…Wednesday marked a big heaping deal of a run.  My good friend, Natalie, was completing her pledged 180th straight day of running to raise money for the victims of the Boston Marathon bombing.  And she invited the group at the store to run those last miles with her.  She chose 4.15 miles, in honor of the date of the bombings, April 15.

So, that evening sort of ran (heh…no pun intended.  See what I did there?) like a Monday night.  That morning, I cooked up two servings of jasmine rice, let it cool, and tucked it away in the fridge for later.  Upon returning home from work…I heated up the rice, pulled out my next packet of Tasty Bite goodness…and got ready to dive in.

This week…Tasty Bite Paneer Makhani.  Paneer, for those of you not familiar with Indian cuisine, is a soft, vegetarian-friendly cheese.  It can be firm or soft…depending on how it is made.  But it is…delicious.  Makhani is a Hindustani word meaning “with butter.”  So…this is basically Butter Paneer.  Don’t freak out…really it’s these cubes of paneer that are cooked in this fantastic, creamy tomato sauce…spiced just right to give it that Indian flavor.  I love the taste of Indian food.  So yummy.

So…what happens when said entree comes in a microwavable pouch?  What happens when it only takes 90 seconds to heat and eat?  Magic.  Because Tasty Bite knows what it is doing when it comes to these fun little meals.  Honestly.  I wasn’t too sold on the thought of a buttery cheese dish…but…they proved me wrong.

The Tasty Bite Paneer Makhani is just what I described above…home-style paneer cheese in a creamy, spiced sauce.  This pouch is a delicate balance of natural ingredients that are non-GMO, vegetarian, and gluten-free.  Happy dance.  In fact, the ingredients in this particular Indian meal include tomatoes, paneer cheese, water, onion, cream, cashew nuts, sunflower oil, ginger, garlic, salt, coriander, chiles, and spices.  Sounds delicious, yes?  Of course it does.  So, after giving my jasmine rice a quick steaming in the microwave to reheat it…this little pouch of goodness was put in and given it’s 90 seconds to warm through.

I poured the contents over two bowls of rice…and dinner was done in 5 minutes total.

So, we all know that this Tasty Bite Paneer Makhani was easy to prepare…but how did it stack up in flavor and taste?

It was good.  It was really good.  I loved the bit of mild heat from the variety of spices in the sauce itself.  The sauce was the perfect thickness…not too runny, but not too thick either.  Perfect consistency.  I wished I had more of the sauce, honestly.  The cheese was…pretty good.  I love paneer cheese, but this just seemed a bit rubbery.  Probably because it is, after all, in a microwavable pouch.  It wasn’t bad…it was still soft…but it wasn’t the star of this dish like it should have been.  Major props to the sauce.  It saved this one.  I’d probably invest in this variety again…but only if nothing else caught my eye.  The Paneer Makhani wasn’t about the paneer at all.  It was all about that Makhani sauce.

So, let’s talk nutrition.  A serving of the Tasty Bite Paneer Makhani is 1/2 of the pouch.  This serving dishes up 220 calories and 17 grams of fat.  YIKES!!  Some of that, however, does come from the cashews…but most of it comes from the paneer.  That’s…a hefty dosage of fat, I think.  I mean, 150 of those 220 calories come from fat.  That’s…not that great.  A serving of the Paneer Makhani also will provide you with 440 mg of sodium and 3 grams of sugar.  Not bad for a shelf-stable, processed meal, right?  Also, you will be getting 1 gram of fiber and a whopping 10 grams of protein.  Low fiber, high protein…good for running.

So, while the flavor was there in the Paneer Makhani, the paneer cheese definitely fell flat, but the sauce saved it.  I would recommend trying this one, if you are a fan of Indian flavors.  And if you love paneer cheese.  Just know…fresh cheese that isn’t sealed in a pack and kept on the shelf definitely stands up better when used in Indian cuisine.  But when you are an on-the-go kind of person…this definitely works in a pinch.  So…not one of my favorites, but not bad either.  Tasty Bite hasn’t put out a bad product…this one just didn’t wow me like the others have so far.

Tasty Bite Paneer Makhani over jasmine rice

Product Review: Love Grown Foods Apple Walnut Delight Oat Clusters

Love Grown Foods Apple Walnut Delight Oat Clusters

Product: Love Grown Foods Apple Walnut Delight Oat Clusters – $4.99+

Granola is something that I buy…every week…when I’m at the grocery store.  I have to be selective.  I have to.  The requirement is it must be gluten-free and have a low amount of sugar.  I don’t want my granola to be packet with sugar.  I already take in way more sugar every day than I should.  So…two requirements.  You’d be surprised how many granola brands on the market do not fit that bill.

A lot.

That being said, there are a few select brands that do…and they are brands that I am quite familiar with and return to in my constant rotation of granola through my pantry.

This week…I let my roommate choose.  She and I both adore, love, and cherish the granola we get from Love Grown Foods.  So, she opted with that brand.  YAY!  Her flavor choice, however, was a new one for us to try.  It is their Apple Walnut Delight.  Since I am putting this granola over Greek yogurt and caramelized apple…I figured this was actually a very good choice.  Therefore…it was the granola gamble of the week.

I have fallen in love with every flavor of the Love Grown Foods Oat Clusters that I have brought home.  They strike that perfect balance, whether eaten on their own, with milk, or in one of my infamous breakfast parfaits.  The seasoning is spot on, the sweetness is at the right level.  The flavors are subtle…yet…just there, so your taste buds catch every part of the cluster…the granola mix…but it doesn’t overwhelm the palate.  Love Grown Foods distributes love with each sack of granola.  For real.

The Apple Walnut Delight Oat Clusters are truly…delightful.  The granola is a blend of gluten-free oats, honey, walnuts, coconut, agave syrup, expeller pressed canola oil, dried apples, sunflower seeds, pure vanilla, milled flaxseed, cinnamon, and sea salt.  There is truly a touch of sweet and savory in this one…but it means you keep on going back for a little more…then…a little more.  It’s a fantastic balance.

The dried apples are really good, and the walnuts add a bit of rustic flavor to the mix.  But the star is the sweetened gluten-free oats.  The way the agave and cinnamon play against each oat flake is amazing.  The touch of vanilla livens everything up.  And each bite will leave you quickly spooning your bowl for another one.  Or, at least that’s what happened in my case.  I was loving the clusters in this one…the pockets of cinnamon and vanilla, mingling with the nuts and the fruit.  It’s one flavor party in a bag…in my breakfast…and in my belly.

Let’s talk nutrition for a moment.  A serving of Love Grown Oats Apple Walnut Delight Oat Clusters is 1/4 cup.  This serving provides you with 130 calories and 6 grams of fat.  A serving is low in sodium (only 35 mg) and only contains 7 grams of sugar.  That is fantastic for a granola.  Trust me.  Each serving provides 3 grams of fiber and 3 grams of protein as well.  This granola is cholesterol free, gluten-free, and non-GMO!

Loving it.

And loving Love Grown Foods once again.  If you love the taste of apples and cinnamon…with a hint of nuttiness with the addition of the walnuts…then you should definitely try this granola.  These oat clusters are fantastic.  Love Grown Foods really does put a lot of love into their products.  That is beyond evident.  Every time I try a new product from their lineup.

Still impressed.  Still loving it!

Caramelized Apple and Greek Yogurt Breakfast Parfait with Love Grown Oats Apple Walnut Delight Oat Clusters

Recipe: Gluten-Free Smokey Purple Sweet Potato and Chickpea Veggie Burgers

While out grocery shopping this weekend…my roommate and I both made it abundantly clear that we were craving burgers.  Now, she’s a carnivore…and I’m a vegetarian…but she loves veggie burgers…especially when I make them out of real ingredients…fresh…not frozen…not a patty of artificial preservatives and more chemicals than a science lab holds.

Which…makes me incredibly happy!

I’m heading to Chicago this weekend…nothing major…just RUNNING IN THE CHICAGO MARATHON…that’s all.  So, I’m trying to use up as much of my produce that will inevitably go bad while I’m out of town.  So…I had a brilliant moment of brilliance while out running 4 fast miles this morning.  Because…when I run…I think about food.  And I thought…purple sweet potato…and some sort of bean from the pantry.  I have cans and varieties, folks.  When you’re a vegetarian…this happens.  So…after returning home and taking a shower…I got to work in the kitchen creating my base for my veggie patties that I would form upon returning home from work.  A sit in the fridge might actually help the mixture, yes?

I seasoned it up with paprika, cumin, salt, onion powder, and a little hit of black pepper.  That’s where the smokiness comes from.  The rest…well…see for yourself…

Recipe: Gluten-Free Smokey Purple Sweet Potato and Chickpea Veggie Burgers

Gluten-Free Smokey Purple Sweet Potato and Chickpea Veggie Burger (with a side of homemade beet chips)

Servings: 8
Time: Prep 20 minutes; Cook 10 minutes

Ingredients:

  • 2 cups coarsely mashed sweet potatoes (or yams), about 2 large potatoes (I used purple sweet potatoes, but you can use any variety)
  • 1 cup chickpeas (garbanzo beans), drained and rinsed
  • 2 garlic cloves, minced
  • 1/3 cup gluten-free bread crumbs (I used Southern Homestyle Gluten-Free Corn Flake Crumbs)
  • 1/3 cup flour (I used Better Batter Gluten-Free All Purpose)
  • 1 large egg, lightly beaten
  • 1-1/2 teaspoons smoked paprika
  • 1 teaspoon onion powder
  • 1/2 teaspoon pepper
  • 1/8 teaspoon cumin
  • 1 teaspoon salt

Directions:

Pierce the potatoes (I used 2 large) all over with a fork and place on in the microwave on a paper towel.  Microwave for 5 minutes, then flip and cook for 5 minutes more. Remove the potatoes and slice them in half, allowing them to cool enough so that you can scoop out the flesh.

In a large bowl, coarsely mash beans with a fork.  Add the sweet potatoes and mash together.  Add in the cumin, paprika, onion powder, spices, salt, pepper, minced garlic, egg, breadcrumbs,  and flour.  Mix together until combined.

Refrigerate the mixture for 15-20 minutes or all day while you’re at work (like me).  This will help make it easier to form them into patties…but they still can be quite messy.  Trust me.  then place bowl in the fridge for 15-20 minutes. This helps form them into patties, but as a warning they are still somewhat messy.

Heat a large skillet over medium heat and add 2 tablespoons coconut oil (or olive oil).

Remove the mixture from fridge and form into 8 equal patties.  Once the skillet is hot, place the patties in the pan and allow to cook on one side for about 5-6 minutes.  Make sure it has a nice crust on that first side before carefully flipping it over and allowing to cook for another 5-6 minutes.

Toast buns if desired.  I toasted the gluten-free hamburger buns I picked up from my local allergen-free bakery, Annie May’s Sweet Café.

Assemble the burger with your favorite toppings and enjoy!

I served mine with homemade beet chips.

Yum!

~*~*~

These burgers can be a bit crumbly…but they are so packed with flavor.  I loved the smokiness brought on by the paprika.  And the sweet potatoes and chickpeas definitely made a nice base for this patty.  All it took was a little binder and my favorite toppings (kale, caramelized onion, and avocado slices)…and dinner was an epic burger of vegetarian awesomesauce.  I also made a vegan roasted garlic sriracha aioli to top off the burgers.  DELICIOUS!

I am so glad I have 6 more of these patties in my freezer.  They were truly fantastic.  A lot of flavor in each bite.  That’s how veggie burgers should be done.  They were a bit crumbly…but on the whole…a total win.

Try them out…and see for yourself!

Recipe: Baked Delicata Squash with Pomegranate and Goat Cheese

I know what you’re thinking.  You’re thinking…”Squash…again?”  Heck yeah.  It’s the time of the year where my CSA bin is inundated with squash.  It’s unstoppable.  You can’t stop it.  You just have to embrace it, find new ways to eat it, and then enjoy the fruits of your labor.

In this case…that’s exactly what I did.

This is the second time my CSA bin has thrown delicata squash my direction.  I copped out last time and chopped it, steamed it, then threw it on a broccoli crust pizza.  But this time…I really wanted to experience the delicata squash.  So, I went hunting on Pinterest (because…hello!) and happened across a recipe originally posted on the blog Peanut Butter & Peppers, which focuses on health, fitness, and good food.  As delicata squash was not something that came up a lot on Pinterest…and I had the squash and goat cheese…I figured I could at least wrangle up a pomegranate (or 2…because I love pomegranate) and give this recipe a try.

Tonight…was that night.  And below…is said recipe.

Recipe: Baked Delicata Squash with Pomegranate and Goat Cheese

Baked Delicata Squash with Pomegranate and Goat Cheese

Servings: 2
Time: Prep 10 minutes; Cook 20 minutes

Ingredients:

  • 1 Delicata Squash (536 grams)
  • 2 tsp. olive oil
  • 1/4 tsp cinnamon
  • 1/4 tsp. salt
  • 1/8 tsp cayenne pepper (optional, but highly recommended)
  • 2 tbsp. pomegranate arils
  • 1/2 oz goat cheese


Directions:

Preheat oven to 375 degrees

Line a baking sheet with aluminum foil, spray with cooking spray.

Wash delicata squash, cut off the ends.

Slice squash in 1/2″ pieces.  With a spoon take the seeds out.

Place the squash in a bowl and toss with olive oil, cinnamon, salt, and cayenne pepper.

Place squash on the prepared baking sheet.

Bake for 10 minutes, flip the squash and bake for another 10 – 12 minutes or until fork tender and skin slightly blistering.

Place squash on a plate and top with pomegranate arils and goat cheese.

~*~*~

This dish is a flavor explosion.  You have the sweet creaminess of the roasted winter squash.  Then you have the sweet tang of the pomegranate arils.  And then that savory, rich flavor of the goat cheese.  The cinnamon and cayenne pepper give it this nice warmth (not heat, but warmth)…with just the right amount of sweetness.  It all balances out and comes together right on the plate.

As I was eating, the only fault I could find was that there wasn’t more of it.  This is a fantastic dish…and very nutritious too.  Clean eating, once again, for the win!!

I’m sure any winter squash would be a good stand in, but the delicata squash made for a beautiful, and more importantly, delicious plate.