I have been a reader of Vegetarian Times since before I went full-on vegetarian. No joke. And after I took the step toward eating a plant-based diet, I became a subscriber. It’s one of the magazines I just can’t live without each month. Well, back in the April/May 2015 issue, they had an amazing recipe that involved polenta and corn, and black beans, and some other easy to find, or already have on-hand, items. And I had it in my head to make it.
This happens every month when I get my magazine subscriptions. But this time, it was different. Instead of just saying I would one day make that recipe. This time I did.
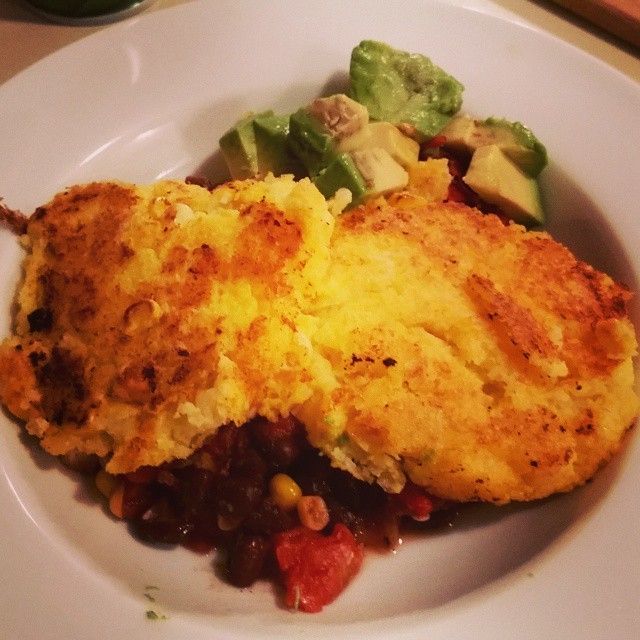
The recipe is for Double Corn Cakes with Black Beans…and the flavors, textures and just presentation are all fabulous. It’s a healthy and plenty filling meal. Having a hard time with your protein? Make this and you’ll be getting 19 grams in one serving. YES!
2 (15-oz) cans no-salt-added black beans, rinsed and drained
1 (15-oz) can diced tomatoes
1-½ cups fresh or thawed frozen corn kernels, divided
1 tablespoon lime juice
1 (18-oz) tube pre-cooked polenta
1 large egg, lightly beaten
Directions:
Heat oil in large skillet over medium-high heat.
Add onion, garlic, jalapeño, and cumin, and sauté 5 minutes.
Stir in beans, tomatoes, 1 cup corn, and lime juice; season with salt and pepper, if desired.
Cook 5 minutes, or until heated through. Transfer mixture to covered container, and keep warm.
Wipe out skillet.
Meanwhile, crumble polenta into microwave-safe bowl, and mash with fork until nearly smooth. Add remaining 1/2 cup corn kernels. Microwave 1 minute to soften polenta. Stir, then add beaten egg, and fold into polenta mixture until smooth.
Coat skillet with cooking spray, and heat over medium-high heat. Shape polenta into 8 1/3-cup cakes, gently flattening with palm. Cook corn cakes in two batches in skillet 5 minutes per side, or until golden brown.
Serve corn cakes over black bean mixture.
~*~*~
There is something amazing about transforming corn kernels and polenta into savory fritters. I served mine with a side of sliced avocado, but salsa would be a great touch as well. These fritters have this nice crispy outside and soft inside. Fantastic flavor. Healthy. Delicious!! I need to really make more recipes from my magazine subscriptions in the future!
This might surprise you if you are unfamiliar with Carolina Gold Rice and/or Chef Sean Brock (owner of Husk in Charleston, SC and Nashville, TN)…but this isn’t really ice cream. Not at all. It’s a rice dish.
*SHOCK! GASP! DISBELIEF!*
But ever since I watched Sean Brock make this dish on Mind of a Chef, and really go in depth into how amazing Carolina Gold Rice really is…I not only wanted to try the rice, but I wanted to make this recipe as well. Back in January, I went to Charleston, SC to run the Charleston Marathon, and while I was there, I hit up the market and purchased (for a hefty price…but worth it!) a sack of Carolina Gold Rice. The actual phrase “ice cream” in this particular recipe refers more to the preparation, which involves a boil-and-strain initial cooking of the rice, and then the process of oven drying it to give it a better texture. each grain is a distinct bit of food…no clumping. As the rice dries and the butter is added, the rice simply becomes the star. And that’s why it makes a simple, but perfect meal all on its own.
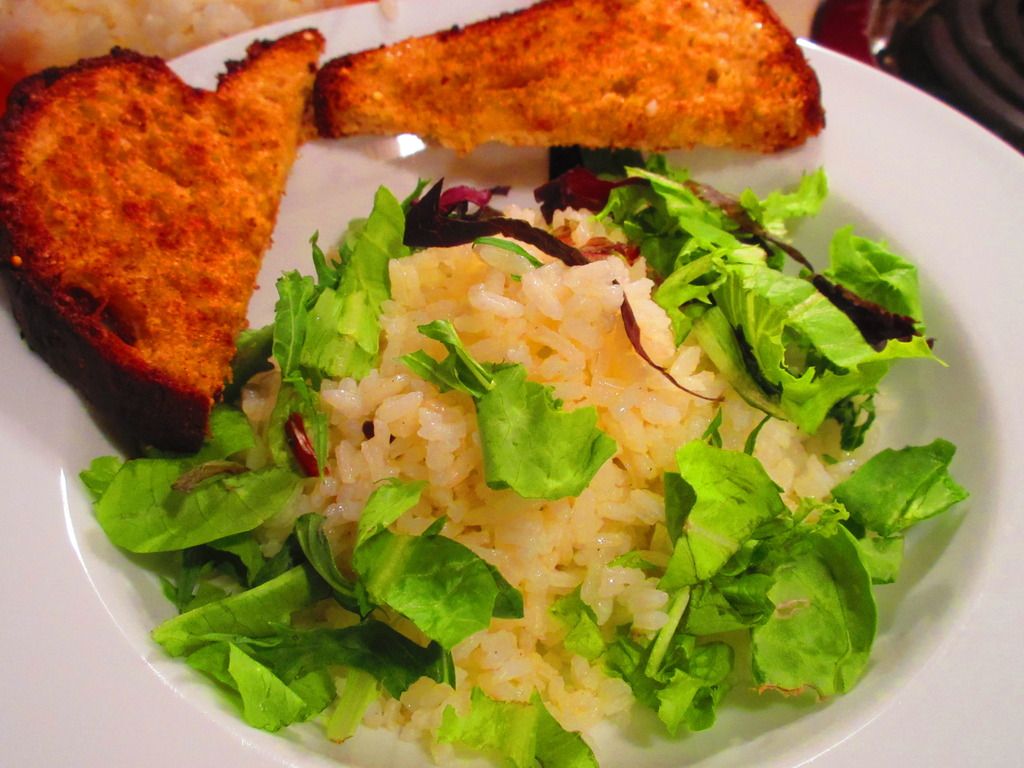
Since I had a bit of time yesterday, and since I wasn’t screamingly hungry, I went ahead and decided to use some of the field greens I got in my CSA bin as the topper for this dish and prepare it for dinner, using some of the Carolina Gold Rice I brought back from Charleston, SC. It takes a little bit of time and patience, but the end result…is amazing, simple, and delicious. A little elegant touch of the South right in your own home. Trust me, you’ll rethink the way you prepare rice in the future.
Recipe: Charleston Ice Cream
Charleston Ice Cream
Servings: 4
Time: Prep 5 minutes; Cook 45 minutes
Ingredients:
6 cups water
1 teaspoon salt
¼ teaspoon white pepper
1 bay leaf
1 cup Carolina gold rice
4 tablespoons unsalted butter, diced
Baby lettuces (or some julienned greens) (for serving)
Directions:
Preheat the oven to 300°F.
In a heavy stockpot, bring the water, salt, pepper, and bay leaf to a boil over medium-high heat. Reduce heat to medium, add the rice, stir once, and bring to a simmer. Simmer gently, uncovered, stirring occasionally, until the rice is al dente, about 15 minutes. Drain the rice.
Spread the rice onto a sheet tray.
Dry the rice in the oven, mixing occasionally. After 10 minutes, spread the butter evenly over the rice. Continue stirring every few minutes. The rice should be dry in about 15 minutes, and the grains should separate.
Serve by plating the Rice in a bowl and garnishing with the baby lettuces.
~*~*~
This recipe is super easy and really simple to prepare. I was most concerned about the flavor being bland, but I promise, it’s not. The simple addition of salt and white pepper to cook the rice in, not to mention the bay leaf, brings in a huge amount of flavor. And don’t skip the greens. They are refreshing and add a great texture and flavor to the finished dish. It’s an unconventional way of cooking rice, yes. But, damn…it’s amazing!
I am definitely hooked on Charleston Ice Cream. And…will want to keep Carolina Gold Rice in my pantry forever from now on. If you don’t have Carolina Gold Rice, any long grain rice will substitute for it. But, if at all possible, order some in, get your hands on some, and try it. You’ll be amazed.
I’m getting back into the swing of using up everything that comes in my CSA bin before the next one arrives. Sometimes, it’s hard…but this past week, I have literally used up every bit of produce that came to me last Friday in my green bin of happiness. Ah, I love Friday because it is BIN DAY!
So, after using up the cucumber (I made a childhood favorite…cucumbers in vinegar), zucchini, squash, blueberries, apples, green beans, broccoli, watermelon, and onion, all that remained was the kale. And, I do love cooking with kale. Usually I make kale chips or use it in a breakfast egg scramble of sorts. But I wanted to get a little more creative than that this time around. So…with just enough white wine remaining in the bottle in the fridge, I set out to master…pasta and kale…with white wine.
The premise of the recipe was skimmed over while reading through the Funny Love blog. And from there, I tweaked it to fit my dietary needs. What emerged was a healthy, delicious, and runner-friendly (non-runner friendly too!) meal this evening that both my roommate and I sat down and devoured while watching Friends on Netflix. Life…can be good and delicious all at once.
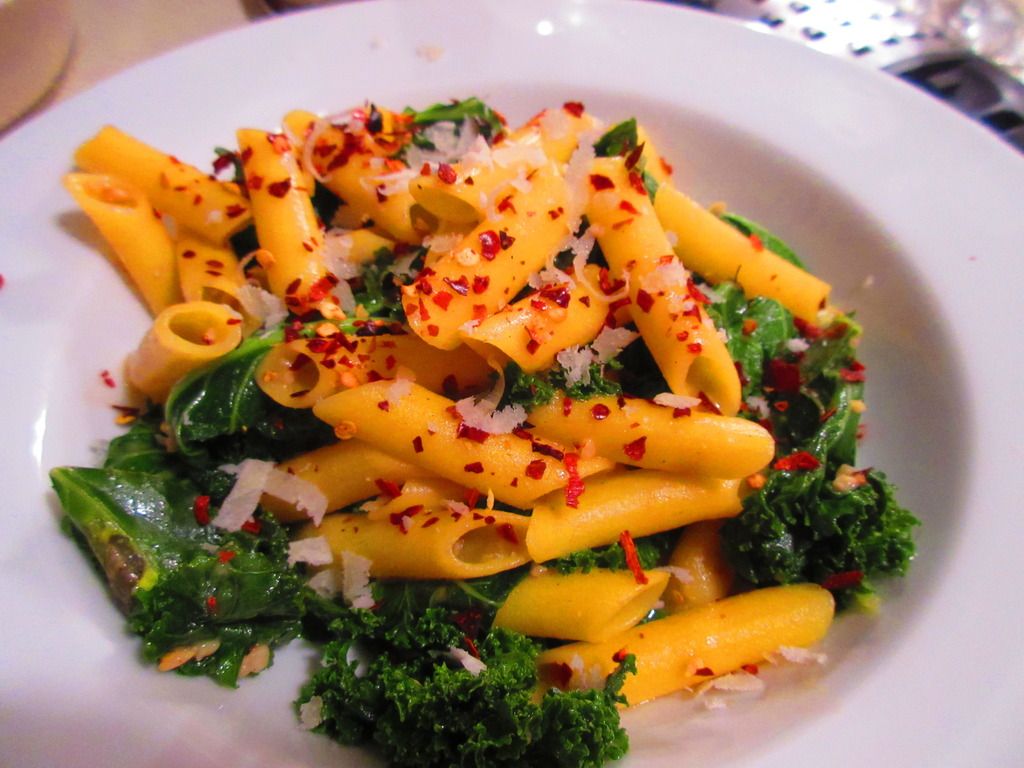
Recipe: Gluten Free Penne with Kale and a White Wine Sauce
8-12 ounces Gluten Free Penne (I used Aldi’s liveGfree brand)
4 cloves garlic, minced
Salt
Crushed red pepper
Olive oil
4 cups kale
Parmesan cheese, for serving
1 cup white wine
1 cup pasta water (reserve right before you drain the pasta)
Directions:
Cook the pasta per the package instructions.
While the pasta is cooking, pull out a pan I used the one I was using to make the sauce) and add about an inch or two of water with about a teaspoon of salt. Place pan on stove and bring water to a boil.
Cut the kale into large strips and remove the stems.
Put the kale into the boiling water for about a minute. Drain the kale and set it aside.
In the same pan, prepare the sauce. Add a drizzle of olive oil, the red pepper flakes, and the minced garlic and cook over medium heat, for about 2-3 minutes, until the garlic is soft and golden. Do not burn the garlic. It will make everything bitter.
Stir in the wine. Allow the wine to come up to a boil and reduce for about a minute. Then, add some of the starchy pasta water, if you’d like a bit more liquid in the dish. Stir in the drained pasta, the kale, and some Parmesan cheese (as much as you’d like). Season with salt, more cheese, red pepper, or pasta water as you deem necessary.
Serve.
~*~*~
This turned out to be a light dish, despite having the pasta integrated into the rest of it. I found it a great way to use of a bottle of white wine from the fridge so that it didn’t go wasted. And…I love finding new ways to enjoy kale! Packed with nutrients, light, delicious…yeah…it’s a perfect meal. And one I might consider the night before a long run…should this hip ever improve enough to get me back out onto the roads.
Okay…I know what you’re thinking. You’re thinking…what is the gluten-free vegetarian doing with a breadcrumb coating that is meant for making fried chicken?
Well…it all starts with Cuisine Cube.
I signed up for Cuisine Cube back in May 2014…and for a year have been receiving a monthly subscription box of full-size products from artisan and smaller gluten-free companies. I love it. You can subscribe for as little as $29.99/month. While you might be uncertain about the quality of the service, let me tell you…you will receive products you may never have heard of and are definitely not readily available stores. You will receive 5-6 products (full-size) each month, each one representing a time when you’d eat: breakfast, lunch, dinner, snack, dessert. And…sometimes…a bonus! For me, some some products get used faster than others…and some sort of linger in my pantry until I can figure out something to do with them.
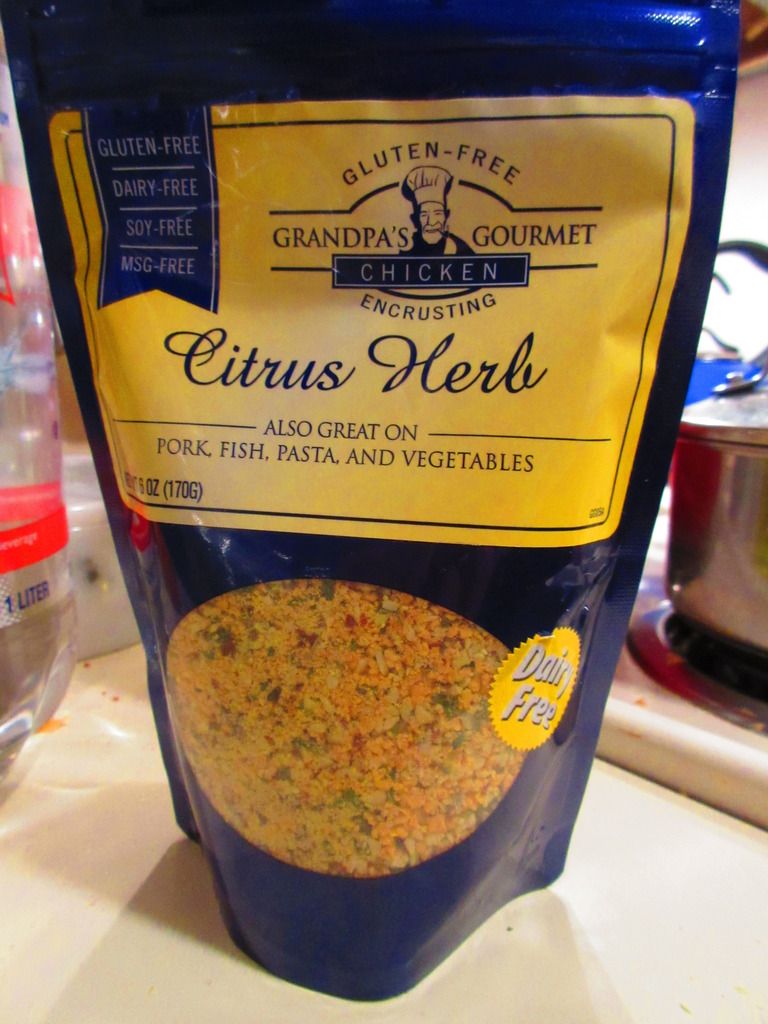
That was the case when, in my July 2014 Cuisine Cube, I received a 6 ounce package of Grandpa’s Gourmet Gluten Free Citrus Herb Chicken Encrusting. Upon first opening the box, I thought…”I’m a vegetarian…what am I going to do with this?” But, as most of you are well aware, I do love to coat some of my fresh vegetables in different breading (some made out of re-purposed items, and some…from actual gluten-free breadcrumbs) and bake them up in the oven to serve for dinner. And, after almost a year of procrastinating on this product, I thought it was time to move the last of the 2014 products out.
That honor…went to Grandpa’s Gourmet Gluten Free Citrus Herb Chicken Encrusting. Grandpa’s Gourmet was founded by a couple – he is a Celiac and she can’t have sugar, making meal planning quite a task. One night, while she was preparing her grandfather’s old recipe for oven fried chicken, her husband gave into the craving and devoured all the fried chicken he could get his hands on. He, of course, braced for the inevitable reaction – which never came. Could it be…they had stumbled upon a recipe that would mean – “One Meal for Everyone!”?
Grandpa’s Gourmet calls their line of products “Encrustings” because they are breading taken to the next level. Typical store-bought breading (or breadcrumbs) you get are genetically modified, unnatural wheat-based products that contain high amounts of sodium, sugar and preservatives. Even most gluten-free breadings are loaded with fat because they are nut based or have a gritty texture as they are rice based. But that’s what sets Grandpa’s Gourmet Gluten Free Encrustings apart. Not only are their products all natural and healthy…but they taste great. These encrustings have a non-GMO corn base, instead of rice or potato, giving it a fantastic texture. They are sweetened with natural fruit juice…no artificial flavorings here. And then, they fold in their own custom blend of spices and seasonings that smell amazing as they cook.
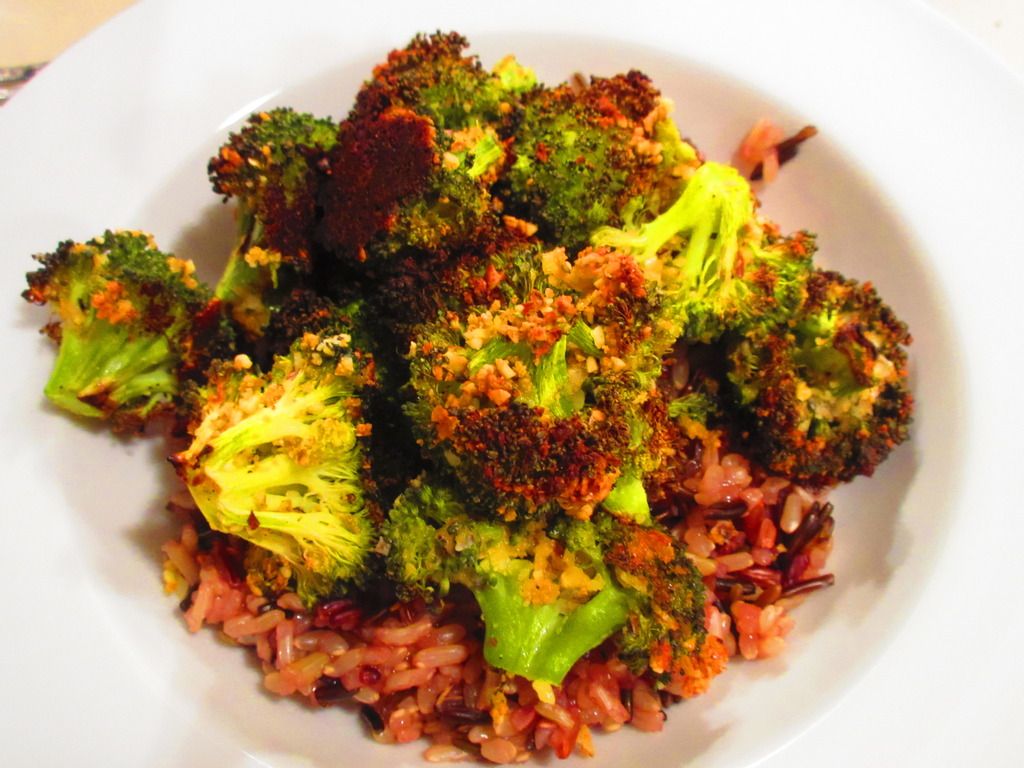
Roasted Broccoli over a Wild Rice Blend using Grandpa’s Gourmet Gluten Free Citrus Herb Chicken Encrusting
I don’t eat chicken…nor do I cook meat…but I do a lot with vegetables. Had I thought about it before, the Grandpa’s Gourmet even suggests putting it on vegetables on the front of their pouch. It says, “Also great on: pork, fish, pasta, and vegetables.” VEGETABLES! DUH! So, last night and tonight, it was all about the Grandpa’s Gourmet Gluten Free Citrus Herb Chicken Encrusting.
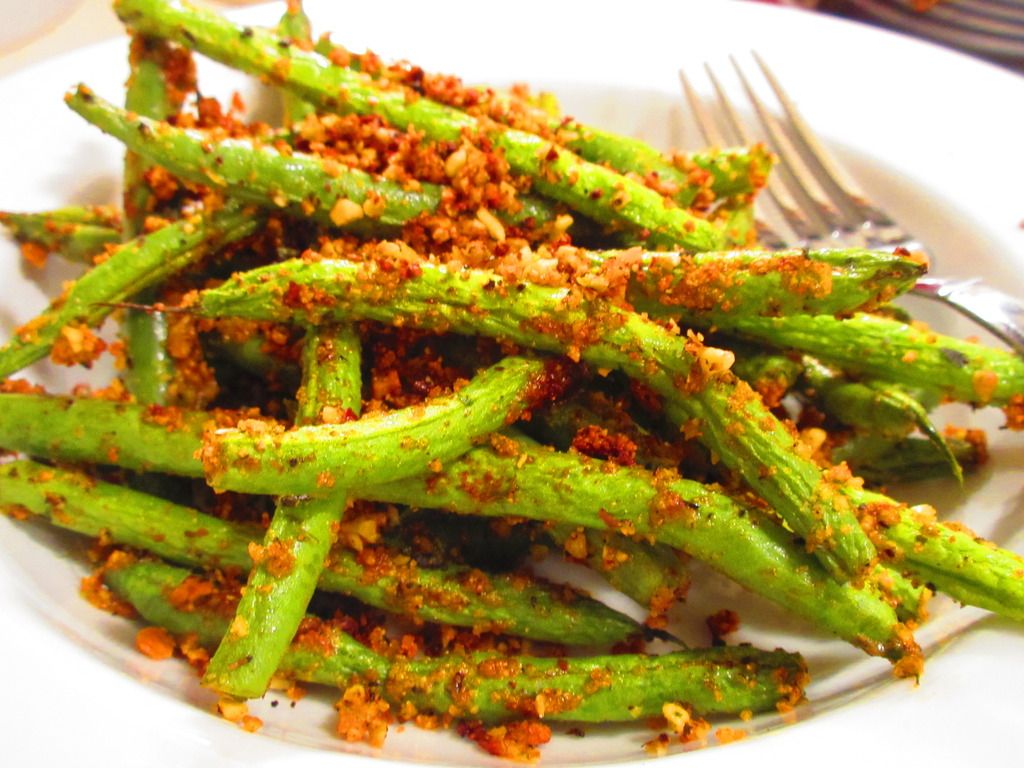
Last night, I roasted up some broccoli that I coated with some olive oil and the encrusting mix. I did the same tonight with green beans, which I toasted up in the oven to get them nice and crispy and good. Let me tell you, Grandpa’s Gourmet Gluten Free Citrus Herb Chicken Encrusting is phenomenal. While I liked it well enough on the oven roasted broccoli, it really shined tonight when I put it on the green beans and toasted those up for dinner. WOW. This breading is anything but bland. In fact, it is a fantastic seasoning that would work well even in scrambled eggs. Honestly…I am beyond impressed with this amazing product. And to think, I never would have thought about this product otherwise. It is versatile and amazing.
Let’s take a look at the ingredients that go into a pouch of Grandpas Gourmet Gluten Free Citrus Herb Chicken Encrusting. This breading is made from organic corn meal (organic corn meal, organic grape and/or pear juice concentrate, sea salt), cashews, almonds, spices, salt, and orange peel. This encrusting is gluten free, dairy free, soy free, MSG free, and non-GMO.
As far as nutrition goes, I am totally impressed with how this all adds up. A serving of Grandpa’s Gourmet Gluten Free Citrus Herb Chicken Encrusting is 1/4 cup. There are about 6 servings per container. One serving will provide 120 calories and 6 grams of fat. This serving will also dish up 0 mg cholesterol, 220 mg sodium, 14 grams carbohydrates, 2 grams sugars, 2 grams fiber, and 3 grams of protein.
Honestly, I never would have given Grandpa’s Gourmet Gluten Free Citrus Herb Chicken Encrusting a second glance, but thanks to Cuisine Cube, I now have a product I can actively seek out (and order) and indulge in and include in so many dishes. This is one versatile breading…so even if you’re like me and don’t eat meat…you can still enjoy this product. I am definitely in love. Enough that I even ate the breading that flaked off my green beans tonight. A nice salty-sweet treat at the end of a meal. Definitely a new favorite.
Crispy Green Beans made with Grandpa’s Gourmet Gluten Free Citrus Herb Chicken Encrusting
So…I’m totally addicted to Brussels sprouts. You may or may not be aware of this. The first time I ever cooked them up, I made them in a casserole. And then…it was all about the roasting. With olive oil and seasoning…or maple syrup and nuts…the possibilities were endless.
But…I have a lot of wine in my apartment. A LOT. And with a fresh bottle of white wine now open and in the fridge…I am coming up with clever ways of using it that doesn’t involve drinking it night after night after night. Not that there is anything wrong with that…but the medication I’m on for my hip sort of doesn’t mix well with alcohol. So…yeah…
With Brussels sprouts in my bin this past week and wine in the fridge, I went on a small hunt for recipe ideas. Because I was just going to roast them up…but that didn’t use any wine…
What I found was a recipe from Taste of Home, which I modified slightly to fit the ingredients I had on hand and to fit my dietary needs. And what emerged…was a nice twist on Brussels sprouts.
Recipe: Brussels Sprouts in a Gluten Free White Wine Sauce
Brussels Sprouts in a Gluten Free White Wine Sauce
1/4 cup gluten-free all-purpose flour (I used Cup4Cup)
1/2 teaspoon salt
1/4 teaspoon pepper
1 cup non-dairy milk (I used unsweetened cashew milk)
2/3 cup white wine
1 cup white onion, chopped
2 tablespoons raw whole almonds
1 tablespoons sliced almonds
Directions:
Place Brussels sprouts and a small amount of water in a microwave-safe dish. Cover and microwave on high for 2 minutes. Stir; microwave 1-2 minutes longer or until partially cooked. Let stand 5 minutes; drain and set aside.
In a large saucepan, melt butter. Stir in the flour, salt and pepper until smooth. Combine cream and wine. Gradually whisk into flour mixture. Bring to a boil. Cook and stir for 1-2 minutes or until thickened and bubbly. Stir in the onions, chopped almonds, and reserved Brussels sprouts.
Transfer to a greased 1-1/2 quart baking dish. Sprinkle with sliced almonds. Bake, uncovered, at 400°F for 20-25 minutes or until bubbly and Brussels sprouts are tender. Season with salt and pepper.
~*~*~
This was definitely a change from the oven roasted version, but it was good to step outside the box and do a little cooking with wine. And it was full of flavor and cooked up really well. Everything went together. I added a few red pepper flakes to my own bowl just to take it up a notch.
Don Tamal All Natural Veggie Vegan Gourmet Tamales
Product: Don Tamal All Natural Veggie Vegan Gourmet Tamales – $6.99+
Happy Cinco de Mayo! Or I should probably say Feliz Cinco de Mayo!
Either way…it’s May 5th…Return of the 5th…and yes…Cinco de Mayo.
And I felt the need to celebrate. This time at home…not at Moe’s or Q’doba. Home. Because I have no money. What I did have, however, was a local product in my freezer. Yes. Local. Let me tell you the tale…
It was a few months ago. I was wandering around Whole Foods, attempting to stick to my tight food budget and epically failing at it. But…I was trying. As I was making my way up to the registers, my roommate pointed out a table where a nice gentleman was handing out samples of vegan tamales. Vegan. Gluten Free. Tamales. I had to have this in my life, so I bee-bopped over that way and tried a sample. Cathy was right behind me. He was just removing some fresh tamales from his steamer. He plated a few bits and one bite sold us both. The nice man was actually the founder of the local Don Tamal…and pointed out that we could purchase them in the freezer section and directed us that way. We were already a bit over budget, but we couldn’t pass this up. They were REALLY good.
So, the purchase was made. I took the Don Tamal Veggie Vegan Tamales home and placed them in the freezer. Where they have been ever since.
But…as I said…it’s Cinco de Mayo. Time to get our tamales on.
Don Tamal is a local business based out of Louisville, Kentucky that specializes in…TAMALES. This business strives to provide authentic, all natural, Mexican tamales for people on-the-go who love to eat healthy without sacrificing enticing flavors and textures. Their philosophy is that all people should have the chance to eat delicious food that is free of additives, preservatives, chemicals, trans fats, growth hormones, and genetically engineered ingredients. The reward…traditional food of better quality. In fact, the wife of the founder, Marcela, pursued a PhD in Food Science and Engineering and came up with ways to make flavorful food without sacrificing the texture or flavor. Same traditional fare…better ingredients. A healthier choice.
Oh yeah…they had my attention.
There are two ways to cook up the frozen tamales. You can use the preferred method of using a veggie steamer on the stove top. Which, if I had a veggie steamer, I’d have done. But…I don’t. Luckily…it’s not required. I used the microwave method, where in I wrap the two tamales that come in the package in a very tamp paper towel and place them in a microwave safe container with a lid. I microwaved these for about 3 minutes and 15 seconds (the package says 2.5 minutes, but my microwave is old and not very powerful), and then let it stand and steam for about 1 minute. Then, discard the husk and enjoy!
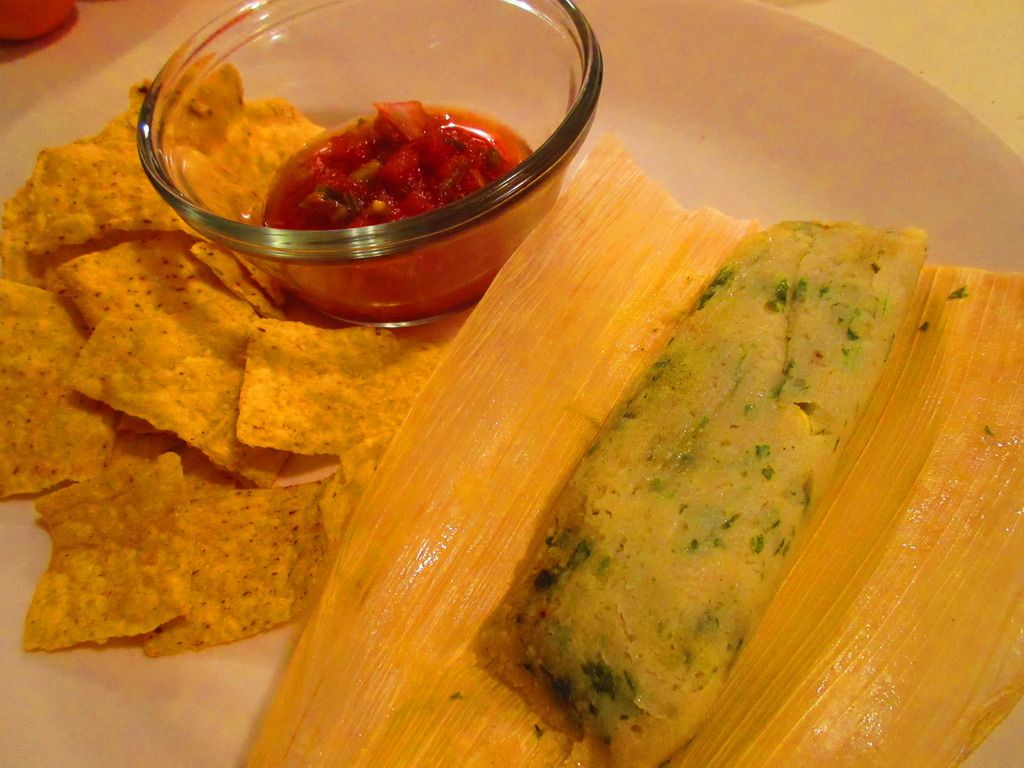
It really doesn’t get much easier than that. I served mine up with some tortilla strips and salsa. Yummy!
Let me tell you…these are fantastic. I forgot what drove me right over to that freezer in the first place. Holy cow, these were just amazing. The masa was soft and creamy. The veggies that were mixed in tasted so good. And the different veggies stuffed inside…those were just…yummy. Despite having habanero pepper in it, it wasn’t spicy. Which is good, or my roommate (Cathy) would never have let me live it down. Superb. Not bad at all for reheating from frozen. I was beyond impressed back at Whole Foods and tonight just re-introduced to me the reason why. After one bite, I started pointing at it with my fork and finally managing a, “We’re getting more of these tamales” in between forkfuls. It was gone way too soon.
Let’s look at the ingredients that go into the Don Tamal All Natural Veggie Vegan Gourmet Tamales, shall we? These tamales are made from corn dough (corn with lime, vegetable base (organic carrots, organic celery, organic onion, organic tomato, salt, organic and gluten free soy sauce, organic cane sugar, organic maltodextrin, yeast extract, organic potato starch, organic onion powder, organic garlic powder, and organic spices), poblano pepper, organic carrots, organic corn, purple onion, yellow onion, olive oil, organic palm oil, cilantro, organic kale, fresh garlic, spices, aluminum free baking powder, habanero pepper and vinegar. These tamales are made without hydrogenated oils or lard. And, yes, they are certified vegan.
As this is a local business selling these, I don’t have the nutrition information…but…I can tell you…they are YUMMY!
Nutritious. Delicious. Tamales. Happy Cinco de Mayo indeed! Thanks, Don Tamal. I’m heading to Whole Foods for more this weekend!
Don Tamal All Natural Veggie Vegan Gourmet Tamales (cooked)
So…I was in Boston…for The Boston Marathon. And you know what it means when I’m gearing up for a race. The traditional night-before-the-race gluten-free pizza. It is a must. Sure, I can do gluten-free pasta, but pizza seems to be my mojo. My magical little race-day helper. And so, this tradition has gone unchanged whenever possible.
I consulted with a good friend of mine, Julie, before heading to Boston, looking for restaurant recommendations, especially for pizza. She sent me so many different options, I was elated to see how many options were available in Boston. If you are a Celiac or gluten-free and planning on a trip to Boston, trust me…it is so easy to find something to eat there. It’s wonderful. Never before have I had so many options in one place.
With her high recommendation, and the praise of my high school friend, Lydia, it was decided that we would be noshing on Sunday night (Monday is marathon day in Boston!) at a place called Upper Crust Pizzeria. They have several locations throughout the Boston area, but as we were spending the day hiking the Freedom Trail, we decided that we’d wind our way out toward Beacon Hill and land there right around dinner time.
We actually ended up getting there sooner, rather than later, so we ducked into some candy shops and walked around the Beacon Hill area until around 5 p.m. That was when we made our way back to the little establishment and stepped inside.
It wasn’t what I was expecting. This was one tiny little establishment, indeed. In fact, the kitchen was on the far right as you enter, with one long community table in the middle of the restaurant. That was it. We lucked out in that people finished up eating by the time we ordered, so we had a place to settle in and eat. Because there was no way the pizza would make it back to the hotel and still be hot.
Cathy and I had scouted the menu prior to leaving for Boston and already knew what we were going to get. This left my friends Heather and Jenn to either have pizza by the slice or split a pizza. As Heather wanted pepperoni and Jenn does just cheese, they ended up getting two slices each.
Their slices were ginormous!! Seriously!! Holy cow. It made me more than a little concerned over how big the gluten-free pizza slices were going to be and whether Cathy and I could eat it on our own.
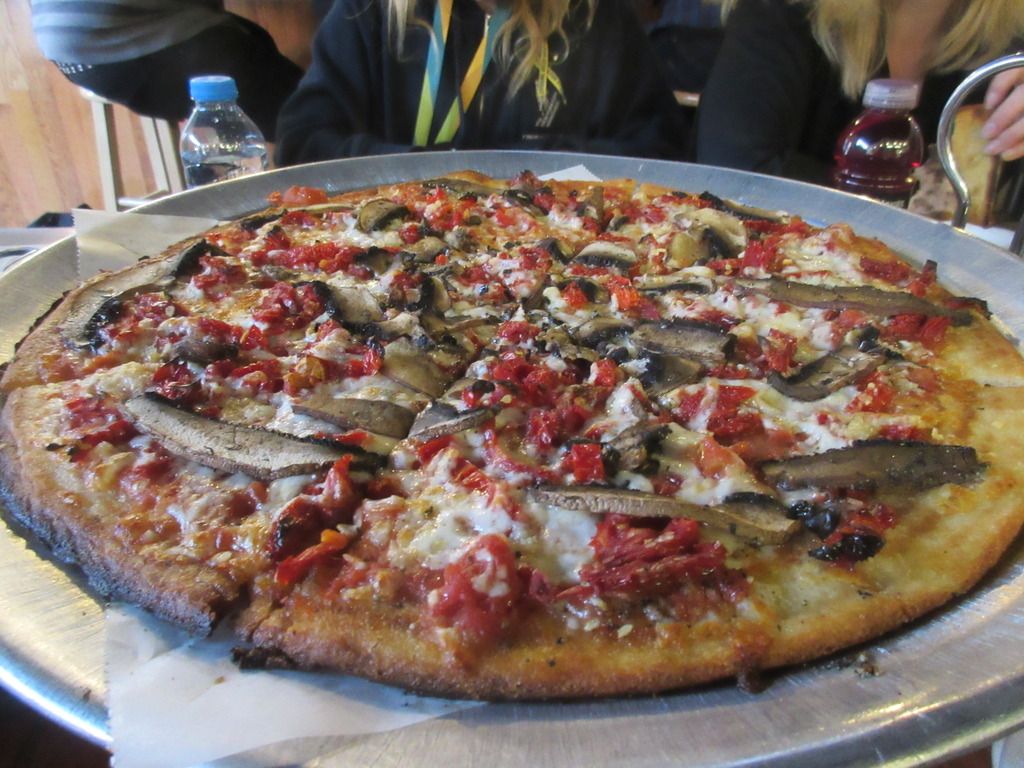
But, our 14-inch gluten-free pizza arrived a short time after their slices…and it looked fantastic. We ordered one of the custom pies that is a “local favorite.” It’s called Charles Street ($19.00 – the gluten-free crust is a $2 upcharge), and we had it made on the gluten-free dough. It comes topped with portabella mushrooms, sundried tomatoes, and fresh garlic. For the sake of my stomach, we asked them to go light on the cheese on this pizza. And it looked absolutely fantastic when it arrived at the table. We paused long enough in our hunger to snap a picture before diving in, each peeling off a slice. The pizza is their “small” size…and it’s actually quite big…but it was perfect for 2-3 people to share. And since we hadn’t eaten much that day, it was perfect for Cathy and I to split without any help.
The Charles Street pizza at Upper Crust Pizzeria is AMAZING! A-M-A-Z-I-N-G!! Totally and honestly. I ate a bite on its own and immediately was all “Mmmmmm.” Like in “Mmmmmmarathon” and “Mmmmmmore please” and “Mmmmmmgoooooood!” But then, I doctored it up with some dried herbs and a little bit of red pepper flakes. My stomach fears no spice, not even before a marathon. The crust of the pizza was thin, but not a cracker crust. You could definitely tell it was white rice flour based, but it wasn’t a distracting overlying taste. In fact, the crust was one of my favorite things about this pizza. I love a good crust, but I also love to indulge in more pizza…so a thin crust is a nice thing in my book. Cathy tried a bit of Jenn’s pizza and said the gluten-free crust was even better than the original. Score!! I loved the earthiness that flavored this particular pizza. The Charles Street had this great balance of savory with a hint of sweetness from the sundried tomatoes. It was amazing. I devoured every slice. For the first time ever, I think Cathy finished her pizza just as I was polishing off mine.
I can’t say enough good things about this pizza. At first I was a little uncertain, due to the venue more than anything. I mean, one table…and no room when we arrived for us to sit and enjoy…it was a little intimidating and off-putting…but a spot cleared up and we settled in after ordering, and all of us were happy with our pizza. I would go back and eat here the next time I was in Boston, even if there wasn’t a marathon involved. Really fantastic. There were a few other signature pizzas that they make that sound absolutely amazing, so I’m definitely eager to return and give them a taste.
If you’re in Boston…and you want a great gluten-free pizza…find one of the locations for Upper Crust Pizzeria (or go to the original one, like I did, in Beacon Hill) and order up a slice of heaven in pizza form. I know I’ll be back. Oh yes, I will be back!
Upper Crust Pizzeria’s Gluten Free Charles Street Pizza
I know some pretty amazing people. I really do. One of such people is a friend of mine from high school. Awhile back, she contacted me and said that Tastefully Simple was releasing some gluten-free products that she would love for me to try. My friend, Rebecca Fifield, just happens to be a Tastefully Simple Consultant. So, she sent them to my. And then Tastefully Simple released more products…and I bought them and some of the ones that had originally just been sent to me. And I loved every one of them that had tried.
I think what I love most about what Tastefully Simple is doing with their gluten-free mixes is that they are making it so easy to make bread or pizza or cake cookies or pancakes. They take all that fancy flour mixing and make it so you have it in one easy place, and only need to add 2 ingredients to it. I love it. LOVE it.
And now, thanks to both Rebecca and my own trial-by-fire with the gluten-free products that Tastefully Simple offers (they’ve added cookies and pancakes since I last looked!)…I’m obsessed. Because, as much as I love baking and cooking and being in my teeny-tiny kitchen…I love simplicity too. Because baking can be stressful…gluten-free baking can be catastrophic if anything is off.
That’s the glory of Tastefully Simple. They take that guess work off.
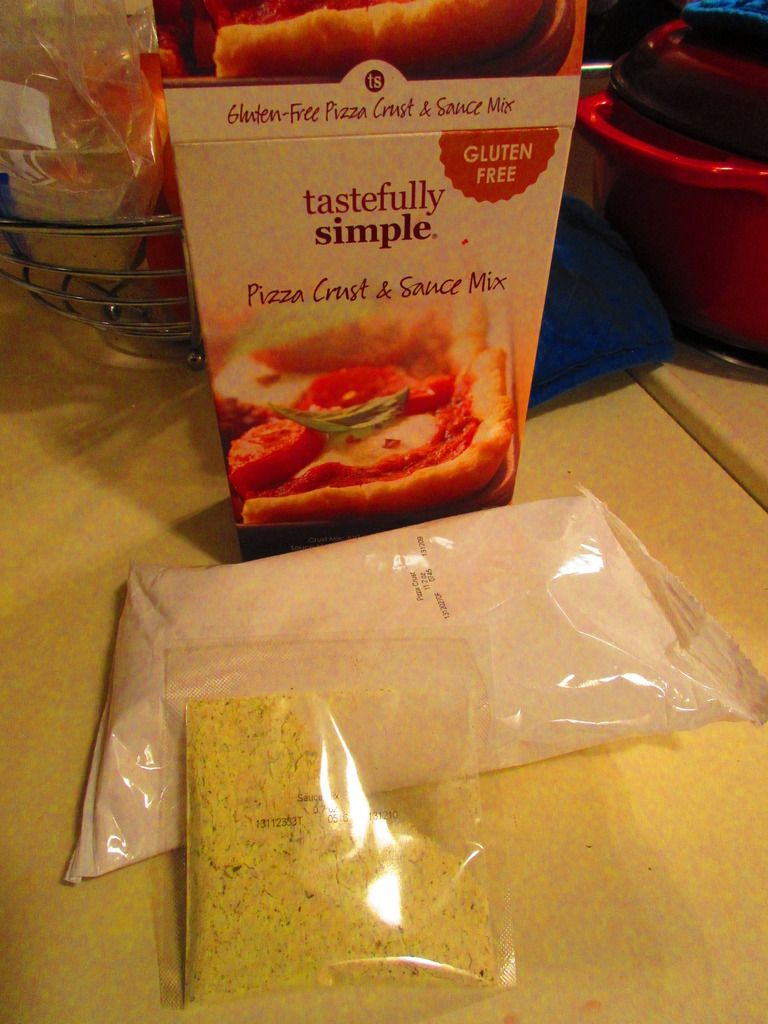
So, with me heading out of town on Friday evening, the main goal this week is to use up all the fresh produce that would otherwise go bad in my absence. So, with fresh basil and some tomatoes and onions lurking about, I remembered that I had a Tastefully Simple Gluten Free Pizza Crust & Sauce Mix in my pantry. So…pizza it would be. AND…it would last for three days between my roommate and I. Added bonus. No more cooking the rest of the week. YAY!
Preparing the Tastefully Simple Gluten Free Pizza Crust & Sauce Mix is super easy!! For real. That’s why there is the word “simple” in the brand. HA! To prepare the crust, simply combine the crust mix with 1 cup of water and 2 tablespoons of olive oil. The dough will be sticky. Cover it losely with plastic wrap and let it stand for 10 minutes at room temperature. Using lightly oiled hands to prevent sticking, spread the dough out on a pizza stone or a 12-inch greased pizza pan. Bake it for 10 minutes in a 400°F oven.
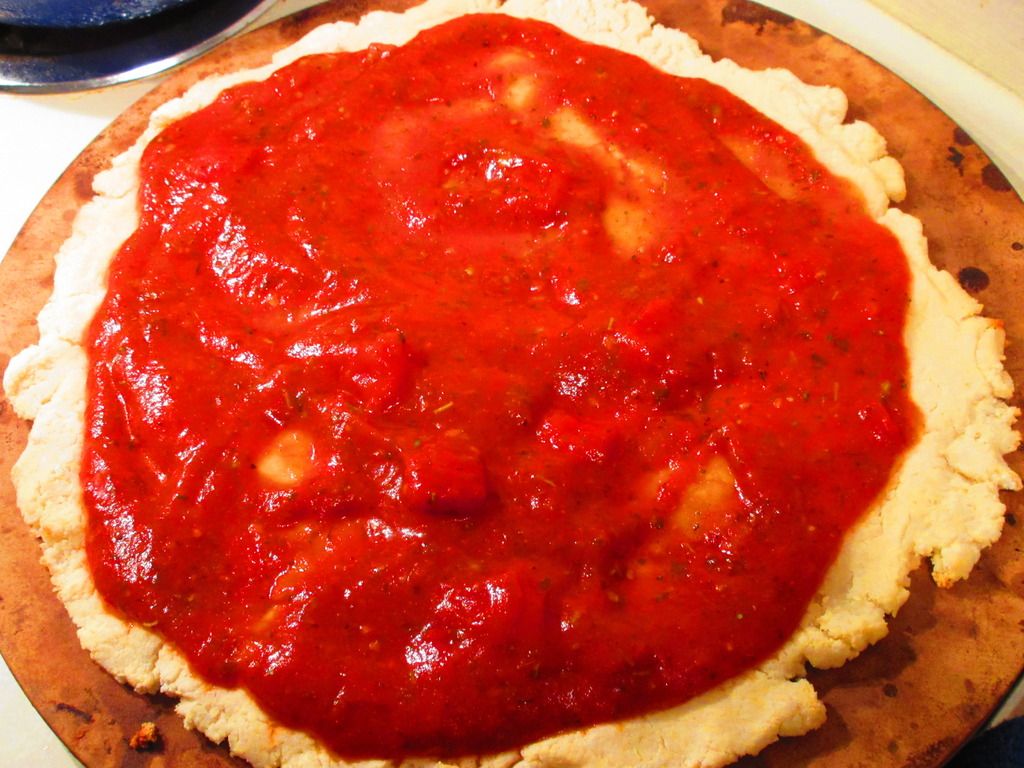
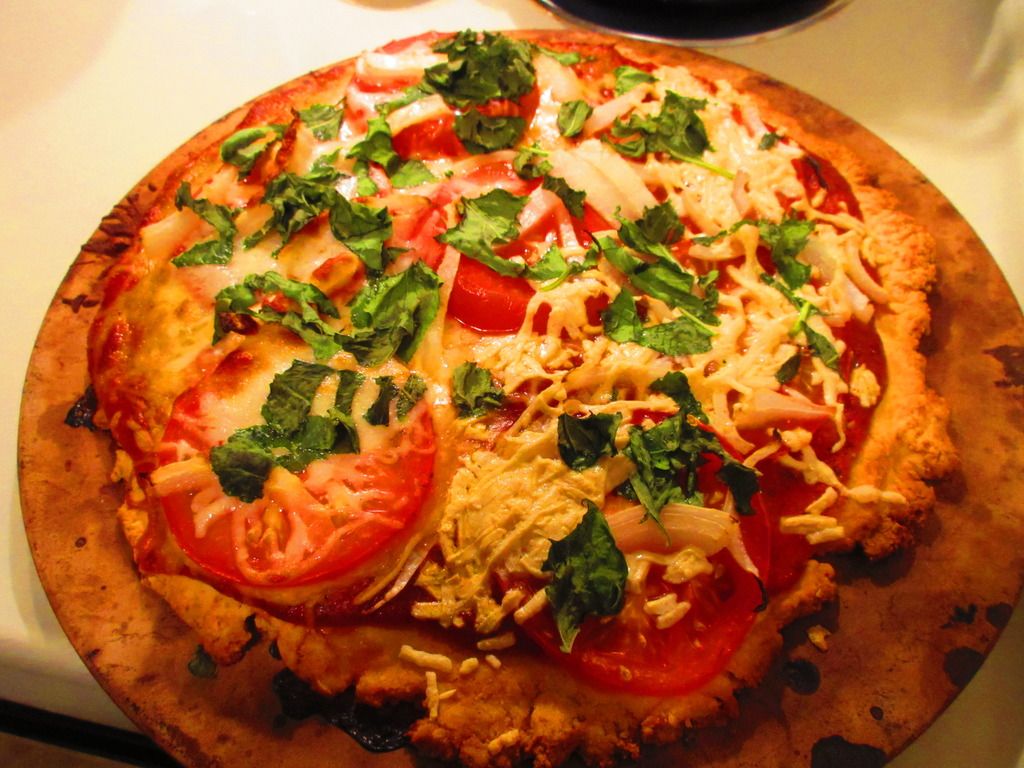
While it’s baking…mix up the sauce. It’s a breeze. Simply combine the sauce mix with the remaining 1 tablespoon of olive oil and tomato sauce. Spread it over the warm crust you have now baked for 10 minutes. Add your favorite toppings (in my case…tomato, onion, basil and Daiya vegan mozzarella cheese shreds) and place back in the oven to cook for another 17-20 minutes, until the crust is golden brown. Slice into 6 pieces and devour.
The quality, however, always comes in the taste test. And they totally nailed it. The dough wasn’t too sticky when I went to press it out on the pizza stone. And, it cooked up to this amazing crispy, golden brown. The sauce and toppings didn’t make it soggy. It held up to slicing and being moved onto plates. And I loved the flavor. It had this amazing crusty quality that just made it work. It was the perfect base for my toppings of choice. And it was one of my favorite crusts I have made at home. It was easy, and it didn’t take too long to bake up either. Perfect way to enjoy my dinner tonight. Tastefully Simple is not only making gluten-free delicious, but easy too!
So, let’s take a look at what Tastefully Simple puts into their Gluten Free Pizza Crust & Sauce Mix, shall we? This pizza crust mix is made from rice flour, tapioca flour, sugar, baker’s yeast, potato starch, cassava flour, salt, less than 2% hydrogenated palm kernel oil, soy lecithin, baking powder and, xanthan gum. The sauce mix is made from maltodextrin, dehydrated garlic, garlic powder, salt, dehydrated onion, spices, roasted dehydrated garlic, sugar, Romano cheese, less than 2% of natural flavors, toasted sesame oil, citric acid, whey, cheddar cheese, hydrolyzed soy protein, disodium phosphate, and silicon dioxide (anticaking).
As far as the nutritional information for the Tastefully Simple Gluten Free Pizza Crust & Sauce Mix goes, this isn’t bad for pizza. Really. A serving size is 1/6 of the package. This serving will dish up 200 calories, 1.5 grams of fat, no cholesterol, 810 mg sodium (it’s a little high, yes), 43 grams carbohydrates, 3 grams sugar, 1 gram fiber, and 4 grams of protein.
If you love pizza and want that “from scratch” appeal with a golden, crispy crunch, without it being the frozen cracker-crusts that the gluten-free community are otherwise delegated to having…then give Tastefully Simple’s Gluten Free Pizza Crust & Sauce Mix a try. Hop on over to my friend, Rebecca Fifield‘s, page and place an order. Not only will you be amazed with how easy this is to make, the taste, texture, and everything else will win you over. I promise you that.
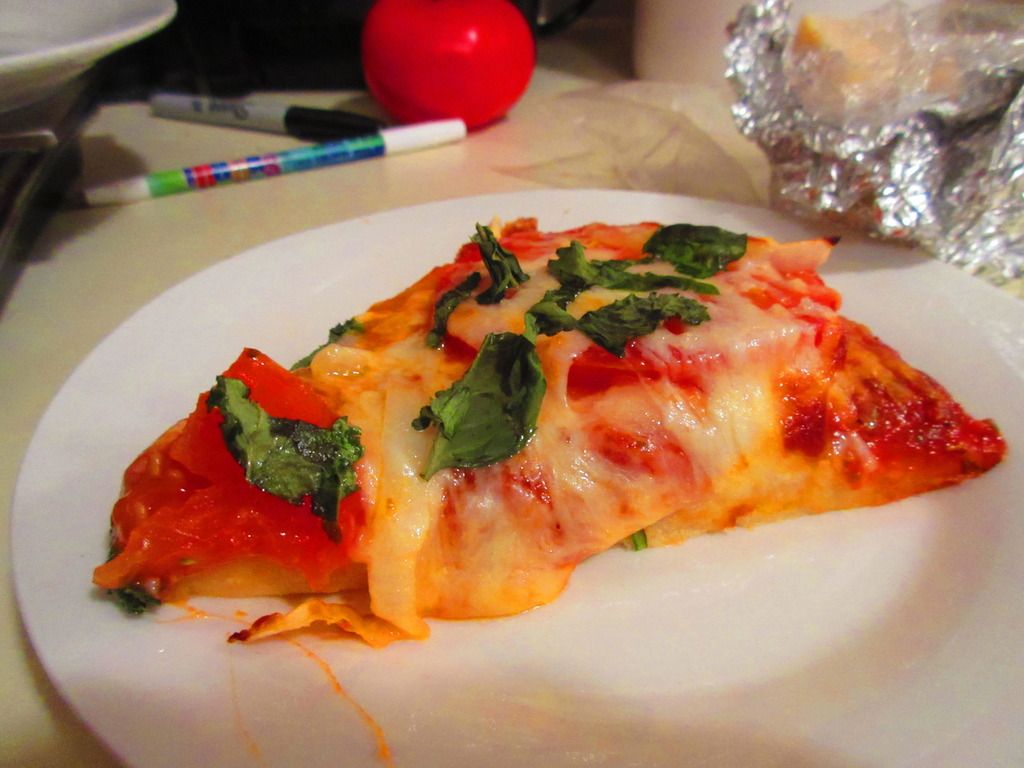
A slice of pizza made with Tastefully Simple Gluten Free Pizza Crust & Sauce Mix
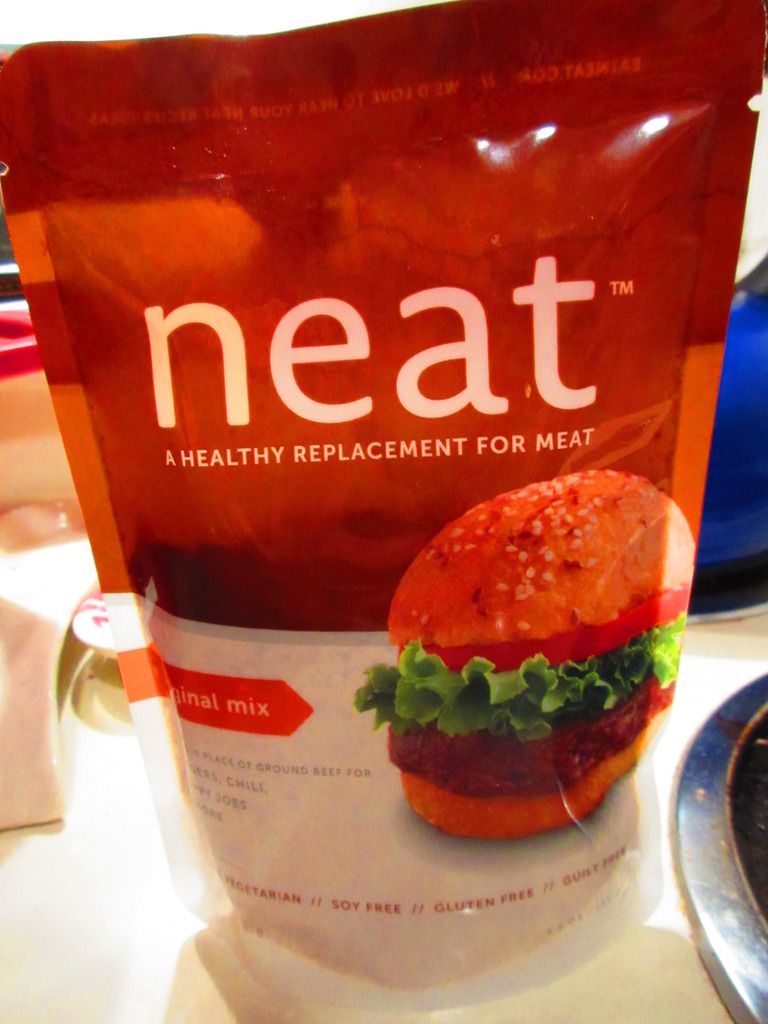
Neat – A Healthy Alternative For Meat Original Mix
Product: Neat – A Healthy Replacement For Meat Original Mix + Recipe Bonus – $4.99+
I am so excited. And the reason why is simple. I have found the meat replacement, Neat, at a few of my local stores. My Kroger, my Meijer, and even a few of my natural food stores now carry these little pouches of meat replacement goodness. Now, mind you, I’m not one who often will replace meat in a dish. I usually will use something like tofu or mushrooms instead, but there are some recipes (from my childhood, especially!) that just call for using an actual meat replacement. I have a few go-to brands that are gluten-free as well as either vegetarian or vegan. But ever since I received a pouch of the Mexican Mix from Neat in my Cuisine Cube back in October, I was hooked. I just had nowhere in this area to purchase it on my own.
Until now.
Up until yesterday, my pantry held the Italian Mix and the Original Mix. I’m using a few things up in my pantry (I have a bit of an overstock, HA!), so I decided I would go ahead and bake up some of the Moon Rabbit Foods pie crusts that I had from another Cuisine Cube. I could freeze two of them, and then give using the third one a shot in an old family favorite, which I would adjust to make gluten-free, dairy-free, and vegetarian.
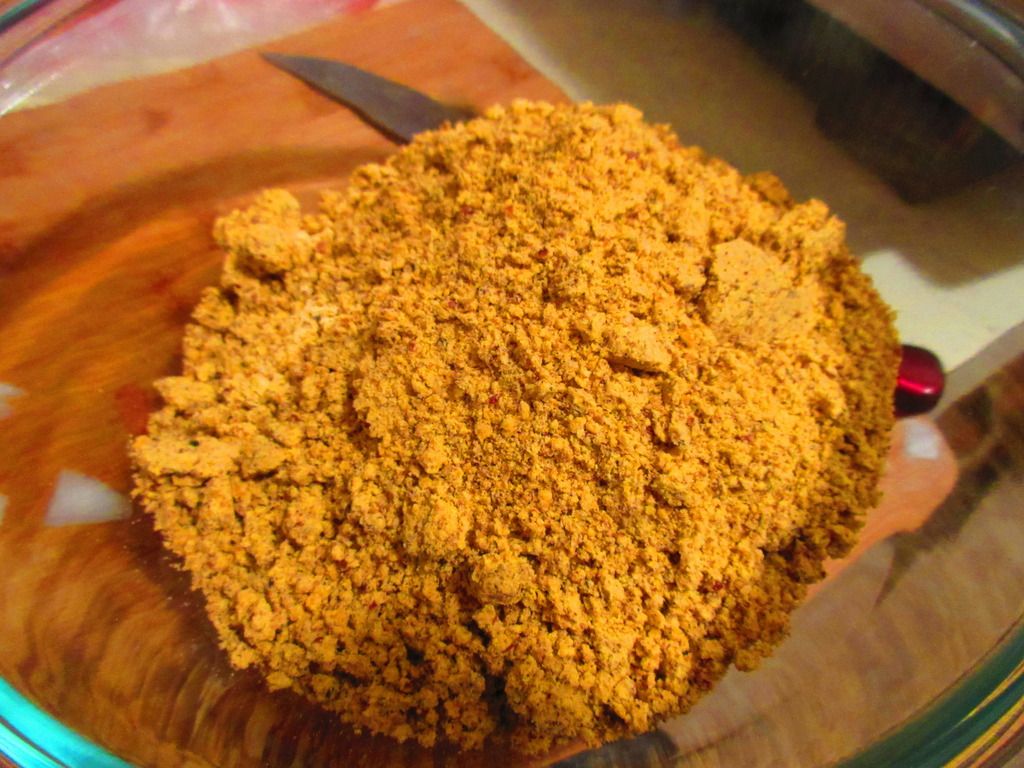
Neat – A Healthy Replacement For Meat Original Mix (before adding eggs/egg replacer and water)
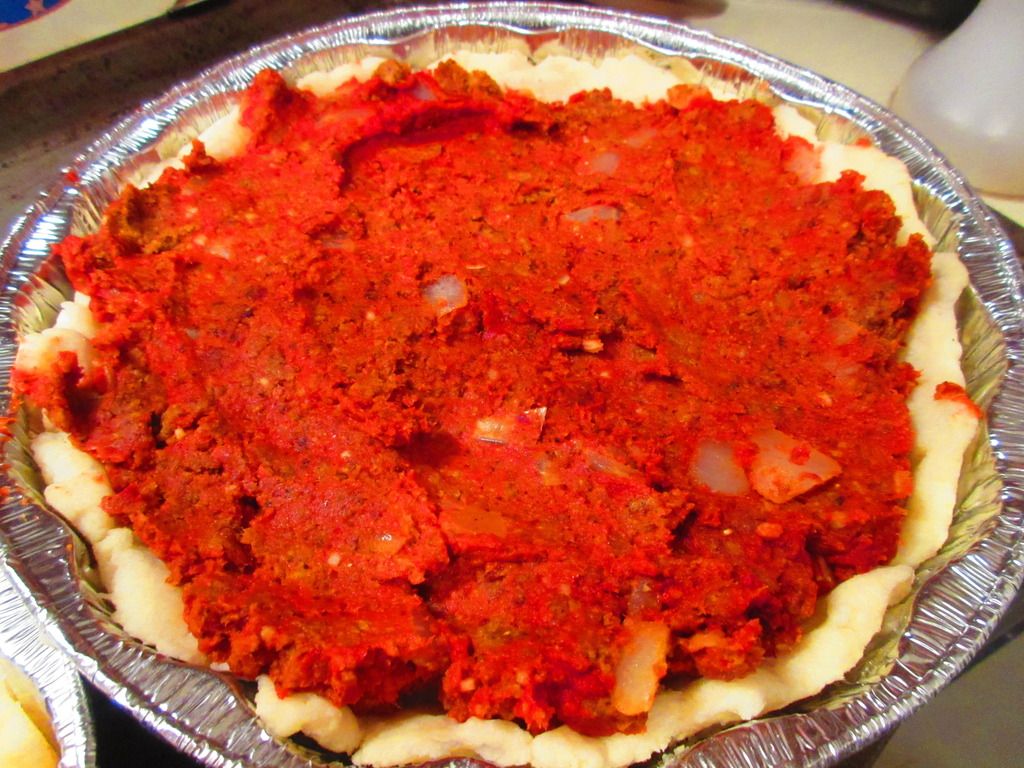
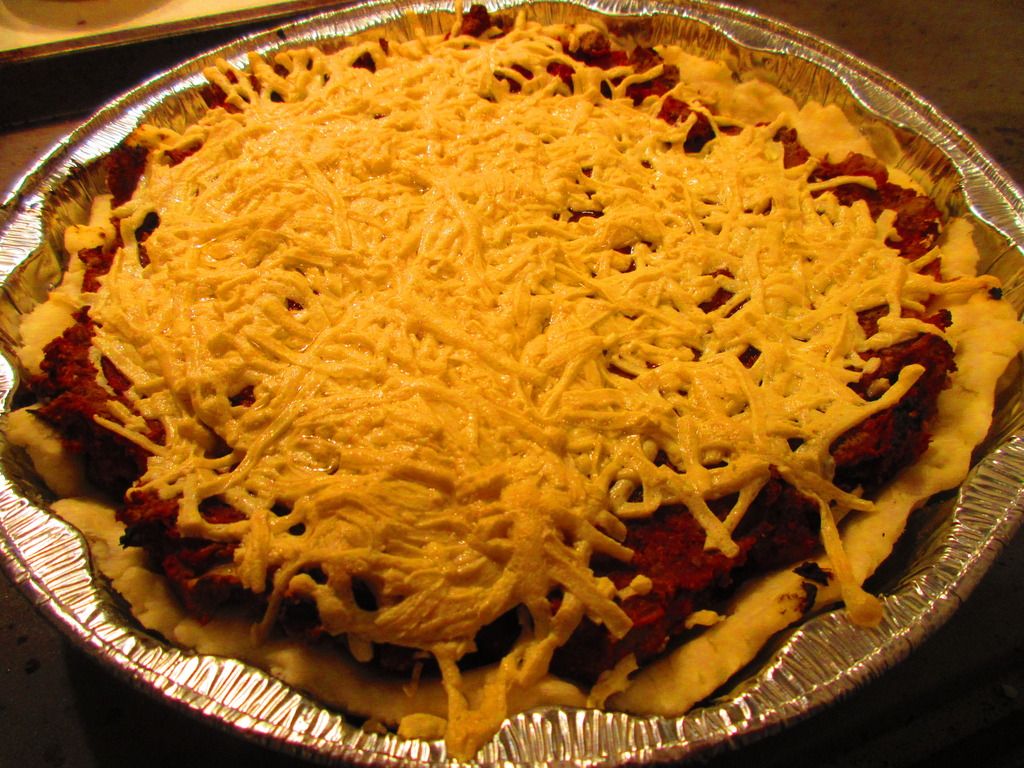
With a pie crust baked up…it was time to make the filling. As I was using my mom’s recipe, I began to brown the sweet onion while I mixed up the ingredients for the Neat Original Mix. This is really easy. Simply empty the Neat mix into a bowl, add two eggs (or egg substitute) and 2 tablespoons of water. Mix well. Once the onions had began to soften, I added the neat mixture and cooked it on medium heat for about 7-10 minutes, chopping at it as one would with regular ground beef. It looked and smelled perfect. I added the tomato paste, cooked it a few moments longer and then put it all in the pie crust. On went the topping of Daiya cheese and…into the oven it went.
Before I talk more about the original mix, let me tell you a bit about Neat. Neat is a meat replacement that is derived from nuts and other non-GMO natural ingredients. It is a product that was created by a mother of two children who decided that they were going to become vegetarians. At first she would puree beans into sauces to help her girls get the protein they wanted, but after awhile, everyone got tired of it. And that was when she got into the kitchen, experimented, and created what is now marketed at Neat. Neat comes in this shelf-stable pouch in a powdered form. All you do to prepare it is pour the pouch into a bowl, add two eggs (or a vegan egg replacer), plus two tablespoons of water. Then, you just cook it in a skillet, as you would ground beef, for about 7-9 minutes. It’s really easy…and really delicious too.
Neat – A Healthy Alternative For Meat Original Mix (prepared) cooked with onion and tomato paste
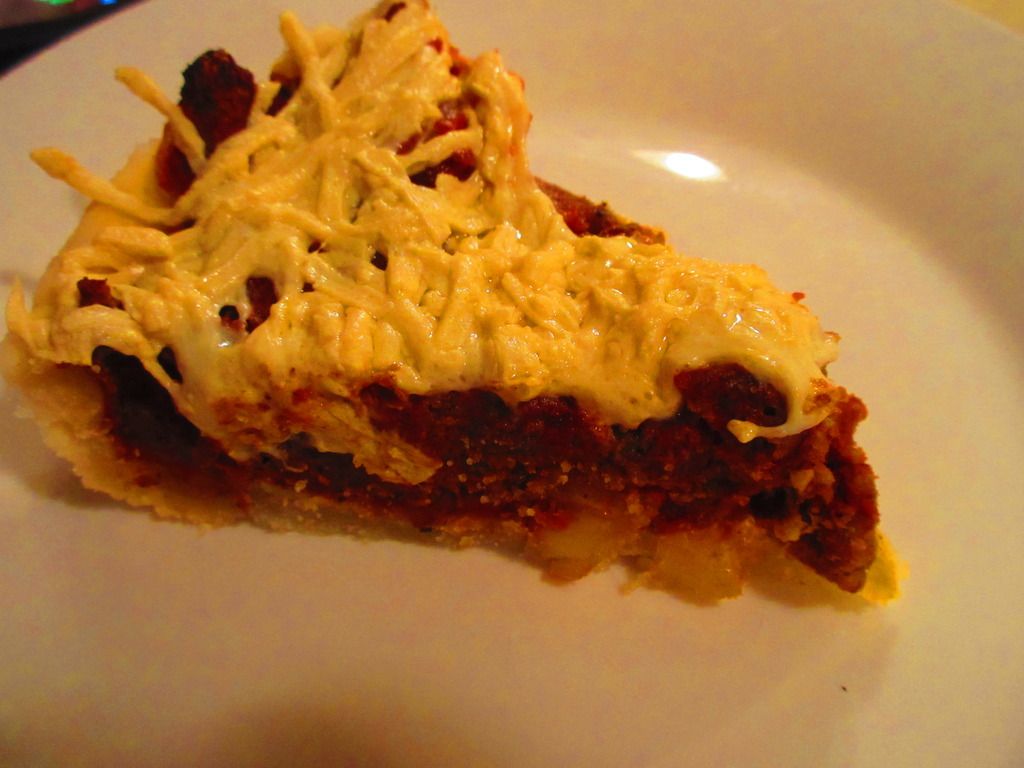
So, a vegetarian and gluten-free Cheeseburger Pie…that was what this was used for. When I sliced through the pie crust and the filling, I was just anticipating the crumbling and falling apart. But Neat surprised me. Much like my mom’s recipe (which used real meat as I wasn’t a vegetarian at that point), this all stuck together and made for a perfect slice. The Neat seemed to be the meat replacement I was looking for. And it was the perfect choice for this recipe for sure. I dished up two slices of the Gluten-Free and Vegetarian Cheeseburger Pie and handed one to my roommate and settled in with mine. My roommate took the first bite and said that it tasted dead-up like a cheeseburger. That’s good. She’s not a vegetarian, nor is she dairy-free or gluten-free like me. But this impressed her. It impressed her a lot. The most disappointing aspect of the dish was the pie crust and that was a whole unrelated product, and it still worked out well in the end.
The Neat Original Mix is fantastic. I mean, it is so close to the real thing. As I said, I don’t often do meat replacements, but sometimes when revisiting old recipes I grew up with, it is necessary. I don’t think any other replacement for beef will come close to what Neat does for these dishes. This is the second time I have used a Neat product and both times I have been beyond impressed. The taste and texture are phenomenal. Even meat eaters won’t realize they aren’t really eating meat. That’s the wonder and the glory of this product. Anyone can have it (unless they have a nut allergy) and enjoy it. It was, for the second time, love at first bite. And it was wonderful to be able to adapt an old family favorite to fit my dietary needs.
A slice of Cheeseburger Pie (gluten-free, dairy free, and vegetarian) made with Neat – A Healthy Alternative For Meat Original Mix
Let’s now take a look at what goes into the Neat Original Mix. This product is made up of pecans, garbanzo beans, gluten free whole grain oats, organic whole grain gluten free cornmeal, garlic, onion, sea salt and spices. Simple. Delicious. Clean eating! It is gluten-free, non-GMO, and kosher.
As for nutrition, the Neat Original Mix is a powerhouse. A serving is 40 grams and there are 4 servings per pouch. One serving will provide 190 calories and 15 grams of fat. You will also be getting 232 mg sodium, 11 grams carbohydrates, 2 grams of sugar, 4 grams fiber, and 4 grams of protein. It is filling, so it makes a fantastic substitute for meat. But there is that added bonus of protein from the nuts that are blended into the mix.
It really did make a great addition and the perfect substitute for actual ground beef in the following recipe…
Gluten-Free, Dairy-Free, and Vegetarian Cheeseburger Pie
Gluten-Free, Dairy-Free, Vegetarian Cheeseburger Pie
Servings: 8
Prep: 10 minutes; Cook 30 minutes
Ingredients:
1 package Neat – A Healthy Replacement For Meat Original Mix
2 organic cage-free eggs
2 tablespoons water
1/4 cup chopped onion
1 (6 oz) can tomato paste
1 gluten-free pie crust (either made from scratch or bought at the store)
2 cups Daiya Mozzarella Cheese Shreds
Directions:
Preheat oven to 375°F.
Pour the Neat – A Healthy Replacement For Meat Original Mix into a medium bowl. Add two eggs (or egg replacer if vegan) and 2 tablespoons of water. Mix well.
In a non-stick skillet over medium heat, brown the Next Mexican Mix and onion. Cook until vegetables begin to soften and the Neat can be chopped into a meat texture. Add the tomato paste and stir well. Allow it to heat through for a few minutes to marry the flavors together.
Pour the mixture into the prepared pie crust and top with 2 cups of Daiya cheese shreds. Bake in the oven for 20-25 minutes, until cheese is melted and pie crust is browned (with any luck). Slice and serve.
~*~*~
I have fallen head-over-heels for Neat. It is, without a doubt, the healthiest replacement of meat out on the market. I am thrilled that it is more available in my area. In fact, with so many places carrying it, I’m guaranteed to be able to pick it up at one place or another when I need it for a dish.
Neat…you are by far my best find and my favorite substitute in old family recipes. Nothing else can do what you do! So much love.
Product: Jaali Bean Cumin and Pea Lentil & Brown Rice Kit – $4.99+
It was the start of a new year. Yes. January 2015. And what happens at the start of a brand new year? New Year’s Resolutions! WOOO!! I am proud to say that I don’t make resolutions, because I don’t like to make promises I can’t keep. I do, however, try to make each year a good one and try to improve on some things.
Like…eating better.
Well, my New Year 2015 (January) Cuisine Cube, took a lot of the work out of that by providing a box of 6 healthy choices for food/snacks. YAY! So, as you all are pretty much aware, Cuisine Cube is a delivery subscription service that brings smaller, lesser-known, artisan products from the gluten-free food world to your door. Yes, some of them I have heard of…but most I haven’t. And that’s the beauty of this service. Without it, I’d have no idea that some of these products or companies even existed. And, subscriptions start for as low as $29.99/month. It’s a great deal and a great service. If you haven’t tried it or have been meaning to give it a try…do it. You’ll end up loving it as much as I do.
So, January was all about healthy products it seemed. And the product that was packed inside for the Lunch option was this great little Indian spiced meal kit from Jaali Bean. It was the Jaali Bean Cumin and Pea Lentil & Brown Rice Kit. It sounded beyond delicious as I am a huge…and I mean HUGE…lover of Indian food. Around here, I can find a plethora of the Tasty Bite Indian meals, but this was the first time I ever heard of Jaali Bean. Already, I was intrigued.
Jaali Bean was created by Brian and Molina Junkins, a husband and wife team who shared a passion for food, family, and healthy living. They also had a passion for helping people discover the amazing flavors and tastes that are incorporated in Indian cuisine. They challenge everyone to toss aside their preconceived notions about preparing Indian cuisine at home, because they make it all happen within minutes with these great little kits they put together. It is super easy and the are just loaded with all-natural ingredients and all the spices that make you fall in love with Indian food.
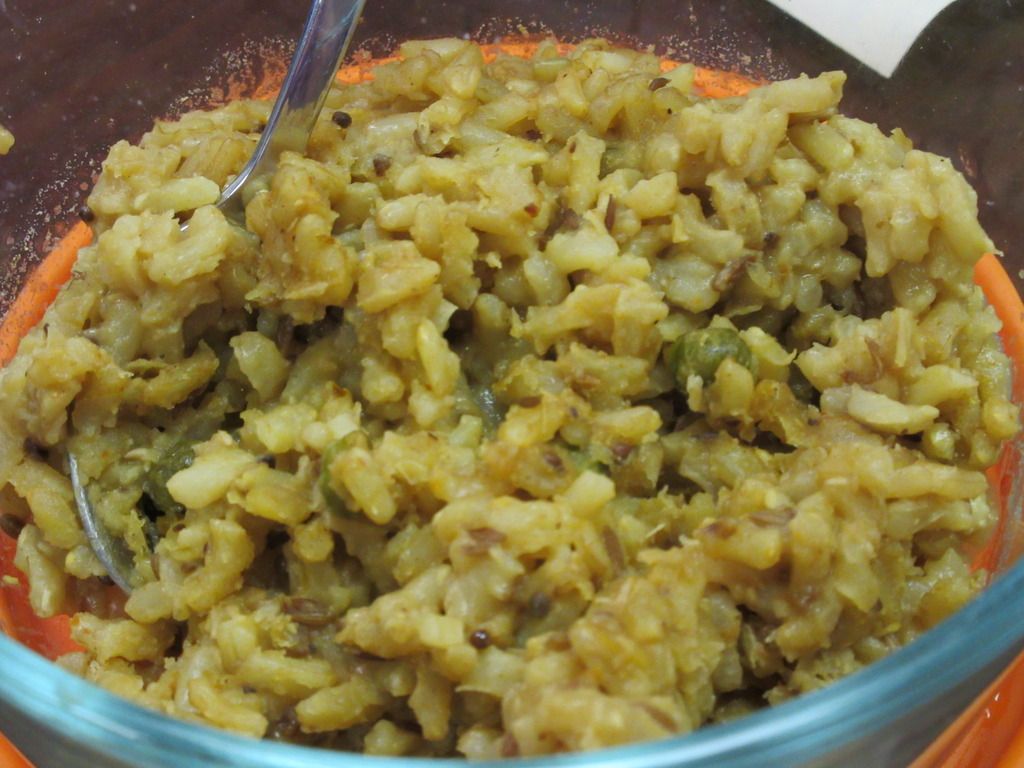
They really do make it easy. The Jaali Bean Cumin and Pea Lentil & Brown Rice Kit comes with two packages attached. Inside is the brown rice and lentil mixture. In the smaller pouch…the spices. Simply set a pot on medium-high heat and heat up 1 tablespoon of oil. Put the spice packet in and stir for about 40-50 seconds. You’ll know when it’s done when you get that amazing aroma out of the spices. Do not burn them. Add 2-1/4 cup water and bring to a boil. Once the water is boiling, turn the heat down to low, cover the pot, and let it cook for 30 minutes. After 30 minutes, remove the pot from the heat and give it a stir. Let it sit for an additional 5 minutes. All the extra liquid will get absorbed. Trust me. It works. You are left with a fantastic pot of moist and creamy looking rice that smells as amazing as it looks.
But the true test is always with the taste.
And, let me tell you…Jaali Bean Cumin and Pea Lentil & Rice Kit cooks up an amazing taste of India. Better than Tasty Bite…and as close to authentic restaurant quality as possible at home. Amazing. I grew up eating Indian food, thanks to my neighbors up the way, who were from India. The cuisine has always resonated with me. And I know what is good and what isn’t. Jaali Bean is delicious. Seriously…delicious. The rice cooks up rich and creamy, seasoned to perfection. It’s mild in flavor, so add a kick of your own heat if, like me, you like things a little spicier. I think my only complaint was that there wasn’t enough peas for my liking. How’s that for a complaint, eh? Seriously, perfectly seasoned and it cooks up beautifully. Nothing else I have had packaged has come close to tasting this close to the real deal. I am beyond impressed.
So…let’s discuss what all goes into the Jaali Bean Cumin and Pea Lentil & Brown Rice Kit, shall we? This kit is a combination of par boiled long grain brown rice, orange masoor lentils, peas, spices (which include cumin, mustard seeds, coriander, dried red chili powder, and amchur powder), salt, cane sugar, tomato granules, and nutritional yeast. It is gluten-free, cholesterol free, vegan, and non-GMO.
As for the nutrition information in regards to Jaali Bean Cumin and Pea Lentil & Brown Rice Kit…I was very impressed. A serving is 1 cup and there are 4 servings per package. Each serving will provide 160 calories, 2 grams of fat, 380 mg sodium, 32 grams of carbohydrates, 2 grams sugar, 4 grams fiber, and 6 grams of protein. Healthy, filling, and delicious. You can’t go wrong.
Honestly, I’ve never seen Jaali Bean products around here, so without my subscription to Cuisine Cube, I might still be in the dark. With that being said…these products are now on my radar and I know how to get my hands on them via the Internet, if I can’t find any here. And that, my friends, is a very good thing. I’ll definitely keep these on hand for a quick and easy go-to meal.
On a side note, this product wraps up my January 2015 cube. The only product I didn’t get to blog on was the Budi Bar, because somehow I missed the note on freezing it and it got all fuzzy and moldy. I was sad when I had to throw it away. But…perhaps I’ll run across them somewhere around here. Or, I’ll just order one online. We’ll see.
Jaali Bean Cumin and Pea Lentil & Brown Rice Kit (prepared)