You read that right. All natural. All things I had at home. All healthy ingredients. And the best part, it really does fill you up. Fiber is a wonderful thing. Trust me.
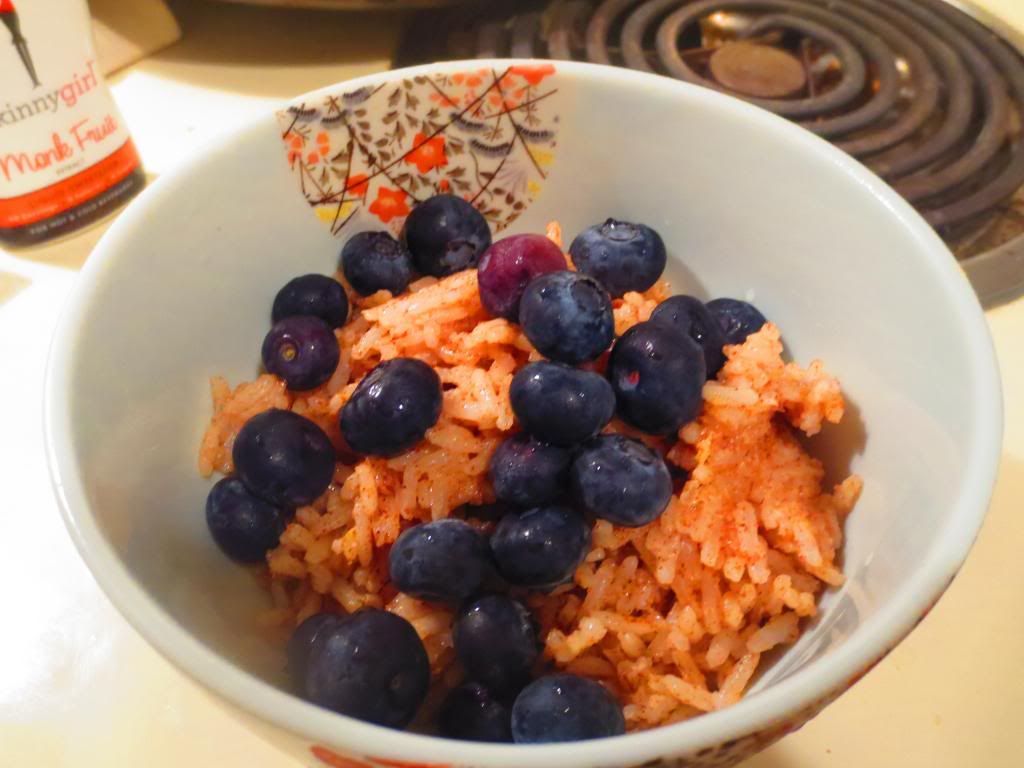
It was a bitter cold morning…around 0°F…and I didn’t want to have anything cold. Nothing. Hot coffee. Hot breakfast. So, I modified a recipe I spotted in a magazine and it proved to be as epic as it sounded. I loved the play of flavors and the way everything was fresh, light, and filling. This is definitely a hearty, no-guilt breakfast.
Recipe: Blueberry Breakfast Rice Bowl
Blueberry Breakfast Rice Bowl
Servings: 4
Time: Prep 5 minutes; Cook 20 minutes
Ingredients:
1 cup brown rice
1 tablespoon coconut oil
2 teaspoons ground cinnamon
1/2 teaspoon finely grated lemon zest
1/4 teaspoon sea salt
1/4 cup almond milk
4 teaspoons pure maple syrup
1/2 teaspoon pure vanilla extract
1 packet stevia
1 cup fresh blueberries
Directions:
Cook rice according to package directions.
In a medium bowl, combine rice, oil, cinnamon, orange zest and salt. Divide among serving bowls.
In a small saucepan, bring milk and maple syrup to a boil on medium heat. Remove from heat and stir in vanilla and stevia. Drizzle over top of rice mixture and top with blueberries, dividing evenly.
~*~*~
I loved the warm, homey feel of this breakfast. It was definitely something different. Rice for breakfast…when done like this…doesn’t seem too different at all. The spices and flavors all mixed really well. The blueberries really played well with the cinnamon and lemon. And I loved how everything just sort of played well together.
This is a new favorite. And it is so easy to make.
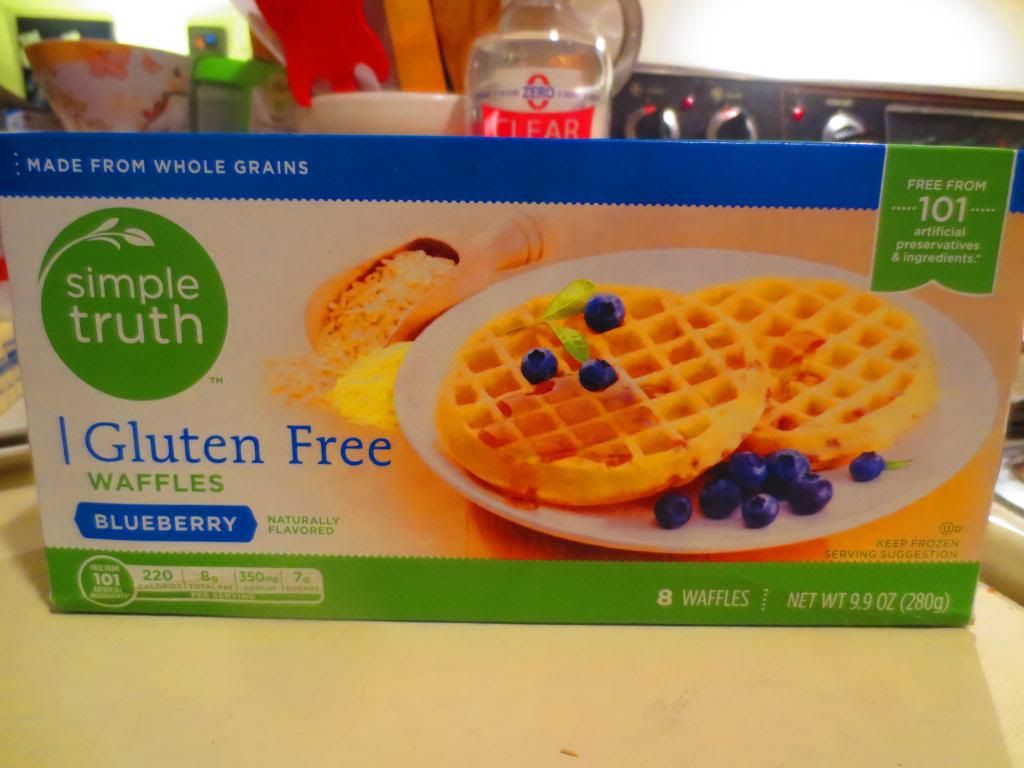
Product: Simple Truth Gluten-Free Blueberry Waffles – $2.49+
Okay…they aren’t Van’s Gluten-Free Waffles…but they aren’t half bad!
I admit it. I had a coupon for Kroger’s organic brand of waffles from Simple Truth…and they happen to have two varieties of gluten-free waffles on the market…so I definitely took advantage of the coupon this past weekend. And, no sooner had I bought them, I was whipping them out for a quick breakfast. After all, I circuit trained and did spinning this morning. This meant…easy breakfast that can toast while I showered and got ready for work.
Waffles.
Easy peasy!
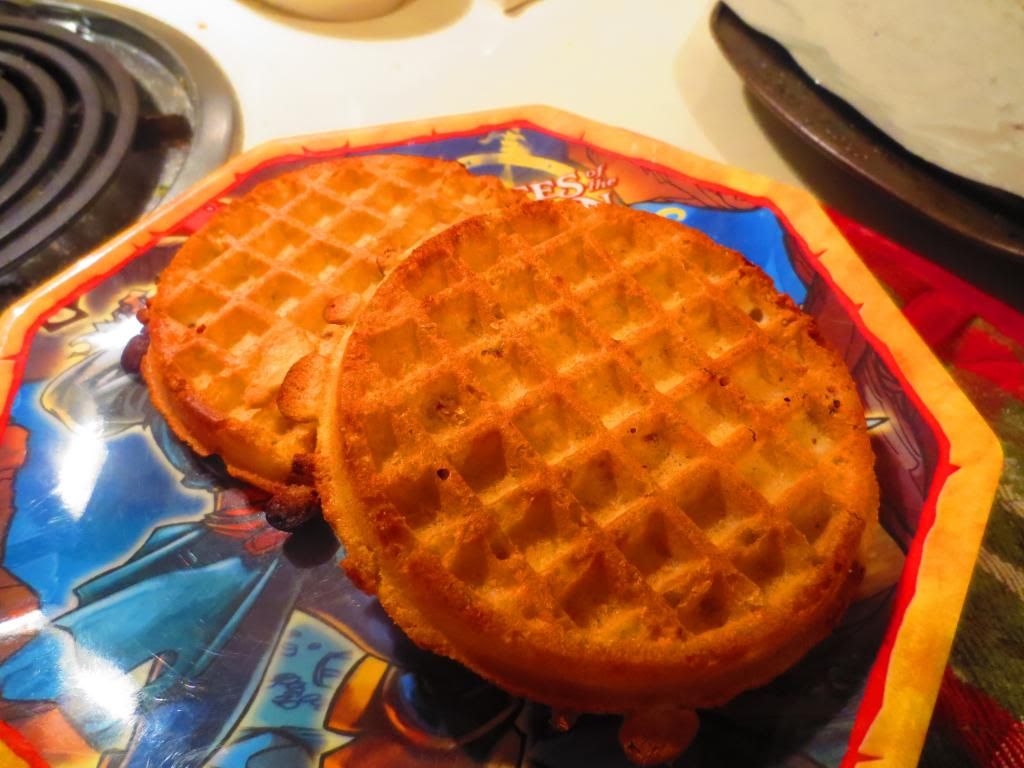
Onto a baking sheet and into the oven they went (ever since being diagnosed as Celiac…the toaster went into the garbage due to cross-contamination problems…and was never replaced). 10 minutes later, I was pulling golden, perfectly toasted waffles from my oven. They smelled amazing. They toasted up perfectly. And I could even see the blueberries inside the little waffle shapes. Quick, but efficient breakfast was about to commence. A little dab of butter and some maple-agave syrup over the top…and we were in business. I paired it with some water and a cup of coffee. Just the easy meal I needed after a hectic morning.
So, how were they?
Less soft and substantial than Van’s Gluten-Free Waffles. But, for a freezer waffle…for a gluten-free freezer waffle…I give them a solid 8 out of 10. The batter seemed really thin in parts, making them more of a crunchy waffle, rather than that crisp outside, soft middle that I associate with perfect waffles. The blueberries weren’t even throughout…mine were mostly to one side of the waffle…but at least they were in there, right? Yeah! They were sweet, which I love…waffles should be sweet…and they had a good flavor. And, when all is said and done, that is the most important thing. Were they perfect? Nope. Were they edible? Beyond edible. They were tasty. And organic…which you have to love. And they, honestly, were good!
They just weren’t as good as Van’s Gluten-Free Waffles. But…I haven’t found one that is yet either.
Let’s talk ingredients. Simple Truth’s Gluten-Free Blueberry Waffles are made from water, brown rice flour, potato starch, vegetable oil, corn flour, organic tapioca starch, blueberry bits, sugar, potato flour, inulin, leavening, soy lecithin, fruit juice concentrate blend, natural flavors, and salt. So…it’s sort of a mess…but not too bad. Not really. Not for a quick dine-and-dash morning meal anyway. Especially one that is, honestly, coming out of a box in the freezer.
Nutritionally speaking, a serving is 2 waffles. These waffles will serve you up 220 calories and 8 grams of fat. Not great…but not bad either. Van’s does better with 10 fewer calories and 2 grams less fat. So…there is that. The Simple Truth Gluten-Free Blueberry Waffles also will serve you up 350 mg sodium and 7 grams of sugar. Van’s beats them here too, with way less sugar and 30 mg less sodium. You will also have 2 grams of fiber an 1 gram of protein. Not exactly a filling breakfast…but it’s a sugary treat from the freezer (and not one I make a habit of consuming either!).
So, the basic gist of this is…Simple Truth puts out a good gluten-free waffle. The blueberries gave it a nice added bit of flavor. And they had a nice crusty outside that toasted up perfectly. They weren’t the best frozen waffles I have had since going gluten-free…but they are close. I liked them.
So, if you can get Simple Truth products, I recommend trying the Gluten-Free Blueberry Waffles, or even the Gluten-Free Homestyle Waffles (which I’ll get next time I have a coupon). They make a good, quick, and easy breakfast when you have a busy, busy morning. Thumbs up.
Simple Truth Gluten-Free Blueberry Waffles (toasted)
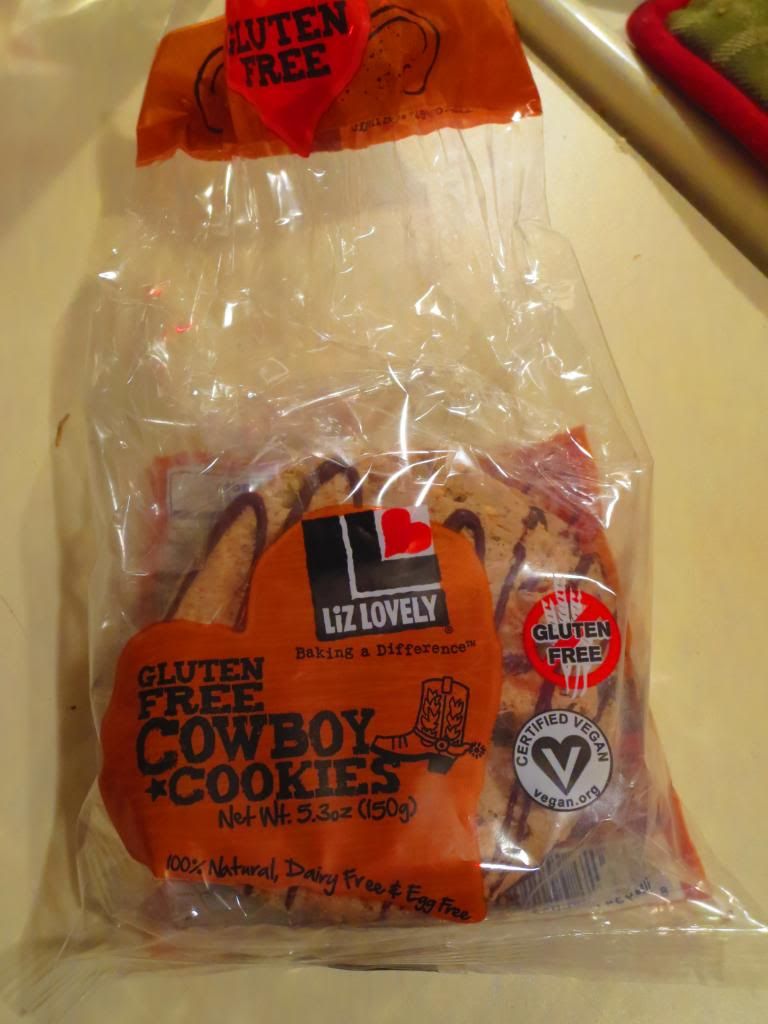
Product: Liz Lovely Gluten-Free Cowboy Cookies – $3.99+
Remember awhile back when I worked my way through every Liz Lovely gluten-free cookie available?
Times are changing.
And so is Liz Lovely. In fact, they recently just got their certification. Certified. Certified for goodness, of course. But this is HUGE. Liz Lovely is now CERTIFIED 100% FREE OF WHEAT, DAIRY, AND EGGS! Yep.
You know what this means?
It means this cookie monster has more cookies from this amazing company at my disposal. My taste buds are ready!
While out at my local natural food store, I spotted the Liz Lovely shelf that I usually walk to and stare longingly at for a little while. Most of the time I can talk myself out of purchasing a pack of 2 cookies…but this had varieties I had yet to try. I got the roomie to consent to one item off the grocery list/budget this week and we brought home Liz Lovely’s Gluten-Free Cowboy Cookies. Previously, you could only get this version done vegan…now it’s both.
And I am one very happy cookie monster.
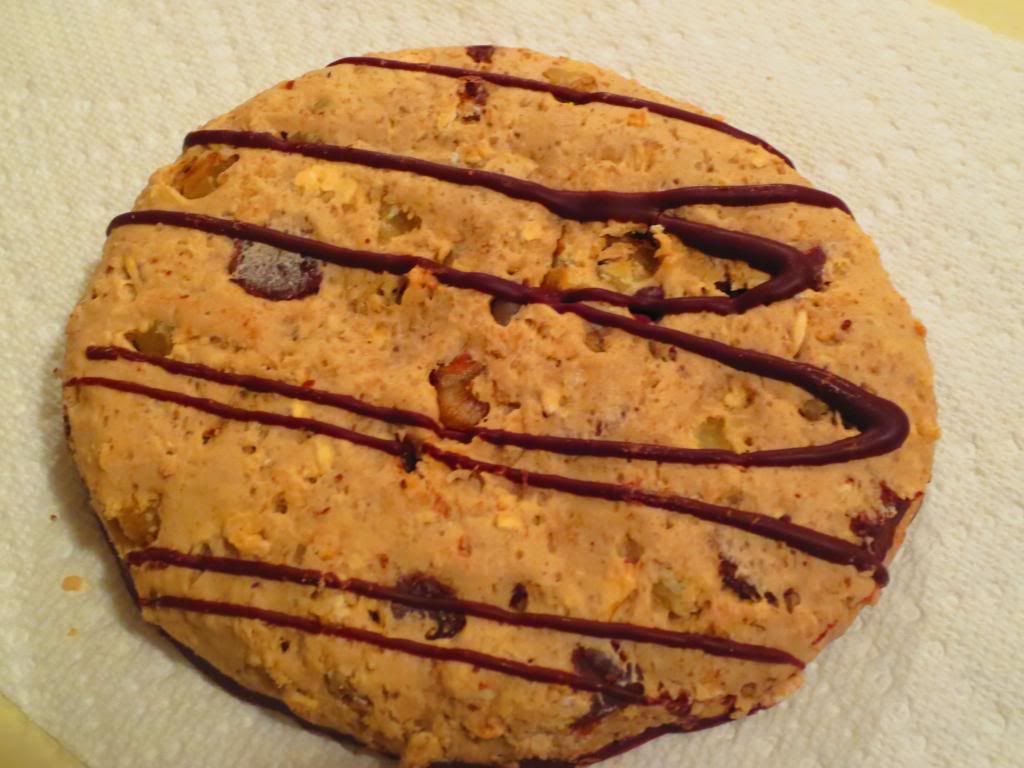
So, what is a cowboy cookie? Well, it’s a hearty cookie for one thing. Usually they contain oats, chocolate chips and some sort of nut. Sometimes…coconut is included. In the case of Liz Lovely’s variety of Cowboy Cookies, you get a magical combination of oats, chocolate chips and walnuts. YUMMY!! The base of her cookie is dipped in delicious dark chocolate and the top has some nice dark chocolate stripes. It looked amazing. Sounded delicious. And after dinner last night, I split one in half with my roommate and we enjoyed a gluten-free Cowboy Cookie dessert.
On Liz Lovely’s Web site, she gives a little background as to how the Cowboy Cookies reinvented the idea of the original business concept. Liz Lovely was originally going to do vegan truffles, but it turns out, one night before hosting a tasting party, Liz had extra chocolate but no more centers…so she quickly baked up some oatmeal chocolate-chip cookies and drizzled the extra chocolate all over them. The truffles were all but forgotten at the party. The cookies were the hit. So, the next day, it was decided…Liz Lovely would be a cookie company. Cowboy Cookies…that’s what made it happen.
I can see why too! These cookies are fantastic. Way better than I could even imagine a vegan truffle to be (although I love vegan truffles too). My first dessert love is a cookie…always and forever…so this was a very nice treat. The oats in the dough give it this fantastic texture and a bit of sustenance. The chocolate chips bring the sweetness. And those walnuts…not only add a bit of a crunch, but that saltiness that pairs well with the chocolate. I love how the extra chocolate on the bottom and top of the cookie meshes with the rest of the flavors. It is one sweet, hearty, delicious bite. That’s for sure! Consider me one happy cookie monster.
So…now we’ll talk ingredients and nutrition.
One thing I love about Liz Lovely cookies is that they are real. No ingredient is processed or fake or made up of chemicals. You’ll recognize (and enjoy) everything that goes into her cookies. In the case of the Gluten-Free Cowboy Cookies, you’ll find: unrefined cane sugar, gluten-free rolled oats, rice flour, dark chocolate, palm fruit oil, walnuts, water, tapioca starch, xanthan gum, molasses, vanilla extract, sea salt, potato starch and baking soda. The ingredients aren’t a mile long…and, as I said…everything is recognizable and able to be purchased in your grocery store. LOVE IT!
Now, let’s talk about nutrition. Do remember…this is a COOKIE and any way you slice it (in my case…in half) it is a treat. A serving size of a Liz Lovely Gluten-Free Cowboy Cookie is 1/2 of the cookie. This half will dish you up 180 calories and 8 grams of fat. This half of a cookie also contains 14 grams of sugar (I know…it’s a lot…but it’s a COOKIE!) and a mere 75 mg sodium. Not too shabby. And you’ll also be devouring 2 grams of fiber and 3 grams of protein.
Nice!
And these cookies are naughty and nice. Honestly. If you are going to splurge, I encourage you to find a store that sells Liz Lovely’s cookies and give them a try. I have yet to find any better on the market. They are soft, chewy, and just…amazing.
And…if you can’t find them where you live, you can always order online.
I live just outside of Louisville, Kentucky. One short drive over a bridge and I am in the city. I can see Louisville from my apartment. I’m that close. But it’s not the city itself that makes me feel lucky. It’s the gem that sits at the heart of it.
Recently, Louisville has really come onto the foodie scene. With chefs showing up on television shows, the restaurant scene exploding (especially over in NULU), and features in food magazines like Food & Wine, Louisville really has something to offer for everyone.
Yes. Everyone.
Including me – a gluten-free vegetarian.
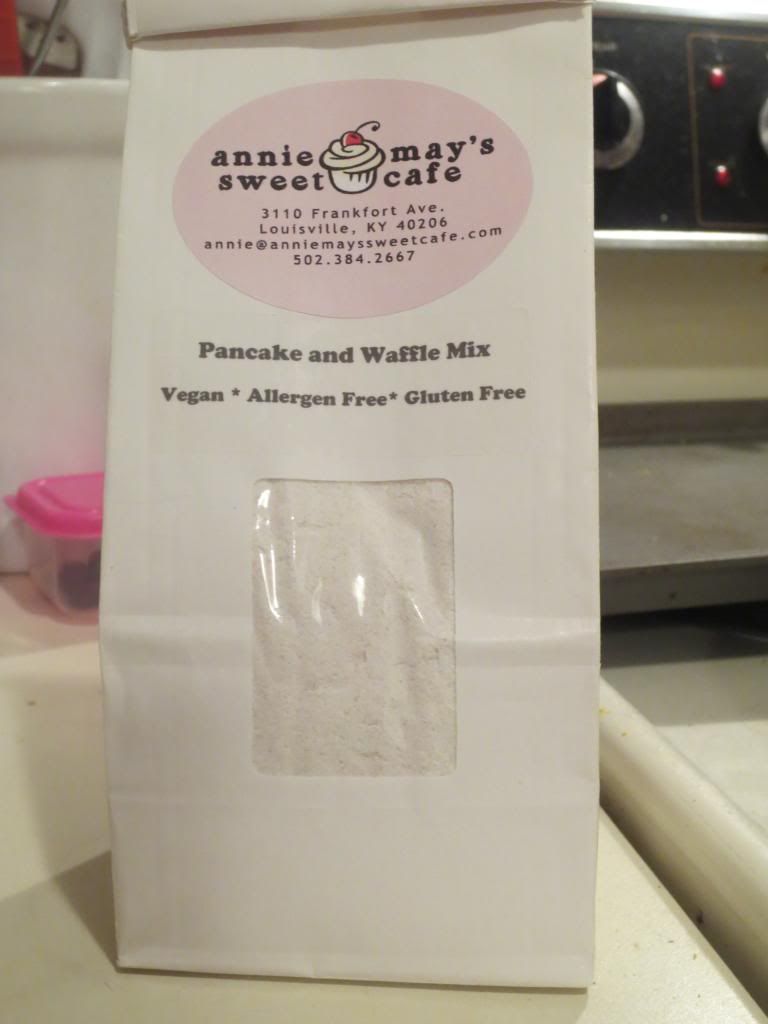
The place – Annie May’s Sweet Café, located at 3110 Frankfort Avenue. It’s a short little journey there…and one that I make weekly…if I’m in town. I don’t miss any opportunity to support this business and the people who make this genuinely good food. And trust me…you don’t need to have a food allergy to enjoy the products that they put in their case and offer Tuesday – Saturday.
Really, trust me. My roomie eats there every week with me. I’ve taken my running friends Natalie and Harry there. I’ve taken my sister there. I’ve taken my friend Greg there…and he is hooked on her Allergen-Free Double Chocolate Brownies. Trust me…he always buys at least two when he’s in town. In fact, you’d be hard pressed to tell her food was gluten-free or dairy-free it wasn’t advertised. Seriously. Good eats. All around.
But today, I am not just going to talk to you about the business. Today…I want to talk to you about one of the mixes that is available for purchase from Annie May’s.
I’m talking about Annie May’s Sweet Café Allergen-Free Pancake and Waffle Mix.
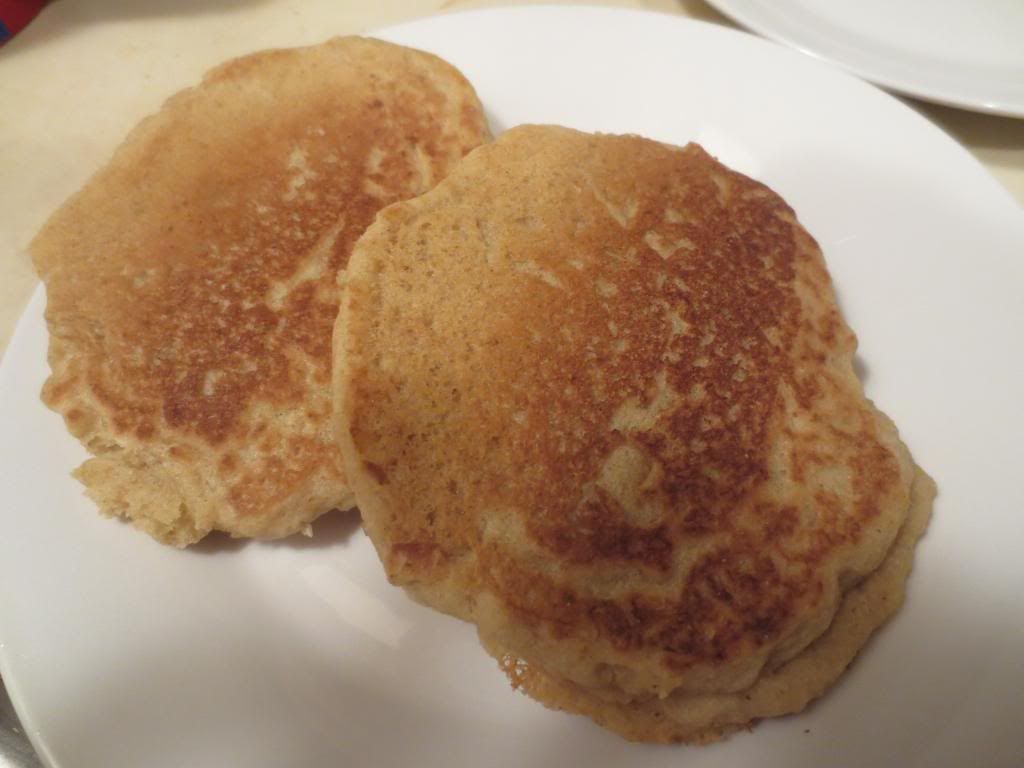
Yes. More pancakes. The world would be a better place if more pancakes were consumed. But…they must be good pancakes. I’ve eaten a lot of different pancakes since going gluten-free. Frozen, from mixes, from restaurants. And this mix really does cook up some fantastic pancakes. I actually utilized the mix two ways to be honest. I did my first four pancakes just plain…made as the bag instructed me to make them. But for the second batch…I added Enjoy Life Mini Chocolate Chips…and made chocolate chip pancakes for the following day. The mix is so easy to make and it has a great texture. I just had a good feeling when I put it all together in my mixing bowl and then scooped up the 1/4 cup to set on the skillet.
The pancakes cooked to perfection. No joke. Golden and crusty on the outside. They were a thing of beauty. In fact, I might have let out a little squee of glee and did a little hop-dance of joy in the kitchen after I flipped the first one. Because it was gorgeous. A stunning and perfect pancakes. I only had to be sure not to burn them. And…I didn’t. I totally rocked these out and they fluffed up and got all soft and hot in the middle. I am drooling just writing about them. Then, after serving them up with real maple syrup…I devoured. And as I was savoring and scarfing all at the same time…I got the chocolate chip version cooking.
Once again…perfection. I tucked these into a container and put them in the fridge. I had a spinning class to take on Friday morning, so I figured when I got back from that, I could pop these bad boys in the microwave, nuke them to reheated perfection, and serve them up with that maple syrupy goodness. I was so pleased with how well these reheated. Honestly. So many times you just get a soggy, mushy mess. While these don’t get that golden crust they have fresh off the skillet, they don’t wilt and fall apart after a day in the fridge either. They reheated really well and maintained the integrity of the previously consumed pancakes…still so delicious…down to the last bite.
I have two pancakes left. Can you guess what I’m eating Sunday morning? HA! I can’t eat them tomorrow…I’m going to Annie May’s Sweet Café for their amazing breakfast menu. Might even splurge and get a few extras. Because…I can. And I want to. And so…I will.
Don’t be disheartened if you don’t live in or near Louisville, Kentucky. Annie May’s Sweet Café ships! Yes…they ship. Just go to this page and place an order. Trust me…you will not be disappointed. And, yes…the Allergen-Free Pancake and Waffle Mix is available for order. So…don’t think. Just do. DO IT!
And…I still count myself as one very lucky lady to live near a place that has a restaurant that I feel totally and completely at ease in. I know I can get good food there…and I will continue to bring my friends and family there. So far, no one has been disappointed.
And to Annie May, Kenna, and the staff…keep up the good work. See you tomorrow morning!
Perfect pancakes made from Annie May’s Sweet Café Allergen Free Pancake and Waffle Mix
Restaurant: The Village Anchor, Anchorage, Kentucky
Twas the weekend before Christmas and my roommate and I were set to have our official Christmas dinner out at a local restaurant. We started this tradition of a holiday meal a couple years back. It gives me a break from the kitchen, which, no matter how much I love to cook, is always welcome, and gives us a great excuse to try out a restaurant we might not have picked otherwise. It’s usually a little more upscale…a little pricier…but this only happens once a year. The splurge is worth it.
This year, the roomie chose the restaurant. It was one we had visited before, but never had the luxury of eating there. I ran a short mile run there during the summer. In fact, I never had set foot in the restaurant part, only the bar – The Sea Hag – prior to this visit. We chose the earliest dinner seating available, as we knew this was going to be a crazy-busy weekend for dinners out.
The Village Anchor opened at 5 p.m. We were actually there way ahead of schedule, so we took the opportunity to walk up and down the streets of Anchorage. If you’ve never been to Anchorage, Kentucky…it’s gorgeous. Go there and be awed. It was even more beautiful as a lot of the homes and businesses were lit up and decorated for the holidays. I love this time of year for that reason.
At 5 p.m. though, we were both starving and ready to get our meal on. We stepped into the restaurant itself and were immediately greeted by a very friendly hostess. I gave her my name, which the reservation was under, and she picked up a couple of menus and took us through the dining room, sitting us down at a quiet table not too far from the hearth. And that fireplace had a nice fire going in it too. It felt like the perfect winter’s night.
Our server, Alan, came over to introduce himself. Our water glasses were filled and we were asked if we’d like anything else to drink. We both decided to stick with water. He said, “I noticed that we have a vegetarian with a gluten allergy…” I raised my hand. “That would be me!” He gave me a very relaxing smile and said that the chef could do up a great roasted veggie plate for me as an entree. He mentioned Brussels sprouts, asparagus…yeah…he won me over right there.
What this also indicated to me was that The Village Anchor pays attention to the reservations that are made through Open Table. I have made reservations before for so many other places, but this was the first time my food allergies were ever addressed right away without me having to bring them up. I raise a glass and give high kudos to The Village Anchor for this. As always, I get a bit nervous when I try out somewhere new…but this really put my mind at ease and relaxed me for the rest of the meal.
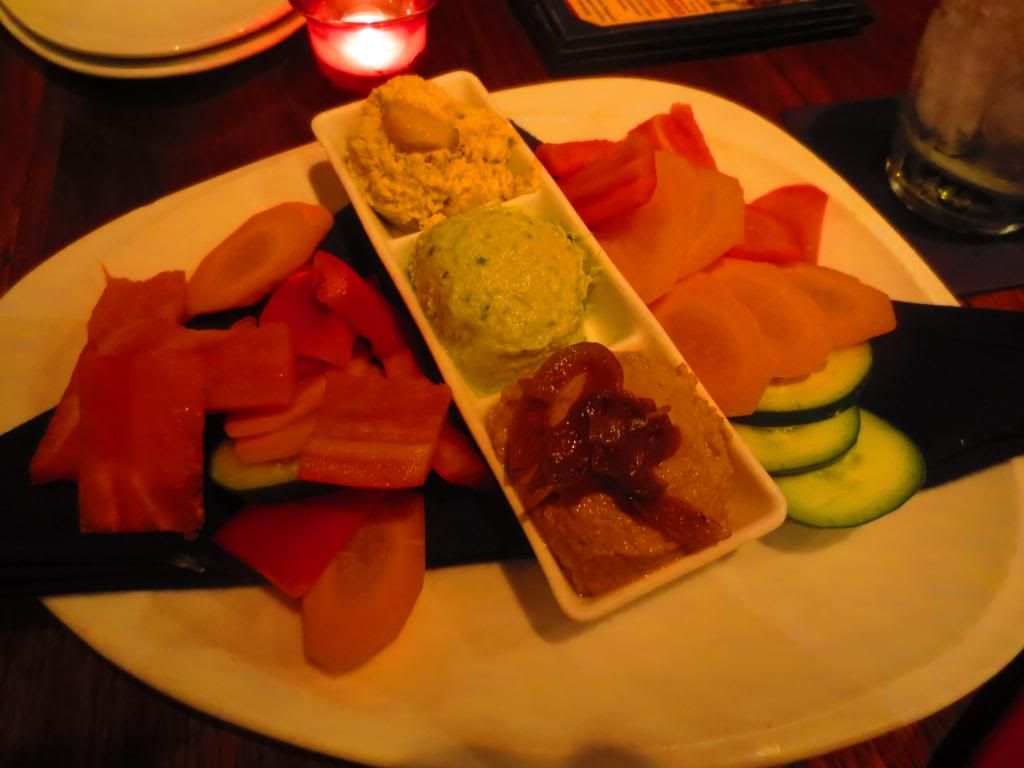
The Village Anchor’s Hummus Trio (top to bottom: Roasted Garlic, Jalapeño-Cilantro, Caramelized Onion-Chipotle) served with fresh veggies for dipping to make it gluten-free
But…we weren’t just here for the entrées. Like I said…this was our holiday meal. And after just taking in a very light breakfast, followed by a movie…we were pretty much famished. So, Cathy already knew she was going to try out a cup of the award-winning Elk Chili ($6.00) as her starter. We inquired what might be a good option for me. Alan said he would recommend the risotto, but it has soy sauce in it so it’s not safe for me. I told him I’d be good with the fresh fruit…but he had other ideas. He sure did. And what I ended up getting for my starter was their Hummus Trio ($11.00), which came with fresh sliced vegetables instead of the pita and the grilled crostini.
The Hummus Trio is a plate that contains three different house-made blends of hummus: the roasted garlic, jalapeño-cilantro, and caramelized onion-chipotle. As I said, my version came with sliced carrots, cucumbers, and red bell peppers. SO good. I thought the roasted garlic hummus was really rich. I love roasted garlic…and blending it into the hummus gave it this nice flavor that went so well with the vegetables. This one turned out to be Cathy’s favorite. The jalapeño-cilantro was the next one I sampled. I actually expected this one to be spicy…but it was actually rather mild. Even Cathy thought so when she tried it…and we’re talking about a heat wimp here. The flavors were great and I loved the freshness that came with each dip. This one went really well on the carrots. My personal favorite was the caramelized onion-chipotle hummus. OH MY HUMMUS GODS! I sampled this one ahead of Cathy and knew she’d be fanning her mouth. While not super-hot…it did have a kick to it and a slow burn. The caramelized onion was a brilliant addition, lending a little hint of sweetness to the hummus itself. Needless to say…this met a very messy death. If you love hummus, get this. Just trust me!
It was now time for the entrée round. As this was a pub, Cathy already knew what she was getting…Fish and Chips ($15.00). Her meal also came with house-made tartar sauce and coleslaw. She’s not a coleslaw person normally…but she ate the hell out of that coleslaw. I might need to see if the kitchen will give me the recipe. Red cabbage, raisins, and carrots…but it was the vinaigrette-like dressing that made it. Yes…we asked if it was safe for me to try and after checking with the chef, Alan assured me it was. It was really good.
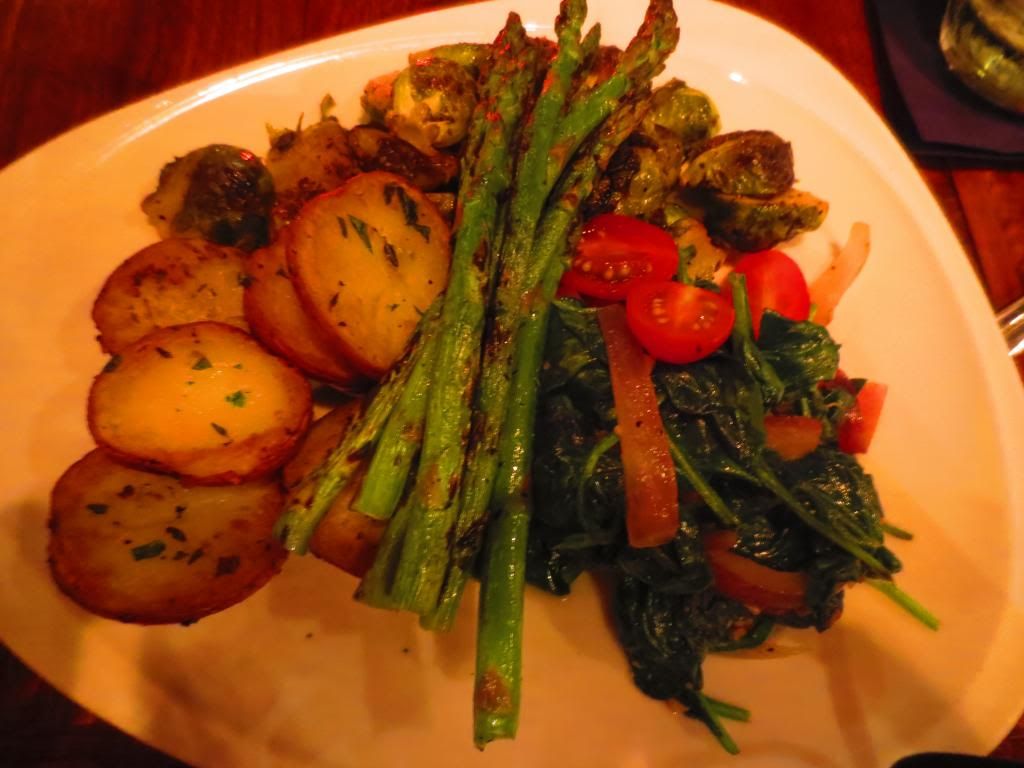
The Village Anchor’s Chef Creation – Roasted Veggie Plate
The chef got to play around with my dish and what I got was a vegetable plate masterpiece. Perfectly seasoned, perfectly roasted, perfectly perfect vegetables. And what a variety as well. My Roasted Veggie Plate ($16.00) came complete with roasted potatoes, roasted asparagus, roasted Brussels sprouts, and some sauteed spinach that was cooked with garlic and red onion, topped off with tomatoes. It was AMAZING!! I love that the chef included potatoes as well for something more filling. They were cooked to perfection and seasoned with some fresh herbs. Carby goodness. Yum! The asparagus was really done well. It still had a bit of crunch to it, without being raw. I loved the depth of flavor that were drawn from these. The spinach and the Brussels sprouts were my two favorite things on that plate though. The spinach was wilted and cooked to absolute perfection. I loved the hint of garlic, the bite the red onion gave it, and the sweetness of the red tomatoes. I was in heaven. And the Brussels sprouts were roasted to perfection. No burned edges…just flavor and lots of it. I was beyond impressed with this meal. Here I was expecting to get stuck, once again, with a salad. But The Village Anchor totally made my night!! They definitely went above and beyond for me.
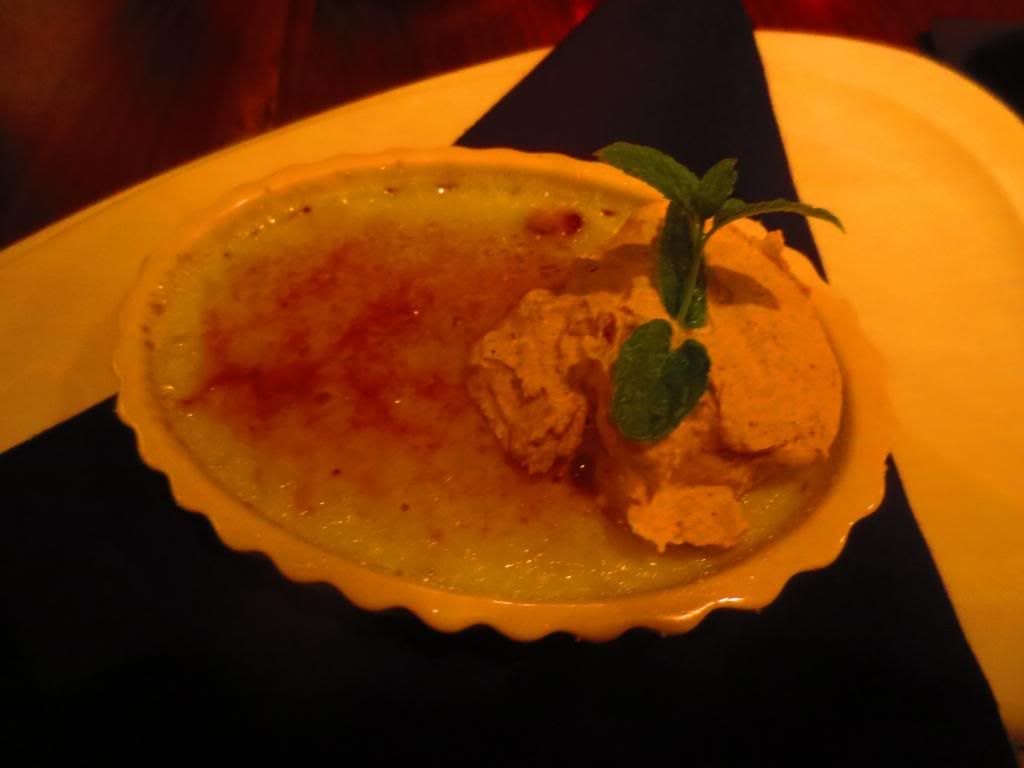
With this being a holiday celebration…we managed to save a little room for dessert. The special that night, in honor of the holidays, was a Cranberry Crème Brûlée. Now, more often than not, the crème brûlée is a safe choice for the gluten-free…but I wanted to be certain. Alan was prepared for this and said that he would check with the chef. He returned a few moments later with the word – the Cranberry Crème Brûlée was gluten-free…the only other things on their menu that are gluten-free is the ice cream, which is provided by The Comfy Cow. I get Comfy Cow ice cream a lot…so I decided to give the Cranberry Crème Brûlée ($11.00) a try. It even came with a cinnamon whipped cream. It sounded delicious. Cathy opted for the Granny Smith Apple Crisp, à la mode ($8.00).
When our desserts arrived I was just so happy to be able to enjoy a dessert while eating out at a restaurant. Thrilled. And my Cranberry Crème Brûlée looked beyond amazing. I was ready to dig in…and had to do the thing where I crack the caramelized sugar on top. It shattered and through the custard, I spotted the red cranberries at the bottom. One bite…I was in dessert heaven. SO good. And that spiced cream that was served with it definitely complimented the holiday flavors and added this little hint of spice and warmth to the dish. I polished it off…and was definitely full. But pleasantly so.
Holiday meals are supposed to be relaxing and enjoyable. The Village Anchor not only had a fantastic, cozy dining area, but the food was amazing. The staff was more than prepared to work around my food allergies. And they didn’t act like I was an inconvenience either. I love that the chef prepared a dish specifically for me…taking care to make it beautiful to look at and delicious to eat. Both Cathy and I were beyond impressed with The Village Anchor.
You better believe we’ll be coming back for more in the very near future. My hat is off to the staff, the kitchen, and the owners of this fine restaurant just outside of Louisville, Kentucky. I was immediately made to feel at ease about my food and knew that I was in good hands. They didn’t disappoint. And now…I’m spreading the word as much as I can. Local places are always worth checking out – but this one is something special. This one is a keeper!
As much as I love gluten-free waffles made from scratch…these days it seems impossible to find the time to actually make them. Trust me…it is an undertaking and a half. Seriously! And, my favorite homemade gluten-free waffles to prepare are…pumpkin! Yep…pumpkin. Delicious. Tasty. And we all know how much I love pumpkin flavored things. Just…YUM!!
These days, however, I just am never home long enough to actually work through the recipe and get the pumpkin waffles made from scratch. So…waffles have been off the menu. Because, regular waffles can be a task and a half to make as well. So…it’s been pancakes, Greek yogurt parfaits with fruit and gluten-free granola, cereal, and things with roasted potatoes…or just gluten-free bagels. No waffles. Not for a very long time.
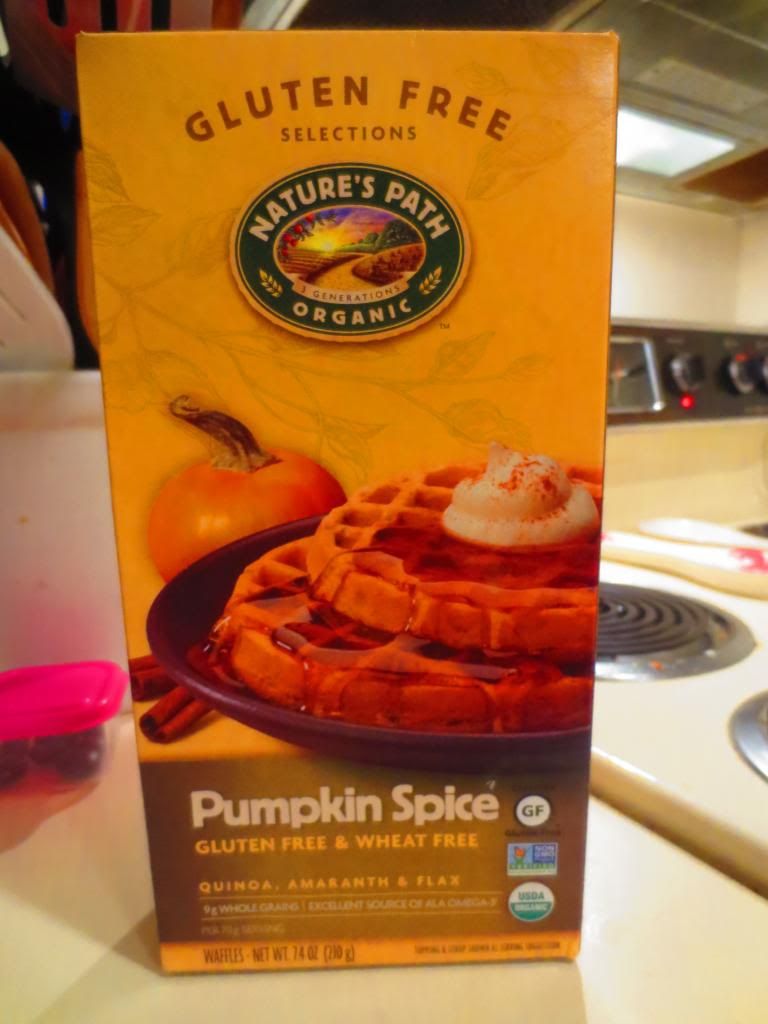
But that changed. That changed the moment I stepped into the freezer section of my local Whole Foods and spotted…one of the most wonderful things I have ever encountered in that aisle. Gluten-Free Pumpkin Spice Waffles. YES! GLUTEN-FREE PUMPKIN SPICE WAFFLES!! Shout it from the rooftop friends. I did another happy dance of joy in the aisle. I should really stop doing that…but I just get so excited!
This box of frozen waffles is made by Nature’s Path. I tried one other variety of their gluten-free waffles a year or two ago…but don’t remember too much about them. Other than that Van’s gluten-free versions blew them out of the water. For real!
But…let bygones be bygones…and…Van’s doesn’t make pumpkin spice waffles…so…HA! These were in my basket and at the register before my roomie or I could talk ourselves out of the purchase. The deed was done.
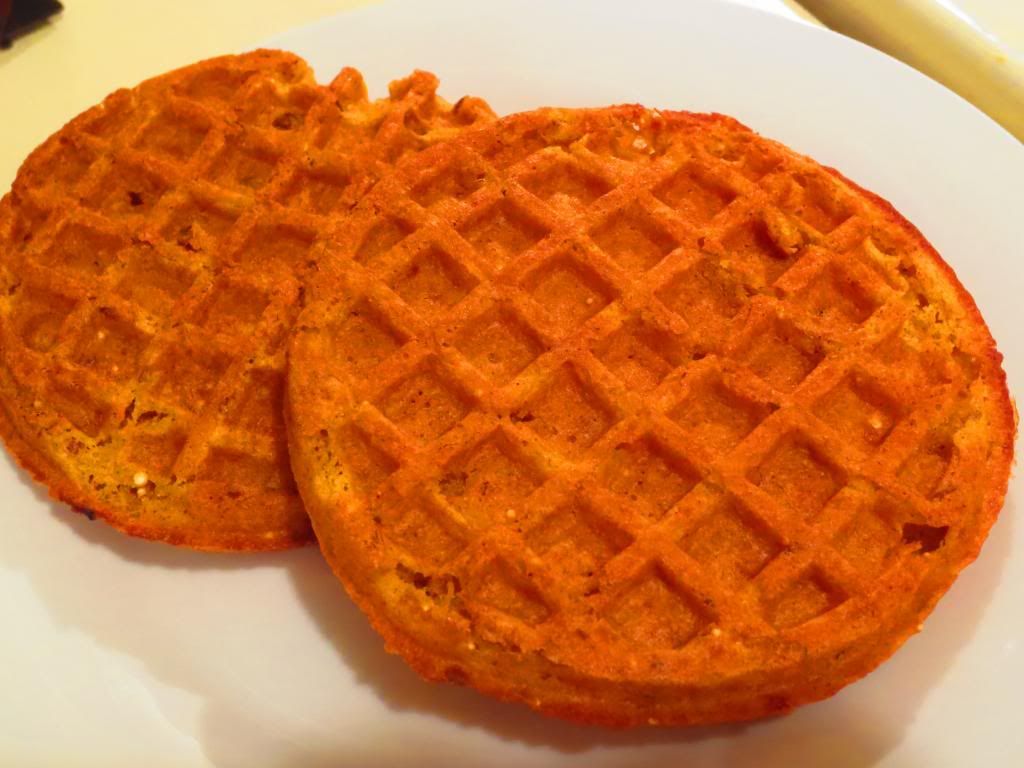
And with me taking an early morning spin class a couple mornings a week…these are the perfect thing to throw in the oven to toast while I shower off before work. And that’s exactly what I did on Friday. Friday was already crazy. I had just gotten back in town from my Christmas trip to see my family. My luggage had gone missing and was returned late that night. I was worn out…but really wanted to get a little activity in before settling back into my routine for one day. Spinning did that. And I just happen to get home right as my roomie is waking up. So, I put these waffles in the oven and went to shower. They were done just as I finished off dressing. I warmed up some of my agave maple syrup to pour over them and…just like that…brekkies was served.
Oh…these definitely made an impression on me. The pumpkin spice flavor is there…but not overpowering. There is pumpkin and then there is PUMPKIN. I love pumpkin flavors…but I want to taste the other spices too. In this case…cinnamon and nutmeg. Perfect compliments. The waffles toasted up beautifully…their orange color turning a deep golden as they reached the perfect level of toastiness. This gave them this great crunch on the outside, but that soft, steamy center that make every waffle perfect. Oh…it was bliss. Bliss in a pumpkin-y waffle-y form. These made my hectic morning easy…and super delicious. I hope these aren’t a seasonal thing because I really want to stock up!
Nature’s Path Gluten-Free Pumpkin Spice Waffles are made from water, organic pumpkin puree, organic brown rice flour, organic potato starch, organic yellow corn flour, organic soy oil, organic tapioca starch, organic cane sugar, organic potato flour, baking powder, organic flax seeds, organic soy lecithin, organic pear and/or grape juice concentrate, organic quinoa, organic amaranth, organic spices, and sea salt. Whew. It seems like a lot of ingredients, but I recognize every single one of them. That’s something. And I love how a majority of the ingredients are also organic.
So, let’s talk nutrition. A serving of Nature’s Path Gluten-Free Pumpkin Spice Waffles is 2 waffles. This pair of pumpkin waffle yumminess will serve you up 210 calories and 7 grams of fat. These waffles contain no cholesterol, have only 385 mg sodium, and 6 grams of sugar. Not too bad. They also have 2 grams of fiber and 2 grams of protein…so not too filling…but I wasn’t starving all morning either. Definitely a healthier choice for breakfast if you have to do the “from-the-freezer” grab on a busy morning. Seriously…worth it.
These waffles are amazing. I love the pumpkin flavor. I loved the texture and taste. The crunch with the warm, soft center. Oh yeah. Perfect for those busy mornings…and always good drizzled with syrup. Makes these winter mornings cozy and warm. Let me tell you…I think I’m in love with a new gluten-free waffle.
You see, one of the people I run with…a lot…had a birthday. And he also recently ran yet another marathon, making 11 for this year, I believe. Well, birthdays and marathons are things to be celebrated.
Originally, I was going to make a Boston Cream Pie to bring to the run group…but I just couldn’t figure out a way to make it dairy-free with the custard inside. Well, I could…but it wasn’t going to be easy and time was a little tight. So, I changed my mind at the very last minute, while standing in my kitchen, and instead threw together a version of the Girl Scout favorite (which I haven’t been able to indulge in since my diagnosis three years ago!). Guess what? They were a hit.
The recipe came together with a little help from Gluten-Free On A Shoestring. So, check out the recipe and give it a go. They brought back so many happy memories and made a lot of people happy that night.
Recipe: Gluten-Free Thin Mint Cookies
Gluten-Free Thin Mint Cookies
Servings: 30 larger cookies (I made 65 small cookies)
Time: Prep 15 minutes; Bake 7 minutes
Ingredients:
COOKIES
5 tablespoons unsalted butter (I used Earth Balance)
4 ounces semi-sweet chocolate, chopped (I used Enjoy Life morsels)
¼ teaspoon pure vanilla extract
½ teaspoon pure peppermint extract
¾ cup high-quality all-purpose gluten-free flour (I used Better Batter)
¼ teaspoon xanthan gum (omit if your blend already contains it)
½ cup unsweetened natural cocoa powder
¼ teaspoon baking soda
½ teaspoon kosher salt
GLAZE
½ pound dark chocolate, chopped
pure peppermint extract, to taste
Directions:
Preheat your oven to 300° F. Line rimmed baking sheets with unbleached parchment paper, and set them aside.
In a medium-size microwave-safe bowl, place the butter and all of the semi-sweet chocolate except for 3 to 4 1-1/2-inch-size chunks.
Microwave at 70% power for 45 seconds at a time, stirring in between, until melted and smooth. Add the reserved chunks of chocolate, and stir until the chocolate has begun to thicken a bit and the chunks have melted.
Add the vanilla extract and peppermint extract, and stir to combine. Set the chocolate aside.
In a large bowl, place the flour, xanthan gum (if using), cocoa powder, baking soda, salt and sugar, and whisk to combine well. Add the chocolate mixture, and mix until the dough comes together and is well-integrated. Press the cookie dough into a disk.
Place the dough between two sheets of unbleached parchment paper, and roll it out until it is about 1/4 inch thick (any thinner and the cookies are more likely to burn in the oven, and they will crack when you try to coat them in chocolate). Cut out rounds that are about 1-1/2 inches in diameter, and place them, 1 inch apart, on the prepared baking sheets.
Place the baking sheet in the center of the preheated oven and bake, rotating once, for 7 minutes.
Remove from the oven, and allow the cookies to cool completely on the baking sheet.
Once the cookies are cool, make the glaze.
Place all of the dark chocolate except for 3 to 4 1-1/2 inch-size chunks in a medium-size, microwave-safe bowl.
Microwave at 70% power for 45 seconds at a time, stirring in between, until melted and smooth. Add the reserved chunks of chocolate and the peppermint extract, and stir until the chocolate has begun to thicken a bit and the chunks have melted.
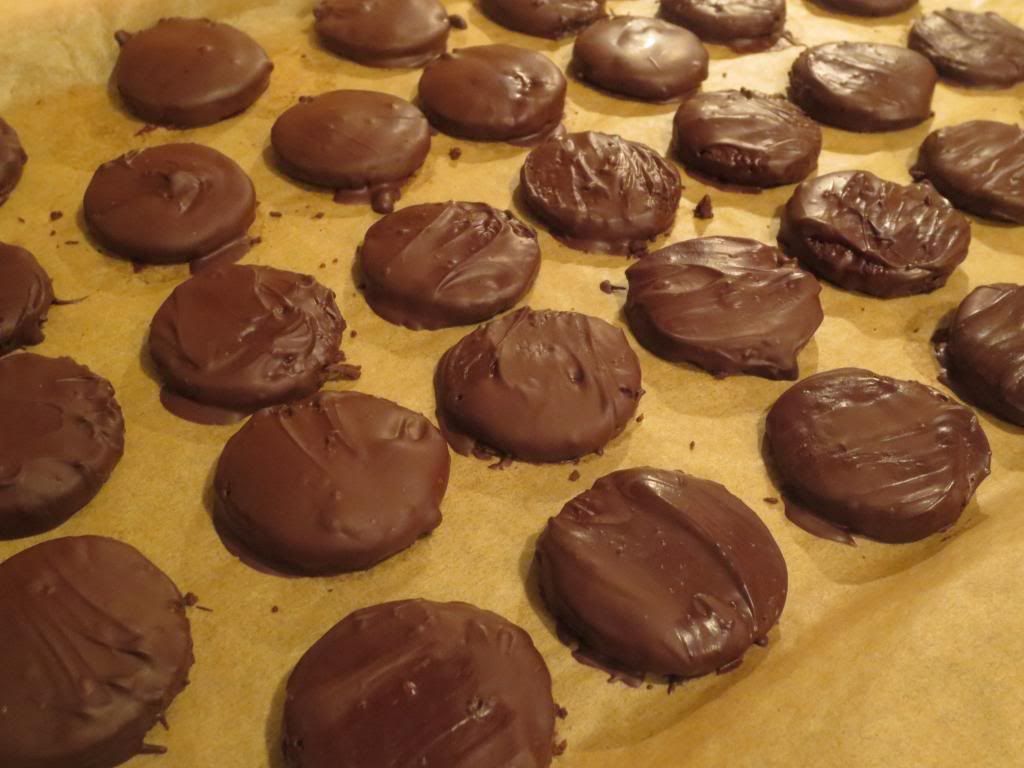
Place the cookies, one at a time, in the glaze. Press down on the cookie with the tines of a fork, then flip it gently in the chocolate. Pull the cookie out of the chocolate by slipping the fork under it and bobbing the cookie on the surface of the chocolate a few times before pulling it along the edge of the bowl and carefully placing it on a clean sheet of parchment paper. Allow the chocolate to set at room temperature.
Serve and enjoy!
~*~*~
While it has been ages since I have last been able to eat a Thin Mint Cookie (or 12 in one sitting)…these reminded me SO much of the cookies I grew up devouring. I loved them enough to have as much trouble stopping myself from eating them as I did the real things. So, from this one-time Girl Scout to all of you Celiacs and gluten-intolerant people out there…don’t give up hope. You can now make your own Girl Scout favorite in the comfort of your own kitchen.
I love Snickerdoodles. Seriously. I loved it in the winter time when my mom would bake all the holiday cookies, bars, fudge, etc…and we’d have a literal smorgasbord to choose from each night for dessert. One treat. So…make your decision wisely.
Never failed. I wanted the Snickerdoodles.
It has been years since I have had my mom’s homemade Snickerdoodles. And she will probably never make them again, sadly, since she has since had to go gluten-free as well and has switched over to eating paleo.
Lo and behold…I came up with a solution. You see, one of my running buddies is also on the paleo diet. And I love, love, love to bake goodies for my run group. I’ve been craving Snickerdoodles for awhile now, so today I decided that’s what I would make for my fellow runners. But, I wanted everyone to be able to enjoy them, so I did a little searching on the Internet.
And with a little guidance from various blogs, especially The Urban Poser, I was able to make Snickerdoodles tonight that are paleo, vegan, egg/grain/dairy-free. Gluten-Free Snickerdoodles.
They aren’t my mom’s specialty…but they are good. So, go ahead and give this recipe a spin.
4 tablespoons coconut oil, softened or liquid (5 for a softer cookie)1/4 cup mild honey (like clover) or vegan alternative (such as agave)
1 tablespoon gluten-free vanilla extract
Cinnamon coating:
1 tablespoon raw coconut crystals (I used Coconut Secret)
1 tablespoon ground cinnamon
Directions:
Preheat the over to 350 degrees F and line and grease or line a baking sheet with parchment paper.In a medium sized bowl, combine the dry ingredients; mix together well. (When measuring almond flour, use the dip & sweep method for best results. Dip the measuring cup into the loose almond flour and drag the flat edge of a knife over the top. Pouring the flour directly into the measuring cup can result in too much or even too little almond flour in the recipe).In a separate bowl, mix together the oil, honey and vanilla. Add the wet ingredients to the almond flour mixture and stir until combined.
In another small bowl, combine the coconut sugar crystals and the ground cinnamon in a small bowl.
Using a rounded tablespoon, scoop out the dough, then gently form into a ball. Roll the dough in the cinnamon mixture.
Place the balls of cookie dough on a parchment lined baking sheet, about 3 inches apart.
Using a mason jar or your hands, slightly flatten each cookie.
Bake the cookies for 8-9 minutes. Leave the cookies on the cookie sheet while cooling. They may seem under-baked at first, but they will firm up to just the right texture as they cool.
Dig in and enjoy!
~*~*~
So, they aren’t my mom’s Snickerdoodle cookies…but these do come out sweet, thin, crackled and chewy. Not cake-y, which so many Snickerdoodles tend to be when sold in stores. These remind me of how my mom’s used to cook up. They don’t taste the same…but they are totally Snickerdoodles in their own right.
I’ve been wanting to poach pears for a long time. I see those celebrity and television chefs do it all the time. Then they serve it up all pretty with ice cream or this rich sauce.
I did neither of those last things.
But, thanks to having a bunch of pears, compliments of my CSA bin, and no more cookies left in my apartment…I figured…why not give poached pears a shot. Usually done in a dessert wine…I opted for something I had in my fridge…apple cider.
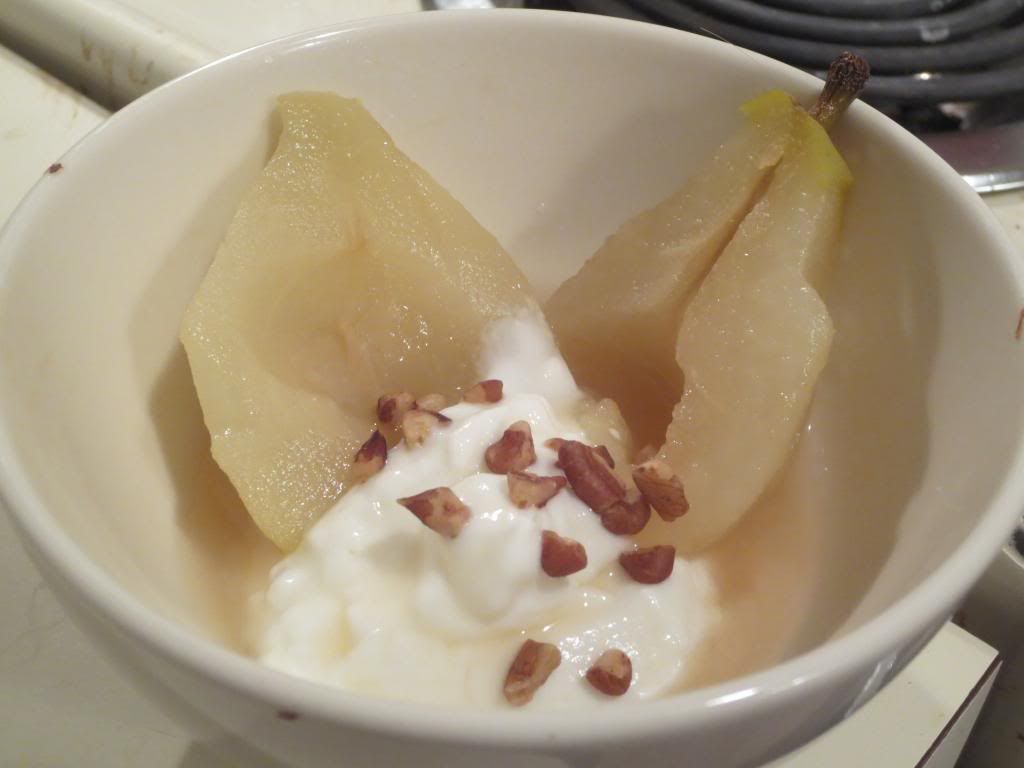
It was fantastic! My roomie is still raving. And that means a lot since she’s not a big fan of pears. But this was a simple, light, and quite nutritious dessert tonight. Easy to make as well. Here’s what I did…
2 cups apple cider (NOT apple juice)
1 cinnamon stick
1/2 tsp vanilla
2 pears, pealed, halved, cored
1 tsp arrowroot powder or cornstarch
Directions:
In a small saucepan, add the 2 cups of apple cider, vanilla, and cinnamon stick. Bring to a simmer.
Add the pears, flat side down, in the saucepan.
Simmer for about 10 minutes, until they are fork tender. Do not leave them in too long or they will get mushy.
Remove the pears from the saucepan. Using the cider in the pan, add the arrowroot or cornstarch and bring to a boil to thicken.
Place pears in a bowl with a scoop of vanilla Greek yogurt (or ice cream), then top with the apple cider sauce. Sprinkle with granola or nuts for a little texture and serve.
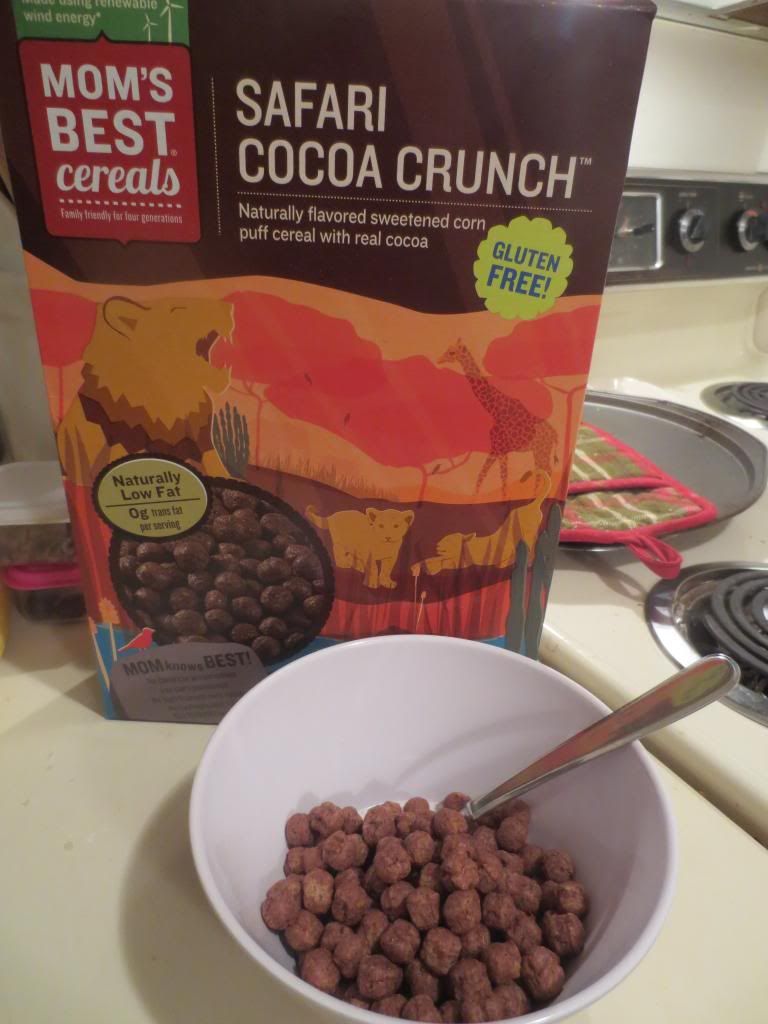
Product: Mom’s Best Gluten-Free Safari Cocoa Crunch – $2.49+
Remember those adds with Sonny the Cuckoo Bird declaring, “I’m cuckoo for Cocoa Puffs!”
I ate it up as a child. As did I devour said chocolatey puffy cereal. Actually, I think my dad enjoyed them way more than we kids did, because he’d eat the entire box if we weren’t watching him. Says something about that chocolate, sugary rush in the morning, yes?
Well, aside from a couple varieties of chocolate rice puffs…anything remotely close to Cocoa Puffs was nonexistent in the gluten-free cereal world.
Or…so I thought.
Enter…The Roomie.
You see, every now and again, I get into my kitchen to start on a meal…and discover that I am missing an ingredient. So, the roomie is normally kind enough to allow me to do more prep work while she runs down to the grocery store to get what I need. And every now and again, she returns with a wonderful new gluten-free product for me to try. This was the scenario the day she came home from the grocery store with…basically gluten-free Cocoa Puffs.
The brand is Mom’s Best…and I’ve had their Crispy Cocoa Rice cereal (basically…chocolate Rice Krispies) before…and loved then. Loved everything about them but the sugar content. But…let’s face it. I’m having chocolate for breakfast.
That’s basically how it works with the Mom’s Best Gluten-Free Safari Cocoa Crunch as well. At first…the amount of sugar was a concern…but I let it go. I tend to obsess over some things…and while watching my sugar intake is important, it isn’t life-threatening if I go over a certain amount. I just try to keep it in check…and I never seem to be able to. But…setting all that aside, this morning I opened up the box of the Safari Cocoa Crunch, and poured myself a serving. These little chocolate puffy balls of cereal looked so much like Cocoa Puffs, I might have squeed a little in delight. Maybe.
Okay…I did.
But even more so after tasting them. I popped a couple pieces of them dry…to get just the flavor on their own. Oh…my chocolate gods of cereal bliss…they were fantastic. Light…crispy…chocolatey…everything this chocoholic could have asked for and more. Chocolate in the morning…yes please! Sign me up. I then ate the rest of the bowl with a small pool of unsweetened almond milk. Fantastic. I might…might…have slurped up the extra milk, now rich with chocolate, at the bottom of the bowl. There is a good possibility it happened.
These were better than I even remember Cocoa Puffs tasting. However…it’s been a very long time since I’ve had cocoa puffs…so…keep that in mind.
But…OMG…YUMMY!!!
So, let’s get down to the ingredients and nutrition portion of this blog, shall we?
Ingredient wise…Mom’s Best Gluten-Free Safari Cocoa Crunch is made up from sugar (ugh…yes…that is the first ingredient!), corn meal, corn flour, corn syrup, coconut oil, corn bran, cocoa, caramel color, salt, calcium carbonate, canola oil, natural flavor and trisodium phosphate. So…not really the best option…and there are a few chemical sounding ingredients, despite the fact that the box declares that there are no flavors or preservatives that you can’t pronounce. Okay…I can pronounce them…doesn’t mean I know what they are. This cereal, however, does not contain high fructose corn syrup or hydrogenated oils. It is gluten-free as well.
A serving of Mom’s Best Gluten-Free Safari Cocoa Crunch is 3/4 cup. In this serving, you will be consuming 120 calories and 2 grams of fat. That really isn’t too bad for a chocolate cereal. You will be provided with 110 mg sodium and a whopping 14 grams of sugar. Again…it’s a chocolate cereal. I’m going to try not to obsess over that. Unfortunately, this cereal will not leave you feeling full, as I found out this morning. It has only 2 grams of fiber and 1 gram of protein. I ate my bowl before heading to the gym and I was already starving 30 minutes into my workout. So, it won’t stick with you. Then again, it’s mostly sugar…so there is a reason.
Overall though…really, really tasty. I love chocolate and it’s nice to treat myself every now and again to a sinfully sugary cereal. I don’t make a habit of it…but this one was totally worth it. Really good. Mom’s Best has once again bested the sugar-addict in me…and made me fall in love with yet another chocolate breakfast treat.