By now…many of you know that I am obsessed with quinoa. I mean…obsessed with it. It is always in my pantry, ready for me to cook up, fluff up, and serve in a variety of ways. It is so versatile and can be used not only in cooking, but in baking too. This ancient grain is a protein powerhouse, something that I love about it. And it cooks up quicker than rice…and is way better for you too.
But…sometimes I just need something easy for dinner. Something I can just throw on the stove and not have to do anything else too. That’s when Nature’s Earthly Choice steps in with their handy-dandy boxes of Easy Quinoa. I picked up all four varieties that were available last year when I was in Minneapolis, Minnesota. Why? Because I had never seen this item before in any of my grocery stores (a few of my natural food stores now carry these) and…it was quinoa. QUINOA!!
Yes…that did say last year. I was in Minnesota to run a race and spend time with my family…and as a reward for doing so well on my run…I picked up some items I had never seen before. Or even heard of for that matter. These little boxes of quinoa goodness were just some of what ventured home in my luggage. As I have tried two of the four varieties so far, you will recall that one was a hit and one was a miss. So…the other night as I was prepping to head out for a fun run with my running group in Louisville, I needed something easy to make and easy on the stomach.
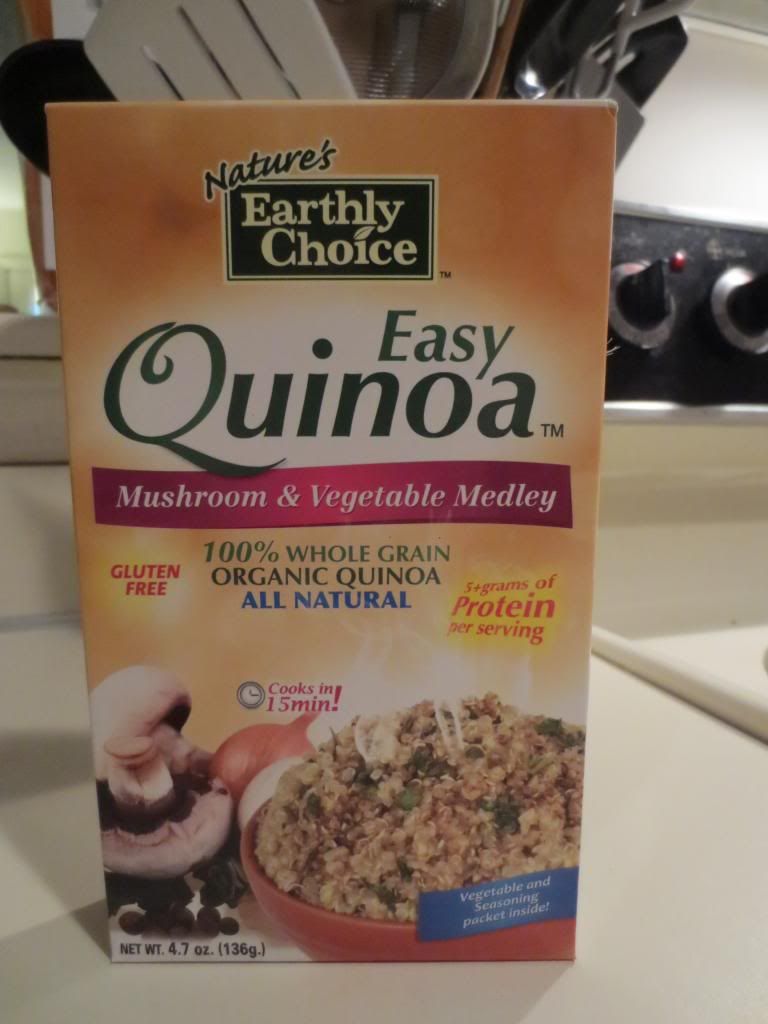
I pulled one of the Easy Quinoa boxes out of the pantry and hoped for the best. My selection: Mushroom & Vegetable Medley.
Sounded appetizing enough. I love mushrooms. I love veggies. I love quinoa. Had to be something to it, right?
Cooking this up takes about 20-25 minutes total. Something I didn’t consider when I thought I would be reaching for something quick. I sort of missed my group run and ended up running it on my own…by myself. Ah well.
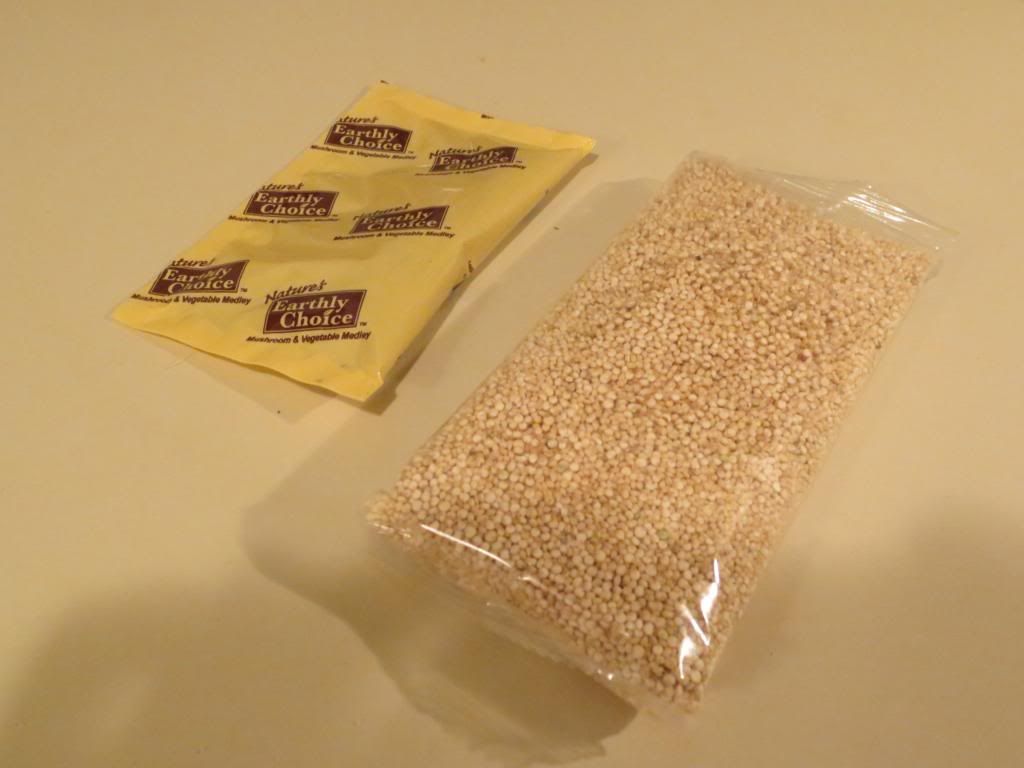
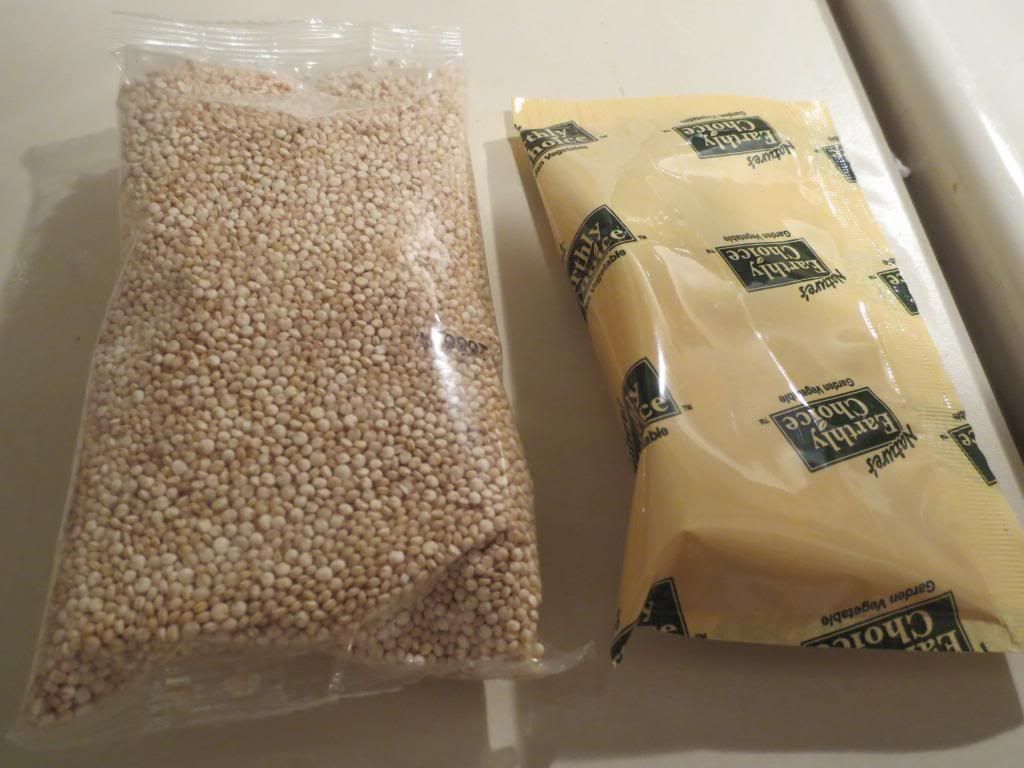
Quinoa and seasoning packets for Nature’s Earthly Choice Mushroom & Vegetable Medley Easy Quinoa
As I was saying, once the water is boiling, the rest is easy. But you do need to account for the time it takes to bring the water to a boil. In a saucepan, add 2 cups of water and the pouch of quinoa and bring it to a vigorous boil. Reduce the heat to a simmer and add the vegetable and seasoning packet. Give it a good stir so that everything blends together well. And then you just let the quinoa cook until it is tender and chewy (white spiral threads appear around each grain) and all the water is absorbed. Remove the pan from the heat and give this mixture a good fluffing with a fork.
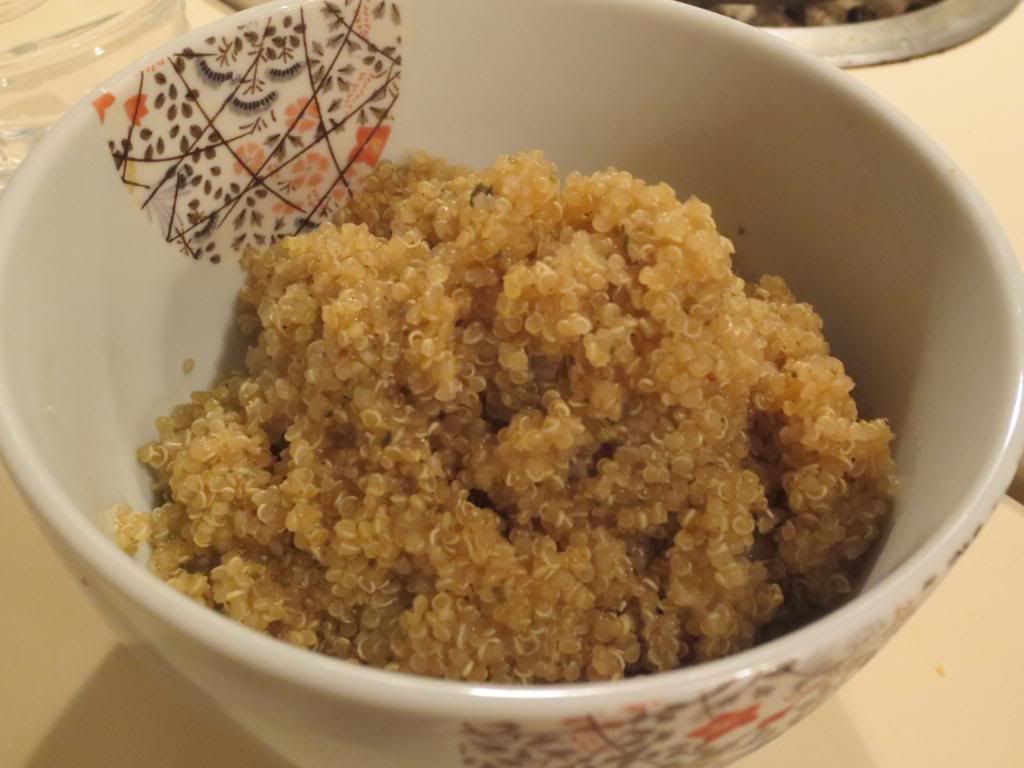
Dish into bowls and settle in to eat. My roommate and I split the box between the two of us…but there are 3.5 servings per box. With this already being mentioned, I might as well hit you up with the down and dirty nutritional facts. One serving will provide your body with 160 calories and 2.5 grams of fat. The sodium content for something that comes from a box is very low, topping off at 230 mg per serving. You get 3 grams of fiber and an amazing protein hit of 6 grams. Awesome.
Every ingredient is something that I recognize. These include: quinoa, potato starch, onion powder, mushroom extract, dry milk, salt, yeast extracts, sugar, olive oil, soybean oil, garlic, tomato powder, glucose syrup, maltodextrin, celery flakes, spices, natural flavorings, citric acid.
So…how does this concoction of quinoa and dried veggies and spices taste? Better than I thought it would. The entire time it was cooking, I kept thinking that it smelled like chicken noodle soup…or some soup of that respect. It had a really great taste to it though. The onion and the spices really shine. I didn’t really get the mushroom flavor, but I’m sure it was blended in there. What mattered was how good it was. It had this savory, slightly salty flavor in each bite. The quinoa was cooked to perfection. And the flecks of veggies throughout the mix rehydrated really well when added to the water and allowed to cook into the quinoa. Everything just worked together really well and provided a distinct, and delicious flavor.
You could easily bulk this up into a main dish by adding a protein of choice (for me…tofu…for others, perhaps chicken, shrimp, beef or pork). Or…adding some sauteed vegetables or even some potato might really turn up the volume. The possibilities are endless…and that’s what is so great about Nature’s Earthly Choice Easy Quinoa. And, while the Sundried Tomato Florentine is still my favorite, this one is definitely a close second. I only have one more variety to try…and I’m really looking forward to it.
Search for these at your local grocery stores and/or natural food stores. Cook up a delicious protein-filled side or meal in no time flat. Yep…it really can be that simple.
So, I got a little impulsive when I was at Annie May’s Sweet Café on Saturday morning. It happens. Especially after a good race. And even more so after having not been to the cafe for two weeks. Two long weeks. UGH! Way too long to be away from my favorite place to grab food that I know I can safely eat. But, I’m finally back in town for a little while and that means…I’m back to my routine.
After running a great 5K race in Louisville on Saturday, my roomie and I headed to Frankfort Avenue and pulled up (FINALLY!) into Annie May’s Sweet Café parking lot. It was breakfast sandwich time. And as we were sitting there noshing on our delicious breakfast (which also included an allergen-free doughnut…because…they are doughnuts and I love them!), Cathy spotted a bag of dinner rolls up on the top of the bakery case.
While we were polishing off breakfast, she asked if I wanted to get them to try. I gave her that, “Are you really asking me that?” look and nodded my head while happily stuffing my face with more of the allergen-free vegan breakfast sausage sandwich. With that decided and our breakfast consumed, we went to the bakery case (where I resisted ordering one of the amazing chocolate chip cookies…despite really, really wanting one) and just snagging up one of the two bags of the allergen-free dinner rolls. We went to the register, paid for them, and went on our way.
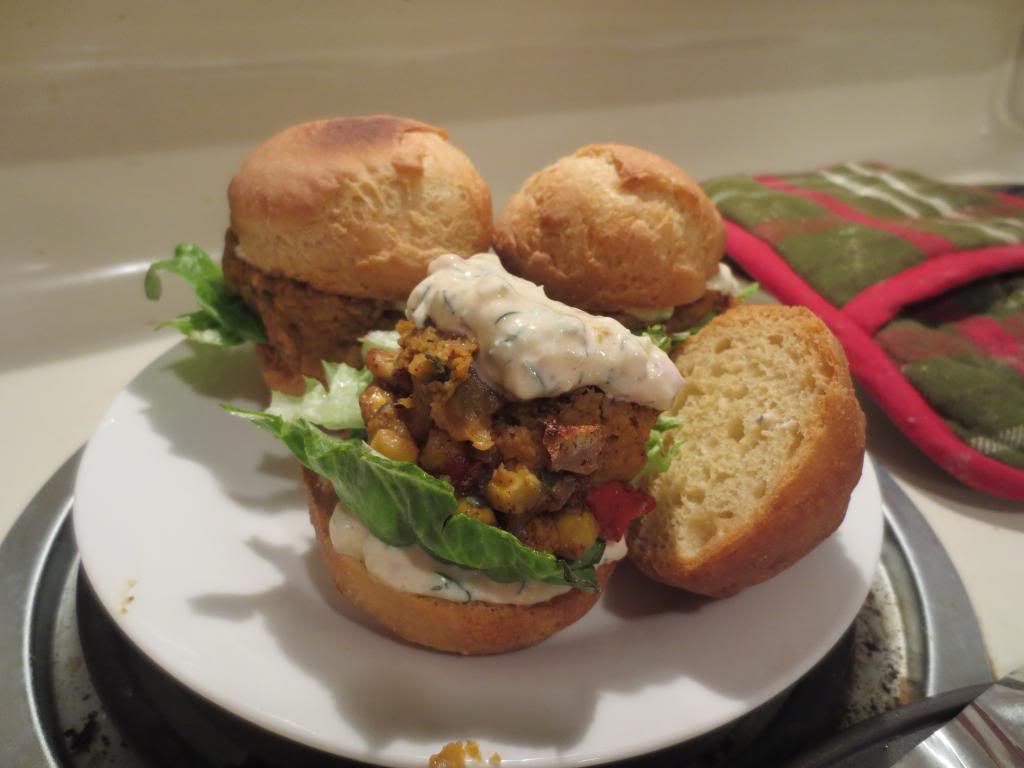
I had no idea what I was going to use them for at that point. But my roommate had suggested I make tzatziki with the cucumbers I got in my CSA bin. And I had these gluten-free and vegan pablano chickpea patties in my freezer so I thought…why not make sort of a mock falafel slider? These dinner rolls would definitely make the perfect slider buns. Saturday we indulged in both Annie May’s Sweet Café and then gluten-free crepes from Sweet ‘N Savory Food Truck at Louisville’s Buy Local Fair. So, we were pretty full upon returning home that day. But…that’s what Sunday’s are made for.
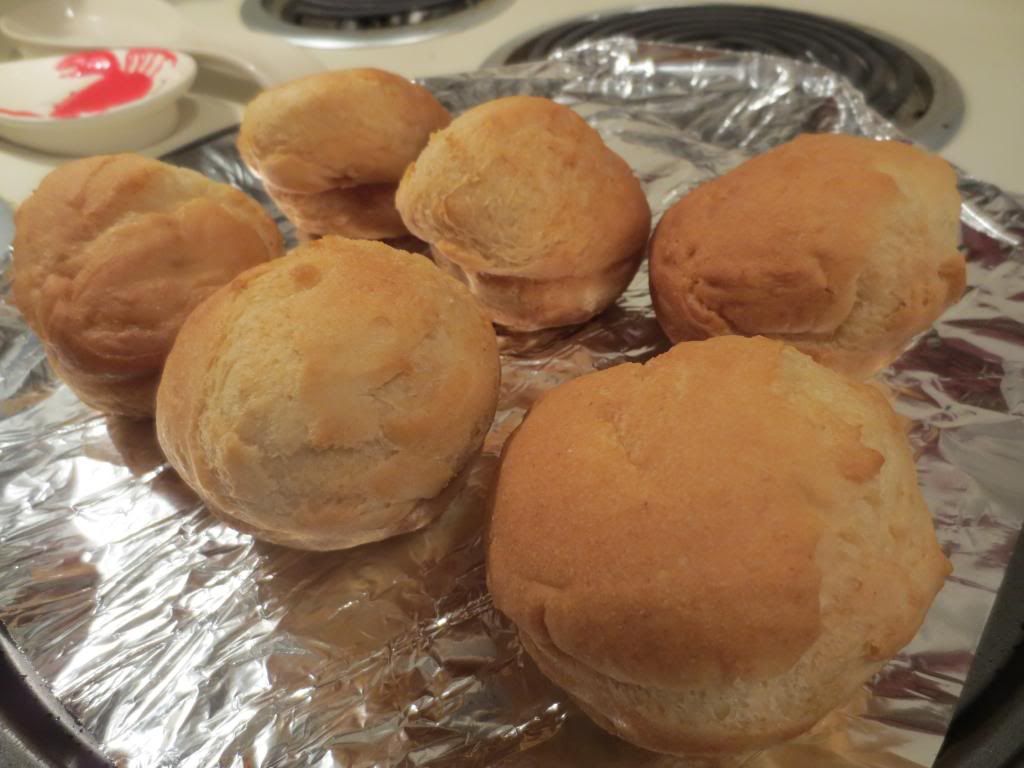
Sunday evening, I made up my homemade tzatziki and then got the poblano chickpea patties into the oven. While they were starting to cook, I got the bag of dinner rolls off the counter and undid the tie. I pulled out all six of the dinner rolls (carb happiness, yes?) and put them all on a baking sheet. When the chickpea patties were about halfway done, I slid the dinner rolls into the oven to toast for about 15 minutes at 350°F, just to get them golden crispy on the outside. I did make sure I watched them though, as I didn’t want them to burn. The chickpea patties and rolls finished at the same time. I let them both stand for a minute while I sliced up a leaf of romaine lettuce and pulled the tzatziki out of the fridge.
Annie May’s Sweet Cafe Allergen-Free Dinner Rolls
Now…the fun part. I sliced each of the dinner rolls in half. They were so soft and steamy on the inside. They looked absolutely fantastic. It was definitely food porn of the drool=worthy type. I placed a dollop of tzatziki on each bottom half of the dinner roll, added some lettuce, put 1/3 of each patty over the lettuce, topped it off with a little more tzatziki, then put the top of the dinner roll over it. BAM…instant mock falafel sliders. All gluten-free. LOVING it.
But, the real test would come with the dinner rolls. How would they hold up? How would they taste?
I should have known, given that these came from Annie May’s…that they would be epically awesome. I never doubted it for a moment, to be honest. One bite…and I knew that these little dinner rolls had to come to Thanksgiving with me this year. They were soft to begin with, but I wanted to be sure they could hold up to the sliders I was making. So, just that short time in the oven and they got this golden crispness on the outside, but remained soft on the inside. It was dinner roll perfection. And, they didn’t hollow out. You actually got an entire dinner roll. They were light and fluffy on their own, without skimping on the bread part on the inside. They tasted awesome. Perfect. And completely allergen-free.
Annie May’s Sweet Café lists the ingredients for these allergen-free dinner rolls as millet flour, sorghum flour, tapioca starch, quinoa flour, water, olive oil, egg replacer, agave nectar, apple cider vinegar, and xanthan gum. I recognize all of those ingredients and think that they have really hit the nail on the head when it comes to their bread mix. The flours they use just bake up beautifully. Light. Not dense. Not heavy. And perfect. I was in love with every bite. And I meant it when I said I would buy a dozen or so of these for Thanksgiving, which I am hosting this year and keeping gluten-free…because that’s how my kitchen is.
A big shout-out to my local gluten-free bakery, Annie May’s Sweet Café for once again bringing me allergen-free perfection. This time…in the form of a simple dinner roll. Sometimes it’s these little things in life…these little kitchen miracles I bring home from your business…that make my gluten-free life so much more amazing. I love you…and can’t wait to try more of your goodies that I have yet to try. Until then…see you on Saturday for breakfast.
Mock Falafel Sliders made using Annie May’s Sweet Cafe Allergen-Free Dinner Rolls and Moo Moo’s Vegetarian Cuisine Vegan & Gluten-Free Poblano Chick(pea) Patties
I’m leaving tomorrow for a trip. Immediately following work. Which means, tonight will consist of me doing laundry, packing, and generally running around like a stressed out lunatic until I feel I have everything in order and where it needs to be.
Welcome to my life.
That being said, I needed dinner to be of the hassle-free variety this evening. And, thankfully, my previous journey to Minnesota (that’s where I’m heading) led me to the discovery of these little boxes of protein-packed, quinoa goodness. Yep…it was another meal-out-of-a-box night for my apartment, but, as long as the food that comes out of the box is good…it’s not a big deal.
This meal-in-a-box just happened to be another Easy Quinoa meal by Nature’s Earthly Choice. For those of you wondering…yes…I ate one last night too. But, when sell by dates approach and you are going insane trying to prepare for a trip…you do what you can with what you have. And I happen to have some stress-free stuff in my pantry. Every chef needs those from time-to-time…trust me.
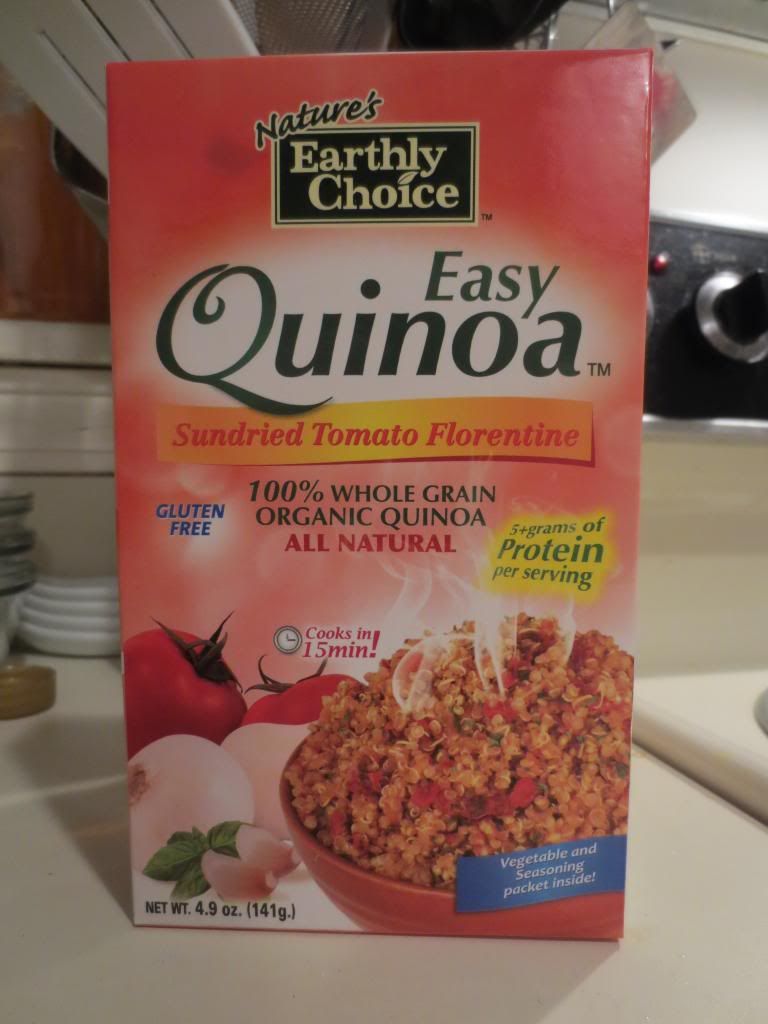
Tonight’s flavor…Sundried Tomato Florentine. Sound intriguing? It should. Unlike the Garden Vegetable version that I had last night, I felt that the Sundried Tomato Florentine had a lot more flavor. It was definitely not as bland as I found the previous one. Thank goodness.
Nature’s Earthly Choice Sundried Tomato Florentine Easy Quinoa is a good, healthy choice for a dinner. The ingredients are simple, yet packed with flavor, including quinoa (of course), dehydrated sundried tomatoes, potato starch, onion powder, dry milk, salt, yeast extract, garlic powder, spinach, paprika, and spices. Nothing that screams chemical. Nothing that is impossible to pronounce or recognize without looking it up online. Simple, natural ingredients. You have to love that. And without all the preservatives and chemicals, what you get in the end is an amazing clean flavor.
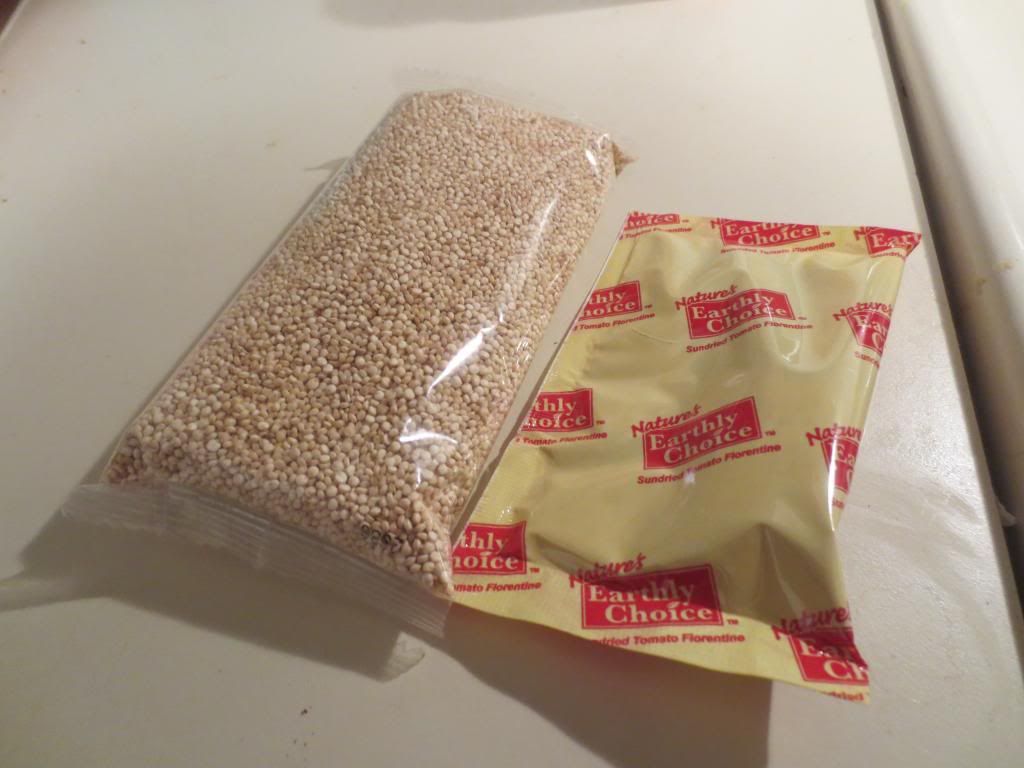
Quinoa and seasoning packets for Nature’s Earthly Choice Sundried Tomato Florentine Easy Quinoa
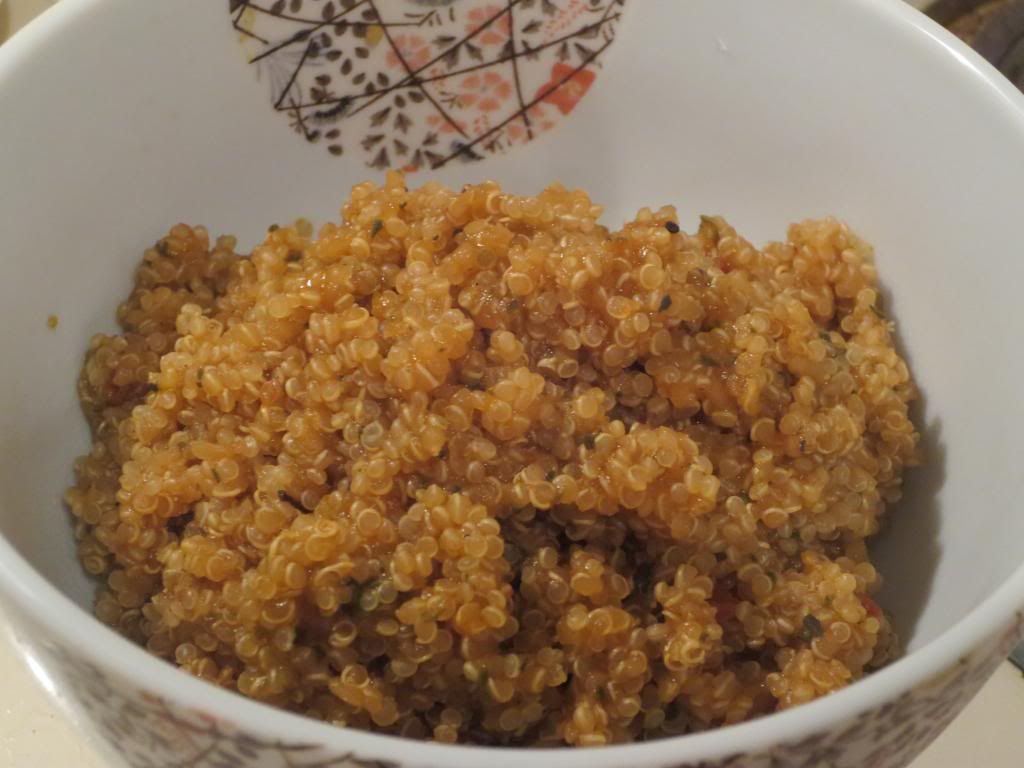
I thoroughly enjoyed the rich tomato flavor that came with the small dehydrated sundried tomatoes. It really brightened up the quinoa. I told my roommate she’d probably really love it if I dropped pearls of fresh mozzarella cheese throughout it. She totally agreed. But, on its own, the Sundried Tomato Florentine Easy Quinoa really, really tasted good. It had bolder flavors, and definitely felt like the seasoning was spot-on for this one.
Nutritionally speaking, not bad either. My roommate and I split the box as we were eating it as our entree (with a side of steamed broccoli with some lemon pepper dusted on top). Even doing that, our calorie total was under 270 calories each. How about that?! However, if you are going to go by the serving size, you get about 3.5 servings per box. Each serving (about a cup, cooked) will set you back 150 calories and 2.5 grams of fat. Awesome, yes? You get 3 grams of fiber and 6 grams of protein in each serving as well. This is a low sodium food, a serving only containing 230 mg. The Nature’s Earthly Choice Sundried Tomato Florentine Easy Quinoa is cholesterol free, trans fat free, and saturated fat free. Loving it?
You should be. And, if you like a light, but rich tomato flavor…then this is a great way to get it without slaving over a stove. Two cups of water, the pouch of quinoa, then the seasoning. Boil, let it simmer until the water is absorbed. Serve. It took about 20 minutes on my stove top and while it was cooking, I was able to get a few other things done that needed to be done. On a night where multitasking is key…that was helpful.
I found that I truly enjoyed each spoonful of the Nature’s Earthly Choice Sundried Tomato Florentine Easy Quinoa. It wasn’t heavy…but it was filling. The tomato flavor complimented all the other spices and vegetables, without overpowering, but was definitely the star of the boxed meal itself. I devoured it in record time, partly because I was hungry, and partly because it tasted really, really good.
Find these boxed delights at your grocery store because they are certainly worth it. Especially on those nights where you’d rather do anything else than spend the night in the kitchen preparing dinner. Easy, fast, and delicious. Perfection.
I’m a sucker for quinoa. There…I said it. It’s not only a fantastic whole grain, but it is packed with protein that this runner girl needs. For real. But…sometimes I don’t feel like doing all the seasoning, flavoring, and pairing on my own. Not that it’s difficult…I just sometimes don’t want to do it.
Thankfully, quinoa is becoming one of those products that is exploding on the market place. While in Minnesota last year for a race, I was browsing the gluten-free selections at the local Cub Foods near my grandpa’s home. Lo and behold, I discovered four different flavors of this easy quinoa in a box-type meal. Sort of like Rice-A-Roni…but made with quinoa and better ingredients (you know…like real, recognizable ingredients and no partially hydrogenated oils…and no gluten…no gluten!).
I, honestly, have been wanting to crack these boxes open for awhile now, but I’ve got a bit of a backlog in my gluten-free pantry. But…tonight, that all changed. My original plan for tonight was going to be tofu nuggets with carrot fries. The problem was…my tofu was no longer good. Dang it. So, I had to go to Plan B. I had no Plan B. So it was either thaw some gluten-free bread and make a vegan grilled cheese sandwich, or…dig around a little.
I knew these were up on a shelf and coming close to their sell by date. That being said…I now had a new plan for dinner. Plan B was now cooking up a box of the Nature’s Earthly Choice Garden Vegetable Easy Quinoa.
Easy…is putting it mildly. This is basically a meal that prepares itself. Honestly.
Quinoa and seasoning packets for Nature’s Earthly Choice Garden Vegetable Easy Quinoa
Took cook on the stove top, simply put 2 cups of water and the quinoa from the pouch inside the bag into a medium saucepan. Bring the contents to a vigorous boil and then reduce the heat to a simmer. Open the other pouch, which contains the seasoning mix, and add it to the water. Stir well. Continue to let it cook until the quinoa is tender but still chewy, and white spiral-like threads appear around each grain. Usually this is when the water is completely absorbed. This took about 15-20 minutes for me. Remove the pan from the heat and fluff the quinoa with a fork. Good to serve.
I made a quick honey-chili dipping sauce for my carrot fries that I roasted in the oven, and dished up this quinoa dish for myself and my roomie to enjoy for dinner. It’s a good thing she’s used to me doing stuff like this. Needless to say…we settled in to dinner and tucked our spoons into our bowls for tasting purposes.
All around, I’d say that Nature’s Earthly Choice does a decent job with this quinoa blend. You get chunks of vegetables (which were dehydrated in the seasoning pouch and include sun-dried tomatoes, carrots, celery, spinach, dehydrated bell pepper) throughout the quinoa itself, giving it a little color and a bit more depth of flavor. Which…it needs. While this was certainly a tasty dish, I found it to be a little on the bland side. The fact that this is a low sodium choice is a good thing, but a little touch of salt would have probably benefited this flavor immensely.
That being said, it was tasty and very filling.
My roommate and I split the box in half and made a meal of it. Even doing that, the calorie count for each of us was still under 300 calories.
A serving size of Nature’s Earthly Choice Garden Vegetable Easy Quinoa is about a cup, cooked. This will set you back only 150 calories and 2.5 grams of fat. There are only 260 mg of sodium in a serving. And with that, you also get 3 grams of fiber, only 3 grams of sugar, and a whopping 6 grams of protein. Awesome. This product is completely gluten-free.
So, I wasn’t as blown away by it as I anticipated, but it was still really good. And, for people who are minding what they eat, or trying to add less sodium to their dishes, this is a great way to do it. Plus you get additional nutritional goodness in the process. I’d buy it again, sure…but I might toss some tofu or a sauce with it, just to liven it up a little.
But…on the whole…not a bad product at all. Quinoa is one of my favorite grains for a reason. It’s nice to change it up from rice every now and again, yes? Why not do it with the nutritional powerhouse that is quinoa. And, make it easy on yourself…let Nature’s Earthly Choice dress it up and flavor it for you. Just cook and serve. Easy…and yummy.
Restaurant: The Pfunky Griddle, Nashville, Tennessee
As a gluten-free vegetarian, sometimes eating while on the road can be a challenge. Fast food joints don’t work for me. And I’ve never been big on fast food regardless. This often means, especially when I travel to visit my family, that finding a restaurant to stop and eat is a priority. Thankfully…in this brave new world of smart phone apps, there is an app for that.
Find Me Gluten Free.
If you have not put this app on your phone…do so now and then continue reading this blog. I’ll wait.
…
Okay…congratulations! Your dining life just got a lot easier. Trust me.
The midway point between my home and my parents home is…Nashville, Tennessee. There is no shortage of places to eat in Nashville. There are also plenty of places that have gluten-free options. Normally, we’d probably make it easy and stop off at Taco Mamacita or even go to McCreary’s Pub in Franklin, Tennessee. But…while I know there are things I could eat at either one of those places (McCreary’s does not have a gluten-free menu, FYI, but Taco Mamacita does), I just wasn’t feeling the usual haunts. So this necessitated a search.
And naturally…I find a place that specializes is…breakfast and brunch.
When breakfast is your favorite meal of the day…this is one hell of a find. It had brilliant ratings on Find Me Gluten Free, so my roommate and I decided we would stop there on the way home and dine on some pancakes for lunch. Breakfast for lunch. Yep…my favorite way to eat.
The Pfunky Griddle is located on Bransford Avenue in Nashville, Tennessee. This is a quaint neighborhood with houses done up into businesses and offices. My kind of area. Parking, however, was a nightmare. We arrived sometime just after noon and there were already parties of people standing around outside. No parking was available in the lot, so Cathy dropped me off to go check on the wait time and she went to circle around and see if she could find somewhere to park. I ducked into the building and stood in a short line at the front where the coffee drinks were being made. I asked about wait time for a party of 2 and was told it would be about 25 to 30 minutes. That wasn’t unreasonable, so I put my name in and went to go see if I could find Cathy and tell her. She had just managed to find a parking spot, so we stood around outside for a moment before I asked if she’d like some coffee while we waited.
The Pfunky Griddle’s Honey Child Latte with Almond Milk
Caffeine while on the road is never a bad thing. And…The Pfunky Griddle has almond milk. Could I love this place any more already? Is it possible? After giving it a little bit of thought, Cathy agreed that caffeine might be a good idea (DUH!) so I told her I would treat us to our café order. She went with a Peppermint Mocha with skim milk ($3.75). As for me…I went with something that I couldn’t get anywhere else. Not that I’m aware of, anyway. Stepping away from my order of a Cafe Au Lait for a moment, I opted for what they call a Honey Child Latte with almond milk ($3.75). The Honey Child Latte is a double shot of espresso, combined with honey, cinnamon, vanilla and your steamed milk of choice. Never heard of anything like it…but it sounded epically delicious. So, I had to have one. Besides, I can get cafe au laits anywhere. This was something I had only seen here. Why not go for it?
The coffee orders were backed up, so it took around five minutes to get our actual drinks. No worries though, Cathy and I weren’t in any hurry. And it gave both of us time to stand in line to use the bathroom before getting seated. Her peppermint mocha was up first, and she commented on how awesome it smelled when I passed it off to her. My Honey Child Latte was up next and when I received it…I couldn’t wait to try it. Photos first…then the taste test.
One sip and I was in love. The combination of the rich espresso worked so well with the spice from the cinnamon, the sweetness of the honey, and the smooth vanilla after tones. It all just meshed so well. Love at first sip. I even made Cathy try it and even she commented on how delicious it was. Smooth, dreamy, and sweet. Just how I like it!
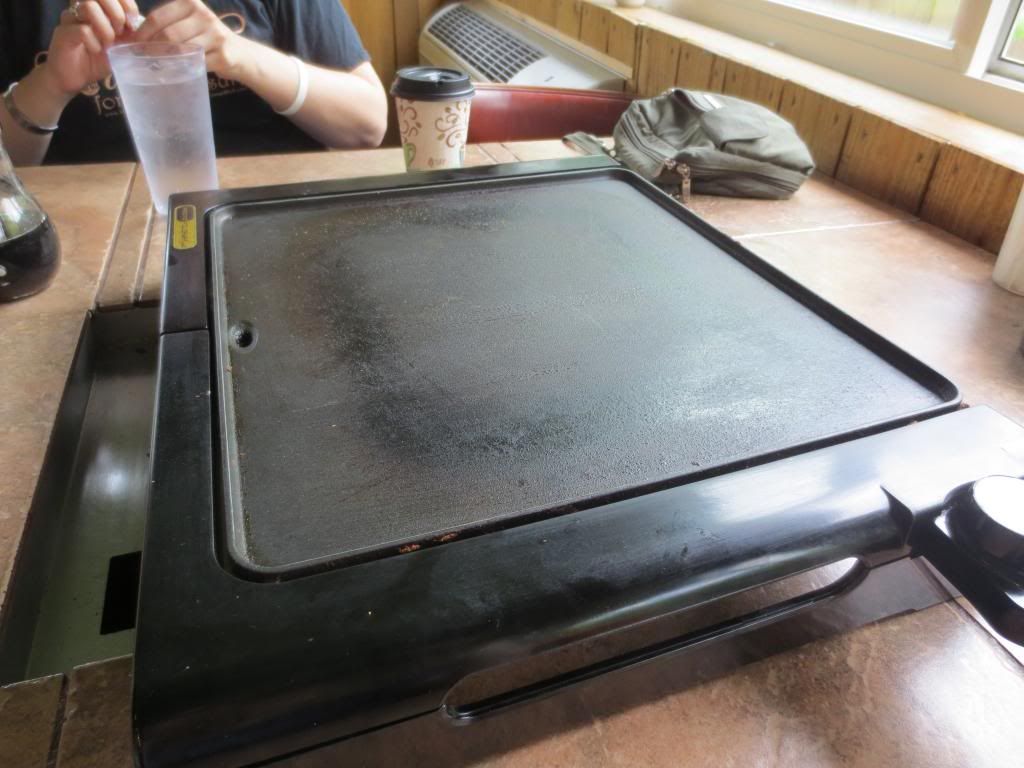
Dedicated gluten-free griddle (placed over the one built into the table) at The Pfunky Griddle
I was about halfway through my latte when my name was called. We eagerly followed the hostess to our table in the back room near the window. The table was outfitted with a griddle in the middle because at the Pfunky Griddle…you flip your own pancakes, bitches! Sorry…but it’s a really, really awesome concept. As we were handed menus, I looked at Cathy and said, “I don’t know what they are going to do, but I need this hot griddle completely cleaned…or I can’t eat on it. Cross contamination.” She nodded and went back to the menu…and lo and behold…there at the bottom was a note that said if you were a Celiac, a special griddle would be provided for you.
I admit…I smiled. I smiled a lot. I was already feeling better about the situation. Our waitress came over to take out drink orders. As we both still were downing or pre-game coffee drinks, we opted for water. Cathy went ahead and told her that I was a Celiac…so the waitress said she would send someone out with a new griddle for us. A few moments later, one of the other employees was flipping off the griddle in the center of the table and putting a new griddle across our table. He had it wiped down and left it there. I felt a whole lot better.
And, when eating at The Pfunky Griddle…you get something you put on that griddle. Cathy and I already had our mind made up. They have an all-you-can-eat pancake deal going. So, we opted for that. We got the gluten-free pancakes ($6.99 per adult per person, including 1 topping each). Cathy chose chocolate chips for her included topping and added walnuts for another option ($0.75). For my included topping, I went with blueberries, then added bananas for an additional choice ($0.75). As we were really hungry, we each got a side with our pancake order. Cathy opted for the 2 biscuits ($1.00), which came with butter and jam. As for me, as it was labeled gluten-free, I stuck with the potatoes ($3.00). Order in.
I noted that our griddle wasn’t turned on, so I went ahead and turned it on, giving it some juice. I wasn’t sure how high to set it to cook, so I opted for around 300 degrees, because I didn’t want to burn anything, so I figured a little extra time on the griddle wouldn’t hurt anyone. Not one bit. Our waitress came out with a a bowl that had packets of ketchup and hot sauce in it. And soon…or food followed.
We received a pitcher of gluten-free pancake batter and little plastic containers that contained our toppings of choice. The waitress set this heaping bowl of potatoes down in front of me and told me to cook them for three minutes on each side. I could handle that. With that…we were left to our own devices to cook up our meal at our table. FUN!
Cathy poured her first pancake and went to sprinkle just her chocolate chips over the top. I would have thrown the nuts in too, but she kept them to just sprinkle over the top after her pancake was plated. I got a couple of spoonfuls of potato working on the griddle then poured my own pancake. I poured way more than I expected and had this monster to start off with. I went ahead and tossed some blueberries and banana slices onto it and let it sit to brown on the one side. The heat was definitely too low as both the pancakes and my potatoes were taking awhile to cook. Cathy went ahead and dived into eating her biscuits, really enjoying the flaky, lightness of them. I turned the heat up slightly, which helped. Soon I found myself flipping her pancake and my own because her first attempt was pretty much a fail. But, I cook pancakes on a griddle at home…so I’m sort of a master.
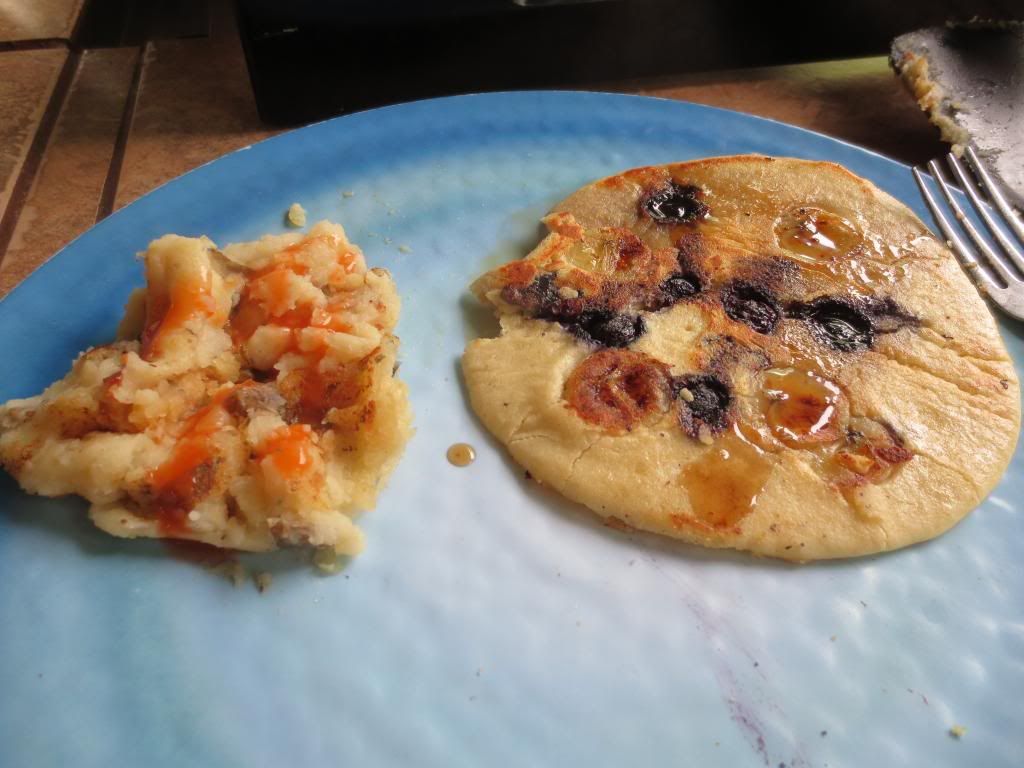
Gluten-Free pancakes and potatoes on the dedicated gluten-free griddle at The Pfunky Griddle
With the other side working, I went ahead and tried the potatoes.
Oh. My. GOD! No, these were honestly some of the most amazing breakfast potatoes ever. Laced with a delicious garlic flavor, these mashed up spuds were crispy from the griddle on the outside, soft on the inside…and really freakin’ fantastic. The flavor was awesome. I told Cathy she had to try some, and she said she intended to. She went ahead and scooped some up for herself to get it working on the griddle while I plated our first pancakes and poured more batter for our next round. We threw on toppings and then settled in for our first taste.
The batter cooks up beautifully. We each achieved this gorgeous golden color on our pancakes. My bananas even caramelized after I flipped my pancake over and the toppings began to work into the pancake itself. I love a light pancake. Nothing is worse than eating one pancake and feeling stuffed. And here, you can make them as big or as small as you want. You can add one topping, both, or more. Whatever your whim…it’s yours to create. And these pancakes really hit the spot. They were sweet, without being overly sweet. And thin. And light. And just plain delicious. The batter wasn’t heavy at all, making the pancakes almost as light as air when I removed them from the griddle and onto our respective plates. And those potatoes. Oh…hell yes!! Those potatoes were one of my favorite thing. Cathy and I both enjoyed them, getting them golden on each side then moving them to the plate. I added hot sauce to mine, just a dab, which only enhanced the amazing flavor. All together…a carby, delicous, amazing, happy dining experience. One of the best gluten-free pancakes I have ever tasted…and I eat a lot of gluten-free pancakes.
This may be a new go-to place in the near future when passing through Nashville. Very happy. I never felt like I needed to worry about my food. The spatulas were rubber, not the metal ones other tables got, so I am certain they were for gluten-free foods only. I felt completely safe, and completely satisfied with my experience there. I’d go back and stuff myself silly with more of their gluten-free pancakes and potatoes.
For the record, they also have gluten-free bread, so you could have one of their sandwiches, or even French toast if your little heart desired it. The point is…this is a business doing gluten-free right. And I am forever thankful for them. And I’m also glad we stopped in and ate here. On the way out, I even purchased a bag of their gluten-free pancake mix for $5.50. So now I can make some at home too.
My gluten-free joy knows no bounds. Doing flips over everything at The Pfunky Griddle.
Love in brunch form!
My Gluten-Free Blueberry and Banana Pancake with Gluten-Free Potatoes that I safely prepared at The Pfunky Griddle
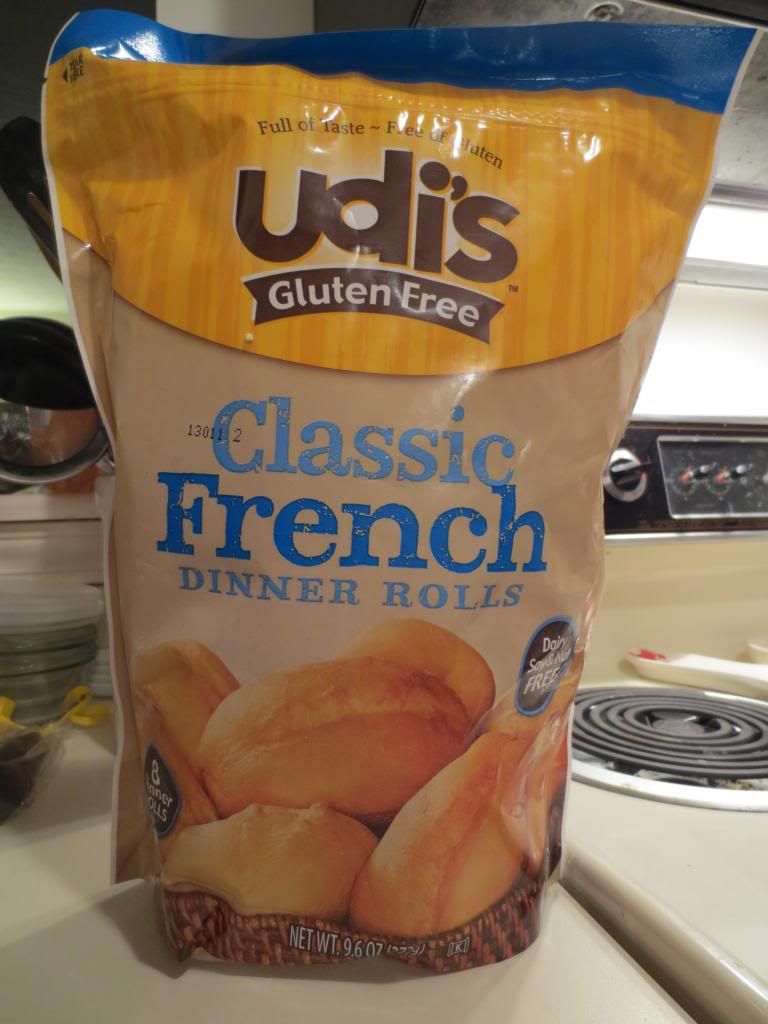
Product: Udi’s Gluten-Free Classic French Dinner Rolls – $8.99+
You read that right. But go ahead…read that blog title again. Befuddled, are you? Did I mistype? Am I playing some sort of cruel practical joke?
Not at all. What you read is the absolute truth.
Last year, Udi’s unveiled their new dinner rolls (two different kinds: Whole Grain and Classic French), and my area finally got them in. It only took a year. And trust me…I’ve been hunting high and low.
Why? Because every attempt I have ever made at making my own gluten-free dinner rolls have had less than satisfactory results. Too heavy. Too dense. Not the right taste. Wrong. Wrong. All wrong.
But that doesn’t have to be the case anymore. Because Udi’s made gluten-free dinner rolls a no-hassle event. Honestly. These rolls are kept in the freezer. And even though they come from a frozen state, they are so easy to prepare. Put them on a pan and cook from 10-15 minutes. What emerges are perfect dinner rolls, crusty on the outside and light and fluffy on the inside. Light. And. Fluffy.
These rolls are so versatile. Sure, you can serve them up as a side at dinner, with a schmear of butter. Or…you can use them in other ways too. In fact, that’s exactly what I did tonight. After a 4.5 mile run after work, I wanted to come home to an easy-to-prepare dinner. My thought…sliders. While I didn’t have any gluten-free veggie burger patties prepped, I did have some of my gluten-free and vegan homemade bacon in the freezer. I also had some fresh veggies…tomato, avocado, onion, spinach…a deluxe BLT slider looked like it was shaping up.
Udi’s Gluten-Free Classic French Dinner Rolls (toasted and fresh from the oven)
So, I preheated my oven to 400°F and put the rolls onto a pan. Into the oven they went…for about 5 minutes. Just enough to warm them through. After 5 minutes, I pulled them out and sliced each of them in half. I topped one half with a slice of vegan cheese. Then, I turned on the broiler. Back into the oven they went for a couple of minutes…just enough to melt the cheese. They emerged lightly toasted to perfection. I topped off each slice with the veggies and the vegan and gluten-free bacon, gave it a schmear of my own creation – a sriracha vegan mayonnaise. I pressed the halves together and…viola…Deluxe Gluten-Free and Vegan BLT Sliders. All compliments of Udi’s and their Classic French Dinner Rolls.
I am not going to gussy this up with flowery words. The Udi’s Gluten-Free Classic French Dinner Rolls are AMAZING! Honestly. If you had company over for dinner and placed these in a bread basket for dinner…no one would even guess that they were gluten-free. My roommate, as we know, does not have to eat gluten-free and she LOVED these rolls. Loved them. Especially how weightless they seem. They taste fantastic…on their own or dressed up however you like it.
If you haven’t tried these amazing dinner rolls from Udi’s Gluten-Free…you are missing out. Find them. And if you can’t…see if your grocery store or natural food store can order them in. Trust me. They are amazing and I intend to always keep them stocked in my freezer. I can build meals around these…or just let them shine as a side.
Thank you Udi’s…for filling the dinner roll gap I had in my life. Much love.
Gluten-Free and Vegan Deluxe BLT Sliders made with Udi’s Gluten-Free Classic French Dinner Rolls
I wish I could write a love letter to Trader Joe’s. Quite honestly.
So often, the snack foods or vegan/vegetarian foods that most people can eat…I can’t. Because I can’t have gluten. And so often, some sort of gluten containing ingredient works its way into said snack foods or food items.
But…Trader Joe’s seems to hold the market…and that’s what keeps me coming back time and time again. While normally I don’t do queso dip…my roommate spotted this awhile back at Trader Joe’s…and as it was clearly marked gluten-free…she asked if we could go ahead and get it. For blog purposes, of course. Which is easy for her to say…because she’s not the one who has to type it. But…she rarely asks for a product while we are out grocery shopping, so I agreed and promised I would come up with something to use it with.
And then it sat in the pantry. And sat. And sat. And every time I contemplated using it in something, I would find something else to use. And so…it continued to sit on the pantry shelf.
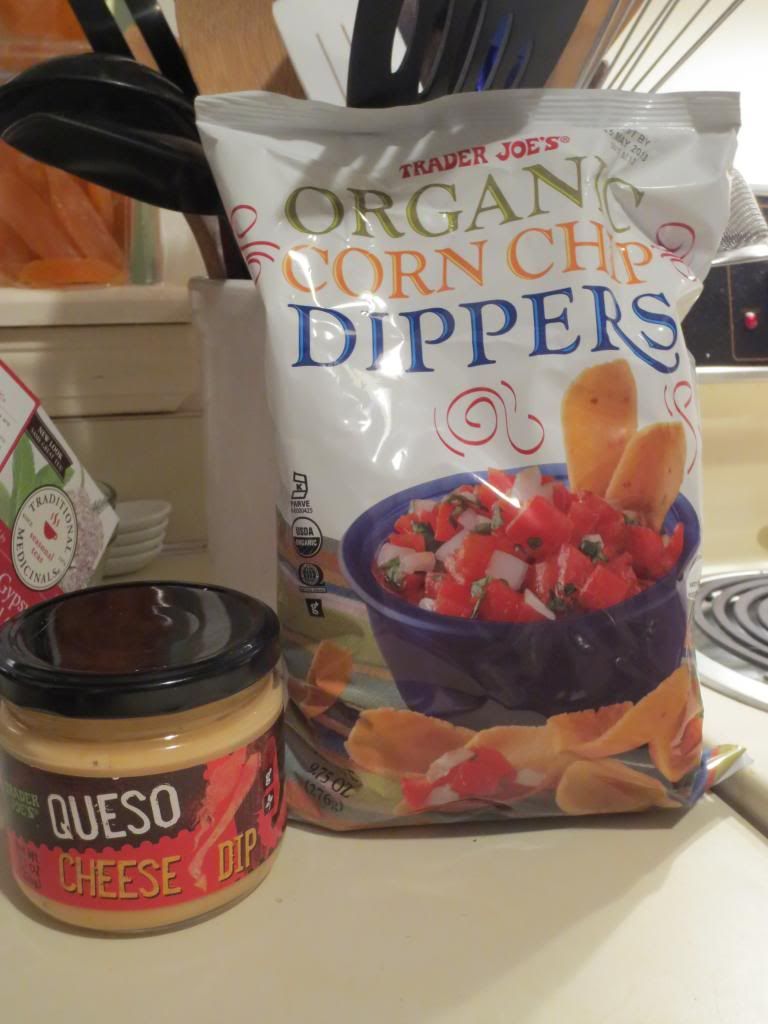
A couple weeks ago, my roommate spotted yet another item while we ducked into Trader Joe’s. This time, the Organic Corn Chip Dippers. Basically, organic Fritos. They were even labeled gluten-free, so once again, who was I to say no. I was certain I could find a dish to pair them with.
And then…I didn’t.
Until tonight.
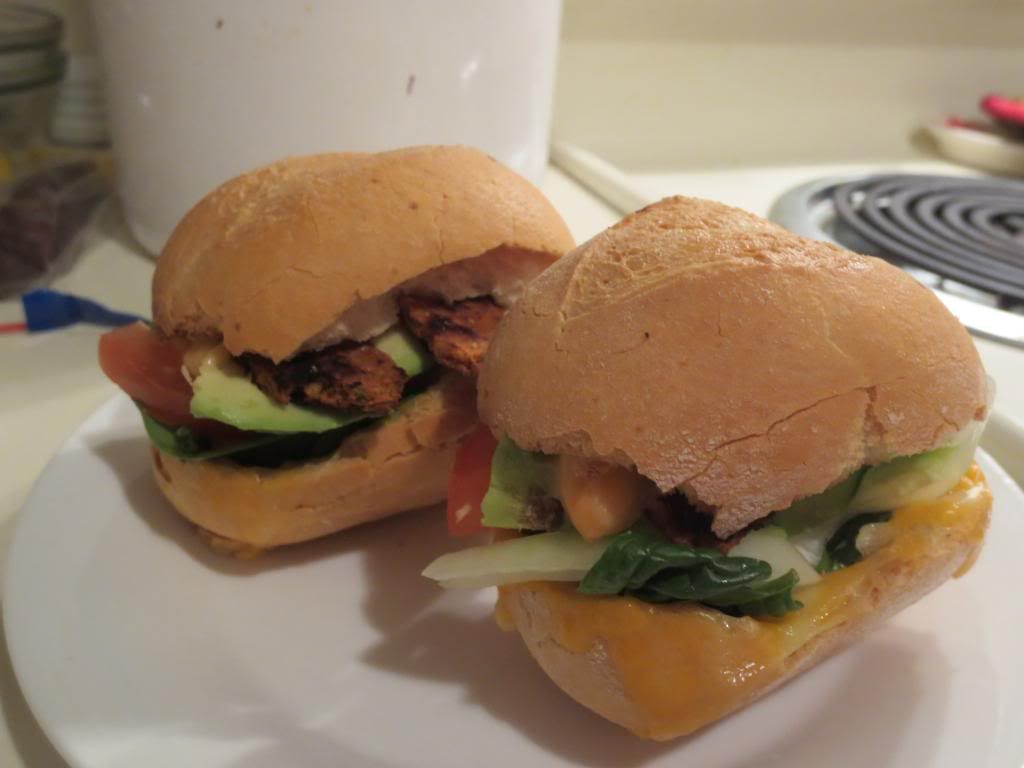
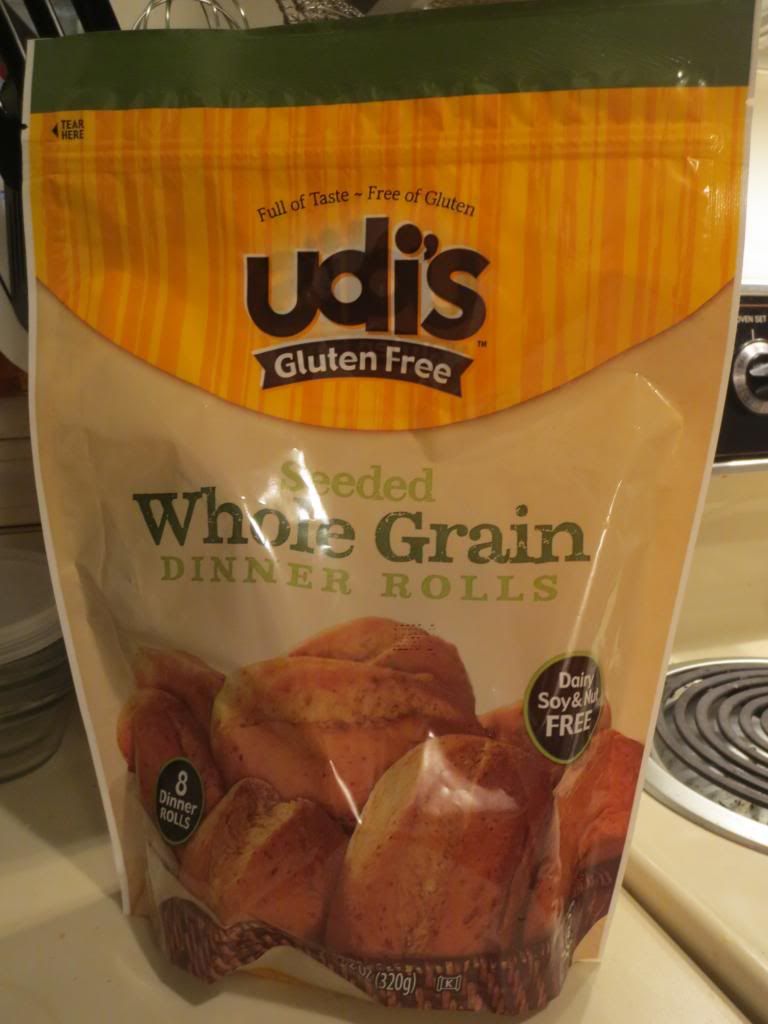
My roommate is now obsessed with sliders. Why? Because I made these little mini meatball sub sliders and now…everything she wants this week is in slider form. It’s a fun way to use some produce and get a bit creative in the kitchen. Tonight, I was making a gluten-free black bean and soy chorizo (using Trader Joe’s vegan and gluten-free chorizo) sliders, which I placed on toasted Udi’s Seeded Whole Grain Dinner Rolls with some fresh vegetables from my CSA bin. But, two little sliders, while still a decent dinner…needed something to go with it.
And after some quick thinking and a peek into the pantry…Trader Joe’s took over my dinner plates.
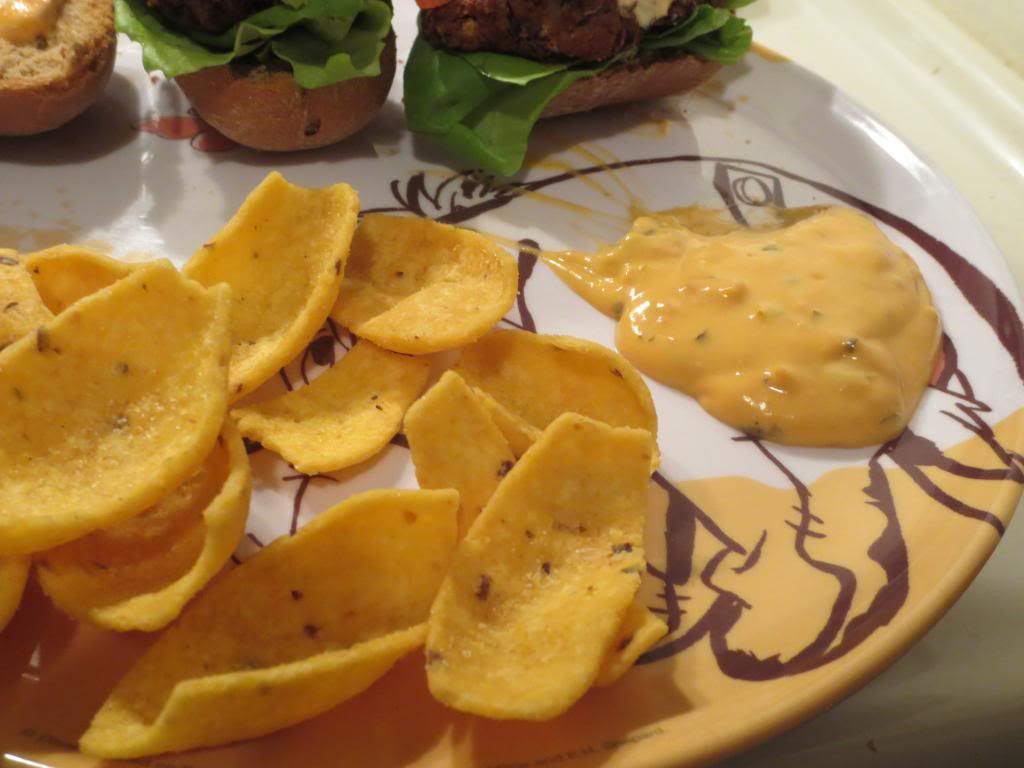
I’ll start with the Organic Corn Chip Dippers. As I stated before, these are basically a healthier and more natural Frito corn chip. The difference between these and Fritos is that Trader Joe’s version of these corn chips have no preservatives, no trans fats, and no chemicals baked into them. They aren’t greasy like Fritos are, leaving no oily residue behind on my fingers. And the ingredients list is super short: corn, sunflower oil, salt. Three ingredients. That’s all. So right there, they won me over. These chips are perfect for dipping, sturdy enough to hold a goopy scoop of queso cheese dip without busting apart or crumbling under the weight. And they aren’t overly salty either. Which, I do appreciate, because it lets the crisp, earthy flavor of the corn in these chips really shine. Perfectly flavored and great tasting.
As for nutritional information on the Trader Joe’s Organic Corn Chip Dippers, a serving is 28 grams (or about 10 chips). This serving will set you back only 160 calories. You will be taking in 10 grams of fat in this serving, which is a bit high, but these are chips…so keep that in mind. And much of that fat is a result of the sunflower oil, so at least it is a healthy fat. These chips also have only 160 mg of sodium. Not bad for a chip, right?
So, just because they are organic doesn’t mean they are healthy. Stick to a serving, and you’ll be enjoying a better-for-you corn chip dipper. Way better and way more flavorful than Fritos.
And, naturally, I decided to pair these chips with the Trader Joe’s Queso Cheese Dip that had just been begging for me to open it up since I bought it. And now I wonder why I had waited so long to do so.
Trader Joe’s Queso Cheese Dip is the perfect dip for nachos. It’s super cheesy flavored with a nice spicy kick that isn’t too much. Even my roommate, who is a spice wimp, raved about the queso. I think she liked it better than my black bean and soy chorizo burgers, to be honest. Bold flavors and a hint of spice make any queso amazing. But what really makes Trader Joe’s queso stand out is that a serving of 2 tablespoons has…are you ready for this?…only 15 calories. This is NOT a joke, my friends. Only 15 calories. For cheesy queso dip. I swear to the food gods! Don’t believe me? Go to your local Trader Joe’s and find this cheese dip and see for yourself. You realize, then, that the entire jar only would set you back 165 calories…which is what usually 2 tablespoons of regular queso would set you back. Um…AWESOME! That being said, a 2 tablespoon serving will only contains 0.5 grans of fat and 130 mg of sodium. This is beyond amazing. If you are tired of salsa and guacomole isn’t what you’re craving, then do pick up a jar of Trader Joe’s Queso Cheese Dip because with these nutritional facts, paired with the amazing flavor…you can’t go wrong.
Addictive. And a perfect snack or side dish to a meal. That’s what Trader Joe’s provides with Organic Corn Chip Dippers and Queso Cheese Dip. I was blown away. So, if I were to pen a love letter to Trader Joe’s…it would simply say:
I love the food you are able to provide for me when other stores fail to do so.
It’s the truth. And when the food is beyond my expectations and tastes amazing…even better.
Thank you, Trader Joe’s.
Trader Joe’s Organic Corn Chip Dippers with a serving of Trader Joe’s Gluten-Free Queso Cheese Dip
It’s amazing how you never realize how much you miss something until you no longer have the option of having it. Like…a dinner roll. Something that simple. And at first, maybe you just say…”I don’t need that anyway. I don’t need those calories…” But after awhile…when everyone else at the table has something to scoop up their sauces with…you sort of miss having the option.
Maybe not to the extent of being jealous. But sometimes…the social binder that is the bread basket at dinner on the holidays or at gatherings does leave a void…when you are a Celiac or gluten intolerant.
But…that’s all about to change.
Awhile back, Udi’s introduced a couple of new bread products to their line-up. Among them were a gluten-free French baguette, classic French dinner rolls and seeded whole grain dinner rolls. All of which I had been dying to try…but never quite allowed myself to purchase when on my strict grocery budget. But…a Groupon happened to come around for a local natural foods store…and I purchased it. As the expiration date was swiftly approaching, my roommate and I ducked in there this past weekend (during the chaos of a Vegetarian Tasting Fair) to get some products we really wanted to try.
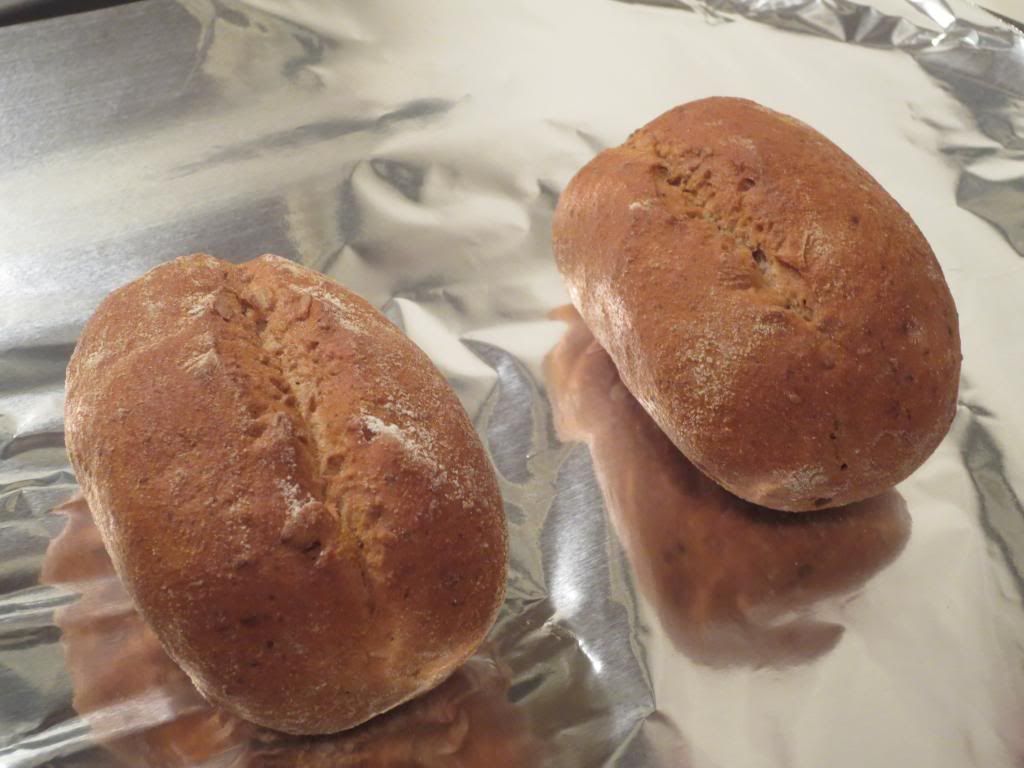
One of the first products that was overwhelmingly decided on were…Udi’s Gluten-Free Seeded Whole Grain Dinner Rolls.
My usual mojo is that items end up sitting in my freezer or pantry for awhile as I use up other items that came before it. But I had nothing quite like these…and I really, really, really wanted to test them out. As I was making a pasta dish for dinner the other night, it would be the perfect side dish to accompany the meal.
Udi’s Gluten-Free Seeded Whole Grain Dinner Rolls (toasted and fresh from the oven)
Nothing could be simpler. Open bag of frozen dinner rolls, remove, place on a baking sheet, and warm in an oven at for about 10-15 minutes…and they are ready to serve. Yes…really that easy.
Before I get into the taste, let’s start with the basics. The serving size is one roll. Yep. One roll. These rolls are about 2.5 inches in length and about 2 inches in circumferance, so they are a very good size. You only really need one. Each roll is 100 calories (not bad for bread!), 4 grams of fat, 3 grams of fiber, and 4 grams of protein. It’s pretty much a powerhouse. Where does all that protein come from? Simple. Udi’s makes their Seeded Whole Grain Dinner Rolls with healthy chia, sunflower, and flax seeds. Right there is a healthy combination that you wouldn’t get with regular bread. They are even healthier than Udi’s own Gluten-Free Classic French Dinner Rolls. How about that?!
Now…I’ve utilized these in two ways…
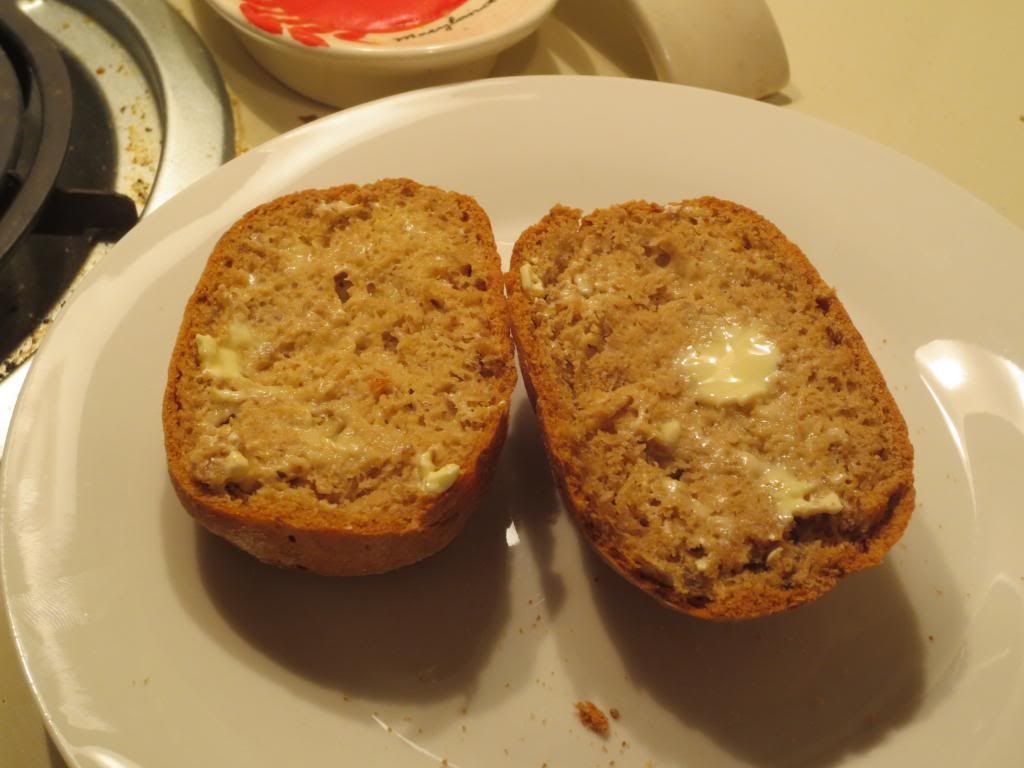
Udi’s Gluten-Free Seeded Whole Grain Dinner Roll (sliced in half with a schmear of vegan butter)
The first two times I ate them, I ate them just as a side dish. This was the perfect side for my pasta dish. And then, last night, my roomie and I each had a roll with my Chickpea Teriyaki over Steamed Spinach. I simply toasted these in the oven, sliced each roll in half, and gave them a light schmear of vegan butter. It was perfect like that for each dish. What was the best part of eating the rolls like that was that I truly got to taste the bread. My pasta didn’t have a sauce with it (I coated it with vegan butter and Parmesan), so again…I could taste the bread.
My roommate found that it tasted a lot like a honey wheat bread. She loved it…and she can have regular rolls!! She isn’t the one that has to eat gluten-free. She does…because I have to. We both agreed…these got a nice crispy crust on the outside in the oven…but were so soft and fluffy on the inside. They aren’t heavy or dense at all. Amazing. I probably could have eaten another one each time…but resistance was futile.
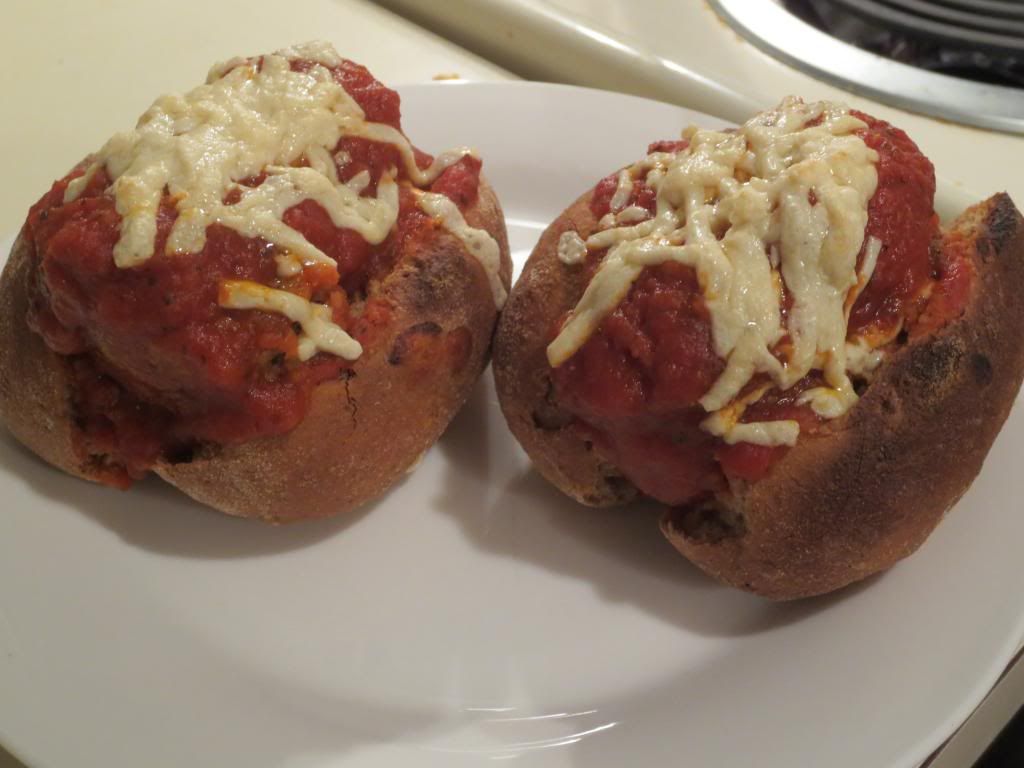
And the reason for that being…tonight I took the last four rolls and made each of us gluten-free and vegetarian “meatball” mini-subs. OH. MY. GLUTEN. FREE. GOODNESS. No…for real. This was probably one of the best ideas I came up with. I simply threw some marinara sauce into a pan on the stove while my oven warmed up. In went the vegetarian meatballs (I used Franklin Farms Veggieballs) to heat through while the sauce simmered. Then, I placed the rolls on the baking sheet and put them in the oven for 5 minutes at 400°F. When 5 minutes were up, my sauce was simmering and the veggieballs were heated through. Perfect timing. I pulled the pan from the oven and turned on the broiler. Then, I sliced each roll down the center, making sure I kept the bottom in tact. I opened it up (sort of like a baked potato) and spooned two veggieballs inside, coating them with some of the remaining sauce. I threw some Daiya vegan mozzarella shreds on top, tossed the mini sub rolls under the broiler for about a minute…just long enough for the cheese to get a good melt on it, and BAM. Dinner was served. And these rolls made the best mini sub rolls I could have asked for. Honestly. Still light with the crusty outside, it made holding them and eating the sandwich easy and less messy. Texture is important and these were spot-on. For real.
I’m already putting these on my grocery list this week because now I can’t imagine not having a bag in my freezer. They are super delicious. Super easy to prepare. And best of all…good for you. Especially where gluten-free breads are concerned.
Hunt these down in your local grocery stores. Find them. And try them. I guarantee you…you’ll fall in love with them too.
Gluten-Free and Vegetarian “Meatball” Mini Subs made with Udi’s Gluten-Free Seeded Whole Grain Dinner Rolls (also used: Franklin Farms Veggieballs and Daiya Mozzarella Shreds)
Do you know what happens when I forget that I have a certain item from my CSA bin in my crisper drawer until the day the new bin is to arrive and I’m attempting to make room for it? I’ll tell you what happens…I start to panic and then think up, as quickly as possible, one of the most efficient ways to use up said ingredient.
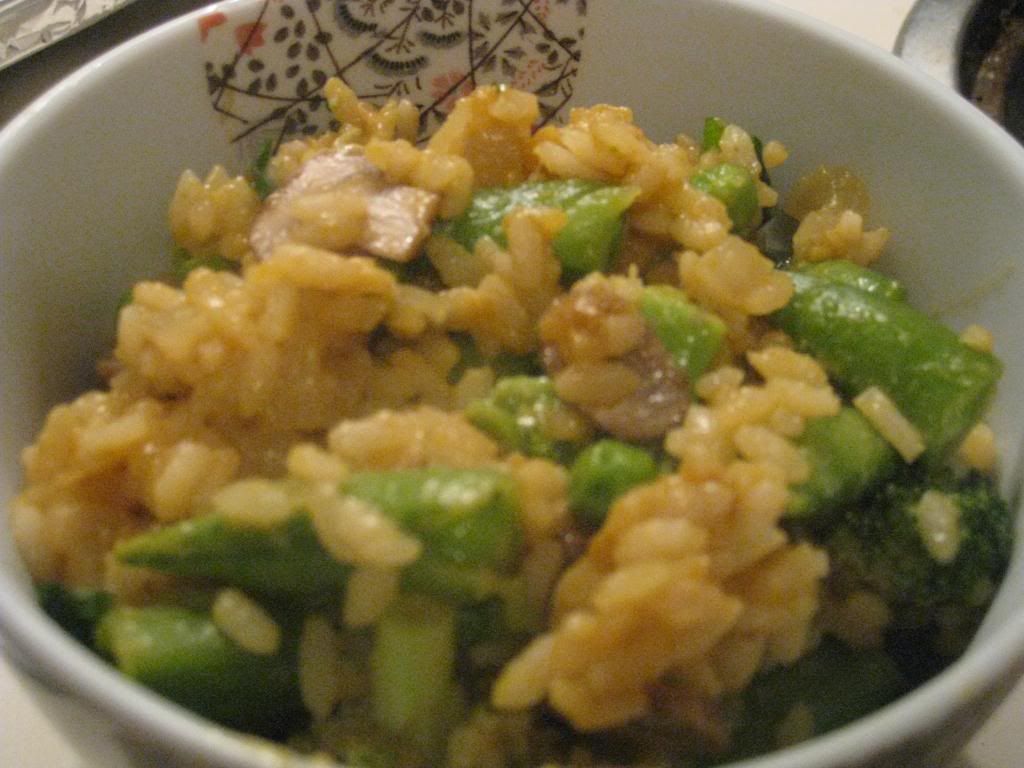
Normally with snap peas, I would totally stir-fry them. But I had just polished off a stir-fry and wasn’t feeling it this week. So, instead, I decided to make a risotto.
I have more than a lot of rice in my pantry…and two large bags of Arborio rice. So…why not? Everything that got added to this risotto was something I already had in my pantry or fridge or freezer from previous bins or the current one…
And, since it’s been awhile since my last recipe post…I figured it was time to shake things up in the kitchen.
Heat about half the olive oil in a medium pan on medium-high heat. Add the mushrooms and the onions to the pan. Don’t stir for a moment. Add a pinch of salt and allow to cook. Give the onions and mushrooms a stir every now and again, allowing the onions to soften and the mushrooms to brown slightly. Remove the mushrooms and oions from the pan, reserving in a dish.
Add the remainder of the olive oil to the pan. Pour in 1 cup of rice. Stir for 3-4 minutes, coating the rice with oil. Add one cup of the warm veggie stock and stir until absorbed. Continue to add broth, one ladleful at a time. While the rice is cooking, put the broccoli, snap peas, and green peas into a bowl and cover with a plate. Place in the microwave for about 4-5 minutes and allow to steam and soften. Carefully remove.
Once risotto has achieved a soupy, creamy consistency and the rice is cooked, toss in the snap peas, green peas, broccoli, onions, mushrooms, scallions and Parmesan stir to incorporate throughout the rice. Season with salt and pepper and give it one final stir.
Serve immediately with a little more Parmesan if desired.
~*~*~
I am a huge fan of risottos and I loved the way this one came out. The vegetables were a nice touch, and each with different textures…it all just fit in with the starchiness of the Arborio rice. It was filling and highly nutritious being that much of the serving was vegetables as opposed to the rice. I really love a good veggie risotto and this was was rather good. Any vegetable can be substituted for your favorite veggie or what you have on hand, of course.
I’d make this again in a heartbeat though. Yes, risottos are tricky and do mean a lot of standing over the stove and stirring…but I always love the end product.
ENJOY!
Do you know what has been seriously lacking in my life since I had to go gluten-free? Light, fluffy biscuits. Yes. Light AND fluffy biscuits. They just…don’t seem to be possible either from a mix or from scratch. The closest I have ever come to what i seek was a light and fluffy dinner roll from Sinfully Gluten-Free in Dayton, Ohio. Those were awesome. But I don’t live in Dayton…and, technically, those aren’t really biscuits.
*sigh*
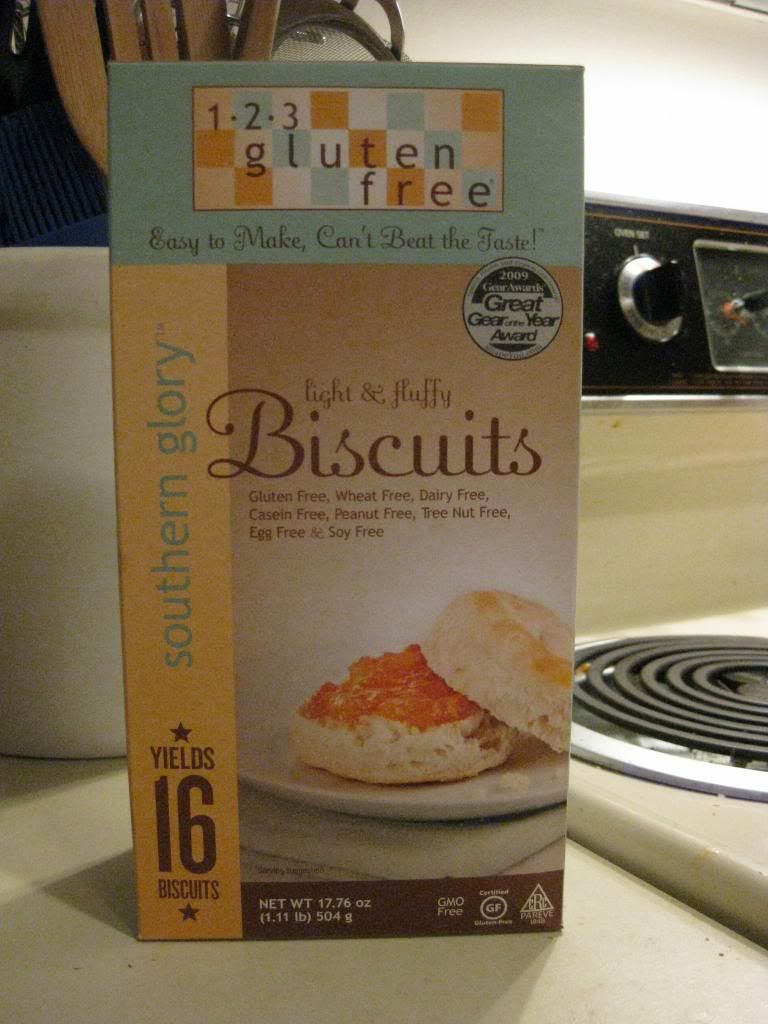
However…the great purge of the gluten-free selection at my local grocery store was going on and one of the items that was on closeout just happened to be 1-2-3 Gluten Free Southern Glory Biscuits. The box lays it all out: Light & Fluffy. Completely gluten-free, wheat-free, dairy-free, casein-free, peanut-free, tree nut free, egg-free, and soy-free. Whew. On the Web site for the company, it might, just might even hint that these biscuits taste better than biscuits that contain gluten.
So…I figured…why not? Since my roomie was craving biscuits and gravy and I had just whipped up a vegetarian mushroom gravy for the occasion…the biscuits were next. Now, the instructions on the back of the box are rather daunting. I will warn you about that. The easiest way to make these would be in a food processor…but mine is so tiny it wasn’t an option. So, for the first part of the process, I used my blender…then did the rest by hand.
But…first things first. I am lactose intolerant…so the rest of the ingredients weren’t going to work for me. Sure, I could use heavy whipping cream and half and half…but my stomach may not like it after I eat a couple of these. However, 1-2-3 Gluten Free has a suggestion on the bottom on how to make non-dairy buttermilk biscuits. So, I poured 1-1/3 cup of warm unsweetened almond milk and added 4 tablespoons of apple cider vinegar to it. I let it sit for about 25 minutes allowing it to thicken. Once it got there…the biscuits were on track to be made.
Into my blender went the package of Southern Glory Biscuit Mix along with the butter, cut up into pieces. I pulsed it until it resembled a coarse meal, then added the ‘buttermilk’ to the mix. This is where my blender stopped being of use, so everything got poured into a bowl and I ended up kneading the dough until it came together into a ball.
The next step was to roll out the dough to about a 1-1/2 inch thickness and cut the biscuits with a biscuit cutter or a glass. I used a biscuit cutter and ended up getting 18 biscuits from the dough. Then, into the refrigerator these went to cool. The box says that the colder the dough, the higher the biscuits would rise. Well, I wanted some really tall biscuits, so I left them to chill for about an hour (the box says to go for at least a half hour). Then, I preheated the oven to 375°F. Each biscuit got a light wash of almond milk and a sprinkling of salt before the pan went into the oven to bake for about 20 minutes. Mine actually took about 30 minutes because my heating element is STILL off.
And when they came out of the oven…they really hadn’t risen all that much. Which…made me sad. My roommate and I decided to go ahead and split one to see how they tasted. They were still a little doughy in the middle, so I put the pan back in the oven for a little longer. But from the half we each were eating…we seemed to like it. It tasted like a real buttermilk biscuit. They weren’t exactly light…or fluffy…but they tasted good. So, that was at least half the battle.
This morning, after a 10 mile run, I came home to assemble breakfast. These biscuits, topped with a homemade vegetarian mushroom gravy and one poached egg. My roommate requested biscuits and gravy…as she has been craving. And in this house, she eats what I cook and I cook what I can eat. So, sometimes allowing the gluten-free vegetarian to be the cook doesn’t always work out to her advantage. Lucky for her…I had a biscuit mix that needed to be used and some gravy that I could make thanks to some fresh produce from my CSA bin.
So, I reheated the gravy, then popped the biscuits into the microwave to warm them back up. With breakfast assembled, I went to settle in to enjoy. And, sadly, the biscuit, while it tasted awesome, was still just heavy and dense. Not light and fluffy. It made me weep a little on the inside because all I really want is to be able to cook up an amazing biscuit to have every once in awhile. While the taste is spot-on with this mix from 1-2-3 Gluten Free…sadly the texture is still not right for me. Still too heavy. Still too dense.
The promise of a light and fluffy biscuit might have fallen…flat…but the flavor…the taste…that is on point. It reminded me of the buttermilk biscuits from restaurants that I used to go to for breakfast. So…at least the taste hit a high-note for this gluten-free girl.
Would I buy these again? Perhaps if they were on sale. My search for the perfect gluten-free biscuit continues. While these delivered on flavor, they completely fell short on texture. Light and fluffy…not so much. I’ll keep on searching…
“Buttermilk” Biscuits from 1-2-3 Gluten Free Southern Glory Biscuit Mix