Recipe: Gluten-Free and Vegan “Clam” Chowder

Awhile back, Prevention magazine did a profile on Kris Carr.  If you’ve never heard that name before, you’d be inspired by this woman.  She is a best-selling author, a wellness activist, and a cancer thriver.  Yes…thriver.  You see, on Valentine’s Day in 2003, Carr was diagnosed with a rare and incurable stage 4 cancer.  This diagnosis made her want to feel better, love harder, and enjoy life more fully.  She wanted to live life to the fullest…and live it like she meant it.

Part of that journey was changing the way she ate.  She went to a complete lifestyle makeover.  She switched to a nutrient dense, plant-based diet, began exercising, and found joy and fun in everything.

Really…this woman is amazing and her story was one I remembered from the plethora of magazines I receive each month.  I appreciate Prevention for profiling her…because it led me to her book: Crazy Sexy Kitchen.

This book just happened to be on the shelf of my local library.  And after flipping through it briefly…I went ahead and borrowed it.  Immediately I had recipes I wanted to try…but the one that interested me most is the one I made for dinner tonight…and, believe me when I say, it’s worth the effort to make.  I had to make modifications with the ingredients at times, but in the end…it turned into a beautiful dish.

The recipe is below.

Recipe: Gluten-Free and Vegan “Clam” Chowder

Gluten-Free and Vegan
Gluten-Free and Vegan “Clam” Chowder

Serves: 12
Time: Prep 60 minutes; Cook 15 minutes

Ingredients for Cashew Cream:

4 cups whole raw cashews, rinsed under cold water

Ingredients for Kombu Broth:

4 pieces kombu seaweed (I didn’t pick this up, so I used sheets of nori)
2 quarts water

Ingredients for Smoked Mushrooms*:

1 tablespoon small hickory chips
1 heaping cup diced king trumpet mushrooms

*(NOTE: I had 10 ounces of crimini mushrooms on hand and no stovetop smoker, so I improvised…)

Ingredients for Chowder Assembly:

1 tablespoon canola oil
1 cup diced white onion
1/2 cup diced celery (I used diced carrot because I didn’t have celery, but I did have plenty of carrots)
1 cup peeled and diced baking potato
2-1/2 to 3 cups water
1 teaspoon lemon juice, more to taste
1/2 teaspoon Tobasco or other hot sauce, more to taste (I used Sriracha)
2 teaspoons kosher salt, more to taste
1 teaspoon black pepper, more to taste

Directions:

Prepare Cashew Cream:  Put the cashews in a bowl and cover with water.  Cover with plastic wrap and refrigerate to soak overnight.

Drain the cashews and rinse under cold water.  Place the cashews in a high-speed blender (this will need to be done in a couple of batches) and add enough water to cover by an inch.

Purée until completely smooth.  If needed, pass the cashew purée through a fine strainer to remove any course bits; the final “cream” should have a smooth, thick consistency of heavy dairy cream.  This will make about 3 cups cream (consistency will depend on the amount of water added while blending, and can vary from just over 2 cups to about 3-1/2 cups; thin as desired)

Prepare Kombu Broth*: Combine the combu and water in a medium pot and bring to a simmer.  Reduce the heat to a gentle simmer and cook 40 minutes, then strain.  This makes about 5 cups kombu broth, more than is needed for the remainder of the recipe.  The broth will keep, covered and refrigerated, up to 10 days.

*(Note: I didn’t have kombu on hand, so I used nori sheets, and followed the instructions as if they were kombu.  The flavor was probably milder than it would have been…but this worked.  I did, however, have to press on the nori to wring out the rest of the broth)

Prepare Smoked Mushrooms*: Prepare a stovetop smoker: Spread the chips in the base of the smoker, directly over the burner.  Place the drip pan (if using) over the chips and a rack on top of the drip pan.  Place the diced mushrooms on the rack (be sure to use a rack fine enough so the mushrooms don’t fall through) indirectly over the chips (do not place the mushrooms directly over the chips, as this can cause them to oversmoke and turn bitter).  Partially cover the smoker with a lid, leaving it open a cuple of inches.  (If you do not have a commercial stovetop smoker, you can substitute by using a heavy roasting pan, a cake rack, and heavy duty foil to cover the pan as a lid.)

Heat the smoker over medium heat just until you see smoke escaping through the opening.  Close the smoker entirely and gently smoke just to infuse the mushrooms with smoke flavor, not to cook, 3 to 5 minutes.  Be careful not to oversmoke, or the mushrooms will become bitter.

*(Note: I don’t have a stovetop smoker or anything I could have used to do the makeshift one…so instead I went about this a little differently.  After rinsing my mushrooms and cutting the stems even to the caps, I put them in a bowl with 1/4 cup olive oil, 2 teaspoons of Liquid Smoke (make sure it is a gluten-free brand), a touch of salt, and some kelp granules.  I mixed this until everything was coated then placed them on a baking pan and roasted in a 350°F oven for 45 minutes.  I then diced them as the recipe called for. It yielded perfect results.)

Assemble Chowder: Heat the oil in a medium-size soup pot over medium-high heat.  Add the onion, celery (in my case, carrots), and potato.  Sweat the ingredients, stirring frequently, until softened, 8-10 minutes.

Add 1-1/2 cups each of the Kombu Broth, Cashew Cream, and all the smoked mushrooms.  Reduce the heat, and cook over low heat, stirring frequently, for 10 to 15 minutes to develop and marry the flavors.  The Cashew Cream will thicken as it cooks, and you will need to add water from time to time to thin and adjust the consistency.  We added about 3 cups of water as the soup cooked.

Season with lemon juice, Tobasco (or hot sauce of choice), salt, and pepper.  Taste and adjust the seasonings as desired.  This makes a generous 2 quarts of soup.

~*~*~

This recipe looks labor intensive at first glance, but I soaked the cashews overnight and making the cashew cream was a synch.  As for the broth, I made that ahead as well and let it chill in the fridge.  Then, when I needed it, I poured out the amount for this recipe and it was all set to go.  All I really needed to do was chop the vegetables and get everything cooking.

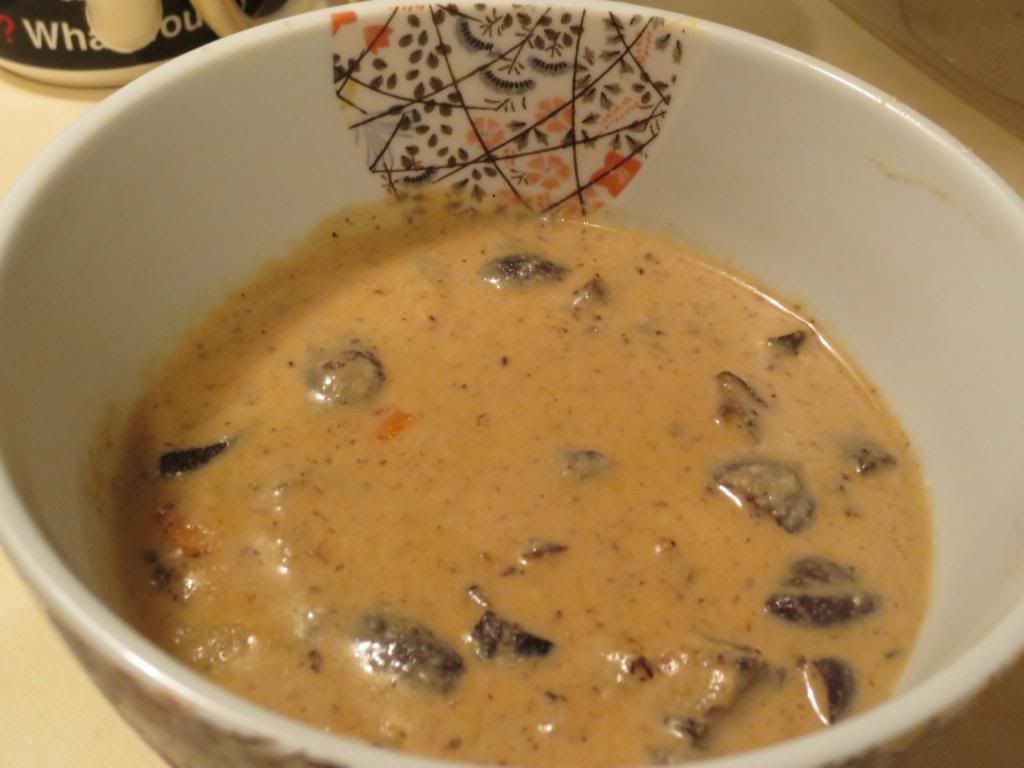
And what emerged was a flavorful, creamy, delicious vegan clam chowder.  The flavors were awesome.  And the texture of the mushrooms after roasting in the oven for that long was just like a clam tasted (back before my vegetarian days and when chowder was safe to eat).  I wasn’t sure what to think about this as I started to cook everything together in my big pot on the stove, but the end result was awesome.

I can’t wait to heat up more and enjoy it all over again.

As a side note, this soup is freezer-friendly.  So go ahead and freeze the extra if needed and allow it to thaw when you’re ready to have more.  Otherwise, the soup does keep for about 1 week in the fridge.

This is TOTALLY going to be made over and over again.  Shockingly delicious.  But, then again, Kris Carr enlisted the help of Chef Tal Ronnen for this one…so it’s no surprise this soup is packed with awesomeness.

Make it.  Go ahead.  I dare you!

Recipe: Gluten-Free and Vegan Shrimp Tacos with Mango Salsa and Sriracha Sour Cream

So, last night I set out to work some culinary magic with some items in my refrigerator and my freezer.  What came out of the plethora of ingredients I had on hand was one of the most amazing taco dinners I have ever created.  I made mine gluten-free and vegan to fit my dietary needs, but if you happen to like real shrimp…use it.  If you can eat regular sour cream…use it.  The great thing about recipes is…they are made to be modified.

By popular demand, here is the recipe for my Gluten-Free and Vegan Shrimp Tacos with a Mango Salsa and Sriracha Sour Cream.

Recipe: Gluten-Free and Vegan Shrimp Tacos with Mango Salsa and Vegan Sriracha Sour Cream


Gluten-Free and Vegan Shrimp Tacos with a Mango Salsa and Sriracha Sour Cream


Servings: 2 (2 tacos each)


Ingredients for Avocado, Tomato and Mango Salsa:

Avocado, Tomato and Mango Salsa
  • 1 mango – peeled, seeded and diced
  • 1 avocado – peeled, pitted, and diced
  • 4 medium tomatoes, diced
  • 1 serrano pepper, seeded and minced
  • 1/2 cup chopped fresh cilantro
  • 3 cloves garlic, minced
  • 1 teaspoon salt
  • 2 tablespoons fresh lime juice
  • 1/4 cup chopped red onion
  • 3 tablespoons olive oil

Directions:

In a medium bowl, combine the mango, avocado, tomatoes, serrano, cilantro, and garlic.

Stir in the salt, lime juice, red onion, and olive oil.

To blend the flavors, refrigerate for about 30 minutes before serving.

Note: You will have left-overs…so enjoy with some gluten-free corn tortilla chips or save for the next day.

While the salsa is chilling in the fridge…prepare the rest of the tacos…

Ingredients:

4 Rudi’s Gluten-Free Fiesta Tortillas
1 box of Sophie’s Kitchen Gluten-Free Breaded Vegan Shrimp (or you can use real shrimp if not a vegetarian/vegan, just make/use a gluten-free breading)
2 leaves of Romaine lettuce, chopped
1/4 cup vegan sour cream (I used Tofutti Better Than Sour Cream – or use real sour cream)
1 tablespoon Sriracha

Directions:

Preheat the oven and cook the shrimp according to the instructions on the box.  If using Sophie’s Kitchen Gluten-Free Breaded Vegan Shrimp, it takes about 10-15 minutes.

Mix together the vegan sour cream (or real sour cream, if using) with the Sriracha to make the Sriracha sour cream.

Warm the Rudi’s Gluten-Free Fiesta Tortillas in the microwave for about 20 seconds.

Remove and place on plates.

Placed chopped lettuce on each of the tortillas.

Scoop about 1/4 cup of the Avocado, Tomato and Mango Salsa over the lettuce.

Top the salsa with the cooked shrimp.

Top each taco with the Sriracha Sour Cream.

Fold tortillas around filling and ENJOY!

~*~*~

I’m already considering making this again tonight, because I still have a good chunk of the salsa remaining and…it was really, really, REALLY good.  The combination of the sweet salsa with the savory vegan shrimp (don’t mock…they are awesome) and the hint of heat from the vegan Sriracha sour cream all just worked together.  My roommate (who doesn’t have to do gluten-free or vegan…in fact…loves real shrimp) fell in love with this dinner and said it was one of the best dinners I ever made.

I encourage you to give it a try!

Recipe: Avocado, Tomato and Mango Salsa

By now, it’s no secret that one of the few fruits that I do not like (trust me…there aren’t many) are mangoes.  Yep.  Mangoes.  I have never been a fan of that particular fruit.  Give me papaya any day of the week…or any other fruit for that matter.  But mangoes…there is just something about them that I just don’t like…flavor-wise.

So…while I was away in Minnesota visiting my grandpa and running a half marathon, my CSA bin order automatically went through.  In this particular order that I was not around to modify (come on, I was visiting family, not sitting on my computer!), I soon realized that I would now be the proud (I guess?) owner of two fresh mangoes when my bin arrived on Friday.

Just…great!  (Yes…that is sarcasm).  So…what does someone who doesn’t like mangoes do with mangoes now that she has them and refuses to let anything go to waste?

Who knows?  But I get on Pinterest and do some hunting for ideas.  And one that I found, and that looked and sounded delicious…was a recipe for a mango salsa that also included other vegetables such as avocado and tomato.  It could work.  Maybe.  So…I picked up the rest of the ingredients that I needed on the way home tonight and made this salsa to accompany the vegan and gluten-free shrimp tacos I was making for dinner.

I was really, really, really surprised by how much I liked this!  Sweet, slightly spicy, and refreshing.  The recipe, taken from Allrecipes.com, is as follows:

Recipe: Avocado, Tomato and Mango Salsa

Avocado, Tomato and Mango Salsa

Servings: 6
Time: Prep 15 minutes; Chill 30 minutes

Ingredients:

  • 1 mango – peeled, seeded and diced
  • 1 avocado – peeled, pitted, and diced
  • 4 medium tomatoes, diced
  • 1 serrano pepper, seeded and minced
  • 1/2 cup chopped fresh cilantro
  • 3 cloves garlic, minced
  • 1 teaspoon salt
  • 2 tablespoons fresh lime juice
  • 1/4 cup chopped red onion
  • 3 tablespoons olive oil

Directions:

In a medium bowl, combine the mango, avocado, tomatoes, serrano, cilantro, and garlic.

Stir in the salt, lime juice, red onion, and olive oil.

To blend the flavors, refrigerate for about 30 minutes before serving.

~*~*~

Yes…it really is that easy to make.  The prep work is what takes up all the time.  And it’s just a bunch of dicing and chipping to be honest.  What emerges from the fridge is this amazing salsa that is refreshing and layered with flavors.  Sweet from the tomatoes and mango, a bit of spice from the cilantro, onion, and serrano chili, all just mixed together and creating this deliciously balanced condiment.

I put mine on my gluten-free and vegan shrimp (yes, vegan shrimp) tacos…and that worked out beautifully.  It was one of my favorite dinners I have ever put together.  But, go ahead and pair this with tortilla chips or anything in need of a delicious salsa.

Trust me…you’ll love this.

Recipe: Gluten-Free Lemony Asparagus Pasta

My e-mail from Eating Well couldn’t have come around at a better time.  Inside, a link that would take me to about 25 different recipes which utilized asparagus.  And I was swimming in asparagus thanks to my CSA bin having back-to-back weeks with this vegetable.  I love asparagus, so this isn’t an issue, but I haven’t used asparagus too much in my cooking, so sometimes I need a little inspriation.

I used to be a subscriber to Eating Well magazine.  But life got a little busy, so I had to let some of my subscriptions go.  And, sadly, this was one of them.  But I still get a few special e-mails regardless, mostly with recipes.  And, when I showed this one to my roommate, I informed her that we had every ingredient that was needed for the recipe in the fridge or pantry at home.

I knew what dinner was going to be.  I made a couple of adjustments to fit my dietary needs.

But nothing could be simpler to make!  Looking for a new way to enjoy pasta and work some asparagus into the menu?  Give this recipe a shot.

Recipe: Gluten-Free Lemony Asparagus Pasta

Gluten-Free Lemony Asparagus Pasta

Servings: 2
Time: Prep 15 minutes; Cook 20 minutes

Ingredients:

  • 4 ounces pasta (the original recipe uses penne, but I had DeBoles Gluten-Free Rice Spaghetti Style Noodles on hand)
  • 1/2 bunch asparagus, trimmed and cut into 3/4-inch pieces
  • 3/4 cup whole milk (I used unsweetened almond milk)
  • 2 teaspoons whole-grain mustard (I used Grey Poupon Dijon Mustard)
  • 2 teaspoons all-purpose flour (I used Hodgson Mill Gluten-Free Multipurpose Flour)
  • 1/8 teaspoon salt
  • 1/4 teaspoon freshly ground pepper (I used cayenne pepper…for spice!)
  • 1 teaspoon extra-virgin olive oil
  • 2 tablespoons minced garlic
  • 1 teaspoon minced fresh tarragon, or 1/4 teaspoon dried
  • 1/4 teaspoon freshly grated lemon zest
  • 1 teaspoon lemon juice
  • 1/2 cup freshly grated Parmesan cheese, divided (vegan Parmesan can be substituted)

Directions:

Bring a large saucepan of water to a boil.

Cook gluten-free rice pasta for 4 minutes.

Add asparagus and continue cooking, stirring occasionally, until the pasta and asparagus are just tender, about 3 minutes more.  Drain and return to the pot.

Meanwhile, whisk milk, mustard, flour, salt and pepper in a medium bowl.

Heat oil in a small saucepan over medium-high heat.  Add garlic and cook, stirring constantly, until fragrant and lightly browned, 30 seconds to 1 minute.  Whisk in the milk mixture.  Bring to a simmer, stirring constantly, and cook until thickened, 1 to 2 minutes.  Stir in tarragon, lemon zest and juice.

Stir the sauce into the cooked pasta and place over medium-high heat.  Cook, stirring constantly, until the sauce is thick, creamy and coats the pasta.

Stir 1/4 cup Parmesan into the pasta until combined.

Serve the pasta topped with the remaining 1/4 cup Parmesan.

~*~*~

What I loved about this dish was the lemon tang in the sauce coupled with the slight heat I added by using Dijon mustard and cayenne pepper.  The sauce is light, especially with my decision to keep this lactose-free by using almond milk instead of whole milk (which my stomach would have hated).  The sauce still gets thickened and creamy and coats the pasta deliciously well.

The crisp asparagus coupled with the al dente pasta and the creamy sauce make a fantastic treat for the palate.  My roommate and I both loved this dish and can’t wait to make it again…when we have more asparagus.

Give it a try.  It’s super easy to prepare.  The lemon really livens up and makes the dish!  Don’t skip it.  And if asparagus isn’t your thing…change it up and use a vegetable that you enjoy!

Recipe: Gluten-Free Avocado and Asparagus Egg Sandwiches

Breakfast, as many of you know, has always been my favorite meal of the day.  In fact, I have been known to eat breakfast foods for not only breakfast, but also lunch and even dinner.  Sometimes…all in the same day.  I don’t know what it is about breakfast, but I have always loved it.  It’s always so fulfilling and can be either savory, sweet, or a little of both.  And maybe that’s just what food love is all about.

As I mentioned in my previous recipe, I have a fridge that is overflowing with asparagus.  My CSA bins the past two weeks have included asparagus.  And I do love asparagus, but sometimes I have a hard time fitting bin items into my meals…and so, two pounds of asparagus later, I’m seeking some recipes to help move it out before I lose it.  I don’t like waste so I try to use what ingredients I have when I can.

That being said, I saw a pin come up on Pinterest the other day that was repinned from a recipe featured in Better Homes and Gardens.  I was intrigued.  This was for an Avocado and Asparagus Egg Sandwich.  Sounded like the perfect thing to try for breakfast…and it moved out a couple of items from my bins.  Perfect.

Breakfast, for the most part, is simple to convert to gluten-free.  For this recipe, I simply used gluten-free challah bread from Katz Gluten Free, my vegan & gluten-free homemade bacon, and instead of frying up an egg in butter, I lightened up my dish by poaching the egg, which happens to be one of my favorite ways to eat eggs.  I also made my sandwiches open-faced instead of having another slice of bread on top.

This made quite an impression at breakfast today.  Even my roomie devoured it.  The recipe (with my modifications) is below…

Recipe: Gluten-Free Avocado and Asparagus Egg Sandwiches

Gluten-Free Avocado and Asparagus Egg Sandwich

Servings: 4
Time: Prep 10 Minutes; Cook 12 minutes

Ingredients:

  • 1/2 pound green, white, and/or purple asparagus, trimmed
  • 1 avocado, halved, seeded, peeled, and chopped
  • 1 teaspoon lime juice
  • 2 tablespoons butter (only if you are frying or scrambling your eggs)
  • 4 eggs (I poached mine, so I didn’t need aforementioned butter)
  • 4 slices of bread (I used Katz Gluten Free Challah Bread)
  • 8 slices crisp-cooked bacon (I used my homemade vegan & gluten-free bacon)
  • Salt and pepper to taste (I seasoned with cayenne pepper for a bit of spice)

Directions:

Place asparagus in a single layer in a shallow baking pan.  Cover with about 2 cups of boiling water.  Let stand for 10 to 12 minutes, until bright green and crisp-tender.  Drain.  Finely chop three of the asparagus spears; set aside.

In a small bowl mash avocado with lime juice. Stir in chopped asparagus; set aside.

If frying your eggs, in a large skillet, melt butter over medium heat.  Break eggs into skillet.  Lightly sprinkle with salt and pepper.  Reduce heat to medium-low. Cook eggs for 6 minutes, until whites are completely set and yolks begin to thicken.  If desired, turn eggs, to fully cook the yolks.

If like me, you prefer poached eggs, bring water and a splash of vinegar to just below boiling.  Break an egg into a bowl.  Stir the water to get a whirlpool effect and slide the egg from the bowl into the water.  Leave in water for about 3 minutes.  Remove to paper towel and season with salt and pepper.

Meanwhile, toast the bread.  Spread avocado-asparagus on four slices.  Lightly sprinkle with salt.  Layer bacon, egg, asparagus.

Enjoy!

~*~*~

This recipe was SO easy to make and put together.  And the best part was just how tasty it was.  I sincerely enjoyed every bite.  And the poached egg worked so well with the creamy avocado and the light crunch of the asparagus.  The slightly runny egg yolk just added to the texture and flavor overall.  I can’t wait to make this again.  It will definitely become a welcome addition to my breakfast table.

This breakfast is definitely packed with nutrition and healthy fats, as well as a great source of protein.  What a great way to start your day!

Recipe: Gluten-Free Asparagus and Ricotta Pizza

There has been a common ingredient in my past two CSA bins that have arrived at my doorstep on Friday evenings.  For the last two weeks, my bin has had asparagus in it.  And I absolutely LOVE asparagus.  But I hadn’t even used the previous week’s bunch and here I was with a fresh stock of it as well.  I needed to come up with something…and fast.  I could always toss it in with pasta…or make up a risotto, both options I have done before.  But…I wanted to try something different.  Think outside the box.

And thanks to a pin that showed up on my feed on Pinterest, I had to look no further than a simple pizza.

Pizza!

This truly was a simple pizza, made with ricotta cheese, asparagus, Parmesan, garlic, salt and pepper.  That’s it.

I figured, why not try it?  After all…I had some vegan ricotta cheese lingering in my fridge and now had a recipe to use it in again.

So, last night for dinner, I baked up a gluten-free version of the recipe that was posted on Just A Taste, a blog about exploring life through food.  Hmmm…my kind of blog.  Anyway, I made the necessary adjustments to make this fit into my gluten-free diet.  Below is my version of the original recipe.

Recipe: Gluten-Free Asparagus and Ricotta Pizza

Gluten-Free Asparagus and Ricotta Pizza

Servings: 2 (half of the pizza)
Time: Prep: 15 minutes; Bake 10 minutes

Ingredients:

  • 1 Udi’s gluten-free pizza crust, or gluten-free crust of your choosing or making
  • Cornmeal, for dusting baking sheet/pizza stone
  • Olive oil
  • 3/4 cups ricotta (I used Tofutti Better Than Ricotta Cheese)
  • 1/4 cup shredded Parmesan cheese
  • 2 cloves garlic, minced
  • 2 Tablespoons chopped fresh flat-leaf parsley (I used 1 tablespoon dried parsley)
  • 1 pound asparagus (medium thickness)
  • Lemon, for garnishing

Directions:

Preheat the oven to 500ºF.

Sprinkle your baking sheet or pizza stone with cornmeal.  Place the pizza dough/crust on the baking sheet and brush the top lightly all over with olive oil.

In a small bowl, combine the ricotta, parmesan cheese, garlic and parsley.  Season the cheese mixture with salt and pepper to taste.

Using a vegetable peeler, shave the asparagus length-wise into thin ribbons. (There’s no need to remove the tough ends first, as you can use them to more easily grip the asparagus as you peel them. Just make sure not to shave off any of the tougher part.) In a small bowl, toss the ribbons with 2 teaspoons of olive oil.

Spread the cheese mixture all over the pizza, leaving a 1/2-inch border around the edges, then evenly distribute the asparagus ribbons on top of the cheese.

Bake the pizza for 10 to 12 minutes, rotating it half-way through, until the crust is fully baked and golden brown.

Remove the pizza from the oven to a cutting board, drizzle it with fresh lemon juice.

Slice and serve.

~*~*~

The picture over on the blog I got the original recipe for was much prettier than mine…but my vegetable peeler was not liking the asparagus.  It just didn’t want to shave it cleanly.  So, I made do with what I could manage.  And probably got a little overzealous with the amount I put on the pizza…but…it was a nice change of pace for a pizza.

I loved how even the vegan ricotta cheese melted down to creamy perfection, forming the perfect base layer for this pizza.  When roasted in the oven on the pizza, the asparagus took on the texture of a green pepper.  It was fantastic.  I loved each bite of this pizza.  And the crust was golden and crispy and held up to the unwieldy toppings that I tossed on there.  Next time…prettier asparagus shavings.  But this was good for a first attempt.  I would totally make this again.  And I might have to try other pizzas with that vegan ricotta base.  The creaminess mixed with the crunch of the crust and the crisp, oven-roasted asparagus really made the texture of this pizza perfect.

I encourage you to experiment with some asparagus…and whip it up on a pizza.  It was amazing.

Recipe: Gluten-Free Irish Soda Bread

There are a couple of things I really remember and cherish about the four times I have been to Ireland.  One of them…is drinking hot tea and enjoying a piece of Irish Soda Bread.  Most people don’t immediately relate Ireland with food…but this is me we’re talking about.  And I live for my food.

Luckily…I also love to cook and bake.  And while I have done gluten-free Irish Soda Bread before…it really hasn’t impressed me or anyone else.

Imagine my delight, then, to find an easy recipe for Irish Soda Bread on the back of a box of, believe it or not, Gluten Free Pantry (Glutino) Brown Rice Pancake & Waffle Mix.  It looked so easy.  Too easy, perhaps.  I was leery…I didn’t know how bread would work coming from a mix meant for delicious, carby, breakfast goodness.  But, isn’t that what bread is anyway?  Why not.  As I happened to have all of the ingredients in my pantry and fridge…I went for it.  All I would be out was a box of pancake mix that was nearing expiration anyway, and a few pantry staples.

Lucky for me…what emerged was SO not what I expected and everything I hoped and prayed it would be.  Easy.  Delicious.  Dense without being heavy (like real Irish Soda Bread).  Buttery.  And not dry and flaky.  Perfection.

And here…is the recipe, straight off the back of the box of Glutino’s Gluten Free Pantry Brown Rice Pancake & Waffle Mix.

Recipe: Gluten-Free Irish Soda Bread

Gluten-Free Irish Soda Bread

Servings: 12
Time: Prep 10 minutes; Bake 35 minutes

Ingredients:

  • One box of Gluten Free Pantry Brown Rice Pancake and Waffle Mix
  • 2 organic eggs
  • ¾ cup low-fat organic milk (I used unsweetened almond milk)
  • 2 tablespoons melted organic butter or vegetable oil (I used Earth Balance)
  • ¾ cup organic raisins (I used golden raisins)
  • 2 teaspoons caraway seed (optional)
  • 2 teaspoons grated organic orange rind
  • 1 tablespoon melted organic butter to brush top of bread

Directions:

Preheat oven to 350°F.

Lightly oil an 8-inch cake pan.  Set aside.

Empty contents of one box of mix into medium mixing bowl.

Blend in caraway seeds and orange rind, if using.

Combine eggs, milk and 2 tablespoons butter or oil and beat into mix.

Fold in raisins.

Spread into prepared cake pan.

Bake 35-40 minutes or until top is brown.  Brush with 1 tablespoon melted butter.

Cool slightly.  Cut into wedges and enjoy!

A wedge of Gluten-Free Irish Soda Bread

~*~*~

Oh.  My.  Goodness.  Honestly, I wasn’t expecting much from this recipe at all.  I mean, come on, it’s being made from, not a flour blend or all-purpose flour.  Nope.  A pancake and waffle mix.  I had my doubts.  But this came out of the oven a rich golden color, all fluffy and amazing smelling.  It looked awesome.  I sliced it up into 12 wedges and served them up for breakfast.

SO delicious.  Dense, like real soda bread, and packed with awesome flavor.  The orange zest really does add a nice zing to the loaf, so I do recommend adding that.  I skipped the caraway seeds in my recipe.  I love this bread.  I can’t wait to make it again in the very near future.  If you love Irish Soda Bread…give this recipe a try.  You’d never guess it was gluten-free.  And, even better, you’d never know it came from a pancake and waffle mix.

This is for breakfast again today.  YUM!

Recipe: Baked Potatoes with Balsamic Caramelized Onion and Mushrooms

Oh, my dear time-suck that is Pinterest.  Sometimes…just sometimes…I stumble across some of the best recipes that have ever happened to me.  Sometimes…they are elaborate and something I could never, reasonably, undertake.  Especially in my kitchen…with my limited space and limited cooking appliances.  However, there are times that I find something so incredible…that I know I have to make it that very week.  Even better when I just happen to have all the ingredients on hand.

That is what happened when I stumbled across a very broad recipe pin for 23 Amazing Ways to Eat a Baked Potato for Dinner.  I scoured the list.  And this one…this very recipe was the one that stood out to me the most.  It sounded…awesome.  Mouthwatering.  Amazing.  So, yesterday…after a a 10K race, some grocery shopping, and an ongoing battle with bronchitis…I decided this was going to be dinner.

It was super easy to make…and super delicious.  I am going to make this again and again and again.  Because I’m always looking for new ways to enjoy a baked potato.

The original recipe comes from Katie Goodman on Makezine.  I changed out her choice of Gorgonzola cheese for Daiya vegan mozzarella shreds.  But, I bow down to her palate…because this was fantastic.

Recipe: Baked Potatoes with Balsamic Caramelized Onion and Mushrooms

Baked Potato with Balsamic Caramelized Onion and Mushrooms

Servings: 4
Time: Prep 20 minutes; Cook 1 hour

Ingredients:

  • 4 large baking potatoes, baked according to your preference (I coated with olive oil and sea salt and baked for an hour)
  • 2 tbsp olive oil
  • 1 medium onion, yellow or red
  • 1 clove garlic
  • 16 oz crimini mushrooms
  • 8 oz red wine
  • 3 oz balsamic vinegar
  • 1/8 tsp sugar
  • 3/4 tsp cornstarch
  • 2 tsp fresh parsley, minced
  • Salt and pepper, to taste
  • Daiya mozzarella shreds
  • Chives, sliced for garnish

Directions:

Wash and pat dry the baked potatoes.  Lightly coat with olive oil and sprinkle with coarse sea salt.  Place in an oven at 425°F for about an hour.

While the potatoes are baking, clean the mushrooms and remove the stems.  Slice the mushrooms thinly, about 1/4 of an inch thick.

Cut the onion in half from end to end. Remove the skin and discard.  Cut the onion into slices.

Combine the red wine, balsamic vinegar, sugar, and cornstarch.  Whisk to mix well and set aside.

Heat olive oil in a large cast iron skillet or sauté pan over medium-high heat until the oil is shimmering.  Add the onion slices to the pan, tossing to coat with oil on all sides.

Evenly spread the onions out in the pan and continue to cook, stirring just occasionally for about 15 to 20 minutes.

Grate one clove of garlic over a microplane grater and add to the pan. Stir in the mushrooms and sauté until tender and golden.

Add the red wine and vinegar mixture to the pan.  Bring to a boil over high heat, then reduce to medium and cook until thick and syrupy.  Stir in the parsley and season to taste with salt and pepper.

Remove potatoes from the oven.  Turn on the broiler.

Slice each potato open and fill with the mushroom mixture.  Top with sliced chives and mozzarella cheese crumbles.

Place potatoes under the broiler for about a minute, just enough to let the cheese melt.

Serve and enjoy!

~*~*~

I loved how full of flavor these were.  The potatoes were a nice starchy base for this sweet and savory mushrooms and onions, and the syrup that they cooked in.  The cheese gives it a nice additional flavor which all rounds out to form the most epic baked potato ever.

Seriously.  If you love caramelized onions, mushrooms, and potatoes…then this recipe is definitely for you.

Recipe: Gluten-Free Grasshopper Pancakes

Ah, St. Patrick’s Day.  It brings out a little Irish in all of us.  And, for some reason…it makes me want to make green food.  And not just green food…minty green food.  I can’t explain it.  It just happens.  It’s one of those things.

Well, originally, my plan for St. Patrick’s Day breakfast was going to be some elaborate Irish breakfast of sorts…done vegetarian and gluten-free, of course.  But, then my roommate woke up much earlier than expected so I executed Plan B.

Which was…pancakes.

But…how to do Irish pancakes?  I mean, aside from potato pancakes (or boxty…which I could have made…but didn’t…), how can you get your Irish flap-jack on?

Minty-green pancakes, of course.

Below is my recipe for these exciting, duel colored pancakes.  This is a super-easy recipe to make.  And you can use any baking and pancake mix for the batter.  As I am gluten-free…I do that.

So, give this a go…and enjoy!

Recipe: Gluten-Free Grasshopper Pancakes

Gluten-Free Grasshopper Pancakes

Servings: 4
Time: Prep 20 minutes; Bake 20 minutes

Ingredients:

  • 1 c baking and pancake mix (I used Pamela’s Products Gluten-Free)
  • 1 tablespoon sugar (I used Truvia)
  • 1.5 tablespoons baking powder (this is NOT a typo…not teaspoons…tablespoons!)
  • Pinch of salt
  • 1 cup milk (I used unsweetened almond milk)
  • 2 tablespoons organic pumpkin
  • 1/2 teaspoon Mexican vanilla (or any vanilla extract)
  • 1/2 teaspoon peppermint extract
  • green food coloring (optional…but fun!)
  • 1/3 cup Nestle’s dark chocolate and mint morsels
  • 3 tablespoons cocoa powder

Directions:

Turn griddle to medium heat.

Combine dry ingredients in a large bowl, excluding the cocoa powder and the dark chocolate and mint morsels.

In a separate bowl, combine the wet, excluding the peppermint extract, and then add them to the dry.

Stir until just combined and no large lumps remain.

Split the batter into two bowls.

Add another splash of milk and the cocoa powder to one.

And add several drops of green food coloring and the peppermint extract to the other.

Split the dark chocolate and mint morsels between the two bowls and gently fold them into the batter.

Spoon about 1/4 cup of each batter onto the greased griddle.  Carefully flip when bubbles appear on top or the edges look dry, then cook for 1-2 minutes more.

Top with extra dark chocolate and mint morsels and maple syrup.

Serve and enjoy!

~*~*~

I loved the play of colors in these pancakes.  The only difference in my recipe is that in the chocolate pancake batter I folded in Guittard’s green mint chips and in the minty green batter I folded in Hershey’s Semi-Sweet Chocolate Chips.  Only because I had them in my pantry.  Otherwise, they would have gotten the Nestle’s Dark Chocolate & Mint Morsels in each batter.  I did, however, use the dark chocolate and mint morsels to top off each serving of pancakes that morning.

And these were a huge success.  Minty, fresh, hot, and chocolatey all at once.  It made for a great breakfast.  And I was very happy with the way the pancakes fluffed up, even without eggs, and how light they were.  The flavors were definitely spot-on for a fun St. Patrick’s Day breakfast.  But, why just do this for St. Patrick’s Day?  There is something so amazing and delicious about mint and chocolate…these are honestly good any time.

Nothing could be easier…and oh…so delish.

Recipe: Quinoa Porridge with Blueberries and Walnuts

In addition to apples and oranges this week, my CSA bin decided to shake things up a little bit and offer some organic blueberries.  I.  LOVE. BLUEBERRIES.  For real.  Not only that, they are little antioxidant powerhouses on top of just being really, really delicious.

The thing is…the oranges are great for gym mornings…portable and easy to handle.  The apples…perfect for home…where I can slice them, dice them, caramlized them, top them with nut butter…do whatever I want with them.  So, I had everything covered.  What to do with the blueberries?

Then I recalled a recipe that Runner’s World put up a long, long time ago.  I had been meaning to make it…and I finally had a reason.  The original recipe, from the Closet Cooking blog, uses red quinoa and pecans, but I had just regular quinoa in my pantry and walnuts.  It’s quinoa.  It’s nuts.  It will work.  And this is one easy breakfast to throw together.  The original recipe says this serves one.  But my roommate and I split it because it really, really makes a lot.  So, I would say it makes 2 servings in all reality.  Unless you are running a marathon.  Then it may just serve one.

That being said…the normal human being would get two servings out of this.

Recipe: Quinoa Porridge with Blueberries and Walnuts

Quinoa Breakfast Porridge with Blueberries and Walnuts
Quinoa Porridge with Blueberries and Walnuts


Servings: 2
Time: Prep 5 minutes; Cook 15 minutes

Ingredients:

  • 1/2 cup quinoa, rinsed
  • 1-1/2 cup milk (I used unsweetened almond milk)
  • 1/4 teaspoon vanilla extract
  • 1 dash cinnamon
  • 1 tablespoon maple syrup
  • 1/4 cup blueberries
  • 1 tablespoon walnuts, toasted and roughly chopped

Directions:

Bring the quinoa, milk, vanilla, cinnamon and maple syrup to a boil, reduce the heat and simmer, covered until tender, about 15 minutes.

Mix in the blueberries, add more milk to taste and top with the pecans.

~*~*~

Super easy!  Now, my roommate and I both agreed that the quinoa was a wee bit bland, so I gave each of our bowls a small sprinkling of sugar and a dash more of cinnamon to mix in.  It made a world of difference.  This was really filling and so full of good for you protein, antioxidants, and other such nutrients.  It is definitely a powerhouse breakfast.  I loved how the texture of the quinoa mixed so well with the sweet blueberries and the crunchy nuts.  And toasting the nuts really does bring out more flavor, so do not skip that step.  It’s important.

If you need a healthy, nutritious, hearty, warm breakfast…give this one a try.