Product Review: Conte’s Gluten-Free Potato and Onion Pierogi

Conte's Gluten-Free Potato and Onion Pierogi
Conte’s Gluten-Free Potato and Onion Pierogi

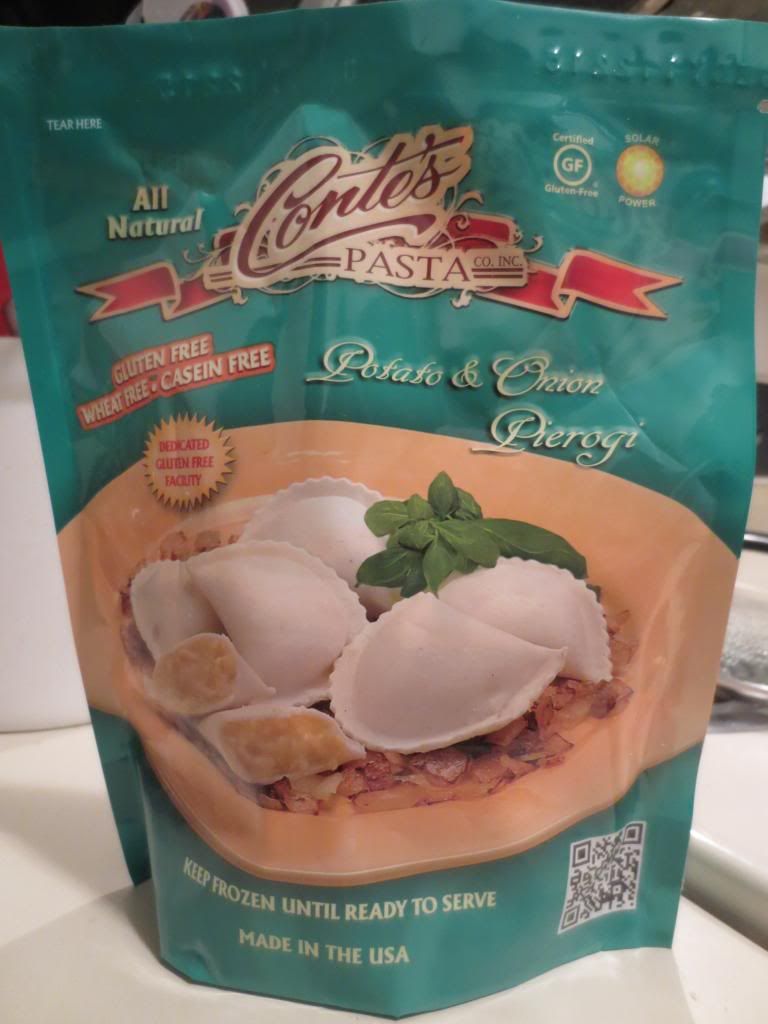
Product: Conte’s Gluten-Free Potato and Onion Pierogi – $6.99+

Dear Gluten-Free Gods of Food and Consumables:

THANK YOU!

Seriously…from the bottom of my gluten-free, vegetarian, foodie heart…THANK YOU!!

Thank you for bringing a company like Conte’s to the gluten-free world.  Because, my dear Gods of Awesomesauce…Conte’s hasn’t failed me yet on foods that I used to be able to eat and thought were off limits…until they turned up in a freezer section somewhere.  The world just seems right again.  And I couldn’t imagine my gluten-free life without Conte’s in it.  For real.

So…again…THANK YOU!!

Love,
Me

Honestly…my love letter about Conte’s could go on and on and on and on and on and on and on…

But I’ll stop there because there is a reason I am falling all over myself to praise this company and their foods.  Because they made me able to eat pierogies again.  Yes…pierogies.  Those little pockets of potato…delicious.  I ate the hell out of them growing up.  They were one of my favorite side dishes to eat with my dinner.  And when I went gluten-free…I attempted to make them once.  It wasn’t an epic fail…but it wasn’t a complete success either.

Conte’s did the hard part for me.  I just didn’t know these even existed until I was taken to this great little natural food store in Columbus, Ohio…called The Raisin Rack…by my friend Jenn.  Oh…the trouble and budget-busting I got into there.  I might have broken my roommate’s wallet.  But she did, in all fairness, hand me a basket and tell me to fill it up.  Jenn said we could “Tetris the shit out of that” and so we did.  And with it…frozen foods.  This meant getting a cooler too…but that was no biggie.

In the frozen section I spotted this teal bag…and it was Conte’s (who makes the awesome cheese ravioli I use all the time).  But these weren’t ravioli.  No, no, my dear readers.  This was so much better than ravioli.  This was GLUTEN-FREE PIEROGIES!!!  You better believe that bag went into the basket.  Along with other things.  And I might have carried a few items too…and cheated a little.  But…I got away with it in the end.  HA!

Well…fast forward to returning home from a weekend away.  No CSA bin this week because we were out of town.  BOOO!  Also, making up hours at work meant long work days and staying late.  So, the other night, the roomie and I got home and I went to find something easy to make from either the pantry, fridge, or freezer.  My roommate originally said she wanted pasta…but she came back out to the kitchen and said…

“I want the pierogies.”

I was hoping she would say that.  Secretly.

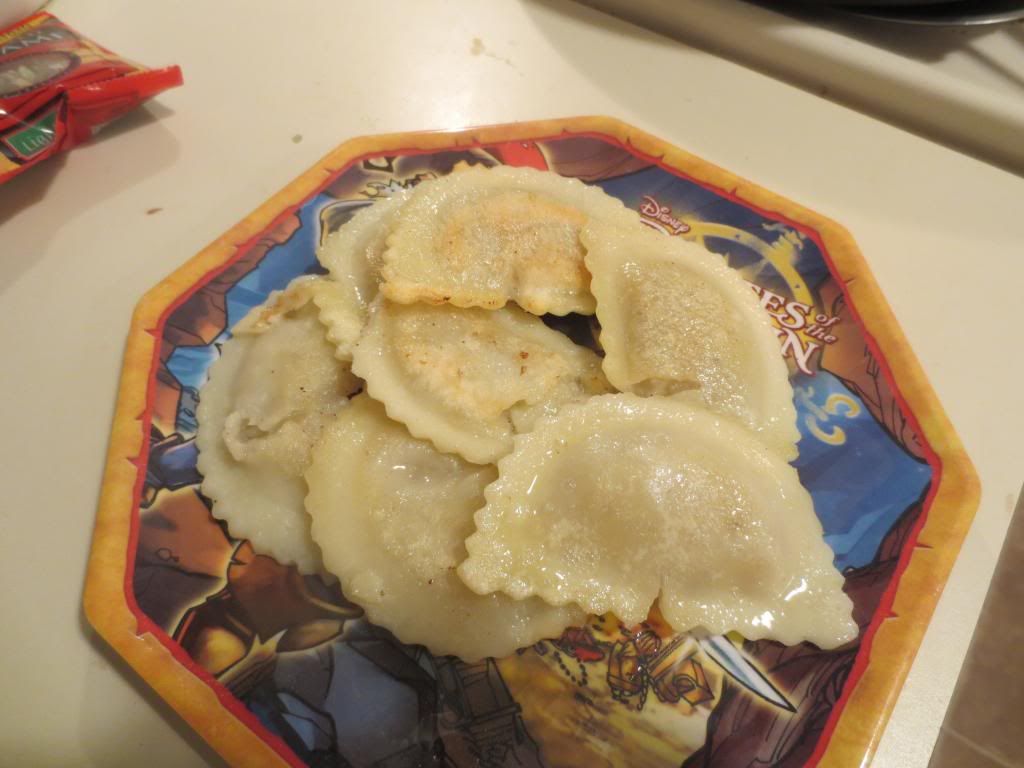
So…out came a big pan, which I filled with water and seasoned with salt.  I brought it up to a boil and soon added the Conte’s Gluten-Free Potato and Onion Pierogies.  I gave them a stir and let them cook away, stirring occasionally, for about 8 minutes.  As they boiled away, I got out my sautée pan and melted a tablespoon of butter.  I drained the pierogies and then carefully placed them into the pan to let them get a bit of a crunch on them.  I always remember my mom cooking ours in a skillet as well.  I love that rich, buttery crust that adds a bit of flavor to the little pillows of potato.  Mmmm…

They smelled amazing as they cooked away.  I flipped them over after a couple of minutes, not wanting to burn them, and cooked the other side.  Then…I dished them up and dinner was served.

My roommate actually beat me to the first bite.  And she was a huge fan.  This definitely bode well in my eyes.  I settled into my plate and took a bite too.

Fantastic.  Great texture.  Amazing flavor.  I loved how the dough was soft, but had that nice crust on it from the pan fry that I gave it.  The potato and onion filling was seasoned perfectly.  It was everything I remember pierogies being…which was so good.  So very good.  I devoured these…in record time, I do believe.  And I kept reminiscing about my mom preparing pierogies for us…and how much I loved them.  And now, thanks to Conte’s…I can once again.  And I am beyond impressed with how these turned out.  They are a bit delicate…so be prepared for them to start to fall apart.  But…that’s not unusual for gluten-free products such as this.  The main thing was…they were awesome.  And I am one happy girl…hoping to be able to find these…somewhere…locally.

Let’s talk ingredients, shall we?  Conte’s Gluten-Free Potato and Onion Pierogies are made from a gluten-free flour mix (rice flour, corn starch, tapioca dextrin, xanthan gum), eggs, water, salt, vegetable oil, potatoes, onions, water, salt, and black pepper.  That’s it.  Seriously.  Clean eating in a package!  These are gluten-free, wheat free and casein free.  They are also made in a dedicated gluten-free facility.

As for the nutrition facts…a serving size is 4 ounces, or 4 pierogies.  This serving will give you 180 calories and 1.5 grams of fat.  These gluten-free pierogies also serve up 45 mg cholesterol, 110 mg sodium, and 1 gram of sugar.  Seriously…not bad.  You also are provided with 3 grams of fiber and 3 grams of protein.  Trust me…you will feel full.  My roommate and I split the bag and it made for a perfect size dinner.  Perfectly delicious!!

I hope that I can find these in a local store, because I’m already craving them again.  If not…I know where to get them in Columbus…but I don’t get up there often enough to satisfy my want of gluten-free pierogies.  Believe me…now that I’ve had them…it’s all I want.

Conte’s wins  me over once again with their amazing product.  If you can find Conte’s Gluten-Free Potato and Onion Pierogies…buy them.  Make them.  Devour them.  But do enjoy them.  Because…trust me…you will!!

Conte's Gluten-Free Potato and Onion Pierogies
Conte’s Gluten-Free Potato and Onion Pierogies

Restaurant Review: Alma Cocina, Atlanta, Georgia

Alma Cocina, Atlanta, Georgia

Restaurant: Alma Cocina, Atlanta, Georgia

So, here I was in Atlanta, Georgia…having completed a marathon earlier that morning.  I spent the afternoon doing the tourist thing…scoping out the CNN Studios and just walking around and enjoying the city.  Trust me…after a marathon, it’s best to keep moving.  That being said…another important thing to do after running is to begin proper recovery.  And part of that is nutrition.

A big part of that is nutrition, actually.

Prior to the race, my roomie and I had thought that we’d simply return to Max’s Coal Oven Pizzeria for dinner.  Then we ate there…and were not impressed.  At all.  So, this meant new plans had to be made.  And, after watching some Food Network and seeing guacamole…I was craving.  Mexican.  Mmmm…guacamole.  Yum yum!  So, I got onto my Find Me Gluten Free app and discovered that not far from the hotel was a nice Mexican joint called Alma Cocina.  I pulled up the Web site, glanced at the gluten-free menu and thought…this might be a great place to try.  I passed the laptop to my roommate so she could take a gander, and she agreed that Mexican sounded good.  So, we made 6 p.m. reservations…and called it a night.

I marathoned.  I did the tourist thing.  I walked…a lot.  I discovered that I was hungry…and still had an hour to go before dinner reservations.  Cathy decided that we should start ambling that way because she wouldn’t feel bad walking in at 5:30 p.m.  I liked her logic, so that’s what we did…killing off a bit of spare time by wandering around the block and checking out the Dragon*Con hotels.  Because…why not?  Around 5:30 p.m., we strolled into Alma Cocina for dinner.

We were greeted immediately upon entering.  I told them that we had reservations at 6, but we were here early.  They said it wasn’t a problem, and took us right to the table.  We were seated and they went to check off our reservation, returning a moment later with some menus, including the gluten-free menu for me.  AH!  They read the reservation.  YAY!  I was feeling good about this already.

Alma Cocina's Gluten-Free Menu
Alma Cocina’s Gluten-Free Menu

As we looked over the menu, our server came over to get our drink orders.  I was recovering…so water for me.  Cathy did the same…because she’s a copy-cat.  Just kidding.  But…she did also get water.  When he returned, I inquired as to how big the sides were.  He said they were relatively big…so I pondered for a moment, but we went ahead and ordered the Gluten-Free Guacamole ($6.00) as a starter.

After leaving to put in the order, our server returned and asked me if the gluten-free was a food allergy or just a dietary choice.  I told him I was a Celiac and he nodded and said, “Okay…so cross-contamination is not okay.”  He hurried off.  I might have arched an eyebrow at Cathy.  They really do pay attention.

Alma Cocina's Gluten-Free Guacamole (served with chayote...not chips)
Alma Cocina’s Gluten-Free Guacamole (served with chayote…not chips)

Our appetizer of gluten-free guacamole came out a few minutes later.  It was this little bowl of gorgeous, creamy…yet chunky, mashed avocado with all the right seasonings and additions.  But…no chips.  The server said that to prevent cross-contamination, the tortilla chips were replaced with chayote.  I was intrigued!  He then asked if we were ready to order…and at this point we were.

Cathy went ahead and ordered the Fried Avocado Tacos ($14.00), which consisted of crispy queso cotija, poblano pesto (which she says I need to make!), roasted tomato…and yes…fried avocado.

I went for the sides…because the only other option on the gluten-free menu for me would have been the Vegetarian Platter and that just sounded like too much.  So, I opted for ordering the Mexican Chopped Salad ($4.00), which was a mix of jicama, chayote, red onion, ancho chile powder, and cilantro.  I also ordered the Black Beans and Poblano Chili Rice ($4.00) which came with pico de gallo.  Orders in…we were left to our appetizer.

The guacamole was amazing!!  Seriously.  It had red onion, serrano pepper, red onion, lime, cilantro…everything that I make mine with at home.  And it tasted fantastic.  Cathy told the waiter when he came back to see how it was that was amazing…almost as good as mine.  Hee!  But…what really made this a standout, believe it or not, was the chayote.  No lie!  The sweetness of the chayote (which, in case you haven’t googled it yet…is an edible plant that is pear shaped with a thin, green, wrinkly skin and white flesh.  It is sort of like a squash…but sweet.  And it can be eaten raw, cooked, mashed, baked, boiled, fried, etc.) was just what the guacamole was needing.  Now, at home I eat my guacamole with tortilla chips.  If I can find chayote in one of the numerous stores I shop in…that won’t happen ever again.  This is above and beyond tortilla chips.  This plant was made for guacamole!  Between the two of us, Cathy and I made short work of the guacamole.  In fact, we were just polishing it off when our entrees arrived.

Now, the chef got a little creative with my Mexican Chopped Salad.  Seemed they were out of it, so he went ahead and pretty much sliced up all the components and made a version of the salad for me.  It looked delicious and fresh as it was settled down in front of me.  And I was beyond intrigued by my green rice and super-delicious looking black beans.  Oh yeah…I was one happy marathoner.

We were left to enjoy our dinner and Cathy dove into her tacos…declaring them one of the best things she has ever eaten.  And praised that poblano pesto to the roof.

I started with the Mexican Chopped Salad.  It was an amazing array of textures and flavors.  I loved the jicama and how it tasted when mixed with the chayote.  The red onion brought a bit of bite to what, otherwise, would have been way too sweet.  As it was…I got about 3/4 of the way through before calling it quits.  It was delicious…but with the chayote with the guacamole…I needed some spice and some heat.

I turned my attention to the Black Beans and Pobalno Chili Rice.  Oh my gluten-free gods…this was delicious.  It is so simple.  So basic.  And yet…the flavors were awesome.  I loved to scoop up some of the beans and rice together.  I loved the little bit of heat that the beans had with them.  I loved the sweet, with a hint of heat, rice…and how it was green.  Pablano chili rice…for the total win.  I was enamored with this side.  I sort of wished I had ordered two of them.  But, I was getting full fast.  Rice and beans will definitely get that tummy full.  Carbs, fiber, and protein, baby!  But it was what I needed.  And I polished that plate clean.

And I was full.  The waiter came to take away the dishes and asked if we were interested in dessert.  We passed because both of us were now quite full.

Wow…what an amazing restaurant.  The atmosphere.  The service.  The overall experience…I would go back in a heartbeat to Alma Cocina.  I felt like they were very mindful of my food allergies and took great care when it came to preparing and serving my food.  LOVED every moment of our time there.

Alma Cocina's Side Orders of Mexican Chopped Salad (left) and Black Beans and Poblano Chili Rice (right)
Alma Cocina’s Side Orders of Mexican Chopped Salad (left) and Black Beans and Poblano Chili Rice (right)

Restaurant Review: Max’s Coal Oven Pizzeria, Atlanta, Georgia

Max's Coal Oven Pizzeria, Atlanta, Georgia
Max’s Coal Oven Pizzeria, Atlanta, Georgia

Restaurant: Max’s Coal Oven Pizzeria, Atlanta, Georgia

Twas the night before the Publix Georgia Marathon
And all through the town
Runners were carb loading
Wherever pizza or pasta could be found…

I wish it were that simple for me when it came to where and what I can eat before a big race (half marathon or more).  Honestly, it would make travel a little less stressful if I didn’t have to totally research every convenient (and sometimes not-so-convenient) restaurant in or around a city I was visiting.  But those are not the cards I was dealt in life.

So, as stated above, it was the night before a marathon in Atlanta, Georgia.  There were a slew of runners swarming through the city.  And we were all hungry.  And needing to fuel up for the race the following morning.  I had dome some research for some places to grab some gluten-free pizza in Atlanta that wouldn’t require hopping in the car and driving somewhere.  I narrowed it down to two places: Mellow Mushroom and a local place known as Max’s Coal Oven Pizzeria.

Since I can get Mellow Mushroom here…Cathy and I chose to try out Max’s Coal Oven Pizzeria.

Around 5 p.m. that evening, we stepped into the dimly lit, but rustic little pizzeria.  I loved the ambiance.  And we were greeted immediately and seated at a table.  There was a bar on the wall to the left, the kitchen against the back wall, with…yes…a coal oven that would toast up the pizzas.  Tables filled the floor and there were a few runners taking up some of the seats and booths.  It smelled fantastic inside so I was feeling good about this decision.

Our waiter came over and asked if we wanted something to drink.  As I was prepping for a race…water…and lots of it.  While he went to retrieve our water, Cathy and I tried to figure out which pizza we wanted to try.  I told her to go ahead and pick…so she made her choice and when our waiter returned…we were ready to order.

So, we ordered the Gluten-Free Fontina & Funghi Pizza ($17.00), which was a white pizza that was topped off with Fontina cheese, wild mushrooms, caramelized onions, and fresh oregano.  Sounded amazing, yes?  I thought so and was already hungry just thinking about getting a slice of this coal oven pizza.

So…you can imagine my great disappointment when the pizza arrived at the table.

Traditional.  Gluten-Free.  Cracker.  Crust.

UGH!  Okay…okay…it doesn’t mean it’s bad.  I mean, Mellow Mushroom does cracker crust…but they manage to do it well…so maybe…

We dug in, each taking a slice.  As I am lactose intolerant, I took a lactace pill to help with the digestion of the cheese and Cathy took the slices that had more cheese on them.  I took one bite…and thought about how fantastic the toppings were.  The cheese, the mushrooms, the sweetness of the onions…it all worked.  It worked well.  The lack of sauce meant that none of those earthy flavors were missed.  Yes…the toppings were fantastic.

But the crust…the crust…*WHIMPER*.

I don’t know what I was thinking.  I have said it once…and I’ll say it again…I have been spoiled by my local gluten-free bakery because their pizza crust is NOT a cracker crust.  It’s chewy and delicious and crusty and amazing.  And this…this pizza crust at Max’s Coal Oven Pizzeria…was NOT any of that.  This crust was…bland.  It was cooked all the way through, unlike my previous gluten-free pizza outing (in Birmingham, Alabama).  But it had no real flavor.  No buttery flavor.  Nothing that really elevated the pizza.  And then…the more I ate…the less ecstatic I was even about the toppings.  Because…I can get those toppings anywhere.  The base really needs to help elevate the dish.  And this crust didn’t achieve that.  AT ALL!

So, another gluten-free pizza fails to impress.

We polished off the pizza though…even though neither of us were thrilled with it.  And we payed the bill and left.  I was feeling so disappointed.  You know, the meal before a marathon should be filling and hearty and just really satisfying…and this was none of those things.  We walked back to the hotel and I lamented another gluten-free pizza that could have been great…but wasn’t.

So, next time…we’ll just go to Mellow Mushroom.

Live and learn.

As for Max’s Coal Oven Pizza…perhaps their regular pizzas are amazing…but the gluten-free versions fall short of anything worth raving about.

Too bad.  I was hopeful about this one.  So hopeful that Cathy and I had every intention of returning the following night.  But we quickly made other plans after we both didn’t enjoy our food that night.

Max's Coal Oven Pizzeria's Gluten-Free Fontina & Funghi Pizza
Max’s Coal Oven Pizzeria’s Gluten-Free Fontina & Funghi Pizza

Recipe: Gluten-Free Morning Bread Pudding with Salted Caramel

There is one thing that I love to do over at my friend Jenn’s house…and that’s cook.  Especially a breakfast on Sunday.  Saturday we sometimes cook in…sometimes we out.  But Sunday…we normally always make something.  And that was the case this past weekend after we discovered a drool-worthy recipe on Pinterest…hosted on Smitten Kitchen’s blog.  What drew my attention to it was the salted caramel portion of the bread pudding recipe.  It sounded divine.

So…I planned it out with Jenn.  I’d order the gluten-free challah bread if she could get the rest of the necessary ingredients.

The plan to bake this on Sunday morning was totally on.  And that morning, with my ginormous gluten-free braided challah loaf from Katz Gluten-Free ready to slice…we set to work.  While this recipe does take some time to prep…it’s worth it.  I’d make this again in a heartbeat.  And I will.  I have plenty of extra bread to use up.  So…go ahead…try it.  Don’t be intimidated.  My modifications were made to make it gluten-free.  It didn’t take away from any part of this dish.  The texture and flavors were to DIE for.

One word of warning…that caramel can get pretty hard…so make sure you don’t do what we did and throw it in the freezer.  LOL!!  Lesson learned.

Recipe: Gluten-Free Morning Bread Pudding with Salted Caramel

Gluten-Free Morning Bread Pudding with Salted Caramel

Servings: 8
Time: Prep 30 minutes; Bake 45 minutes

Ingredients:

  • 3/4 cup plus (optional) 2 tablespoons granulated sugar
  • 6 tablespoons unsalted butter
  • 1/4 teaspoon flaky sea salt or just 2 or 3 pinches of a coarse one
  • 10 to 12-ounce loaf brioche or challah bread (cut into slices about 1/2-inch thick and about 3 inches square or round, which sounds really persnickety, but they really do fit better in the pan this way) (I used Katz Gluten Free Large Braided Challah Loaf)
  • 6 large eggs
  • 1 cup mascarpone cheese, divided (1/4 cup for custard; 3/4 cup for serving)
  • 1 cup milk
  • 1/4 teaspoon almond extract


Directions:

First, choose your baking dish.   We opted to use a 9-inch round cake pan, which was a squeeze, but we made it work.  Other options would be 2-quart oval gratin/roasting dish, a 9- to 10-inch cast iron skillet, a 2-quart casserole dish or 1 deep-dish pie pan.

If your dish is safe for the stove top, use this to make the caramel. If not, use a small, heavy saucepan and place 3/4 cup sugar, butter and sea salt and heat over medium heat. The butter will melt and, after 7 to 10 minutes, the sugar will dissolve and begin to brown. Reduce heat to medium-low and stir with a spoon or spatula so that it browns evenly.  The butter does separate from the sugar, but that’s okay.  Just continue to stir them together.  It will all work out in the end even if it splits.  I know…because ours did!

If you’re using a saucepan, your caramel is done when it reaches a copper color.  Pour it over the base of your baking dish.

If you’re making the caramel in your dish (like a cast iron skillet), your caramel should be taken off the stove a step sooner, a shade more pale than copper, something of a medium brown; this is because it will continue cooking and darkening for a minute off the stove.

Regardless of what you choose to bake it in, place the dish in refrigerator and chill until caramel is cold and solid, about 30 minutes. Once chilled, arrange the bread slices. Place the heel of the bread in the center and do what you can to fan the slices around it, overlapping each slightly and knowing with complete confidence that even if your dish doesn’t resemble a blooming rose, nobody will care at all.  Mine looked nothing like a blooming rose…and, honestly, no one cared.

In a large bowl whisk together eggs, remaining 2 tablespoons sugar (if using; I skipped this) and 1/4 mascarpone cheese (save rest for serving), until very smooth.  Add milk and almond extract.  Pour this over the bread, making sure to saturate all of it.  Cover tightly with plastic wrap and chill for about 30 minutes to an hour.  You can let it soak overnight if you have that sort of time or plan that far in advance.  If you bread seems too high in the vessel to get a good soak, you can weight it with a plate in the fridge.

After the allotted time (or in the morning), take your dish from the fridge.  Heat oven to 375°F.  Remove plastic from dish and bake 30 to 35 minutes, until moist but not wet in center. Remove from oven and run a knife around edge of dish, loosening bread from sides. Place a serving plate over top of dish (bottom side up), and, using potholders, hold pudding over sink and flip pudding onto the plate. Lift baking dish off plate; scrape any extra caramel from pie dish over pudding.

Serve, cutting it into wedges at the table and spooning a healthy dollop of mascarpone onto each plate.

A slice of Gluten-Free Morning Bread Pudding with Salted Caramel

~*~*~

While the original recipe called for this to soak overnight, we were busy watching Thor 2…so that didn’t happen.  The fact that we only let it soak for about 30 minutes in the fridge did not, at all, make the dish any less of a delicious treat.  It worked perfectly.  So, don’t feel like you have to make it the night before…unless you have that sort of time.  Do plan ahead though, because this does take some time.  Jenn and I took out 2 of the eggs from the original recipe as we thought 8 eggs was a bit much.  I think we made a good call.  This cooked up to a beautiful perfect meal.  And we all sat and enjoyed it…and kept the leftovers for the next couple of mornings.  SO amazing and delicious!!

Yeah…totally making this one again!

Product Review: Katz Gluten Free Large Braided Challah Loaf

Katz Gluten Free Large Braided Challah Loaf

Product: Katz Gluten Free Large Braided Challah Loaf – $35.00

Let me tell you…I adore products from Katz Gluten Free.  I have been pimping the quality, taste, and everything about their variety of products since I have tried so many of them.  However…in order to make a gluten-free breakfast bread pudding with a friend of mine…I needed some gluten-free challah.  And I knew the only place to get it was from Katz Gluten Free.

I debated for a long moment over whether to go ahead and order the very, very, very pricey Large Braided Challah Loaf…or just skimp on that line of thinking and get either the sliced challah loaf or the rice challah.  I debated.  Price had a lot to do with it.  I mean…holy gluten-free gods…$35 was a lot to spend on a loaf of bread.  But…I figured I wanted to go for quality of what we were making and opted to go ahead and place an order for Katz Gluten Free Large Braided Challah Loaf.  I just hoped it was worth the $35 I was spending on it.  Oy!

A few days later, the loaf arrived via UPS…and I was really excited to take a look at what a $35 loaf of bread looked like.

Little did I know that when the loaf is called a large braided loaf…it really is LARGE!!  Seriously…the size of two of my heads put together.  That is not an exaggeration!

I only hoped the Large Braided Challah Loaf was worth the investment in the end.  I’d find out on Sunday morning…after a short run…when my friend, Jenn, and I raided her kitchen and began working on a recipe for Gluten Free Morning Bread Pudding with Salted Caramel.  We had the recipe picked out prior to the get-together weekend…and I told her if she got the rest of the ingredients, I would get the bread.  And with both of us following through on the deal…it was time to open up this monster loaf and see if I made a wise investment.

The bread smelled fantastic the moment I got that plastic wrap off of it.  I mean…almost like it was fresh out of the bakery.  So amazing.  I sniffed the air quite a few times, ignoring the slight hunger rumbles in my belly. There was a lot of time between this moment and breakfast time…so I had to focus on getting it made if I wanted to get myself fed.  I sliced off the end piece and, instead of using it as the center of the bread pattern as suggested by the recipe…we cut it up to sample.

Gluten-Free Morning Bread Pudding with Salted Caramel made with Katz Gluten Free Large Braided Challah Loaf

OMG…it was good.  It was really, really good.  I loved the taste of the crust and the actual challah bread itself.  The sesame seeds that are scattered on the top of the loaf are a brilliant touch and a very tasty addition.  I wouldn’t have though that those little seeds could be so important, but the taste and texture was only elevated with their presence.  I was impressed.  And, let me tell you…this is one very soft and fluffy loaf of bread.  You’d never guess it because it feels so heavy…but you slice into it and it is just super airy and light.  It’s so weird, I know…but that’s the truth.  It didn’t crumble or fall apart as I sliced into it, as so many loaves of gluten-free bread can do.  And the taste was out-of-this-world delicious.  It tasted like it had just been made and pulled out of the oven.  It didn’t even need a reheat to make it taste edible.  It can go straight from the freezer to the counter top with only a quick defrost.  Amazing.  Totally worth all $35 I paid for it.

I don’t know how this ranks nutrition-wise as no nutrition information is available on the site.  Just know this bread loaf is HUGE!!  HUGE!!  The recipe we were making called for about 12 ounces and I used less than 1/3 of the loaf.  Honestly.  The rest is sitting in my freezer until my next culinary adventure arises.

I can, however, list off the ingredients that Katz Gluten Free uses to make its legendary Large Braided Challah Loaf.  This gigantic loaf is made from a mix of gluten-free flour (white rice, tapioca, arrowroot, corn, soy, and potato), fresh eggs, palm oil, brown sugar, honey, xanthan gum, yeast, salt, flaxseed, and apple cider vinegar.  Mine came topped with sesame seeds, however you can choose to purchase the loaf without the seeds on top.  However, if you don’t have an allergy…I highly recommend keeping them on there.

This bread was amazing in the bread pudding that we baked up for breakfast.  It’s amazing on its own.  It’s amazing with a little butter schmeared on it.  It’s amazing with pizza toppings cooked on it.  It’s awesome as a grilled cheese sandwich.  It holds up to anything and everything.  It won’t fall apart on you.  The flavor is amazing.  The texture is more than superb.  And the versatility this loaf offers is unmatched.  And you’ll want to use it in a variety of ways…since there is so damn much of it.  Not a complaint anymore.  One of my favorite gluten free breads I have ever eaten.  I will definitely spend another $35 in the future without a second thought.

Thanks Katz Gluten Free…for this amazing addition to my gluten-free menu!!

A slice of Gluten-Free Morning Bread Pudding with Salted Caramel made with Katz Gluten Free Large Braided Challah Loaf

Recipe: Gluten-Free Pasta with Asparagus and Cherry Tomatoes

I have a bin problem.  I’m going out of town (yes…again!)…and I have fresh CSA bin ingredients to use.  I wanted something amazing.  Something flavorful.  Something that would use more than one item.  Because…I don’t want to waste any of my fresh veggies and fruit that I get each week when I’m home.

So…the other night, I modified one of Giada De Laurentiis’ recipes.  Her recipe was originally a penne recipe that incorporated asparagus and cherry tomatoes and other vegetables.  I had the tomatoes and the asparagus…and I played with the vegetables I had instead of what she recommended…but no gluten-free penne on hand.  But…I did have gluten-free pasta on hand, which I picked up on the eve of the Chicago Marathon from Da Luciano Pasta, Pizza & Catering.

This recipe is full of spring flavors, which is just what this winter-hating girl needed.  And, yeah…FULL of amazing flavor.  Light.  Fresh.  Delicious.  The recipe is below!

Gluten-Free Pasta with Asparagus and Cherry Tomatoes

Gluten-Free Pasta with Asparagus and Cherry Tomatoes

Servings: 4-6
Time: Prep 5 minutes; Cook 10 minutes

Ingredients:

  • 8 ounces gluten-free pasta
  • 3 tablespoons olive oil
  • 2 garlic cloves, minced
  • 1-1/2 pounds thin asparagus, trimmed and cut into 1-inch pieces
  • Salt and freshly ground black pepper
  • 2 cups (about 9 ounces) cherry tomatoes
  • 3 cups fresh spinach
  • 1/2 cup low-sodium vegetable stock
  • 1 cup grated Parmesan cheese

Directions:
Bring a large pot of salted water to a boil over high heat.Add the pasta and cook until tender but still firm to the bite, stirring occasionally, about 6 to 10 minutes.  Drain the pasta, reserving about 1/2 cup of the pasta water.In a large saute pan, heat the oil over medium-high heat.Add the garlic and cook until fragrant, about 1 minute.

Add the asparagus, season with the salt and pepper, and cook for 3 minutes until slightly soft.

Add the cherry tomatoes and spinach.

Cook for 2 minutes.  Pour the vegetable stock into the pan and bring the mixture to a simmer.  Cook until the tomatoes start to burst and the stock is reduced by half, about 3 minutes.

Transfer the asparagus mixture to a large serving bowl.  Add the cooked pasta and 1/2 of the Parmesan.  Toss well, adding reserved pasta water, if needed, to loosen the pasta.  Garnish with the remaining Parmesan and chopped basil.

~*~*~This pasta dish is awesome.  You won’t feel filled to the brim and about to burst.  In fact, the light flavors and delicious vegetables are a nice way to dress up the pasta noodles.  And my gluten-free pasta noodles were amazing.  My roomie and I loved this dish so much, we made it again the following night.Great way to use some spring vegetables and get in the mood for that warmer weather.  Thanks for the inspiration, Giada!

Product Review: Hilary’s Eat Well World’s Best Veggie Burger

Hilary's Eat Well World's Best Veggie Burger
Hilary’s Eat Well World’s Best Veggie Burger

Product: Hilary’s Eat Well World’s Best Veggie Burger – $3.99+

When you have a product that is actually called the “World’s Best Veggie Burger”…then, by God, you better have the best damn veggie burger in the world.

Prior to having to go gluten-free…I went vegetarian, so I have had pretty much every veggie burger out there.  By having to go gluten-free has only helped me to step beyond the very chemical-laden Morningstar veggie burgers and discovered healthier and much tastier options.  Made with…REAL ingredients.  Loving that.

After reading crazy-good and amazing reviews on the veggie burgers that are done by Hilary’s Eat Well…I knew…absolutely knew I had to try them out.  And, on a recent journey over to my local Whole Foods store, my roommate told me to go grab one of the Hillary’s Eat Well veggie burgers from the freezer section.  They had quite a few varieties…but I thought it best to start with the original.  The burger that started it all.

Hilary’s Eat Well World’s Best Veggie Burger.

Hilary's Eat Well World's Best Veggie Burger (frozen)
Hilary’s Eat Well World’s Best Veggie Burger (frozen)

Quite a reputation to live up to, yes?  Yeah…

A little history on this burger.  Hilary created this recipe back in 2005 for her restaurant, Local Burger, wanting to have it be free of all the common food allergies and artificial ingredients…yet still be packed with great flavor.  It was a hit at the restaurant…and now…it’s available to the general public in your natural food stores.

Ready to dive into a delicious new veggie burger and test out my brand new vegetable spiralizer to make sweet potato curly fries…the other night I got down and dirty cooking this frozen patty up.  Nothing was easier.  I preheated my electric skillet and put a little coconut oil in there.  Once it was heated up, I threw both of the patties in, hearing it immediately begin to sizzle.  With my spiraled sweet potato going down, I was able to focus on cooking these patties perfectly.  These easily took about 3 minutes on each side.  Not too long at all.  And when I flipped the burgers, they didn’t fall apart at all.  Most of the time, my gluten-free veggie burgers crumble.  Not these.  They held together amazingly well.

Hilary's Eat Well World's Best Veggie Burger (cooked)
Hilary’s Eat Well World’s Best Veggie Burger (cooked)

I plated the burgers on a gluten-free bun from my local gluten-free bakery, topped it with a bit of red leaf lettuce and some tomatoes.  A squirt of Dijon mustard and…there it was.  Dinner was served.

Even better…dinner was awesome.  One bite and I knew exactly why these is called the World’s Best Veggie Burger.  This burger is awesome.  Packed with flavor.  Not flat at all.  And, as I mentioned above, they don’t fall apart as you bite into it, or hold it in the bun.  It’s sturdy, yet soft and delicious.  And I am now hooked, very eager to try out the other offerings from Hilary’s Eat Well.

The Hilary’s Eat Well World’s Best Veggie Burger is made up from water, organic millet, organic quinoa, expeller-pressed non-GMO coconut oil, organic sweet potato, organic spinach, organic onion, organic psylliam husk powder, organic arrowroot, organic apple cider vinegar, salt, organic garlic.  Real ingredients!  Real, recognizable ingredients.  I LOVE this!  It is corn-free, yeast-free, gluten-free, dairy-free, egg-free, soy-free, and nut-free.  It’s perfection!

As for nutrition, the serving is 1 of the 2 patties that are in the package.  This one veggie burger will serve you up 210 calories and 9 grams of fat.  It might seem high, but much of that comes from the coconut oil.  The Hilary’s Eat Well World’s Best Veggie Burger also serves up 340 mg sodium.  This burger is cholesterol free and sugar free.  In addition, you will be getting 4 grams of fiber and 5 grams of protein.  Trust me…you will be FULL!

I love polishing off a meal and feeling full for hours afterwards.  And that’s what happened here.  I didn’t even have popcorn that night for a snack.  It’s not every day a meal fills me up.  Very impressed.

So far, the two products I have tried from Hilary’s Eat Well have blown me away.  I am SO in love with the World’s Best Veggie Burger.  And, as of right now, it really does live up to its name.  Brilliant.  And delicious.  I’m hooked!

A gluten-free and vegan burger made with Hilary's Eat Well World's Best Veggie Burger
A gluten-free and vegan burger made with Hilary’s Eat Well World’s Best Veggie Burger

Product Review: Sophie’s Kitchen Vegan Prawns

Sophie's Kitchen Vegan Prawns
Sophie’s Kitchen Vegan Prawns

Product Review: Sophie’s Kitchen Vegan Prawns – $5.99+

Vegan seafood.

Sounds impossible, right?  I would have doubted its existence myself, until a trip to Jungle Jim’s in Cincinnati, Ohio last year.  My eyes were opened to so much potential and awesomeness.  It’s…seafood…made from plant-based ingredients.

Seriously!

And while my journey into the vegan seafood began with Sophie’s Kitchen Breaded Vegan Fish Filets…which were…eh…okay…I have found other products by this company to be amazing.  Like…you wouldn’t even know it wasn’t seafood.  I’m not kidding.  Taste is sometimes even better.  Texture is spot on.  Yep…I’m in love with this company.  So much, in fact, that the Breaded Vegan Shrimp are always in my freezer.

Between the numerous natural food stores that I shop at each weekend, there is a variety of Sophie’s Kitchen options available.  My most trusted spot, however, is Whole Foods, as they seem to have more of the products than anywhere else.  And on a recent journey, these amazing products were…ON SALE!  So, my roommate and I grabbed one of each.

And…with Fat Tuesday’s arrival…I was in the mood for some Cajun food.  This meant I took the Vegan Prawns and rubbed them with a Cajun seasoning (a la Emeril Lagasse) and cooked them in the oven at 375°F for 6 minutes.  This really is that simple, I swear.

Why Cajun shrimp?  Well, when I was at Disney World this past January and was meeting Tiana (from The Princess and the Frog), I asked how her restaurant was going and explained that it was a dream of mine to open my own.  She said to make my signature dish an amazing Cajun Shrimp Alfredo.  So…here I took her advice…except I kept mine vegan and gluten-free.  Because…I want to be able to eat it, yes?  Yes!

Sophie's Kitchen Vegan Prawns (frozen)
Sophie’s Kitchen Vegan Prawns (frozen)

Well, being that this was the first time I was eating the Vegan Prawns from Sophie’s Kitchen, I didn’t stir them into the pasta, but rather laid them on tip.  And it worked.  The dish looked beautiful and the pasta came out perfect.  I made up a sauce using So Delicious Dairy Free Unsweetened Cultured Coconut Milk, almond milk, nutritional yeast, vegan butter, garlic, fire roasted tomatoes, and a bit more Cajun seasoning.

And I’ll get to the taste in a moment…

Because Fat Tuesday is tonight and I had another idea going in my head.

This time…a Cajun Shrimp Po’boy.  With my vegan slaw on a gluten-free sandwich roll.  This HAD to happen.  I mean…for real.  I once again rubbed the Vegan Prawns down with my Cajun seasoning, but this time I decided to cook them up in a pan.  I toasted the rolls in the oven, added some local lettuce, slathered them with some slaw and topped them off with the Vegan prawns.  My own, personal twist on a Po’boy.  Getting in the Mardi Gras spirit here!  I cooked the prawns in coconut oil and…OH MY GOODNESS…that was magic.  The Cajun seasoning blackened up perfectly.  And these were…winning!

So, now I can talk about what I thought about the Sophie’s Kitchen Vegan Prawns…

Oven baked or cooked in the skillet, I was beyond impressed with the flavor, texture, and overall taste of the Vegan Prawns.  They were fantastic cooked in the coconut oil in the pan though.  Reminded me of when I used to help my mom make her garlic lover’s shrimp (with real shrimp, mind you!).  And, I think next time I purchase these (and, yes, there will be a next time), that’s what I’m going to do with them.  YUMMY!!  I thought these meshed well with the other flavors I paired with it, in both dishes.  And while baking them in the oven was good…the pan cooking was beyond amazing.  I think I found my new favorite way to prepare them.  In fact, next time I get the Vegan Scallops…that’s how I’m cooking those as well.  Honestly, these are fantastic.

As far as ingredients go, the Sophie’s Kitchen Vegan Prawns are made from water, konjac powder, beta glucan, potato starch, paprika, organic agave nectar, sea salt, carageenan (seaweed based gelatin), alginate (from seaweed), and calcium hydroxide.  The Vegan Prawns are soy-free, gluten-free, 100% vegan and plant-based, non-GMO, contain no artificial colors, preservatives or MSG. These have no added sugars or artificial…anything.  Honestly!

Nutritionally speaking, each box contains 3.1 servings…or 10 of the Vegan Prawns.  A serving is 3 prawns, but being as I’m splitting this with two people over two days, we each had 2.5 Vegan Prawns.  That being said, a normal serving of the 3 prawns would give you 50 calories.  This product is fat free and cholesterol free.  A serving will also provide you with only 150 mg sodium and 1 gram of sugar.  Loving that.  And finally, three of the Vegan Prawns provide you with 3 grams of fiber and less than 1 gram of protein.

Discovering Sophie’s Kitchen products has been amazing for me.  I often keep one product stocked in my freezer at all times.  You never know when you might need it.  If you haven’t tried these yet…go to your local natural foods store and check their freezer section.  Serious yummy vegan seafood eats here!

Sophie's Kitchen Vegan Prawns (cooked 2 ways) - Left: Vegan Cajun Shrimp Alfredo (baked); Right: Vegan Shrimp Po'Boys (pan fried)
Sophie’s Kitchen Vegan Prawns (cooked 2 ways) – Left: Vegan Cajun Shrimp Alfredo (baked); Right: Vegan Shrimp Po’Boys (pan fried)

Product Review: Urbāne Grain Three Cheese and Mushroom Whole Grain Quinoa Blend

Urbāne Grain Three Cheese and Mushroom Whole Grain Quinoa Blend

Product: Urbāne Grain Three Cheese and Mushroom Whole Grain Quinoa Blend – $4.99

Quinoa.  I love quinoa.  I cook with it often.  And I have used it as a hot cereal in the morning as well as a side…and even baked it in casseroles.  I’ve also supplemented it for rice-based meals, as quinoa has a much better nutrition profile than rice.

Even better…it tastes great.

One day, while hitting up the (seriously) nine grocery stores I shop at every week, my roommate decided to splurge a little and had me pick out one of the new products we hadn’t seen elsewhere before.  I noticed some black pouches on a shelf with clearly labeled “gluten-free” markings on them.  They were quinoa dishes, that were also touted to be all natural and restaurant quality.  Since I am a quinoa whore…I desperately wanted to try one of the variety of flavors.  So, I pointed to them and my roommate told me to pick a flavor.  As I am less picky than her I told her to pick the one that sounded best to her.

Her choice?

Urbāne Grain Three Cheese and Mushroom Whole Grain Quinoa Blend.

Sounds good, yes?

I thought so.  So…we brought it home with us.  And promptly let it sit in the pantry for a few months.  D’oh!  But…even though a bin was received today, I already had it in my mind that this quinoa meal was going to be our dinner tonight.  And so…it was.

Now, I had physical therapy on my ankle right after work, so this put us home much later than normal.  I didn’t take that into account this morning when I noticed the 20-25 minute cooking time on the stove and in the microwave.  Ah well.  I figured I could pair it with a nutritious kale salad with some fresh veggies and that would help get us through the cooking time.

So, as instructed by the package, I immediately filled a pan with 1-1/2 cups of water, 1 tablespoon of olive oil, then added the contents of the pouch.  I gave it a stir and set it on medium-high heat, letting it come up to a boil.  Once there, I covered it, took the heat down to low and let it simmer for about 25 minutes.  The entire time it was cooking, and the couple of times I lifted the lid to give it a stir, the dish itself smelled fantastic.

Like…macaroni and cheese.

I’m okay with that.

Anyway, after it cooked and the liquid was mostly gone, I removed it from the heat and let it sit, still covered, for five minutes.  After that, I gave it a quick fork fluffing and dished it up.  Dinner…was finally served.

And my, oh, my…this was one crazy indulgent dinner.  First of all…hello quinoa.  I love you.  Pair that with a blend of organic millet and brown rice and you’re talking a filling little bowl of goodness.  The cheeses..Romano, Cheddar, and a 12 month anged Parmesan.  Amazing.  It smelled as good as it tasted.  And that texture was rich and creamy, with a little bit of that rice-chewy texture that is just what you need so everything isn’t just one strange texture.  It was awesome.  The dehydrated mushrooms softened up beautiful.  And my cheese-loving roommate devoured it as quickly as I did.  Really amazing.  I thought it was one of the better packaged items that involved quinoa that we have picked up to date.  YUM-A-LICIOUS!

Ingredient-wise…it doesn’t get much simpler than this.  The Urbāne Grain Three Cheese and Mushroom Whole Grain Quinoa Blend contains parboiled brown rice, quinoa, millet, Cheddar cheese, Parmesan cheese, and Romano cheese, dehydrated mushrooms, sea salt, and dried herbs.  Simple ingredients make the best meals.  Even when they come in a package.

Nutritionally speaking, a serving of Urbāne Grain Three Cheese and Mushroom Whole Grain Quinoa Blend is 1/3 cup of the dry mix.  There are 2.5 servings per package, which makes about 2 cups when completely cooked.  A serving will provide you with 180 calories and 2.5 grams of fat.  You will also be consuming 550 mg sodium, and only 1 gram of sugar.  Nice!  A serving also will dish you up 3 grams of fiber and 6 grams of protein, so you will feel full when you eat this.  Trust me.  This mix is gluten-free and cholesterol free.

I fell in love with this package of awesome quinoa goodness.  The flavors were amazing.  It cooked up beautifully. It was indulgent and rich and…just really amazing. I can’t say enough good things about it.  They aren’t kidding when they say it is restaurant quality.  I can’t wait to try the other 8 flavors out there.

Urbāne Grain Three Cheese and Mushroom Whole Grain Quinoa Blend (cooked)

Product Review: A Taste of Thai Pad Thai for Two

A Taste of Thai Pad Thai for Two

Product: A Taste of Thai Pad Thai for Two – $3.59+

I’m very fortunate that I live near one of the best Thai restaurants in the nation.  Yes.  I will go as far as to say that.  However, that being said…I also can’t afford to eat out much these days.  My money is better spent on travel and food experiences outside of my own neighborhood.

And race fees.

But…that’s a horse of a different color.

As I’m getting through a very long two weeks of no CSA bin filled with fresh fruit and vegetables, I’m scraping my pantry, fridge and freezer for things to eat until Friday.  It’s coming.  But it’s been a very rough two weeks of eating processed foods.  Some good…some better…none horribly bad.  I do pay a lot of attention to nutrition information when I shop and when I do buy something in a box or package…I mind the ingredient list and nutrition information above everything else.

Anyway…with nothing real to make food out of, save for a container of organic baby kale and a red onion…I pulled the final Thai food box out of my pantry.  This time it was the Pad Thai for Two from A Taste of Thai.  It sounded brilliant and the picture on the box looked drool-worthy.  One thing I didn’t take into account was that the box literally only contained rice noodles and the Pad Thai sauce.  No joke.  So…I had to think.  And I thought…kale and onions…caramelize…sauté…add noodles…BAM!  Dinner.  Why not?  My roomie seemed game for that too, so I set to work.

Pad Thai Sauce and Rice Noodles in A Taste of Thai Pad Thai for Two

I boiled some water and put the rice noodles into a large bowl, covering it with the hot water and letting it sit for 20 minutes.  As the noodles were soaking, I went ahead and sliced up the last of my red onion and got it into a pan over medium heat to begin the caramelizing process.  I, not thinking, started this in a smaller sauté pan…remember this later.  The onions were caramelizing beautifully, so I went ahead and added a couple handfuls of organic baby kale.  I sautéed it until it wilted down and turned bright green.  When the noodles were ready, I drained them and then added them to the small sauté pan, realizing then my error.  Somehow, I managed to contain it all in the pan and still swoosh it and stir it.  I didn’t risk tossing it as the pan was rather full of Thai goodness.  After about 4 minutes, I added some chopped (and toasted) cashews that I decided to add at the last moment, and then the packet of sauce.  All of this was mixed in that itty-bitty pan, but it got the job done.  And soon, I was dishing it up into two bowls and after about 30 minutes…dinner was served.

Was it worth it?  Yes!!  It was.  I enjoyed this little boxed meal more than I thought I would.  I thought the onion, cashew and kale were perfect additions (and very non-traditional, I know!) to the mess of noodles and sauce because they brought different flavors and textures to the meal.  The rice noodles actually ended up being cooked perfectly.  They didn’t stick together, as I was afraid they would because normally that’s what happens with rice noodles.  I was pleasantly surprised.  The sauce was tangy and sweet more than spicy, which was a nice change of pace (but you know I love my spicy foods!).  And it was easy to eat this noodle dish with chopsticks without making a huge mess.  No mess at all, in fact.  I found that I truly enjoyed eating this meal.  I would definitely consider buying it again for one of those quick-to-make meals where I have time for a little prep work and cook time…but it isn’t a flash in the microwave either.  LOVED it!

So, let’s talk ingredients, yes?  As I mentioned, the box contained a packet of rice noodles and a packet of sauce.  The rice noodles are simply made from rice flour, water, and modified (I hate that word!) tapioca starch.  The Pad Thai sauce was made from palm sugar, tamarind juice, water, shallot, sweet radish, garlic, soybean oil, potassium chloride, maltodextrin, miso, salt, hydrolyzed vegetable protein, yeast extract, paprika oleoresin, citric acid, alpha-tocopherol, and chili oleoresin.  I know…not very clean…and some very hard to pronounce words.  Ugh.  So much promise…

Let’s now talk nutrition.  A serving is 1/2 of the package.  This serving will provide you with 391 calories and 3 grams of fat.  This will also provide you with 433 mg sodium and 16 grams of sugar.  That sugar is off-the-chart.  YIKES!!  As for the sodium…it’s under 600 mg, so I can live with that.  Without the additions…this dish has no fiber, but does provide 5 grams of protein.  Of course, then I added onions, kale, and cashews and that really bumped up some of those nutrients, but hardly added any calories at all.  Love it.

So…yes…this is a highly processed item…and the nutrition factors aren’t fantastic, but they aren’t totally bad either.  The sugar content is high, but that is mostly contained to the sauce.  And the overall taste and textures were a huge hit.  My roommate and I loved eating them, but will probably try to do  more from scratch.  But, in a pinch, on those just scraping by weeks…this will do!

A Taste of Thai Pad Thai for Two (prepared with caramelized onion, kale, and cashews)