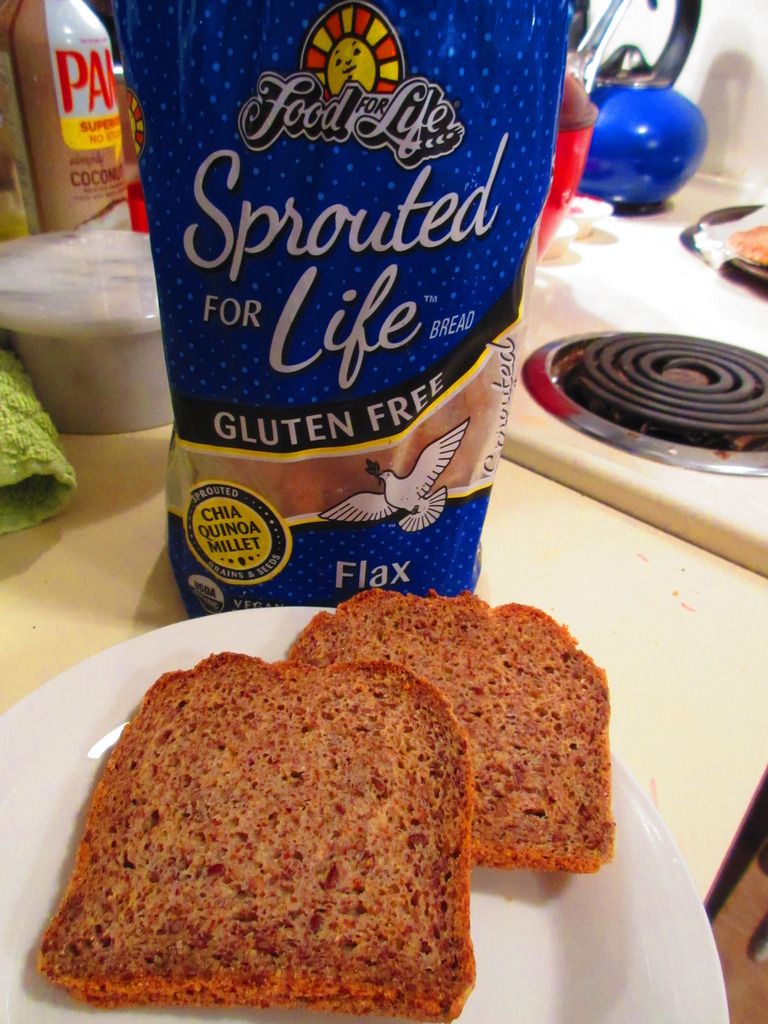
Food For Life Sprouted For Life Gluten Free Flax Bread
Product: Food For Life Sprouted For Life Gluten Free Flax Bread – $5.99+
A little while ago, I was introduced to a couple of new breads on the market. While the brand name has been producing gluten-free breads for awhile now, it wasn’t a brand that I actively sought out. Yes, I saw it all the time in the freezer section of Whole Foods and other natural food stores, but I had grown accustomed to snagging Rudi’s or Udi’s or (now) the Aldi liveGfree brand or Canyon Bakehouse. Food For Life was there…I just always overlooked it.
And why?
Who knows? As an active (even now, with an injury) athlete, it’s important to properly fuel my body and eat wholesome foods. Most products on the market for the gluten-free diet happen to be junk food. It drives me nuts. I hit that gluten-free section of a store and I can find a vast array of cookies, crackers, chips, pretzels, and the like. It is one of the biggest pet peeves of the grocery store. Yes, a lot of people with Celiac and gluten intolerance do miss out on some of the finer treats like Oreos and the like, but the shelves are literally overrun with products that aren’t going to feed your body right and healthy.
But Food For Life set out to change that. Through a lot of research and development, Food For Life released the first ever gluten free breads made from sprouted grains, such as quinoa, millet and chia. A majority of gluten-free breads, while satisfying the “gluten free” bread requirement, don’t address the overall health needs of consumers. Without the gluten to give bread the soft, elasticity of regular breads, most manufacturers choose alternative ingredients that mimic the feel of gluten, using egg, milk, and refined starches in order to achieve a softer and chewier texture. But these breads are created from ingredients that you wouldn’t expect to find in natural breads, many of which are devoid of nutrients.
Food For Life stepped up and decided to start a line with four varieties of completely gluten-free breads that were specifically created with the health of consumers in mind. Not only are they gluten free, but they are also vegan and made from nutrition packed ingredients that have been sprouted to maximize nutrition and digestibility.
I was fortunate enough to be sent one loaf of each of the Sprouted For Life Gluten Free Breads from Food For Life. These loaves come in Original 3 Seed, Almond, Cinnamon Raisin, and Flax.
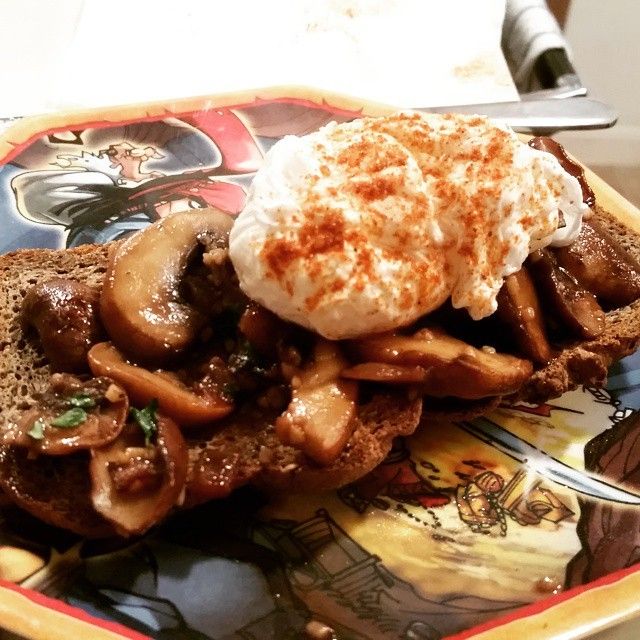
The hardest part, for me, was choosing where to begin. It had been a long and tiring week and I was looking for a nutritious, but filling dinner. And, as breakfast is one of my favorite meals of the day, I decided to hit up one of my favorite recipes and have breakfast for dinner. Hence, it was time to bust out a very British, and all-time favorite in my book, breakfast recipe – Mushrooms On Toast.
And I had the perfect vehicle for the toast portion in my kitchen freezer. I consulted with my roommate and we decided to start with the Food For Life Sprouted For Life Gluten Free Flax Bread.
I thawed out four slices of the bread and then prepped them to toast in the oven while I prepared the rest of the meal. This involved sauteing up mushrooms, red onion, garlic, seasoning, and some of my homegrown fresh thyme. I made it creamier with rice milk. And then poached some eggs to top off the entire dish.
Food For Life Sprouted For Life Gluten Free Flax Bread turned out to be the perfect vehicle for Mushrooms On Toast. The bread is firmer, and stands up a bit more to toppings and the like. I was a bit worried when I thawed it out, as it seemed really dense and heavy, but that was ideal. That was, actually, a good thing in this case. The Flax variety of the Sprouted For Life line of gluten-free breads is amazing. It is dense and has this rich nutty flavor to it. The texture, if made into a sandwich might be a bit dry and heafty, but in a dish like this, where a sturdy bread is needed, it is ideal. In fact, this bread was almost like a sourdough, and that was where the magic was with this bread.
I loved the crunchy, sturdy nature of the bread when topped off with the creamy garlic and mushroom sauce. It held up to the runny middle of the poached egg and even a smattering of hot sauce. It was crispy, and delightful with each spoonful. Seriously, any other bread would have gotten damp and soggy, but this…this held up and stayed a piece of toast throughout the entire eating process.
Food For Life Sprouted For Life Gluten Free Flax Bread is rich in essential fatty acids and was developed specifically to help you perform at your best. With a great balance in the nutritional aspect, this bread is quite appealing. Made with sprouted chia, sprouted quinoa, and sprouted millet, this bread is a trio of health. And the flax is an added bonus for sure.
Let’s talk about ingredients. Food For Life Sprouted For Life Gluten Free Flax Bread is made from organic sprouted quinoa (red and/or white), filtered water, organic arrowroot, organic potato starch, organic sprouted millet, organic tapioca, organic sprouted flax, organic applesauce, fresh yeast, organic safflower oil, organic cactus, organic sprouted chia seeds, organic agave, organic vanilla, sea salt, vegetable gum (xanthan and cellulose), and organic psyllium. It is gluten-free, vegan, high in fiber, cholesterol free, and free of added sugars.
So, let’s talk nutrition. Since starting my nutrition course (oh…did I not mention that yet?), I have learned that there is more to counting calories. Sure, it is important, but it shouldn’t be the focus. It’s all about the nutritional aspects of the food. Avocados are high in fat and calories…but SO much better for you than that chocolate bar with the same amount of fat and calories. See what I mean? So, a serving of Food For Life Sprouted For Life Gluten Free Flax Bread is one slice of bread. This slice of bread will give you 110 calories and 2.5 grams of fat. This bread is free of saturated fat and trans fat (YAY!). The Flax Bread also will provide 115 mg sodium per slice, 0 mg cholesterol, 21 grams carbohydrates, 4 grams of fiber, 0 grams of sugar, and 2 grams of protein. I was freaked out at first with the high calories per slice, but, again, not all calories are created equal and there is nothing fake going into this bread. It’s all healthy, all good, all nutritious. Making this a fantastic choice.
I was so excited to receive the loaves of the Food For Life Sprouted For Life Gluten Free Breads. And if they are all as amazing and delicious as the Flax variety, then I am in for a treat for sure. My hat is off to the nutritional value, the top-notch ingredients, and the amazing taste of the new Sprouted For Life Gluten Free Flax Bread from Food For Life. My only complaint, as with most gluten-free breads out there, is the small size of the loaf. Aside from that…amazed. Happy to have been given the opportunity to really try it out. I am beyond impressed.
Garlic Mushrooms on Toast made with Food For Life Sprouted For Life Gluten Free Flax Brea
I have been a reader of Vegetarian Times since before I went full-on vegetarian. No joke. And after I took the step toward eating a plant-based diet, I became a subscriber. It’s one of the magazines I just can’t live without each month. Well, back in the April/May 2015 issue, they had an amazing recipe that involved polenta and corn, and black beans, and some other easy to find, or already have on-hand, items. And I had it in my head to make it.
This happens every month when I get my magazine subscriptions. But this time, it was different. Instead of just saying I would one day make that recipe. This time I did.
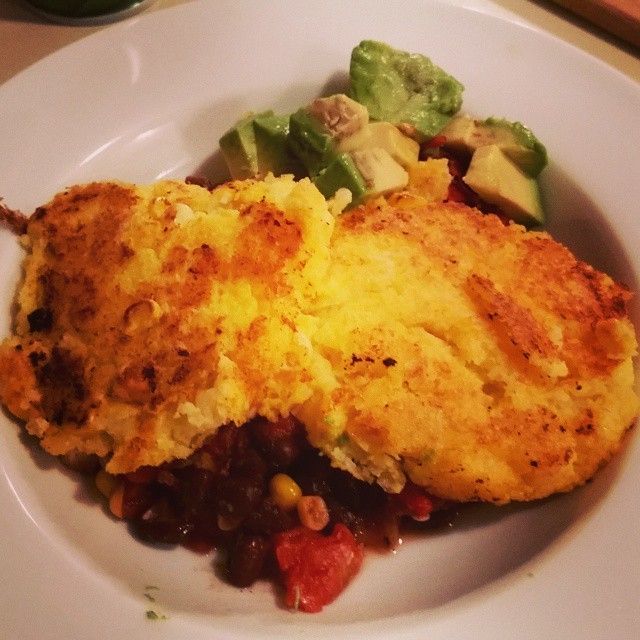
The recipe is for Double Corn Cakes with Black Beans…and the flavors, textures and just presentation are all fabulous. It’s a healthy and plenty filling meal. Having a hard time with your protein? Make this and you’ll be getting 19 grams in one serving. YES!
2 (15-oz) cans no-salt-added black beans, rinsed and drained
1 (15-oz) can diced tomatoes
1-½ cups fresh or thawed frozen corn kernels, divided
1 tablespoon lime juice
1 (18-oz) tube pre-cooked polenta
1 large egg, lightly beaten
Directions:
Heat oil in large skillet over medium-high heat.
Add onion, garlic, jalapeño, and cumin, and sauté 5 minutes.
Stir in beans, tomatoes, 1 cup corn, and lime juice; season with salt and pepper, if desired.
Cook 5 minutes, or until heated through. Transfer mixture to covered container, and keep warm.
Wipe out skillet.
Meanwhile, crumble polenta into microwave-safe bowl, and mash with fork until nearly smooth. Add remaining 1/2 cup corn kernels. Microwave 1 minute to soften polenta. Stir, then add beaten egg, and fold into polenta mixture until smooth.
Coat skillet with cooking spray, and heat over medium-high heat. Shape polenta into 8 1/3-cup cakes, gently flattening with palm. Cook corn cakes in two batches in skillet 5 minutes per side, or until golden brown.
Serve corn cakes over black bean mixture.
~*~*~
There is something amazing about transforming corn kernels and polenta into savory fritters. I served mine with a side of sliced avocado, but salsa would be a great touch as well. These fritters have this nice crispy outside and soft inside. Fantastic flavor. Healthy. Delicious!! I need to really make more recipes from my magazine subscriptions in the future!
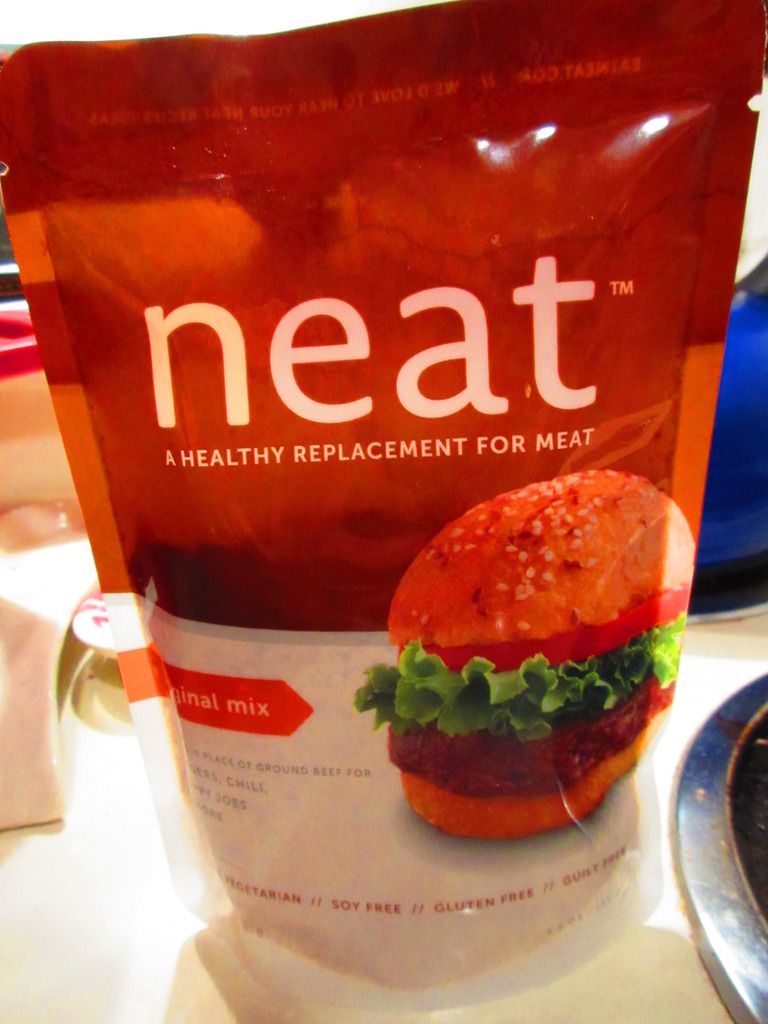
Neat – A Healthy Alternative For Meat Original Mix
Product: Neat – A Healthy Replacement For Meat Original Mix + Recipe Bonus – $4.99+
I am so excited. And the reason why is simple. I have found the meat replacement, Neat, at a few of my local stores. My Kroger, my Meijer, and even a few of my natural food stores now carry these little pouches of meat replacement goodness. Now, mind you, I’m not one who often will replace meat in a dish. I usually will use something like tofu or mushrooms instead, but there are some recipes (from my childhood, especially!) that just call for using an actual meat replacement. I have a few go-to brands that are gluten-free as well as either vegetarian or vegan. But ever since I received a pouch of the Mexican Mix from Neat in my Cuisine Cube back in October, I was hooked. I just had nowhere in this area to purchase it on my own.
Until now.
Up until yesterday, my pantry held the Italian Mix and the Original Mix. I’m using a few things up in my pantry (I have a bit of an overstock, HA!), so I decided I would go ahead and bake up some of the Moon Rabbit Foods pie crusts that I had from another Cuisine Cube. I could freeze two of them, and then give using the third one a shot in an old family favorite, which I would adjust to make gluten-free, dairy-free, and vegetarian.
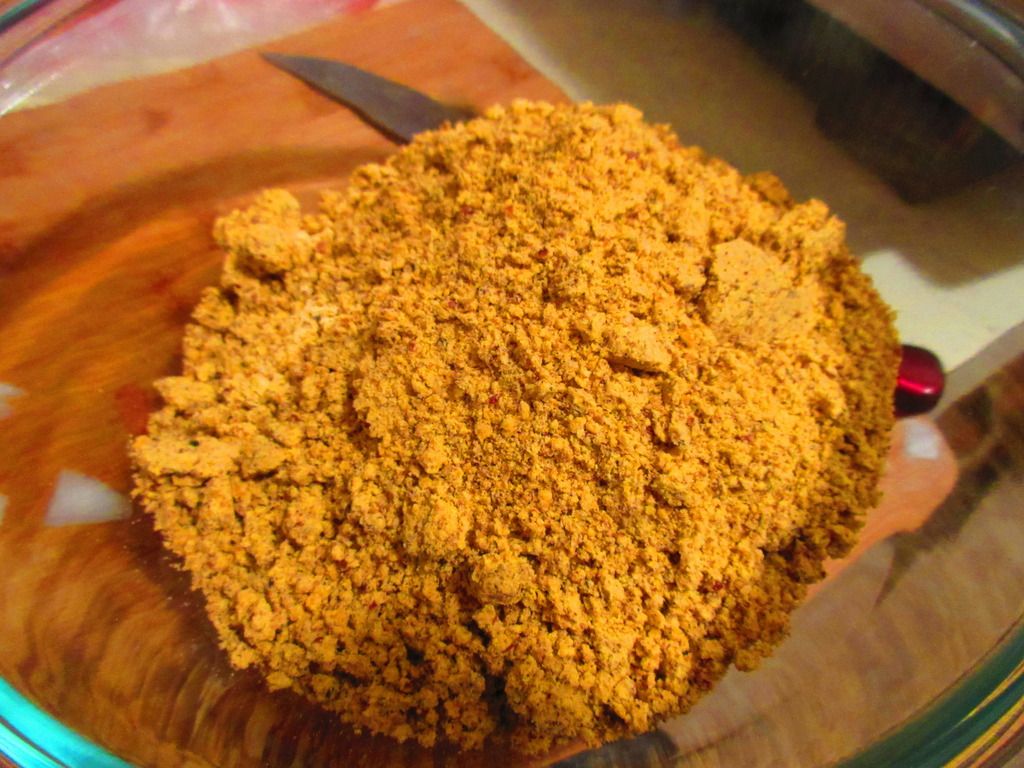
Neat – A Healthy Replacement For Meat Original Mix (before adding eggs/egg replacer and water)
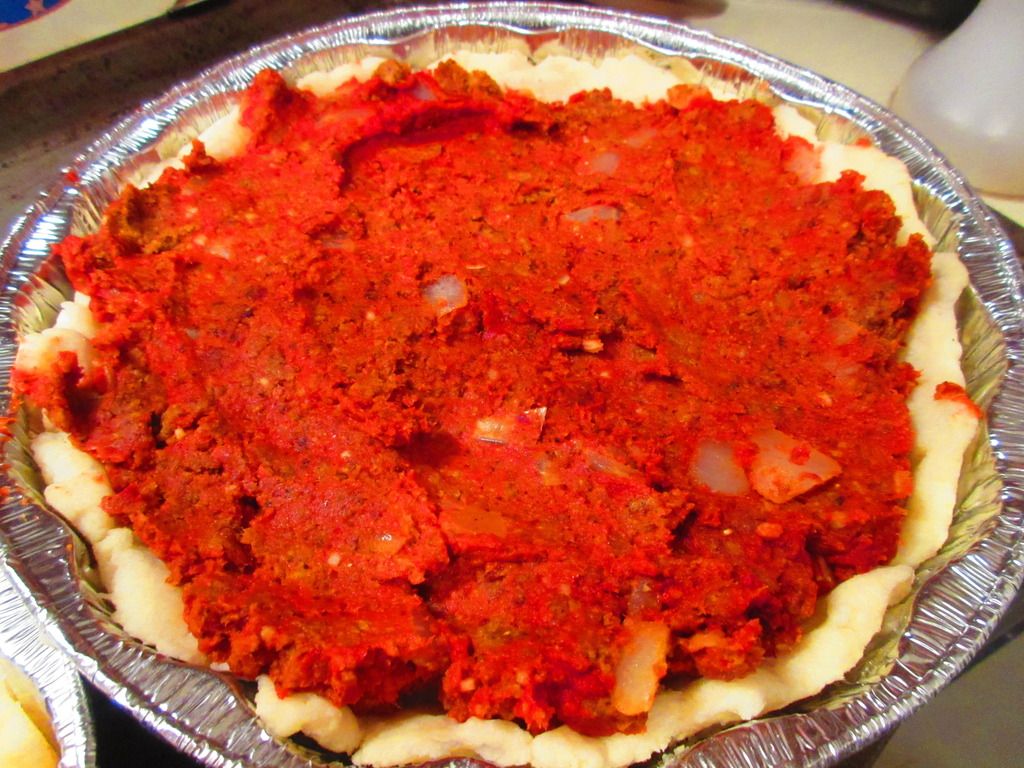
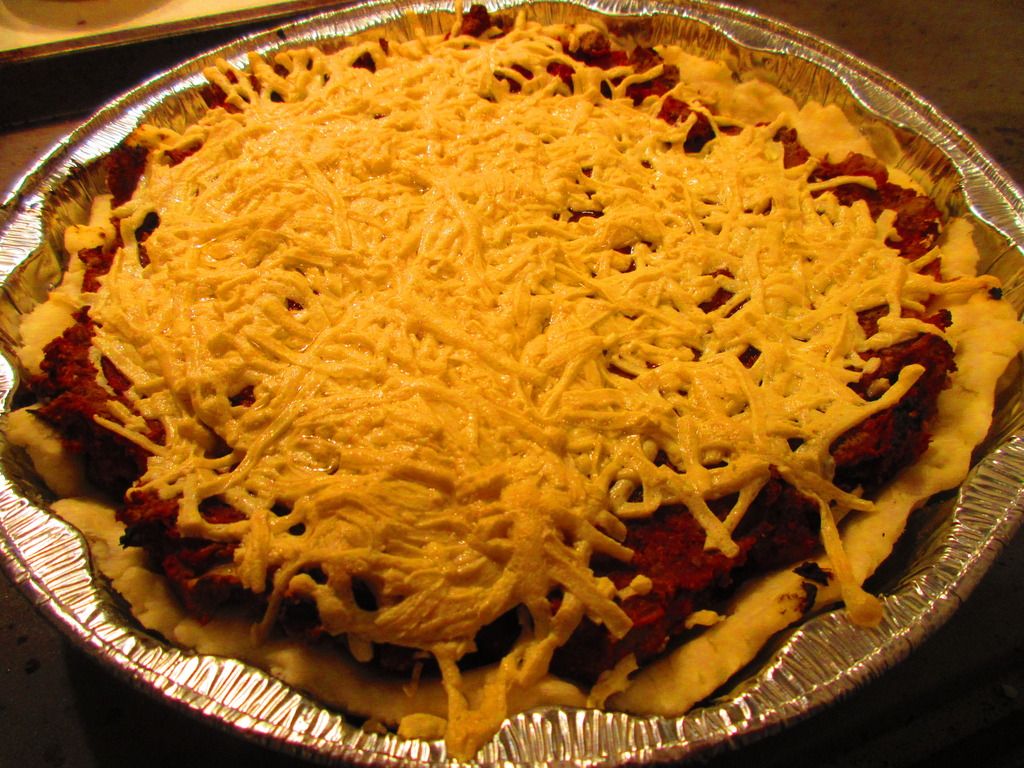
With a pie crust baked up…it was time to make the filling. As I was using my mom’s recipe, I began to brown the sweet onion while I mixed up the ingredients for the Neat Original Mix. This is really easy. Simply empty the Neat mix into a bowl, add two eggs (or egg substitute) and 2 tablespoons of water. Mix well. Once the onions had began to soften, I added the neat mixture and cooked it on medium heat for about 7-10 minutes, chopping at it as one would with regular ground beef. It looked and smelled perfect. I added the tomato paste, cooked it a few moments longer and then put it all in the pie crust. On went the topping of Daiya cheese and…into the oven it went.
Before I talk more about the original mix, let me tell you a bit about Neat. Neat is a meat replacement that is derived from nuts and other non-GMO natural ingredients. It is a product that was created by a mother of two children who decided that they were going to become vegetarians. At first she would puree beans into sauces to help her girls get the protein they wanted, but after awhile, everyone got tired of it. And that was when she got into the kitchen, experimented, and created what is now marketed at Neat. Neat comes in this shelf-stable pouch in a powdered form. All you do to prepare it is pour the pouch into a bowl, add two eggs (or a vegan egg replacer), plus two tablespoons of water. Then, you just cook it in a skillet, as you would ground beef, for about 7-9 minutes. It’s really easy…and really delicious too.
Neat – A Healthy Alternative For Meat Original Mix (prepared) cooked with onion and tomato paste
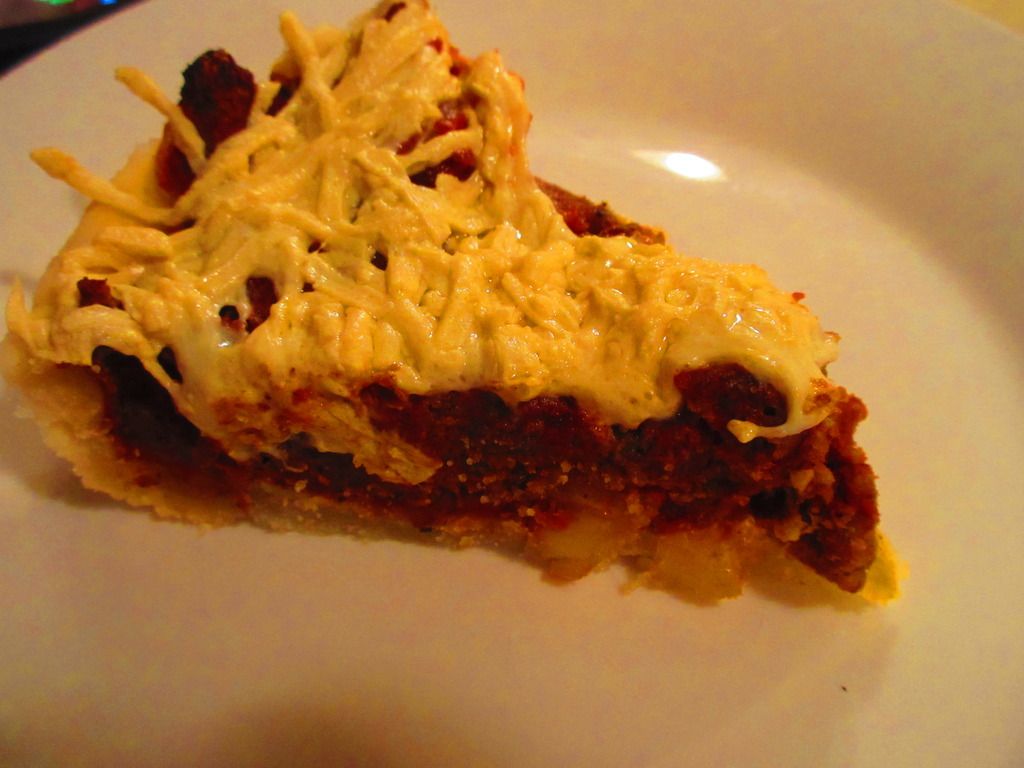
So, a vegetarian and gluten-free Cheeseburger Pie…that was what this was used for. When I sliced through the pie crust and the filling, I was just anticipating the crumbling and falling apart. But Neat surprised me. Much like my mom’s recipe (which used real meat as I wasn’t a vegetarian at that point), this all stuck together and made for a perfect slice. The Neat seemed to be the meat replacement I was looking for. And it was the perfect choice for this recipe for sure. I dished up two slices of the Gluten-Free and Vegetarian Cheeseburger Pie and handed one to my roommate and settled in with mine. My roommate took the first bite and said that it tasted dead-up like a cheeseburger. That’s good. She’s not a vegetarian, nor is she dairy-free or gluten-free like me. But this impressed her. It impressed her a lot. The most disappointing aspect of the dish was the pie crust and that was a whole unrelated product, and it still worked out well in the end.
The Neat Original Mix is fantastic. I mean, it is so close to the real thing. As I said, I don’t often do meat replacements, but sometimes when revisiting old recipes I grew up with, it is necessary. I don’t think any other replacement for beef will come close to what Neat does for these dishes. This is the second time I have used a Neat product and both times I have been beyond impressed. The taste and texture are phenomenal. Even meat eaters won’t realize they aren’t really eating meat. That’s the wonder and the glory of this product. Anyone can have it (unless they have a nut allergy) and enjoy it. It was, for the second time, love at first bite. And it was wonderful to be able to adapt an old family favorite to fit my dietary needs.
A slice of Cheeseburger Pie (gluten-free, dairy free, and vegetarian) made with Neat – A Healthy Alternative For Meat Original Mix
Let’s now take a look at what goes into the Neat Original Mix. This product is made up of pecans, garbanzo beans, gluten free whole grain oats, organic whole grain gluten free cornmeal, garlic, onion, sea salt and spices. Simple. Delicious. Clean eating! It is gluten-free, non-GMO, and kosher.
As for nutrition, the Neat Original Mix is a powerhouse. A serving is 40 grams and there are 4 servings per pouch. One serving will provide 190 calories and 15 grams of fat. You will also be getting 232 mg sodium, 11 grams carbohydrates, 2 grams of sugar, 4 grams fiber, and 4 grams of protein. It is filling, so it makes a fantastic substitute for meat. But there is that added bonus of protein from the nuts that are blended into the mix.
It really did make a great addition and the perfect substitute for actual ground beef in the following recipe…
Gluten-Free, Dairy-Free, and Vegetarian Cheeseburger Pie
Gluten-Free, Dairy-Free, Vegetarian Cheeseburger Pie
Servings: 8
Prep: 10 minutes; Cook 30 minutes
Ingredients:
1 package Neat – A Healthy Replacement For Meat Original Mix
2 organic cage-free eggs
2 tablespoons water
1/4 cup chopped onion
1 (6 oz) can tomato paste
1 gluten-free pie crust (either made from scratch or bought at the store)
2 cups Daiya Mozzarella Cheese Shreds
Directions:
Preheat oven to 375°F.
Pour the Neat – A Healthy Replacement For Meat Original Mix into a medium bowl. Add two eggs (or egg replacer if vegan) and 2 tablespoons of water. Mix well.
In a non-stick skillet over medium heat, brown the Next Mexican Mix and onion. Cook until vegetables begin to soften and the Neat can be chopped into a meat texture. Add the tomato paste and stir well. Allow it to heat through for a few minutes to marry the flavors together.
Pour the mixture into the prepared pie crust and top with 2 cups of Daiya cheese shreds. Bake in the oven for 20-25 minutes, until cheese is melted and pie crust is browned (with any luck). Slice and serve.
~*~*~
I have fallen head-over-heels for Neat. It is, without a doubt, the healthiest replacement of meat out on the market. I am thrilled that it is more available in my area. In fact, with so many places carrying it, I’m guaranteed to be able to pick it up at one place or another when I need it for a dish.
Neat…you are by far my best find and my favorite substitute in old family recipes. Nothing else can do what you do! So much love.
It was Easter Sunday and I woke up early. I haven’t been sleeping well due to bouts of chronic pain in my back and hip. So, I got out of bed and came out to the living room to do my stretches assigned to me by my physical therapist. It was as I started doing these that I thought to myself:
“Self…what are we having for breakfast this beautiful Easter morning?”
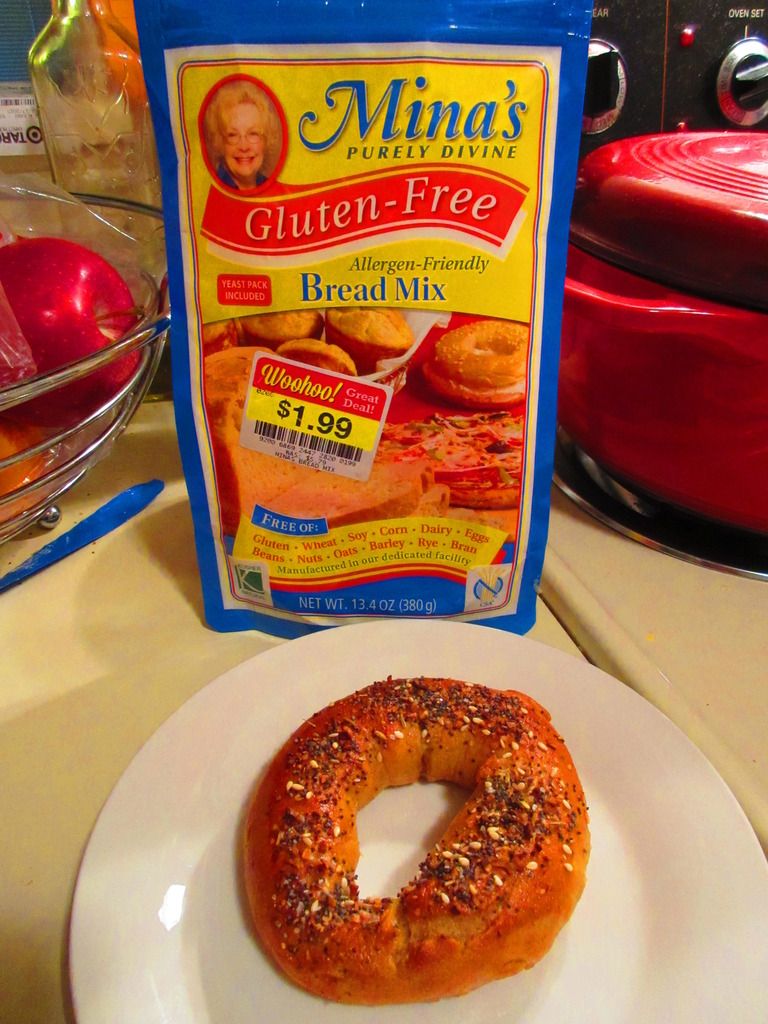
Since I am currently in a state of no running at all…I had plenty of time to come up with something. And for some strange reason, I recalled having two bags of Mina’s Purely Divine Gluten Free Bread Mix in my pantry. I bought these and a chocolate cake mix (which I have used already and didn’t review because I never tried the finish product…I made it for someone else…so now I have to purchase another bag) on Manager’s Special at my local grocery store…for $1.99. How fantastic is that?
I knew very little about the Mina’s Purely Divine products when I bought them, just that I had seen them featured in ads in my gluten-free magazines. That was the only familiarity I had with them. So, with the recollection and the realization that I had two pouches of the Gluten-Free Allergen-Friendly Bread Mix in my pantry…I thought…
Bagels.
Because when I already fail at baking up gluten-free bread more often than I succeed…why not bake bagels. Because that is SO much easier! *SARCASM*
That being said…I had it in my head now to make them. It was going to either end well…or be a complete and epic fail. It wouldn’t be my first. So, while the roomie was still slumbering in her room…I went into the kitchen and plucked one of the bags of Mina’s Purely Divine Gluten Free Bread Mix off the shelf and set out to work.
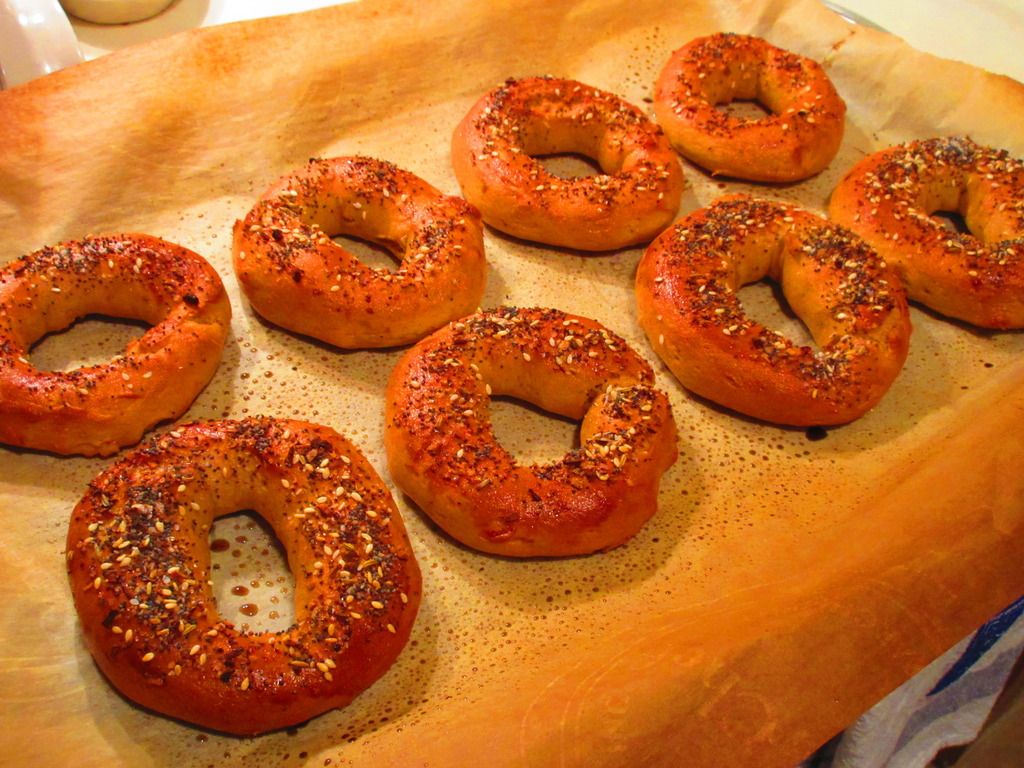
Long story short…for my first time making bagels (and gluten-free bagels at that!)…this worked wonderfully. They didn’t rise as much as I had hoped they would, but they did rise some in the 30 minutes I gave them to just sit. I think next time I’m going to try the oven on warm thing that a friend suggested and see if it makes any sort of distance. They held up to boiling in the water and even the actual baking. Totally impressed. But the real challenge was going to be in the taste.
By the time the bagels were in the oven and baking (given a little bit of egg wash over the top and a sprinkling of the “everything spice” that I picked up in Charleston, SC, the roomie had emerged and was ready for some brekkies. I told her that breakfast was currently in the oven…and I would have it ready once the timer went off. It was already starting to smell amazing, so when she asked what it was, I actually told her.
Bagels.
She looked really surprised. “You made bagels?!” You see…she has suffered through more than one epic gluten-free homemade bread loaf fail…so I wasn’t insulted at all. I nodded and as I pulled them out of the oven, called her over to take a look. They were perfectly golden on the outside. Fresh and hot out of the oven, I didn’t want to slice into them so just put some vegan cream cheese in a bowl and said we’d dip (kind of how I used to eat soft pretzels). So, onto some plates the bagels went while the rest cooled on the pan. I handed a plate and bowl of the cream cheese over to her and went to get my own. She started her cry of “hot, hot, hot!” as she broke it open and steam from the fresh bagels swirled up from the little breakfast goodie. She took a bite and said, “It tastes like a bagel!”
Now, she’s had Everything Bagels from some of the top-flight bakeries in New York City…and she seemed quite content to dive into my first attempt at ever making bagels. Trust me…she’s quite the critic and if she doesn’t like something…she’ll say so. But she thought the texture and the flavor were spot on. And after I got settled to try it for myself…I totally agreed. As a New Yorker, bagels were a way of life growing up. I still love them, but am often relegated to getting the frozen versions from Udi’s (as they are the only gluten-free bagels outside of Jennifer’s Way in NYC that have come close to tasting like the real thing!)…which is fine in a pinch. But these…these were mine. And they wouldn’t have been possible without Mina’s Purely Divine Gluten Free Bread Mix, for sure.
Truth…I can’t wait to make these again with the other batch. Maybe get a bit more rise out of them so that middle gets all fluffy and amazing. Cathy said these were very reminiscent of the ones we ate at Jennifer’s Way back in March, which I took as a high compliment as my first bite of one of Jennifer’s Way bagels made me cry. Good tears. This mix worked beautifully and made amazing bagels. Talk about taking a risk and having it pay off in the end.
Let’s discuss the ingredients in Mina’s Purely Divine Gluten Free Bread Mix. This mix is made up of organic rice flour, potato starch, organic cassava starch, organic sorghum flour, arrowroot starch, rice flour, teff flour, sea salt, yeast, xanthan gum, and guar gum.
As far as nutrition goes, the Mina’s Purely Divine Gluten Free Bread Mix contains about 13 servings, with each serving being about 1/4 cup. A serving will provide 100 calories, 0 grams of fat, 0 mg cholesterol, 50 mg sodium, 23 grams carbohydrates, 4 grams of sugar, 1 gram fiber, and 1 gram protein. That’s really good for a bread mix. I am very impressed.
If you have access to Mina’s Purely Divine Gluten Free Bread Mix…and feel like taking on a challenge, go ahead…whip up your own homemade gluten-free bagels!! You’ll be very impressed with the results.
Recipe: Gluten Free Everything Bagels
Gluten Free Everything Bagels made with Mina’s Purely Divine Gluten Free Bread Mix
Servings: 6-12 (I made 8 good-sized bagels!)
Time: Prep 1 hour; Bake 18-20 minutes
Add to mixer bowl, 1 cup warm water, 1 tsp of sugar and the yeast. Whisk and let rest for 10 minutes.
Add to yeast mixture: 1 cup of bread mix, the rest of the sugar, the oil, the molasses, and mix well.
Add last 1-2/3 cups of bread mix. Mix on medium high for 5 minutes.
Scrape out on a lightly oiled surface. Form dough into a log. Cut into 6 large or 12 small pieces. (I went for the middle and did 8 perfect size pieces). Roll each piece with lightly oiled hands into a 6″ rope. Shape in a circle, crimping edges.
Arrange bagels on parchment paper. Cover with oiled plastic wrap. Let rise in warm draft free area for 30 minutes. Dough will be tender at this point after the initial rise.
Preheat oven to 450 degrees F.
Bring 3 quarts of water to a slow boil. Gently using oiled hands, or spatula, drop each bagel, one at a time, into the water. Boil in small batches, do not crowd. Simmer for 30 seconds on each side, flip over once. Drain on rack for 5 minutes.
Brush with whisked egg white (optional) and sprinkle the toppings on at this point, if using.
Bake on a lightly greased cookie sheet for 20 to 25 minutes for large bagels and 15 minutes for small bagels. (It took mine 18 minutes…so if you do 8…go with that!)
Cool on rack.
DEVOUR!
~*~*~
I was so impressed with the way Mina’s Purely Divine Gluten Free Bread Mix baked up perfect, delicious bagels. And with this being my first time ever attempting such a culinary feat…well…it just made me want to improve on it.
That being said…WOW!! Total and complete WOW!! Find Mina’s Purely Divine Gluten Free Bread Mix and, seriously, give this recipe a try. I am dying to do it all over again! Maybe even improve on it some. We shall see!
Mina’s Purely Divine is purely amazing, purely awesome, and…yes…purely divine! Just WOW!
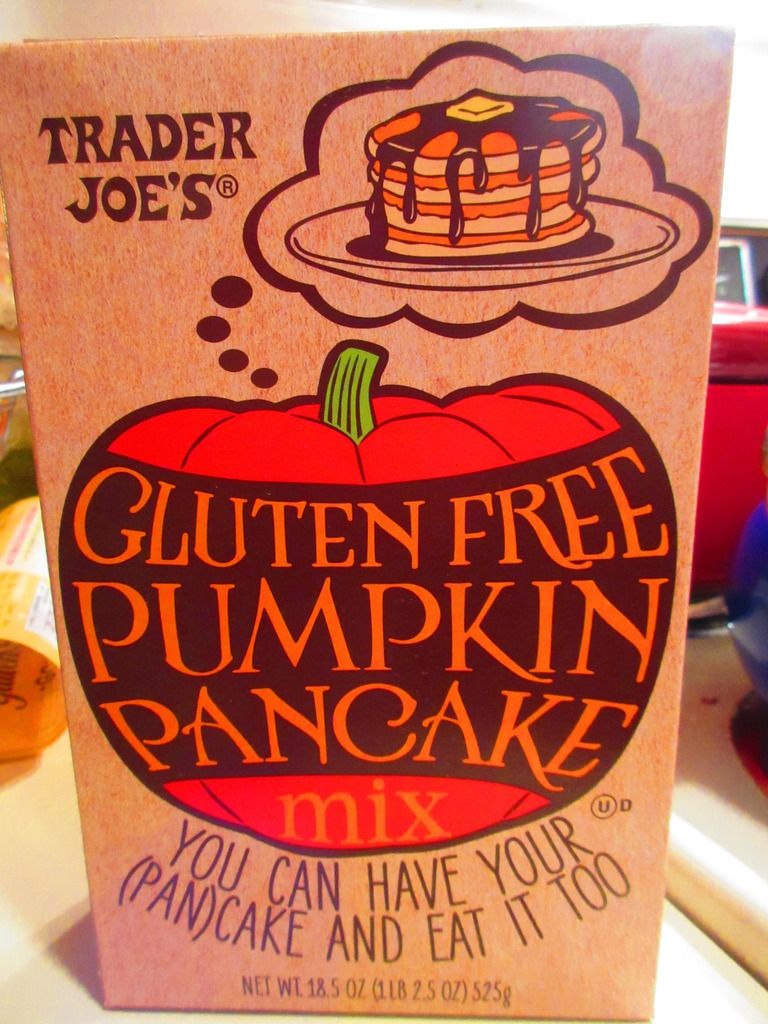
It was October 2014 and I was entering the great land of Trader Joe’s in Louisville, Kentucky. I had just passed the big center display of bananas when my gaze fell upon an end cap that was holding a bunch of pumpkin goodness. I love anything pumpkin. This is no secret. And a Trader Joe’s mix with pumpkin pancake-y goodness? HELLO! Sign me up.
I snagged a box of it and gave the sad Celiac eyes to my roommate. And…yes…we fit them into the budget. Sad Celiac eyes work wonders!! So, checkout was complete. And fall turned into winter. And then spring came around. And while I had been making things for breakfast…pancakes even…I had other mixes and flour blends that had to be used first. But, as the great kitchen pantry purge continues…Trader Joe’s Gluten Free Pumpkin Pancake Mix was up to bat today!
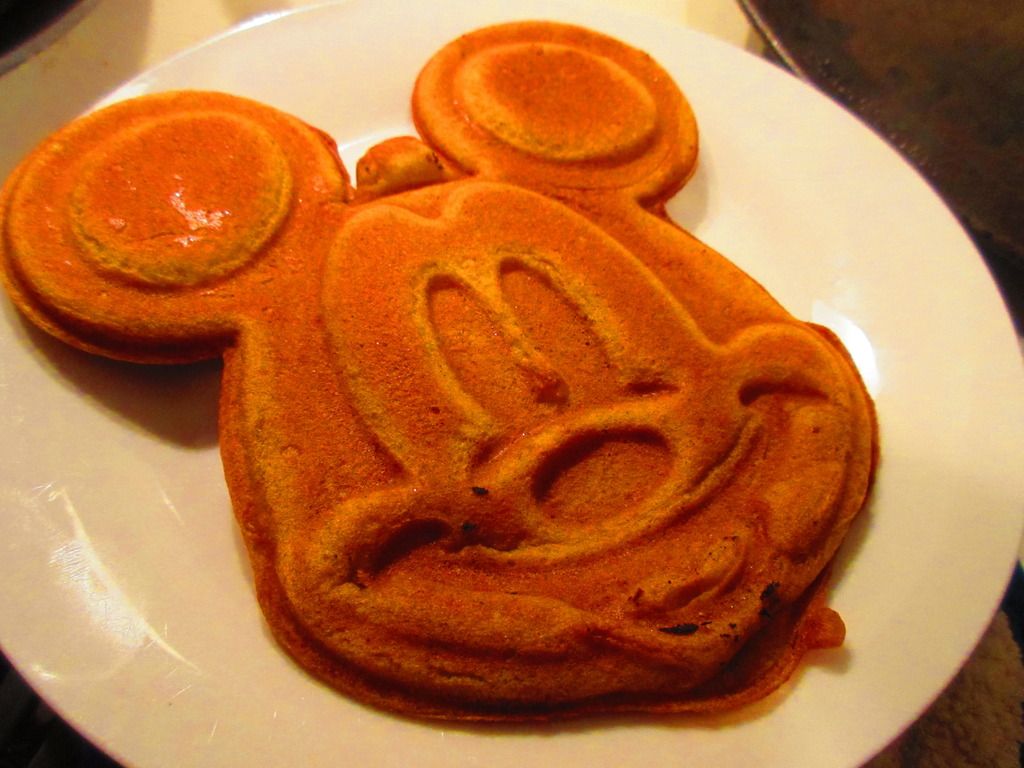
So, this morning, I decided to haul out the Mickey (Mouse) waffle maker and make some pancake waffles. Why? Because waffles are delicious and fun…and these are shaped like Mickey. They win. Always. I mean, pancakes probably would have been less labor intensive but…I was craving waffles for awhile. In fact, I sort of promised my roommate I’d make waffles after we went to our gluten free bakery Saturday morning for breakfast and she lamented that she wished they still offered their gluten free waffles (and pancakes). So, a promise is a promise.
Mixing up the Trader Joe’s Gluten Free Pancake Mix is super easy. Simply get out a bowl and crack an egg inside. Then, add 2 tablespoons of melted butter (or oil). I melted down 2 tablespoons of Earth Balance. Then, whisk them together. Add in 2/3-cup of water plus 2 additional tablespoons and whisk that up as well. Then, scoop out a cup of the Trader Joe’s Gluten Free Pumpkin Pancake Mix and add it to the wet ingredients. Mix until just combined. It’s okay if it’s a little lumpy.
So easy. I had all that done by the time my roommate hauled herself out of her room. Perfect timing. I ladled the mix into the waffle maker and closed the lid, allowing it to cook to that perfect crusty outside, soft inside consistency. It usually takes about five minutes to get there. And while that was working, I warmed up some pure maple syrup to pour over it. YUMMY! I lifted the lid of the waffle maker when the steam subsided and lo and behold…the perfect pumpkin-y gluten-free waffle shaped like Mickey Mouse. YES! I was already feeling good about this mix. I slathered it up with some Earth Balance spread and then dowsed it in some maple syrup. I then got my own waffle working and prepared to do the same thing. Once again, the perfect waffle emerged, with this golden crust on the outside. I was elated. As the third (and final) waffle (now in the freezer) was working, I settled in to enjoy my breakfast.
So…it was awesome. Let me just say that. Some flour mixes and pancake mixes don’t get that golden crust on the outside, but Trader Joe’s managed it to perfection with this mix. It had the perfect amount of pumpkin spice flavor. Not too much. And not too little (although my roomie says that she didn’t get much pumpkin). I disagree with the roomie and think that the amount of pumpkin flavor was spot on. As I am the pumpkin freak…I know best. The crust on the outside was crisp and crunchy and the inside of the waffle was light and soft and just…so amazing. I was in love with each bite. I may have hoovered it, using the last bite to mop up any extra syrup lingering on the plate. Really, very impressed.
The Trader Joe’s Gluten Free Pumpkin Pancake Mix was a new product that was introduced last October due to numerous requests from their fans of the original Trader Joe’s Pumpkin Pancake Mix, who had found themselves now eating a gluten-free diet. The Trader Joe’s peeps went to work for months to get the right texture (no soggy, heavy pancakes allowed) and finally it it spot on, even getting the seasoning right to bring that warm fall-ish feeling to the finished product. The recipe for the pumpkin pancakes (the one I listed above) was on the side of the box to make sure you succeeded on your pumpkin pancake quest. They did well. They did very well.
The Trader Joe’s Gluten Free Pumpkin Pancake Mix is made from white rice flour, potato starch, cane sugar, dehydrated pumpkin flakes, buttermilk powder, tapioca flour, molasses powder, baking powder, sea salt, organic vanilla flavor, expeller pressed canola oil, ground cinnamon, ground allspice, ground ginger, xanthan gum, annatto for color, and ground nutmeg. This mix is gluten-free and cholesterol free.
A serving of Trader Joe’s Gluten Free Pumpkin Pancake Mix is 1/3 cup dry mix or 2 pancakes prepared. A serving of the mix will provide 130 calories and 0.5 grams of fat. It contains 250 mg sodium and 7 grams of sugar. The dry mix will also give you 29 carbohydrates, 1 gram of fiber, and 2 grams of protein. When it is prepared as per the instructions on the side of the box, you will be taking in 210 calories and 8 grams of fat. You will be taking in 70 mg cholesterol, 270 mg sodium, and 7 sugars. Prepared, you will have29 grams of carbohydrates, 1 gram of fiber and 4 grams of protein.
Honestly, it is one of the better gluten-free pancakes mixes out there. I was above and beyond happy with the way my Mickey waffles came out. Not only were these full of perfect pumpkin flavor, they were crispy and soft and the texture was right where it needed to be. Trader Joe’s definitely nailed the gluten-free pumpkin goodness in these. I hope this mix is back on the shelves this upcoming fall. Total yum!
Gluten Free Pumpkin Mickey Waffles made with Trader Joe’s Gluten Free Pumpkin Pancake Mix
You might be able to tell that I’m on a bit of a sweet potato kick. And who can blame me? Sweet potatoes are nutritional powerhouses. I mean, this one food is an excellent source of B6 vitamins and potassium, but in addition to that, you will be provided with over 400% of your daily needs for Vitamin A and 37% Vitamin C. Sweet potatoes are a great source of beta-carotene, which has been shown to reduce risk of developing certain types of cancer, offers protection against asthma and heart disease as well. Sweet potatoes are one of my favorite plant powerhouses when it comes to foods I consume often.
While I love to incorporate baked sweet potatoes into recipes or stuff them with healthy avocado and some onion and eat them fresh out of the oven…I recently found my stash of frozen sweet potato pancakes in my freezer. I knew they were there, I just made no effort to actually pull them out to eat. Go figure. But with a lack of fresh produce coming in from my bin these last couple of weeks, I have been doing some slimming down on what I have in my pantry and my fridge and freezer. Last week, I ate a different variety of sweet potato pancakes, more like the familiar pancakes I would settle in to at breakfast.
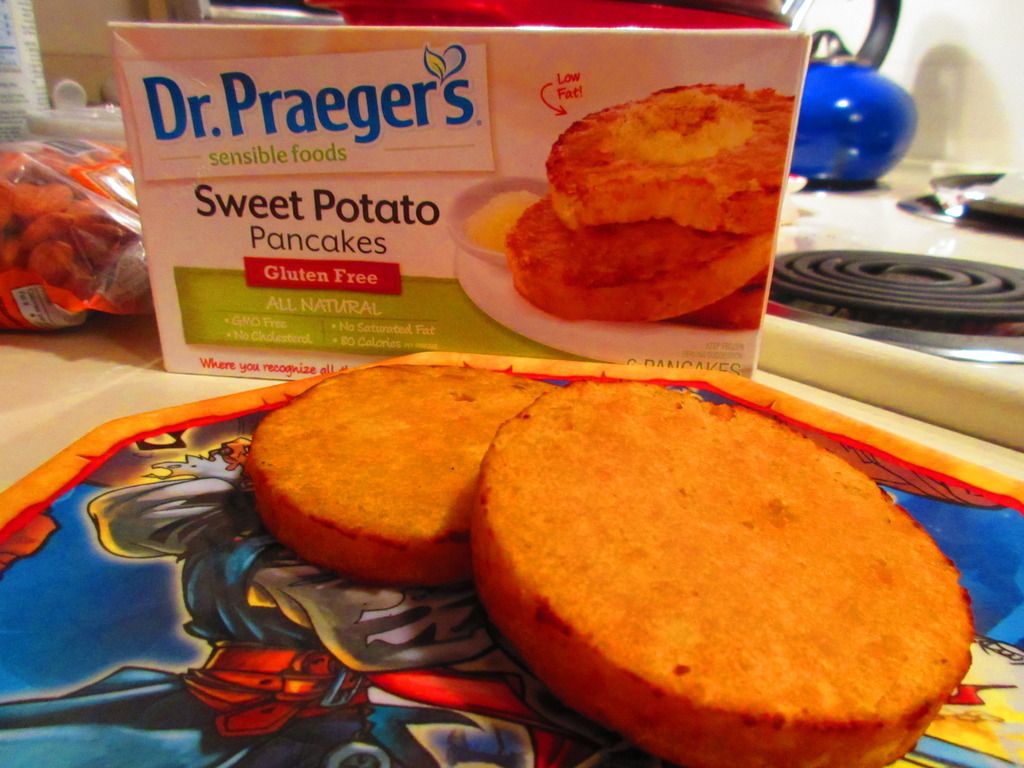
And that’s one of the first things I noticed about the Gluten Free Sweet Potato Pancakes from Dr. Praeger’s Sensible Foods. They look more like hash browns than your breakfast pancakes. Which, is fine by me, for sure. While I liked the Julian’s Recipe version, I found that they tasted a bit…odd. But that wasn’t the case with the ones from Dr. Praeger’s.
Dr. Praeger’s Sensible Foods began in 1994, when a New Jersey cardiothoracic surgeon, Dr. Peter Praeger, and his medical partner, Dr. Eric Somberg, helped keep a family business alive by purchasing Ungar’s Gefilte Fish, a popular kosher food company within the Jewish community. The two doctors set out on a mission – to introduce people to nutritious food that actually tasted great. They opted to keep the Ungar’s brand, but also developed Dr. Praeger’s Sensible Foods to include all natural and convenient (and wow…they are convenient!) frozen products that could appeal and draw in a wider consumer based. This family owned and operated company has grown into a leader in the all-natural, vegetarian, gluten-free, vegan, and kosher frozen food categories, with products ranging from veggie burgers to home-style veggie cakes, to breaded fish items, and veggie-packed goodies for children too in their “Kid’s Littles” line, and many more options. The Dr. Praeger’s items are found in the frozen or ethnic foods section of most retailers, but certainly in most natural food stores.
I’m quite familiar with the Dr. Praeger’s brand. In fact, I have enjoyed some of the Kid’s Littles (hey…I’m a kid at heart!) and have tried the veggie burgers as well…and have loved everything I have tried. But, I won’t lie…I was beyond intrigued by the Gluten Free Sweet Potato Pancakes when I spotted them at Whole Foods awhile back. This morning, as I was packing like a wild woman to head out to New York City for some birthday shenanigans with my roommate (her birthday is tomorrow), as well as a possible race (depending on my hip), I needed something that would be filling, yet easy to prepare. I hit up my pantry, but all the mixes just seemed time consuming. My freezer was next, and the final bit of breakfast-like food (hey…pancakes are pancakes…even if they are savory!) caught my attention when I spotted the white box for Dr. Praeger’s Sensible Foods Gluten Free Sweet Potato Pancakes. SCORE!
I pulled out four of the individually wrapped pancakes (think of a large hash brown, and you get the basic size and thickness of these pancakes) and placed them on a baking sheet. I put them into an oven set at 450°F and baked them for about 5 minutes before turning them over and baking them for another 4 minutes, or until they began to brown. Simple and something that I honestly didn’t need to babysit. I just had to check in every few minutes to make sure I wasn’t burning them. That gave me some time to throw things into a suitcase…HA. Granted, I should have done that the night before…but I was busy watching Star Trek – The Original Series. Priorities.
So…first of all…these aren’t your typical pancakes that you might imagine drowning in maple syrup and devouring for breakfast. Nope. They aren’t thin and light and look like something you cooked up in a skillet that morning. Like I said…these will remind you of a hash brown. And they are hearty and thick just like hash browns too. Seriously. These are amazing. I loved these more than the previous round of sweet potato pancakes (savory and more of the breakfast pancake type) that I had last week. These are actually perfect for a healthy snack, a light meal, or a side dish. Honestly. But mine…mine were going to be breakfast for my roommate and I. And after I had them baked up, I served them up with some marshmallow fluff (which I toasted with my kitchen torch) and some roasted almonds on top. I served them up and settled in for breakfast before finishing up my packing that morning.
Dr. Praeger’s Sensible Foods Gluten Free Sweet Potato Pancakes are AMAZING. Hearty and healthy is one thing, but these also tasted amazing. These are made from real food and real ingredients, so nothing tasted off or weird when I dove into these. I sort of wish I cooked them up with some scrambled eggs and topped them off with a bit of ketchup, but I still have two more pancakes in order to do that with. So it’s all good. These have great sweet potato flavor and tasted really good the way I dressed them up. But when I sampled a piece on its own, that amazing sweet potato flavor just came through. And that was what I wanted. Honest. Real. Healthy. Food. A sophisticated hash brown masquerading as a pancake. I LOVE IT! And I loved these. I sort of want to stock my freezer with them for future use. Seriously. If you want an easy and go-to option for your clean eating diet. THIS…would be my suggestion.
Let’s discuss ingredients. Real ingredients and real food is what you’ll find in Dr. Praeger’s Sensible Foods Gluten Free Sweet Potato Pancakes. These delightful disks of goodness are made from sweet potatoes, egg whites, potato flakes, expeller pressed canola oil, brown sugar, arrowroot, and salt. That’s it. Amazing. Clean eating in your freezer! These potato pancakes are gluten-free, kosher, dairy-free, cholesterol-free, non-GMO, and free from saturated fat and trans fats.
As far as nutrition goes…these are little pancakes of power. The nutrition stats on the Dr. Praeger’s Sensible Foods Gluten Free Sweet Potato Pancakes wowed me and they will wow you too. A serving is 1 pancake, but my roommate and I each had 2 this round as it was breakfast. One pancake will serve you up 80 calories and 2.5 grams of fat. One sweet potato pancake will also give you 120 mg sodium and 7 grams of sugar. One serving also provides you with 2 grams of fiber and 2 grams of protein…so filling without being too filling. Double it to two pancakes, and you’ll be full until lunch time. Trust me. I know I am.
I was completely impressed with and blown away by Dr. Praeger’s Sensible Foods Gluten Free Sweet Potato Pancakes. I’m not kidding when I saw these will find their way back into my freezer. Honestly, they were beyond what I anticipated and totally captured my attention and the attention of my taste buds. Delicious. Healthy. And amazing. You can’t beat that. If you haven’t tried them…do it now. Next time…ketchup!
‘Twas the month of December and I was starting to contrive
Brand new recipes for when my Cuisine Cube was due to arrive…
Yes! The December cube is here! It arrived on Monday and I happily dug right in, wondering what sort of goodness lay under the flaps of cardboard and paper. What I was met with was a delightful array of items. It was like Christmas had come early as I sorted through the breakfast, baking, lunch/snack, dessert dinner, and other dessert options. I was ready to dive right in and have a little of everything. But, self-control does still in handy at times.
First of all, let’s discuss Cuisine Cube. I’ve blogged on items I’ve received since signing up in May. Cuisine Cube is a gluten-free delivery service put together by a team of enthusiastic eaters, food professionals, and allergy suffers from New York City. They have scoured the country looking for lesser known brands made by small artisan producers that taste better than the highly processed and subpar items you can find at virtually every grocery store. This was a way to help support small businesses. These products are meticulously selected and then delivered right to your door. So, you get to try a new brand or item you may never have discovered otherwise. It’s a great, efficient, and fantastic service. One that I always look forward to each month.
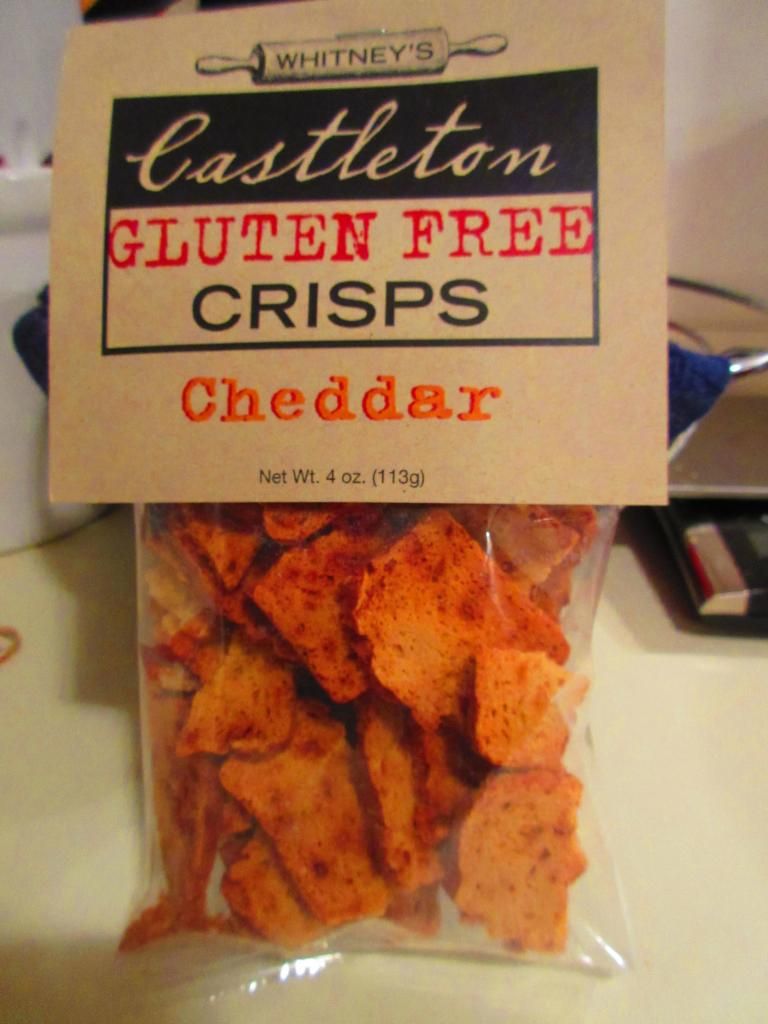
So, this month, I selected Whitney’s Castleton Gluten Free Cheddar Crisps to lead off my month of delicious eating. I thought they looked a lot like the Glutino Bagel Chips that you can find in most grocery stores these days. But, I didn’t just want to eat these straight out of the package…or just throw them on top of a salad. I wanted to do something a little different with them. And I did.
But…not without trying one first. I can’t just re-purpose a product without trying it out as it is first…
There you have it…I opened up the package and popped one of the crisps into my mouth. And I was immediately greeted with the crunchy texture. I love that for these kinds of crisps. They are called crisps for a reason…they should be crispy. But, even more importantly…the flavor! Before I had to go gluten-free…and before I started to really pay attention to what I ate, I was a Cheeze-It connoisseur. And the cheddar flavor in these crisps…reminded me of those. But better. WAY better. I was almost sad to repurpose these for my recipe…because they were amazing on their own.
But my creative chef mind was calling…
So…the rest of these amazing and delicious crisps went into my food processor and got pulverized.
Now, before I share this recipe with you, let’s talk about the Whitney’s Castleton Gluten Free Cheddar Crisps. As far as ingredients go, these are made from sorghum flour, tapioca flour, brown rice flour, white rice flour, xanthan gum, Vermont Farmstead’s Farmstead Cheddar, milk, white vinegar, brown sugar, baking soda, kosher salt, dry mustard and cayenne pepper. These are produced in a designated gluten-free facility.
Nutritionally speaking, a serving is 1 ounce of these crisps…and the package holds 4 servings. One serving will provide you with 120 calories and 3 grams of fat. You will be consuming 10 mg cholesterol, 230 mg sodium, and 2 grams of sugar. In addition, these have 1 gram of fiber and 3 grams of protein.
So, what came of these crisps?
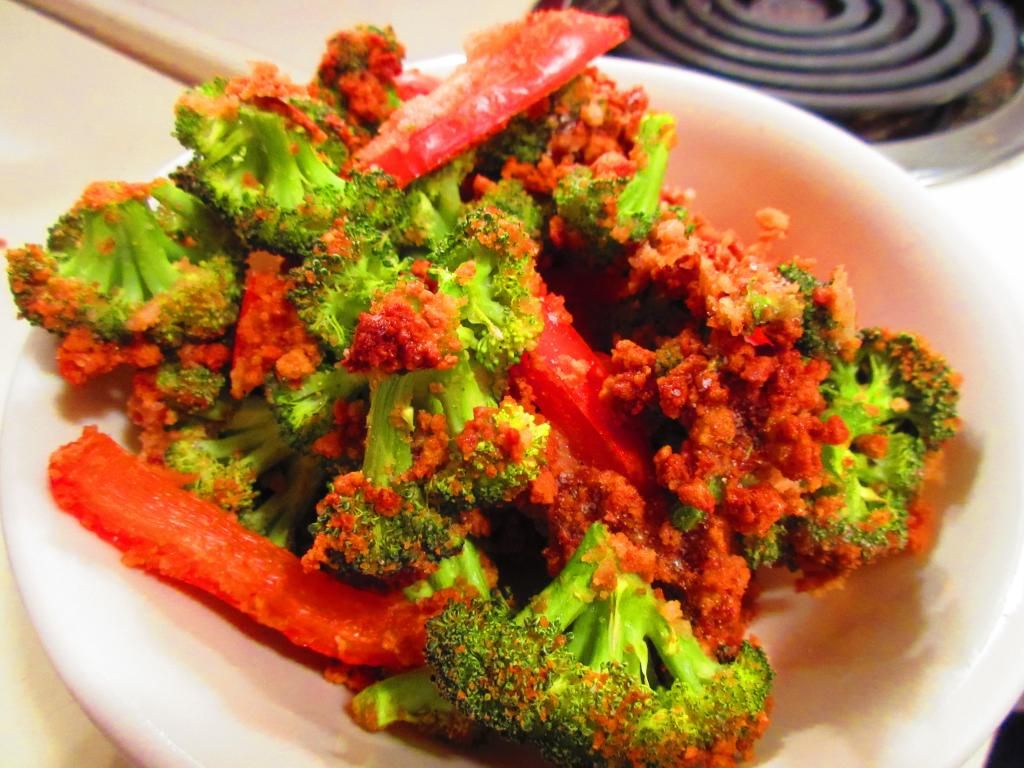
Well, back before I became a vegetarian, and definitely back before I was diagnosed as a Celiac…one of my favorite things to order at Red Lobster was the Fried Calamari appetizer. My roommate would eat the calamari…I wanted the fried broccoli and red peppers that were served with it. Honestly, one of my favorite foods (and definitely not good for you by any means…but it was so good)…which I hadn’t even thought about in years…
But I happened to have a red bell pepper and some broccoli from my CSA bin in my fridge…and now…a breading. I do not fry anything. I just don’t. So, I set out to recreate the infamous Red Lobster vegetables…by baking them. And thanks to Whitney’s Castleton Gluten Free Cheddar Crisps…I now had the perfect gluten-free breading.
Recipe: Crispy Broccoli and Red Peppers
Crispy Broccoli and Red Peppers (made with Whitney’s Castleton Gluten Free Cheddar Crisps)
4 ounces gluten-free breading (I used a package of Whitney’s Castleton Gluten Free Cheddar Crisps)
Directions:
Preheat the oven to 350°F.
In a large plastic bag, place in the broccoli florets and red pepper slices. Add the egg white(s). Close the bag and shake to coat. Add the gluten-free breading. Reseal the bag and shake again. Spread the vegetables onto a baking sheet and bake for 15-20 minutes, until crispy.
~*~*~
Guess what? This was so close to how I remember the original tasting. I love the flavors that baking something in the oven can really coax out of things like vegetables. And the Whitney’s Castleton Gluten Free Cheddar Crisps made the perfect coating for these vegetables. It gave it a nice cheese flavor on top of turning a beautiful golden color in the oven and really making the apartment smell fantastic. I was smelling a great cheddar aroma after these were in the oven for only 5 minutes. Way beyond impressed. I sort of want these in my pantry for always.
So, if you are curious about the Whitney’s Castleton Gluten Free Cheddar Crisps, head over to their site and read more about their products and order some for yourself. Or order from Cuisine Cube’s stock up site!
And if you want to give Cuisine Cube a try, head over to their Web site and check out their subscription options…joining for a monthly, three month, or six month subscription. This Cube (box of goodies) will arrive at your door within the first week of each month and you will have at least 5 full-size gluten-free items inside. I encourage you to give it a try…
…because I never would have heard of these crisps without the aid of Cuisine Cube.
And yeah…they were really fantastic…on their own and in my dish.
There are a lot of Thanksgiving foods that, as a gluten-free vegetarian, I no longer indulge in at the dinner table. That being said, my Thanksgiving meal usually consists of a scoop of vegetables, some plain potatoes, and usually a fruit of some sort…or whatever I brought with me for the occasion.
This year for my contribution to the Thanksgiving meal, I brought desserts. YAY! I also, however, brought gluten-free stuffing. From my local gluten-free bakery. I actually pre-ordered it prior to receiving my November 2014 Cuisine Cube. But…this just gave me the opportunity to have stuffing…all over again.
And this is a good thing. Because I absolutely LOVE stuffing! I never ate it much as a kid, because, prior to going vegetarian, my family’s go-to Thanksgiving meal was shrimp creole, not turkey, but sometimes, on Christmas, my mom would cook up a turkey and I would request stuffing. And…it was usually Stove Top. But, to me, it was amazing!
So, stuffing was one of my guilty pleasures that I rarely indulged in, but would devour every time I had the chance.
When my Cuisine Cube happened to have a box of a gluten-free stuffing in it, I might…might…have done a happy dance of joy with a few bounces and jumps and squeals of happiness. This isn’t uncommon each month when I open up my Cuisine Cube…but we are talking GLUTEN FREE STUFFING!! Did I make that clear yet?
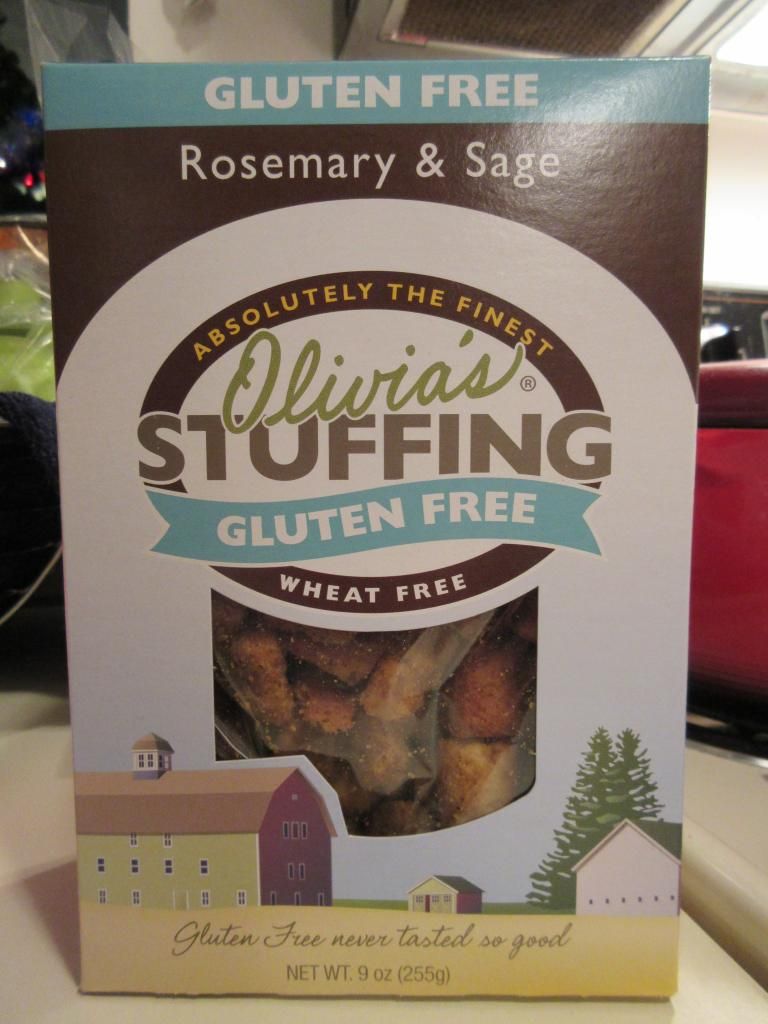
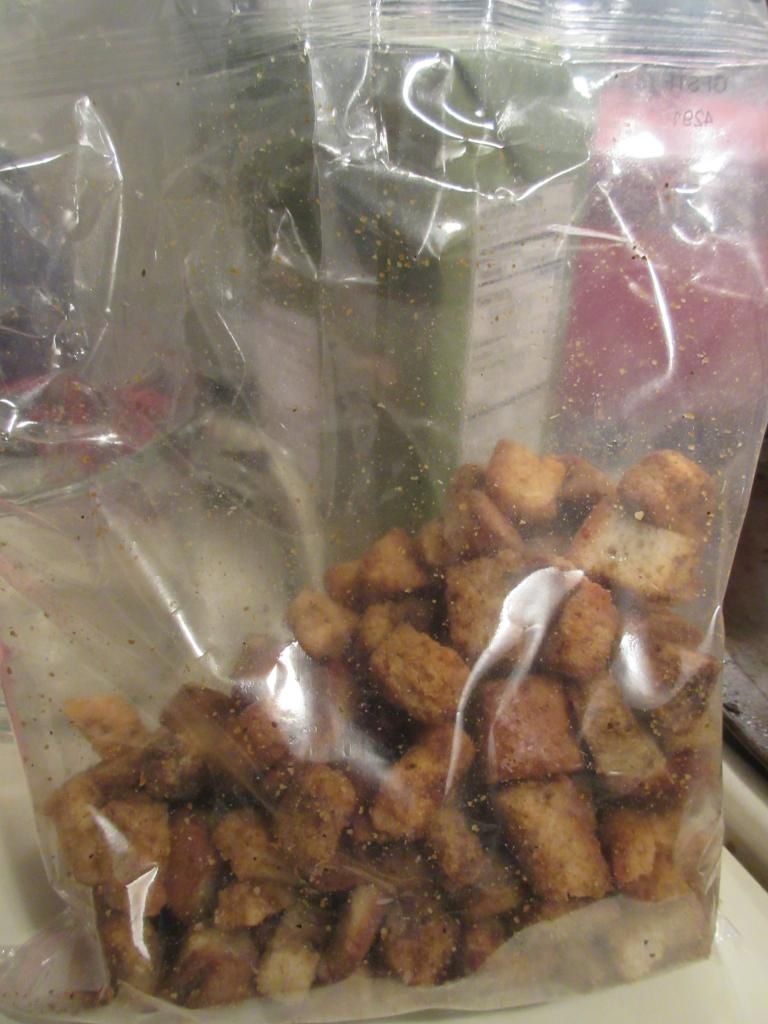
Olivia’s Gluten Free Rosemary & Sage Stuffing
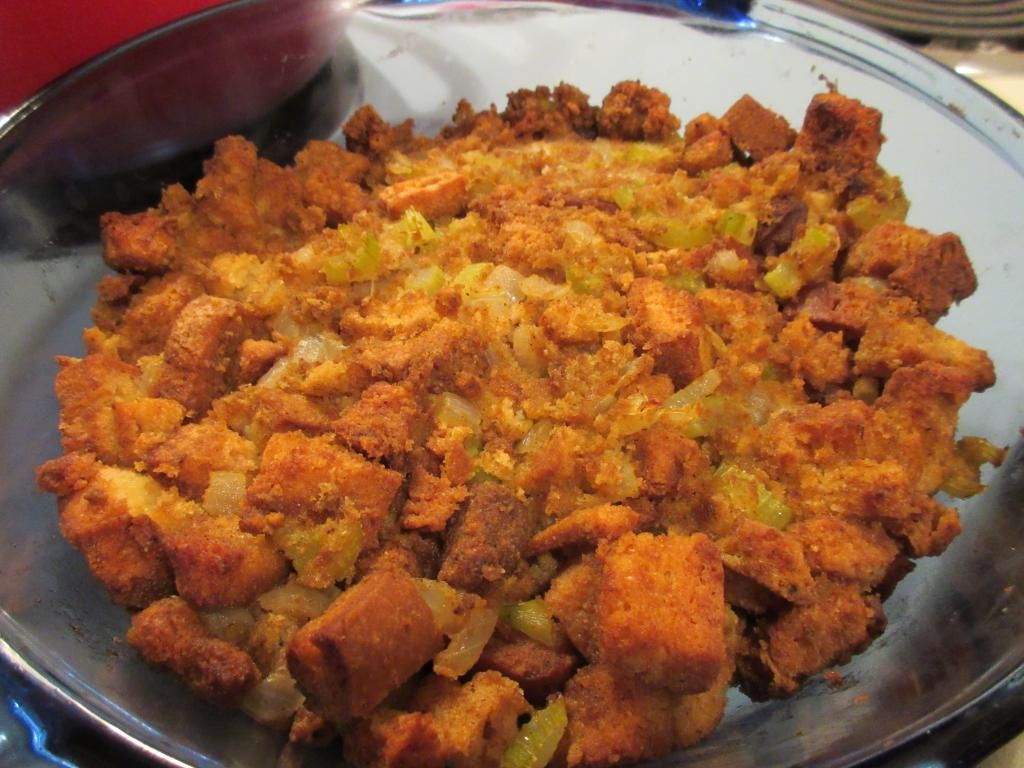
So, since I had my local allergen-free bakery make me some gluten-free stuffing for the big meal on Thursday, I got to have some fun and get a little creative with my box of Olivia’s Gluten Free Rosemary & Sage Stuffing. But, this still meant that I needed to cook it up properly. And this stuffing is really easy to make! I cut up some onion and celery per the instructions on the box, cooked it in my vegan butter, and then added some vegetable broth. I transfered the liquid into a large mixing bowl and added in the Olivia’s Gluten Free Rosemary & Sage Stuffing mix. I gave it a stir and let it sit for about 8-10 minutes, until the cubes were moist and the liquid was completely absorbed. After that, I put the mix into a baking dish and baked it for 30-40 minutes per the instructions on the box until it was beautifully golden and ready to eat.
I won’t lie…I had a small serving of it then. I had to. The smell as it was baking was phenomenal. Really. I was practically salivating the entire half hour it was cooking. So, yeah…I wanted to try it so I could tell you, my readers, how it was before I had some fun with it.
It was amazing. No joke. Freakin’ fantastic. The chunks of bread got to that perfect golden crispness, while the vegetables and the absorbed liquid kept it moist and delicious. The level of flavors was spot on. Definitely perfect on its own. I didn’t even need to add any additional salt and pepper. Olivia’s Gluten Free Rosemary & Sage Stuffing was better than any stuffing I have ever eaten in my life. Way better. That goes for the boxed stuff as well as the stuff made from scratch. This was an total win. I wish I had made it up for dinner at my roommate’s family’s home. Perhaps next year. They wouldn’t even begin to guess that it was gluten-free…except for I’d be eating it, so they would know!
I am so in love with this stuffing. My only complaint was there was only one box of it. Good thing I can order more through Cuisine Cube and Olivia’s Gluten Free Web site. Trust me…this will be happening!
Let’s talk about the ingredients in Olivia’s Gluten Free Rosemary & Sage Stuffing. This stuffing is made from gluten-free bread, certified non-GMO canola oil, granulated onion and garlic, rosemary, sage, thyme, celery seed, sea salt and pepper. It is cholesterol free, gluten-free and made in a dedicated gluten free facility.
As far as nutritional information goes, Olivia’s Gluten Free Rosemary & Sage Stuffing makes about 9 servings per container. If you use it traditionally. A serving size is 3/4 cup prepared. This serving will provide you with 110 calories and 4 grams of fat. You will also be taking in 200 mg sodium and 1 gram of sugar. In addition, you will be consuming only 1 gram of fiber and 1 gram of protein. On its own, this stuffing won’t make you feel stuffed, but you will love every single bite of it. Trust me.
But…as I mentioned earlier…I had some fun with this stuffing.
Why eat it straight up when you can do something a little outside the box, right? Well, on Black Friday, I picked up a new waffle maker (shaped like Mickey Mouse!) and I really wanted to test it out. I’m like a child…I get something new and I want to try it out right away. So, on Saturday night, I took the stuffing that I cooked up out of the fridge and put it into a big mixing bowl. It was time to use the “leftovers” in a new way. Prepare yourself…
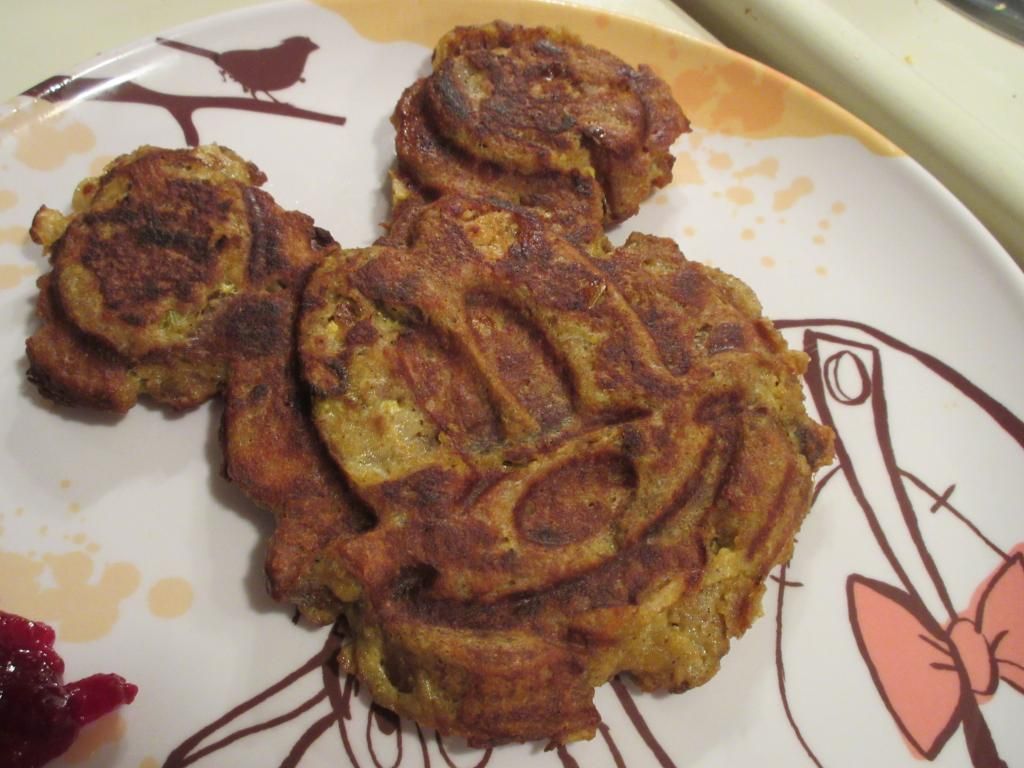
Recipe: Gluten Free Leftover Stuffing Waffles
Gluten Free Leftover Stuffing Waffle (shaped like Mickey Mouse)
1/4 cup vegetable broth (or chicken broth if you’re not vegetarian)
Directions:
Preheat the waffle maker and grease it with cooking spray.
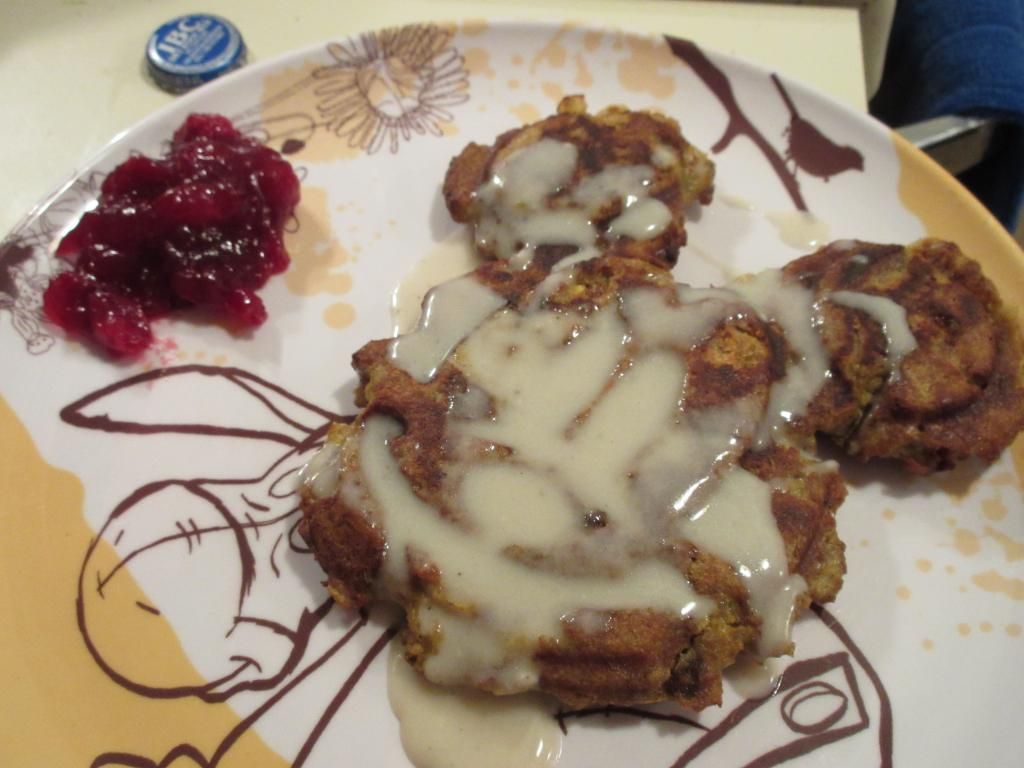
Gluten Free Leftover Stuffing Waffle with Vegan Homemade Vegan White Gravy and Cranberry Chutney
In a large bowl, stir together the leftover stuffing and eggs. Add 1/4 cup of vegetable broth and mix until well combined. Continue adding broth as needed until the mixture is well-moistened.
Scoop the stuffing mixture into the prepared waffle maker, spreading it evenly. (The stuffing will not spread or expand like regular waffle batter as it bakes, so arrange it in an even, thin layer). Close the lid and let the waffle bake until golden brown and the egg is cooked throughout. Stuffing waffles take longer to cook than regular waffles, as the egg must be completely cooked throughout. Don’t be afraid to let the waffle bake until it’s golden brown and crispy!
Transfer the waffle to a serving plate then repeat the filling and baking process with the remaining stuffing.
Serve.
~*~*~
I know what you’re wondering…you are pondering what I served these waffles with. Simple. I prepared a gluten-free white gravy and took some fresh cranberries from my CSA bin and made a cranberry chutney. I poured a bit of the warm gravy over the waffle with a side of the cranberry relish and…BAM…dinner was served.
It tasted amazing. Mine, being in a Mickey Mouse waffle maker, was shaped like Mickey Mouse…but it came to this perfect golden crispiness on the outside. It paired great with gravy, making it a savory dinner. And the cranberry chutney tied it all together. A great way to use up some of those holiday leftovers for sure!
TRUST ME!
Thanks to Cuisine Cube for including a box of Oliva’s amazing Gluten-Free Rosemary & Sage Stuffing in my box for Thanksgiving. I am forever thankful!
On Friday, I was quickly scrolling through the blogs I follow on WordPress and came across a blog from Clean Eating Veggie Girl, who posted this amazing recipe for a quinoa bowl, inspired by her friend Molly. I had virtually everything necessary to make this meal, save for an onion and some frozen stir-fry vegetables, which I could easily pick up at the store over the weekend and prepare this for dinner Sunday evening.
I actually spent most of my day helping my roomie’s sister paint some of her house…so grocery shopping actually didn’t get completed until much later, and it was past 6 p.m. by the time I back to my apartment to cook. Thankfully, this is a super-easy and super-fast meal to create.
1 tablespoon fresh ginger, minced (I used 1/8 teaspoon ground ginger)
1/4 medium yellow onion, chopped
16 oz bag frozen stir-fry vegetables
1/8 cup Bragg’s liquid aminos (I used San-J Gluten Free Low Sodium Tamari)
1/3 cup sweet chili sauce
Sriracha sauce, optional
2 to 3 large eggs, optional*
*Recipe is vegan without the eggs
Directions:
If you do not already have the quinoa cooked, prepare according to package directions.
Line a large skillet with a thin layer of water. Heat over medium-high heat until very hot. Once hot, lower the heat to medium and add garlic, ginger, and onions to the pan. Cook for approximately 5 minutes, adding additional water as necessary.
Add frozen stir-fry vegetables to the skillet. Cover with a lid and cook for approximately 5 minutes.
Once the vegetables are cooked through, turn the heat to low and stir in cooked quinoa.
Add liquid aminos/tamari sauce and sweet chili sauce to the skillet. Stir until well-combined. Cook an additional 3 to 5 minutes, or until your vegetable and quinoa mixture is hot.
If you are adding an egg to the bowls, cook each one to your liking during the last 3 to 5 minutes of cooking time. I poached mine, but fried or scrambled would work as well.
Scoop the vegetable and quinoa mixture into bowls and, if desired, drizzle with sriracha sauce and top with an egg.
~*~*~
This quinoa bowl is fantastic. It’s a little bit sweet and a little bit spicy. And if you love eggs, the runny yolk from a poached egg just really ties the entire meal together. I was beyond impressed. It was nice to create a healthy, protein-rich meal for dinner after such a busy day. I also appreciated how quickly the entire meal came together. Fantastic.
Me, dressed as Venellope von Schweetz, at the staging area of the Disney Wine & Dine Half Marathon – Orlando, Florida
Race: Disney Wine & Dine Half Marathon
Place: Walt Disney World, Orlando, Florida
Date: November 8, 2014
Time:1:50:09
I’m starting to think I angered the running gods somewhere along the way this year.
Seriously.
Because before I go any further, let me start with these two words for you:
BROKEN TOE!
You read that right. My first night at Disney World this time around…and what do I do? I BREAK A FREAKIN’ TOE! And you know, broken toe stories never really are a good story…because they always just happen randomly and in such a stupid and simple manner. For me…climbing into the shower at my resort. No joke. Jammed it on the tub. Yeah…
So…running gods and goddesses…whatever it is…I apologize. Please, please show me some mercy from here on out…
*COUGH*
That being said…not even a week removed from the New York City Marathon and I find myself up in Columbus, Ohio. Yes…this journey starts in Columbus, because my roomie and I were taking our good friend, Jenn, with us to Walt Disney World this time around. And, believe it or not, it was cheaper to drive up to Columbus and fly out of there on Friday morning than it was to do it from Louisville. Worked out in the end. The three of us could now travel together. YAY!! But…this also meant a very early morning after a night spent on the road to get there. We didn’t get in too late, but we didn’t want to stay up too late either, as our ride would be coming in between 4:15 a.m. and 4:20 a.m. Friday morning. Our flight out was at 6:30 a.m. Early flight…nonstop…meant…in to Disney early. WOOT! Jenn’s dad came and got us, drove us to the Columbus Airport, and dropped us off. Cathy and I checked our bags…Jenn carried hers on…and we went through security. Our first stop…Starbucks. Caffeine was needed for sure at this hour. And I had a tall soy salted caramel mocha calling my name. With coffees in hand, we settled in at our gate and just started discussing the plans for that day.
And…it ran smoothly. We boarded the plane on time and were in the air without any sort of delay. This was a new thing for me. And, believe it or not, our flight team got us in to Orlando a full 20 minutes early. HELLO! This is my happy dance. Cathy went to get the rental car while Jenn and I waited for luggage. The bags came through really quickly, actually, so Jenn and I headed out the way we were directed for rental cars and ended up at the Enterprise kiosk outside. Cathy was inside. Figures. So, she had to come to us. The representative took us out to the midsize cars and pointed out the Prius, as we are accustomed to Toyota vehicles as both Jenn and I own Toyotas. We were sold. Hello amazing as mileage!! Car acquired, we were now setting out to make our required Publix stop, to pick up some fruit, snacks, and some water. Jenn and I also replenished our protein bar stores. I am glad we did this, because I ate my way through all of mine this trip. After that, we headed to the resort and got checked in at…where else?…Port Orleans Riverside.
Yes. Again. Why change up the resort when we love this one so much. I mean…it’s one of my favorite Disney Princess’ place…Tiana, of course! And I know the layout and the rooms (or so I thought, HA!). We got our room…which was…a maze to find. Opposite end of the elevator, all the way around by the pool…second floor. We just had to do some exploring to find it. But, heh, we managed. We settled into the room for a moment…Jenn cooling off by the air conditioner, while I got out my tiara (requirement at Disney…because they call me Princess if I wear it…and I LOVE being called Princess). I had to get my waiver in order to pick up my race packet at the expo. And we grabbed a snack prior to heading out for the day.
First up…the expo. And thankfully, the resorts on Disney property run shuttles to the event. The expo was held at the ESPN Wild World of Sports Complex. Just like it normally is. Well, it was for the Dopey Challenge anyway. Love this venue. It’s really easy to navigate now…but at first it was slightly confusing.
The most amazing thing happened with this race though. In New York City, I met running legend Kathrine Switzer. When she ran the Boston Marathon, she was the now famous Bib 261. Well, my bib number at the Disney Wine & Dine was…261. Having this race bib number has been a dream of mine…Disney Magic made it happen! I love surprises like that. As I was one of the lower numbers, I had virtually no line to stand in. This is usually the case with Disney races for me. I was going to be in Corral A, which anyone with the numbers between 21-500 will be in. They gave me my commemorative pin, which I ordered ahead of time, and then sent me across the way to the actual expo, where I would pick up my t-shirt.
I avoided the vendors upon entering and made my way over to the area in the back for my t-shirts. Not too many people were in line for a women’s small either, so I stepped up and handed my bib over to the lady at the counter. She looked at it as she tore the t-shirt tab off and said, “WOW! You’re the lowest number I’ve seen…how fast can you run a half marathon?” I told her my fastest time and she asked if I was going to try to beat it here. I told her, in my mind, I’d love to, but I had just run a marathon on Sunday, so it wasn’t likely. The body was still recovering. I said I intended to have some fun and just enjoy it. And take pictures with characters this time around. Next time… She laughed and handed me my shirt. Time to shop!
I really intended not to purchase anything. Just look. But…heh…that didn’t work out as planned. I didn’t get a BondiBand here either, for the record. My mojo is off. My usual customs aren’t happening. ACK! But I didn’t see a booth, honestly. Cathy found me the race specific equivalent though in the Official Merchandise area…so we went with that. It would do. One thing I did do, however, was visit the Garmin booth and ended up getting a watch I could wear so I didn’t have to wear my Garmin running watch if I needed to know what time it was. After all, I was at Disney World and I was NOT going to live on my cell phone. Nope! This was vacation! With that purchase…I said I wasn’t allowed to spend any more money…so I avoided the Newton booth and tried to ignore all the cute running clothes. I made it out of there with only that purchase and a wine glass (Disney Wine & Dine…get it!) from Official Merchandise. I did well!
We wrapped things up and took the shuttle back to our resort to drop off our bags. Then…with no pausing, we were back out and this time hopping the regular shuttle bus to take us to Animal Kingdom, our park of choice for our first day there. We had things planned…like Jenn and I were going to ride Expedition Everest, the roller coaster there in Animal Kingdom. We did. And it was epic fun. It was nice to have a ride buddy this time around, as Cathy refuses to do any of those rides…because she somehow became less fun at amusement parks between when we first went to Disney in February 2013…to today. BUT…before any attractions or rides…we needed more coffee…and a snack. So…I hit up the allergy friendly Gardens Kiosk in the park for some hummus and vegetables and Cathy and Jenn grabbed some fries at a restaurant there. We noshed and then…went to grab the infamous COFFEE!! You see, Animal Kingdom has this one place that serves up this fantastic iced coffee in either a French Vanilla or Mocha flavor. I have always done, and will always do, the French Vanilla. But it tastes like a light milkshake. Seriously. It is the best thing ever. My favorite coffee at any Disney park. And…I might be addicted to it. With coffee now acquired and caffeine hitting the system…we had the roller coaster to do and the Kilimanjaro Safari. LOVE dong the safari at Animal Kingdom because the guides are fun, the animals are RIGHT THERE…and it’s just a nice way to relax and see some wild animals. LOVED it. While there, we also did the “It’s Tough To Be A Bug” show and rode on Dinosaur. By the time we wrapped things up, we were running just a tiny bit late to the shuttle to get to the Animal Kingdom Lodge…home of our traditional first meal at Disney World feast…Sanaa.
Sanaa is African food that sort of borrows from the flavors of India. Can you see why I love eating here so much? After talking with the chef, I ended up getting the Vegetarian Sampler, which is Basmati Rice and the choice of two of five of their vegetarian entrees. I went with the Chickpea Wat and the Seasonal Greens and Tomatoes. It was…beyond fantastic as always. For the record, Cathy ordered the Lamb Shank and Jenn got the Slow Cooked Dinner Sampler, which was Basmati Rice with a choice of two of the five plate offerings. She went with Butter Chicken and Goan Seafood Curry. We ended up splitting the dessert…as usual…we ordered the Seasonal Kulfi, which was pumpkin this time. And it was delicious. The couple next to us made conversation with us the entire time, and he ended up getting the trio of desserts, which included the kulfi that we were raving about. He took a bite and his wife said, “That was your sex face.” Hilarity ensued. Anyway, with dinner wrapped up, we had a full day and we knew the race was the following night, so we headed back to the resort to take our turn through the shower and get some much needed sleep.
Broken toe…*sigh*
And this…is where it all went down. I was first up to shower, so I went into the bathroom and got the water going. And as I was climbing into the bathtub…BAM…jammed my foot on the edge of the tub. Hard. And bad. I doubled over for about a minute before toughing it up and finishing the shower. After I was dressed, I hobbled out and pointed to my foot. “I think I broke a toe!” Cathy and Jenn looked up at me with big eyes and Cathy said, “SERIOUSLY!?” It was confirmed the next morning…when I woke up to find it swollen and a pretty shade of black-ish purple.
*SIGH*
Being proactive, we decided to use the athletic tape that we brought with us (because my feet are delicate things and I apparently need to wrap the hell out of them these days) and Cathy taped my broken toe (the 4th one)…to the middle toe. And that was how I managed to get through a full day at Hollywood Studios. For real. Being that the race started at 10 p.m., today was going to be a bit strange for me…because…I had to eat backwards. I also was not going to be having gluten-free pizza prior to this race. Night races…they screw everything up. So, we were having a character breakfast at Cape May (Minnie Mouse, Goofy, and Donald, FTW!). And this was going to be our biggest meal of the day. Honestly. The chef came out to talk to me and she ended up making me GLUTEN FREE MICKEY WAFFLES!! These are a requirement when I go to Disney World and Disneyland. I have to have them at least once. I paired that up with scrambled eggs for protein and a big heaping bowl of fruit. Because…it was there and really delicious! And that was breakfast. Off to Hollywood Studios. Cathy had somehow managed to get the times wrong for the fast passes we had for both the Aerosmith Rock ‘N Roller Coaster and the Tower of Terror. But, we begged and pleaded and after being treated like children, Jenn and I were allowed on our thrill rides that Cathy refuses to even try. We also did Star Tours (always fun!) and Muppet Vision 3-D. LOVE THE MUPPETS. We had some time, so we headed over to The Magic of Disney Animation and sat in on one of the drawing classes, where we were taught how to draw Donald Duck this time. This made me happy…I hadn’t done a Donald Duck before. My lunch was my protein bar and a clementine, which I ate on the go. And after we wrapped up everything…we went back to the hotel, because I had a race to get dressed for…and to get to…broken toe or not.
I actually took the tape off my toes for the race, fearing blisters. We also had weather moving in (even though I was told on numerous occasions that Orlando didn’t have rain for months!). So…yeah…there was that. I was dressing up as Vanellope von Schweetz from Wreck it Ralph this time around. Why? Because Vanellope is awesome. HA! A co-worker of mine even sewed the top for me and it looked fantastic. I was pretty excited about the costume. Not so happy with my toe. And definitely not happy about the impending rain. But, you just suck it up cupcake and get it done. Right? Right! So, I got dressed, and went ahead and ate my cereal (treating my dinner as how I would eat on a race morning…because I was eating backwards all day!). Cathy put all the little candy bits in my hair and I packed a set of dry clothes (but not shoes) for after the race…just in case. The best part about Wine & Dine is the after party in Epcot. You get to try foods and drinks from different countries. And included in the race bag is a $10 gift card to put towards those purchases and samples. So, dinner for Cathy and Jenn was going to be tasting around the world. For me…probably a protein bar because there isn’t too much there for a gluten-free vegetarian. But…I figured I would take in the experience.
So, I grabbed the banana we purchased at the grocery store when we got there on Friday and we headed out to the shuttle to take us to the start of the race, which would be near the ESPN Wide World of Sports Complex. The staging area was mostly in the grass, and it started to sprinkle a bit. The first thing we did was head to information to figure out the best way for Cathy and Jenn to get from the start to the finish. They were told, especially since I was a Corral A runner, that they needed to leave and get a shuttle before I started the race. So…after dancing around and helping me put a garbage bag over my head to keep my body warm as the wind picked up and the weather started to roll in…they gave me hugs…I was told that the “power of Dean compels me” and not to “pants my poop.” TRADITION! And they were gone. So…I just sort of plopped myself down somewhere and tried to stay warm. I ate my banana. I watched people expend a lot of energy by jumping and dancing…and it was fun!! But soon…it was time to get in those corrals. And I made the short hike from the staging area to the corrals, moving all the way up to Corral A.
One thing I loved was seeing so many people in this corral in costume. Disney race or not, a lot of times the higher up corrals don’t get into the Disney spirit. I have always and will always costume for Disney races. They are Disney races. If you run Disney for time, you’re missing the point! I stayed in the black garbage bag until after the wheelchair racers were sent off. The elite runners and Corral A were then moved up to the start line. I shed it then…and that’s when it started to rain. Lightly at first. So, when they sent us off with the fireworks and all…it was like a spring shower. But soon after that first mile, where I met a fellow runner who had just done New York City in that horrible, awful, crazy wind…the rain started to pick up. And then…it was just…a downpour.
The first three miles of this race are done on the highway…and this race also embraces the most hills of any Disney race I have run yet at Disney World. But…after New York City…these didn’t seem too bad. Not really. After the 5K mark, we come into Animal Kingdom. Running through the parks is the best part because you get to have the park employees cheer you on. That and this is normally a key place to snap pictures with characters. The problem was…with the downpour…many of the characters weren’t out. BUMMER! But, you go on. We run around the Tree of Life just after Mile 4 and then duck outside of the park before hitting 5 Miles.
The rain was relentless and my shoes were full of water. The good thing was, my feet were so cold and numb that I couldn’t tell if my toe was hurting or not at this point. But, I knew it was hindering me. There just comes a point where you just can’t do anything about it…so you just stop worrying about it. The next few miles were back on the roads, part of the path we ran for the Disney World Marathon. I recognized it. I was about halfway through and running down the street parallel to those just getting started. On the opposite side of the highway…the later corrals were just getting underway. And we got a lot of cheers from them as we went on.
It’s around Mile 10 that we get filtered into Hollywood Studios. Great park to run through. It was decorated for Christmas and everything was lit up. This has great scenes to run past and the support there is nothing but phenomenal from the cast members. Honestly. Despite running in the shadow of the Tower of Terror and through the various lots that they feature, my absolute favorite part of Hollywood Studios involved disco balls and the Costuming Tunnel in the Backlot. Honestly…I loved looking through the windows, while disco balls are sending lights everywhere in this small tunnel, and seeing people pressing and prepping the costumes for the following day. It was spectacular. I wanted to stop and linger…because…well…it was dry in there…and…IT WAS FLIPPIN’ COOL! But, I was nearing the end of the race and the after party and two very soggy spectators awaited my arrival at that finish line.
Onward.
Out of Hollywood Studios and onto the slick and slippery boardwalk, which runs past the Disney Yacht Club and Disney Beach Club Resorts. Even with the hard rain and cool air, people staying there still came out to cheer. I love the vibe I get at every Disney race. But the electricity through these last two miles was fantastic. Honestly.
From the Boardwalk we took a turn through Epcot, past the giant ball, and out into the parking lot. I know this finish area well, trust me. Around the corner and BAM…there was the finish line. I pressed hard to that finish line, ignoring my foot and toe, just wanting to get over that mat. And I cleared it, soaking wet and dripping with rain and pure determination and stubbornness. Broken toe…check. Half marathon…check. BEAST MODE, BABY!
As I recieved my medal and my mylar blanket, I saw Cathy and Jenn waving to me from the bleachers. They were as wet as I was. They started down while I got the finisher’s photo, some water, and, of course, the goodie box that RunDisney hands you at the end of every race, filled with goodies like Skittles, Clif Bars, Craisins, Fruit Snacks, and Tortilla Chips with a Cheese spread. I wasn’t ready for food. What I was ready for was getting out of the chute and meeting up with my friends. I sipped on some water and went to where I was directed to exit.
There they were. Cathy came up to me and gave me a hug. Jenn came over to do the same and said, “You can tell I love you…” LOL!! I really do have amazing friends. And I give a lot of props and love to the spectators and volunteers who stood or sat out in that downpour for as long as they did.
But now…it was time to check out the after party, which meant an uncrowded spin around the World Showcase with some tasting portions of food at the different country booths and kiosks. But first…I was freezing…and I wanted hot tea. We got that immediately and set out to see what each country had to offer. If something sounded good…devour. If not…move on. I probably should have changed clothes, but at that point, it was still raining, so I didn’t see the point.
Cathy tried foods from 7 countries: Mexico, Singapore, China, Brazil, Belgium, France, Canada. Jenn tried food from China, Brazil, and France. Me…I had tea. And after stopping at France, I decided I REALLY needed to be in dry clothes. I was shaking more than walking. And since it was just an intermittent drizzle, I figured it was the best time to get out of my cold, wet costume and into my long pants and running jacket.
Me, in dry clothes, after walking the World Showcase and enjoying the after party at Epcot after the Disney Wine & Dine Half Marathon
BEST FEELING EVER!
I was dry and now…warm. I also ate one of my protein bars to help with recovery. And we finished up the World Showcase that night and called it a morning. Because by the time we got on the shuttle and returned to the hotel, it was 2:35 a.m. And we all still had to shower. I went first, making it quick. Then Jenn. Then Cathy. We didn’t have any reason to be up early the following morning, so we slept in until 9:30-ish. It was Magic Kingdom day that day…which meant Dole Whip for dessert that night. We ended up having Dole Whip for breakfast the following morning before hitting up Epcot on our last day there.
I even randomly was found by my friend Michele, who also did the half marathon. She found me in Morocco of all places. HA! And we ended up talking about a lot of things for awhile, before she and her group moved on to try more foods from the showcase, and we went to continue on around the other way, killing time before dinner that night.
So, my official results for the Disney Wine & Dine Half Marathon are that I finished with an official time of 1:50:09. ON A BROKEN TOE! IN THE POURING RAIN! I was 418/11,941 overall. I was the 97/7928 woman to cross the finish line. And I was 15/1442 in my division to finish. Disney Magic. Had to be. Not my best half marathon by a long shot, but given the circumstances…just…amazing to me.
Now, really, I need to show some mercy on my poor foot and toe. Time to heal.
Once again, Disney…you were expensive…but totally worth every bit of money I poured into you for those 4 days I was there. Despite not having the characters out on the course for much of the race, I have every desire to come back and do this one again. This time…without the downpour and preferably without the broken toe.
Disney…as always…you are my happy place. Thanks for another great race (and another great reason to dress up in costume to run!).