Recipe: Gluten-Free Thin Mint Cookies

The cookie monster strikes again!

But this time…for a good reason!

You see, one of the people I run with…a lot…had a birthday.  And he also recently ran yet another marathon, making 11 for this year, I believe.  Well, birthdays and marathons are things to be celebrated.

Originally, I was going to make a Boston Cream Pie to bring to the run group…but I just couldn’t figure out a way to make it dairy-free with the custard inside.  Well, I could…but it wasn’t going to be easy and time was a little tight.  So, I changed my mind at the very last minute, while standing in my kitchen, and instead threw together a version of the Girl Scout favorite (which I haven’t been able to indulge in since my diagnosis three years ago!).  Guess what?  They were a hit.

The recipe came together with a little help from Gluten-Free On A Shoestring.  So, check out the recipe and give it a go.  They brought back so many happy memories and made a lot of people happy that night.

Recipe: Gluten-Free Thin Mint Cookies

Gluten-Free Thin Mint Cookies

Servings: 30 larger cookies (I made 65 small cookies)
Time: Prep 15 minutes; Bake 7 minutes

Ingredients:

COOKIES

  • 5 tablespoons unsalted butter (I used Earth Balance)
  • 4 ounces semi-sweet chocolate, chopped (I used Enjoy Life morsels)
  • ¼ teaspoon pure vanilla extract
  • ½ teaspoon pure peppermint extract
  • ¾ cup high-quality all-purpose gluten-free flour (I used Better Batter)
  • ¼ teaspoon xanthan gum (omit if your blend already contains it)
  • ½ cup unsweetened natural cocoa powder
  • ¼ teaspoon baking soda
  • ½ teaspoon kosher salt

GLAZE

  • ½ pound dark chocolate, chopped
  • pure peppermint extract, to taste

Directions:

Preheat your oven to 300° F.  Line rimmed baking sheets with unbleached parchment paper, and set them aside.

In a medium-size microwave-safe bowl, place the butter and all of the semi-sweet chocolate except for 3 to 4 1-1/2-inch-size chunks.

Microwave at 70% power for 45 seconds at a time, stirring in between, until melted and smooth.  Add the reserved chunks of chocolate, and stir until the chocolate has begun to thicken a bit and the chunks have melted.

Add the vanilla extract and peppermint extract, and stir to combine.  Set the chocolate aside.

In a large bowl, place the flour, xanthan gum (if using), cocoa powder, baking soda, salt and sugar, and whisk to combine well.  Add the chocolate mixture, and mix until the dough comes together and is well-integrated.  Press the cookie dough into a disk.

Place the dough between two sheets of unbleached parchment paper, and roll it out until it is about 1/4 inch thick (any thinner and the cookies are more likely to burn in the oven, and they will crack when you try to coat them in chocolate).  Cut out rounds that are about 1-1/2 inches in diameter, and place them, 1 inch apart, on the prepared baking sheets.

Place the baking sheet in the center of the preheated oven and bake, rotating once, for 7 minutes.

Remove from the oven, and allow the cookies to cool completely on the baking sheet.

Once the cookies are cool, make the glaze.

Place all of the dark chocolate except for 3 to 4 1-1/2 inch-size chunks in a medium-size, microwave-safe bowl.

Microwave at 70% power for 45 seconds at a time, stirring in between, until melted and smooth.  Add the reserved chunks of chocolate and the peppermint extract, and stir until the chocolate has begun to thicken a bit and the chunks have melted.

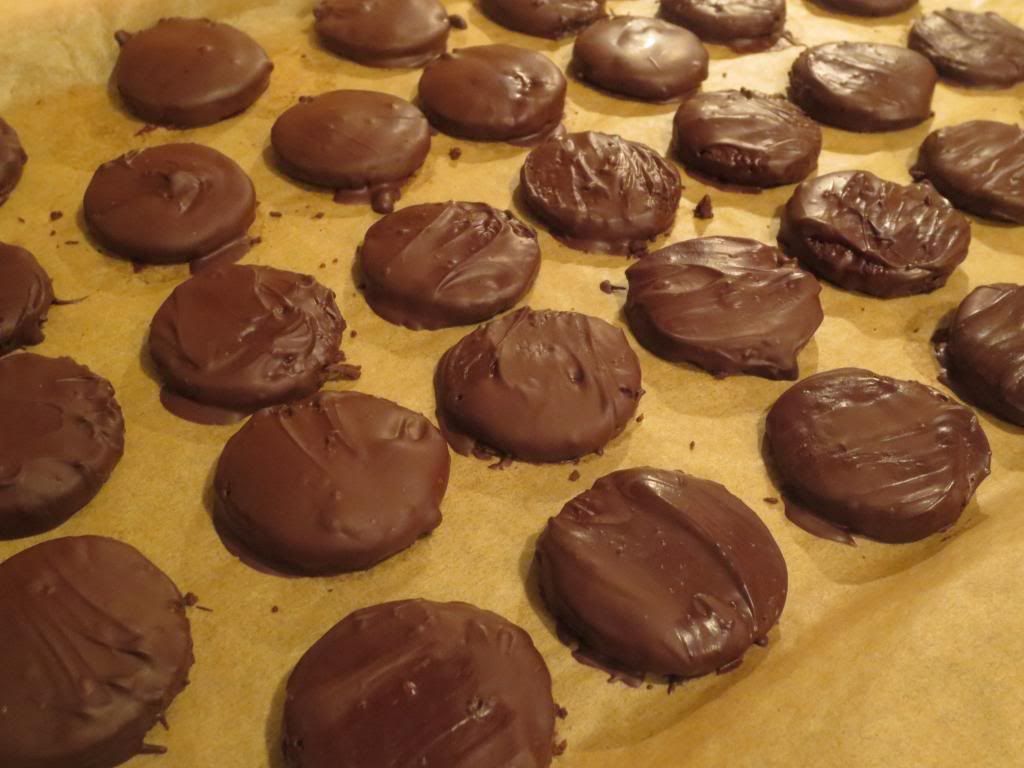
Place the cookies, one at a time, in the glaze.  Press down on the cookie with the tines of a fork, then flip it gently in the chocolate.  Pull the cookie out of the chocolate by slipping the fork under it and bobbing the cookie on the surface of the chocolate a few times before pulling it along the edge of the bowl and carefully placing it on a clean sheet of parchment paper.  Allow the chocolate to set at room temperature.

Serve and enjoy!

~*~*~

While it has been ages since I have last been able to eat a Thin Mint Cookie (or 12 in one sitting)…these reminded me SO much of the cookies I grew up devouring.  I loved them enough to have as much trouble stopping myself from eating them as I did the real things.  So, from this one-time Girl Scout to all of you Celiacs and gluten-intolerant people out there…don’t give up hope.  You can now make your own Girl Scout favorite in the comfort of your own kitchen.

They’re probably less expensive too.  *WINK*

Product Review: Daiya Deliciously Dairy Free Plain Cream Cheese Style Spread

Daiya Deliciously Dairy Free Plain Cream Cheese Spread

Product: Daiya Deliciously Dairy Free Plain Cream Cheese Style Spread – $4.49+

In the previous blog, I reviewed some bagel thins which were made of awesome and happiness.  Like butterflies and unicorns.

Well, I also mentioned vegan cream cheese.  My usual go-to vegan cream cheese is Tofutti.  Which I LOVE so much.  It’s just really, really tasty.  But, you see, my favorite vegan cheese company, Daiya, had just released some vegan cream cheese of their own…and yes…I really wanted to try it.

It was just a matter of finding it, in stock, here in my area.

It took a little while…but I finally stumbled across it at my local grocery store.  The last place I expected to find it…but there it was in all it’s dairy-free glory.  So, you bet your bagel-loving butt that I snatched up a container of it.  With bagel thins in my freezer…I needed some cream cheese, yes?  Of course.  Justifying the grocery budget here!

Anyway…having tried two other vegan cream cheese options and loving them…Daiya had a lot to live up to.  But…Daiya is a brand that I love and trust, so I wasn’t worried.  Not one bit.  And when those bagel thins came out of the oven that morning…I was ready to give each half a nice, healthy schmear.

Which…is exactly what happened.

Compared to the other vegan cream cheese spreads I have used, Daiya was definitely not as creamy or as spreadable as the rest.  It was a bit clumpy when I dished out a serving to put on each half of the bagel thin.  That being said, it did spread out just fine, especially on the toasty top of each bagel, even melting down like regular cream cheese does.  And the taste?  Well…it tastes like Daiya.  That’s about all I can say.  Daiya has this distinct flavor to it.  But it is the absolute best vegan cheese out there and I found myself enjoying the taste of this the more I ate.  Honestly.  At first, I wasn’t too sure about it…but then as I kept eating, I liked it…then loved it.

So, let’s talk about Daiya Deliciously Dairy Free Plain Cream Cheese Style Spread, yes?  Yes.  As with all Daiya products, the Plain Cream Cheese Style Spread is casein free, lactose free, and soy free.  It is made up of filtered water, coconut oil, non-GMO expeller pressed canola and/or safflower oil, potato starch, pea protein isolate, sea salt, vegetable glycerin, xanthan gum, lactic acid (for flavor) agave syrup, natural vegan flavors, titanium dioxide (a naturally occurring mineral), vegan enzyme, and cultured sugar.  So, it’s not a complete chemistry experiment when it comes to ingredients.  Although not everything is all natural either.  But, you have to make exceptions sometimes, right?

Nutritionally speaking, Daiya Deliciously Dairy Free Plain Cream Cheese Style Spread is doled out in servings of 2 tablespoons.  These two tablespoons contain 90 calories and 7 grams of fat.  That’s not too bad.  Each serving contains no cholesterol and a scant 190 mg of sodium.  A serving of this spread does not contain any fiber and only 1 gram of protein.

So, as it stands, Tofutti Better Than Cream Cheese is a better option, however…it does contain soy.  If you are sensitive to soy or limiting your consumption of soy, than Diaya is the way to go.  The cream cheese works great on bagels and I hope to dish up a delicious cheese cake with it in the very near future.  Maybe for Thanksgiving since I am playing host for the first time.  We’ll see.

Give it a try…see what you think!

Daiya Deliciously Dairy Free Plain Cream Cheese Style Spread over O'Doughs Gluten Free Original Flavor Bagel Thins
Daiya Deliciously Dairy Free Plain Cream Cheese Style Spread over O’Doughs Gluten Free Original Flavor Bagel Thins

Product Review: Walden Farms Balsamic Vinaigrette Salad Dressing

Waldon Farms Balsamic Vinaigrette Salad Dressing

Product: Walden Farms Balsamic Vinaigrette Salad Dressing – $4.99+

You know…up until I started on my new 70/30 Clean Eating plan my sports nutritionist has put me on…I never would have thought twice about enjoying the basically guilt-free products put out by Walden Farms.  I mean…I’ve had quite a few salad dressings from their extensive line-up that I have quite enjoyed.  And, a couple weeks ago, a bottle of their Balsamic Salad Dressing just happened to wind up on Manager’s Special at my local grocery store.  I hadn’t tried this flavor yet…so I figured I’d give it a shot.  If I didn’t like it, I wasn’t out much thanks to the reduced price.

So…I initially was introduced to Walden Farms by Rocco DiSpirito in his Now Eat This cookbooks.  He uses the calorie free (yes…CALORIE FREE) ketchup in a few recipes as one of the ingredients.  I was intrigued. I had seen a few of these Walden Farms products lurking at numerous grocery stores in my area…so…one day I decided to try one of the salad dressings.  And…it really wasn’t bad at all.  For the record…I have never tried the ketchup.

Anyway…a few salad dressings later…here I was with one of my favorite dressings to have when out at a restaurant.  Mostly because it’s safe.  Any vinaigrette is normally a safe bet when it comes to dressing up a salad.  And I’ve always loved the flavor of a good Balsamic Vinaigrette.

Polishing off the lettuce, tomato, and green peppers from my last CSA bin, I’ve been making quite a few salads this week.  Tonight, I needed a new salad dressing.  So…out came the Walden Farms Balsamic Vinaigrette Salad Dressing.  I tore off the seal and twisted off the cap, taking a light sniff of the bottle.  It smelled just like Balsamic Vinaigrette…so that was a good sign.

I put the 2 tablespoon serving size over my salad (yes…I did measure it!) and dove in.

The flavor is authentic.  It has the feel, taste, smell…everything a normal Balsamic Vinaigrette would have.  Just…this one happens to have no calories (save the trace ones that are always in something you eat or drink…even those zero calorie diet sodas!).  I was impressed.  I was beyond impressed.  It was like having a full-barrel version of this dressing…but without all the fats and calories.  Delicious.  Amazing.  Just what my salad needed to be dressed with.  It complimented every vegetable inside my bowl.  Two tablespoons almost felt like too much.  This was a hearty dressing…while still having that oil and vinegar consistency.

But…here is where my sports nutritionist has ruined me.  As I’m feasting on this dressing, I start to wonder how a dressing that is normally made from a wine vinegar and olive oil could exist without calories.  Yes…these things run through my mind.  So, I turned the bottle over and took a look at the ingredients.  They include: triple-filtered purified water, balsamic vinegar, white vinegar, cellulose fiber, salt, dijon mustard, lemon juice, onion powder, garlic powder, white pepper, natural flavors, natural spices, caramel color, xanthan gum, sucralose (SPLENDA!! NOOOOO!), and sodium benzoate.  Yeah…first of all…SPLENDA! NO NO NO NO NO!!  SPlenda is bad.  And bad for you.  And now I just want to dump this dressing down the drain and get something real and good and made with natural products.  That’s my next problem…cellulose fiber?  Sodium Benzoate?  Huhwha?

As far as the nutrition panel reads…it’s flooded with zeros.  Zero calories, zero fat, zero cholesterol, zero protein, zero fiber, but it does have 260 mg of sodium.  This dressing is gluten-free, calorie-free, sugar-free, and fat-free.

But the Splenda thing is really bothersome.  I just don’t like it.  At all.  So…fat and calories aren’t bad for you…you just have to take them in moderation.  And so that is how I shall take my salad dressing.

But no longer from Walden Farms.  While I appreciate their products and have enjoyed all the ones I have tried…I just can’t continue to put Splenda into my body.  Not when I’m trying to better it.

It’s too bad.  It really is.

Glutino puts the gluten-free fun back into dipping with new Tortilla Dippers

Glutino Gluten-Free Tortilla Dippers

Product: Glutino Gluten-Free Tortilla Dippers – $3.99+

Glutino.  Glutino.  Glutino.

Here is what I love about Glutino – I have yet to try one of their products and not like it.  Everything has been impressive and delicious and amazing.  So close to what I used to be able to eat…it’s scary…and amazing…full of gluten-free awesomesauce all at once.  They were the first to bring me gluten-free pretzels.  The first to give me gluten-free toaster pastries.  And now…the first to create the ultimate gluten-free tortilla chip…meant for dipping.

Remember Tostitos Scoops?  You should.  Because they are actually one of Frito-Lay’s gluten-free products.  Yeah.  Well, think Tostitos Scoops…but done in a completely gluten-free facility.  That’s what you get when you purchase Glutino’s Gluten-Free Tortilla Dippers.

Glutino’s Web site declares that these Tortilla Dippers are made for the bold, the brassy and the sassy.  And that may not be far from the truth.  The entire point of a dipper is to get all wild and crazy with what you choose to scoop with them.  Or…the toppings you pile onto them.  The entire point is that they must, I repeat…MUST…hold up to the toppings or the weight of the scoop, be it nacho cheese, salsa, guacamole, or some other amazing dip of your own creation.  If they fall apart or crumble…no good!

I spotted Glutino’s Gluten-Free Tortilla Dippers while at my natural food store on an end cap.  The Glutino products were on sale…so I allowed the splurge.  I knew there would be something I could make with them, regardless.  And I was right.  It just took me about a month to actually get around to using them.  But, my roommate had her last wisdom tooth removed this past week, and after being stuck on mushy food for the entire week, yesterday she had one request…

NACHOS FOR DINNER!

So, I complied.  After all, I had some Trader Joe’s queso (gluten-free) in the pantry that was begging for some action.  In addition, some black beans that would add some delicious protein.  Oh…and avocado.  Because if there is a reason to add avocado to something I am going to.  Heck, I’ll just eat the avocado.  But I digress…

Since she was ready for crunchy food again, I agreed to make some nachos per her request.  And I already had everything at home to make it happen.  BONUS!

I pulled out the beans and got them heating on the stove.  While that was happening, I went ahead and chopped up some fresh tomatoes and got the avocado sliced, pitted, and chopped.  Then…the queso was warmed in the microwave.  Soon…dinner would be ready.  All I needed now was the chips.

So I pulled the Gluten-Free Tortilla Dippers out of the pantry and doled out a serving for each of us.  Then the beans were tossed on top…followed by the tomatoes, the avocado, then the queso.  Dinner took almost no time at all…and was now ready to be served.  I added a bit of vegan Sriracha sour cream to the top, and for me a few jalapeno peppers.

Time to dig in and see how the Tortilla Dippers handled my toppings.

The fact was, Glutino did it’s job well.  Not only do these chips have an amazing texture and crunch to them, you can really taste the sweetness of the corn.  It adds a beautiful balance to the dish you are using them with, honestly.  I had to try a chip on its own, and I felt that they tasted even better than Tostitos Scoops.  And I used to heat the hell out of those.  They didn’t get mushy, nor did they crack and crumble when the toppings were piled on top.  I asked Cathy what she thought and she raved about them.  This is always a good thing, because she can be rather finicky at times about things that are close to a favorite product…and she really has always loved to the Tostitos Scoops.

So, let’s talk about nutrition.  For a chip, these are identical in comparison with Tostitos Scoops.  Honestly.  A serving is 28 grams, or about 12 chips.  This serving sets you back 140 calories and 7 grams of fat.  Not bad for a corn chip.  A serving also only dishes up 120 mg of sodium, 2 grams of fiber (one more gram than Scoops), and 1 gram of protein.  Everything else is identical.  This has one gram less in carbohydrates.  Aside from that…nothing too different.  But when I can get something that is certified gluten-free…that’s what I am going to purchase.  So, Glutino…you win!

As far as ingredients go, Glutino’s Tortilla Dippers are made from ground whole white corn, vegetable oil, toasted corn germ, and salt.  Four ingredients.  Simply made.  Simply delicious.  Simply good.

Don’t take my word for it though.  These are definitely a bit pricier than Tostitos, but I’d pay the extra few dollars again.  Without batting an eyelash.  And we all know I live on a strict budget…so that’s saying something.

Next time you’re feeling the need to make a salsa, queso, guacamole, or other dip…give Glutino’s Gluten-Free Tortilla Dippers a try.  I promise…you’ll love them!

Nachos made with Glutino's Gluten-Free Tortilla Dippers
Nachos made with Glutino’s Gluten-Free Tortilla Dippers

Recipe: Gluten-Free and Vegan Shrimp Tacos with Mango Salsa and Sriracha Sour Cream

So, last night I set out to work some culinary magic with some items in my refrigerator and my freezer.  What came out of the plethora of ingredients I had on hand was one of the most amazing taco dinners I have ever created.  I made mine gluten-free and vegan to fit my dietary needs, but if you happen to like real shrimp…use it.  If you can eat regular sour cream…use it.  The great thing about recipes is…they are made to be modified.

By popular demand, here is the recipe for my Gluten-Free and Vegan Shrimp Tacos with a Mango Salsa and Sriracha Sour Cream.

Recipe: Gluten-Free and Vegan Shrimp Tacos with Mango Salsa and Vegan Sriracha Sour Cream


Gluten-Free and Vegan Shrimp Tacos with a Mango Salsa and Sriracha Sour Cream


Servings: 2 (2 tacos each)


Ingredients for Avocado, Tomato and Mango Salsa:

Avocado, Tomato and Mango Salsa
  • 1 mango – peeled, seeded and diced
  • 1 avocado – peeled, pitted, and diced
  • 4 medium tomatoes, diced
  • 1 serrano pepper, seeded and minced
  • 1/2 cup chopped fresh cilantro
  • 3 cloves garlic, minced
  • 1 teaspoon salt
  • 2 tablespoons fresh lime juice
  • 1/4 cup chopped red onion
  • 3 tablespoons olive oil

Directions:

In a medium bowl, combine the mango, avocado, tomatoes, serrano, cilantro, and garlic.

Stir in the salt, lime juice, red onion, and olive oil.

To blend the flavors, refrigerate for about 30 minutes before serving.

Note: You will have left-overs…so enjoy with some gluten-free corn tortilla chips or save for the next day.

While the salsa is chilling in the fridge…prepare the rest of the tacos…

Ingredients:

4 Rudi’s Gluten-Free Fiesta Tortillas
1 box of Sophie’s Kitchen Gluten-Free Breaded Vegan Shrimp (or you can use real shrimp if not a vegetarian/vegan, just make/use a gluten-free breading)
2 leaves of Romaine lettuce, chopped
1/4 cup vegan sour cream (I used Tofutti Better Than Sour Cream – or use real sour cream)
1 tablespoon Sriracha

Directions:

Preheat the oven and cook the shrimp according to the instructions on the box.  If using Sophie’s Kitchen Gluten-Free Breaded Vegan Shrimp, it takes about 10-15 minutes.

Mix together the vegan sour cream (or real sour cream, if using) with the Sriracha to make the Sriracha sour cream.

Warm the Rudi’s Gluten-Free Fiesta Tortillas in the microwave for about 20 seconds.

Remove and place on plates.

Placed chopped lettuce on each of the tortillas.

Scoop about 1/4 cup of the Avocado, Tomato and Mango Salsa over the lettuce.

Top the salsa with the cooked shrimp.

Top each taco with the Sriracha Sour Cream.

Fold tortillas around filling and ENJOY!

~*~*~

I’m already considering making this again tonight, because I still have a good chunk of the salsa remaining and…it was really, really, REALLY good.  The combination of the sweet salsa with the savory vegan shrimp (don’t mock…they are awesome) and the hint of heat from the vegan Sriracha sour cream all just worked together.  My roommate (who doesn’t have to do gluten-free or vegan…in fact…loves real shrimp) fell in love with this dinner and said it was one of the best dinners I ever made.

I encourage you to give it a try!

Recipe: Avocado, Tomato and Mango Salsa

By now, it’s no secret that one of the few fruits that I do not like (trust me…there aren’t many) are mangoes.  Yep.  Mangoes.  I have never been a fan of that particular fruit.  Give me papaya any day of the week…or any other fruit for that matter.  But mangoes…there is just something about them that I just don’t like…flavor-wise.

So…while I was away in Minnesota visiting my grandpa and running a half marathon, my CSA bin order automatically went through.  In this particular order that I was not around to modify (come on, I was visiting family, not sitting on my computer!), I soon realized that I would now be the proud (I guess?) owner of two fresh mangoes when my bin arrived on Friday.

Just…great!  (Yes…that is sarcasm).  So…what does someone who doesn’t like mangoes do with mangoes now that she has them and refuses to let anything go to waste?

Who knows?  But I get on Pinterest and do some hunting for ideas.  And one that I found, and that looked and sounded delicious…was a recipe for a mango salsa that also included other vegetables such as avocado and tomato.  It could work.  Maybe.  So…I picked up the rest of the ingredients that I needed on the way home tonight and made this salsa to accompany the vegan and gluten-free shrimp tacos I was making for dinner.

I was really, really, really surprised by how much I liked this!  Sweet, slightly spicy, and refreshing.  The recipe, taken from Allrecipes.com, is as follows:

Recipe: Avocado, Tomato and Mango Salsa

Avocado, Tomato and Mango Salsa

Servings: 6
Time: Prep 15 minutes; Chill 30 minutes

Ingredients:

  • 1 mango – peeled, seeded and diced
  • 1 avocado – peeled, pitted, and diced
  • 4 medium tomatoes, diced
  • 1 serrano pepper, seeded and minced
  • 1/2 cup chopped fresh cilantro
  • 3 cloves garlic, minced
  • 1 teaspoon salt
  • 2 tablespoons fresh lime juice
  • 1/4 cup chopped red onion
  • 3 tablespoons olive oil

Directions:

In a medium bowl, combine the mango, avocado, tomatoes, serrano, cilantro, and garlic.

Stir in the salt, lime juice, red onion, and olive oil.

To blend the flavors, refrigerate for about 30 minutes before serving.

~*~*~

Yes…it really is that easy to make.  The prep work is what takes up all the time.  And it’s just a bunch of dicing and chipping to be honest.  What emerges from the fridge is this amazing salsa that is refreshing and layered with flavors.  Sweet from the tomatoes and mango, a bit of spice from the cilantro, onion, and serrano chili, all just mixed together and creating this deliciously balanced condiment.

I put mine on my gluten-free and vegan shrimp (yes, vegan shrimp) tacos…and that worked out beautifully.  It was one of my favorite dinners I have ever put together.  But, go ahead and pair this with tortilla chips or anything in need of a delicious salsa.

Trust me…you’ll love this.

Moo Moo’s Poblano Chick(pea) Patties a versatile vegan and gluten-free meal

Moo Moo's Vegetarian Cuisine Vegan & Gluten-Free Poblano Chick(pea) Patties
Moo Moo’s Vegetarian Cuisine Vegan & Gluten-Free Poblano Chick(pea) Patties

Product: Moo Moo’s Vegetarian Cuisine Poblano Chick(pea) Patties – $4.99+

Sometimes…I have to step away from my grocery list and just…splurge on something.  Just take the plunge…grab a product that interests me…and try it out.  That’s what happened when I was in my local natural foods store a couple weeks ago.  I had gone in specifically to pick up some Udi’s Gluten-Free Dinner Rolls while they were still on sale.  The problem is…whenever I go into this store for something specific, I find something else that interests me.  A lot.

This time…it was a product I had never seen before.  Moo Moo’s Vegetarian Cuisine Vegan & Gluten-Free Poblano Chick(pea) Patties.

Intriguing.  Definitely intriguing.  Especially since I love chickpeas and I love poblano peppers.  Screw the budget…screw the grocery list.  I was going to get this.  I had to try it.  I just had to.  So, it came home with me and I tossed it in my freezer for a day where I would need it.

Well…on Friday I was greeted with my first CSA bin in two weeks (I’d been out of town the past two weekends and had to cancel them)…and inside were beautiful cucumbers.  My roommate suggested that I make my tzatziki using the cucumber.  I thought that was a fantastic idea…as soon as I figured out what we would eat with it.  Then, on Saturday morning, we finally made it back to Annie May’s Sweet Café, the local allergen-free bakery here in Louisville, and made a splurge purchase of a bag of their dinner rolls.  We hadn’t tried the gluten-free dinner rolls yet…so we figured…why not?

And that’s when inspiration struck.  As the request for my tzatziki was made…and now we had dinner rolls…what if I used these Poblano Chick(pea) Patties and make sort of a “falafel” slider of sorts.  The roomie was totally all about it…so that was the plan.  This afternoon, while she took in Timothy Dalton as James Bond (GAG!), I was in the kitchen making my infamous tzatziki.  I got it mixed and made and into the fridge.  And a couple of hours later…dinner time was approaching.

I went to the freezer and pulled out the box of Moo Moo’s Vegetarian Cuisine Vegan & Gluten-Free Pobalno Chick(pea) Patties.  Not real falafel…but something I could work with, yes?  I preheated the oven to 350°F and pulled the tray out of the box.  Per the directions, I lifted one corner of the plastic film to vent and put the tray on a baking sheet.  Into the oven it went to cook for about 30 minutes.  While that was happening, I sliced up a leaf of fresh romaine lettuce (also from my CSA bin) and prepped the gluten-free dinner rolls to join the Poblano Chick(pea) Patties in the oven to get a light toasting.

Moo Moo's Vegetarian Cuisine Vegan & Gluten-Free Poblano Chick(pea) Patties with Roasted Corn Salsa (cooked)
Moo Moo’s Vegetarian Cuisine Vegan & Gluten-Free Poblano Chick(pea) Patties with Roasted Corn Salsa (cooked)

They finished up at the same time.  I removed the tray from the oven and let it stand for one minute.  Then, I carefully removed the film.

The tray contained two large patties made from chickpeas, kettle cooked chili onions, brown rice, roasted poblano and red bell peppers.  Included was a roasted corn salsa as well, which I ended up just mashing into the patties.  With the dinner rolls sliced, I placed a small dollop of tzatziki on the bottom half, then placed a little bit of romaine lettuce.  Next came the mix of Moo Moo’s Vegetarian Cuisine Poblano Chick(pea) Patties.  I separated each patty into thirds and began to spoon up the chickpea-poblano mixture with some of the included corn salsa.  I placed this over each leaf of lettuce, then topped  it off with a small bit more tzatziki.  The top of the dinner roll was placed over everything and…voilà…mock falafel sliders.  YES!

I handed my roommate her plate and went to fix mine.  And before I even started compiling my round of sliders, she was already digging in.  And she was already voicing her thoughts on it through happy grunts between bites.  I asked how the chickpea patties were and she said they were really tasty.  She, as she is a bread person, raved more about the rolls.

So, with my sliders now put together exactly as hers were, I settled in to my own dinner.  I couldn’t wait to try these out.  They smelled amazing.  They looked stunning, if I do say so myself.  So…I lifted one carefully to my mouth and took a bite.

First of all, she was right…the dinner rolls were out-of-this-world good.  But…that will be dedicated to another blog.

Moo Moo’s Vegetarian Cuisine got it right with these Vegan & Gluten-Free Poblano Chick(pea) Patties.  Honestly.  Packed with flavor.  The peppers aren’t spicy at all, and the combination of the chickpeas, peppers, onions, and the corn salsa with my homemade tzatziki…it just all played together so well.  The toasted roll and the crisp lettuce just were the perfect combo to elevate these from microwave dinner to…fine dining.  Seriously…I am in love with this product and can’t wait to purchase more.  Maybe I’ll eat it straight next time.  Or maybe I’ll make more sliders from these delicious patties.

A little bit about Moo Moo’s Vegetarian Cuisine.  It was created in 2005 by founder and culinary artist, Michele Rostelli.  The company is committed to providing healthy, sustainable, flavorful vegetarian cuisine that is made with only natural and organic ingredients.  LOVE IT.  You can really taste the quality of the products in each bite.  Trust me…I couldn’t stop eating these sliders I made out of the patties.

As for nutrition…you’ll love this.  A serving is the entire box (both patties).  My roommate and I split the contents, but if you were to sit this down and eat it straight, you would only be consuming 230 calories.  You would also only be set back 3 grams of fat.  A serving of the Poblano Chick(pea) Patties contains only 510 mg of sodium.  But, in addition, you get 9 grams of filling fiber and a kick of 9 grams of protein.  These are completely cholesterol free.  How awesome is that?  Healthy and delicious.  Moo Moo’s Vegetarian Cuisine totally got this one right.

Moo Moo’s Vegetarian Cuisine makes quite a variety of products, some gluten-free, some lactose free, some vegan…some a combination of all of them.  But if this is any indication of the quality of their products, then I can’t wait to try more of their gluten-free options.  Blown away.  Simple, yet powerful ingredients yield delicious products.  This certainly proves that.

“Falafel” Sliders made from Moo Moo’s Vegetarian Cuisine Vegan & Gluten-Free Poblano Chick(pea) Patties (on Annie May’s Sweet Cafe Gluten-Free Dinner Rolls)

Cofresh adds a bit of Indian heat to any dish with this spicy Tandoori Marinade

Cofresh Tandoori Marinade

Product: Cofresh Tandoori Marinade – $2.50+

Oh, the things you find at Big Lots when you walk the aisles.  It never ceases to amaze me what kind of gluten-free goodness lurks in their food aisles.  Especially when you hit up some of the specialty aisles…where things comes from across the ocean.

That was what happened when I happened across Cofresh Tandoori Marinade.  It was any other browsing session through Big Lots to kill off some time.  And naturally, I find something that catches my eye.

Being that I love, love, love, love Indian food…I figured this gluten-free marinade (it’s even labeled!) would come in handy…at some point.  You know.  Like when I feel the need to make something and give it some Indian twist.  So, I purchased this imported sauce and took it home with me.  And then, as is normally the case, it sat in my pantry for a good long while.

Until today.

Because today I decided to flex my CSA Bin muscle.  I have lots of produce left from last week and a new bin on its way tomorrow…so I wanted to use whatever I could this evening with dinner.  Over the weekend, I also picked up some Twin Oaks Original Tofu at Whole Foods, so I figured…at least I could do some Tandoori Tofu.  But how to step it up?  And how to use some of that produce in my crisper drawer?  Hmmm…

And then…it came to me.  It’s what my roommate now calls Triple T!

What is Triple T, you might ask?  Well, it’s Tandoori Tofu Tortilla Wrap.  And I added some of the Bibb lettuce and baby spinach in my crisper drawer, as well as chopped up some shallots to add a bit of texture.  All I needed to do was get that tandoori tofu working.  And that was easy!!

This morning, I cut exactly 6 ounces of tofu (2 servings) from the block and then sliced it up into bite-sized cubes.  I tossed them into a plastic baggy with about 4 tablespoons of Cofresh Tandoori Marinade.  I gave the bag a shake, and then let it rest in the fridge all day while I was at work.  When I returned home tonight, I simply heated up a nonstick pan on the stove, dumped my marinaded tofu into it, and cooked it through.

Then…I warmed one of Rudi’s Gluten-Free Spinach Tortillas up in the microwave, added a touch more of the marinade to it, then layered on the fresh Bibb lettuce and baby spinach.  On top of that when my warmed tandoori tofu, then a sprinkling of raw shallot, for texture.  And when it was done…the Triple T was what we were having for dinner.  I took my roomie her plate then went to get mine.

First of all…this was one healthy and amazingly flavorful dinner.  The Cofresh Tandoori Marinade is labeled as being at a medium heat, but it does have some kick to it.  And, you all know I am a spice girl, so I was loving that gentle burn.  It worked so well on the tofu as the tofu really absorbed that rich flavor of the marinade.  So delicious.  And with the added crunch of the shallot and the fresh greens underneath, this was a hearty, satisfying, and spicy meal that sort of fused Mexican with Indian.  And it was a match made in heaven.

Cofresh Tandoori Marinade also wins as far as nutrition as well.  A serving size is 2 tablespoons, of which only sets you back 20 calories.  That’s amazing for a sauce.  This sauce is also fat free, gluten-free, vegetarian, and also vegan.  The sodium is a bit higher than I like, topping off at 520 mg, but it just means there is no need to season further.  And, honestly, you don’t need to.

I absolutely loved this marinade.  The tandoori flavor had the right amount of heat, kick, and spice to keep each bite interesting to my palate.  And I loved how it worked with my fresh, local produce.  Looking for a new way to spice up your meal, I highly recommend Cofresh Tandoori Marinade.

Tandoori Tofu Tortilla Wrap (made with Cofresh Tandoori Marinade)

Natural Nectar Gluten-Free Sun-Dried Tomato and Oregano Cracklebred a deliciously healthy snack option

Natural Nectar Gluten-Free Sun-Dried Tomato and Oregano Cracklebred

Product: Natural Nectar Gluten-Free Sun-Dried Tomato and Oregano Cracklebred – $3.99+

I was in Minnesota when I stumbled upon a few Cracklebred boxes at Cub Foods.  You see, I had traveled up to Minneapolis to visit my grandpa and also run in the Minneapolis Half Marathon.  Well, I did really well in that race, and as a reward, my roommate told me to pick out some of the gluten-free foods that we had noticed while shopping for foods I could eat while staying with my grandpa and my aunt.

So, I went a little crazy, selecting a few items that had caught my eye and interested me.

One such product was Natural Nectar’s Gluten-Free Sun-Dried Tomato and Oregano Cracklebred.  It just looked…interesting, if nothing else.

Well, I get a little overzealous at times with my gluten-free snacks and definitely overstocked my pantry.  So this box has been sitting there since the race.  The expiration date is in the next couple of months, so it was time to bust it out and give it its time to shine.  And hopefully…it would shine.

Everything about this Cracklebred made me want to try it.  For one thing, it’s nutritious.  No…it really is.

One serving is 3 crackers, which, as you can tell, are a really decent size.  Larger than a deck of playing cards.  These three crackers will serve you up only 52 calories total.  Each cracker is only 17 calories.  No joke.  These are fat free, cholesterol free, gluten-free, low in sodium (only 115 mg per serving), and low in sugar (only 1 gram per serving).  Loving those nutritional facts?  Yeah…I did too.

The Sun-Dried Tomato and Oregano Cracklebred is composed of seven ingredients: rice, corn, tomato puree, evaporated cane juice, sea salt, oregano, and soy lecithin.  Recognize those?  Yep…me too.  Every.  Single.  One.  Of.  Them.  Love that too.

But how do they taste?  Well, that is the interesting part, my dear readers.  I wasn’t sure what to make of these.  They looked like little rectangles of fibery board when I pulled them out of the plastic they were wrapped in.  But, the fact of the matter is, they have about the same texture as a rice cake.  And, as I stated before, I grew up eating rice cakes and actually find them to be quite tasty.  And this…is definitely tasty.  These light crackers are flaky and smooth and just packed with flavor.  On the first bite, you get that rice and corn combination, but then the tomato flavor sinks in…and your cracker just got savory.  Oh, so delicious.  And, of course, these are great on their own, but feel free to top them off however you like with your favorite spreads, cheeses or dips.

I’m hooked.  And I am so happy to have found these in a few of my local natural food stores lately.  So, now whenever I crave…I don’t have to place an order with my family in Minnesota.  I just have to head to the store and pick up a box for myself.

Natural Nectar makes three varieties of their Gluten-Free Cracklebred…the aforementioned flavor of my choice, Sun-Dried Tomato and Oregano, but also original and multigrain.  I definitely want to try them all.

For a nutritious cracker that has a light, crispy texture and a delicious flavor, definitely give the Cracklbred from Natural Nectar a try.  I’m hooked.  Even without a spread to top it off with.

Making a snack out of Trader Joe’s Queso Cheese Dip and Organic Corn Chip Dippers

Trader Joe's Gluten-Free Queso Cheese Dip with Trader Joe's Organic Corn Chip Dippers
Trader Joe’s Gluten-Free Queso Cheese Dip with Trader Joe’s Organic Corn Chip Dippers

Products: Trader Joe’s Organic Corn Chip Dippers – $1.99+; Trader Joe’s Queso Cheese Dip – $2.49+

I wish I could write a love letter to Trader Joe’s.  Quite honestly.

So often, the snack foods or vegan/vegetarian foods that most people can eat…I can’t.  Because I can’t have gluten.  And so often, some sort of gluten containing ingredient works its way into said snack foods or food items.

But…Trader Joe’s seems to hold the market…and that’s what keeps me coming back time and time again.  While normally I don’t do queso dip…my roommate spotted this awhile back at Trader Joe’s…and as it was clearly marked gluten-free…she asked if we could go ahead and get it.  For blog purposes, of course.  Which is easy for her to say…because she’s not the one who has to type it.  But…she rarely asks for a product while we are out grocery shopping, so I agreed and promised I would come up with something to use it with.

And then it sat in the pantry.  And sat.  And sat.  And every time I contemplated using it in something, I would find something else to use.  And so…it continued to sit on the pantry shelf.

A couple weeks ago, my roommate spotted yet another item while we ducked into Trader Joe’s.  This time, the Organic Corn Chip Dippers.  Basically, organic Fritos.  They were even labeled gluten-free, so once again, who was I to say no.  I was certain I could find a dish to pair them with.

And then…I didn’t.

Until tonight.

My roommate is now obsessed with sliders.  Why?  Because I made these little mini meatball sub sliders and now…everything she wants this week is in slider form.  It’s a fun way to use some produce and get a bit creative in the kitchen.  Tonight, I was making a gluten-free black bean and soy chorizo (using Trader Joe’s vegan and gluten-free chorizo) sliders, which I placed on toasted Udi’s Seeded Whole Grain Dinner Rolls with some fresh vegetables from my CSA bin.  But, two little sliders, while still a decent dinner…needed something to go with it.

And after some quick thinking and a peek into the pantry…Trader Joe’s took over my dinner plates.

I’ll start with the Organic Corn Chip Dippers.  As I stated before, these are basically a healthier and more natural Frito corn chip.  The difference between these and Fritos is that Trader Joe’s version of these corn chips have no preservatives, no trans fats,  and no chemicals baked into them.  They aren’t greasy like Fritos are, leaving no oily residue behind on my fingers.  And the ingredients list is super short: corn, sunflower oil, salt.  Three ingredients.  That’s all.  So right there, they won me over.  These chips are perfect for dipping, sturdy enough to hold a goopy scoop of queso cheese dip without busting apart or crumbling under the weight.  And they aren’t overly salty either.  Which, I do appreciate, because it lets the crisp, earthy flavor of the corn in these chips really shine.  Perfectly flavored and great tasting.

As for nutritional information on the Trader Joe’s Organic Corn Chip Dippers, a serving is 28 grams (or about 10 chips).  This serving will set you back only 160 calories.  You will be taking in 10 grams of fat in this serving, which is a bit high, but these are chips…so keep that in mind.  And much of that fat is a result of the sunflower oil, so at least it is a healthy fat.  These chips also have only 160 mg of sodium.  Not bad for a chip, right?

So, just because they are organic doesn’t mean they are healthy.  Stick to a serving, and you’ll be enjoying a better-for-you corn chip dipper.  Way better and way more flavorful than Fritos.

And, naturally, I decided to pair these chips with the Trader Joe’s Queso Cheese Dip that had just been begging for me to open it up since I bought it.  And now I wonder why I had waited so long to do so.

Trader Joe’s Queso Cheese Dip is the perfect dip for nachos.  It’s super cheesy flavored with a nice spicy kick that isn’t too much.  Even my roommate, who is a spice wimp, raved about the queso.  I think she liked it better than my black bean and soy chorizo burgers, to be honest.  Bold flavors and a hint of spice make any queso amazing.  But what really makes Trader Joe’s queso stand out is that a serving of 2 tablespoons has…are you ready for this?…only 15 calories.  This is NOT a joke, my friends.  Only 15 calories.  For cheesy queso dip.  I swear to the food gods!  Don’t believe me?  Go to your local Trader Joe’s and find this cheese dip and see for yourself.  You realize, then, that the entire jar only would set you back 165 calories…which is what usually 2 tablespoons of regular queso would set you back.  Um…AWESOME!  That being said, a 2 tablespoon serving will only contains 0.5 grans of fat and 130 mg of sodium.  This is beyond amazing.  If you are tired of salsa and guacomole isn’t what you’re craving, then do pick up a jar of Trader Joe’s Queso Cheese Dip because with these nutritional facts, paired with the amazing flavor…you can’t go wrong.

Addictive.  And a perfect snack or side dish to a meal.  That’s what Trader Joe’s provides with Organic Corn Chip Dippers and Queso Cheese Dip.  I was blown away.  So, if I were to pen a love letter to Trader Joe’s…it would simply say:

I love the food you are able to provide for me when other stores fail to do so.

It’s the truth.  And when the food is beyond my expectations and tastes amazing…even better.

Thank you, Trader Joe’s.

Trader Joe's Organic Corn Chip Dippers with a serving of Trader Joe's Gluten-Free Queso Cheese Dip
Trader Joe’s Organic Corn Chip Dippers with a serving of Trader Joe’s Gluten-Free Queso Cheese Dip