Product review: Kite Hill Plain Cream Cheese Style Spread

Kite Hill Plain Cream Cheese Style Spread

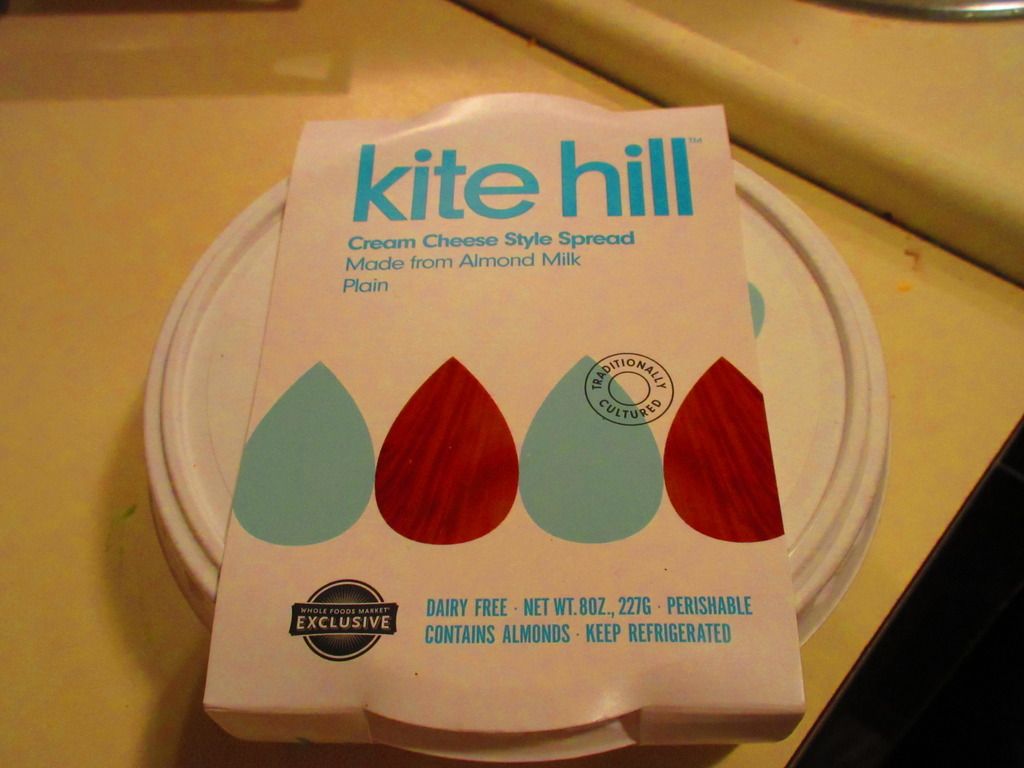
 Product: Kite Hill Plain Cream Cheese Style Spread – $5.99+

I’m always looking for good and healthy alternatives to the not-quite-so-healthy alternatives that I have to east since my body can’t really process the lactose in dairy.  Dairy and I have all but broken up for the most part.  It wasn’t an easy break-up either…but something had to give.

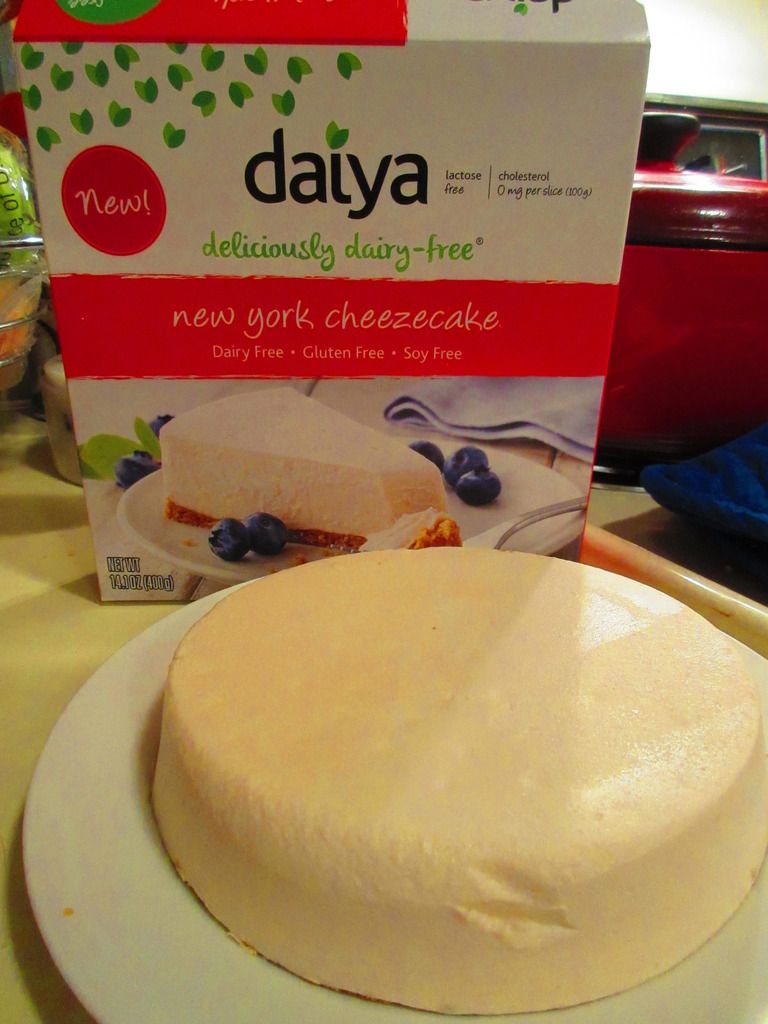
For awhile now, I’ve been purchasing vegan versions of cream cheese from Tofutti and Daiya.  And these worked.  They double as a cream cheese alternative, minus the actual dairy.  Texture works.  Tofutti tastes just like cream cheese.  Daiya tastes like…Daiya…as pretty much all Daiya products do…but still amazing.  These have been staples in my fridge since I found amazing gluten-free bagels (Udi’s, Canyon Bakehouse, and now Sweet Note) and have made a few attempts at making my own gluten free bagels.

But then…one day while in Whole Foods, I saw something new.  Something…different.

Kite Hill was started due to a vision for a plant-based food that would have all the qualities we love in the best artisan dairy cheeses.  Using simple ingredients and using traditional methods, Kite Hill has created artisan cheeses, yogurts, and cream cheeses that can all be incorporated into entrées and desserts.  Created by a dedicated team with deep culinary, cheese-making, and scientific expertise, including Tal Ronnen, Monte Casino, Jean Prevot, Pat Brown, and Matthew Sade, Kite Hill has stepped up to the challenge  to create a non-dairy cheese that met their high standards for quality.  So often, vegan cheese tastes fake or plastic-like.  After years of recipe testing and countless trials and errors to develop the perfect nut milk, cultures, and enzymes needed to create a worthy product, Kite Hill emerged on the market place.

And then…my weekly stop in at Whole Foods.  I went early, because my allergen-free bakery wasn’t open yet.  This allowed me time to sip on coffee from my local coffee shop and just roam, see what I normally would blow past because I was trying to miss the crowd or just in a hurry.  There, over with the cheeses…I saw it.  Kite Hill products galore.  Something new!!  Something vegan!  Something I knew I wanted to try.  I had places to be that day, though, so I couldn’t stock up.  A few trips later, I still hadn’t tried it.  So, one day, my roommate just surprised me with a container of the Kite Hill Cream Cheese Style Spread.  I was SO excited.  While there are two varieties (Plain and Chive), she had started with the plain…because…it’s the original.  The classic.

I had to polish off the container of Tofutti Better Than Cream Cheese that was in the fridge before tackling this…but this morning, the packaging was ripped off.  It was time to try Kite Hill for myself.

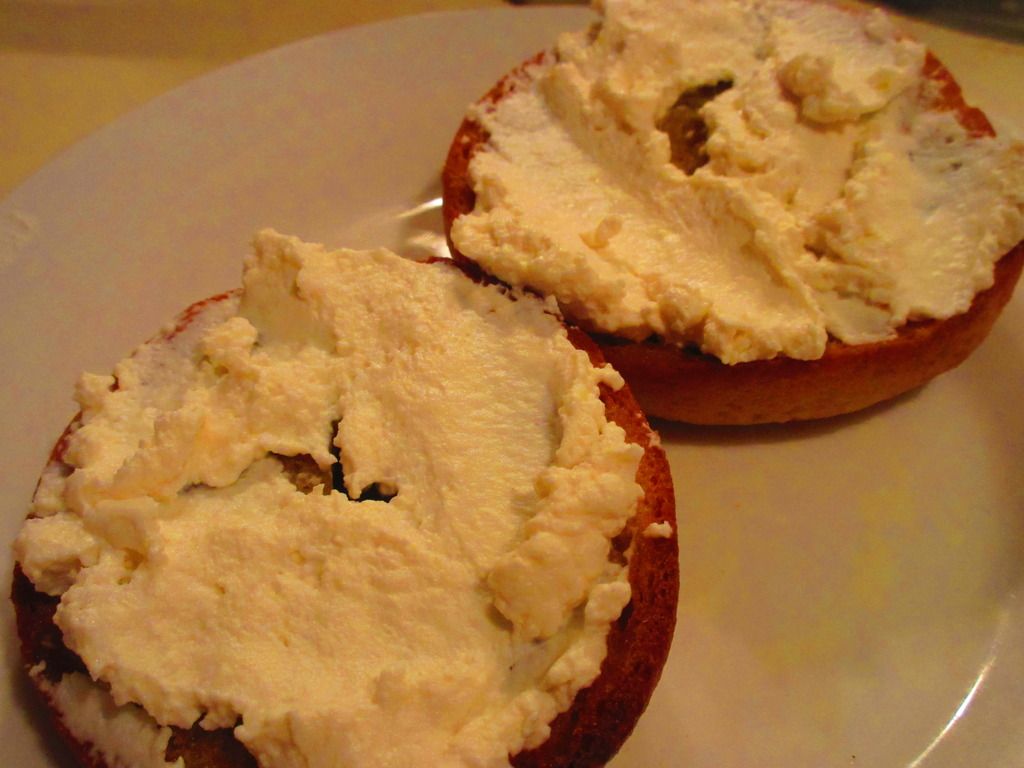
I had toasted up the amazing Sweet Note Bakery Gluten Free Plain Bagels (go to their Web site…order them…STAT!) this morning.  And, in true New York Bagel style…I needed my hefty schmear of cream cheese on top of each half.  I lifted the lid and pulled back the plastic, revealing this soft and creamy spread.  I thought it looked a little more like ricotta cheese than cream cheese.  I scooped up a serving size and placed some on my roommate’s bagel and then some on mine.

Moment of truth.

First of all…I loved how it was all light and fluffy.  Straight out of the refrigerator, it was the perfect texture to immediately spread on the bagel.  No need to battle it out with a knife.  This was smooth as (dairy-free) butter.  The texture was very ricotta cheese like.  It had this faint bit of sweetness…almost like a cottage cheese, without all the gross lumpy bits.  The flavor was very light…not quite like you expect cream cheese to taste…(Tofutti has honestly been the closest on the flavor that I have tried)…but it worked.  It worked brilliantly.  I fell in love with it at first bite.  The smooth, light, airy texture was the perfect complement to a dense, New York style bagel.  It was harmony on my breakfast plate.  I don’t want to ever have another brand again.  This was it for me.  Pure love in every bagel-y bite.  Not sweet, but not savory…a perfect balance.

One of the biggest draws to Kite Hill is their ingredient list.  While Tofutti and Daiya both have a lot of added fillers like ground nut pastes, stabilizers and artificial ingredients to make their cheese-like products, Kite Hill’s cream cheese spread is made from a short list of real ingredients.  We’re talking clean cheating…er…eating at it’s very best.  Kite Hill Plain Cream Cheese Style Spread is made from almond milk (water, almonds), salt, enzyme, vinegar, xanthan gum, locust bean gum, guar gum, and cultures.   That’s it.  It is soy-free, vegan, dairy-free, contains no saturated fat, trans-fat free, cholesterol free, and gluten-free.  Is this love or is this love?

Yeah…love.

And I am also loving the nutrition facts as well.  A serving size of Kite Hill Plain Cream Cheese Style Spread is 1 ounce (28 grams)…or about 2 tablespoons.  There are 8 servings per container.  One serving will provide you with 78 calories, 7 grams of fat (keep in mind this is made from almonds, so this is actually a healthy fat), 170 mg sodium, 2 grams carbohydrates, 0 grams dietary fiber, 0 grams of sugars, and 3 (yes…3!) grams of protein!  When compared to the other, more commonly found, vegan cream cheeses out there…hands down, this one wins the nutrition and ingredient prize!

So, if you’re ready to turn your gluten-free bagel up to eleven…then you need to get to your local Whole Foods (yes…Kite Hill is only available at Whole Foods) and find this brand ASAP!  Now that I’ve tried it, I can’t wait to taste the other cream cheese and artisan cheese offerings that Kite Hill has to offer.  Beyond impressed.  I’m completely converted.  Forget the rest…Kite Hill is best.

Really…it is.  But you should try it for yourself.  So…go on…Whole Foods awaits.

Kite Hill Plain Cream Cheese Style Spread on Sweet Note Bakery Gluten Free Plain Bagels

Recipe: Gluten Free Penne with Kale in a White Wine Sauce

I’m getting back into the swing of using up everything that comes in my CSA bin before the next one arrives.  Sometimes, it’s hard…but this past week, I have literally used up every bit of produce that came to me last Friday in my green bin of happiness.  Ah, I love Friday because it is BIN DAY!

So, after using up the cucumber (I made a childhood favorite…cucumbers in vinegar), zucchini, squash, blueberries, apples, green beans, broccoli, watermelon, and onion, all that remained was the kale.  And, I do love cooking with kale.  Usually I make kale chips or use it in a breakfast egg scramble of sorts.  But I wanted to get a little more creative than that this time around.  So…with just enough white wine remaining in the bottle in the fridge, I set out to master…pasta and kale…with white wine.

The premise of the recipe was skimmed over while reading through the Funny Love blog.  And from there, I tweaked it to fit my dietary needs.  What emerged was a healthy, delicious, and runner-friendly (non-runner friendly too!) meal this evening that both my roommate and I sat down and devoured while watching Friends on Netflix.  Life…can be good and delicious all at once.

Recipe: Gluten Free Penne with Kale and a White Wine Sauce

Gluten Free Penne with Kale in a White Wine Sauce

Servings: 4-6
Time: Prep 10 minutes; Cook 15 minutes

Ingredients:

  • 8-12 ounces Gluten Free Penne (I used Aldi’s liveGfree brand)
  • 4 cloves garlic, minced
  • Salt
  • Crushed red pepper
  • Olive oil
  • 4 cups kale
  • Parmesan cheese, for serving
  • 1 cup white wine
  • 1 cup pasta water (reserve right before you drain the pasta)

Directions:

Cook the pasta per the package instructions.

While the pasta is cooking, pull out a pan I used the one I was using to make the sauce) and add about an inch or two of water with about a teaspoon of salt.  Place pan on stove and bring water to a boil.

Cut the kale into large strips and remove the stems.

Put the kale into the boiling water for about a minute.  Drain the kale and set it aside.

In the same pan, prepare the sauce.  Add a drizzle of olive oil, the red pepper flakes, and the minced garlic and cook over medium heat, for about 2-3 minutes, until the garlic is soft and golden.  Do not burn the garlic.  It will make everything bitter.
Stir in the wine.  Allow the wine to come up to a boil and reduce for about a minute.  Then, add some of the starchy pasta water, if you’d like a bit more liquid in the dish.  Stir in the drained pasta, the kale, and some Parmesan cheese (as much as you’d like).  Season with salt, more cheese, red pepper, or pasta water as you deem necessary.

Serve.

~*~*~

This turned out to be a light dish, despite having the pasta integrated into the rest of it.  I found it a great way to use of a bottle of white wine from the fridge so that it didn’t go wasted.  And…I love finding new ways to enjoy kale!  Packed with nutrients, light, delicious…yeah…it’s a perfect meal.  And one I might consider the night before a long run…should this hip ever improve enough to get me back out onto the roads.

Product Review: Daiya New York Cheezecake

Daiya New York Cheezecake

 Product: Daiya New York Cheezecake – $8.99+

Earlier this year, around the time Expo West was going on (one day…I will get there!), the leading name in vegan cheese products, Daiya, unveiled a line of cheesecakes.  For those of you unfamiliar with the sheer awesomeness of Daiya, let me tell you about my love affair with their products.  Daiya is a household name for so many vegans.  This brand offers a vast array of vegan options, including cream cheese, frozen pizzas, cheese-like wedges/blocks, non-dairy cheese slices, and, what they are most famous for, their cheese shreds (which melt the best of any vegan option out there).  You can imagine the ruckus I made when it was revealed that they were dipping their toes into the cheesecake world.

I grew up in New York – and New York is in love with its…cheesecake.  And who doesn’t appreciate a good cheesecake, right?  They are rich, creamy, dense, and “oh-so-bad-for-you-it’s-so-good.”  Nothing beats a perfect crust with the perfect, dense, creamy layer of cream cheese goodness baked on top.  It is the ultimate comfort dessert.  You eat a cheesecake when you just don’t give a flying flip about anything else.  You eat cheesecake as a treat.  You eat cheesecake and you savor each bite.

It has been years since I’ve had a cheesecake.  I mean…a real cheesecake.  I have made a couple of dairy-free versions of cheesecake…but they haven’t worked out so well.  One spilled out of my springform pan, while the other one was the perfect density and tasted good…but it cracked on top…so it wasn’t perfect and pretty.  But, hey…I tried.

So, leave it to Daiya to swoop in and save the day.

All hail Daiya!

So, I figured it would be awhile before these turned up in my area.  That’s usually how new products unveiled at Expo West happen.  BUT…it was different this time.  A few weeks ago, I was in Whole Foods and as I was walking down the frozen food aisle, I glanced over and saw a shelf of all four flavors of the cheezecakes that Daiya has put out on the market.  For those wondering, these four flavors are: New York, Strawberry, Key Lime, and Chocolate.  I made a few happy noises and my roommate and I vowed to pick up one of the Daiya Cheezecakes the following week, when we could bring a cooler and not leave it in the car while we finished up the rest of our shopping.

True to our word, we did return.  And after a very short discussion over which flavor we should try first, we unianimously settled on the Daiya New York Cheezecake.  Why?  Because nothing is better or more versatile than a New York-style cheesecake.  Trust me.  I know.  We purchased the dessert and brought it home, where I put it in the freezer and let it sit while I made some out of town trips and all that good stuff.

But, with my running on hold (which, granted, probably isn’t the time to develop a dessert-crust on a high-fat treat) while I am in recovery and physical therapy for a torn hip labrum, I am making my way through some of the things in my pantry, freezer, and fridge.  This Sunday, it was all about the cheesecake!

Daiya New York Cheezecake is fairly simply to prep for devouring.  Simply remove the cheezecake from the package and transfer it to a cutting board or plate, and then place it in the refrigerator.  Allow it to thaw for 5-6 hours.  Then, slice into it (it says it feeds 4-6 people, for the sake of my waist and my weight, I opted for 6) and transfer it to plates.  Thaw these slices for an additional 20 minutes at room temperature before serving and refrigerate any unused pieces immediately.  If you don’t have 5-6 hours to kill, you can thaw the unwrapped cheezecake at room temperature for 30 minutes, slice it, and then thaw an additional 45 minutes.  You should NOT refreeze this dessert.  And, according to the box, it is best if consumed within 48 hours of thawing.

So…I did all of the above on Sunday afternoon, allowing the Daiya New York Cheezecake to thaw in the fridge while I went about my crazy Sunday afternoon.  After eating dinner that night, I popped into the kitchen and sliced up the dessert, serving up tiny little wedges to both myself and my roommate.  Settling in, I was eagerly anticipating my first bite.  So…I took it.

And fell in love.  Seriously.  My first thought was that these were going to taste like Daiya.  Let’s face it, my vegan and Daiya loving friends…Daiya products have this particular taste about them.  But the Daiya New York Cheezecake doesn’t have that.  It is light and soft and tastes like a New York Cheesecake.  That’s the great thing about a plain cheesecake.  You can dress it up if you want with berries or jams or even caramel or chocolate.  But I’m a purist.  I wanted to taste it on its own so I could draw a good conclusion on how I felt about the taste.  And, I was beyond impressed.  While it is nowhere near the density and richness of an authentic New York style cheesecake, it was creamy and rich.  I actually appreciated that sort of texture because some New York style cheesecakes are a little hard to swallow.  This could be, honestly, the most perfect dessert.  I also loved that the graham cracker crust is only a tiny, itty-bitty layer on the bottom, because this made the main focus the cheesecake itself.  I don’t want a lot of crust.  It isn’t the star of the dessert.  It’s that creamy topping that everyone wants.  And this was smooth and light.  And that…was a winner for me.  The cheesecake itself is rather small when compared to a regular one, but…I appreciated the size.  No over-indulging.  Just right.

So, let’s talk about what goes into a Daiya New York Cheezecake, shall we?  The Cheezecake Filling is made from filtered water, dessicated coconut, evaporated cane sugar, coconut oil, tapioca starch, non-GMO expeller pressed canola and/or non-GMO expeller pressed safflower oil, potato starch, pea protein isolate, vanilla extract, sea salt, vegan natural flavors, vegetable glycerine, sodium alginate, xanthan gum, lactic acid, tricalcium phosphate, cultured sugar, agave syrup, titanium dioxide, and vegan enzyme.  The Gluten-Free Crust is made from tapioca starch, coconut oil, evaporated cane sugar, brown rice flour, white whole grain sorghum flour, potato starch, filtered water, non-GMO expeller pressed canola and/or non-GMO expeller pressed safflower oil, blackstrap molasses, vanilla extract, milled flax seed, psyllium, leavening, sea salt, xanthan gum, and sunflower lecithin.  Whew.  This dream come true dessert is gluten-free, dairy-free, soy-free, cholesterol free, and vegan.

So, let’s talk about the nutrition facts of the Daiya New York Cheezecake, shall we?  I know it’s a dessert, but it is about half the size of a regular cheesecake…but it will eat like a real cheesecake.  I cut my portion down by making 6 servings instead of four, but if you stick to the 4 slices per the box recommendation, you’ll be taking in 16 grams of saturated fat.  My thighs are already planning their revenge at the gym today.  The fat and sugar contents are both high as well…but…this is a dessert.  I get that.  SO…with that preface…a serving size is 1 slice (100 grams), with 4 servings per box.  One serving will give you 360 calories, 24 grams fat, 16 grams saturated fat, 420 mg sodium, 34 grams carbohydrates, 2 grams fiber, 17 grams sugars, and 3 grams of protein.  So, it’s up there on the calories and fat…so remember…it is a treat.  Do not overindulge.

This was, truly, one of the most amazing, decadent, and fantastic store bought desserts I have had the honor of indulging in since having to give up gluten and dairy.  Rich, creamy, and sinfully good.  Daiya definitely did an amazing job creating this line of cheesecakes and I look forward to trying the other three flavors.  In moderation.  And after hitting the gym.

Well done, Daiya!

Restaurant Review: Upper Crust Pizzeria, Boston, Massachusetts

Upper Crust Pizzeria, Boston, Massachusetts

Restaurant: Upper Crust Pizzeria, Boston, Massachusetts

So…I was in Boston…for The Boston Marathon.  And you know what it means when I’m gearing up for a race.  The traditional night-before-the-race gluten-free pizza.  It is a must.  Sure, I can do gluten-free pasta, but pizza seems to be my mojo.  My magical little race-day helper.  And so, this tradition has gone unchanged whenever possible.

I consulted with a good friend of mine, Julie, before heading to Boston, looking for restaurant recommendations, especially for pizza.  She sent me so many different options, I was elated to see how many options were available in Boston.  If you are a Celiac or gluten-free and planning on a trip to Boston, trust me…it is so easy to find something to eat there.  It’s wonderful.  Never before have I had so many options in one place.

With her high recommendation, and the praise of my high school friend, Lydia, it was decided that we would be noshing on Sunday night (Monday is marathon day in Boston!) at a place called Upper Crust Pizzeria.  They have several locations throughout the Boston area, but as we were spending the day hiking the Freedom Trail, we decided that we’d wind our way out toward Beacon Hill and land there right around dinner time.

We actually ended up getting there sooner, rather than later, so we ducked into some candy shops and walked around the Beacon Hill area until around 5 p.m.  That was when we made our way back to the little establishment and stepped inside.

It wasn’t what I was expecting.  This was one tiny little establishment, indeed.  In fact, the kitchen was on the far right as you enter, with one long community table in the middle of the restaurant.  That was it.  We lucked out in that people finished up eating by the time we ordered, so we had a place to settle in and eat.  Because there was no way the pizza would make it back to the hotel and still be hot.

Cathy and I had scouted the menu prior to leaving for Boston and already knew what we were going to get.  This left my friends Heather and Jenn to either have pizza by the slice or split a pizza.  As Heather wanted pepperoni and Jenn does just cheese, they ended up getting two slices each.

Their slices were ginormous!!  Seriously!!  Holy cow.  It made me more than a little concerned over how big the gluten-free pizza slices were going to be and whether Cathy and I could eat it on our own.

But, our 14-inch gluten-free pizza arrived a short time after their slices…and it looked fantastic.  We ordered one of the custom pies that is a “local favorite.”  It’s called Charles Street ($19.00 – the gluten-free crust is a $2 upcharge), and we had it made on the gluten-free dough.  It comes topped with portabella mushrooms, sundried tomatoes, and fresh garlic.  For the sake of my stomach, we asked them to go light on the cheese on this pizza.  And it looked absolutely fantastic when it arrived at the table.  We paused long enough in our hunger to snap a picture before diving in, each peeling off a slice.  The pizza is their “small” size…and it’s actually quite big…but it was perfect for 2-3 people to share.  And since we hadn’t eaten much that day, it was perfect for Cathy and I to split without any help.

The Charles Street pizza at Upper Crust Pizzeria is AMAZING!  A-M-A-Z-I-N-G!!  Totally and honestly.  I ate a bite on its own and immediately was all “Mmmmmm.”  Like in “Mmmmmmarathon” and “Mmmmmmore please” and “Mmmmmmgoooooood!”  But then, I doctored it up with some dried herbs and a little bit of red pepper flakes.  My stomach fears no spice, not even before a marathon.  The crust of the pizza was thin, but not a cracker crust.  You could definitely tell it was white rice flour based, but it wasn’t a distracting overlying taste.  In fact, the crust was one of my favorite things about this pizza.  I love a good crust, but I also love to indulge in more pizza…so a thin crust is a nice thing in my book.  Cathy tried a bit of Jenn’s pizza and said the gluten-free crust was even better than the original.  Score!!  I loved the earthiness that flavored this particular pizza.  The Charles Street had this great balance of savory with a hint of sweetness from the sundried tomatoes.  It was amazing.  I devoured every slice.  For the first time ever, I think Cathy finished her pizza just as I was polishing off mine.

I can’t say enough good things about this pizza.  At first I was a little uncertain, due to the venue more than anything.  I mean, one table…and no room when we arrived for us to sit and enjoy…it was a little intimidating and off-putting…but a spot cleared up and we settled in after ordering, and all of us were happy with our pizza.  I would go back and eat here the next time I was in Boston, even if there wasn’t a marathon involved.  Really fantastic.  There were a few other signature pizzas that they make that sound absolutely amazing, so I’m definitely eager to return and give them a taste.

If you’re in Boston…and you want a great gluten-free pizza…find one of the locations for Upper Crust Pizzeria (or go to the original one, like I did, in Beacon Hill) and order up a slice of heaven in pizza form.  I know I’ll be back.  Oh yes, I will be back!

Upper Crust Pizzeria's Gluten Free Charles Street Pizza
Upper Crust Pizzeria’s Gluten Free Charles Street Pizza

Product Review: Tastefully Simple Gluten Free Pizza Crust & Sauce Mix

Tastefully Simple Gluten Free Pizza Crust & Sauce Mix

Product Review: Tastefully Simple Gluten Free Pizza Crust & Sauce Mix – $10.99

I know some pretty amazing people.  I really do.  One of such people is a friend of mine from high school.  Awhile back, she contacted me and said that Tastefully Simple was releasing some gluten-free products that she would love for me to try.  My friend, Rebecca Fifield, just happens to be a Tastefully Simple Consultant.  So, she sent them to my.  And then Tastefully Simple released more products…and I bought them and some of the ones that had originally just been sent to me.  And I loved every one of them that had tried.

I think what I love most about what Tastefully Simple is doing with their gluten-free mixes is that they are making it so easy to make bread or pizza or cake cookies or pancakes.  They take all that fancy flour mixing and make it so you have it in one easy place, and only need to add 2 ingredients to it.  I love it.  LOVE it.

And now, thanks to both Rebecca and my own trial-by-fire with the gluten-free products that Tastefully Simple offers (they’ve added cookies and pancakes since I last looked!)…I’m obsessed.  Because, as much as I love baking and cooking and being in my teeny-tiny kitchen…I love simplicity too.  Because baking can be stressful…gluten-free baking can be catastrophic if anything is off.

That’s the glory of Tastefully Simple.  They take that guess work off.

So, with me heading out of town on Friday evening, the main goal this week is to use up all the fresh produce that would otherwise go bad in my absence.  So, with fresh basil and some tomatoes and onions lurking about, I remembered that I had a Tastefully Simple Gluten Free Pizza Crust & Sauce Mix in my pantry.  So…pizza it would be.  AND…it would last for three days between my roommate and I.  Added bonus.  No more cooking the rest of the week.  YAY!

Tastefully Simple Gluten Free Pizza Crust & Sauce Mix (prepared)

Preparing the Tastefully Simple Gluten Free Pizza Crust & Sauce Mix is super easy!!  For real.  That’s why there is the word “simple” in the brand.  HA!  To prepare the crust, simply combine the crust mix with 1 cup of water and 2 tablespoons of olive oil.  The dough will be sticky.  Cover it losely with plastic wrap and let it stand for 10 minutes at room temperature.  Using lightly oiled hands to prevent sticking, spread the dough out on a pizza stone or a 12-inch greased pizza pan.  Bake it for 10 minutes in a 400°F oven.

While it’s baking…mix up the sauce.  It’s a breeze.  Simply combine the sauce mix with the remaining 1 tablespoon of olive oil and tomato sauce.  Spread it over the warm crust you have now baked for 10 minutes.  Add your favorite toppings (in my case…tomato, onion, basil and Daiya vegan mozzarella cheese shreds) and place back in the oven to cook for another 17-20 minutes, until the crust is golden brown.  Slice into 6 pieces and devour.

Tastefully Simple Gluten-Free Pizza Crust & Sauce (baked)

The quality, however, always comes in the taste test.  And they totally nailed it.  The dough wasn’t too sticky when I went to press it out on the pizza stone.  And, it cooked up to this amazing crispy, golden brown.  The sauce and toppings didn’t make it soggy.  It held up to slicing and being moved onto plates.  And I loved the flavor.  It had this amazing crusty quality that just made it work.  It was the perfect base for my toppings of choice.  And it was one of my favorite crusts I have made at home.  It was easy, and it didn’t take too long to bake up either.  Perfect way to enjoy my dinner tonight.  Tastefully Simple is not only making gluten-free delicious, but easy too!

So, let’s take a look at what Tastefully Simple puts into their Gluten Free Pizza Crust & Sauce Mix, shall we?  This pizza crust mix is made from rice flour, tapioca flour, sugar, baker’s yeast, potato starch, cassava flour, salt, less than 2% hydrogenated palm kernel oil, soy lecithin, baking powder and, xanthan gum.  The sauce mix is made from maltodextrin, dehydrated garlic, garlic powder, salt, dehydrated onion, spices, roasted dehydrated garlic, sugar, Romano cheese, less than 2% of natural flavors, toasted sesame oil, citric acid, whey, cheddar cheese, hydrolyzed soy protein, disodium phosphate, and silicon dioxide (anticaking).

As far as the nutritional information for the Tastefully Simple Gluten Free Pizza Crust & Sauce Mix goes, this isn’t bad for pizza.  Really.  A serving size is 1/6 of the package.  This serving will dish up 200 calories, 1.5 grams of fat, no cholesterol, 810 mg sodium (it’s a little high, yes), 43 grams carbohydrates, 3 grams sugar, 1 gram fiber, and 4 grams of protein.

If you love pizza and want that “from scratch” appeal with a golden, crispy crunch, without it being the frozen cracker-crusts that the gluten-free community are otherwise delegated to having…then give Tastefully Simple’s Gluten Free Pizza Crust & Sauce Mix a try.  Hop on over to my friend, Rebecca Fifield‘s, page and place an order.  Not only will you be amazed with how easy this is to make, the taste, texture, and everything else will win you over.  I promise you that.

A slice of gluten-free pizza made with Tastefully Simple Gluten Free Pizza Crust & Sauce Mix
A slice of pizza made with Tastefully Simple Gluten Free Pizza Crust & Sauce Mix

Product Review: Neat – A Healthy Replacement For Meat Original Mix + Recipe Bonus

Neat - A Healthy Alternative to Meat Original Mix
Neat – A Healthy Alternative For Meat Original Mix

Product: Neat – A Healthy Replacement For Meat Original Mix + Recipe Bonus – $4.99+

I am so excited.  And the reason why is simple.  I have found the meat replacement, Neat, at a few of my local stores.  My Kroger, my Meijer, and even a few of my natural food stores now carry these little pouches of meat replacement goodness.  Now, mind you, I’m not one who often will replace meat in a dish.  I usually will use something like tofu or mushrooms instead, but there are some recipes (from my childhood, especially!) that just call for using an actual meat replacement.  I have a few go-to brands that are gluten-free as well as either vegetarian or vegan.  But ever since I received a pouch of the Mexican Mix from Neat in my Cuisine Cube back in October, I was hooked.  I just had nowhere in this area to purchase it on my own.

Until now.

Up until yesterday, my pantry held the Italian Mix and the Original Mix.  I’m using a few things up in my pantry (I have a bit of an overstock, HA!), so I decided I would go ahead and bake up some of the Moon Rabbit Foods pie crusts that I had from another Cuisine Cube.  I could freeze two of them, and then give using the third one a shot in an old family favorite, which I would adjust to make gluten-free, dairy-free, and vegetarian.

Neat - A Healthy Replacement For Meat Original Mix (before adding eggs/egg replacer and water)
Neat – A Healthy Replacement For Meat Original Mix (before adding eggs/egg replacer and water)

With a pie crust baked up…it was time to make the filling.  As I was using my mom’s recipe, I began to brown the sweet onion while I mixed up the ingredients for the Neat Original Mix.  This is really easy.  Simply empty the Neat mix into a bowl, add two eggs (or egg substitute) and 2 tablespoons of water.  Mix well.  Once the onions had began to soften, I added the neat mixture and cooked it on medium heat for about 7-10 minutes, chopping at it as one would with regular ground beef.  It looked and smelled perfect.  I added the tomato paste, cooked it a few moments longer and then put it all in the pie crust.  On went the topping of Daiya cheese and…into the oven it went.

Before I talk more about the original mix, let me tell you a bit about Neat.   Neat is a meat replacement that is derived from nuts and other non-GMO natural ingredients.  It is a product that was created by a mother of two children who decided that they were going to become vegetarians.  At first she would puree beans into sauces to help her girls get the protein they wanted, but after awhile, everyone got tired of it.  And that was when she got into the kitchen, experimented, and created what is now marketed at Neat.  Neat comes in this shelf-stable pouch in a powdered form.  All you do to prepare it is pour the pouch into a bowl, add two eggs (or a vegan egg replacer), plus two tablespoons of water. Then, you just cook it in a skillet, as you would ground beef, for about 7-9 minutes.  It’s really easy…and really delicious too.

Neat - A Healthy Alternative For Meat Original Mix (prepared) cooked with onion and tomato paste
Neat – A Healthy Alternative For Meat Original Mix (prepared) cooked with onion and tomato paste

So, a vegetarian and gluten-free Cheeseburger Pie…that was what this was used for.  When I sliced through the pie crust and the filling, I was just anticipating the crumbling and falling apart.  But Neat surprised me.  Much like my mom’s recipe (which used real meat as I wasn’t a vegetarian at that point), this all stuck together and made for a perfect slice.  The Neat seemed to be the meat replacement I was looking for.  And it was the perfect choice for this recipe for sure.  I dished up two slices of the Gluten-Free and Vegetarian Cheeseburger Pie and handed one to my roommate and settled in with mine.  My roommate took the first bite and said that it tasted dead-up like a cheeseburger.  That’s good.  She’s not a vegetarian, nor is she dairy-free or gluten-free like me.  But this impressed her.  It impressed her a lot.  The most disappointing aspect  of the dish was the pie crust and that was a whole unrelated product, and it still worked out well in the end.

The Neat Original Mix is fantastic.  I mean, it is so close to the real thing.  As I said, I don’t often do meat replacements, but sometimes when revisiting old recipes I grew up with, it is necessary.  I don’t think any other replacement for beef will come close to what Neat does for these dishes.  This is the second time I have used a Neat product and both times I have been beyond impressed.  The taste and texture are phenomenal.  Even meat eaters won’t realize they aren’t really eating meat.  That’s the wonder and the glory of this product.  Anyone can have it (unless they have a nut allergy) and enjoy it.  It was, for the second time, love at first bite.  And it was wonderful to be able to adapt an old family favorite to fit my dietary needs.

A slice of Cheeseburger Pie (gluten-free, dairy free, and vegetarian) made with Neat - A Healthy Alternative For Meat Original Mix
A slice of Cheeseburger Pie (gluten-free, dairy free, and vegetarian) made with Neat – A Healthy Alternative For Meat Original Mix

Let’s now take a look at what goes into the Neat Original Mix.  This product is made up of pecans, garbanzo beans, gluten free whole grain oats, organic whole grain gluten free cornmeal, garlic, onion, sea salt and spices.  Simple.  Delicious.  Clean eating!  It is gluten-free, non-GMO, and kosher.

As for nutrition, the Neat Original Mix is a powerhouse.  A serving is 40 grams and there are 4 servings per pouch.  One serving will provide 190 calories and 15 grams of fat.  You will also be getting 232 mg sodium, 11 grams carbohydrates, 2 grams of sugar, 4 grams fiber, and 4 grams of protein.  It is filling, so it makes a fantastic substitute for meat.  But there is that added bonus of protein from the nuts that are blended into the mix.

It really did make a great addition and the perfect substitute for actual ground beef in the following recipe…

Gluten-Free, Dairy-Free, and Vegetarian Cheeseburger Pie

Gluten-Free, Dairy-Free, Vegetarian Cheeseburger Pie

Servings: 8
Prep: 10 minutes; Cook 30 minutes

Ingredients:

  • 1 package Neat – A Healthy Replacement For Meat Original Mix
  • 2 organic cage-free eggs
  • 2 tablespoons water
  • 1/4 cup chopped onion
  • 1 (6 oz) can tomato paste
  • 1 gluten-free pie crust (either made from scratch or bought at the store)
  • 2 cups Daiya Mozzarella Cheese Shreds

Directions:

Preheat oven to 375°F.

Pour the Neat – A Healthy Replacement For Meat Original Mix into a medium bowl.  Add two eggs (or egg replacer if vegan) and 2 tablespoons of water.  Mix well.

In a non-stick skillet over medium heat, brown the Next Mexican Mix and onion.  Cook until vegetables begin to soften and the Neat can be chopped into a meat texture.  Add the tomato paste and stir well.  Allow it to heat through for a few minutes to marry the flavors together.

Pour the mixture into the prepared pie crust and top with 2 cups of Daiya cheese shreds.  Bake in the oven for 20-25 minutes, until cheese is melted and pie crust is browned (with any luck).  Slice and serve.

~*~*~

I have fallen head-over-heels for Neat.  It is, without a doubt, the healthiest replacement of meat out on the market.  I am thrilled that it is more available in my area.  In fact, with so many places carrying it, I’m guaranteed to be able to pick it up at one place or another when I need it for a dish.

Neat…you are by far my best find and my favorite substitute in old family recipes.  Nothing else can do what you do!  So much love.

Product Review: Moon Rabbit Foods Pastry & Pie Crust Mix

Moon Rabbit Farms Gluten Free Pastry & Pie Mix
Moon Rabbit Foods Gluten Free Pastry & Pie Mix

Product: Moon Rabbit Foods Pastry & Pie Crust Mix – $8.79+

So, for awhile now, I’ve been wanting to revamp another one of my mom’s famous recipes.  Making it not only gluten-free, but also vegetarian.  Oh…and dairy free too…but that’s pretty much a given when it comes to me, right?  The actual dish is her delicious Cheeseburger Pie.  Normally, the crust of this amazing meal is made from crescent rolls from the grocery store fridge area zone.  You know, that place I hardly visit these days.

Sadness.

But…then I got to thinking…what if I cooked up a pie crust and used that instead.  Sure, it wouldn’t be the flaky crescent roll shell that this meal was known for, but I was already going to get rid of the whole meat thing (using a meat substitute) and use Daiya cheese for the cheese.  So…why not give a different sort of crust a try?

The problem is…pie crusts and I have never really gotten along.  We are anything but BFFs.  Then…lo and behold…the Thanksgiving (November 2014) Cuisine Cube arrived in the mail.  And inside was Moon Rabbit Foods Pastry & Pie Crust Mix.  Everything in the November Cuisine Cube could have been used for Thanksgiving itself…but I wasn’t allowed to host this year so most of it was used at my own discretion.  Well, the final product is up now…but first…

Cuisine Cube is run by a small group of foodies who have put together a completely gluten-free box of goodies and then sends them to your doorstep each month.  These boxes contain 5-6 full-size products from small, lesser-known artisan producers…mostly local…some not as local.  Some you may even have heard of before, but most will be new to you.  I signed up for Cuisine Cube back in May and have never looked back.  Subscriptions start as low as $29.99…which is a great price and great incentive to sign up for this subscription box service and try out some gluten-free products you have been too nervous about purchasing yourself or, perhaps, didn’t even know existed.

Such as Moon Rabbit Foods.  Never head of this brand before in my life.  Moon Rabbit Foods follows a philosophy of choosing the finest ingredients and using the latest techniques of the craft of baking to give those living a gluten free lifestyle (like me!) a rare opportunity to enjoy delicious refined pastries and baked goods.  Their baking and pastry blends provide a source for hard-to-find gluten-free products, allowing customers to enjoy that high quality at home, and even allowing them to add their own inspirational touches.  So, here, in my clutches was a pie crust mix.  I had no reason to make a pie.  No one ever wants desserts at the family dinners.  I usually do because I never really get to eat much of what is offered (part of why I love to host).  But, I also hate being the only person to eat dessert, especially when I’m the one providing it.  So, instead of going sweet, I opted to go savory and attempt to recreate a gluten-free, dairy-free, vegetarian version of my mom’s Cheeseburger Pie recipe.

Cross your fingers…

This mix makes 3 9-inch pie crusts.  I went ahead and cooked them all up because…well…I could freeze the rest of them instead of just letting the mix sit and having to haul out all the equipment (a food processor, really) and ingredients (only 3) to do whenever I felt the need to make a pie.  Because if I did that, it would only get used this one time.  Therefore…all or nothing.  So, I took 1 cup of the pie mix and mixed it with one stick (4 ounces) of butter (or vegan butter) and pulsed it until it looked like cornmeal.  Then, in went 3 tablespoons of cold water and I ran the food processor until it all came together.  I formed the dough into a 6-7 inch disk and then put it in the fridge for 30 minutes.  Then I rolled it out and fit it into a pie pan.  It fell apart at some points because pie crusts hate me, but I managed to get it into the pie pans and into a 350°F oven for 30 minutes.  Out come the par baked crusts…and there you have it.  Use it as you will.

For the rest of the recipe, I used NEAT original mix and prepared the recipe from my mom’s cookbook as it would have been prepared regularly.  YAY!  That recipe will go in the review for NEAT.  So stick with me here.  Let’s talk about how the pie crusts cooked up and the rest of that important stuff.

A slice of Gluten-Free, Dairy-Free, Vegetarian Cheeseburger Pie on the pie crust made from Moon Rabbit Foods Gluten Free Pastry & Pie Mix

First of all, I think I sort of expected them to be a little more golden.  They cooked, but they were still a pale white color.  I poked it to make sure it wasn’t still dough.  Then I figured it would get more golden as it cooked with my filling of Neat, tomato paste, onion, and vegan cheese…but it still remained a pale shade of…pale.  It was cooked…it just didn’t look that way.  It was a bit disconcerting.  It tasted good though, so I guess that’s the important thing.  It may look underdone, but it is quite a good pie shell.  I was actually happy to have a pie crust that didn’t incorporate sugar into the mix as I was using it for a savory dish.  This made this a great substitute for the refrigerated croissant rolls that used to make this light, flaky crust for this dish.  Being a thinner crust also helped as well.  So, once again, looks can be a wee bit deceiving.  It’s all in the taste, when it all comes down to it.

So, what exactly is in the Moon Rabbit Foods Pastry & Pie Crust Mix?  According to the package, this mix is made up of potato starch, cassava flour, rice flour, sea salt, unrefined cane sugar, and xanthan gum.  That’s it.  Small list and all recognizable ingredients makes me a happy girl. This crust is gluten-free and vegan.  It is also cholesterol free and fat-free until you add the butter…

As for nutrition, the Moon Rabbit Foods Pastry & Pie Crust Mix has around 24 2 tablespoon servings in the package.  A serving will provide 60 calories, 115 mg sodium, 16 grams carbohydrates, 1 gram fiber and no sugar or protein.  No sugar or protein is added to the mix so…it remains that way in the end.  When it’s prepared, all of this changes depending on your ingredients and the like.

If you need an easy pie crust, I highly recommend Moon Rabbit Foods Pastry & Pie Crust.  Yet another product I never would have even know existed (and, hence, never would have made my mom’s Cheeseburger Pie (albeit vegetarian and dairy free)) if not for Cuisine Cube.  Loving this service and the new products and companies that it introduces to me.

Product Review: Glutenfreeda Gluten Free Roasted Garlic Artisan Flatbread and Pizza Crust

Glutenfreeda Gluten Free Roasted Garlic Artisan Flatbread and Pizza Crust

Product: Glutenfreeda Gluten Free Roasted Garlic Artisan Flatbread and Pizza Crust – $6.99+

If nothing else, this blog post is to remind you about how much I love pizza.  Pizza is the ultimate food to me.  Seriously.  It satisfies every food craving I really have.  Except maybe chocolate.  But I’ve been cutting way back on that, except for an every-now-and-again 1 ounce dark chocolate treat.

But I digress.

Back to the pizza.  Anyway, I have a myriad of gluten free pizza crust mixes that have worked and not worked in the past.  I’ve tried just about every gluten-free pizza shell out there.  If gluten free pizza is on the menu at a restaurant…you better believe that’s what I’m ordering.  Pizza…is perfection to me.  Food perfection.

It’s my go-to pre-race (half marathon or over) meal, which somehow equals out to the perfect amount of fats, carbs, and protein for me to perform at the top of my game.  Trust me, I’ve tested this numerous, countless times.

So, imagine my glee when I was on a miniature shopping spree at The Raisin Rack in Columbus, Ohio, and came across the Glutenfreeda Gluten Free Artisan Flatbread and Pizza Crusts in their freezer section.  I was beyond elated.  Seriously.  They come in four flavors, so I knew I was going to take one home with me, it was a matter of narrowing it down to which one.  The Glutenfreeda Gluten Free Artisan Flatbread and Pizza Crusts come in Sun-Dried Tomato & Herbs, Roasted Garlic, Original, and Parmesan and Asiago.

I love garlic…so I went right for the Roasted Garlic flavor.

Now, I had no intention of letting these linger in my freezer for as long as they did.  I swear to you.  However, that being said, they did.  I just had fresh produce and other, older products to work through first.  That being said, yesterday was a good day.  I guess the Gluten Free Pizza Bites I ate after the soccer match on Saturday got my tastebuds craving more, because both my roommate and I were really wanting pizza.

But I can’t just make any pizza, you know.  I had some fresh produce that needed to be used, so I thought…Brussels sprouts on a pizza.  That could rule.  But what to pair it with?  Vegan and gluten-free bacon.  Perfect.  What else?  Bar-b-que sauce, of course!  Add a bit of sauteed onion and it would definitely be a nice change of pace for a pizza.  After all, who does Brussels sprouts on a pizza?

I DO!

Glutenfreeda Gluten Free Roasted Garlic Artisan Flatbread and Pizza Crust

And thanks to having the Glutenfreeda Gluten Free Roasted Garlic Artisan Flatbread and Pizza Crust in my freezer…I could indulge in my pizza craving without hassle or going to my grocer’s freezer section for a pre-made one.  This one…this one would be all mine.

Super easy.  I preheated the oven with the pizza stone and took the frozen flatbread out of the freezer, defrosting it a little in the microwave.  Once the oven and stone were heated, I placed two flatbreads onto the stone and then topped it with some local barbeque sauce, some sauteed onions and Brussels sprouts, the vegan and gluten-free bacon, and then a bit of vegan cheese.  Into the oven it went for about 10-12 minutes, to allow the cheese to melt and the flatbread/pizza crust to get that perfect crispness on it (I hoped).

Well…it worked.  This was, perhaps, the most durable pizza crust that I can buy in a freezer section at the grocery store that I have ever had.  Most gluten-free pizzas are thin and fall apart if loaded up with toppings.  But because this is also a flatbread, Glutenfreeda has given it some more heft than most gluten-free crusts out on the market.  And, even though it was flavored, it didn’t overpower any of the toppings that went on it.  The crust toasted up beautifully and sliced into perfect triangles.  If using it as a sandwich bread…I’ve heard it can be a little thick for that, but it was perfect for the pizza.  And I’m totally looking forward to baking up another round of these tomorrow for dinner.  I have more Brussels sprouts, after all.  Glutenfreeda really impressed me with their Gluten Free Roasted Garlic Artisan Flatbread and Pizza Crust.

Let’s talk ingredients.  The Glutenfreeda Gluten Free Roasted Garlic Artisan Flatbread and Pizza Crust is made from water, brown rice flour, tapioca starch, potato starch, expeller pressed canola oil (non-GMO), psyllium powder, egg whites, evaporated cane sugar, yeast, teff flour, seasoning (natural roasted garlic flavor, dehydrated garlic, hydrolyzed soy protein, spices, and salt) flax seed, salt, cultured dextrose, xanthan gum, and citric acid.  It is wheat-free, cholesterol free, non-GMO, dairy-free, gluten-free, and contains no trans fats.

As for nutrition…a serving size is 1/2 of the flat bread.  I was using this as my meal, so I ate the entire flatbread.  As did my roomie.  However, if you stick to the serving size, you will be consuming 110 calories and 3 grams of fat.  You will be taking in 380 mg sodium and 0 grams of sugar.  Yes…no sugar.  LOVE.  In addition, you will be consuming 18 grams of carbohydrates, 3 grams of fiber, and 4 grams of protein.  This does make for a filling meal…but one that won’t break the calorie bank either as long as you are smart with your toppings.

I think, when I can’t pick up a pizza crust from my local gluten-free bakery, I need to find a local store that carries these.  Because I was beyond impressed with how it cooked, held up, and tasted.  Forget everything you think you know about frozen gluten-free pizza crusts.  Pick up a package (there are 4 flatbreads per package) of Glutenfreeda Gluten Free Artisan Flatbread and Pizza Crust (in any flavor…but Roasted Garlic is YUMMY!) and see for yourself.  It is amazing.  You’ll see!

Gluten-Free Brussels Sprout and (Vegan) Bacon Pizza on Glutenfreeda Gluten Free Roasted Garlic Artisan Flatbread and Pizza Crust

Product Review: Russo’s Gluten Free Gourmet Pizza Bites

Russo's Gluten Free Gourmet Pizza Bites
Russo’s Gluten Free Gourmet Pizza Bites

Product: Russo’s Gluten Free Gourmet Pizza Bites – $6.99+

They had me with the product name – Pizza Bites.  PIZZA. BITES.  PIZZA-FREAKIN’-BITES!  As in…pizza rolls?  Maybe? Possibly?  Could I be that fortunate to stumble across (finally) one of the products that I no longer ate, not because it was made of crap (and they are), but because they were my favorite go-to snack when I needed something to eat while very, very busy?

Well…kinda.

In fact, these were more like breaded cheese ravioli, rather than pizza bites, but we’ll go with it. Let’s just run with it.  Pizza Bites! WOOO!

So, I found these at my local natural food store, Rainbow Blossom, and had a freakin’ dance of joy in the freezer section.  Honestly.  I mean, I’ve been to parties where pizza rolls are laid out and everyone is just enjoying a few here and there.  I get to stare at them.  Dammit.

No longer.

Thanks to Russo’s Gluten Free Gourmet…Pizza Bites (rolls…ravioli?) are back on my every-now-and-again want list.  And now…I know where to get them.  After purchasing these, I had to go through more fresh produce before allowing myself an indulgence from the freezer or fridge…but after a full day of professional soccer and time with friends…I needed to have something quick for dinner.  I was going to do up some green beans with almonds, but my roommate was craving pizza.  So…these made their debut in our kitchen.

Russo’s Gluten Free Gourmet came about from Neil Russo, a professional chef who was hard at work on gluten-free recipes, which he was striving to perfect after hearing about the many people connected to himself that were having a hard time finding food while on a gluten-free diet due to intolerance or Celiac disease.  After experimenting on his Italian bread loaves and Tiramisu, Russo was ready to give his food to the world.  He first introduced the gluten free food in his restaurant, where he got high praise.  Soon, he opened up Russo’s Gluten Free Gourmet.  And from there…the frozen versions of some of the classic Italian foods he perfected in gluten-free form.  So good, that people even would ask if he was certain it was gluten free.  All of Russo’s products are prepared in a strictly gluten-free facility.

So, two hungry soccer fans (my roommate and I) were ready to give these a try.  I was surprised, when I opened up the bag to find large ravioli like bites inside.  I was definitely expecting more of the pizza roll just from the name.  They were frozen, lightly breaded stuffed pasta.  But…I was hungry.  Cathy was hungry.  Pizza.  Bites.  Rolls.  Whatever.  Give us something delicious in some sort of pizza form.

Cooking the Russo’s Gluten Free Gourmet Pizza Bites is super easy.  Simply preheat the oven to 350°F and place the frozen bites on a cookie sheet.  Bake for 5 minutes, then flip them and bake for another 5 minutes.  Take out when or if the cheese starts to show.  Mine cooked in 10 minutes without the cheese leaking out or anything.  Bonus.

So, it was chow time.  I dished up half the bag for my roommate and half for me.  That was about 6 of the Russo’s Gluten Free Gourmet Pizza Bites each.  We settled in with an episode of Star Trek: The Original Series and dug in.  One bite…and I couldn’t argue…they were delicious.  I was a bit thrown by the ratio of dough to filling…but that is a small, slight complaint.  I thought there was too much dough encasing a cheese filling…that was a little scant.  The pocket had more air than filling, but it was still crispy on the outside with a melty, molten center, regardless.  And yes…they were really, really great.  Delicious.  Amazing.

Yeah…I’d buy these again.

Let’s talk about the ingredients that are in Russo’s Gluten Free Gourmet Pizza Bites.  These pasta pockets of pizza goodness are made from gluten free flour (rice flour, corn starch, tapioca dextrin, xanthan gum, rice extract) tomatoes, part skim mozzarella, vegetable oil, soybean oil, soybean lecithin, water, whole eggs, yellow corn flour, ricotta, onions, sugar, salt, granulated garlic, onion powder, parsley, basil, and black pepper.

As for nutrition, this isn’t bad for pizza bites.  There are three servings in a bag of the Russo’s Gluten Free Gourmet Pizza Bites.  One serving is 4 pieces.  These 4 pieces will provide you with 260 calories and 15 grams of fat.  You will be taking in 40 mg cholesterol, 430 mg sodium, and 2 grams of sugar.  In addition, a serving dishes up 27 grams of carbohydrates, 1 gram of fiber, and 6 grams of protein.

I was actually impressed by Russo’s Gluten Free Gourmet Pizza Bites.  But, what’s not to love about a company that does 100% gluten free products right, that is family owned and operated, and has exceptional quality.  And…they are doing products no one else has managed to put out there.  And they are doing them well.

If you can find Russo’s Gluten Free Gourmet Pizza Bites in your grocery store or natural food store freezer…buy them and try them.  You’ll love them.  And…pizza rolls are, kinda, back in your life.  And that…is amazing in and of itself.  For real!

Russo's Gluten Free Gourmet Pizza Bites
Russo’s Gluten Free Gourmet Pizza Bites


Product Review: Van’s Gluten Free Ultimate Cheddar Penne

Van's Gluten Free Ultimate Cheddar Penne
Van’s Gluten Free Ultimate Cheddar Penne

Product: Van’s Gluten Free Ultimate Cheddar Penne – $3.99+

I am a do-it-yourself kind of girl these days when it comes to pastas.  Not so much making my own gluten-free pasta noodles (I haven’t gotten to that level yet), but I prefer to make my own pasta meals instead of buying the boxed stuff…just because I get some say into what goes into my meal.  That being said, sometimes…I make exceptions to this rule.

Such an exception came to pass awhile back, when on a rare trip to Walmart, I discovered that Van’s had come out with a small line of gluten free pasta sides (or meals in my case).  Seriously!  I think I knew that the gluten-free pastas were around, I had just never seen them in my area out in the wild.  Apparently, braving Walmart does have it’s advantages.  I won’t lie…my Walmart has a rather extensive and impressive gluten-free section.  So it was really no wonder I found these there.  I just never go to Walmart…so it was a nice coincidence in the end.

Prior to this one, I reviewed the Van’s Gluten Free Creamy Herb and Garlic Pasta, which I dished up to not just  my roommate, but my good friend and roomie’s sister – Amanda.  Now, Amanda doesn’t get exposed much to gluten-free foods…unless I subject her to them.  And she loved the Creamy Herb & Garlic Pasta when we enjoyed it for dinner one night.  That left two other gluten-free pasta dishes in my pantry from Van’s.  And last night, after a long week, I just wanted a brainless meal to prepare and enjoy.  Something warm and comforting, as it was a rainy night to boot.  I went to the pantry and spotted the remaining two boxes of Van’s Gluten Free Pastas: Ultimate Cheddar Penne and Rotini and Red Sauce.  I had my roommate make the final decision…and knew before I even asked that she would go cheese.  When I ask her anything and one items involves cheese…that is the one that will be selected.  No problem though.  Totally game.

Van’s Gluten Free choices have never disappointed me.  Never.  Never ever.  That’s a lot to live up to, mind you.  But Van’s puts a lot of love and care into their packaged foods.  And Van’s does believe that nutritious is delicious and that’s why they make their gluten-free pastas with whole grain brown rice, delivering more than a full serving of nutrient dense whole grains.  The cheese sauce over a perfectly cooked pasta…that’s love to me.  Seriously.  And, you can always add in some vegetables or chicken (if you eat meat…which I don’t…) in order to bulk it up.  But as my roommate and I take something that serves three and split it between the two of us…it’s the perfect amount in the end.

Van’s Gluten Free Ultimate Cheddar Penne is a breeze to prepare.  Seriously.  Simply boil 6 cups of water in a medium saucepan.  Add the pasta and allow it to return to a medium boil for about 8-9 minutes, until it is al dente.  Stir occasionally though, so that it doesn’t stick to the pan.  Very important.  Oh…and DO NOT overcook the pasta.  Rice pasta can go from perfect to mush in a moment.  So keep an eye on it.  Drain the pasta and give it a rinse.  In the pan you cooked the pasta in, add 3 tablespoons of fat free milk (I used unsweetened almond milk) and 2 tablespoons of unsalted butter (I used Earth Balance), and allow it to melt together over a low heat.  Then whisk in the cheddar powder until it is smooth.  Then, add the pasta back into the pan and stir them together.  Serve.

Oh…this was good.  Think Kraft Mac & Cheese…but better.  WAY better.  The pasta cooked up perfectly.  It didn’t take too long, but it had that right bit of al dente-ness to it.  I think I just made up a word there…but go with it.  The sauce though…that’s where the magic happens.  No…this sauce is not vegan.  Yes…it has milk in it…but by using the dairy alternatives for the butter and milk, I cut back on the dairy I was consuming. It worked.  The lactose intolerance was there, but it was mild because there isn’t a lot of dairy in this little box of cheesy pasta goodness.  I know, my homemade gluten-free (and dairy free) mac and cheese rocks, but when I don’t have time to do all the prep work and baking that goes into it…this is a definite contender to have on hand in my kitchen for nights where I want a big bowl of comfort food in a snap.  Deliciously creamy, cheesy noodle-y goodness.

One thing that Van’s proudly states is that they use only ingredients that they are proud of.  And that is definitely evident when I read over the list of ingredients they use for the Gluten Free Ultimate Cheddar Penne.  These ingredients are gluten-free penne pasta (brown rice flour, white rice flour), aged cheddar cheese seasoning (cheddar cheese nonfat milk, salt, shey, sugar, buttermilk, rice flour, natural flavors, annatto extract (for color).  Nothing too spooky or weird there, right?  That’s right.  Van’s Gluten Free Ultimate Cheddar Penne is gluten-free, kosher, egg free, contains no trans fats, and has no artificial flavors.

So, how about the nutritional value of a big bowl of gluten-free cheesy pasta noodles?  Actually…not too bad.  Not at all.  Before it’s prepared, the with butter and milk (of your choice), a serving (with 3 per box) contains 210 calories and 2.5 grams of fat.  A serving also has 5 mg cholesterol, 520 mg sodium, and 3 grams of sugar.  One serving will also give you 48 grams of carbohydrates, 2 grams of fiber, and 6 grams of protein.  It will be filling, even as a side.

Once again, Vans Gluten Free has lived up to its standards and name.  These little boxes of pasta are not only convenient, but easy to make and delicious too.  No one would guess they were gluten free if you didn’t tell them.  Yep…when I am in a pinch, these might be my go-to meals.  Super impressed once again!