Recipe: Gluten-Free and Vegan Pumpkin Mac and “Cheese”

Awhile back, I did a gluten-free version of a recipe that came from The Brokeass Gourmet that intrigued me.  It was a Brown Butter Pumpkin Mac and Cheese.  And it was delicious.

It is definitely the time of year for pumpkin flavored things, so when the office potluck luncheon rolled around this week, I decided I would make the Brown Butter Pumpkin Mac & Cheese.  And then, after pondering for a bit, I decided to do things a little differently.  For one thing, it was going to be vegan, as we do have a vegan in the office and I wanted him to be able to eat it too.  Secondly…I was going to do a different recipe that put a little more emphasis on the pumpkin portion of the entree.

So, after some searching I found a recipe that originally came from The Inventive Vegetarian and modified it to fit the ingredients I have (vegan & gluten-free).  The end result…was better than I dreamed.

Recipe: Gluten-Free and Vegan Pumpkin Mac and “Cheese”

Gluten-Free and Vegan Pumpkin Mac &
Gluten-Free and Vegan Pumpkin Mac & “Cheese”

Servings: 6-8
Time: Prep 15 minutes; Cook 45 minutes

Ingredients:


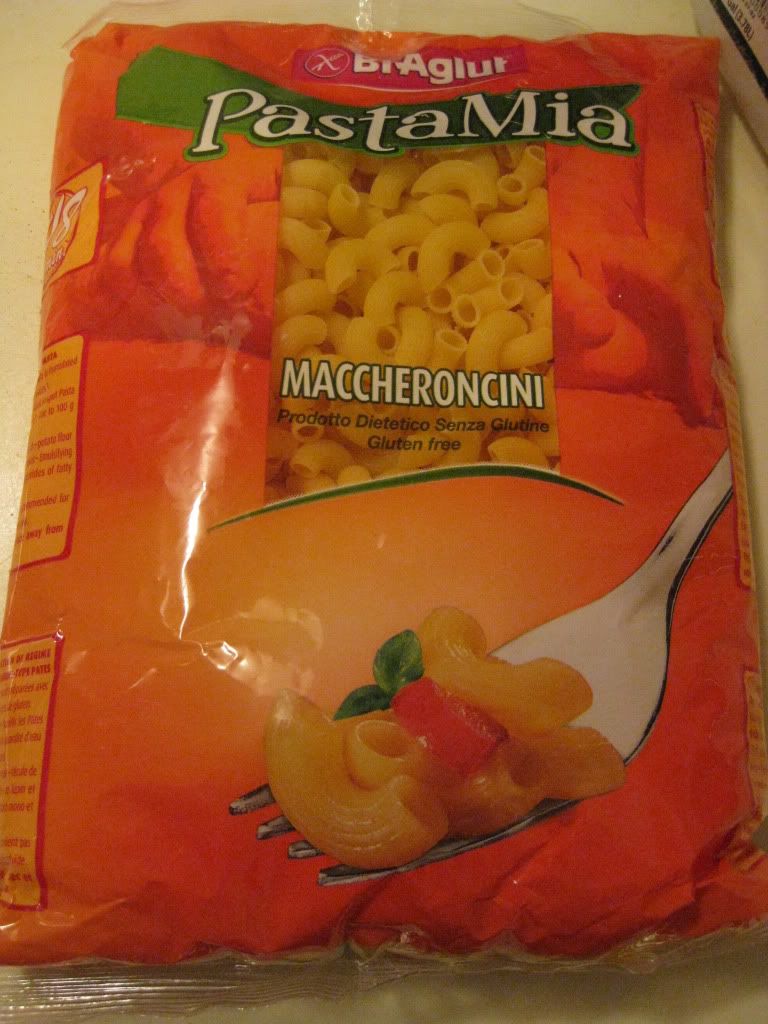
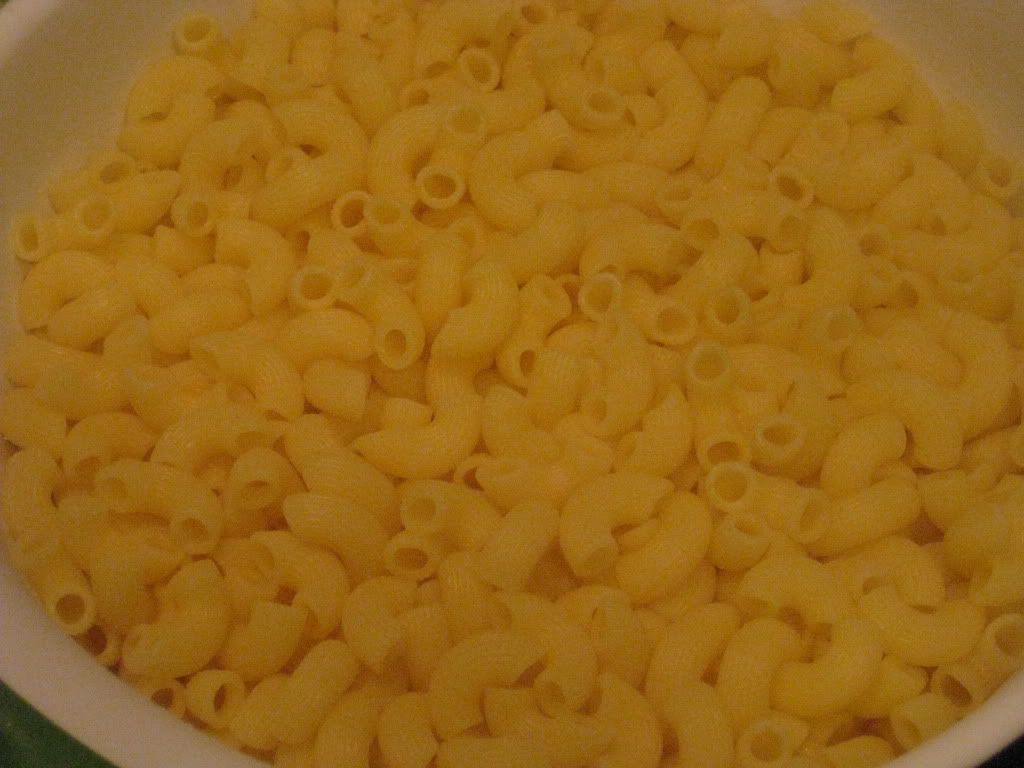
  • 1 box elbow macaroni (I used BiAglut Gluten-Free Maccheroncini)
  • 2 cups almond milk (I used unsweetened)
  • 2 tablespoons olive oil
  • 2 tablespoons all-purpose flour (I used Arrowhead Mills Gluten-Free All-Purpose Flour)
  • 2 cups Daiya Cheddar Style Shreds (I prefer the Daiya wedges, so I just shredded an entire Daiya Cheddar Wedge)
  • 1 can pumpkin puree
  • 1 teaspoon soy sauce*
  • 1/2 teaspoon cinnamon
  • 1/4 teaspoon cloves
  • 1/4 teaspoon allspice
  • 1/8 – 1/4 teaspoon cayenne pepper (or more if you like heat)
  • Salt and pepper to taste

Directions:

Preheat oven to 375 degrees F.

Heat the almond milk in a small saucepan, but don’t boil it.

In a medium pot, heat the oil over medium heat and sprinkle in the flour.  Whisk for about 2 minutes to create a smooth roux.  The mixture should darken slightly during this time.

Still whisking, add the hot almond milk slowly and cook for a minute or two more, until the mixture has thickened.   A good way to check is to dip a spoon into the mixture, then run your finger over the back of the spoon.  If the mixture does not run into the streak made by your finger, it’s thick and good to go.

Add in the pumpkin puree and stir until smooth.  Keep it on the heat for just a minute or two, until the puree is warmed through.

Take the almond milk mixture off the heat and stir in the vegan cheese, soy sauce, and spices.  Partially cover and let the mixture sit as the cheese melts.

While waiting for the cheese to melt, bring a pot of water to a boil and cook your macaroni.  Cook it just shy of al dente (subtract a minute or two from the al dente cooking time on the box).  Drain the noodles when they’re done.

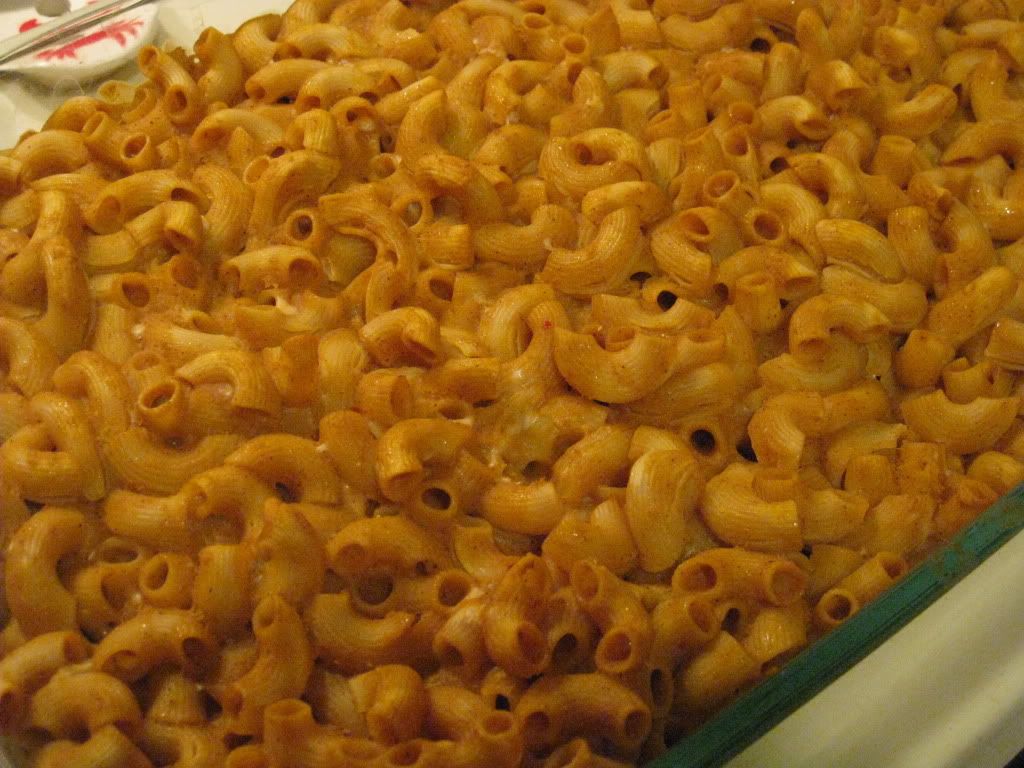
Once the cheese has fully melted (it will take a little longer with this stuff than with real cheese), taste and adjust any of the spices, as well as salt and pepper, to your liking.  The whole mixture should now have a nice, velvety texture to it.  Add the cooked macaroni (and the onions if you’re adding them) and stir well. Pour the whole mixture into a 9×13 baking dish, or a deeper casserole dish.

Bake for 40 to 50 minutes, or until the sauce is bubbly.

Enjoy!

~*~*~

The difference between this pumpkin mac and cheese and the previous one is the pumpkin flavor is definitely more pronounced in this one.  I think that has to do with the seasonings used more than anything.  It was creamy and delicious and those who ventured to try it at the office luncheon all said it was really good.

*Now, I do want to note that if you are using real cheese and not making this a vegan recipe…do not add the soy sauce.  The soy sauce is basically used as a seasoning for the extra umami that soy cheese needs.  Real cheese…you’re good to go without it.

Very impressed with this recipe.  If you love pumpkin and mac & cheese…give this one a try.

BiAglut Maccheroncini best packaged gluten-free pasta around

BiAglut Maccheroncini (Gluten-Free Elbow Pasta)

Product: BiAglut Maccheroncini (Elbows) – $5.45+

I’m declaring it now.  Right there in my subject line for this post.  After all years of searching for the best pre-packaged gluten-free pasta, I think I may have finally found the crème de la crème.  I didn’t think many things can live up to the standard that RP’s fresh gluten-free pasta set…and then I find it…just waiting to be discovered in my pantry.

Fresh pasta is always best, but it’s not always the most practical.

When it isn’t practical, BiAglut should be.  Trust me, I have tried mostly every gluten-free pasta out there.  Rice noodles, corn noodles, tofu noodles, quinoa noodles…I’ve had them all.  Some do better than others.  Some brands I prefer over others.  Some are just easier and more cost efficient in the end.  That being said, I think I would pay a pretty penny to have more noodles from BiAglut.

BiAglut  is an Italian brand of gluten-free products that have been produced in Italy for more than 45 years by the Italian affiliate of H. J. Heinz Company.  The company’s main focus is on individuals with Celiac disease, gluten intolerance, or those who follow a gluten-free diet.  By keeping to this focus group, the brand offers a variety of gluten-free products to the market, including pasta, breads, bread substitutes, flours, cookies, crackers, snacks, and desserts.

But the main item that BiAglut is known for is…their pasta.

I was at a gluten-free expo awhile back and BiAglut was one of the companies there.  It was a very small expo with very few vendors.  But the people who were at the BiAglut table had me try some of their pasta and I loved it.  Great texture.  Great flavor.  It was cold…but…well…you can’t have everything.  After a little discussion, my roommate and I decided to go ahead and buy a bag of their noodles.  They had very few options left (yes…it was going fast), so I snagged the very last bag of BiAglut Maccheroncini (elbows).

And then…it joined the plethora of other noodles in my pantry.  And it sat…as I worked my way through the rest of them.

But, then we had another dreaded office potluck.  I say that because, with the exception of one or two other people in the office, nothing brought in is something I can eat.  Granted, being a gluten-free vegetarian does limit my diet, but it is nice when someone puts for the effort to make something that I can also eat so I’m not stuck with just two things on my plate (the two items I bring, mind you).

With that in mind, I signed up to bring two dishes…some crock pot caramelized apples and a vegan pumpkin macaroni and cheese.

I checked my pantry list and the next pasta noodle to have it’s day in the spotlight was the BiAglut Maccheroncini.  I was kind of sad to be using this pasta on my office because I knew full well that since I was the person bringing it in…hardly anyone would touch it.  It’s…weird.  It’s…*GASP*…GLUTEN-FREE!  I swear to God, no one in that office quite understands what that means and just won’t even try the food I bring in…which is why I hate to bring things in.  I can cook for myself at home and it will save me money, time, and food that won’t go to waste because only 2-5 people are eating it.

BiAglut Maccheroncini (cooked and drained)

That being said, I sucked it up and went ahead and made the items I signed up for.  Early that morning, I stood in the kitchen boiling a pot of water to pour the BiAglut Maccheroncini in and allow it to cook most of the way.  It only took about 6 minutes to get to where I needed them to be.  I mean…it was fast.  Most gluten-free pasta noodles have to be boiled for around 12-16 minutes, if not longer, to get that perfect consistency.  Not these.  They were done so fast I had time to spare.

After I drained the noodles, I put them back into the big pot and poured my vegan pumpkin cheese sauce over the top of it.  With a spatula, I stirred it all together, delighted in the fact that the noodles were holding together.  They weren’t turning to mush.  They weren’t falling apart in the sauce or with the movement of the spatula.  I was already impressed.  Then, the mixture was poured into the baking pan and into the oven it went for about 45 minutes.

When it emerged…the noodles were still perfect.  They already survived boiling and baking.  I was very surprised.  I’m just not used to my gluten-free pastas being so sturdy.  Well, before I could serve this to myself and the brave few who just might have a little taste at the office, I had to make sure it was good.  I plucked a noodle from the casserole dish and…oh yeah…it was good.  The noodle was a perfect al dente.  Perfect.  It cooked up beautifully in the sauce and didn’t fall apart in the baking process.

The true test was going to be lunch.  So, about 10 minutes before lunch was to be served, I got to the kitchen and pulled my mac and cheese out of the fridge.  I brought a splash of almond milk to add to the pasta for when I reheated it, and poured it over the top.  Then, into the microwave it went.  As I reheated it a few minutes at a time, I would stir it around to make sure it heated evenly.  And the noodles held together.  They didn’t crumble as I stirred them.  They didn’t shred.  They held.  And I was so elated.

The moment of truth came – the office luncheon began.  My roommate, myself, and the office vegan I knew would be eating the macaroni and cheese.  Others seemed a bit hesitant.  Some took just a smidge.  Most didn’t even give it another look because…I made it…therefore it’s gluten-free and must be disgusting.  Ignorant fools!

As I sat down to dig in…I was hoping I’d be as impressed with the BiAglut Maccheroncini as I had been this entire time leading up to the first actual bite.  One bite and it was all the confirmation I needed.  Through boiling, baking, and nuking, the BiAglut Maccheroncini not only held its shape, but it still tasted great.  It didn’t mush up or disintegrate under pressure.  It is pure, honest, gluten-free pasta perfection.

BiAglut Maccheroncini is made from cornstarch, potato flour, lupin flour and lupin proteins.  No eggs.  No dairy.  And what comes of this is the best packaged pasta I have had to date.  Gluten-free pasta is so tricky, but BiAglut held up to everything I could put it through and still tasted great in the end.  And, on a personal note, it worked very well in my vegan and gluten-free pumpkin mac and cheese.  Tasted great.

Best texture.  Best quality.  Best all-around when it comes to dry pasta.  BiAglut is amazing.  Now I wish I had purchased more of their products at the time.  Guess I’m going to have to get online and place an order.

If you can find BiAglut…I encourage you to try it.  It is heads and tails above the competition.  It’s happiness in pasta form.

Gluten-Free Vegan Pumpkin Mac & Cheese made with BiAglut Maccheroncini

Recipe: Scalloped Russet Potato and Yam Gratin with Fresh Herbs

As I mentioned, my CSA bin was exploding this past week with treats to help make any Thanksgiving feast complete.  Honestly…everything in there would go in a Thanksgiving meal.  And if I was making a Thanksgiving meal…that would be ideal.  As it was, being the token vegetarian among my roommate’s family, I am always asked to supply a vegetable dish.  And as I had green beans in my bin…I went with that.  Although, I honestly could have provided a healthy and fresh side item (forget canned yams and cranberry sauce…I could have made it from scratch with fresh and local ingredients), I stuck with what I was told to bring and let them open up canned yams and cranberry sauce.  That’s their tradition.

But I’m a firm believer in fresh is best and therefore now had a plethora of Thanksgiving fruits and vegetables to play around with.  As a result…I found a recipe that utilized Yukon Gold potatoes and sweet potatoes, and decided that I could alter it to accommodate my ready supply of fresh Russet potatoes and fresh yams that came in my bin.  It even used some of the fresh, local herbs that I received as well.

WINNING!

So, last night…I cooked up this amazing gratin…and it emerged smelling fantastic and bubbling with goodness.  At first bite…I knew I made a good choice.  The original recipe was printed in a 2008 edition of Bon Appétit magazine.  I adapted it to fit my ingredients.  All of which…I had on hand and begging to be used.

Break out that mandolin slicer and bake up potatoes in a fresh, tasty new way.

Recipe: Scalloped Russet Potato and Yam Gratin with Fresh Herbs

Scalloped Russet Potato and Yam Gratin with Fresh Herbs

Servings: 8-12
Time: Prep 20 minutes; Cook 55 minutes

Ingredients:

  • 1-1/2 pounds medium Russet potatoes
  • 1-1/2 pounds medium red-skinned sweet potatoes (yams)
  • 2 cups heavy whipping cream (I used 1 cup heavy whipping cream and 1 cup unsweetened almond milk)
  • 1/4 cup (1/2 stick) butter (I used Smart Balance)
  • 2 garlic cloves, minced
  • 1 tablespoon minced fresh Italian parsley
  • 1 tablespoon minced fresh rosemary
  • 1 tablespoon minced fresh sage
  • 1 tablespoon minced fresh thyme
  • 1-1/2 teaspoons fine sea salt
  • 3/4 teaspoon freshly ground black pepper (I used 1/4 teaspoon black pepper and 1/2 teaspoon ground red pepper)
  • 1-1/4 cups (packed) coarsely grated Gruyére cheese (about 5 ounces) (I used Extra Sharp Cheddar Cheese)

Directions:

Fill large bowl with cold water.

Working with one Russet potato at a time, peel, then cut into 1/8-inch-thick rounds and place in bowl with water.  Repeat with sweet potatoes.

Combine cream, butter, and garlic in medium saucepan; bring to simmer.  Remove from heat.

Mix all herbs in small bowl.

Mix sea salt and black pepper in another small bowl.

Butter a 13x9x2-inch glass baking dish.

Drain potatoes, then pat dry with kitchen towels.  Transfer half of potatoes to prepared baking dish.  Use hands to distribute and spread evenly.

Sprinkle with half of salt-pepper mixture, then half of herb mixture.  Sprinkle with half of cheese.

Repeat with remaining potatoes, salt-pepper mixture, herb mixture, and cheese.

Pour cream mixture over gratin, pressing lightly to submerge potato mixture as much as possible.

Preheat oven to 400°F.  Cover gratin tightly with foil.  Bake 30 minutes.  Uncover; bake until top of gratin is golden and most of liquid is absorbed, about 25 minutes longer.  Let stand 10 minutes.

Serve.

~*~*~

Cheesy, potato goodness…that’s what this was.  I mean…full of amazing flavor.  The yams were the actual star, though.  The flavor they brought to this gratin was out-of-this-world delicious.  I loved the use of the fresh herbs as they complimented every ingredient that went into this dish.  This would make a fantastic entree or even a delicious side dish at Thanksgiving (or just for a get-together of family dinner).  The hardest part was getting that potato sliced on the mandolin.  But, once that part was done, the rest was super-simple and easy.

Love potatoes and cheese?  Trust me…you’ll love this!

Lakewood, Ohio boasts fantastic gastropub with Deagan’s Kitchen & Bar

Deagan's Kitchen & Bar, Lakewood, Ohio
Deagan’s Kitchen & Bar, Lakewood, Ohio

Restaurant: Deagan’s Kitchen & Bar, Lakewood, Ohio

Sometime the best laid plans fall through and you have to find a plan B.

Welcome to my world on the night of The Monkees concert up in Lakewood, Ohio.  Now, I have a friend who lives in Lakewood and we had made plans to all meet up prior to the show for dinner.  Our original spot of choice was somewhere I found on Find Me Gluten Free.  A little joint called Tommy’s Pizza and Chicken.  Sounds like a dive, yes?  But sometimes dives have the best food.

Unfortunately…we never found out.  Upon arriving at Tommy’s, we could see that it was more of a carry-out sort of place than an eat-in.  That wasn’t going to work…at all.  It definitely was a dive.  And after a couple of texts with my friend in the area, Cathy (yeah…2 Cathy’s…try to keep them straight), we laid out a couple of alternatives.  Get gluten-free pizza to go and bring it to her place.  Check out Aladdin’s (they serve up Lebanese/American food).  But, with a little magic from my Yelp app on my phone under the gluten-free friendly tag…I discovered Deagan’s Kitchen & Bar, a gastropub that wasn’t too far away.  It had good ratings.  I suggested it.  We all agreed to meet there.

Deagan’s was a happening place that night.  Very busy.  Very lively.  We stepped inside and were greeted by the hostess.  I said that there would be five of us so they went to prepare a table.  We ended up being positioned near one of the windows in the front…but in a quieter side room.  That was definitely a good thing.  We were given menus to look at and brought some water to start with.  Although tempted with the drink menu, we forwent that.  Cathy (the roomie) got a Diet Coke for caffeine purposes, but Jenn and I stuck with water.  I explained to our waitress, Anisa (she’s awesome, BTW!), that I was a gluten-free vegetarian.  She said they had a special menu for me and would swap mine out with it.  She returned a moment later with a menu with certain items highlighted and little notes written on it for how to make something gluten-free (like no pita bread).  She said there were some vegetarian options on there as well.  It was nice to have that kind of peace of mind.

Cathy (the other one) and her sister arrived soon after and got settled in with drinks and menus.  We talked and talked and talked and finally decided that we should probably order since we did have a concert to make.  Anisa returned ready to take our orders.

Cathy (the roomie) ordered her standard, must-have, when it is on the menu.  Fish and chips ($18.00).  Jenn decided to try one of their small plates and ordered the Polenta Croutons ($8.00).  The polenta croutons are cubes of fried polenta served with sauteed mushrooms, Parmesan and parsley.  It was different and it looked really good.  And Jenn even tried to eat the mushrooms…but in the end, they were left behind.  The rest, however…she devoured.  Cathy (the local) ordered the small plate of Mac and Cheese ($11.00), which was a rather big bowl of noodles, Gruyere cheese and  chives.  She got it with a side of the Brussels sprouts ($ Cathy’s sister, Sarah, ordered the small plate of Seared Scallops ($12.00), which consisted of two large scallops and was served with shaved Brussels sprouts with grapefruit and pomegranate.  She got a side of the House Fries with it.  As for me…I decided to go with a salad in the end.  I chose to go with their Arugula Salad ($8.00) and, since it was marked gluten-free, give their House Fries ($7.00) a try.

Anisa went to put our orders in and for the rest of the time before food arrived, all of us were chatting up a storm.  We talked movies, books, music, concerts, work…you name it.  And conversation continued even when food arrived to the table.  It took some time.  I was okay with that.  Again, I don’t mind having to wait on my food.  It means that it is prepared fresh and to order.  Not sitting under some heat lamp somewhere or getting to know a microwave.

Deagan's House Fries
Deagan’s House Fries

My Arugula Salad was stunning, by the way.  Simple.  Very pleasing to the eye.  Not a lot of color, but what was there popped.  Deagan’s Arugula Salad consists of arugula, shaved fennel, Parmesan and pine nuts.  It is lightly dressed in a lemon oil.  Now, normally I find arugula to be too peppery on its own…but with the saltiness of the Parmesan and the pine nuts, it all balanced out.  The lemon oil, however, is what really tied it all together.  While the salad looked simple, the layers of flavor in there seemed complex.  It all worked.  It was fantastic and delicious.  And I enjoyed it more than I normally enjoy a salad at restaurants.  Honestly.  This one was really good.

There were a lot of House Fries in my side order, so I shared with Jenn and Cathy (the roomie).  They were fantastic cuts of potato that were topped with shaved Romano cheese and truffle oil.  It was served with a spicy mayo.  Oh.  My.  Potato.  Gods.  These fries were really good and really addictive.  No joke.  The simple addition of shaved Romano cheese and a hit of truffle oil just took them from standard fries to something that was out-of-this-world good.  And different.  The spicy mayo that it was served with was delicious and I took great pleasure in dipping my fries into them.  Yeah…for a different twist on fries…I highly recommend these.

In the end, we all agreed that Deagan’s was the perfect place to end up when all was said and done.  Our waitress took fantastic care of our table.  We all enjoyed and devoured our food.  Cathy (the local) had left over mac & cheese…which she took home in a box.  There was a lot in that bowl they brought her.  She and Sarah ended up splitting the special dessert of the night, a bread pudding with caramel and pear.  It sounded divine…and looked it too.

Afterwards, we paid our checks and headed out.  Cathy and her sister were heading back to her place.  We had The Monkees to go and see.  In the end, I am happy we ended up at Deagan’s.  Sure…this meant I didn’t get my traditional gluten-free pizza the night before a big race (yeah…I was running a 15K the very next morning back down in Columbus, Ohio)…but I did get some carbs (thank you gluten-free House Fries) and had great company and amazing food.  I’d go back to Deagan’s Kitchen & Bar in a heartbeat next time I’m in the area.  Sometimes the best laid plans have to change to lead you to somewhere even better.

Beyond impressed.

Deagan's Arugula Salad
Deagan’s Arugula Salad

The Claddagh in Columbus, Ohio serves up a simple, delicious – but unbalanced – salad

The Claddagh Irish Pub, Columbus, Ohio

Restaurant: The Claddagh Irish Pub, Columbus, Ohio

I love pubs.

I love pubs a lot.  But as a vegetarian, I was already limited on what I could eat there.  When I had to go gluten-free…my options got even smaller.  In most cases, I hope for an amazing salad.  It has happened before.  The right flavor combinations, the right ingredients, and yes…even a salad can be magic.

It was Friday night…the beginning of an exciting and busy weekend…and I was in Columbus, Ohio visiting my friend Jenn.  I had actually purchased a Living Social deal for The Claddagh Irish Pub in Columbus knowing that there would be a cause to use it at some point.  And that night was Friday night after a long trip up in the car.

We arrived and found parking and made our way toward the front of the pub.  We entered and were immediately greeted and asked if we had a reservation.  Uh oh.  Did that mean that there was something going on that evening?  I replied that we did not have a reservation and the hostess didn’t even flinch before picking up three menus and guiding us toward the back room.  We were seated at a low-lit table in the corner and given our menus to look over.

Although…when it comes to pubs, Jenn, my roomie and I pretty much already know what we want.  Our waitress came over and introduced herself and asked if we knew what we wanted to drink.  Cathy grabbed for the folder of booze and looked for the one word that makes her happiest at pubs.  Yep.  They had it.  Magners.  She and Jenn both ordered a pint of that.  I stuck to water as…well…I was running later that weekend and I wanted to hydrate properly.

After our drink orders were taken and water was brought out to all three of us, we placed our orders.  Both Jenn and Cathy went with their most favorite pub offering on any menu.  Fish and chips ($13.99).  As for me…I was down to two salads that interested me.  I was having a hard time choosing and Cathy wasn’t helping me make the call.  So after a little debate…I made up my mind.

My order…the Galway Salad ($7.99).  I stuck with the Balsamic Vinaigrette for my dressing.

With orders in, we sat and talked.  Magners were delivered.  We discussed upcoming plans we all had, the concert we were seeing the next night, and just whatever we felt like talking about.  Why?  Because we are good friends and conversation is never an issue with us.  Love that.  And soon, we found our orders being delivered safely to our table.  Jenn and Cathy had big planks of fish (they use cod in an ale batter) over a bed of pub chips (fries).  They came with a side of slaw and tartar sauce as well.  Cathy, who has taken to at least trying the tartar sauce, was quite impressed with it and alternated dipping her fish in the pool of ketchup on her plate and the tartar sauce.  Needless to say…they enjoyed their fish and chips.

The Galway Salad looks like…a basic salad.  It basically consisted of a bed of mixed greens that was topped off with a boat-load (seriously…it was crazy and a bit overwhelming to the palate) of sun-dried tomatoes, a pile of goat cheese, and a scattering of candied walnuts.  They thankfully kept the balsamic vinaigrette to the side so I could add however much I wanted.

The salad was good…but there were just way too many sun-dried tomatoes.  They were clumped together at times and would definitely overpower a bite if too many were on the fork.  I had to scatter them out and really make sure that they were balanced out by the other components of the salad itself.  And, let me tell you, when you are working with four ingredients, that can be a challenge.  Thankfully the balsamic vinaigrette helped offset some of that as well.

Was it amazing?  Not really.  It was okay.  Not bad.  Just a bit unbalanced when it came to how it was topped.  I mean…it was a very simple, basic salad.  It was good.  It was delicious.  But it was a bit much at times when it came to the heavy-handed sun-dried tomatoes that topped it off.  But, I got through it and polished off my plate, leaving the pub with a happy (and full) tummy.

The Claddagh served me a delicious salad.  I will give them that.  I left there full.  But I think the chef needs to learn take a lighter hand with the sun-dried tomatoes as it was way overpowering at times.  Thank goodness for the goat cheese and walnuts to help tamper that flavor down some.

The Claddagh's Galway Salad with Balsamic Vinaigrette
The Claddagh’s Galway Salad with Balsamic Vinaigrette

Recipe: Cheesy Spaghetti Squash Casserole

There comes a time during those weeks I’m preparing to go out of town for the weekend that I realize I still have a whole heap of fresh produce from my CSA bin that I need to use or lose.  And I am not one that likes to see good food go to waste.  Such is the reason for my brilliant creation that I totally made up on the fly yesterday.

Keep in mind…this would have been a lot easier had I planned it ahead of time…prepped some of the items beforehand.  But…I never have these brilliant moments of brilliance until I am already away from my kitchen.  Naturally.

So, what is an allergic chef to do when her crisper drawer is still heaped full with veggies?  Make something up.  And what emerged was a fantastic little casserole, packed with veggies, sprinkled with a little cheese, and ultimately…nutritiously delicious.

Cheesy Spaghetti Squash Casserole

Cheesy Spaghetti Squash Casserole

Servings: 4-6
Time: Prep 30 minutes; Cook 60 minutes

Ingredients:

  • 1 spaghetti squash, halved
  • 2 tablespoons olive oil
  • 1 cup white button mushrooms, sliced
  • 1 shallot, chopped
  • 1 head of broccoli, cut into florets
  • pinch of red pepper flakes
  • 2/3 cup black beans (mine had actually gone bad…so I substituted with Trader Joe’s Gluten-Free Vegan Chorizo)
  • 1 cup shredded mozzarella cheese
  • 1/4 cup shredded Parmesan cheese
  • 2 tablespoons butter (I used Smart Balance)
  • 2 tablespoons flour (I used Arrowhead Mills Gluten-Free All-Purpose Flour)
  • 1 cup milk (I used unsweetened almond milk)
  • Salt and pepper (to taste)

Directions:

Preheat oven to 375 degrees F.

Cut the spaghetti squash in half and remove the seeds.  Place on a baking sheet.  Bake in the oven for 40 minutes, or until tender enough to pierce with a fork.  Remove from the oven and allow to cool slightly.  When squash is cool enough to handle, scoop out insides, separating the strands with a fork.

Meanwhile, in a pan, heat olive oil and add chopped shallots and white button mushrooms and saute until shallots are soft and mushrooms begin to brown.  Add the broccoli florets.  Season with salt and red pepper flakes.  Saute until broccoli begins to soften.  Add black beans (or vegan chorizo) and heat through.  Remove veggies from heat.

While the vegetables are cooking, melt butter in saucepan over low heat.  Blend in flour, salt and pepper.  Cook, stirring until mixture is smooth and bubbly.  Stir in the milk.  Heat to boiling, stirring constantly.  Boil and stir for 1 minute.

Set the saucepan aside and gently scrape the tines of a kitchen fork around the edge of the spaghetti squash to shred the pulp into strands.

Place half of the strands of spaghetti squash into a 2 quart baking dish.  Add half of the sauteed vegetables and half of the mozzarella and Parmesan cheese.  Repeat the layers.  Pour the sauce over the top and mix well.

Place the baking dish in the oven for 20-25 minutes.  Remove from oven and serve.

~*~*~

I wasn’t exactly sure how this was going to turn out.  Honestly.  I was just in one of those modes where I’ll grab a bunch of ingredients, toss stuff together, somehow incorporate it into a dish, and just hope for the best when it’s done cooking.  My roommate loved this…so this may be added to the list of things I can make with a spaghetti squash.  I have a feeling I’ll be seeing quite a few this winter from my CSA.

Go ahead and give this recipe a try.  See what you think.  I know I’m excited to be dining on the leftovers tonight.  Really, really good.  Sometimes just making something up really works out.

Cheese Smarts Cheddar Crackers are a smart take on snack time

Cheese Smarts Gluten-Free Cheddar Crackers

Product: Cheese Smarts Gluten-Free Cheddar Crackers – $2.30+

Oh, Big Lots.  What would I do without you and your crazy international section with odd-ball gluten-free snacks?  I just don’t know these days.  Back at the beginning of summer, I actually posted about the Parmesan Crackers from Cheese Smarts.  So, going into it, I knew at least that these crackers were palatable.  Knock-you-over-with-cheesiness?  Not exactly.  But still good.

I can’t tell you much about the company, Unismack SA, aside from the fact that it is based out of Greece.  Yep.  Greece.  And as you know, Europe holds food standards to a much higher degree than the United States.  For that, I am thankful.  And I love that these crackers are labeled gluten-free right on the front of the box.  It’s a comfort to not have to haul out the iPhone in an attempt to check ingredients or a product’s Web site in order to be certain of gluten freedom.

Here is what I can tell you about the crackers, in general.  Cheese Smarts Cheddar Crackers are baked, not fried.  So, the cheese flavor is locked in through baking, not leaving a greasy residue like a lot of fried snack crackers do.  That’s a huge plus.  These crackers are made with 24% real cheese.  I know…100% would be far better, but this is declared on the very front of the box.  Only 24%.  Hmmm.  They are gluten-free, free of trans fats, and made with ingredients that are recognizable.  In other words, the actual ingredients don’t read like a science experiment.  Thank goodness.

So…enough with that.  The nitty-gritty of this blog is how they taste and stack up against the plethora of other gluten-free cheese crackers out on the market.  Well, at first bite you definitely get a healthy crunch.  That’s partially due to the baking, I’m certain.  The cheese flavor is there, not overpowering, but a bit underwhelming.  The little flecks of salt on top of the crackers don’t overpower or make it an overly salty snack.  With cheese snacks it can be a fine line when it comes to added salt, as cheese can be rather salty on its own.  They aren’t bad.  They just aren’t a cracker that you’ll hurry out to the store to stock up on.  In a pinch…they’ll do, however.

A serving size is 12 crackers (or 29 grams if you weigh your portions like I do).  This will set you back only 90 calories, however this serving also dishes up 6 grams of fat.  These snacks are very low in cholesterol (10 mg) and sodium (only 240 mg).  So, as far as a snack goes, you get a good portion size for relatively few calories in the cracker world.

These crackers aren’t bad.  Not at all.  They just don’t rank very high against some of the other major brands that are out on the marketplace.  Nutritionally, they are difficult to beat.  However, that being said, if it were to come down to taste…these wouldn’t be my first pick.

But…if I needed an inexpensive gluten-free snack…I’d be okay with these.

A different sort of vegetarian burger in Earth Fare’s Mushroom Rice Burger (gluten-free)

Earth Fare Natural Mushroom Rice Burger

Product: Earth Fare Natural Mushroom Rice Burger – $3.99+

I have fallen into a veggie burger rut.  That sounds strange…I know.  But it’s true.

The marketplace for gluten-free veggie burgers is booming.  And I’m happy about that, because as a gluten-free vegetarian, sometimes I just want to have a good veggie burger.  And many of the ones I have tried have been awesome.  Some have been better than others.  Despite being one of the more pricier ones, I absolutely can not step away from Amy’s Kitchen Sonoma Burger.  It’s delicious.  And one of the more sane ones when it comes to nutrition.

You might recall my run-in with the epically off-the-chain deliciousness of Sunshine Burgers…but the calories and fat content in them totally derailed my moment of joy.

It’s hard to find decent gluten-free, vegetarian food that isn’t laden with high calories and a lot of fat.

But, one day while shopping at my area’s newest grocery store, Earth Fare (I call it Earth Joy because it makes me happy!), I stumbled across their house brand of veggie burgers in the freezer section.  As I was on my last Amy’s patty, I figured…why not try something else?  And with a quick glance at the nutrition information, I felt so much better about this selection than any of the ones that have come before it.  Now, I just had to hope it tasted as good as it sounded.

Earth Fare Natural Mushroom Rice Burger

The veggie burger I chose this time around is Earth Fare’s Mushroom Rice Burger.  And when I removed it from the freezer last night to cook up for dinner, what I loved seeing was the bits of rice that are actually part of the burger.  You can also see the various vegetables that are incorporated into the patty itself.  Love that.  In fact, the Mushroom Rice Burger is composed of portobello and button mushrooms, onions, carrots, red and green peppers, black olives, potatoes, and garlic.  Organic brown rice is added to that flavorful mixture, and they are seasoned with wheat-free organic tamari, sea salt, garlic, and some herbs.

A single burger is the serving size, but for once, the nutrition facts on the back of the box didn’t send me throwing it back in the freezer.  One patty is only 90 calories (I think this is the first gluten-free veggie burger I’ve had that is under 110 calories) and contains only 1.5 grams of fat (THIS IS A FIRST!).  It is a lean burger that is low fat, gluten-free, vegan, non-GMO, and free of saturated fat.  The sodium level is very low (290 mg).  And one patty contains a whopping 8 grams of protein.  Love that.

Last night, because I had some red onion, local bibb lettuce, and some tomato on hand, I decided it was time for another veggie burger.  So, I busted out the Earth Fare Mushroom Rice Burger to cook up and give a try.  I put it in my skillet to cook and heat through.  This was actually very easy to do.  I just made sure that it wasn’t cold anywhere in the middle, and flipped it a couple of times until it was nice and golden on the outside and warm throughout.

As I am out of my gluten-free hamburger buns, I have been opting to sandwich my burgers in…gluten-free bread.  I happened to only have one slice left of my Glutino Genius bread, so I did sort of an open-face burger thing in lieu of getting more gluten-free bread or some gluten-free buns.  I threw a slice of Veggie Slices Provolone Flavor cheese over it to melt down.  Then, I plated it with the fresh vegetables and sat down to enjoy.

My first order of business was to get a piece of the burger itself, with no veg or bread.  Why?  Because I really wanted to see how it tasted, unmarred by the flavors that accompanied it.  One bite…and I fell in love.  This veggie burger is packed with amazing flavor.  All organic.  All delicious.  I haven’t been this impressed by a veggie burger in a long time (especially one that is at least a little more nutritious for me to eat!).  Gluten-free veggie burgers are becoming a little more common, but these…these not only have the best nutritional stats of any that I have tried, but they were moist and rich with flavor.  All of the vegetables, the rice, the seasonings…they all mingled and mixed to form this perfect bite of a burger.

I’m not ashamed to admit that I hoovered it.  Just completely devoured it.

Yes…it is that good.

I have noticed that Earth Fare markets are opening up throughout the country.  If you have one nearby, I encourage you to go inside and try some of what they have to offer.  It’s a great little healthy supermarket.  And I have fallen in love with their selection (especially for someone like me!) and their products.  Their very own brand of veggie burgers has now become my absolute favorite.  Now…how’s that for amazing?!

Earth Fare Natural Mushroom Rice Burger, topped with melted non-dairy provolone cheese, bibb lettuce, and tomato

Cheese Bites Smoked Cheese crackers a more flavorful snack

Unismack Cheese Bites Smoked Cheese Crackers

Product: Unismack Cheese Bites Smoked Cheese Crackers – $1.80+

You know…one thing I have yet to learn is when a deal or sale is going on and I’m purchasing a new product…I shouldn’t immediately load up on every flavor available.  Honestly.  Because there is absolutely no guarantee that I’ll like the product in the first place.

I recently reviewed the Unismack Cheese Bites Parmesan Crackers…claiming that while they were good…they weren’t exactly something that stood out.  Not memorable.  In a world of gluten-free cracker options, I’d eat them again…but not actively seek them out.  Of course, while on that outing to Big Lots that day, I grabbed pretty much every snack cracker that said Gluten-Free on the box.  Because…it’s labeled.  WOOHOO!!  And the Cheese Bites Smoked Cheddar Cheese was the next snack on my gluten-free pantry list.  I was less than thrilled to pull down another box of these, but…you know…the rule is…unless you really can’t stomach it…you eat it.  No gluten-free things go to waste in my house.  None.

So, I dished up a serving to take to work with me today.  And my 3 p.m. snack time rolled around.  I pulled out these crackers, popped the lid of the container, and took my first bite.

And this is why I am on the fence with these.

They taste like…BACON.

There is nothing bacon related in these.  But that’s what they taste like.  Like greasy diner bacon.  Or, as my co-worker said after I let her try one…that it tastes like a bite of a McDonald’s Bacon Egg & Cheese Biscuit.

Normally, this wouldn’t be a bad thing.  Not at all.  But I’m a vegetarian.  So when your vegetarian crackers taste like bacon, it is a little jarring at first.  I didn’t know what to make of it or how to react.  I know it’s just from the cheese being smoked, but…it confused the hell out of my taste buds.

You can’t say that these snack crackers lack anything for flavor.  The very opposite is true for these.  These pack the flavor.  Enough that to some people it tastes like a fast food breakfast sandwich.  Go figure.  To me, it just reminds me of bacon.  Maybe it’s because of that smokey flavor that is in the cheese.  I had to get beyond that in order to really enjoy these crackers, but I ate them.  No fussing on flavor this time.  It’s there.  I’m just not sure what to make of it just yet.

On the flip side, these crackers are rather low in calories (120 calories for a 1 cup (or 29g) serving) and only have 5 grams of fat for each serving.  That’s not bad for a snack cracker.  These are low sodium and also pack 4 grams of protein per serving.  Not bad for a cracker, yes?  All the ingredients are recognizable…probably due to the fact that these are produced in Greece.  No strange chemicals or preservatives.  Just the real-deal when it comes to ingredients.  And these crackers are puffed up triangles of smoked cheese flavor.  And they are light, so they won’t fill you up and spoil your appetite for dinner either.

So, if you love bacon…these might be the crackers for you.  As for me, after my 3 servings that are in this box…I think I’ll pass.  It’s just…weird to me.  But, if you aren’t a vegetarian…these might be the best cracker you’ve ever tasted.  But you’d have to buy them to find out.

Recipe: Creamy Brussels Sprouts Bake

Okay…I’m going to admit it.  When I received my bin from my CSA, I had a major crisis in my kitchen.  No, nothing hazardous or spoiling.  In fact, the issue was more with one of the items in my bin itself.  The culprit – Brussels sprouts.

Laugh it up, but these little mini heads of cabbage really threw me for a loop.  While they have always been one of my mom’s favorite vegetables, we never had them when I was growing up.  Ever.  She never made them and never even attempted to get us to try them.  I knew every joke from television shows and movies though regarding Brussels sprouts, so…yeah…I was sort of thrown for a loop.  Not only had I never tasted these myself, but I had no idea how to prepare them.

My roommate claimed she maybe had them once…and she wasn’t a fan…but probably because they weren’t cooked correctly.

This didn’t boost my confidence in this vegetable at all.  But…I was determined to find a recipe to make…where both of us would hopefully enjoy these little leafy greens.  And after a few searches online, and a few recipes tossed at my roommate, she finally decided on one that would use a couple other items from the bin.  Good thinking!

I embellished the recipe a little as I only had 16 ounces of Brussels sprouts in my bin and the recipe calls for 20.  So, I substituted 4 ounces of broccoli.  No harm no foul, right?  So…for all of you lovers of Brussels sprouts and for those of you, who like me, have no idea if you like them or not…I encourage you to try this recipe.  It’s compliments of Taste of Home…but this is my own take on it.

Recipe: Creamy Brussels Sprouts Bake

Creamy Brussels Sprouts Bake

Servings: 6
Time: Prep 15 minutes; Cook 35 minutes

Ingredients:

  • 1 package (8 ounces) cream cheese, softened (I used Tofutti Better Than Cream Cheese)
  • 1 cup (8 ounces) sour cream (I used Tofutti Better Than Sour Cream)
  • 1/2 pound sliced fresh mushrooms
  • 1 medium onion, chopped
  • 2 tablespoons butter
  • 16 ounces fresh Brussels sprouts
  • 4 ounces fresh broccoli
  • 3/4 cup shredded cheddar cheese


Directions:

Onions, mushrooms, broccoli, and Brussels sprouts sautéing in pan

In a small bowl, beat cream cheese and sour cream until smooth; set aside.

In a large skillet, saute mushrooms and onion in butter until tender.  Stir in Brussels sprouts.  Remove from the heat; stir in cream cheese mixture.

Spoon into a greased shallow 2-qt. baking dish.  Cover and bake at 350F for 25-30 minutes or until bubbly.

Uncover; sprinkle with cheddar cheese.  Bake 5 minutes longer or until cheese is melted.

Serve.

Creamy Brussels Sprouts Bake (fresh from oven)


~*~*~

I admit it…I was nervous going into this one.  With not knowing what to expect from Brussels sprouts, I was actually quite nervous about taking my first bite.  My roommate, as she so often does, threw herself on it immediately and assured me that it was actually really good.  She said the Brussels sprouts had a bit of a nutty flavor to them…and she was right.  And the cream cheese/sour cream soup that surrounded the greens, mushrooms, and onions was out of this world.  This was actually quite delicious…and yes…quite filling.

But I am no longer afraid of Brussels sprouts.  And, perhaps, next time I’ll try simply roasting them in olive oil and give that a go.

Trust me…this is at least worth a taste.