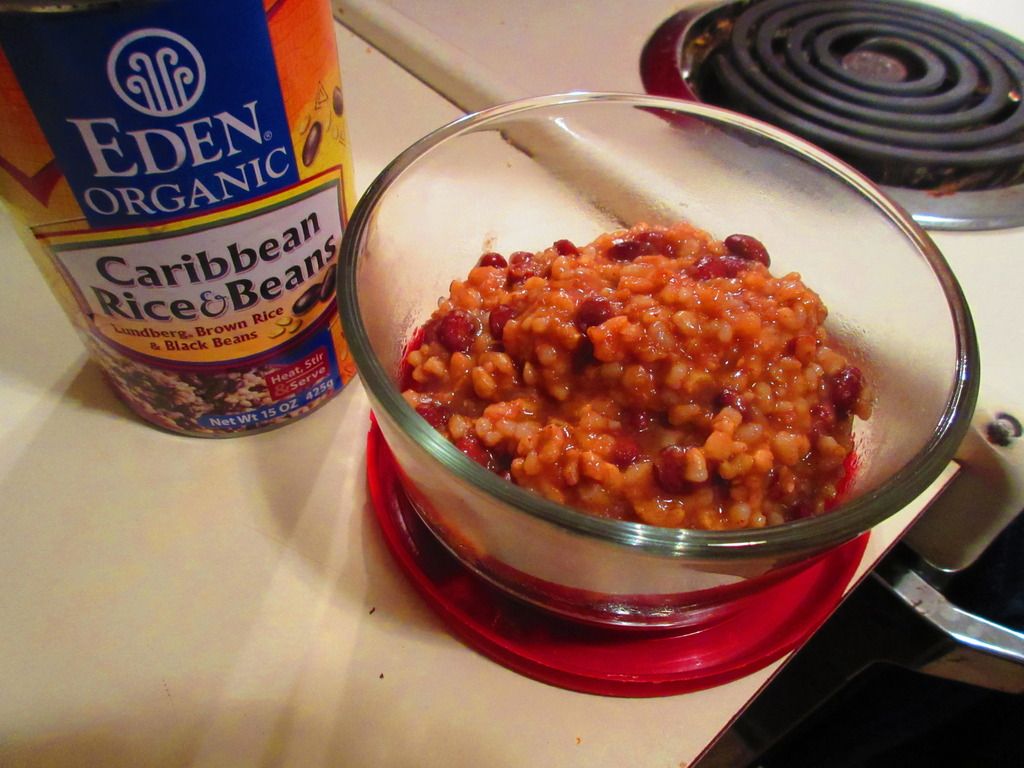
Product: Eden Foods Caribbean Rice and Black Beans – $2.50+
Sometimes life gets a little crazy. Sometimes life gets a lot crazy. And sometimes, life just gets too busy to really plan ahead efficiently. That has been my life as of late. With the tedious and long hours spent doing my physical therapy stretches, and being in enough pain that it hurts to stand for long periods of time (sitting down isn’t always better), sometimes simple and hands off is what you need.
Thank goodness while out at Earth Fare one day, I snagged a can of Eden Foods cans of rice and beans. It was on sale, as I recall, and I figured it was never a bad thing to have some sort of canned meal or side on hand…just in case.
Last week, it sure was a lifesaver when it came to lunch one day. My weeks have been stressful and I’ve been battling my own little injured runner demons. Sometimes, motivation to really do anything is lacking. Sometimes, when I get home from work, all I want to do is collapse and not move for awhile. But, usually, I have lunches and snacks to prepare for the following day, and then dinner for that evening to get going on top of it all.
I reached a breaking point last week and I was so happy to find this can of rice and beans in my pantry. Like…seriously happy. Who knew a canned good could bring so much relief and joy?
Eden Foods Caribbean Rice and Black Beans is a really simple food to prepare. Simply, open the can, and heat. I used the stove top method, which involved putting it into a saucepan and warming it through. I stirred it throughout the cooking period, and then dished it up into two (one for me and one for my roommate) Pyrex containers for the following day. While it was warming, I was working on dinner. It was the best feeling ever to accomplish two things at once without any additional stress or steps.
The next day, I small reheat in the microwave was all that was needed. Lunch…was served.
The Eden Foods Caribbean Rice and Black Beans was decent enough. While I appreciate the BPA-free can and the low sodium, this dish was actually under-seasoned. I had my roommate take a taste before I packed it up for lunch and she said it needed a hit of salt. She’s a sodium-scardy-cat, so this was quite the surprise to hear. I took a pinch of salt from my dish and added it, giving it another stir. And she was happy enough with that. It still was bland on it’s own, however, we both concluded that this would be the ultimate vegetarian burrito/taco filler. In fact, I sort of want to buy another can and have taco night. There wasn’t much heat in the spices, despite including cayenne pepper in the seasonings that go into this particular blend of rice and beans. But, this meant that we could season and add as much spice/heat as we wanted individually. I left it as it was, as I didn’t have my bottle of Cholula with me that day, nor any bereber or red pepper flakes. So, yeah, on its own it was more than a little disappointing. If it had been part of Taco Tuesday or something…it would be amazing. While I was expecting a little more heat, it was very mild on the palate. Not great, but not bad either. I’d purchase it again for tacos…but not to have on its own.
Let’s talk about what goes into the Eden Foods Caribbean Rice and Black Beans, shall we? This product is made up of water, organic Lundberg short grain brown rice, organic black turtle beans, organic onion flakes, organic paprika, organic garlic powder, sea salt, organic cumin powder, organic cayenne powder, and organic cinnamon powder. This product is gluten free, kosher, and cholesterol free.
Nutritionally speaking, however, you’ll love the facts on the Eden Foods Caribbean Rice and Black Beans. One serving is 1/2 cup and there are 3.5 servings in a can. A serving will provide you with 120 calories, 1 gram fat, 100 mg sodium, 230 mg potassium, 23 grams carbohydrates, less than 1 gram sugars, 4 grams of fiber and 4 grams of protein. It is filling and healthy for you. It will definitely do your body good. I just wish it had a bit more…flavor to it.
JUST THINK TACOS!
Anyway, while not wowed by the product, as stated, I would probably purchase another can of the Eden Foods Caribbean Rice and Black Beans for other purposes, aside from being eaten straight as my roommate and I did. Decent food, that will keep for awhile, at a good price…sometimes that’s good enough.
If you do try these out…check the seasoning and spice levels. You might want to add to it.
Okay…I know what you’re thinking. You’re thinking…what is the gluten-free vegetarian doing with a breadcrumb coating that is meant for making fried chicken?
Well…it all starts with Cuisine Cube.
I signed up for Cuisine Cube back in May 2014…and for a year have been receiving a monthly subscription box of full-size products from artisan and smaller gluten-free companies. I love it. You can subscribe for as little as $29.99/month. While you might be uncertain about the quality of the service, let me tell you…you will receive products you may never have heard of and are definitely not readily available stores. You will receive 5-6 products (full-size) each month, each one representing a time when you’d eat: breakfast, lunch, dinner, snack, dessert. And…sometimes…a bonus! For me, some some products get used faster than others…and some sort of linger in my pantry until I can figure out something to do with them.
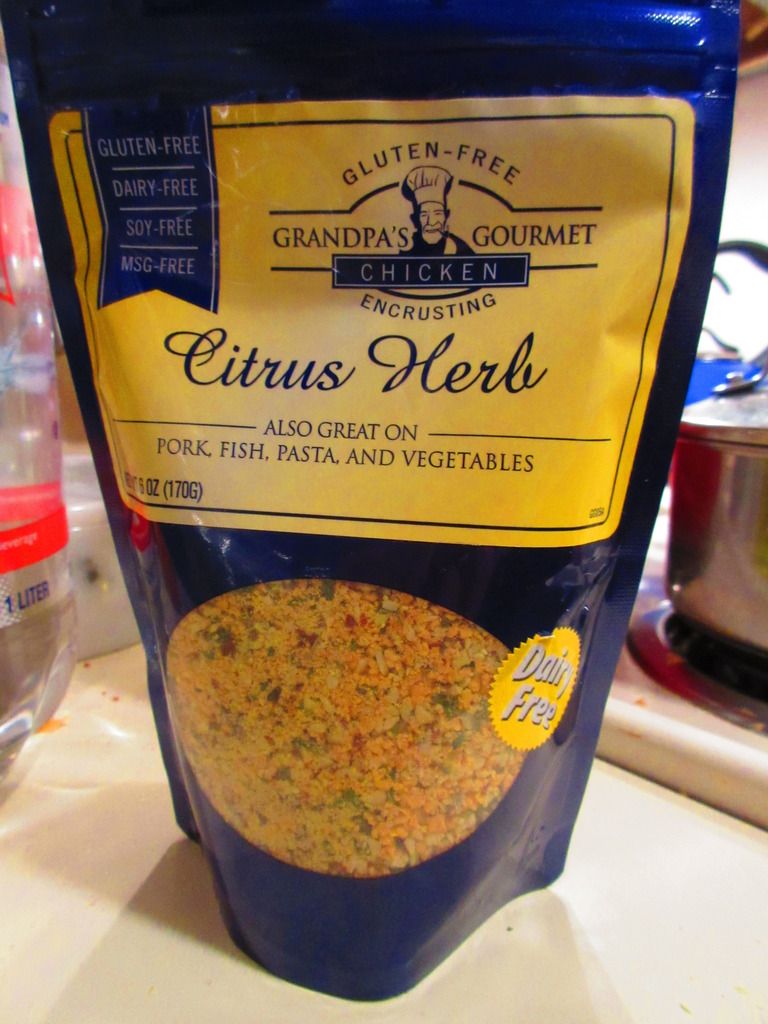
That was the case when, in my July 2014 Cuisine Cube, I received a 6 ounce package of Grandpa’s Gourmet Gluten Free Citrus Herb Chicken Encrusting. Upon first opening the box, I thought…”I’m a vegetarian…what am I going to do with this?” But, as most of you are well aware, I do love to coat some of my fresh vegetables in different breading (some made out of re-purposed items, and some…from actual gluten-free breadcrumbs) and bake them up in the oven to serve for dinner. And, after almost a year of procrastinating on this product, I thought it was time to move the last of the 2014 products out.
That honor…went to Grandpa’s Gourmet Gluten Free Citrus Herb Chicken Encrusting. Grandpa’s Gourmet was founded by a couple – he is a Celiac and she can’t have sugar, making meal planning quite a task. One night, while she was preparing her grandfather’s old recipe for oven fried chicken, her husband gave into the craving and devoured all the fried chicken he could get his hands on. He, of course, braced for the inevitable reaction – which never came. Could it be…they had stumbled upon a recipe that would mean – “One Meal for Everyone!”?
Grandpa’s Gourmet calls their line of products “Encrustings” because they are breading taken to the next level. Typical store-bought breading (or breadcrumbs) you get are genetically modified, unnatural wheat-based products that contain high amounts of sodium, sugar and preservatives. Even most gluten-free breadings are loaded with fat because they are nut based or have a gritty texture as they are rice based. But that’s what sets Grandpa’s Gourmet Gluten Free Encrustings apart. Not only are their products all natural and healthy…but they taste great. These encrustings have a non-GMO corn base, instead of rice or potato, giving it a fantastic texture. They are sweetened with natural fruit juice…no artificial flavorings here. And then, they fold in their own custom blend of spices and seasonings that smell amazing as they cook.
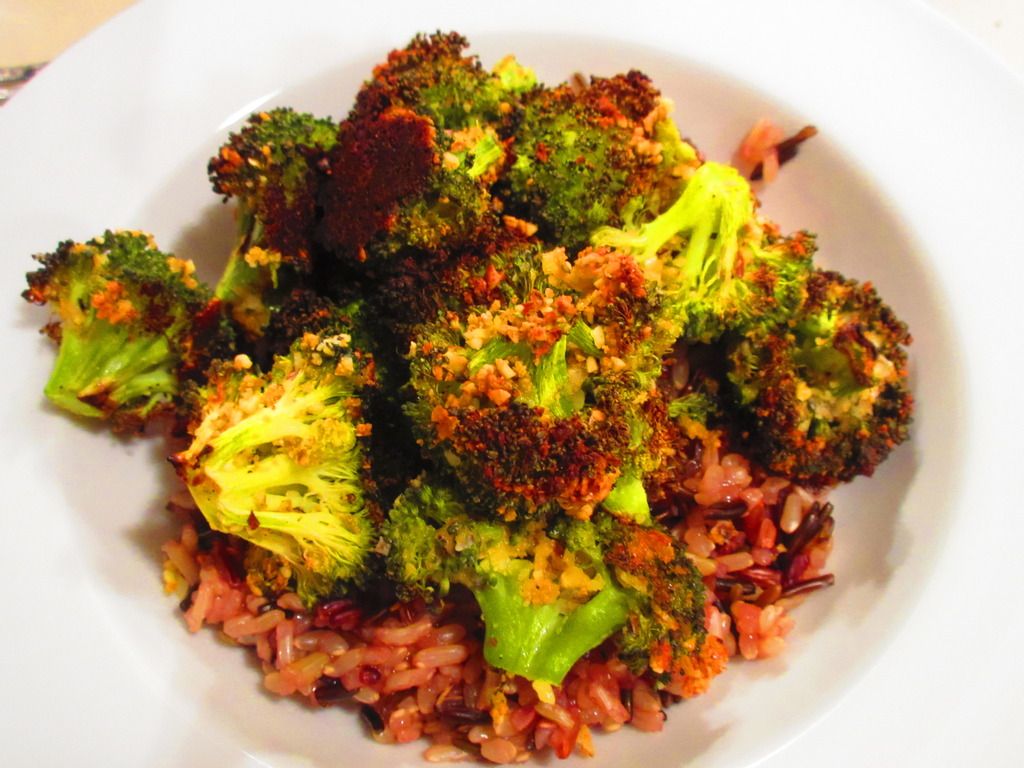
Roasted Broccoli over a Wild Rice Blend using Grandpa’s Gourmet Gluten Free Citrus Herb Chicken Encrusting
I don’t eat chicken…nor do I cook meat…but I do a lot with vegetables. Had I thought about it before, the Grandpa’s Gourmet even suggests putting it on vegetables on the front of their pouch. It says, “Also great on: pork, fish, pasta, and vegetables.” VEGETABLES! DUH! So, last night and tonight, it was all about the Grandpa’s Gourmet Gluten Free Citrus Herb Chicken Encrusting.
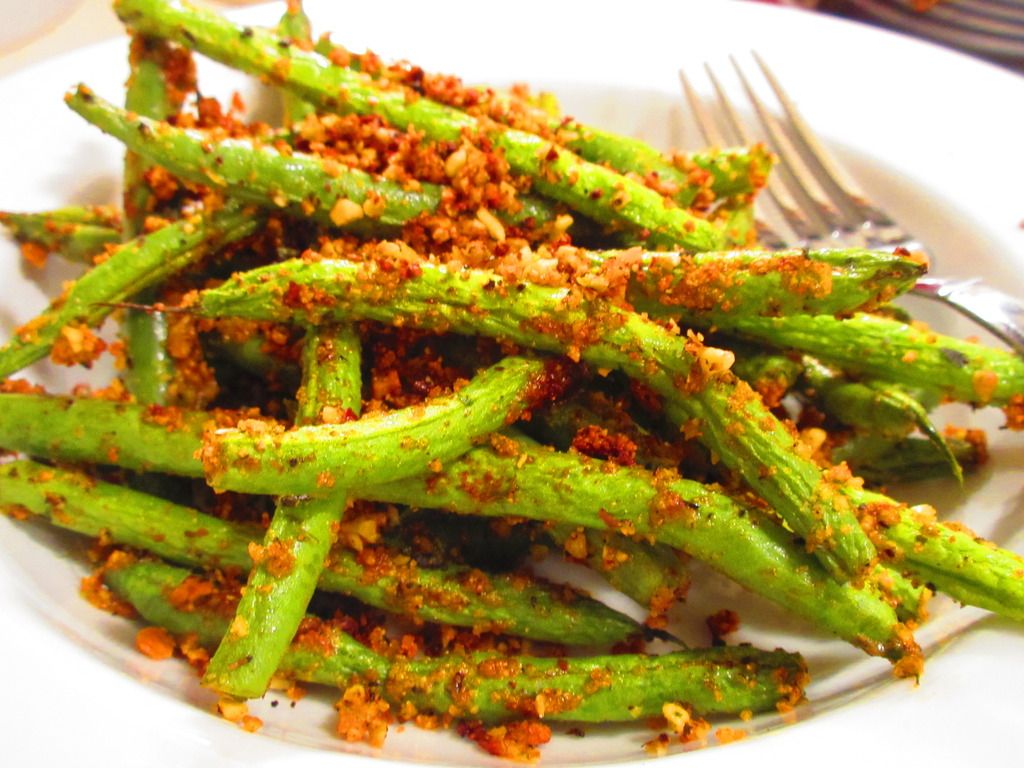
Last night, I roasted up some broccoli that I coated with some olive oil and the encrusting mix. I did the same tonight with green beans, which I toasted up in the oven to get them nice and crispy and good. Let me tell you, Grandpa’s Gourmet Gluten Free Citrus Herb Chicken Encrusting is phenomenal. While I liked it well enough on the oven roasted broccoli, it really shined tonight when I put it on the green beans and toasted those up for dinner. WOW. This breading is anything but bland. In fact, it is a fantastic seasoning that would work well even in scrambled eggs. Honestly…I am beyond impressed with this amazing product. And to think, I never would have thought about this product otherwise. It is versatile and amazing.
Let’s take a look at the ingredients that go into a pouch of Grandpas Gourmet Gluten Free Citrus Herb Chicken Encrusting. This breading is made from organic corn meal (organic corn meal, organic grape and/or pear juice concentrate, sea salt), cashews, almonds, spices, salt, and orange peel. This encrusting is gluten free, dairy free, soy free, MSG free, and non-GMO.
As far as nutrition goes, I am totally impressed with how this all adds up. A serving of Grandpa’s Gourmet Gluten Free Citrus Herb Chicken Encrusting is 1/4 cup. There are about 6 servings per container. One serving will provide 120 calories and 6 grams of fat. This serving will also dish up 0 mg cholesterol, 220 mg sodium, 14 grams carbohydrates, 2 grams sugars, 2 grams fiber, and 3 grams of protein.
Honestly, I never would have given Grandpa’s Gourmet Gluten Free Citrus Herb Chicken Encrusting a second glance, but thanks to Cuisine Cube, I now have a product I can actively seek out (and order) and indulge in and include in so many dishes. This is one versatile breading…so even if you’re like me and don’t eat meat…you can still enjoy this product. I am definitely in love. Enough that I even ate the breading that flaked off my green beans tonight. A nice salty-sweet treat at the end of a meal. Definitely a new favorite.
Crispy Green Beans made with Grandpa’s Gourmet Gluten Free Citrus Herb Chicken Encrusting
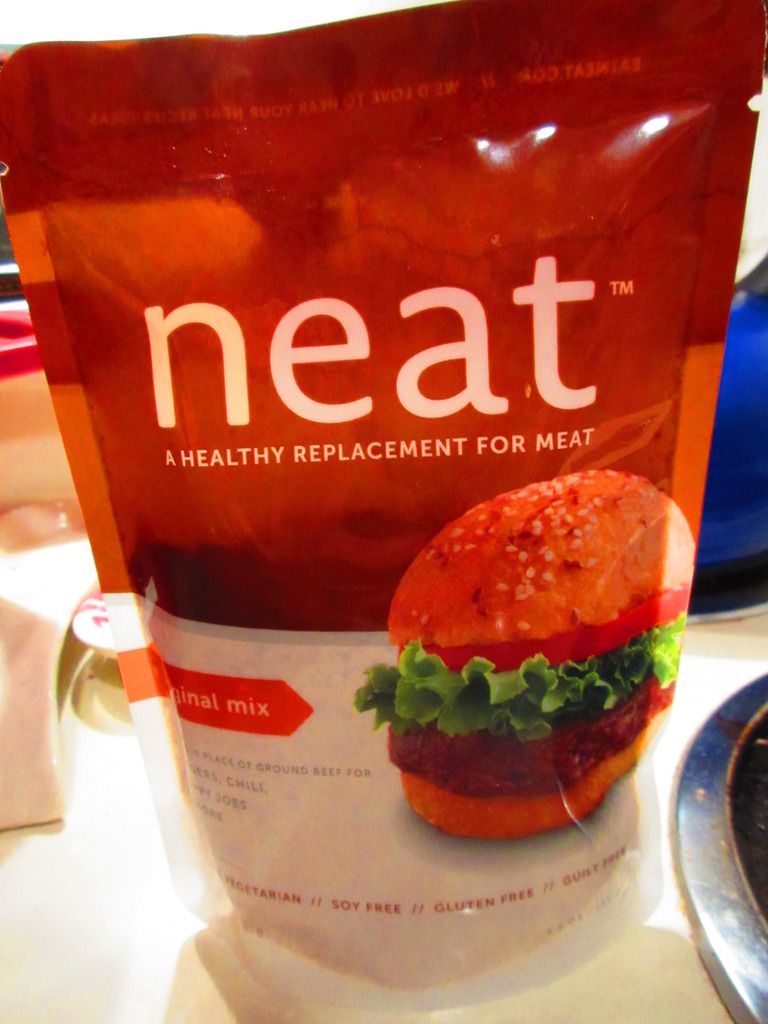
Neat – A Healthy Alternative For Meat Original Mix
Product: Neat – A Healthy Replacement For Meat Original Mix + Recipe Bonus – $4.99+
I am so excited. And the reason why is simple. I have found the meat replacement, Neat, at a few of my local stores. My Kroger, my Meijer, and even a few of my natural food stores now carry these little pouches of meat replacement goodness. Now, mind you, I’m not one who often will replace meat in a dish. I usually will use something like tofu or mushrooms instead, but there are some recipes (from my childhood, especially!) that just call for using an actual meat replacement. I have a few go-to brands that are gluten-free as well as either vegetarian or vegan. But ever since I received a pouch of the Mexican Mix from Neat in my Cuisine Cube back in October, I was hooked. I just had nowhere in this area to purchase it on my own.
Until now.
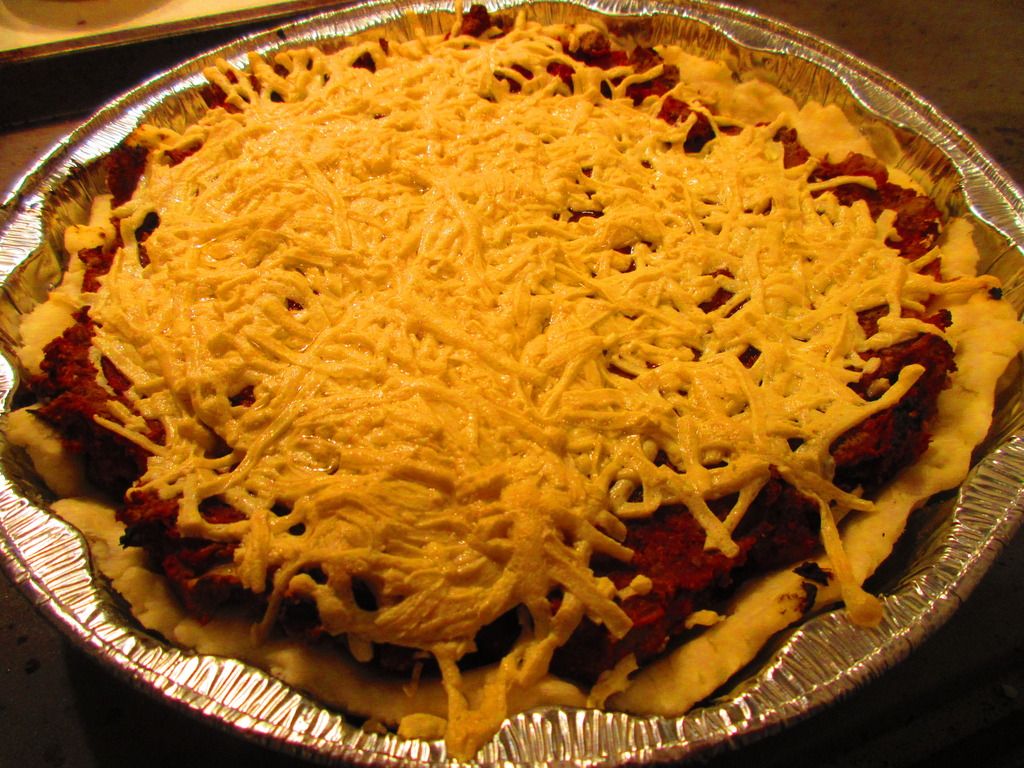
Up until yesterday, my pantry held the Italian Mix and the Original Mix. I’m using a few things up in my pantry (I have a bit of an overstock, HA!), so I decided I would go ahead and bake up some of the Moon Rabbit Foods pie crusts that I had from another Cuisine Cube. I could freeze two of them, and then give using the third one a shot in an old family favorite, which I would adjust to make gluten-free, dairy-free, and vegetarian.
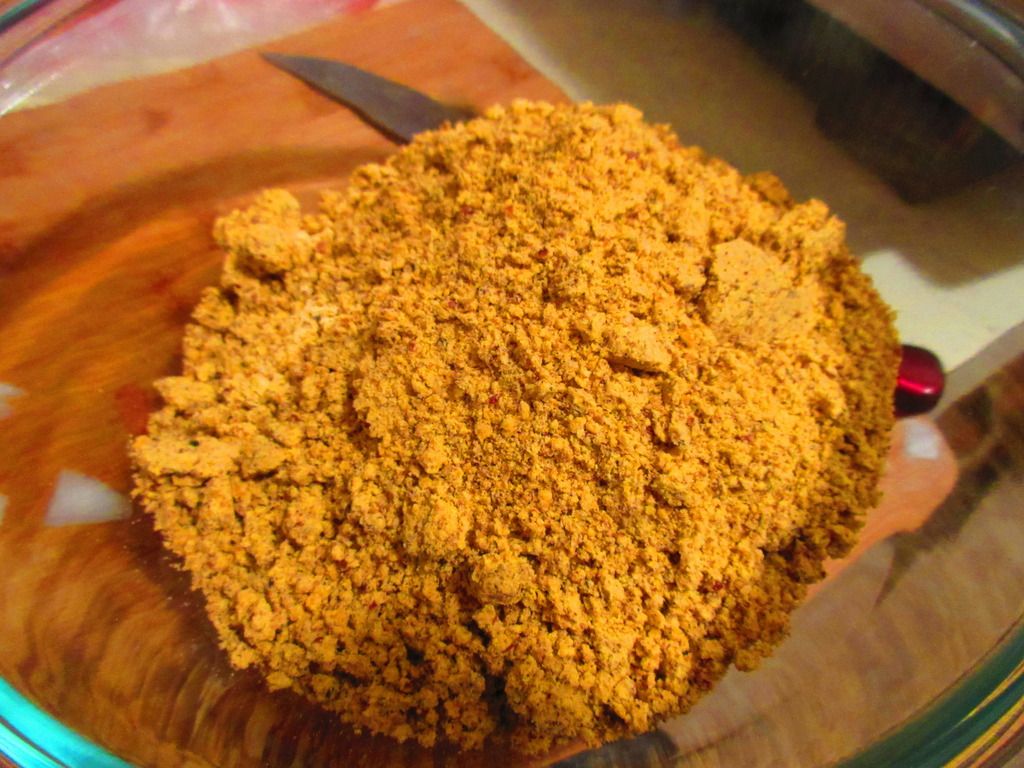
Neat – A Healthy Replacement For Meat Original Mix (before adding eggs/egg replacer and water)
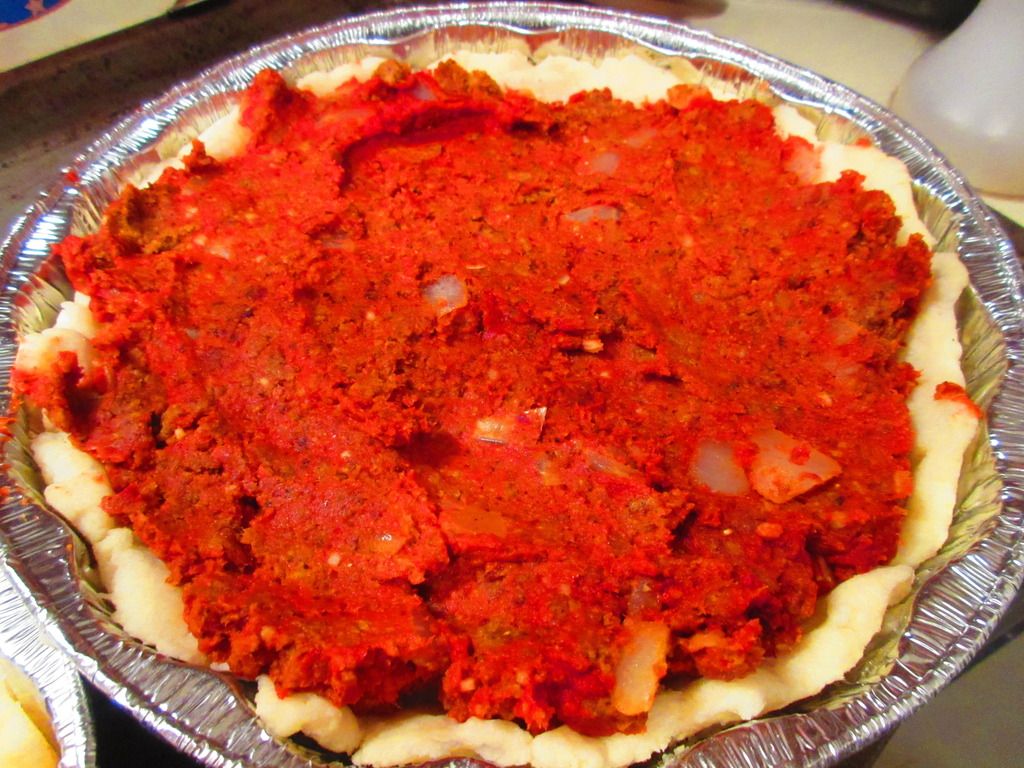
With a pie crust baked up…it was time to make the filling. As I was using my mom’s recipe, I began to brown the sweet onion while I mixed up the ingredients for the Neat Original Mix. This is really easy. Simply empty the Neat mix into a bowl, add two eggs (or egg substitute) and 2 tablespoons of water. Mix well. Once the onions had began to soften, I added the neat mixture and cooked it on medium heat for about 7-10 minutes, chopping at it as one would with regular ground beef. It looked and smelled perfect. I added the tomato paste, cooked it a few moments longer and then put it all in the pie crust. On went the topping of Daiya cheese and…into the oven it went.
Before I talk more about the original mix, let me tell you a bit about Neat. Neat is a meat replacement that is derived from nuts and other non-GMO natural ingredients. It is a product that was created by a mother of two children who decided that they were going to become vegetarians. At first she would puree beans into sauces to help her girls get the protein they wanted, but after awhile, everyone got tired of it. And that was when she got into the kitchen, experimented, and created what is now marketed at Neat. Neat comes in this shelf-stable pouch in a powdered form. All you do to prepare it is pour the pouch into a bowl, add two eggs (or a vegan egg replacer), plus two tablespoons of water. Then, you just cook it in a skillet, as you would ground beef, for about 7-9 minutes. It’s really easy…and really delicious too.
Neat – A Healthy Alternative For Meat Original Mix (prepared) cooked with onion and tomato paste
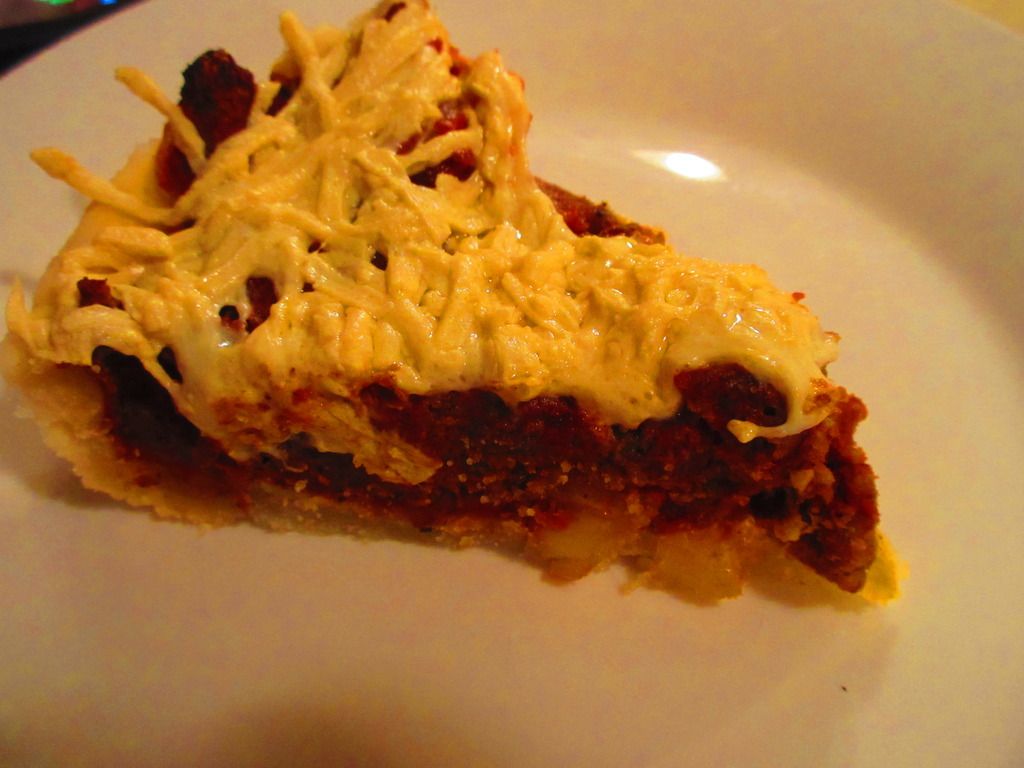
So, a vegetarian and gluten-free Cheeseburger Pie…that was what this was used for. When I sliced through the pie crust and the filling, I was just anticipating the crumbling and falling apart. But Neat surprised me. Much like my mom’s recipe (which used real meat as I wasn’t a vegetarian at that point), this all stuck together and made for a perfect slice. The Neat seemed to be the meat replacement I was looking for. And it was the perfect choice for this recipe for sure. I dished up two slices of the Gluten-Free and Vegetarian Cheeseburger Pie and handed one to my roommate and settled in with mine. My roommate took the first bite and said that it tasted dead-up like a cheeseburger. That’s good. She’s not a vegetarian, nor is she dairy-free or gluten-free like me. But this impressed her. It impressed her a lot. The most disappointing aspect of the dish was the pie crust and that was a whole unrelated product, and it still worked out well in the end.
The Neat Original Mix is fantastic. I mean, it is so close to the real thing. As I said, I don’t often do meat replacements, but sometimes when revisiting old recipes I grew up with, it is necessary. I don’t think any other replacement for beef will come close to what Neat does for these dishes. This is the second time I have used a Neat product and both times I have been beyond impressed. The taste and texture are phenomenal. Even meat eaters won’t realize they aren’t really eating meat. That’s the wonder and the glory of this product. Anyone can have it (unless they have a nut allergy) and enjoy it. It was, for the second time, love at first bite. And it was wonderful to be able to adapt an old family favorite to fit my dietary needs.
A slice of Cheeseburger Pie (gluten-free, dairy free, and vegetarian) made with Neat – A Healthy Alternative For Meat Original Mix
Let’s now take a look at what goes into the Neat Original Mix. This product is made up of pecans, garbanzo beans, gluten free whole grain oats, organic whole grain gluten free cornmeal, garlic, onion, sea salt and spices. Simple. Delicious. Clean eating! It is gluten-free, non-GMO, and kosher.
As for nutrition, the Neat Original Mix is a powerhouse. A serving is 40 grams and there are 4 servings per pouch. One serving will provide 190 calories and 15 grams of fat. You will also be getting 232 mg sodium, 11 grams carbohydrates, 2 grams of sugar, 4 grams fiber, and 4 grams of protein. It is filling, so it makes a fantastic substitute for meat. But there is that added bonus of protein from the nuts that are blended into the mix.
It really did make a great addition and the perfect substitute for actual ground beef in the following recipe…
Gluten-Free, Dairy-Free, and Vegetarian Cheeseburger Pie
Gluten-Free, Dairy-Free, Vegetarian Cheeseburger Pie
Servings: 8
Prep: 10 minutes; Cook 30 minutes
Ingredients:
1 package Neat – A Healthy Replacement For Meat Original Mix
2 organic cage-free eggs
2 tablespoons water
1/4 cup chopped onion
1 (6 oz) can tomato paste
1 gluten-free pie crust (either made from scratch or bought at the store)
2 cups Daiya Mozzarella Cheese Shreds
Directions:
Preheat oven to 375°F.
Pour the Neat – A Healthy Replacement For Meat Original Mix into a medium bowl. Add two eggs (or egg replacer if vegan) and 2 tablespoons of water. Mix well.
In a non-stick skillet over medium heat, brown the Next Mexican Mix and onion. Cook until vegetables begin to soften and the Neat can be chopped into a meat texture. Add the tomato paste and stir well. Allow it to heat through for a few minutes to marry the flavors together.
Pour the mixture into the prepared pie crust and top with 2 cups of Daiya cheese shreds. Bake in the oven for 20-25 minutes, until cheese is melted and pie crust is browned (with any luck). Slice and serve.
~*~*~
I have fallen head-over-heels for Neat. It is, without a doubt, the healthiest replacement of meat out on the market. I am thrilled that it is more available in my area. In fact, with so many places carrying it, I’m guaranteed to be able to pick it up at one place or another when I need it for a dish.
Neat…you are by far my best find and my favorite substitute in old family recipes. Nothing else can do what you do! So much love.
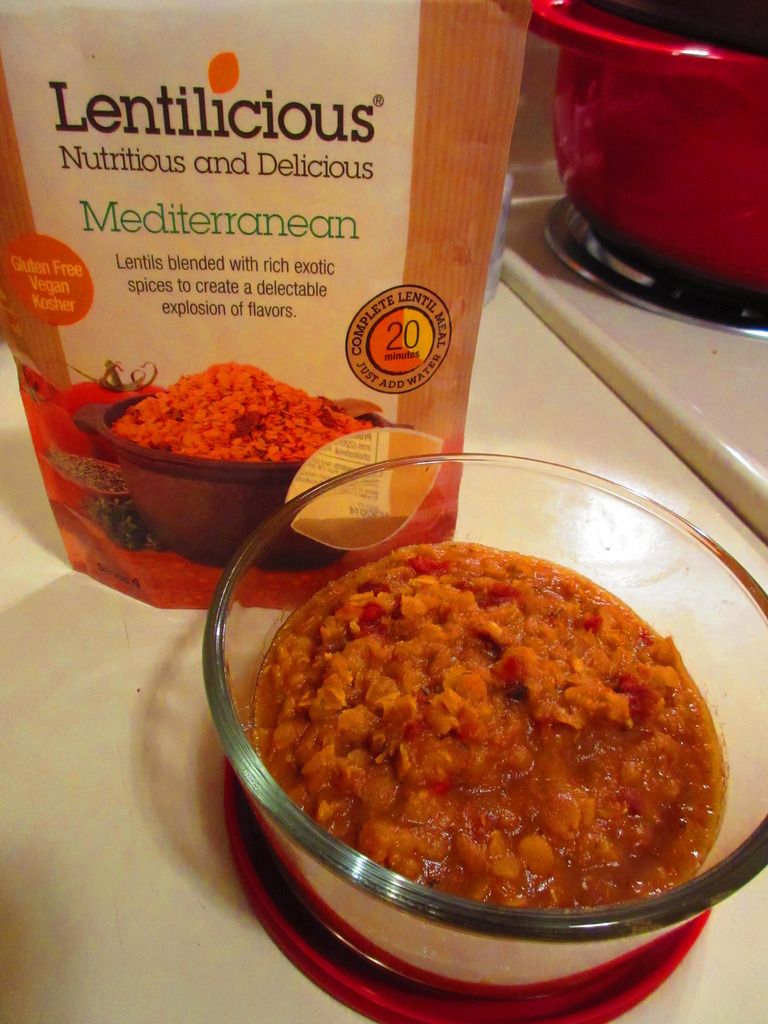
It was the heat of the summer – July 2014. Yes…think back with me. I was in my third month of Cuisine Cube and was sent a box full of goodies, most of which I have already used up. Only two remained. One is the Citrus Herb breadcrumbs, which is meant for chicken, but as a vegetarian, I’ll repurpose them (like on broccoli or tofu or something)…and the Lentilicious Mediterranean Lentils.
If you’re veterans of my blog, you know all about the amazing delivery service that is Cuisine Cube. If you are new, then let me give you a quick run-down. Cuisine Cube is a gluten-free subscription box that specializes in pantry/meal items, delivered to your door once a month. Included are 5-6 products, not samples, but full-size products, that cover breakfast, lunch, dinner, dessert, a snack…and then an added bonus once and awhile. It’s fantastic. I’ve been introduced to products and small artisan companies that specialize in gluten-free products that I otherwise never would have known about.
One of these is definitely Lentilicious. Lentilicious originated in a small town near Byron Bay, Australia. It was a startup company for two women who wanted to share their love of quick, easy and nutritious food – mainly lentils. Lentils are a nutrient dense “superfood” that cooks up quickly without having to soak them. Lentils are bursting with planty protein and dietary fiber, and red lentils, such as those found in Lentilicious meals, are low on the glycemic index and also low in fat. Lentilicious offers a package that is nutrient rich, quick to make, portable, and a surefire way to keep you full and provide sustained energy. Oh…it’s also good for you.
So…now almost a year had gone by and these were still in my pantry. Definitely no good. I’m working my way through my pantry and freezer and finally getting to the stuff that I’ve put aside for way too long. I am so sorry that I waited so long to try the Lentilicious Mediterranean Lentils. Why? Well…you’re about to find out.
First of all, Lentilicious meals are super easy to make. It takes 20 minutes of your day. That’s it. You can cook them in the microwave or on the stove. I opted for the stovetop…which was just more convenient for me. Either way…20 minutes. So, to prepare by stovetop, I simply poured the entire packet of lentils and spices into the pot and covered with 3 cups of cold water. I simply brought that to a boil, lowered the heat, and allowed it to simmer, uncovered, for 20 minutes, just stirring every now and again. That’s it. EASY! I cooked this up while I was cooking dinner. It required no extra supervision. Because, this was going to be lunch for my roommate and I for half of this week. Monday and Tuesday…this was what we were having. And, as it cooked up, I could already tell I was going to love it.
In fact, I reheated these at work both days, and each day I was complimented on how delicious my lunch smelled. But, food is all about the scent and the flavor. So…it was time to give it a taste. Let me say this…AMAZING!! This tastes like a lentil chili. The texture and the flavors are phenomenal. I thought it was spiced up to perfection, with a mild hit of Mediterranean spices and this creamy, yet “meaty” dish. I was in love at first bite and would savor each spoonful. Total win! It was also filling and just tasty. Beyond impressed. Already making some plans to seek it out or at least order it online.
With all that being said, let’s take a look at what goes into the Lentilicious Mediterranean Lentil Meal. This meal is made up of red split lentils, sundried tomatoes, onion flakes, sea salt, and contains less than 2% spices. That’s it. Clean eating, indeed!! This product is gluten-free, vegan, kosher, low GI, non-GMO, 97% fat free, high in protein and high in fiber. LOVE IT!
As for nutrition, a pouch of the Lentilicious Mediterranean Lentil Meal contains 4 servings. Each serving will provide you with 180 calories, 1 gram of fat, 240 mg sodium, 30 grams of carbohydrates, 8 grams of fiber, 2 grams of sugar, and 13 grams of protein. AMAZING! Lentils and I are BFFs forever.
Once again, Cuisine Cube delivered an amazing product! Totally loving, and now on the hunt for, Lentilicious. If you are looking for an amazing plant-based source of protein…lentils are a fantastic choice. Even better…you simply have to add water to and cook up! Lentilicious for the big win!
One of the healthiest and best diets out there these days is the Mediterranean diet. There is little question as to why. Largely plant-based and focused on seafood and lean proteins, the Mediterranean diet offers a whole lot of health benefits without giving up delicious tasting foods.
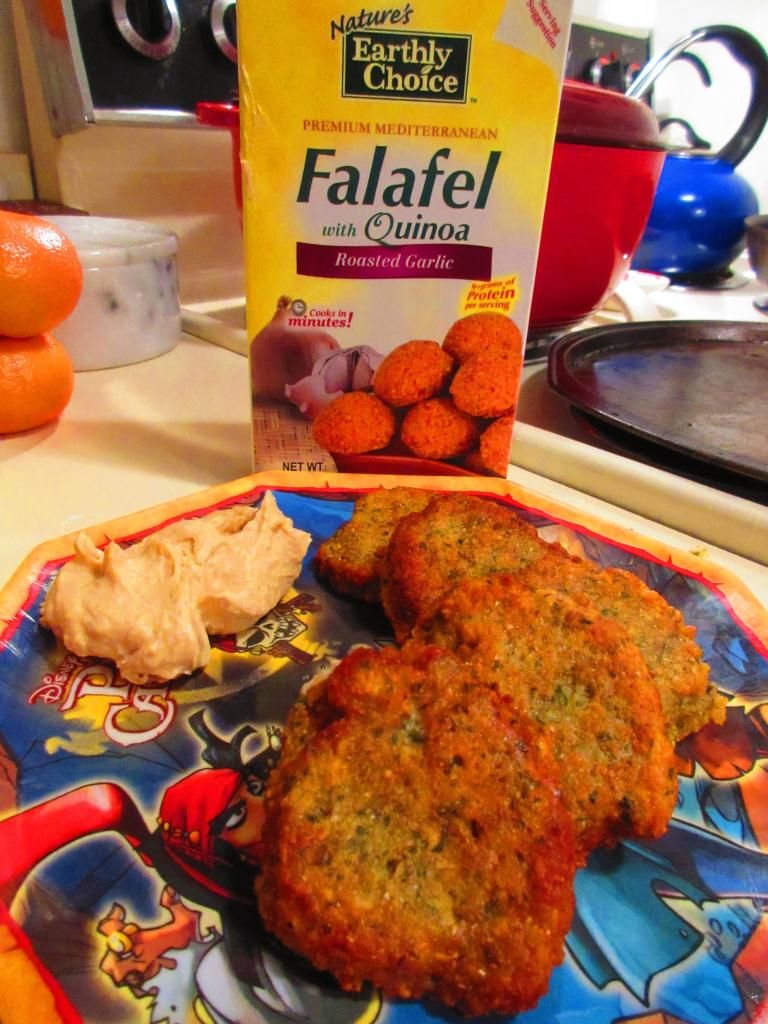
But I am no Greek and the Mediterranean diet seems almost Greek to me when it comes to figuring out foods to prepare and the best way to do it. That being said…thankfully there are shortcuts out there. One such shortcut is to pick up a box of Nature’s Earthly Choice falafel varieties. I have previously tried some quinoa products from Nature’s Eartlhy Choice, so trying out falafel (which I love and ate a whole hell of a lot of before going gluten-free) seemed like the next step. I purchased a box of Nature’s Earthly Choice Roasted Garlic Falafel from The Raisin Rack in Columbus, Ohio…quite a bit ago. This once again fell prey to my use of my fresh produce rather than processed and packaged goods…which is not a bad thing. But this past week and this week ahead, I have no CSA bin for my fresh produce, and trying to keep the budget in check, I am using up foods that I have in my fridge, freezer, and pantry. Out with the old…and hopefully not replacing the highly processed foods with more in the future.
That being said, Nature’s Earthly Choice is not a bad option when it comes to foods that come packaged. In fact, Nature’s Earthly Choice was created in 2005 and founded on the principles of creating healthy products. Originally, this company launched products that were made of quinoa (for the gluten-free), farro and wheat berries, with the expectation of living up to their mission to provide healthy and wholesome products to the public and consumers. Since then, they have added wild rice, chia, hemp, basmati rice, a continent grain blend, and other grains to their list of products, continuing to maintain the healthy aspect of their foods and expand their line to allow for new and delicious items. Their products are easy to prepare and hassle free as far as cooking. No matter the dietary needs (they offer products that are gluten-free, rich in omega 3’s, high in protein, offering alternative grains), Nature’s Earthly Choice is passionate about the products they create and are committed to delivering the best tasting and highest quality products to support everyone’s unique healthy lifestyle.
So with my past love of falafel, I decided finding a mix for a gluten-free falafel, a flavered one at that, would be something worth checking out. It takes time for me to get around to these things at times…but I do get there. And tonight, after yesterday’s long ride home from Birmingham, Alabama, and my upcoming trip on Thursday to New York City…I needed something easy and something delicious to cook up for dinner. This week was going to be a short, but busy one. My meals needed to fit into my time…I didn’t have time to linger in the kitchen over a hot stove, babysitting something that needed constant stirring and such.
Nature’s Earthly Choice Roasted Garlic Falafel was so easy for me to make after a long day of physical therapy appointments and work. Seriously. I came home, poured the mix into a bowl, mixed it with 3/4 cup water and let it sit for 10 minutes. After it has sit (make sure not to let it sit too long), I formed it into 10 patties and set it in a skillet with 1/3 cup vegetable oil. Giving each patty a chance to cook for about 4 minutes on each side, letting it brown up evenly and beautifully and get crispy on the outside. I served mine with lemon hummus…because I had it in my fridge, believe it or not.
As for how it tasted…well…I’m ambivalent. On its own, I wasn’t impressed. It was bland and a little…dry(?), I suppose. There was a small hint of garlic flavor, but nothing that really stood out. Now, when I paired the Nature’s Earthly Choice Roasted Garlic Falafel with the lemon hummus…magic. It worked. The hummus brought it out. True falafel…nope. Nowhere near it. A passing acquaintance…definitely. Would I purchase it again…eh…probably not. It wasn’t bad…it just didn’t blow me away. It didn’t make me reminisce about the days of falafel from the nearby Mediterranean restaurant. It just made me long for those days all over again. It just wasn’t everything I hoped it would be.
Let’s talk ingredients, shall we? The Nature’s Earthly Choice Roasted Garlic Falafel is made from fava beans, chickpeas, quinoa, potato starch, garlic powder, spices, onion powder, and salt. This mix is gluten-free, cholesterol free, and dairy-free. There is also an option for baking the falafel, but I always find a pan fry seems to work best on such products.
A serving of Nature’s Earthly Choice Roasted Garlic Falafel is 1/4 cup dry mix, or about 2.5 small falafel patties. As I was making a dinner out of this, my roommate and I split the entire box, making 5 falafel patties for each of us. One serving, however, would give you 150 calories and 1 gram of fat. A serving will also provide you with 150 mg sodium and only 1 gram of sugar. Loving that. One serving will give you 8 grams of fiber and 9 grams of protein, making this a very filling and long-lasting meal choice. You won’t be hungry immediately following your meal. Trust me.
While this ended up being quite a filling meal, the lack of taste and proper texture just sort of left me half empty. When paired with a dipping sauce or spread…this was amazing. But on it’s own, there was nothing that stood out or made me wish I had more boxes of this in my pantry. Decent…but not a favorite.
I am a stranger in a not so strange land. Seriously. Because for the past three three years that I’ve had to be gluten-free…I’ve followed, discussed, and even met the infamous Jules Shepard, AKA: Jules Gluten Free, AKA: gfJules. And, despite all of that…it has taken me up until now to actually try one of her products! Hard to believe, right? Truth of the matter is…no store in my area currently carries any of the Jules line. I hope that changes.
So…it was due to my November 2014 Cuisine Cube (aka: the Thanksgiving Cube) that my Jules drought finally came to an end. Thank you, Cuisine Cube. Because, honestly, I was beginning to wonder if I was ever going to be able to give this an easy try, without it involving some online ordering and shipping and…yeah. So, yes, Jules brand is not new to me…but it is. Confused yet? Don’t be.
Jules Shepard is one of the biggest advocates and leaders that I know in the gluten-free community. She was diagnosed with Celiac back in 1999 and embarked upon her new diet. As a former attorney who was unwilling to accept the dry, gritty, vacuous foods that the gluten-free community was limited to. Two years later, Shepard perfected an all-purpose flour blend that allowed her to continue her passion for baking. Soon, people were begging for her to sell it commercially…which she did. She introduced this flour blend back in 2008, with her former company, Jules Gluten Free, and now exclusively through her new company – gfJules. Not only is she an entrepreneur, but Shepard has written three highly regarded books and attends various speaking engagements at gluten-free consumer, business, and trade gatherings. She is the mother of two children, hosts a weekly radio show, pens one of the gluten-free community’s most active blog, organizes an annual Gluten Free Cookie Swap, and personally monitors all forms of her social media network. She’s doing it all…but not letting her high standards slip in the slightest.
So…here I was, three years after having discovered Jules via Facebook and Twitter, having met her in person last year at a Gluten Free Expo in Indianapolis, Indiana, and having spent forever longing to try her flour and mixes…it finally happened. Thanksgiving. A time for giving thanks and eating comforting and hearty foods. Like…cornbread. And that is what Cuisine Cube sent me!
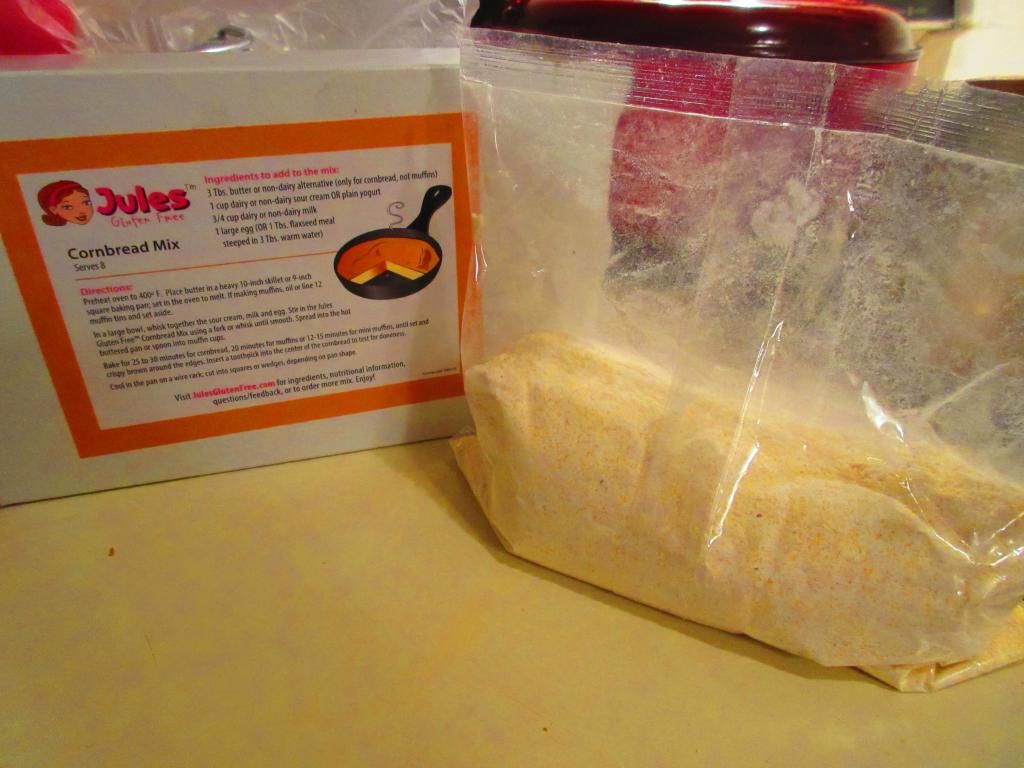
gfJules Cornbread Mix (mixed)
The gfJules Gluten Free Cornbread Mix is a gluten free cornbread mix that “will put a smile on anyone’s face.” Or, so I was told by the Web site. As cornbread is one of Jules’ favorite sides, she took extra care when she crated this mix, making it so authentic, some restaurants even serve it and don’t promote it as being gluten-free. It’s really easy to prepare and make too. Simply whisk together sour cream, milk and an egg. Stir in the mix using a fork or whisk until smooth. Spread into a hot buttered pan (or into muffin cups) and bake for 25-30 minutes. The cornbread is done when the edges are crispy and brown and a toothpick inserted in the center comes out clean. That is…if you bake it according to the instructions on the box.
By now, you should know…that’s not what I do.
Before I get to the recipe I used this amazing product in, let’s discuss it, shall we?
I loved how a light and airy this batter was once I had it all mixed together. It just whisked up beautifully and perfectly. I had a good feeling that this wasn’t going to bake up heavy and dense like most gluten-free cornbread…and I was right. The cornbread turned a perfect golden in the oven, the edges browning perfectly. And it had this amazing crust that gave it some great texture. And the inside was light and soft and moist and…so good. It ranks up in my top gluten-free cornbreads I have made and tried. I am blown away by just how delicious and perfect this bread was. Now I want to try more of her mixes…and will have to skip over to her Web site and make it happen. This was one of the best parts of this entire dish.
gfJules Cornbread Mix (prepared, not baked)
The gfJules Cornbread Mix is made from the following ingredients: yellow cornmeal, modified tapioca starch, cane sugar, potato starch, cornstarch white rice flour, corn flour, baking powder, flaxseed meal, xanthan gum, baking soda, salt, tocopherols (vitamin E). It is made in a certified facility free of gluten, wheat, dairy – all of the Top 8 food allergens. All her ingredients in the cornbread mix are also non-GMO. Love it.
The gfJules Cornbread Mix makes 8 servings per box. In each serving, you will be provided with 160 calories and 1 gram of fat. This serving will give you 490 mg sodium and 5 grams of sugar, which is really good for cornbread, if you ask me! And, finally, you will be taking in 2 grams of fiber and 2 grams of protein.
And now…how about the recipe that featured the always amazing gfJules Cornbread Mix? I won’t keep you waiting any longer, I promise…
Recipe: Gluten Free and Vegan Cheddar Chili Cornbread Pasta Bake
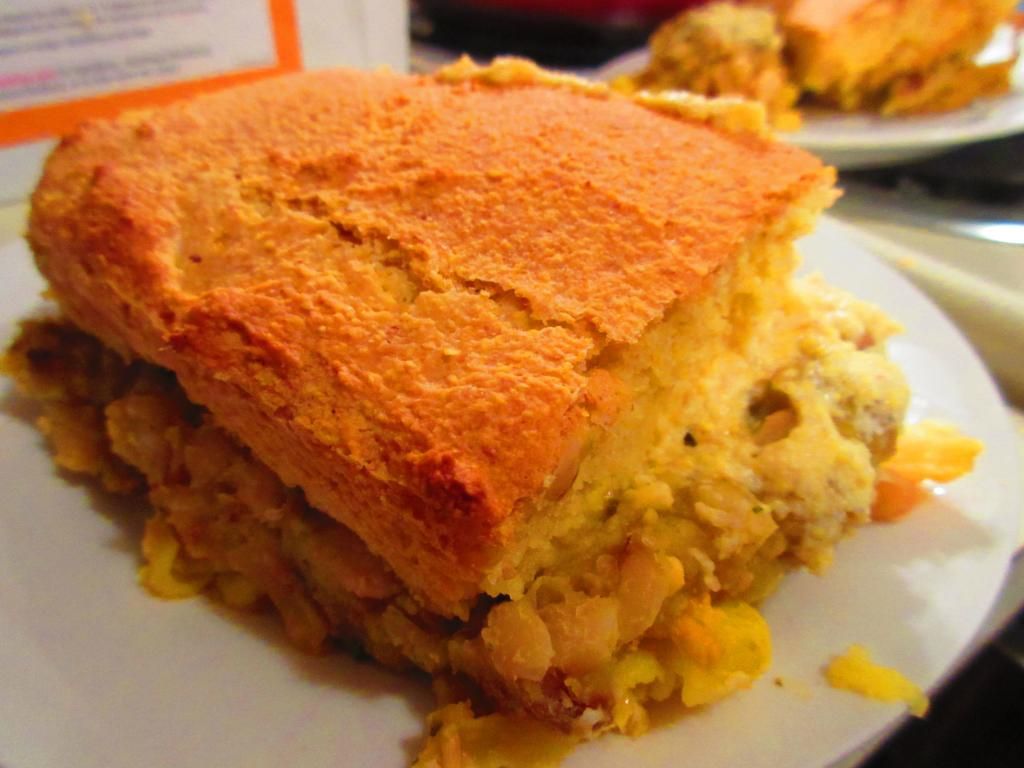
gf Jules Cornbread (prepared) on top of the Gluten Free and Dairy Free Cheddar Chili Cornbread Pasta Bake
Servings: 6
Time: Prep 4 hours; Cook 30 minutes
Ingredients:
1-1/2 cups uncooked gluten-free elbow noodles (I used Meijer Gluten Free Corn Pasta Elbow Noodles)
3/4 cup Daiya Cheddar Style Shreds (if you do dairy…freshly shredded cheddar works!)
2 1/2 – 3 cups of leftover chili (I used Mary Ann’s Beans Gluten Free White Chili)
1 batch of your favorite cornbread (I used gfJules Cornbread)
Directions:
Preheat oven to 425° F.
Bring the water to a boil and prepare the pasta according to the directions on the package, taking about 1-2 minutes off of the cooking time, as the noodles are going into the oven.
While the noodles are cooking, mix up a batch of your favorite cornbread (just the batter…do not cook it!) and get the cheese prepared.
Drain the pasta when it’s ready.
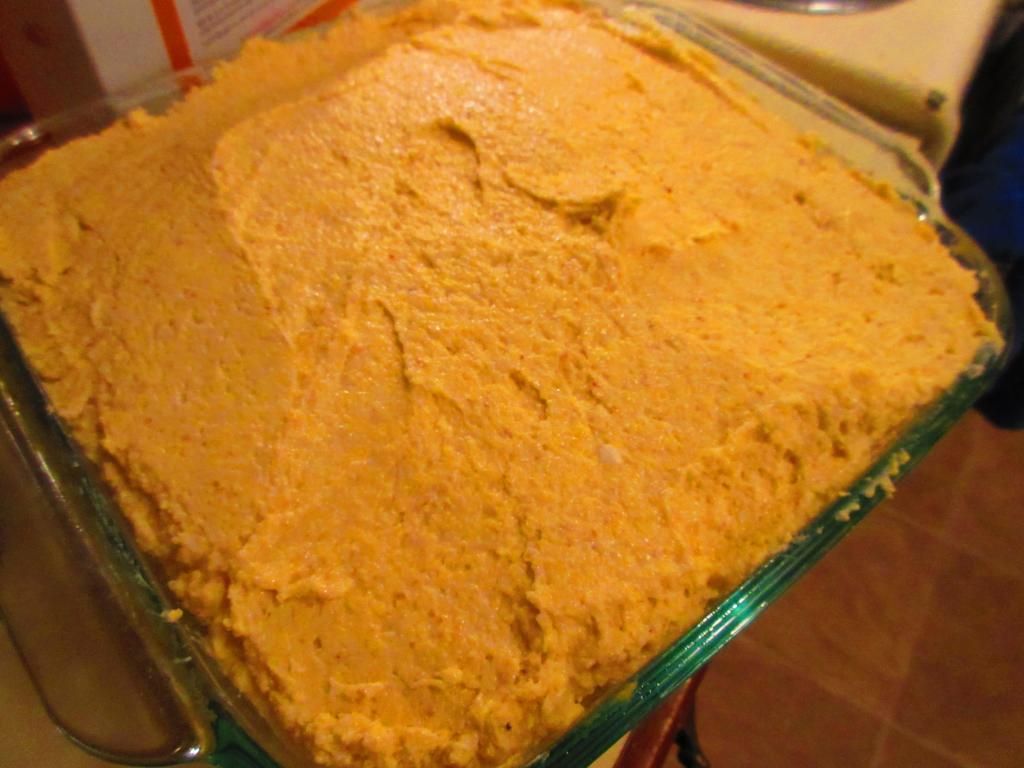
In an 8 x 8 inch baking dish, spray non-stick cooking spray. Add the pasta to the botom of the dish. Then top it with a layer of cheese. Then add the chili. Top with the cornbread batter, spreading it evenly over the top with a spoon. It’s okay if it doesn’t reach the edges.
Bake for 30-35 minutes, or until the cornbread is golden on top and cooked all the way through. You can use a spoon to lift up the cornbread layer to make sure that it is completely cooked. Cooking times may vary with the cornbread mixture you use, but keep an eye on it and check it. The cooking time might increase due to the “wet” layers that are underneath the layer.
Serve immediately.
~*~*~
I don’t think a better upper crust could have existed. No doubt about it. gfJules lives up to the high pedestal that I have regarded it on since I first discovered Jules Gluten Free three years ago. So happy that, because of Cuisine Cube, I finally got to try one of her amazing products. It was everything I thought it would be. Maybe even more. Count me one happy cornbread loving girl!
And, if you have yet to give gfJules a try, or Cuisine Cube for that matter…head over to the Cuisine Cube page and sign up for at least a month. If you aren’t impressed (but, trust me, you will be), you can opt out after that. With plans starting as low as $29.99/month for each cube, you get the convenience and amazing pleasure of having box of gluten-free goodies arrive each month, featuring lesser-known and smaller gluten-free artisan products. I have been amazed, wowed, and completely blown away at times by the items I have had the opportunity to find out about and try thanks to Cuisine Cube. We aren’t talking sample sizes either…you get a full size product, as you would purchase it in the store. So…what are you waiting for? Go sign up!
And, gfJules…I loved meeting you this past year…and I have really enjoyed finally getting to try one of your outstanding and top-of-the-line gluten-free products. I hope more people hop over to your site and order. Now that I have tried it…there’s no stopping me now!
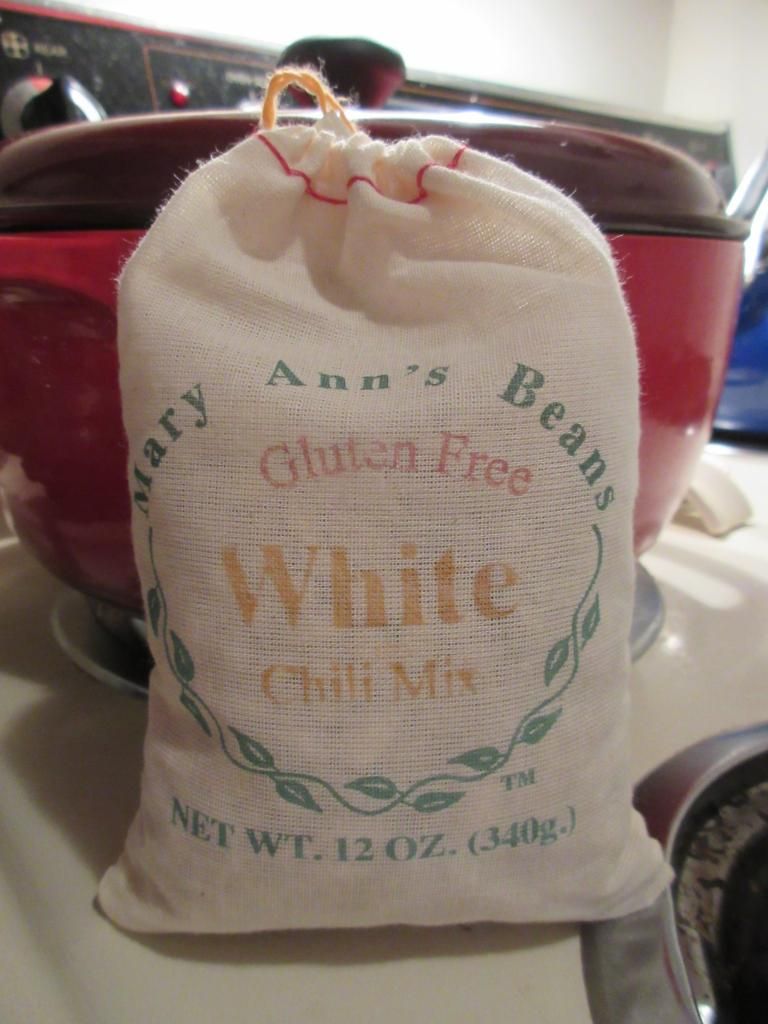
Product: Mary Ann’s Beans Gluten Free White Chili Mix – $8.00
It’s the New Year. Time to make resolutions and then, over the course of a month…break them. Right? Yes. Right. It’s the way it works every year. You vow to stop eating chocolate…to go to the gym…to eat more vegetables and less potato chips. You promise to get into a habit…make it a routine. But then…by MLK Day…you’re already off the wagon.
And you know what? That’s okay. We’re in the midst of winter here. Cold temperatures and lack of sunlight have a funny way of killing off any bit of motivation out there. We’re human. It happens. But, it’s also okay to enjoy the little things in life and to be less strict with yourself. Resolutions can be broken…but they can be picked right back up on where we left off. That’s the best part.
Being that it is January…and the New Year has come and gone…and the weather outside is frightful(ly cold)…I’m a lover of all things comforting when it comes to food. Tis the season for those hearty meals that make you just want to curl up with a good book in front of the fireplace and dig in while losing yourself. Ah…it’s a wonderful thing. And, when it comes to winter comfort foods…nothing is better than soups, stews, chili, and pasta, right? Of course!! Those are classic comfort foods if you ask me.
Well, in the January Happy New Year 2015 Cuisine Cube, we were served up a few products that were good for you…but also a guilty pleasure and comfort. That’s the wonderful thing about Cuisine Cube…you just never know what to expect from one box to the next. One cube guarantees a product that is good for a breakfast, lunch, snack, dinner and dessert. And sometimes, like in the case of January, you get a bonus item. In this case…another snack. YAY!
I know, if you’re reading this blog regularly, you are familiar with the service that Cuisine Cube offers…but just in case you are a newbie…first of all…welcome. Secondly…hop on over to Cuisine Cube’s Web site and take a look at this fantastic service. This small group of foodies put together a completely gluten-free box of goodness each month with 5-6 products from small, lesser-known artisan producers…some local…some not-quite-so-local. I’ve discovered so many amazing products after I signed up for this service back in May. And…you get a cube delivered right to your door each month…starting at $29.99. So, yeah…I encourage you to check them out. Have a little surprise each month and enjoy a few products you might never have tried or known about before. It doesn’t get much better than that.
With that said, the January Cube was packed with a lot of healthy foods. Seriously. The dessert was dark chocolate covered rice cakes. Yes, there will be blog on those soon…stay tuned. Even the most comforting of foods inside…is healthy-ish! And I’m okay with this. But…I’m also dealing with a bit of the winter blues…so when I saw the unassuming cloth pouch of Mary Ann’s Beans Gluten Free White Chili Mix…my brain immediately turned to comfort food. And with that, I set out to do more than just make the chili and eat it. You know, reinventing a product is something I love to do.
First, let me talk a little bit about Mary Ann’s Beans. Chili can be comfort food, but Mary Ann’s Beans is making it a part of a healthy lifestyle. All of the soup and dip mixes are nutritious and low in sodium. They have options for vegetarians, gluten-free, and offer all seasoning mixes that are made with no salt, no sugar, and no MSG. In other words…it’s good for you. And these soups tastes great too.
Mary Ann’s Beans Gluten Free White Chili Mix (dried beans and seasoning packet)
Make Mary Ann’s Beans part of your heart healthy lifestyle with our delicious and nutritious low sodium soup mixes. With flavors to please every palate, and options including vegetarian and gluten-free, your whole family will love our soups. Our all natural soup, dip and seasonings mixes are hand made with no salt, no sugar, and NO MSG. Mary Ann’s Beans most famous mix is the Gluten Free White Chili Mix that was in the January Cuisine Cube. And, honestly, I can see why!! These mixes do take some time to make, but, trust me…it’s well worth it.
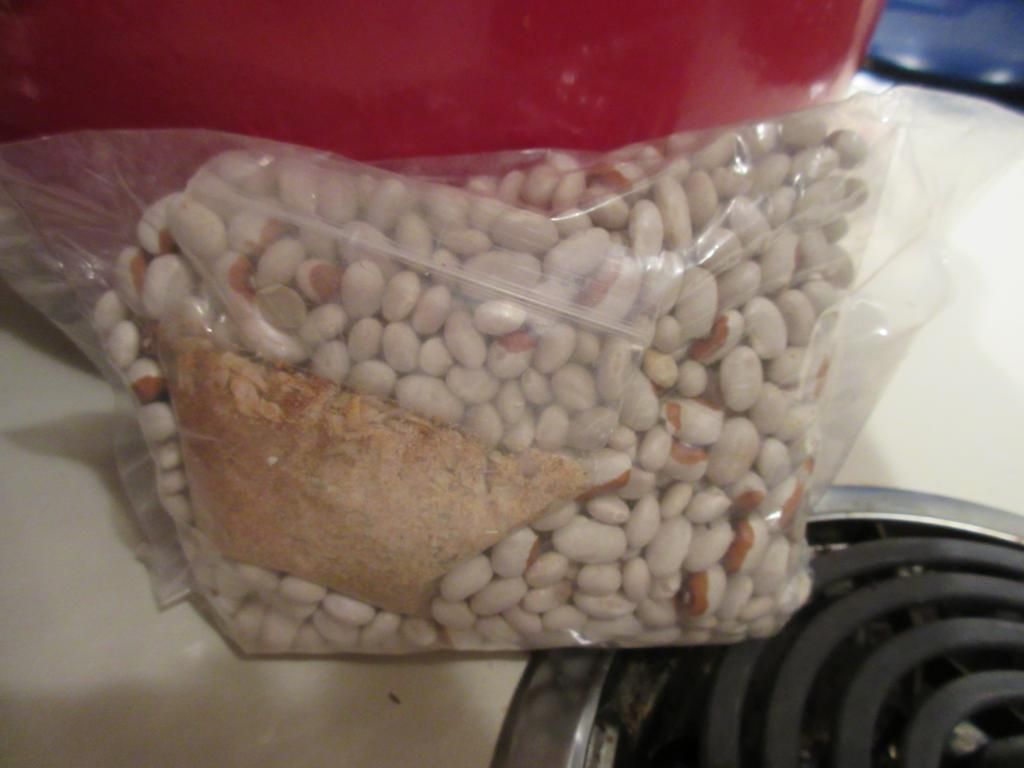
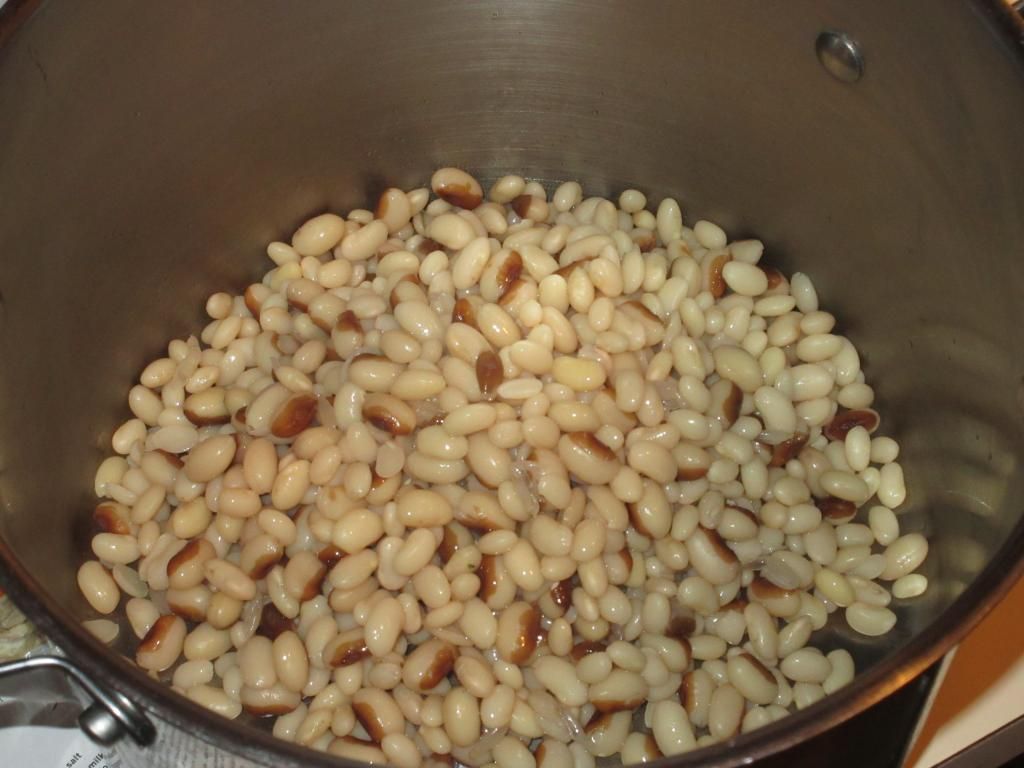
Mary’s Ann’s Beans Gluten Free White Chili Mix (beans soaked)
Last night, I soaked the packet of dried white beans in water. I drained them and rinsed them. And then…set out to cook them. The instructions included on this chili mix package give two ways to cook it…in a slow cooker for 6-8 hours or…on the stove top for 3-4 hours. I went with the stove top method. And making this chili is super easy. The actual instructions do call for chicken, as it is a white chili. But, as a vegetarian, I just left it out and kept it strictly the beans and the can of chopped green chilies. I used Vegetarian No-Chicken Broth as well, instead of chicken broth. Cooking it is time consuming, but it yields amazing results. With the stove top method, you simply combine the white chili beans, 6 cups of broth (vegetable, non-chicken, chicken…), a 4 ounce can of chopped green chilies, 1-1/2 – 2 cups of boneless cooked chicken (if you are using…if you are a vegetarian like me…it’s fine to leave it out!), and the contents of the spice packet that is included, into a large pot and bring it to a boil. Reduce the heat, cover, and allow it to simmer for 3-4 hours, or until tender. I let mine go for about 3-1/2 hours and it was perfect. Add a bit of salt at the end voila…your chili is ready to eat.
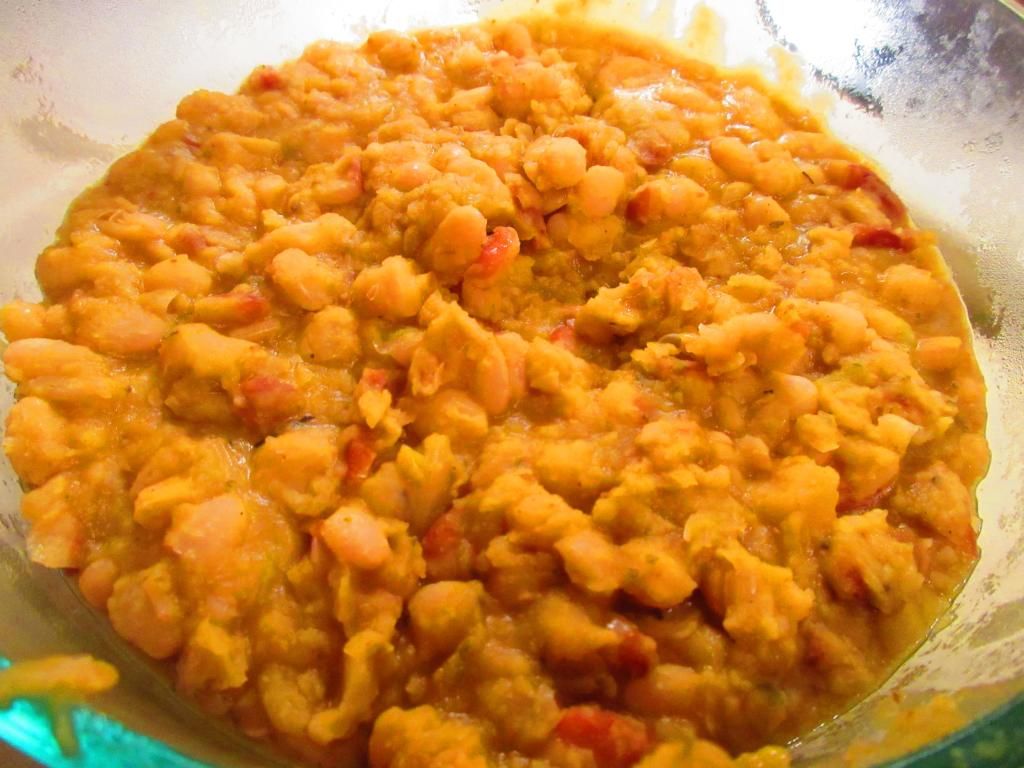
What emerges is this hearty and thick chili that has this light, and slightly spicy taste to it. White chili is amazing, even without the chicken, and it makes for a beautiful and eye-catching addition to any potluck or chili cook-off. But I was not just going to cook up this fantastic product and just eat it straight. You know better than that. I did, however, take a few spoonfuls to see how it was. And, let me tell you, Mary Ann’s Beans is doing comforting winter food right. The flavor is familiar…the texture is hearty and rich…and the spice is a mild heat. If you like hotter (I do), you can put in jalapenos instead of chilies, but my roommate isn’t a lover of spice, so I kept it mild. At the end of cooking, I added some salt and a hit of berbere seasoning…and it made pure chili perfection. If you love chili…you will love this.
Mary Ann’s Beans Gluten Free White Chili Mix (prepared)
Let’s talk ingredients, shall we? Mary Ann’s Beans White Chili Mix is made from great northern beans, navy and yellow eyed beans, dried onions, garlic and spices. As stated before, these are gluten-free, contain no salt, no sugar, and no MSG. This mix is also cholesterol free.
One pouch of Mary Ann’s Beans Gluten Free White Chili Mix contains about 6 servings. One serving will give you 190 calories and 1 gram of fat. A full serving will also dish up only 10 mg sodium and 1 gram of sugar. As for being filling…it’s chili…it will be filling. You get 13 grams of fiber and 12 grams of protein in each serving. I do love hearty, nutritious, comfort food. And this is all of that rolled into one.
But wait…there’s more!! I created an amazing (vegan and gluten-free) ultimate comfort food dish using the prepared Mary Ann’s Gluten Free White Chili Mix. Trust me, your winter blues will disappear while you dive into this dish.
Recipe: Gluten Free and Vegan Cheddar Chili Cornbread Pasta Bake
Gluten Free and Vegan Cheddar Chili Cornbread Pasta Bake
Servings: 6
Time: Prep 4 hours; Cook 30 minutes
Ingredients:
1-1/2 cups uncooked gluten-free elbow noodles (I used Meijer Gluten Free Corn Pasta Elbow Noodles)
3/4 cup Daiya Cheddar Style Shreds (if you do dairy…freshly shredded cheddar works!)
2 1/2 – 3 cups of leftover chili (I used Mary Ann’s Beans Gluten Free White Chili)
1 batch of your favorite cornbread (I used gfJules Cornbread Mix)
Directions:
Preheat oven to 425° F.
Bring the water to a boil and prepare the pasta according to the directions on the package, taking about 1-2 minutes off of the cooking time, as the noodles are going into the oven.
While the noodles are cooking, mix up a batch of your favorite cornbread (just the batter…do not cook it!) and get the cheese prepared.
Drain the pasta when it’s ready.
In an 8 x 8 inch baking dish, spray non-stick cooking spray. Add the pasta to the bottom of the dish. Then top it with a layer of cheese. Then add the chili. Top with the cornbread batter, spreading it evenly over the top with a spoon. It’s okay if it doesn’t reach the edges.
Bake for 30-35 minutes, or until the cornbread is golden on top and cooked all the way through. You can use a spoon to lift up the cornbread layer to make sure that it is completely cooked. Cooking times may vary with the cornbread mixture you use, but keep an eye on it and check it. The cooking time might increase due to the “wet” layers that are underneath the layer.
Serve immediately.
~*~*~
Oh. My. Gluten. Free. Comfort. Food. Gods. No…really. If you love a hearty winter meal, this is the way to go. I loved the rich flavors that the Mary Ann’s Beans White Chili brought to the dish. It was the centerpiece…the middle layer…the glue. And it was an absolutely amazing addition to this entire dish. When winter has you hiding under the blankets longing for something warm and wonderful to eat…this will definitely fulfill that desire. Either that…or a big, steaming bowl of just the chili on its own. However you serve it up…flavorful, creamy, and just…so good!
It was thanks to the amazing products that Mary Ann’s Beans put out and Cuisine Cube sent me that I was able to piece together this hearty, and amazing dinner. For the record, the gfJules Cornbread Mix (review to follow) is also a product I received from Cuisine Cube in November. So, as you can see…it is definitely a service worth trying out. Seriously, your inner foodie will thank you for it.
I’m having one of those weeks. One of those weeks where it just seems like I don’t have enough time. For anything. Let alone cooking. And despite some fresh produce still in my crisper, it was the eve of an early gym morning, late afternoon emotional burnout, and a long day at the office. The last thing I wanted to do, especially with Valentine’s Day goodies to make still, was try to make dinner from scratch. I did that last night…having to eat my delicious Maple Roasted Brussels Sprouts with Walnuts…standing up, while stirring a pot of melting chocolate that would become a decadent and rich chocolate mousse.
SIGH!
Don’t get me wrong…I love making gifts for people who appreciate it…but sometimes I just want to sit down and relax. More and more these days, there isn’t enough time to think let alone relax. What would be ideal would be something that I could simply throw in the oven, the microwave, or on the stove, set a timer, and get some stuff done. Like lunches and snacks for lunch the next day.
So, after much searching through both pantry and freezer, I decided to pick out one of the boxes of rice meal things that were lurking right up front. I had about three or four to choose from, but ultimately reached for a brand I know, I love, and I trust.
Lundberg Family Farms.
Lundberg is committed to producing the finest quality rice and rice products. And since 1937, the Lundberg family has been growing healthy, great tasting rice while respecting and sustaining the earth. With the third and fourth generations currently carrying on the family heritage, using eco-friendly farming methods to produce wholesome, healthful rice, rice cakes, rice chips, risottos, and pastas while improving and protecting the environment for generations to come.
Gotta love a company that has a heart.
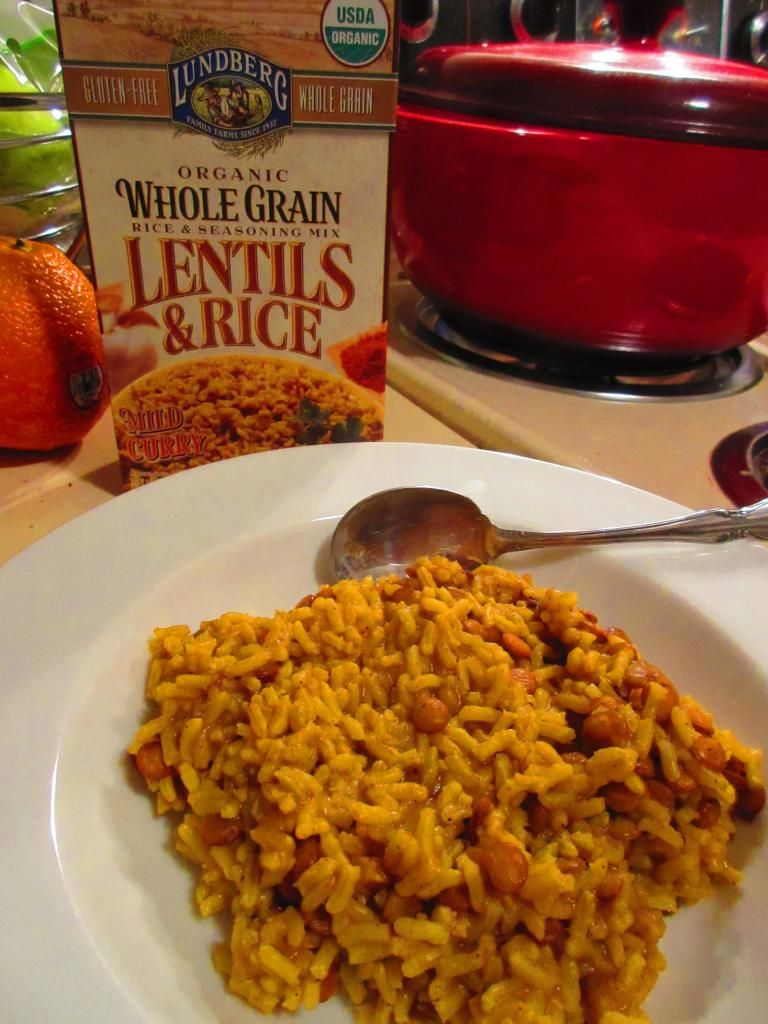
So, Lundberg Family Farms recently began expanding their line of rice products into these little rice and pasta sides. I picked up some pasta awhile back…but this time I had my eyes set on the new rice sides. I was visiting my friend Jenn in Columbus, Ohio, and stopped into my new favorite store there, The Raisin Rack. I filled up a small basket of items and products I wanted to try that I had a hard time finding in my area. And one of these, at the time, was Lundberg Family Farms Organic Whole Grain Lentils & Rice – Mild Curry flavor. The Mild Curry was what actually caught my attention. The other being that these little boxes make for easy meals every now and again. And while I don’t like to cook out of packages, sometimes it just becomes necessary. But, the best part is, you can choose what you purchase to use in these situations. And, for me, Lundberg Farms uses great ingredients, non-GMO, and really cares about the environment. I have never had an issue with any of their products, so…for me…this made for a great meal (my roommate and I split the box between us instead of using it as a side dish).
It was very easy to make. Just combine water, rice, lentils and the seasoning packets into a pan and stir well. Bring it to boil, then turn the heat down, cover it, and allow it to simmer and cook for about 30-32 minutes. Do not lift the lid. Just let it cook. Remove it from the heat and allow it to stand for 5 minutes before fluffing it with a fork and serving it up. Simple. And it was so hands free. No need to babysit the pan and remember to stir it every now and again. It was perfectly ideal for a night like tonight. I finished up my prep work for lunches and snacks, talked to my sister on the phone, changed into pajamas…and got some gluten-free focaccia bread heated up to accompany the meal. Then, I dished the rice and lentil mixture into two bowls.
It smelled fantastic. Honestly. It had this great cumin and garlic aroma that just wafted up from the pan when I lifted the lid and began splitting the dish between us. The rice was fluffy and the lentils to that perfect al dente. The yellow hue was brought about by the use of most of the curry spices, especially turmeric. I love turmeric. It’s a great anti-inflammatory. And with how bad my back has been lately…it’s my new best friend! So…dinner was served.
And HOLY CURRY GOODNESS…this was fantastic. For one thing, the flavor is mild. So, when it says “Mild Curry” on the box…believe it. This will not burn your tastebuds off or set your mouth aflame. In fact, my roommate actually turned into me for a small moment and said she missed it having a bit more heat. That’s weird for her to say, since she is a heat wimp. But…yes…the mild flavor compliments the grains, rather than overpowers. And that is a good thing. I agree though, I could have used a little more spice level regardless. But, it tasted absolutely amazing. It cooked up to be light and full of these rich Indian flavors. And it was packed with nutrients and healthy carbs…so it made for two very happy diners as we ate our meal.
Let’s talk ingredients, shall we? One thing I love about Lundberg Farms is their use of real ingredents. You won’t see ingredients you don’t recognize in their products. In the Lundberg Family Farms Organic Whole Grain Lentils & Rice – Mild Curry, you will find organic parboiled brown rice, organic lentils, organic rice flower, sea salt, organic spices (ginger, turmeric, coriander, cumin, cinnamon, black pepper, and fenugreek), organic garlic powder, organic rice concentrate. This box of whole grain goodness is also vegan, non-GMO, cholesterol free, and kosher.
As for nutrition, a serving of Lundberg Family Farms Organic Whole Grain Lentils & Rice – Mild Curry is 1 cup, prepared. There are three servings per box. In this serving, you will be consuming 210 calories and 2 grams of fat. This serving provides 460 mg sodium and 0 grams of sugar. Both of these are really low for a boxed product. In addition, you will feel full after dining on this because one serving also provides 3 grams of fiber and 6 grams of protein.
I asked Cathy if she would be happy having one of these boxed rice meals from Lundberg Family Farms again, and she totally said she would. And I have to agree. Great flavor. Great texture. And wholesome ingredients. What’s not to love when it’s so easy to cook up and so easy to eat. And good for you too! Gotta love that.
Back in November, when I ran the TCS New York City Marathon, my friends and I celebrated my finish by going out to eat…at Marcus Samuelsson’s restaurant, Red Rooster, in Harlem. Amazing meal and amazing experience. When my server came to the table, we explained that we were celebrating my completion of my final marathon of the year and then mentioned my food allergies. He said he would go speak to the chef.
The chef was also a marathon runner and asked if he could create a dish for me. I never turn down this opportunity. I love it when chef’s get a bit creative with the ingredients they have on hand to produce a dish off the cuff. I was more than happy to allow him to do so.
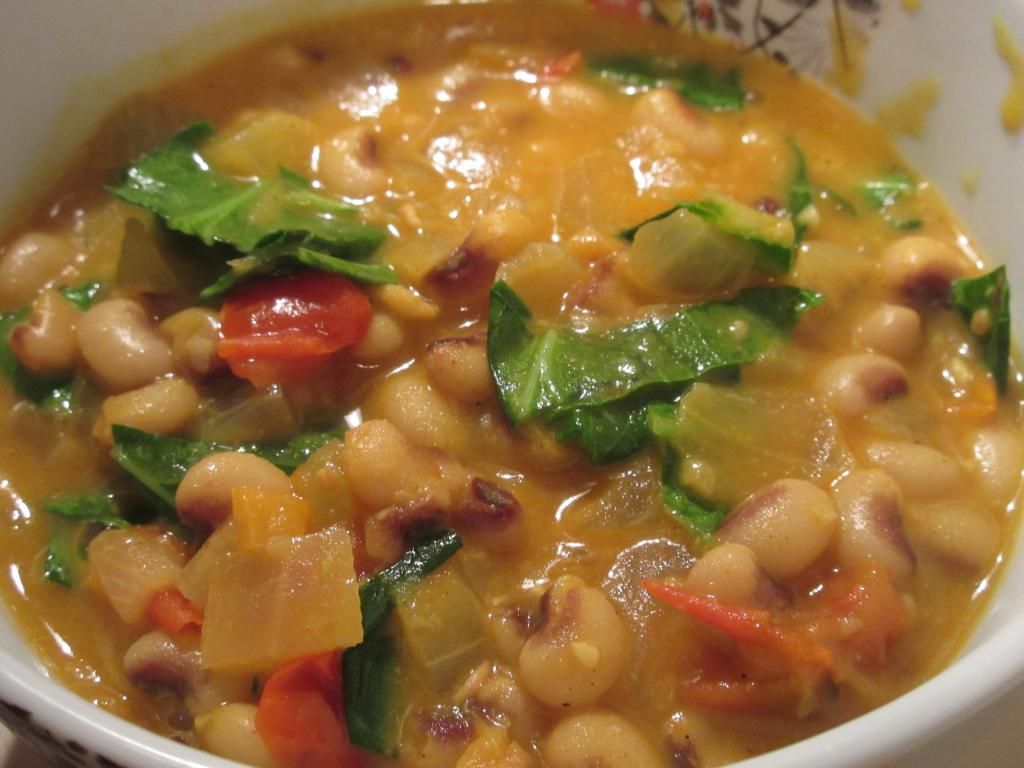
One part of the dish was this amazing curried black-eyed pea dish. I was beyond impressed. So, naturally, I went hunting online for a recipe. And while this is not the exact dish that I had at Marcus Samuelsson’s restaurant, this was one amazing dish. One I was beyond happy to cook up.
I made a few minor tweaks, substituting the cilantro with collard greens. I also used dried ginger instead of fresh. The habanero is important. It adds sweetness and a bit of heat (but it is seeded, so not too much!). Do not leave it out. Also, invest in berbere seasoning. It is my favorite spice on my spice shelf at the moment.
Recipe: Black-Eyed Peas with Coconut Milk and Ethiopian Spices
Black-Eyed Peas with Coconut Milk and Ethiopian Spices
In a large saucepan, cover the peas with water and bring to a boil.
Simmer over moderately low heat until tender, about 40 minutes. Add a generous pinch of salt and let stand for 5 minutes, then drain well.
Meanwhile, in a large saucepan, melt the butter.
Add the onion, ginger, garlic and chile and cook over moderate heat, stirring occasionally, until softened and just starting to brown, about 10 minutes.
Add the berbere and turmeric and cook, stirring, until fragrant, about 2 minutes.
Add the tomatoes and cook, stirring, until softened, about 5 minutes.
Stir in the coconut milk and stock and bring to a boil. Simmer over moderately low heat, stirring occasionally, until the tomatoes break down and the sauce is thickened, about 20 minutes.
Add the peas to the sauce and cook over moderately low heat, stirring, until the peas are lightly coated, about 10 minutes.
Fold in the collards and serve.
~*~*~
This definitely had a bit of bite to it. I almost thought it would be too spicy for my roommate, but she said that she could just handle it. I absolutely loved it. Definitely not the dish I had at Red Rooster, but amazing and delicious all its own. And with the New Year almost here, it is often considered lucky to have black-eyed peas and collard greens on New Year’s Day in the South. So, here is an easy, delicious dish where you can enjoy both in a new and different way.
I have the leftovers in my freezer. Can’t wait to enjoy it again at a later date.
I totally broke tradition. I did. I was in New York City to run the TCS New York City Marathon…and so far I had managed really amazing gluten-free pizza the night before the race. Normally, after I race, my friends and I go to a pub to celebrate the occasion.
Not. This. Time.
But, it was of my own doing that we ended up in Harlem just after 6 p.m. on Sunday evening.
How?
Well…since we were going to be in New York City, I thought it might be fun to check out a restaurant that belongs to one of my favorite chefs of all time.
The venue: Red Rooster.
The chef: Marcus Samuelsson.
After all, we were celebrating my finish at the marathon earlier that afternoon. Why not make it special. So, yeah…I broke tradition and decided to forgo the pub for something…a little different. And I have never made a better decision in my life.
Prior to heading to New York City, I had told Cathy that I really wanted to go into Harlem and eat at Red Rooster. She knows how much I adore Marcus Samuelsson. And, honestly, we’re both foodies…she was right there with me. So, she went ahead and called the restaurant and talked to them about reservations on marathon eve. She mentioned that I was a gluten-free vegetarian and they said that food for me would not be an issue. With that done, Cathy set up a reservation for 6 p.m., giving me plenty of time to run, shower, walk around, come back and change, and get there with my group of friends. We had reservations for 4 people…me, Cathy, Heather, and my good friend Marisa.
So, that night, I dressed up in this elegant vintage dress…but kept on my recovery compression socks (and wore them with my heels, HA!), and my three friends and I went down to the subway and hopped the train to Harlem. We emerged steps away from Red Rooster. Literally.
And about 10 minutes late. Whoops. But…we got there…before they handed our table away.
We were seated near the kitchen, which was fantastic for me because I could see the people bustling around in there, working hard at the various stations. I loved the feel of Red Rooster…very chic casual. A fun, vibrant, laid back, but classic vibe. It was the kind of place I would want to return to and bring everyone I know…at least once. Totally my style.
Our server, Ryan, came over to greet us. He said that if we had any questions regarding the menu to let him know. I mentioned that I was a gluten-free vegetarian, and he said that wouldn’t be a problem. In fact, he would go and talk to the chef and see what they could do for me. I thanked him and we all studied the different menu options. At one point, I know Cathy was trying to convince Marisa to try the soup with tripe in it, but that wasn’t happening.
Ryan returned, and said that he mentioned that I had run the TCS New York City Marathon and was a gluten-free vegetarian, to which he said the chef would like to create a dish for me. I was thrilled and thanked him for checking.
Glasses of Brotherhood Riesling
With that said, Cathy took one matter into her own hands. We were, after all, celebrating. So, she ordered a bottle of wine for the table. We went with a sweet wine (Heather prefers dry…but she was a good sport), opting for a local Riesling – the 2013 Brotherhood from Washingtonville, New York ($48.00).
We were ready to order, it seemed. Ryan already had mine. He said the chef was going to do up a Vegetable Plate ($21.00) for me. So, I was excited to see what would emerge from the kitchen. Cathy went with Marcus Samuelsson’s signature dish – Helga’s Meatballs, which are served with lingonberries, braised green cabbage, and buttermilk mashed potatoes ($23.00). Heather ordered the Triple-Double Burger, which is served with bacon, jarlesburg, and rooster sauce ($19.00). Marisa did a little picking and choosing, and went with the Upstate Farms Squash Soup, which includes yogurt, honeycrisp apples, and lentils ($12.00) with a side of the Cornbread ($4.00). And, because they sounded good…Heather and I split a side of the Hearth Roasted Brussels Sprouts ($8.00).
Red Rooster Entrees: Helga’s Meatballs, Upstate Farms Squash Soup, and Triple-Double Burger
Ryan went to put or order in and we all got down to talking about New York, about work, about life, about the race, about food, about events…whatever we wanted to talk about. We were in no rush and the restaurant was not rushing us. I loved being able to just drink in the atmosphere.
Just before the food arrived, Ryan returned with our Riesling bottle, pouring a little bit into Cathy’s glass. Cathy lifted the glass and took a sip. And it was love at first taste for her. So he poured some in each of our glasses, and I made sure to keep drinking my water too. No dehydration here.
And then…our entrees arrived, each one settled down in front of us carefully.
The plates…were gorgeous!
Chef Creation: Vegetable Plate – Curried Black Eyed Peas, Charred Broccolini, Berbere Carrots and Parsnips, and Roasted Brussels Sprouts
The chef created a fantastic dish for me. In a bowl on my left was Curried Black Eyed Peas. And on the platter beside it…Charred Broccolini, Berbere Carrots and Parsnips, and Roasted Brussels Sprouts. Oh…I will note, these Brussels Sprouts tasted different than the side that Heather and I were splitting. It was chef magic. And it was a beautiful and gorgeous plate. One that I looked forward to eating.
Let’s start with the Curried Black Eyed Peas. Just…WOW. WOW! So much flavor. Lots going on. And yet…simple. I like to traditionally have black eyed peas on New Years Day…and this is how I would want them this year. For real. Just this incredible depth of flavor with the curry spices. Not hot…just simply bringing out more of the peas themselves. One of the best dishes involving peas of any sort I have ever had in my life. And, trust me, I’ve eaten plenty.
The vegetables that the chef prepared were a delicious and filling treat for me. The broccolini was gorgeously cooked and vibrant green. It had the right amount of crisp to it, yet, still soft and easy to bite through. I love broccolini, and this was just as it should be…simple and delicious. The Brussels Sprouts were roasted to perfection, giving that outer layer some depth of flavor, yet keeping the vegetable itself soft on the inside. Fork tender perfection.
My favorite thing, however, on that plate was the Berbere Carrots and Parsnips. HOLY COW! This side is exactly why I rushed out to a spice store in order to purchase berbere. This spice is awesome. It has this great flavor to it, followed with a little bit of heat at the end. It paired beautifully with this root vegetables. In fact, these were what I saved for my last bite. Completely in love with a plate of vegetables. How amazing! My compliments to the marathoning chef. My meal was sheer perfection.
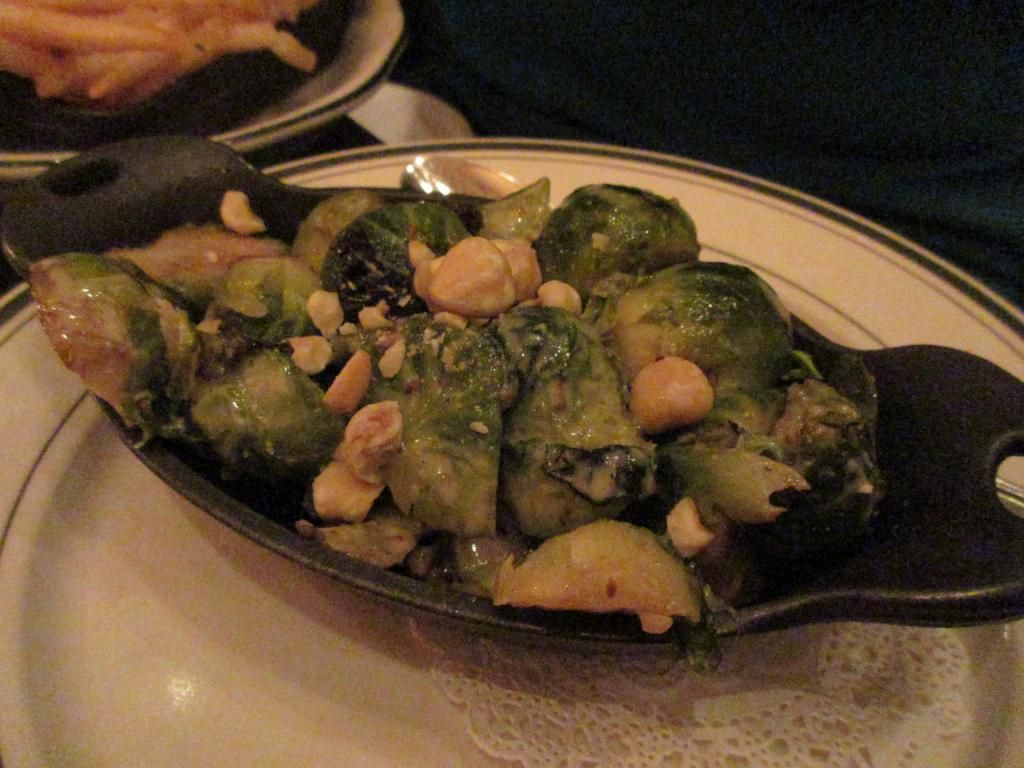
Red Rooster’s Hearth Roasted Brussels Sprouts
And I know you’re wondering about the Hearth Roasted Brussels Sprouts that Heather and I split, right? Of course you are! These were different from the ones that were on my plate. These sprouts had this amazing char to them, but also hit up with a bit of a lemon or citrus flavor. Sprinkled on top were macadamia nuts. It was a combination that I hadn’t had before with Brussels sprouts…and I liked it.
But, wait…there is more!
Because when we celebrate we get dessert too! We were handed the menus so we could peruse the options. Ryan was taking care of another party at that moment, so I asked the new server about gluten-free options. She highly recommended The Green Apple Viking Delight ($11.00). I was game. Heather actually ended up doing that too. Leave it to the Scandinavian Minnesotans to order something with the word “viking” in it. HA! Cathy knew she wanted to have cheesecake in New York City, so her choice was the obvious one…Vanilla Cheesecake, served with yogurt, a granola crumble and pomegranate sorbet ($11.00). Marisa went for the signature dessert of the restaurant, the Red Rooster Doughnuts, which are filled with sweet potato and coated in cinnamon and sugar ($12.00). It came with an icing to dip them in as well.
Red Rooster’s Vanilla Cheesecake and Red Rooster Doughnuts
Red Rooster’s Green Apple Viking Delight
Desserts arrived shortly after and…yeah…we were quite happy with our choices. I thought The Green Apple Viking Delight was like a cold crème brûlée. It was a green apple sorbet set on top of a white chocolate fennel cream. On the side was chopped apple and fennel. And a little tuile was set on top, giving it a little crunch and texture. I was totally in love with the flavors, even though I wasn’t completely certain, at first, that they would work. They complimented each other perfectly and each bite was a burst of sweetness, with a bit of richness from the white chocolate. Divine.
Cathy loved her cheesecake (it looked deconstructed…so cool!) and Marisa was more than pleased with the doughnuts. Needless to say…we are girls. Desserts are awesome. But these…these took awesome up to the next level. Which I guess is phenomenal. Or, in the culinary world, a sweet note to end the night on.
We left the restaurant completely satisfied with the meal. The ambiance of Red Rooster was like no other restaurant that I have been in to date. A live jazz band had started to play during our desserts and we really just took a moment to not only savor the food, but savor the experience as well.
I have been a Marcus Samuelsson fan for years…being able to eat at his restaurant was a dream come true. Having a dish created for me, and having a careful and very caring staff made it unforgettable. I was congratulated so many times on finishing the marathon. It was an amazing day, but that night really just sealed it as one of the best days of my life. Good race…good friends…good food…good times.